
Work with Meetings
The Meetings tool enables workspace members to host meetings with team members and other people outside your organization, and schedule meetings in the context of their ongoing work and projects. Scheduled meetings can be held in person.
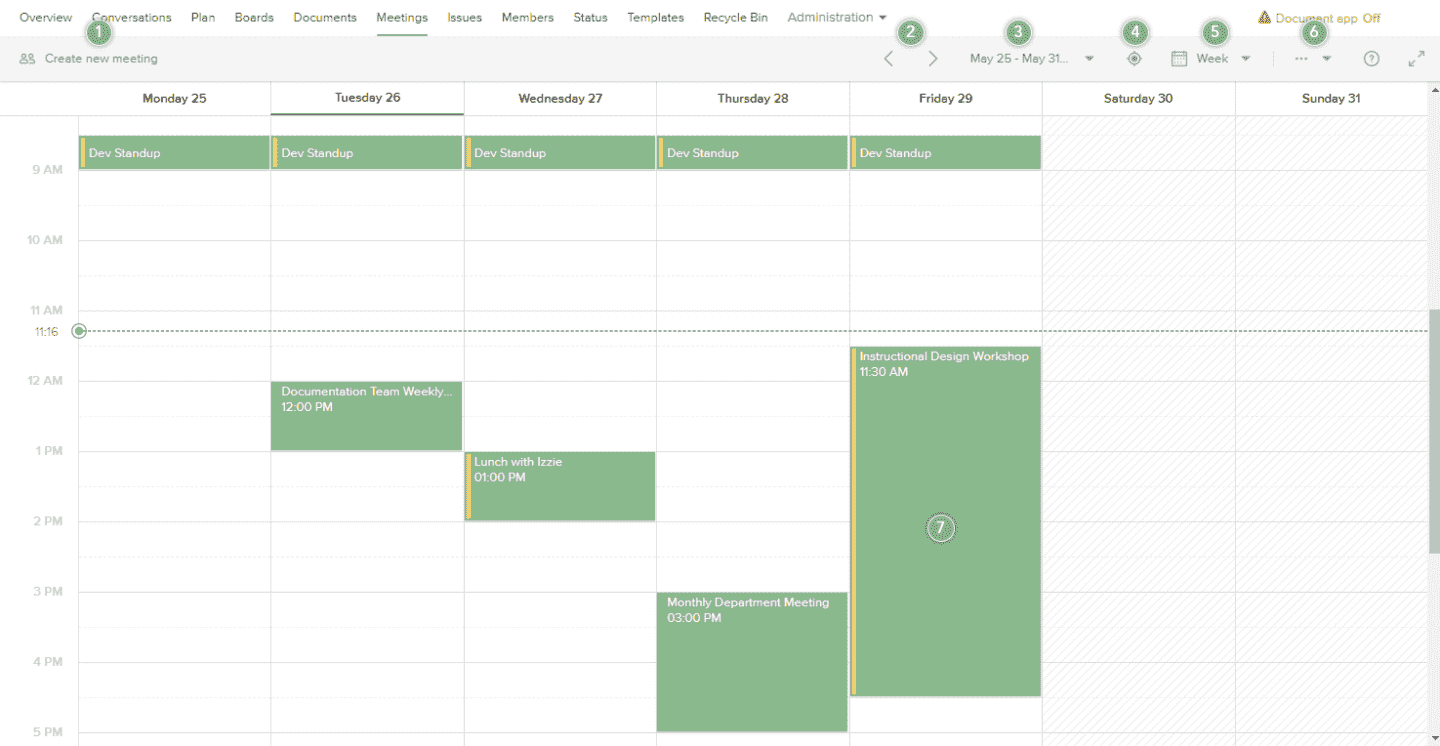
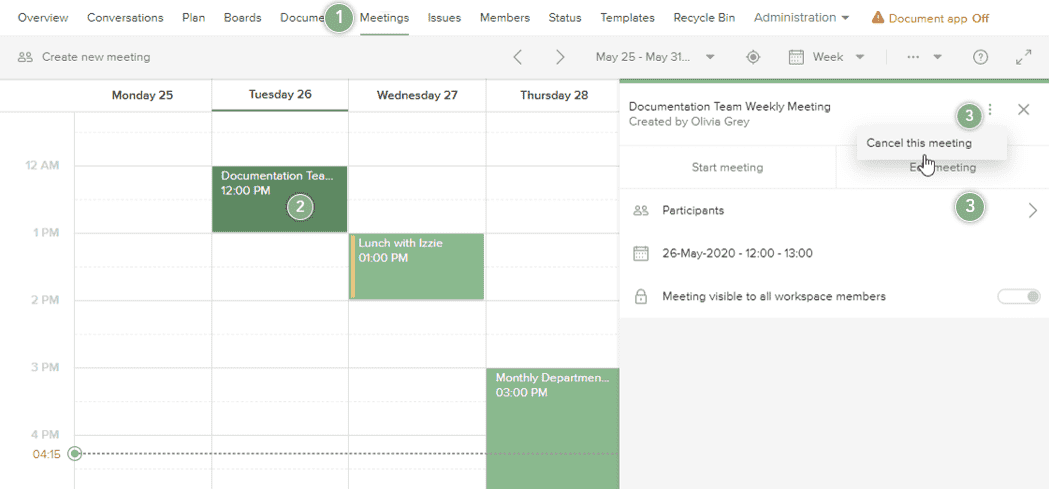
- Create a workspace meeting.
- Use the arrows to browse future and past meetings in the timeline.
- Select the period of time you want to display in the calendar view.
- Go to today's date in the calendar view.
- Click on the calendar dropdown to switch to a daily, weekly or a monthly view.
- Click the More options
 menu and select the Show declined meetings option to display meeting invitations you have declined in the calendar view.
 - Meetings are displayed as blocks of time in a calendar view.
Click on a meeting to open the detail pane. Here, meeting participants can view meeting details and respond to a meeting invitation, comment and add attachments on comments, and meeting hosts can edit the meeting details or cancel the meeting.
Workspace administrators must enable the Meetings tool to make it available for workspace members. Learn more about activating workspace tools.
Create a Workspace Meeting
To create a workspace meeting:
- Navigate to a workspace you are a member of and click the Meetings tab.
- In the top left corner of the tool, click Create new meeting.
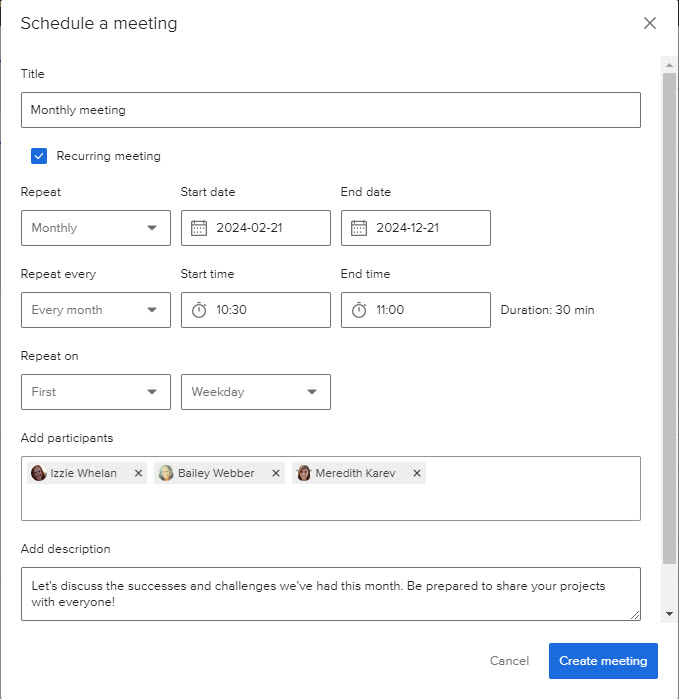
- In the Schedule a meeting window:
- Enter a meeting title.
- Select the date and time you want the meeting to occur, or click the Recurring meeting checkbox and select from the following options:
- Choose to repeat either monthly or weekly.
- Select a Start date and End date.
- Chose how often to repeat in the Repeat every drop-down.
- Select a Start time and End time.
- Choose which day of the week or month to repeat on.
- Add participants: Type and/or select the groups, people, and external email addresses you want to invite to the meeting.
- Add a short description so participants know the meeting topic and/or agenda.
- Select the Only those invited can see the meeting option if you want to hide the meeting from all non-participants in the workspace.
- Click Create meeting. A meeting invitation is sent to the participants via email, and participants will also receive a notification in the service. You can also create a meeting from the workspace overview by clicking on the Create new meeting option in the meeting widget
Respond to a Meeting Invitation
Meetings you have not yet responded to are shaded gray (rather than green) in the calendar view.
To respond to a meeting you have been invited to:

- Navigate to a workspace you are a member of and click the Meetings tab.
- Click on the meeting to open the detail pane.
- In the detail pane, click Accept, Tentative, or Decline. Your response will be forwarded to the host of the meeting.
Edit a Meeting
To edit a meeting:
- Navigate to a workspace you are a member of and click the Meetings tab.
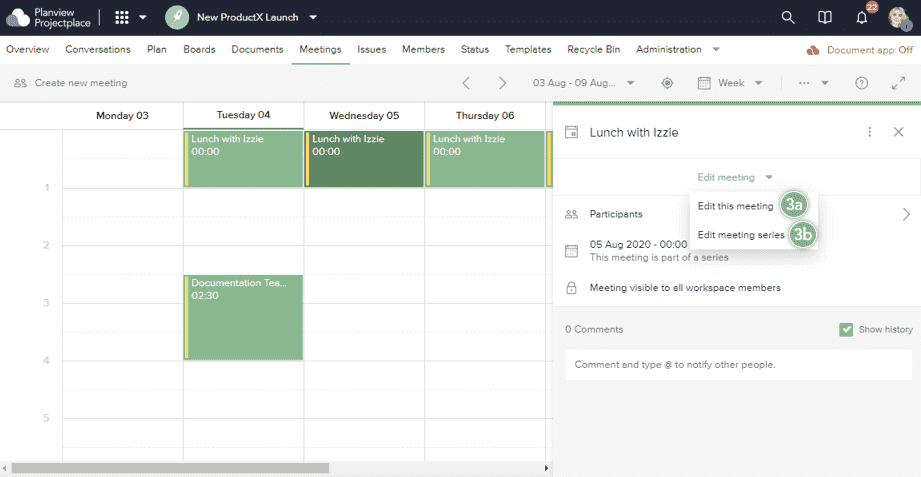
- Click on the meeting to open the detail pane.
- In the detail pane, click Edit meeting. If the meeting is a recurring meeting, choose one of the following options from the dropdown:
- Edit this meeting: Edit the details of the selected meeting.
- Edit meeting series: Edit the details for all meetings in the series.
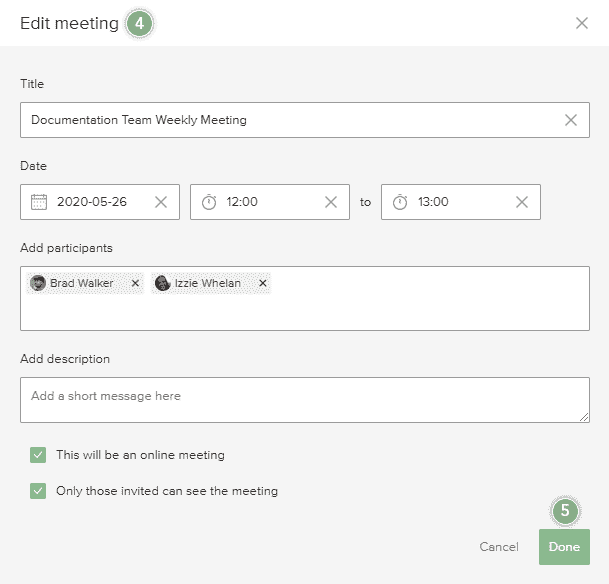
- In the Edit meeting window, make the desired changes to the details of the meeting.
- Click Done. An updated invitation is sent to all participants.
Cancel a Workspace Meeting
If you are the meeting host, you can cancel a workspace meeting.
To cancel a meeting:
- Navigate to a workspace you are a member of and click the Meetings tab.
- Click on the meeting you want to cancel.
- In the detail pane, click the More options menu and select Cancel this meeting.