
Work with the Workload Tool
Find Your Way Around the Workload Tool
The Workload tool includes a list of all members in the account and external users and provides an overview of how much work each member has currently been assigned and how much work is planned for the near future.
It is available by default to Account owners/administrators, Workspace administrators, Team administrators and to members that have been granted access to workload.
- Account owners/administrators will view information for all members in the account.
- Members that have been granted access to Workload will view information on an account or department level.
- Workspace administrators will view information for the workspaces they are administrators of.
- Team administrators will view information for the teams that they are Team administrators of.
To open the Workload tool:
Click the tool selector  in the top navigation bar, then click Workload.
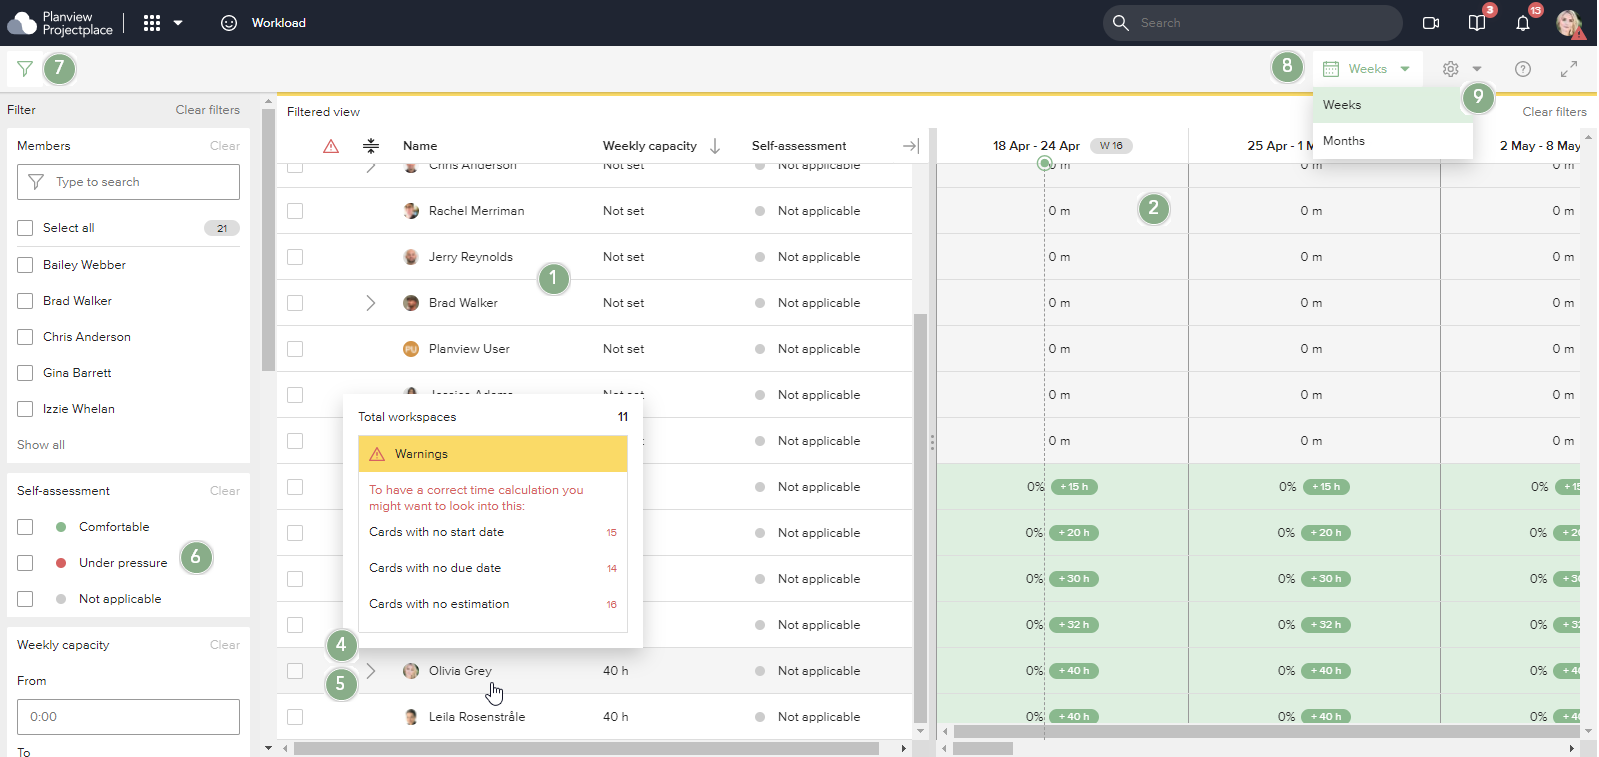
Figure 1 - Workload management
- The List section displays all members in the account. It provides an opportunity to drill down into individual workspaces and their respective assignments for members. Not shown: Planned, Ongoing, and Overdue columns, which provide an understanding of the amount and status of all the work for a member. The weekly capacity for any account members (except external members) can be changed directly from the list if you have access to the Workload tool. Members that get their weekly capacity updated will be notified in the service.
- The Timeline section shows the workload assigned to each member. The timeline takes into account the start and end date of the card, to spread the estimation and resource capacity over that time frame
- Resize the list viewing area by clicking and dragging the handle
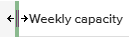 in the vertical green separator bar to the right or left in the header. (Not numbered on diagram above.)
 - To see warnings on cards for a member, hover your mouse over the member's name. A popup will appear with details of the warnings.
- To get a more comprehensive detailed workload for a single member, click the greater than symbol before a member's name to open the member's assignment drill-down. (See Figure 3 below).
- The Workload Self Assessment is located next to the members' avatar/initials and is represented by a color, indicating if they feel comfortable
 (green) or under pressure
  (red) with regards to their workload. The
  gray indicator means there is no current self assessment, either because the member has not provided one or because their last one has expired. A self assessment lasts 14 days, after which it returns to gray and the member is asked again. The Workload Self Assessment along with the information provided on the timeline, gives a clear view of who can take on more work and who is currently overwhelmed with too much work to do.
 - Use the filter icon
 and search field to narrow down the results in the filter list, and also to narrow down assignments by the card start and end date.
 - Select either weeks or months from the timeline dropdown to fine-tune the display.
- In the More menu option you can select Customize list view (personal setting) or Export the current Workload view to an Excel document.
Capacity and Assignments View
Capacity and Assignments view summarizes the amount of work a user has been assigned each week. The values are based on the relationship between the estimated time on the member's assigned cards and their weekly capacity. When there is a planned start date and a due date entered on a card, the workload effort is be distributed between these dates in the workload capacity view.
NOTE
Time reported on cards will not affect the booked time calculation.
Cards with a due date will be calculated in the week they are due. Cards that are overdue, or have no due date, will always be calculated in the current week.
- Weekly capacity column is displayed to the right of the member's name and it indicates the number of working hours per week. Each member adds their capacity from their personal settings. In the column Account administrators can also set and change the weekly capacity of account members. If the weekly capacity is updated, the Account member will be notified.
- Booked time per week is presented as a percentage if a member has entered their capacity time, otherwise Booked time includes a total of estimated time in hours. There are three levels of work status:
 (green) 0 - 79%,
  (yellow) 80 - 99% and
  (red) 100% or above. (Only the primary assignee on cards factor into the booked time calculation; it is not split between co-assignees.)
 - A warning icon
 appears when the Booked time calculation could be incorrect. You will see the warning icon when cards do not include due dates and estimations, or are overrun (reported time exceeds the estimated time) during that week.
 - When you hover over a week cell or time slot you will see more detailed information for that specific member’s workload for the selected week. You will also see the total estimated time on cards for that week and any eventual warnings. (See Figure 3 below).
TIP
To see the current or present workload or to view the future workload, click and hold the mouse button and drag the cursor over the timeline. The timeline view ranges from the current week to up to one year from the current week.

Figure 2 - Capacity and Assignments
5. The List section includes the number of cards that are overdue, ongoing, or planned for each member. It also shows the number of workspaces each member is involved in. (See image below.) By hovering the mouse near a name, a popup will appear, showing an individual's workspaces and their respective assignments.
6. Looking at the Timeline, blue bars indicate where planned work is scheduled. A lighter shade of the bar indicates there is a single card while the darker shade of the bar indicates multiple cards during a specific period of time.
7. A single card with a due date and no association to an activity in the Plan tool is indicated by a single day bar in the timeline.
8. A single card without a due date and no association to an activity is indicated by a single day bar with today's date.
If a card belongs to an activity, it will be represented by a bar that represents the duration of the activity (this is the implied work duration for that card).
TIP
To see the current or present workload or to view the future workload, click and hold the mouse button and drag the cursor over the timeline. The timeline view ranges from the current week to up to one year from the current week.
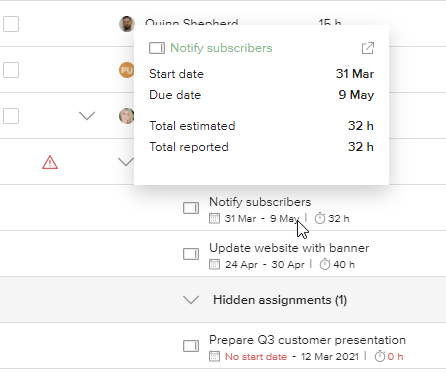

Figure 3 - List section - Hover popups, showing Assignment drill-down and Time detail (step 4 above)
Heatmap View
The workload administrator can view an assignment heatmap for a member to visually identify the times when they are overloaded with work or have availability.
In the toolbar you can switch between the two different views.
In the view, the assignment bars can vary in different shades of blue. The darker the assignment bars, the more assignments the members have, which may indicate that the member is overloaded. If you hover over an assignment bar, you can get more information about the assigned cards. In the list view you can get more details by drilling down into individual workspaces and their respective assignments for each member.
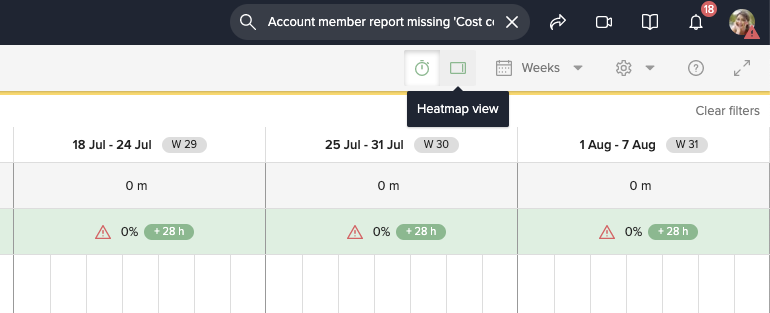
Figure 4 - Switching between Capacity and Heatmap view
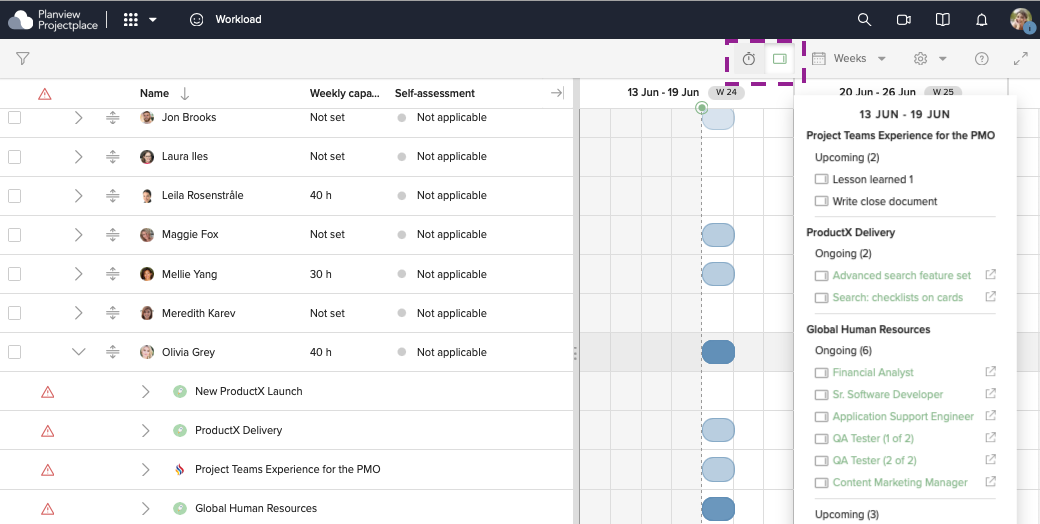
Figure 5 - Heatmap view with varying assignment bars
Settings for Workload tool
We have added Settings for the Workload tool in Account administration. In the Settings window the account administrator will be able to set:
- how cards without a start and due date should be handled, and
- when warnings in the tool should be enabled
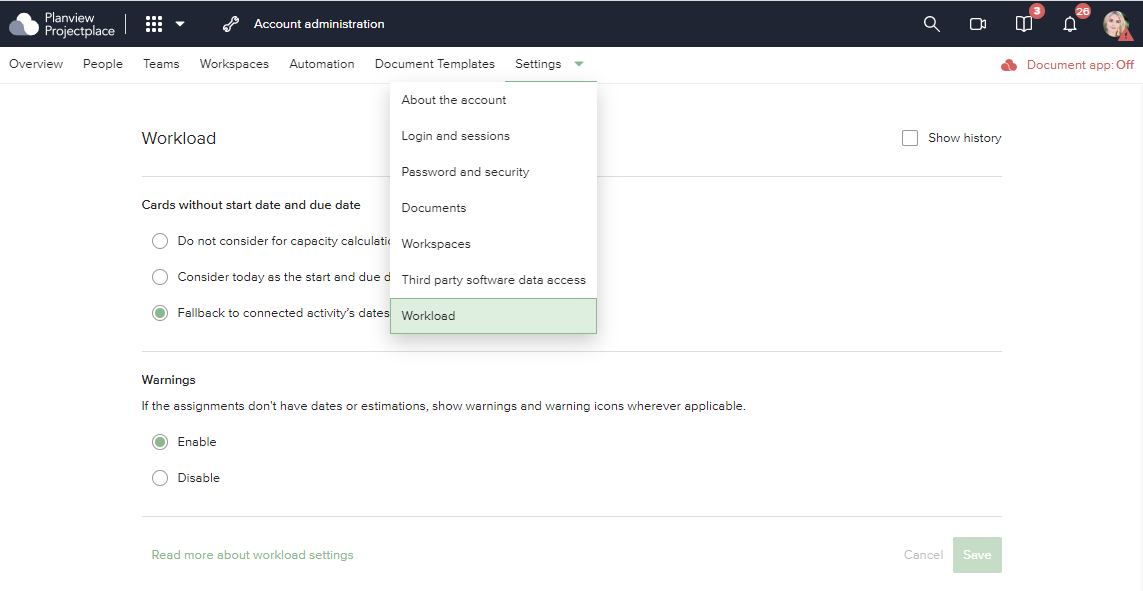
Figure 6 - Settings for the Workload tool
Filter and Search
By using the available filters from the left panel, the Workload list can be filtered by Self-assessment, Dates (assignments), Workspaces, Weekly capacity, Teams or Departments to see a subset of members. The example below, includes a list of members that currently have the self assessment set to (red) Under pressure.
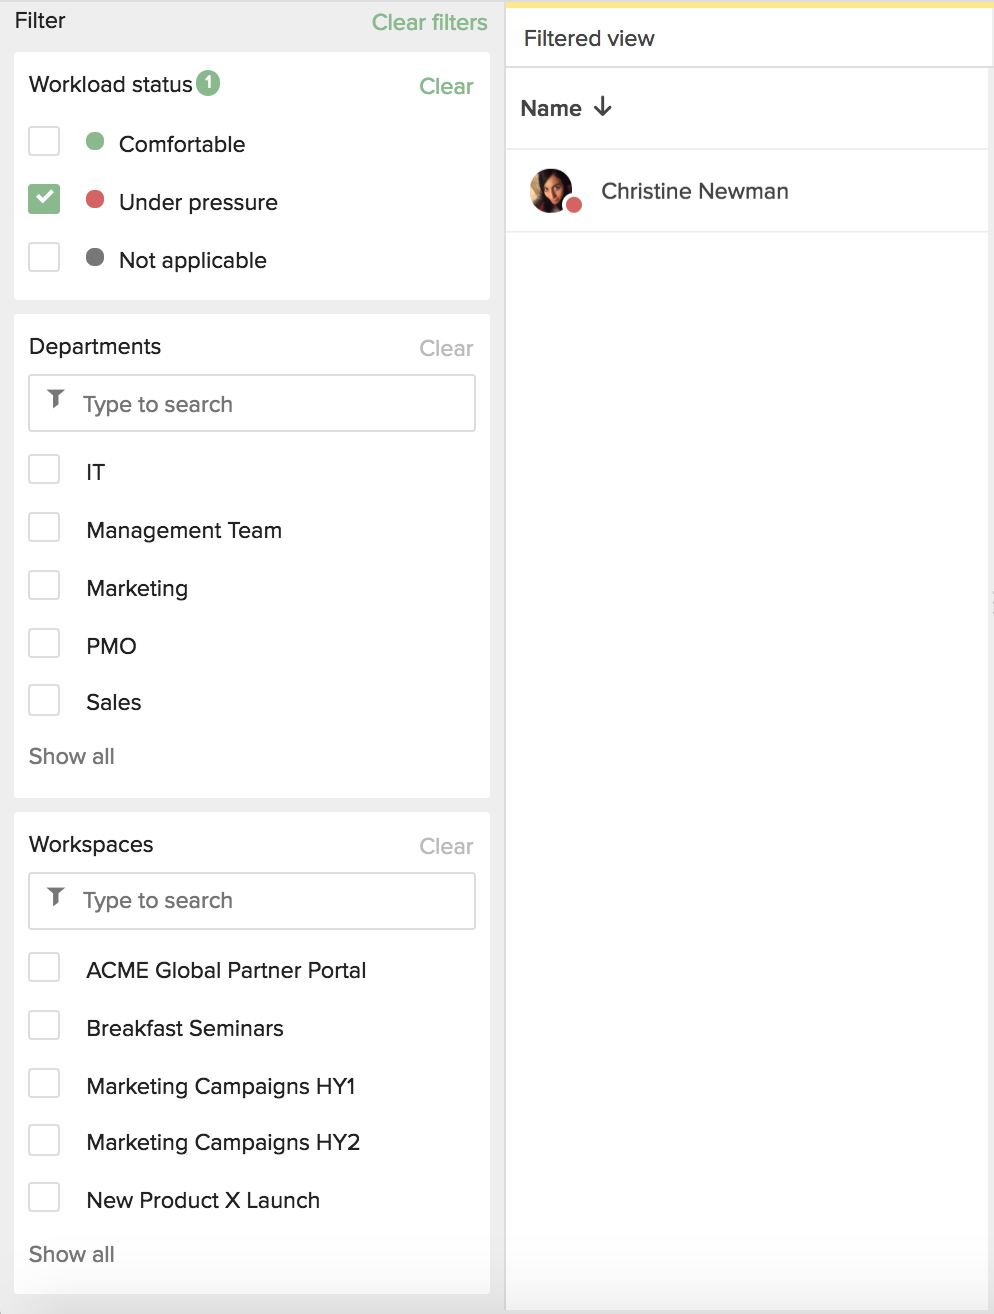
Figure 7 - Filter and Search
To search for specific members:
- Open the filter section by clicking on the funnel icon.
- In the Members section, type the first few letters of the members name to find and select the desired member.
- To clear the search, click the X in the search box.
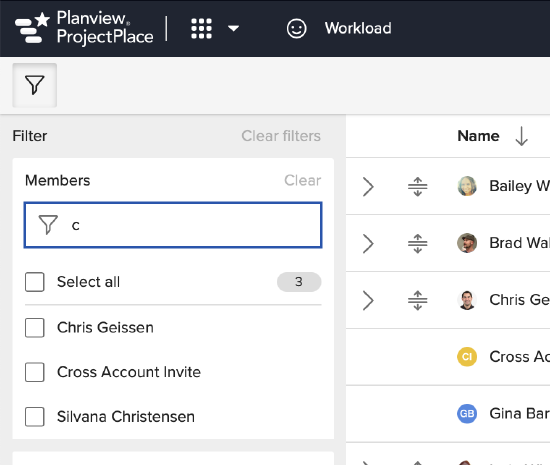
Figure 8 - Specific member search