Customize a Board to Fit Your Way of Working
Video: Customize a Board
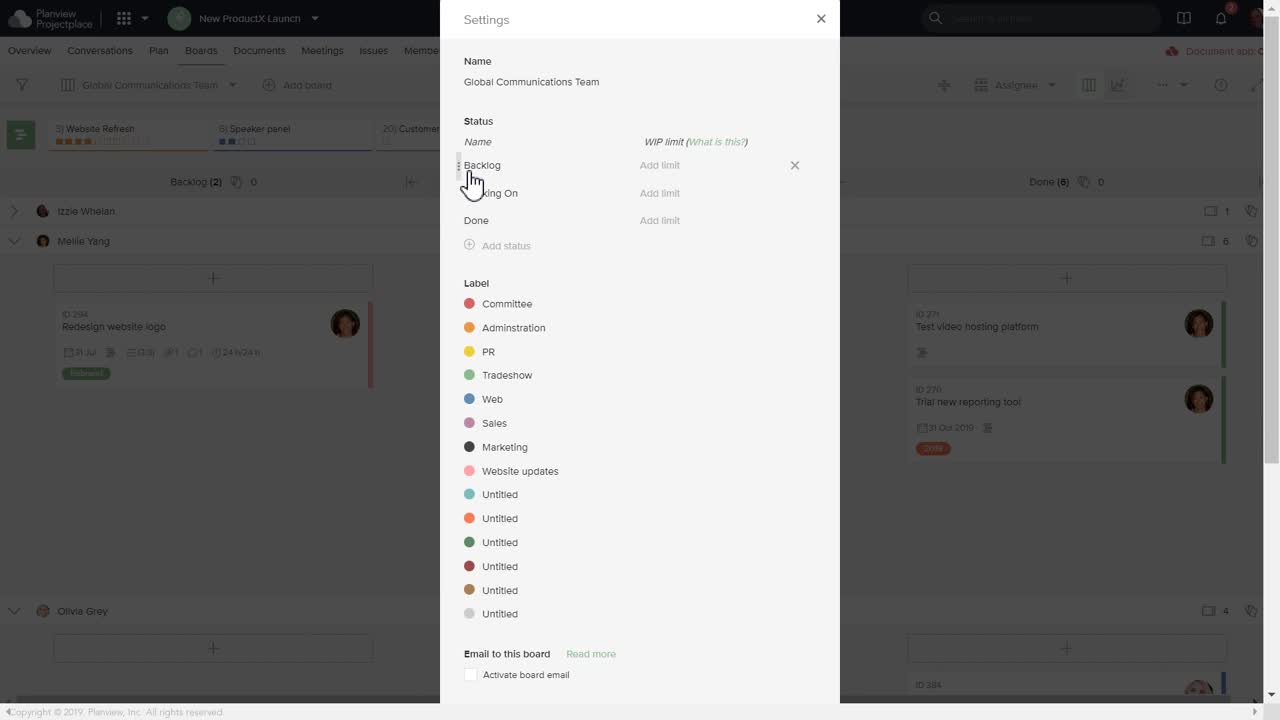
Define Status Columns
Change or rename the status columns to fit the way you work. When cards are moved to the second column, they are considered as started, and cards in the last column are considered as done, regardless of the assigned column names.
A board must always have at least two columns.
To change or rename status columns:
- Navigate to the board in which you want to change the status columns names.
- Click the options menu
 and then click Settings.
 - Add, remove, and rename status columns to fit your workflow. Drag and drop each status column to arrange the column order that best meets your needs. To remove a column, click the plus icon to the right. To change a name, click the column status name and replace the existing name with a new name.

Define Work in Progress Limits
You can add a Work in Progress (WIP) limit for a status column. This value gives a visual indication on the board when the number of cards allowed in the column has been exceeded. It can help prevent reduced productivity due to too many simultaneous tasks.
This is especially useful if there is a tendency that work collects and resides in specific columns. By adding a WIP limit, the team must work together to remove bottlenecks and move cards forward, instead of putting even more cards into a column with a WIP limit giving the team a more efficient work process.
To add a WIP limit:
- Navigate to the board for which you want to change status columns.
- Click the options menu and then click Settings.
- Click to expand the section Customize columns.
- Click Add limit for a column and enter the maximum number of cards allowed in that column.
Customize the List View
The Customize list view setting lets you show, hide, and rearrange the order in which columns appear in a board's list view, letting you define the order of columns (card attributes) and which columns are—or are not—displayed when a user toggles to the board's List view.
NOTE
Any custom fields you have created will also be available in this list.
To customize the board's list view:
- Navigate to the board for which you want to customize columns.
- Click the options menu and then click Settings.
- If the Customize list view section is not already expanded, click Customize list view. In this section, you can do the following:
- Drag and drop columns to rearrange their order.
- Select the check box next to the columns you want to include in the list view.
- Clear the check box next to any columns you want to hide from the list view.
- Click Close.
Define Labels
Use labels to categorize different cards - each label is represented by a specific color. Labels can be used, for example, to define what role or competence the person that performs the work should have, or the type of work the card represents.
You can group cards on a board by labels to get an overview, and to focus on the cards with a specified label.
To define labels:
- Navigate to the board for which you want to change labels.
- Click the options menu and then click Settings.
- Click in the field next to the label color to change the label name.
Now that the board is adapted to how you work, learn more about working with boards.
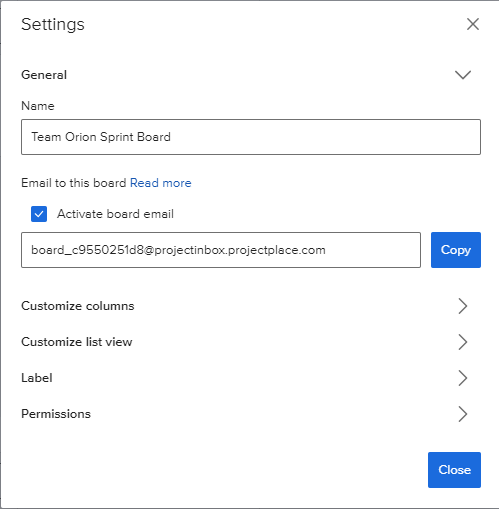
Define Board Email Settings
When you set up a board to accept emails, each email sent to the board is converted into a card on the board:
- The email's subject transfers to the card title.
- The email's content transfers to the card description.
- Any attachments in the email are automatically uploaded and attached to the new card.
Anyone, even people who aren't workspace members, can send emails to the board. After an external card creator sends the initial email to the board to create the card, they will receive an additional confirmation email after their original email is received. If they want to add any additional information to the card, they can respond directly to the confirmation email.
Users with access to the board can communicate with the external card creator through the comment section of the card. Select the Send to external card creator option to send the comment to the external card creator via email.
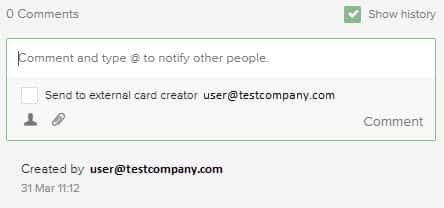
When the external card creator responds to the email, their response is added as a comment on the card.
Comments sent to external card creators cannot be edited or deleted. Attachments cannot be added to comments sent to external card creators.
Activate Board Emails
To set up a board to accept emails:
- Navigate to the board to which you want to start accepting emails.
- Click the options menu icon and then click Settings.
- Click the checkbox next to Activate board email.
- Copy the email address that is generated and distribute it to the appropriate contact or team.
Distribute the Board's Email Address
The email address of the board is hard to remember. To make it easier, download a vCard that is compatible with your contact manager application (such as your email client). The vCard contains the name of the board, the email address, and the URL.
To access the vCard for the board:
- Navigate to the board for which you want to download the contact.
- Click the options menu icon .
- In the available to the list that appears, select Email to this board
- Click the Export vCard option.
- Once downloaded, double-click the file to import it into your contacts.
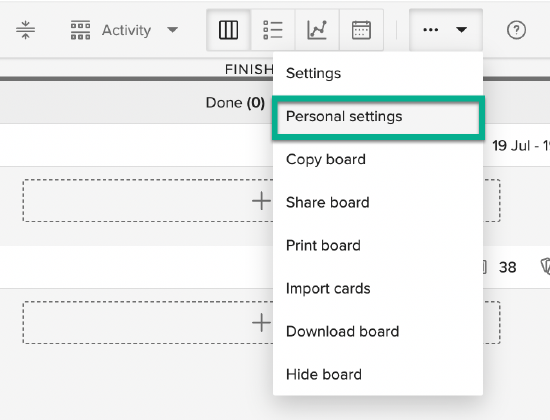
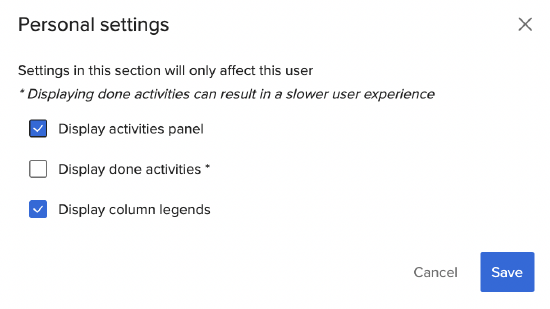
Define Personal Settings
You can define whether the activities panel, done activities and/or column legends are displayed on the board. These options apply only to you when you view the board. Changes done in a board's personal settings will be applied across all boards. This applies a board's personal settings to all boards that the user visits. This is a change from how it used to work, namely that the user would have to configure these settings separately on each board they had access to.
The ability to set board-specific personal settings has also been removed.
These also only change how personal settings work. All other settings work as before. The personal settings have also been moved to their own option on the boards menu.
- Navigate to the board for which you want to change the personal settings.
- Click the options menu icon .
- Click Personal settings.
- On the dialog box that appears, select the check boxes for the options to be displayed on the board:
- Display activities panel – Shows the activities panel and is enabled by default.
- Display done activities – Shows the Done Activities and is disabled by default. You can enable this option to display all activities connected to the board that have been set to Done.
- Display column legends – Shows the Column Legends and is enabled by default. You can disable this option to hide the 'Not Started,' 'Started,' and 'Finished' legend located above the columns on the board.
- Click Close.
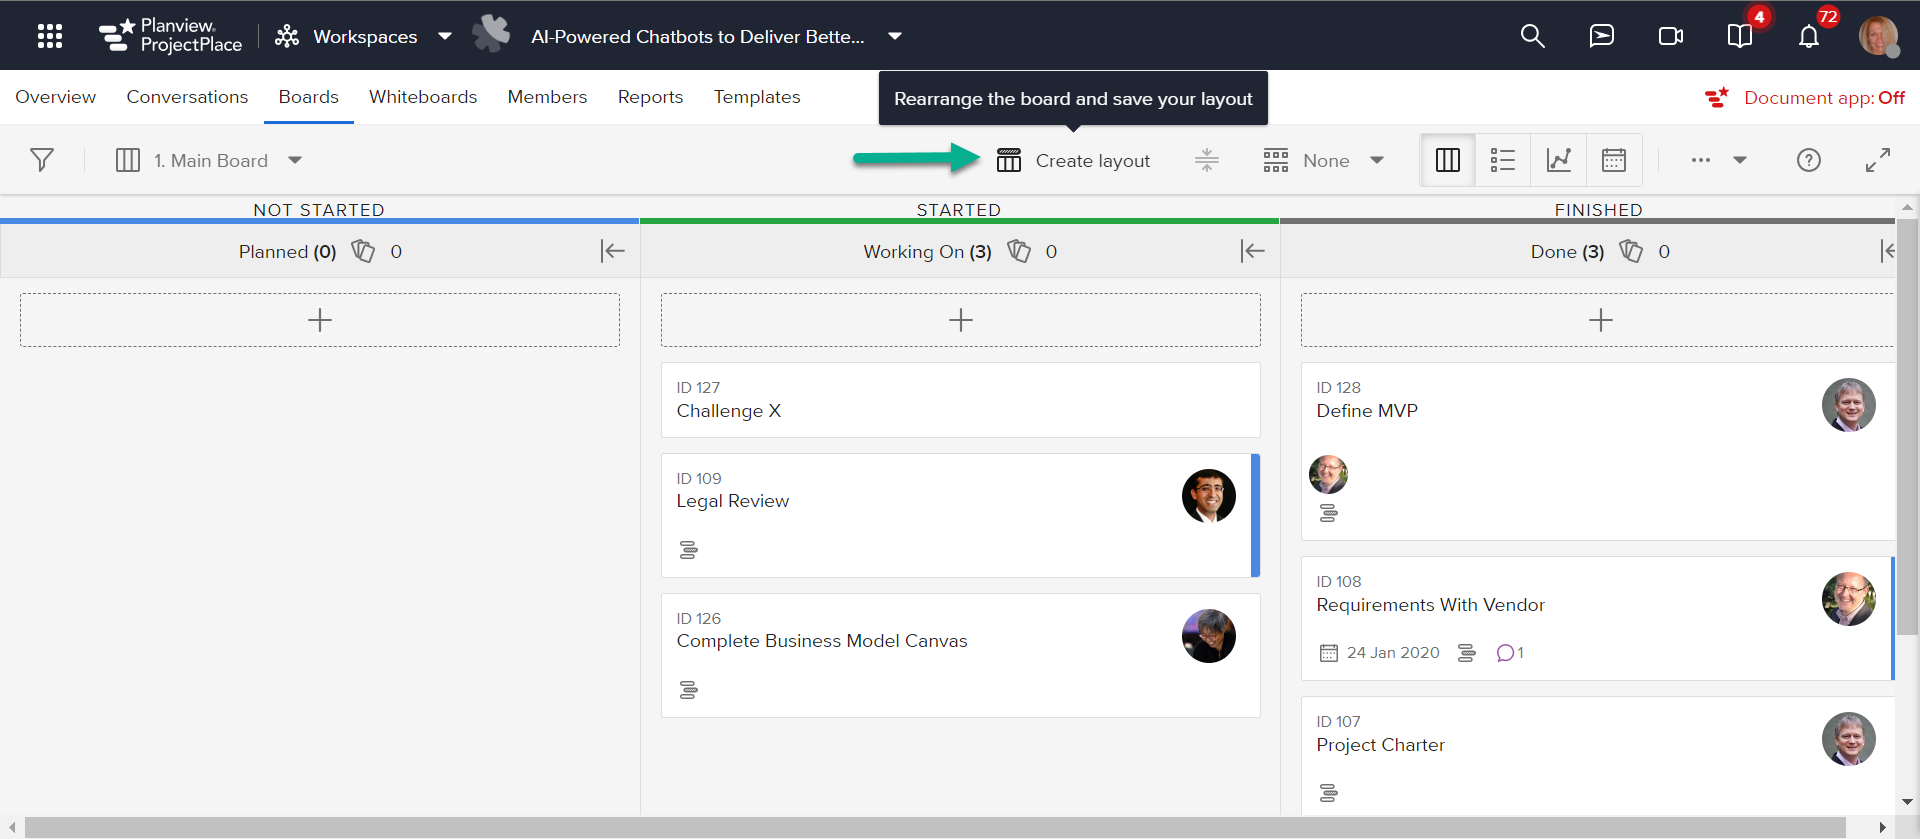
Customize Board Layout
When working with boards, depending on what you are doing, you might want to customize the board to suit the occasion such as standup, sprint planning for the teams, or meetings with customers. It can be time consuming to adjust the columns, swimlanes, and/or grouping every time. This feature enables a user to create reusable layouts.
Anyone with access to the board is able to use and manage the layouts This features only applies to the Board view.
To create a custom layout:
- Navigate to the workspace and board for which you wish to create a custom layout.
- Customize your board, which you can do by collapsing columns, hiding swimlanes, and setting how you want your view to be grouped (activities, labels, assignees. etc). You can also set to have the board maximized.
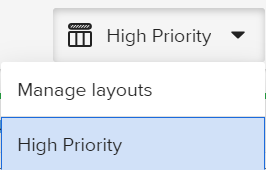
- Click Create layout, if there are no layouts created yet. Otherwise this button will be called Manage layouts.
3. On the Manage layouts popup, click Create custom layout and type in a name for the layout.
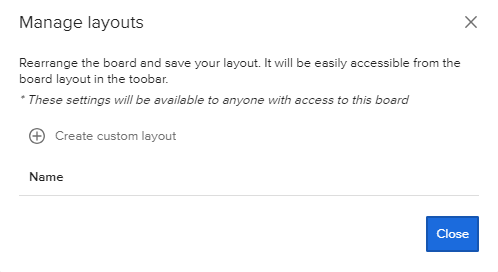
4. Click Close. The new layout will be added to the Layouts dropdown as well as the Manage layouts popup.
![]()
New layout in Manage layouts popup
You can Delete or Update a layout on this popup via the Refresh and X icons above the Close button on this popup.
To apply a new layout to a board:
- From the Boards dropdown click Board name.
- From the Layouts dropdown, select the layout you wish to apply to the board.