
Work with Whiteboards

Whiteboard Basics
The whiteboard is a tool that you use to create designs and plans while collaborating or brainstorming the same way you would using an actual whiteboard. There are options to add shapes, lines, text, and freehand drawings. You can save whiteboard drawings with the board, as well as download them in SVG, PNG, and JSON formats or copy them to the clipboard to be used in other apps. You can work on a whiteboard simultaneously with others, with the edits appearing in real time.
The following 3-minute video gives many useful tips and tricks for creating and using whiteboards.
Watch our webinar to learn more about how Whiteboards can be of great support for you and your team.

Creating a Whiteboard
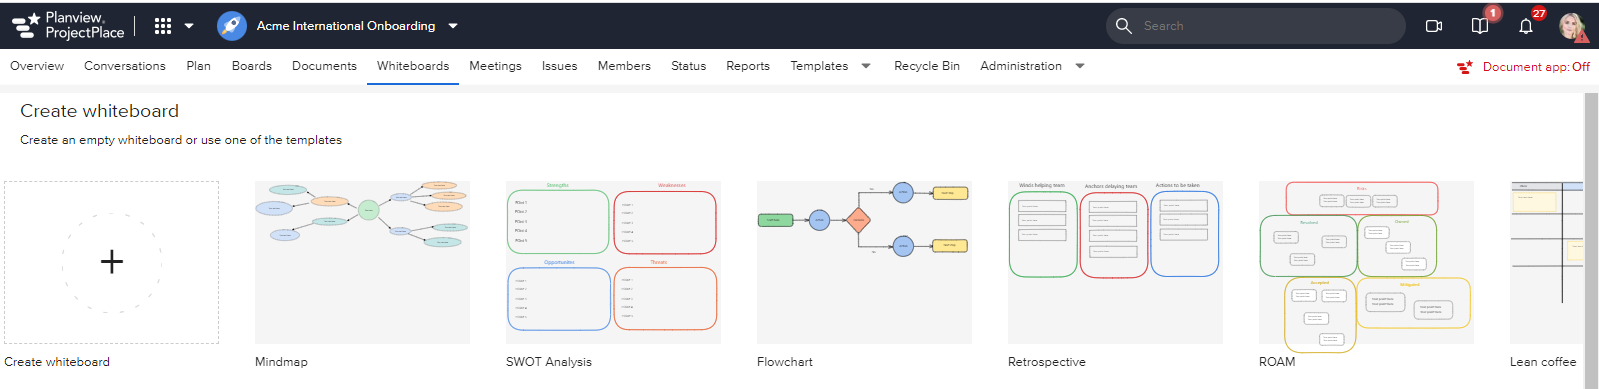
You can create a blank whiteboard or create one based on predefined templates.
- In a Workspace, click the Whiteboards tool.
- Click Create whiteboard or select one of the templates.The whiteboard is automatically assigned a numbered name. For Folder information, see the Folders in Whiteboards section below.

- To rename the whiteboard, click the menu icon
 > Rename.
 - To add elements (shapes, lines, arrows, text, etc.) to the whiteboard, click the relevant square icon in the center of the view or you can use our predefined libraries. When you select an element, the element options appear on the left side of the whiteboard.

TIP
Try out the various options by selecting an icon and experimenting. If you want to add text within a shape, click any element that is a shape and then either press Enter or double click in the shape and start typing text.
- To change the background color of the whiteboard, click the menu icon > Change background color.
- To access the help for the whiteboard, click the question mark icon
 at the bottom right.
 - To reset the whiteboard and start over, click > Wipe the whiteboard.
- To save the whiteboard, click > Save.
- To copy the whiteboard to the clipboard, click > Copy to clipboard.
- To save the whiteboard in PNG, SVG, or JSON file format, click and then select the option.
Adding Images to a Whiteboard
Members of the workspace can paste or upload images to the whiteboard to share with other members.
- Click the image icon (top green arrow).
- Select the file you wish to add to the whiteboard by either dragging and dropping it onto the whiteboard, or choosing it from File Manager (bottom green arrow).
- Move file to desired location on whiteboard.
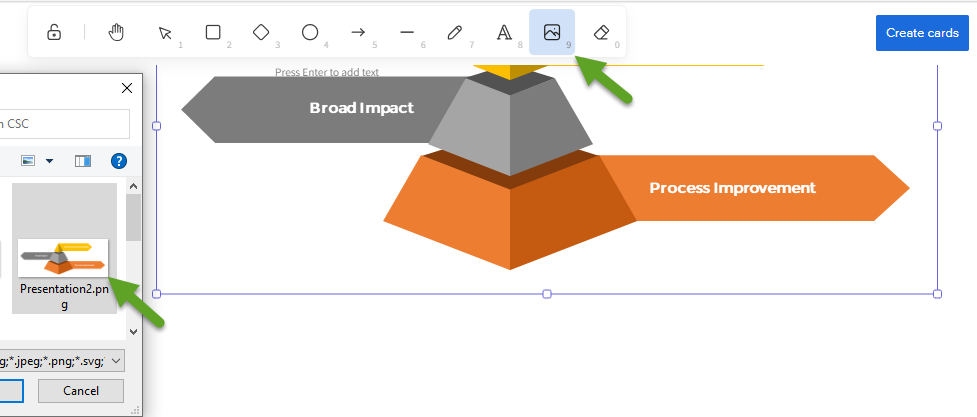
You can also paste an image (copied to clipboard) onto the whiteboard as well.
File formats supported:
* svg
* png
* jpg
* gif
* webp
* bmp
* ico
* avif
* jfif
File size limit is 1 MB.
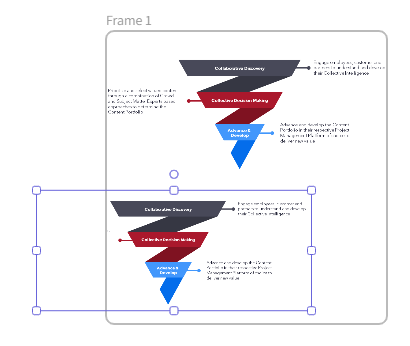
Adding Frames to a Whiteboard
Frames can be added via the whiteboards toolbar. You can add elements to frames for better organization, or constraint, which helps for exports.
To add a frame:
- Click the More tools icon
 .
. - Click the Frame tool in the drop down menu.

3. Drag your cursor on the whiteboard to create the frame.
4. Images that you add can be "constrained" in the frame so that only what is in the frame will appear. (Note that the left side text in the lower image "disappears" when the image is positioned in the frame differently from that of the upper image.) You can also add a frame around an image that already exists on the whiteboard.
Whiteboard Presentations
By utilizing the Frame tool option in the Whiteboard, you can easily convert the contents inside the frames to a presentation and save to a PDF or a Powerpoint file.
To create slides of your framed image(s) or text:
- Insert one or more images
 on a whiteboard and/or type in text
  . (You can insert multiple images and text blocks, if you wish, to include in a frame!)
 - Click the More tool icon and select Frame tool.
4. Drag your cursor on the whiteboard to wrap a frame around the image(s) and/or text.

5. Double click on the Frame label to type in a name for the slide.

5. Click the Monitor icon  on the lower left of the screen (below). This slide will now show up on the Presentation sidebar to the right, where you can also rearrange the order of slides by dragging and dropping them within the sidebar.

6. Click the blue Start presentation button at the bottom of the Presentation sidebar to go to Presentation mode,

The toolbar at the bottom of the Presentation mode's screen contains various options:

7. You can jump to a different slide by clicking the Slide number on the Presentation mode toolbar, and selecting a different slide from the popup menu that appears.

8. Click the End presentation button to return to Whiteboard mode.
To save your presentation as a PDF or PowerPoint:
- In Presentation mode, click the Pdf or Ppt button in the lower, floating menu bar (shown above). OR
- In Whiteboard mode, click the Monitor icon at the bottom of the screen.
- On the Presentation sidebar, click the More button
 at the top of the slide menu (below).
 - Select Download as PDF or Download as PPTX from the dropdown menu.

5. Your presentation will appear in your downloads folder. Name the file and save it off where you wish.

6. And that's the power of the Whiteboard Presentations feature!

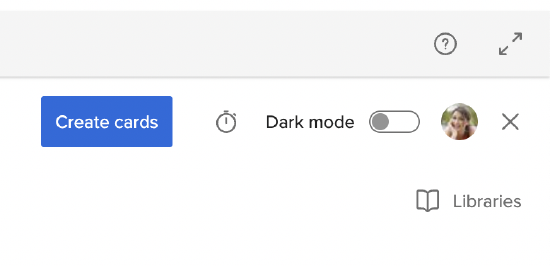
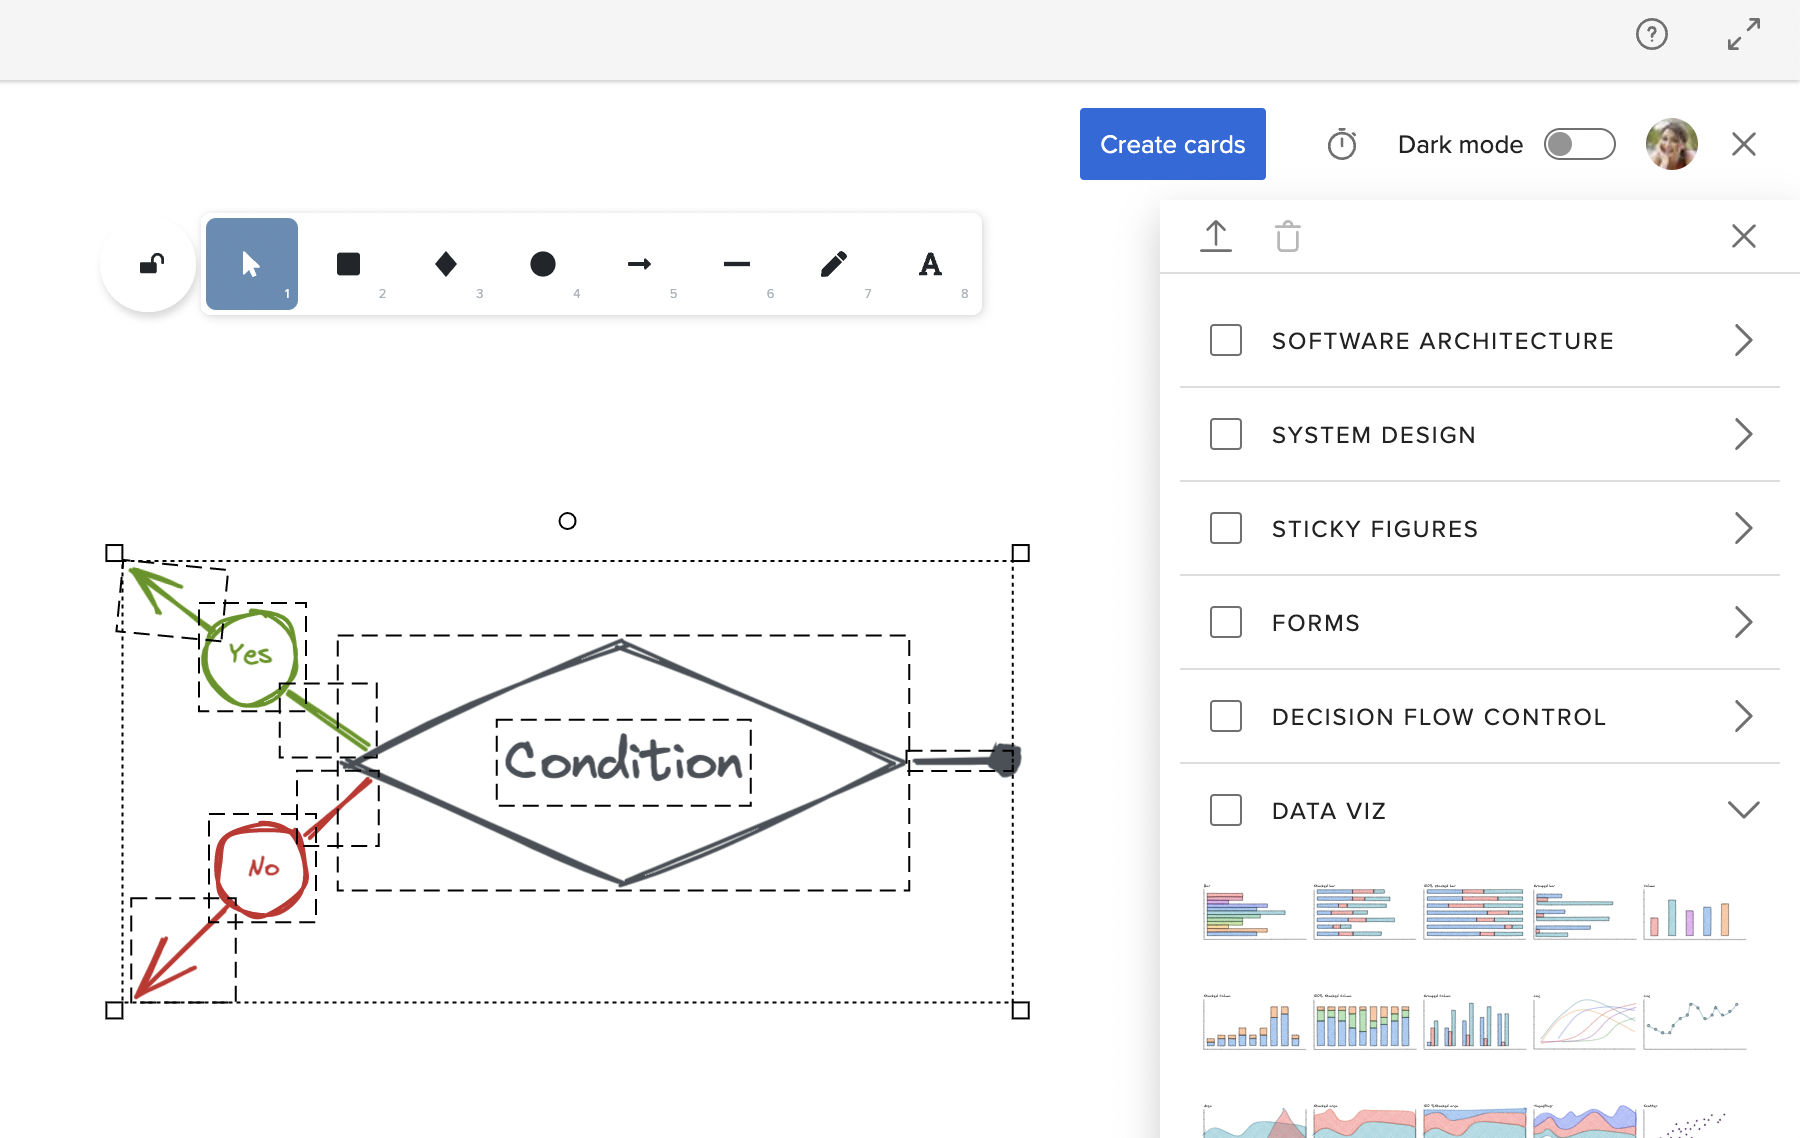
Libraries
Whiteboard libraries are a collection of digital tools and resources that can be used to create and collaborate on whiteboard-style diagrams and illustrations. These libraries typically provide a variety of shapes, icons, and other visual elements to create diagrams, flowcharts, mind maps, and other forms of visual representation. You can find the libraries feature in the top right center of the view. When you open the Libraries section you can drag and drop the diagrams and illustrations onto your whiteboard and resize and edit the shapes.
You also have the possibility to add more libraries to the list and also remove those that are not relevant. Visit Excalidraw Libraries where you search for libraries that are relevant to you and follow the instructions. To upload the new libraries into the whiteboard, open Libraries and you will find an upload icon at the top of the list. The new library or libraries that are uploaded will then be available in all whiteboards.
Whiteboard Templates
It is now possible to create a whiteboard based on standard templates. This helps users get started quickly using standard templates such as:
- Mindmap
- Retrospective
- Flowchart
- Lean Coffee
- SWOT Analysis
- ROAM
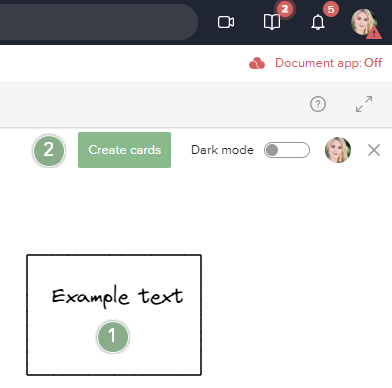
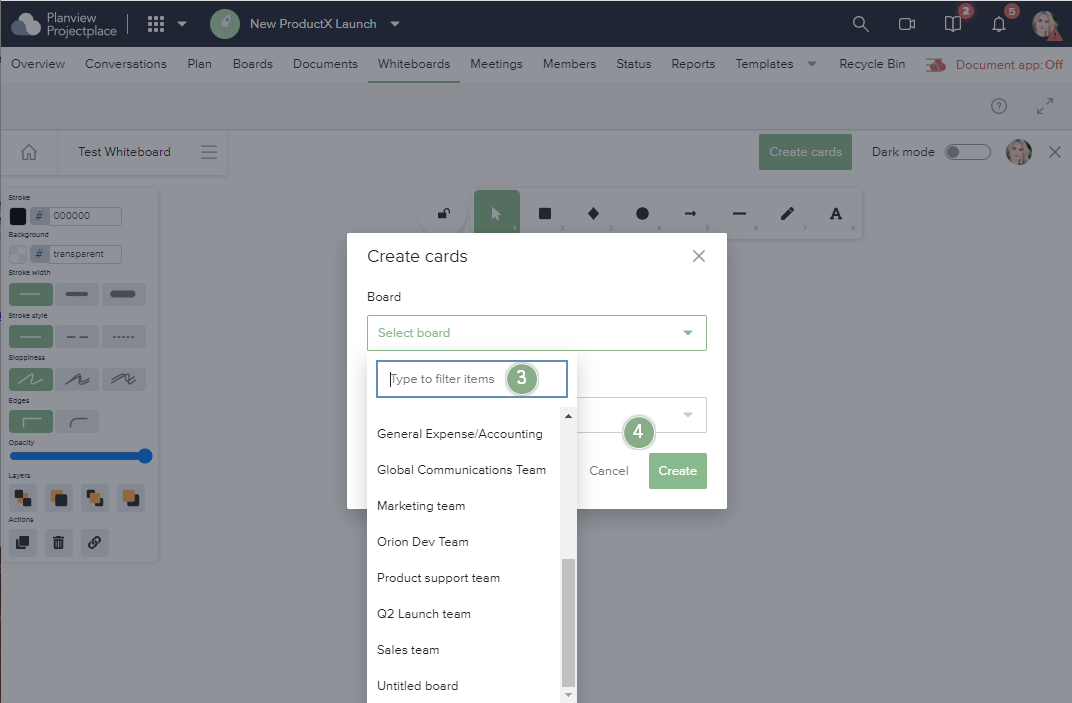
Converting a shape with text into a card
To create one or several cards based on shapes:
- Select one or several shapes with text (images below).
- Click the Create cards button.
- From the dropdown menus on the Create Cards popup, select which board and activity upon which you want to place the card(s).
- Click Create and the new card(s) will be added to the specified board.
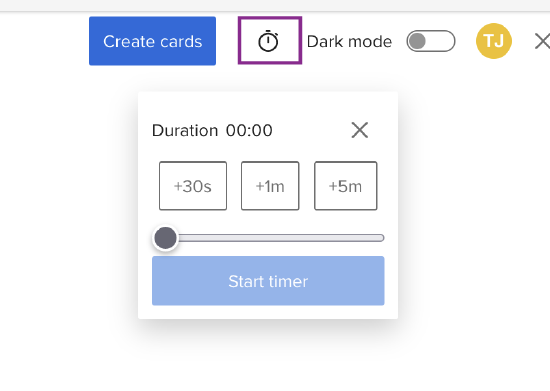
Timer
When the team is having timebound sessions, such as for brainstorming or a retrospective it can be helpful to keep track of time with the timer. This functionality helps users be aware of the time they work on a particular topic. Also, in scenarios where a group of people is collaborating to find consensus, the timer functionality can help the group arrive at a consensus with relative ease.
Editing a Whiteboard
- In a Workspace, click the Whiteboards tool.
- To edit a whiteboard, click the whiteboard thumbnail.
- To edit an element, click the element.
- To delete a whiteboard, click the Action menu
 > Delete on the whiteboard thumbnail.
Managing Access to Whiteboards
You manage access to whiteboards the same way you manage access to other workspace tools such as plans, boards, and documents. For more information, see Manage Workspace Settings.
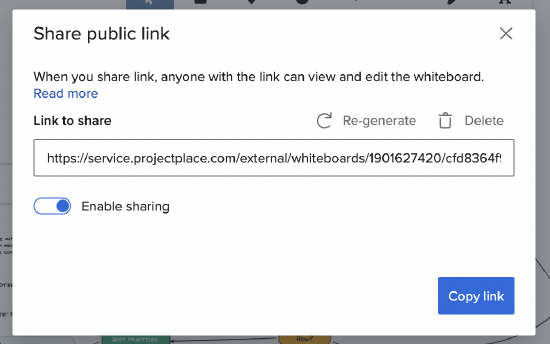
Share the Whiteboard
The Whiteboard can be shared with other members and people outside of ProjectPlace to work together on the whiteboard. A public link needs to be generated within the whiteboard and anyone given with the link will be able to view and edit the whiteboard. The link to the whiteboard can be disabled or deleted at any time.
 .
. 
Folders in Whiteboards
Users can now create folders in Whiteboard to organize their boards and collaborate more efficiently. This feature helps keep workspaces tidy by grouping related content together, making it easier to find and manage projects.
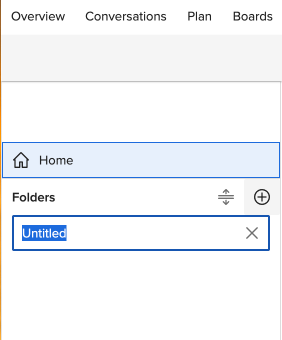
To create a folder:
-
Click the + icon next to Folders in the left pane (above).
-
A new folder will be created.
-
Name the folder and press Enter to save it.
Alternatively, you can create a folder from the right screen by clicking the "Create Folder" icon.
To add a whiteboard to a folder:
-
Click the three dots
next to the folder name.

2. Select “Create whiteboard.”
3. Enter the whiteboard name and press Enter. The whiteboard will be created inside the selected folder (below).

To move a whiteboard to a folder:
-
Click the three dots
next to the whiteboard.

2. Select “Move to folder.”
3. Choose the folder where you want to move the whiteboard.
To move a whiteboard between folders:
Simply drag and drop the whiteboard from one folder to another in the folder menu.
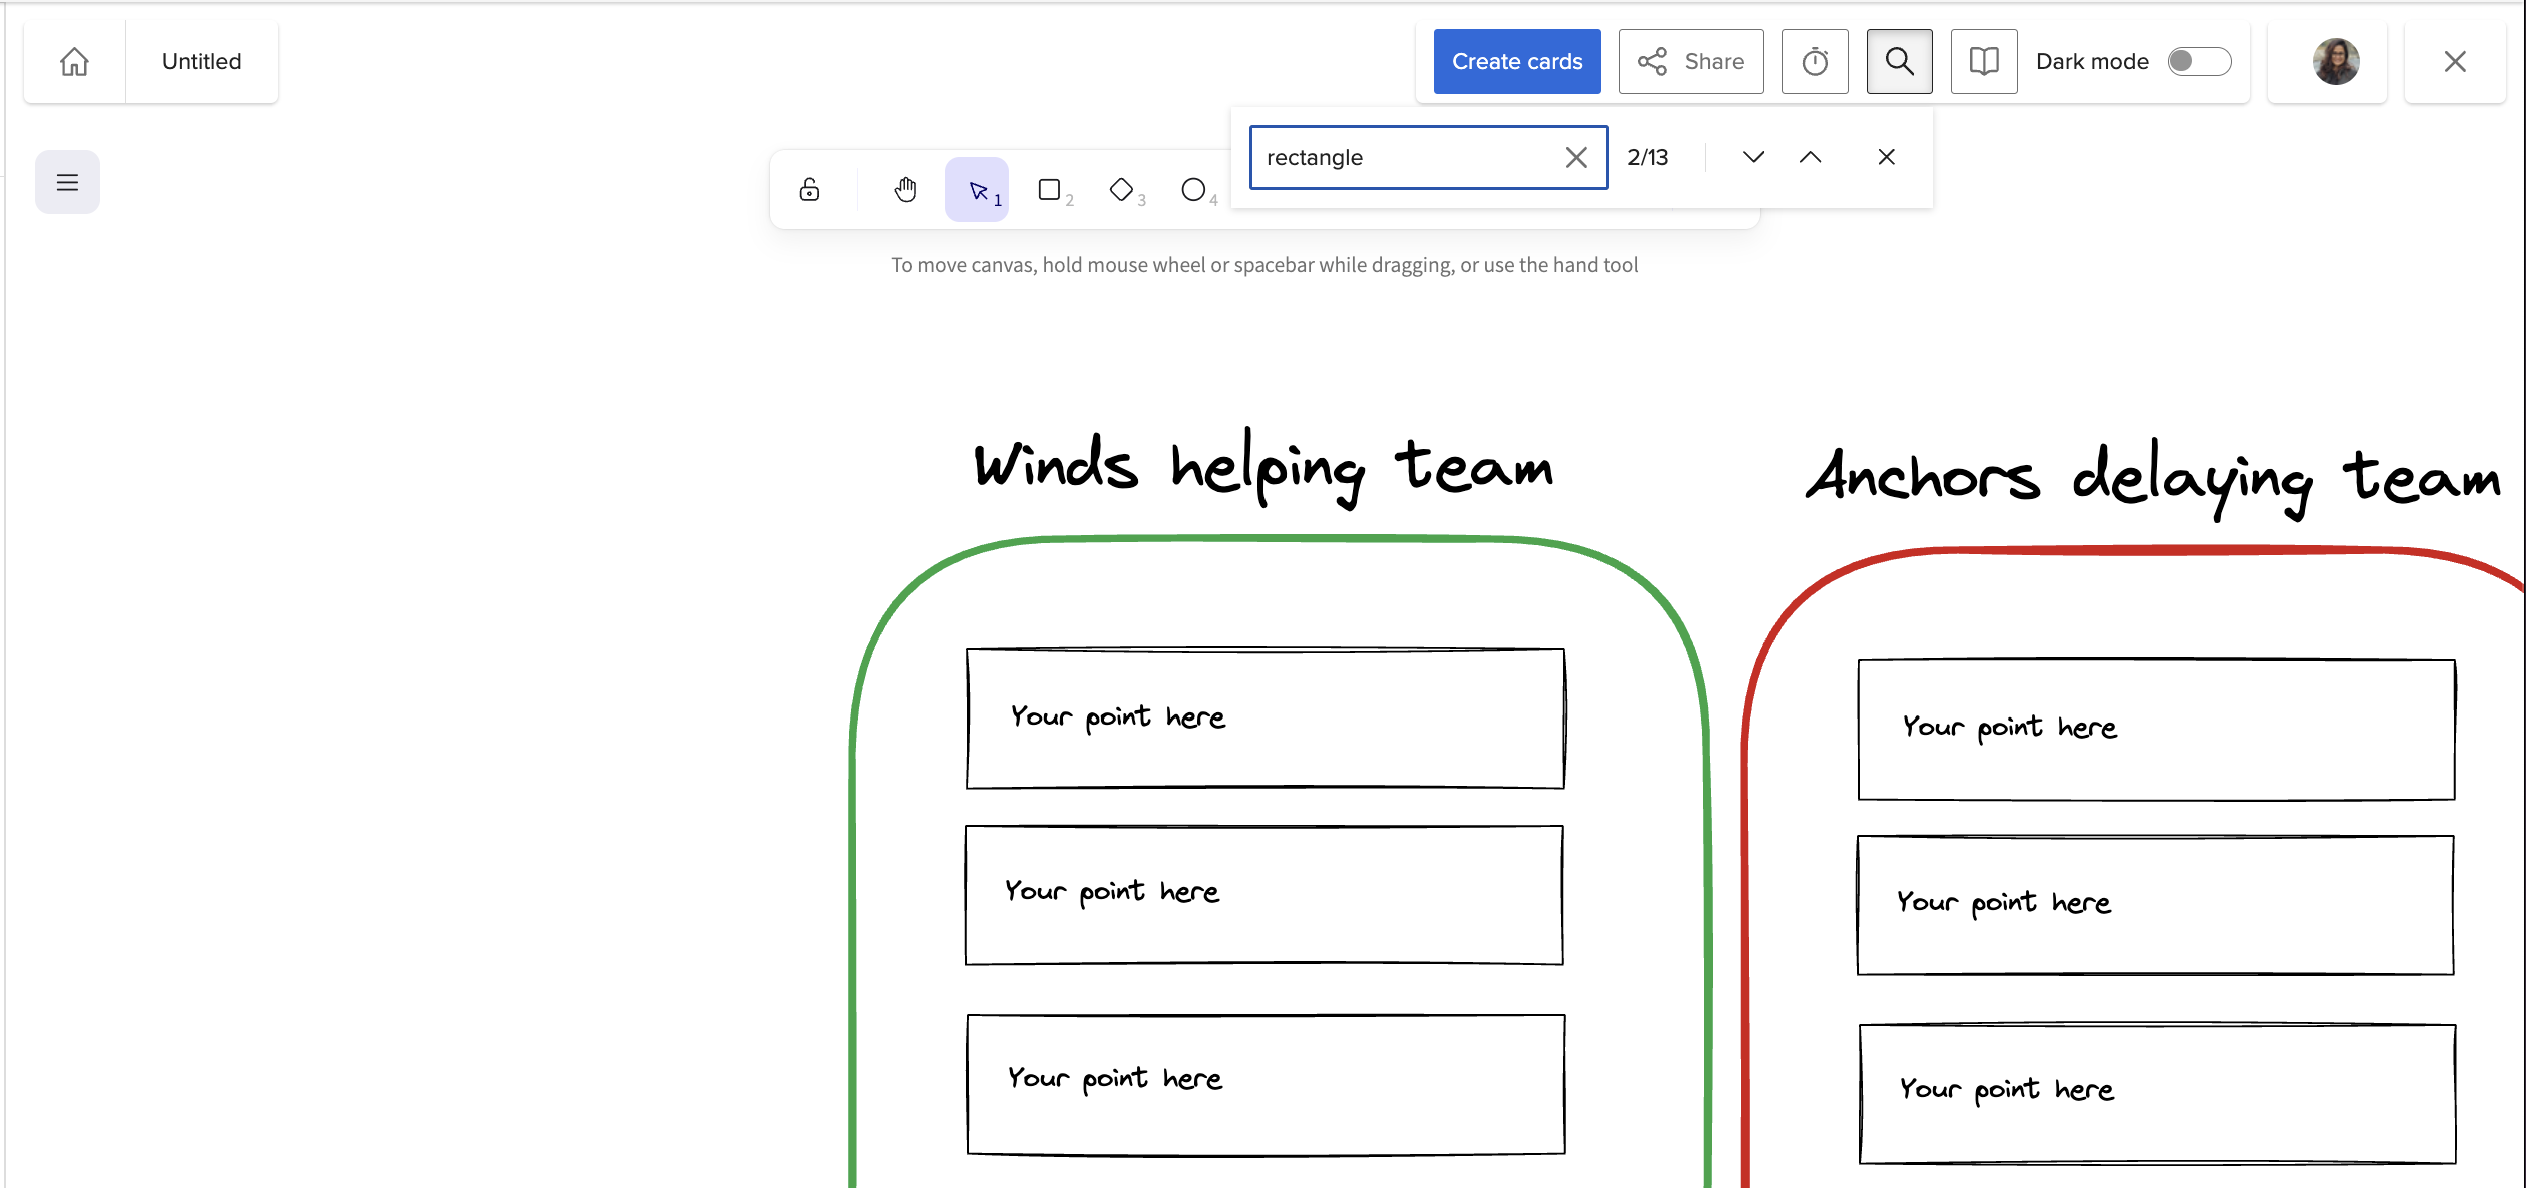
Search in Whiteboards
Search for specific text or element types (rectangles, images, ellipses, arrows, lines, and freedraw) within a particular whiteboard.
Search within a specific board; narrow your results to the current whiteboard for focused navigation.
Obtain faster reviews and edits. Ideal for design cleanups, workshop follow-ups, and visual audits.
To Search in Whiteboards:
-
Click the Search icon while you're in the Whiteboard view.

- Type the name of the icon or text you want to search for.
-
Press Enter, and the Whiteboard will automatically zoom in to the selected search result.
NOTE
For element search, we currently support English only.