Snapshot of the Plan
Introduction
As time passes a project evolves and plans get changed. For project managers, it would be very helpful to be able to view how the plan looked at a time in the past and how it has progressed over time. This would be a powerful way to identify variances in the plan. This feature provides the possibility to take snapshots of the whole plan and store information from a given point in time.
Such comparisons help project managers perform the following tasks:
-
Identify variances in the plan by visually view that in the Gantt chart and in the WBS
-
Measure the success of a work item's schedule in an ongoing manner
-
Determine if an original plan was accurate enough
The Workspace administrators and members with read and write access are able to create, edit and delete snapshots only.
Create, Rename, or Delete snapshots
To create a shapshot:
- Navigate to Workspace > Plan.
- Click
 if there are no existing snapshots, OR, if there are preexisting snapshots, click the Snapshots dropdown > Manage snapshots.
 - On the Manage snapshots popup that appears, click .
- Enter the name of the snapshot.
- Click Close.
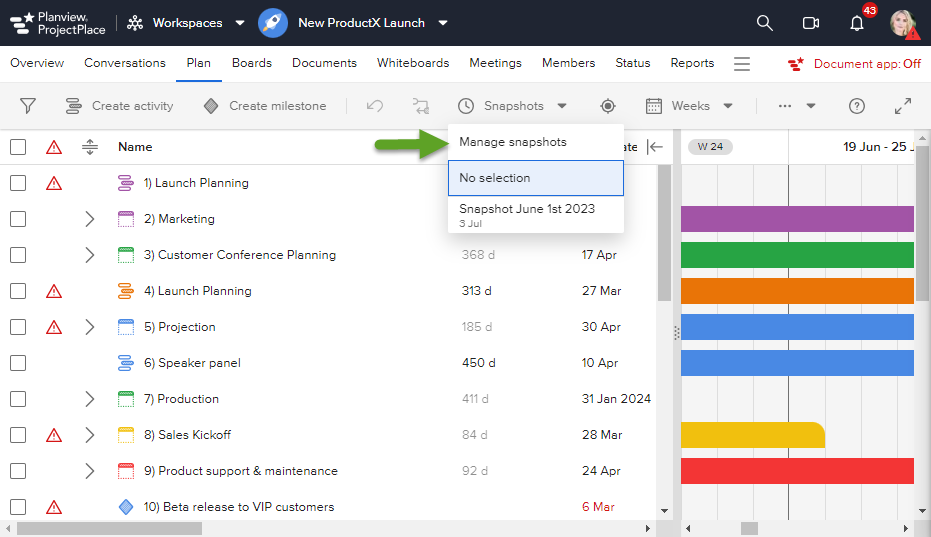
The new snapshot will now appear on the snapshot dropdown:
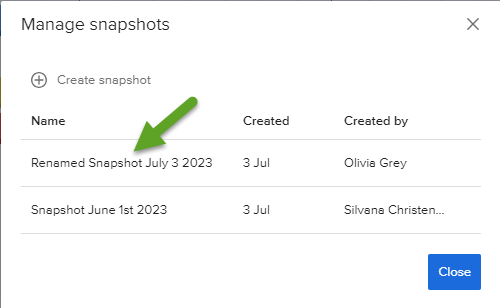
To Rename a snapshot:
- Click Manage snapshots on the snapshot dropdown.
- Click in the name field of the snapshot you wish to rename.
- Edit name.
- Click Close. The renamed snapshot will appear on the snapshot dropdown and on Manage snapshots.
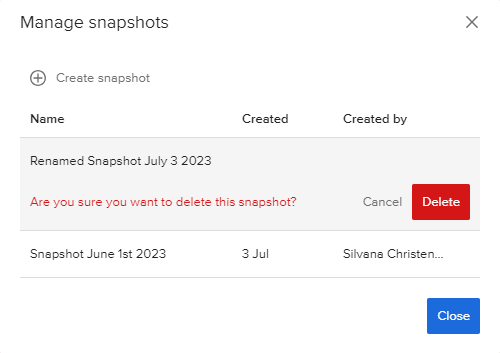
To Delete a snapshot:
- Click Manage snapshots on the snapshot dropdown.
- Hover your mouse over the name of the snapshot you wish to delete. An "X" will appear on the right side of its row.
- Click the "X" on the line of the snapshot you wish to delete. You will be asked whether you wish to proceed with the deletion.
- Click the Delete button if you wish to proceed with the deletion.
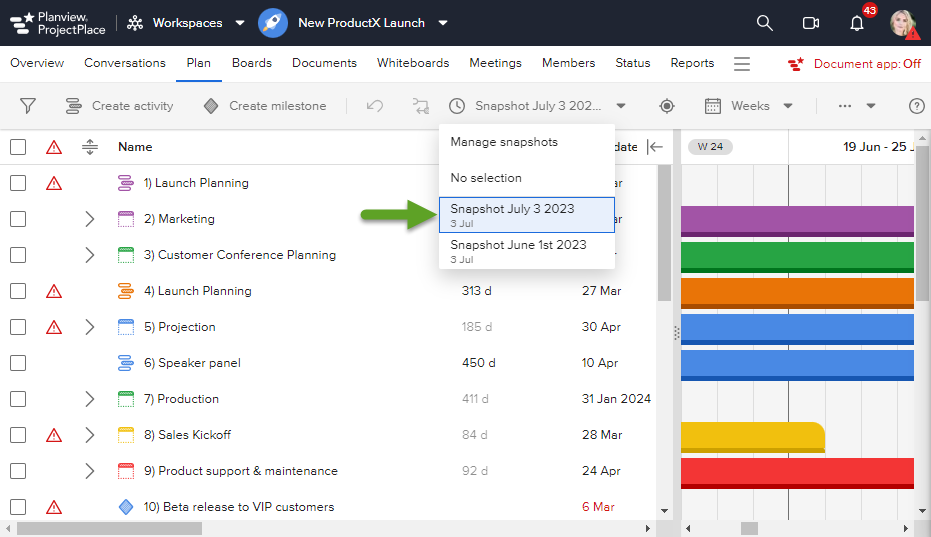
Select a Snapshot to Compare with Current Plan
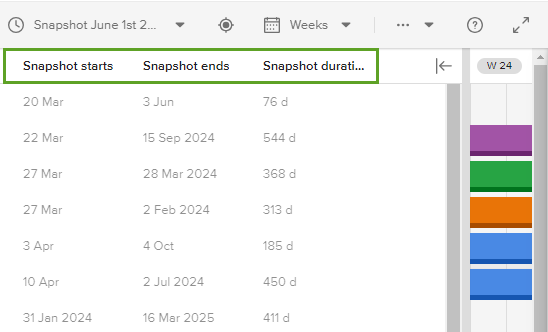
When you select a snapshot from the list, the start, end, and duration dates will be visible in the WBS. Also in the timeline you will view thin lines below current activities and milestones (see screenshot below). There will be deviations when the thin line and current activity or milestone don´t match both start and end. In the examples below you can see the yellow activity is unchanged, the green activity has started earlier than planned and the blue activity has started later than the original plan.

The three fields Snapshot start, Snapshot ends, and Snapshot duration are visible in the WBS list:
Additionally, if you select a snapshot from the list and then export or print the plan, the dates and duration will be reflected in the report or pdf-file.
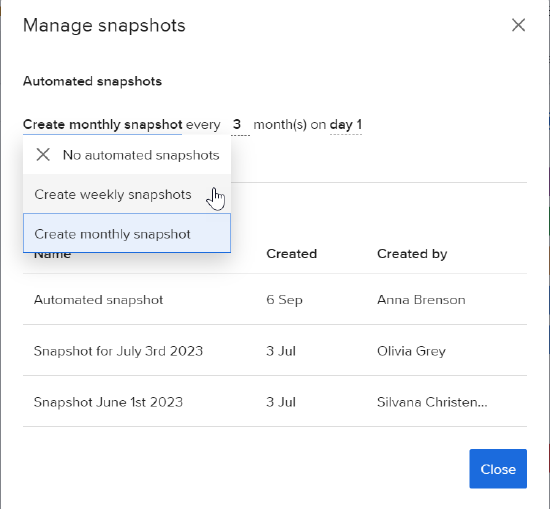
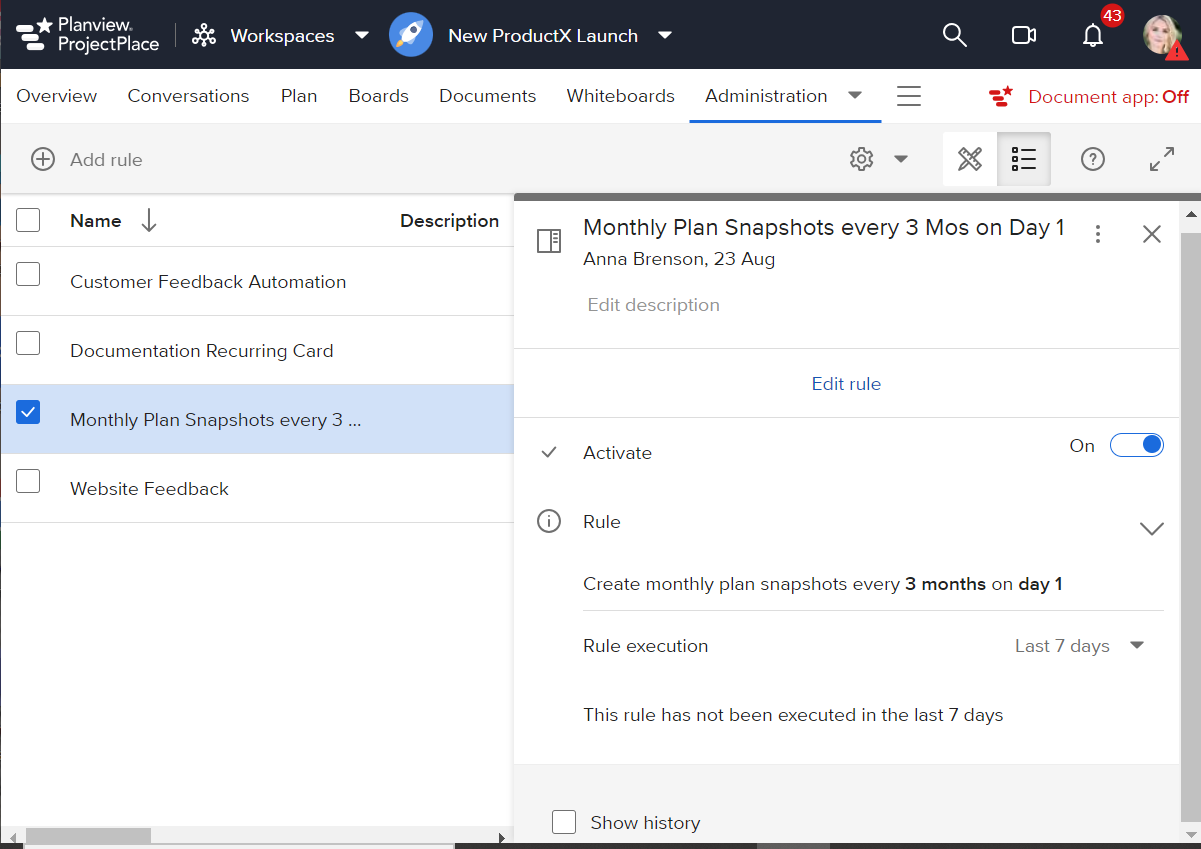
Automate Snapshots
You can also automate snapshots on a weekly or monthly cadence. When selecting either of these two options it is possible to configure it further, for instance setting a snapshot to be created every second week on a Monday or every third month on the first day of that month. This provides great flexibility to customize to your needs. This functionality is available both from within the Plan where you click on the Manage snapshots option and if you navigate to Administration and click on Automation.
To Automate a snapshot:
- Under Workspaces > Plan, click Administration.
- Click Automation on the drop down.

3. From the Templates view, click the snapshot automation template that you need.
4. Click Next.

5. Select parameters from clickable bolded text.
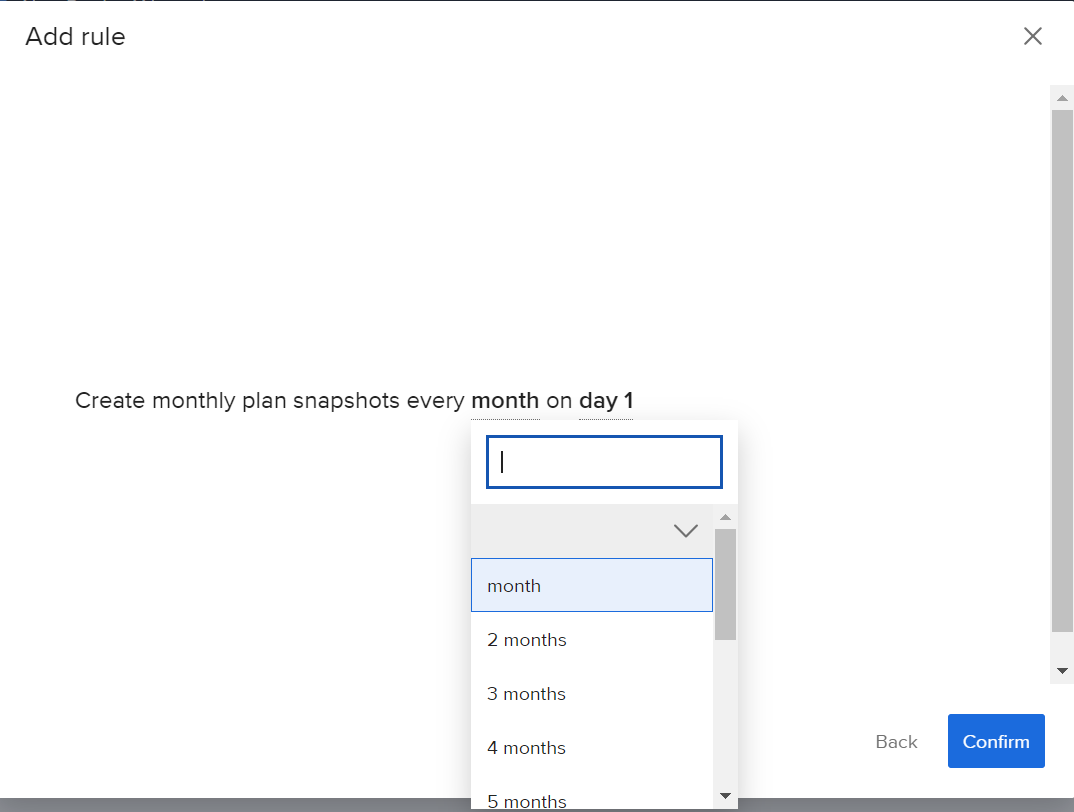
6. Click Confirm.
7. Assign a title to the new rule. Press Enter.
8. To make the rule active, click the Activate toggle to switch it to the on position.
To view/edit an Automated Snapshot:
- Under Workspaces > Plan, click

- Select Manage Snapshots.
- From the Automated Snapshots list, you can modify existing snapshots, by clicking on selectable parameters and choosing new ones from the drop down menu.