
Manage Workspaces in the Account
Video: Manage Workspaces in Account Administration
As an account administrator, you can monitor the workspaces in the account, for example, to make sure they are based on the correct template, or that you have enough disk space for the workspaces. You can view and modify key details of the workspaces as well.
Accessing Workspace Details and Customizing Your Workspace
You can see all the workspace that are created in your account along with the following details:
- Workspace name
- Last activity
- Created on date
- Space used
- Member count
- Head administrator
- Manager
- Template used
- Department
- Cost code
- External member invitations allowed
- Currently syncing (for example with Portfolios or PPM Pro)
To view a list of the projects contained in your Workspaces:
- Click the tool selector
 in the top navigation bar and select Account administration.
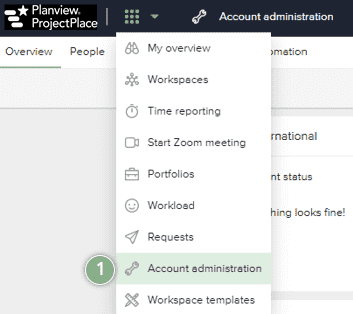
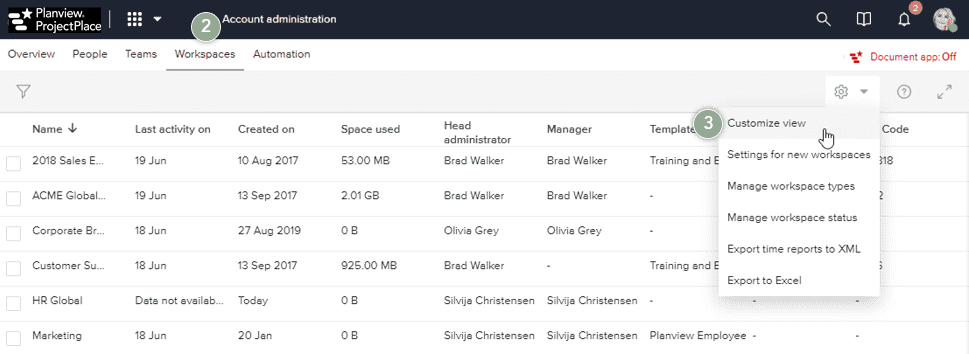
- Click the Workspaces tab.
- You can customize this view and only include information most relevant to you. Click the Settings
 menu and select Customize view.
-
A new window appears. Click each checkbox to include the available column names you want to include. Use the drag and drop method to reorder the selected column names to arrange them in the order you prefer.
-
Click Save to save your changes.
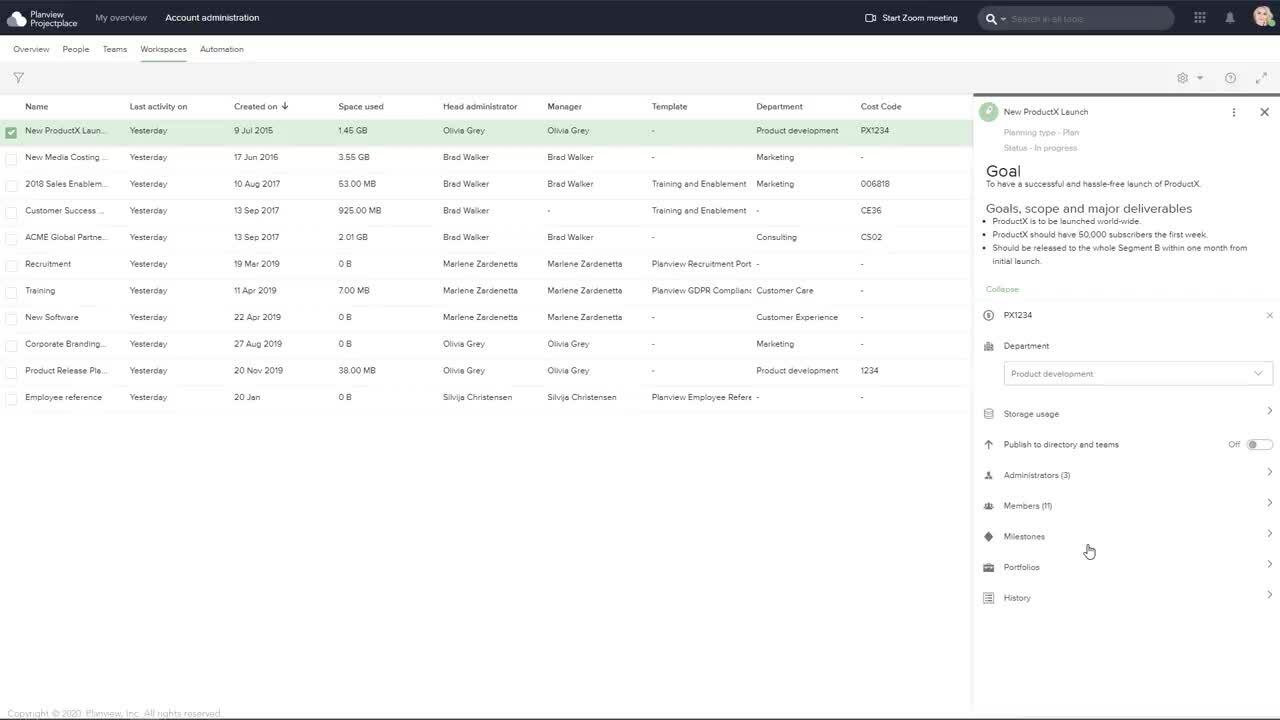
Using the Workspace Detail Pane
To see information pertaining to one Workspace:
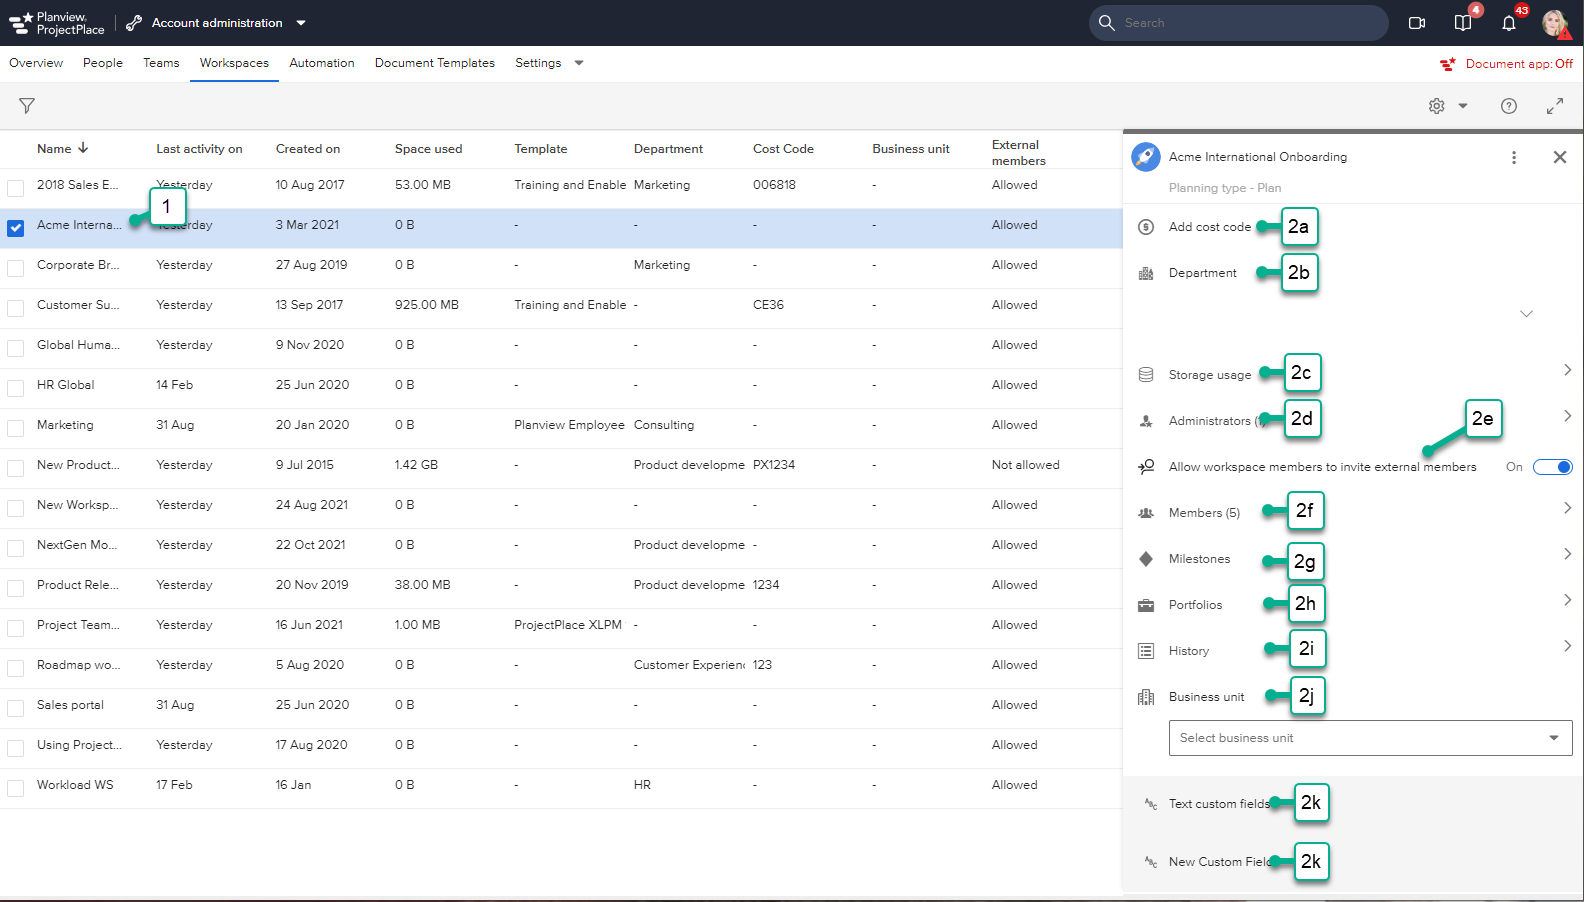
- Click the name of the workspace to open the workspace detail pane. Notice the workspace name is now highlighted in green and the detail pane appears on the right side of the window.
- You can add or make changes to the following Workspace elements:
- Cost Code
- Department
- Workspace storage usage
- Administrators
- Allow workspace members to invite external members
- Members
- Milestones
- Portfolios
- History
- Business unit
- Custom fields
- In Account Administration under the Workspaces tab it is possible for account administrators to download a workspace event log in a .json format. You find the option in the More
 menu after you have selected one or several workspaces in the list. The event log contains information about creative and destructive events in the workspace only. Such as user additions/removals and item creations/deletions.
 - You can also download, archive, and terminate a Workspace via this dropdown menu too.
Allow or Block External Users from being added to Workspaces
To allow for better control of which external members are being invited to workspaces, the Account Administrators can allow or block workspace members from adding external members to a workspace. Only the Account administrators will be allowed to add new external members from the Workspace details pane within Account Administration. All workspace members trying to invite a new user will be informed to reach out to the Account Administrator.
Filtering Workspaces
Filter your workspaces to find a particular workspace or search for workspaces with specific criteria.
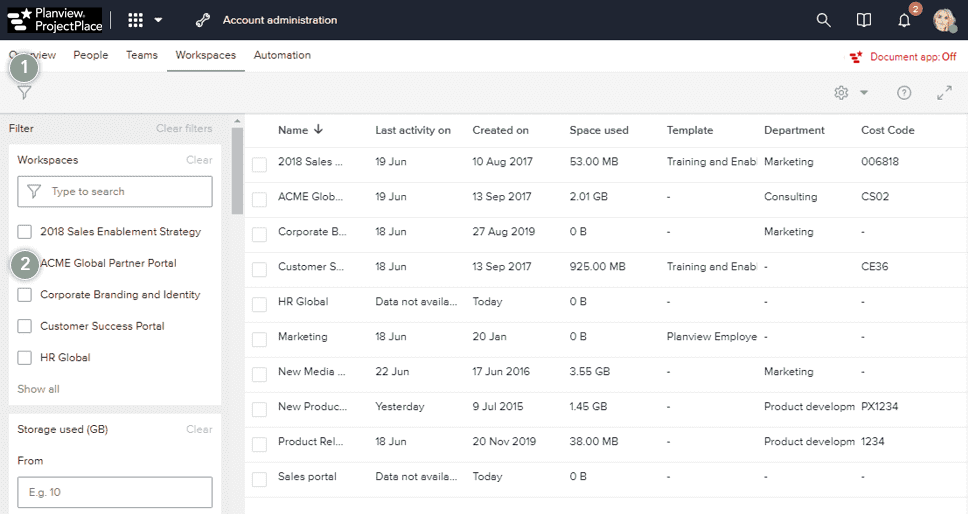
- Click the Filter
 icon near the top, left corner of the window
 - Click each desired checkbox to perform a filtered search. The filter criteria categories include:
- Workspace name
- Storage used
- Storage limit
- Visibility
- Status
- Last activity
- Template type
- Department
- Portfolios
- Cost code
- Member type
- Workspace type
- Currently syncing (e.g. Portfolios or PPM Pro)
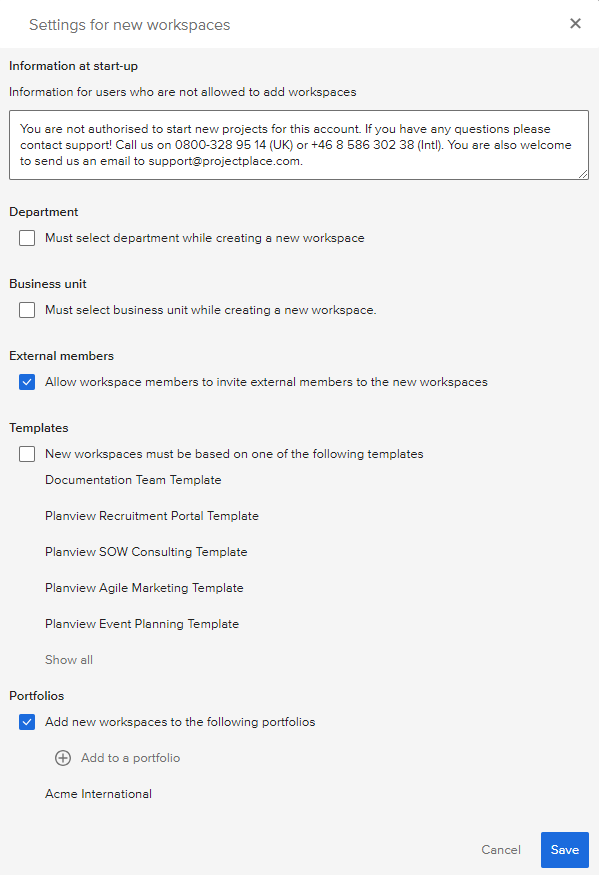
Settings for New Workspaces
Account administrators can select settings that are appropriate for each new workspace. To set workspace settings:
- Click the tool selector in the top navigation bar and select Account administration.
- Click the Workspaces tab.
- Click the Settings menu and select Settings for new workspaces.
- In the Settings for new workspaces window, you can make changes to the following workspace settings:
- Information at start-up - Enter the text that the users will view when trying to create a new workspace.
- Department - Select whether the Department field for a new workspace should be mandatory or optional.
- Business unit - Select whether the Business unit field for a new workspace should be mandatory or optional.
- External members - Select whether workspace members should be able to add external members to a new workspace.
- Templates - Select whether new workspaces should be mandatorily or optionally based on listed templates.
- Portfolios - Select whether the a new workspace should be mandatorily or optionally added to listed portfolios.
- Click Save.
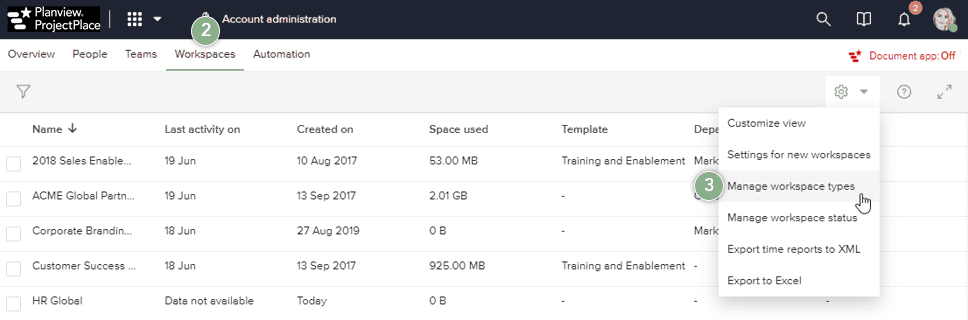
Manage Workspace Types
Account administrators can define custom values for workspace types that will be used by all the workspaces in the account.
To create, edit, or delete a workspace type:
- Click the tool selector in the top navigation bar and select Account administration.
- Click the Workspaces tab.
- Click the More Options icon located in the top right corner and select the Manage workspace types option.
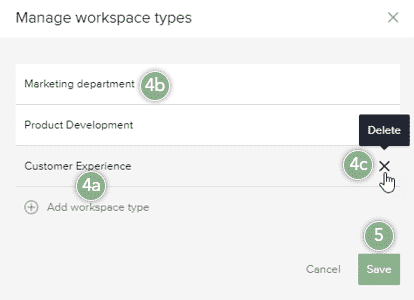
- A new window appears with all the default types available for your account. Take any of the following actions:
- Create a new workspace type: Click + Add workspace type, then type the name of your new workspace type and press Enter.
- Edit an existing workspace type: Double-click the workspace type you want to edit, make the desired changes and press Enter.
- Delete a workspace type: Hover over the workspace type you want to delete and click the X.
- Click Save to save your changes.
Learn how to create, archive and delete workspaces.
Manage Workspace Statuses
Account administrators can define custom values for workspace statuses that will be used by all the workspaces in the account. The Not started and Completed workspace statuses are not editable, but you can create, edit, and delete any In progress workspace statuses.
To create, edit, or delete a workspace status:
- Click the tool selector in the top navigation bar and select Account administration.
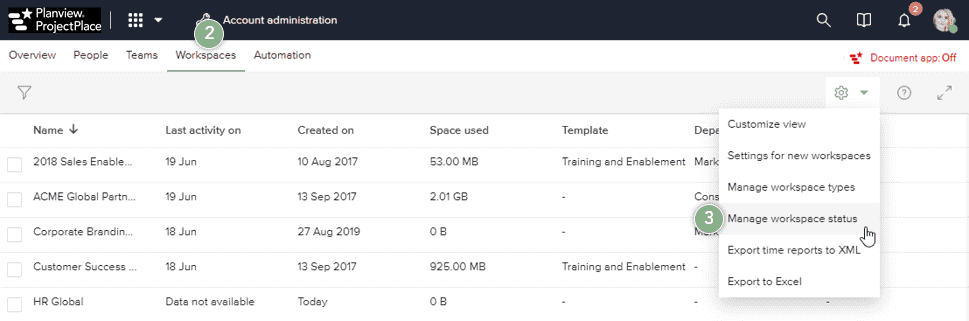
- Click the Workspaces tab.
- Click the More Options icon located in the top right corner and select the Manage workspace status option.
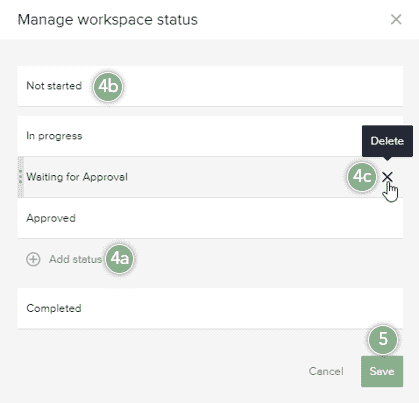
- A new window appears with all the default types available for your account. In the In progress section, take any of the following actions:
- Create a new status type: Click + Add status, then type the name of your new workspace status and press Enter.
- Edit a status type: Double-click the status you want to edit, make the desired changes and press Enter.
- Delete a status type: Hover over the status you want to delete and click the X.
- Click Save to save your changes.
Download Workspace Data
Account Administrators and Account owners can select up to 20 workspaces and download the data for the selected workspaces at the same time. Note that only non-archived workspaces can be selected for download, and archived workspaces need to be reopened in order to download the data.
To download the data for one or more workspaces:
- Click the tool selector in the top navigation bar and select Account administration.
- Click the Workspaces tab.
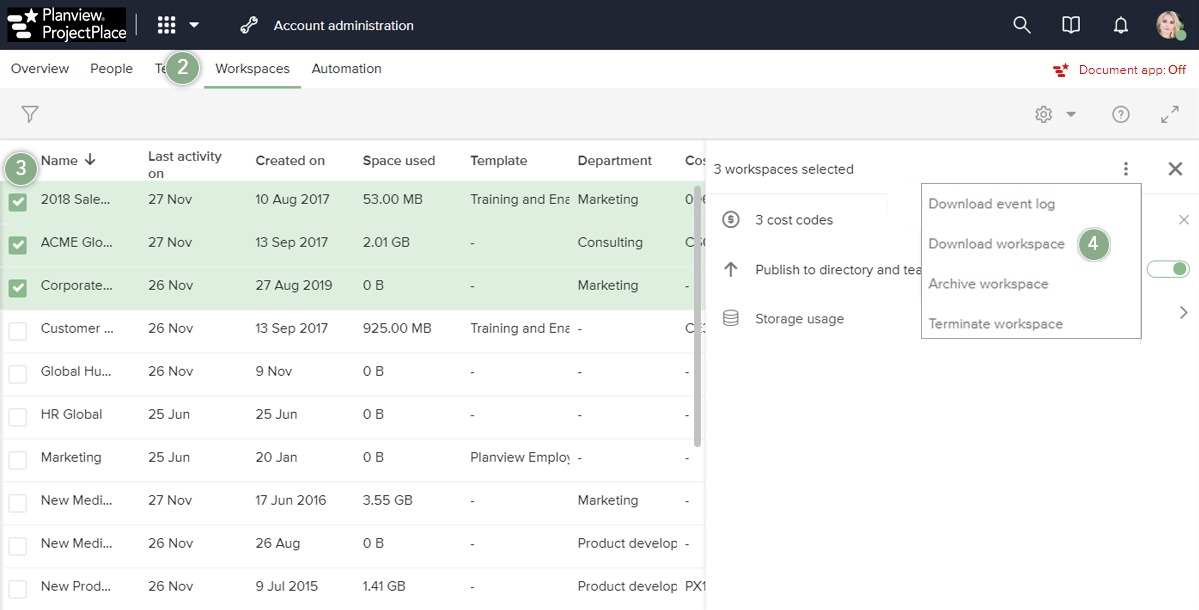
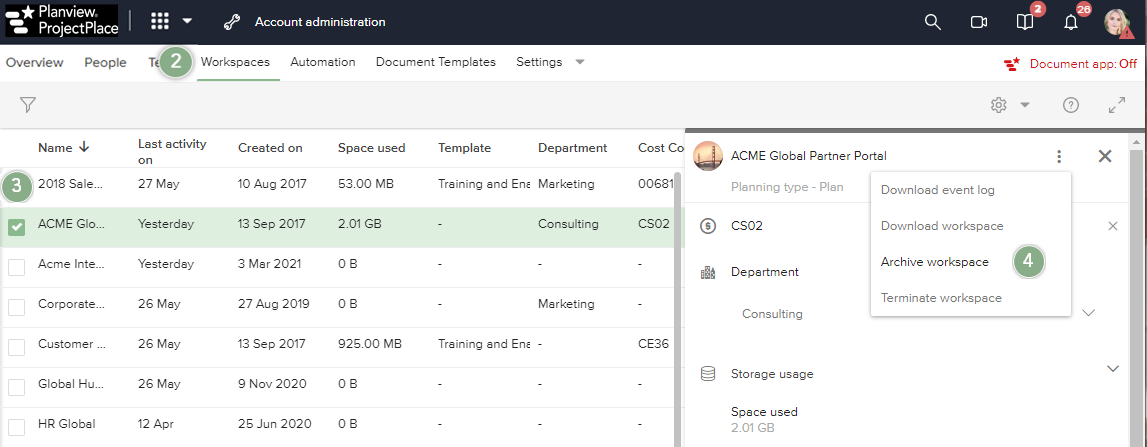
- Use the checkboxes to select the workspaces that contain the data you want to download.
- In the detail pane, click the More menu icon
 and select the Download workspace option.
5. In the window that appears, select the information you would like to download from the workspaces and click Download.
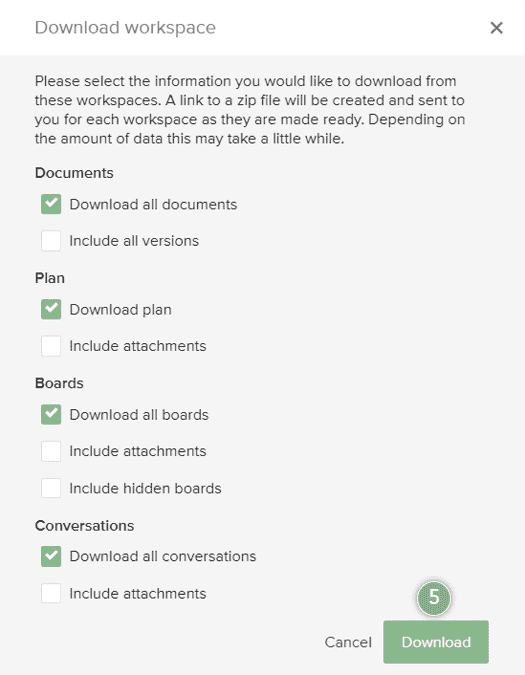
6. A link to a zip file for each workspace will be created and emailed to you.
Archive a Workspace
Account Administrators and Account owners can remove a workspace from the workspace list and save the workspace content and history by archiving completed workspaces. The workspace and all information within it is still accessible in the archive.
To archive a workspace:
- Click the tool selector in the top navigation bar and select Account administration.
- Click the Workspaces tab.
- Use the checkboxes to select the workspaces that contain the data you want to archive.
- In the detail pane, click the More menu icon and select the Archive workspace option.
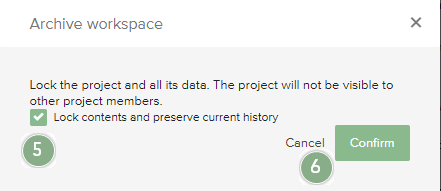
5. If you don’t want the contents to be locked for editing, uncheck the Lock contents and preserve current history box.
6. Click Confirm to archive the workspace.
Terminate a Workspace
If you delete a workspace, all contents are deleted and those contents cannot be recreated. You must be the Account Administrator or Account owner to delete the workspace. Before deleting a workspace you can save contents locally.
You might consider notifying the Head administrator that the workspace is being deleted. This notification allows the Head administrator the opportunity to save any relevant information before the workspace is deleted. The Head administrator is found in the Administrators section.
To delete a workspace:
- Click the tool selector in the top navigation bar and select Account administration.
- Click the Workspaces tab.
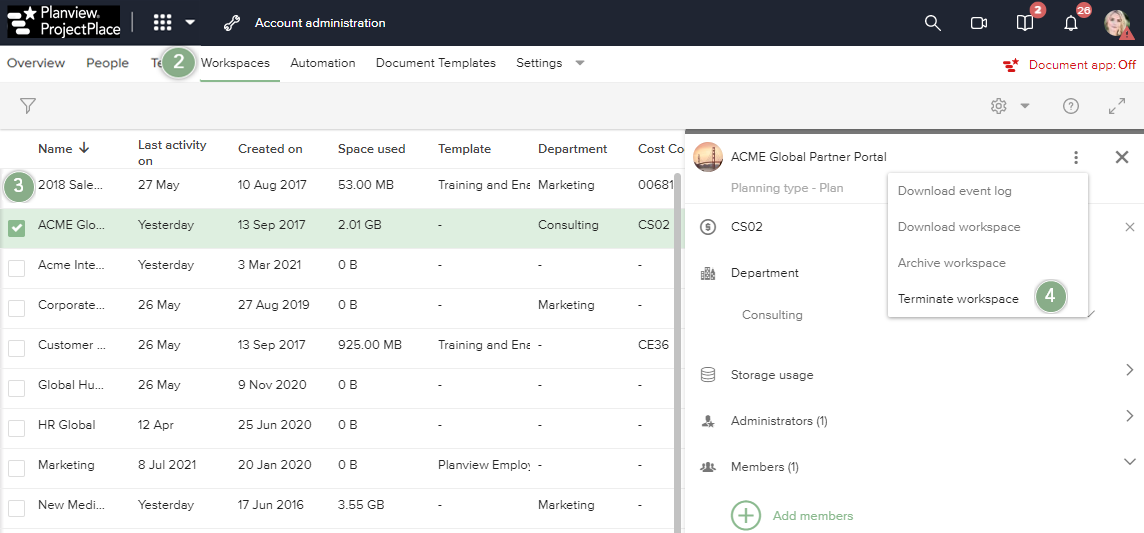
- Use the checkboxes to select the workspaces that you wish to delete.
- In the detail pane, click the More menu icon and select the Terminate workspace option.
5. Confirm that you have read the terms of use and click Confirm to delete the workspace.
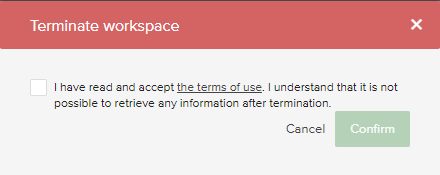
The workspace and all of its contents are deleted and cannot be recreated.
Download Event Log
In Account Administration under the Workspaces tab it is possible for Account Administrators and Account owners to download a workspace event log in a .json format.
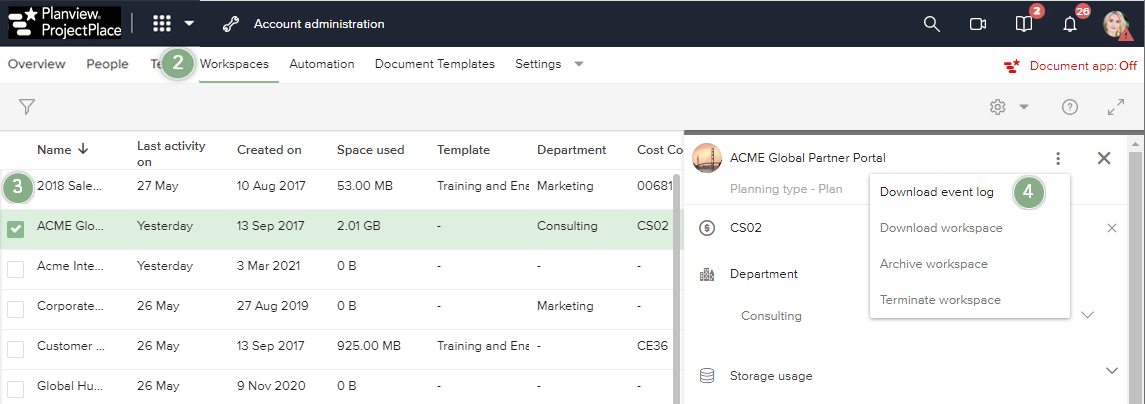
- Click the tool selector in the top navigation bar and select Account administration.
- Click the Workspaces tab.
- Use the checkboxes to select the workspaces for which you want to download an event log.
- In the detail pane, click the More menu icon and select the Download event log option.
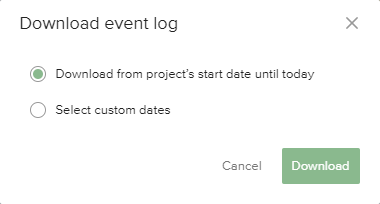
5. On the popup that appears, select either to Download from the project's start date until today, or to Select custom dates, and click the Download button.
The following events are returned in the event log:
- Member added
- Member role changed
- Manager change
- Member removal
- Tool visibility change
- Tool access rights changes
- Password policy changes
- Project exports
- Allowing/disallowing external members
- Deletion of activity
- Creation of document
- Upload of document
- Viewing of document
- Removal of document
- Destruction of document
- Destruction of folder
- Folder access rights changes
- Deletion of issue/risk
- Destruction of issue/risk
- Deletion of board
- Deletion of card
- Destruction of card
- Creation of card
- Copy of card
- Restoration of card