
Card Automation
Do you find yourself doing too many repetitive, manual tasks? Would you like an intuitive, user-friendly way to streamline your work?
Elevate your workflow with Card Automations! This new feature allows you to create your own automated step-by-step processes. Build combinations to suit your team's needs without having to learn to code!
NOTE
Card Automations apply to existing and newly created cards on boards. Once a Card Automation is created on a board, if a card that was created before the Card Automation or a card created after the Card Automation matches the configured Criteria, then the Card Automation will be triggered.
Key terms
Every automation has three components:
- EVENT TYPE or Trigger: an event you choose which sets the automation into motion.
- CRITERIA or Condition: a requirement that the trigger must meet in order for the automation to work.
- ACTION: an event that occurs as a result of the Event Type and Criteria being met.
How it Works
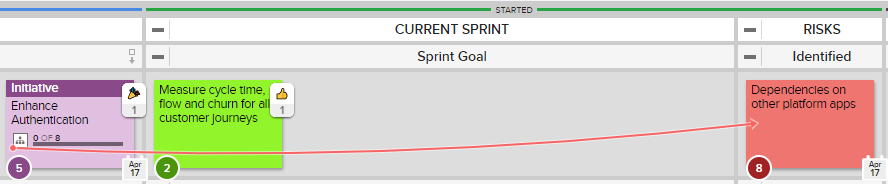
To further understand Event Types, Criteria, and Actions, let's look at an example of a formula: "When its first child card is moved to the Currently Working On lane, move the parent card there too." As shown below, the Event Type is "When its first child card is moved". The Criteria is "to the Currently Working On lane" and the action is "move the parent card to the Currently Working On lane".
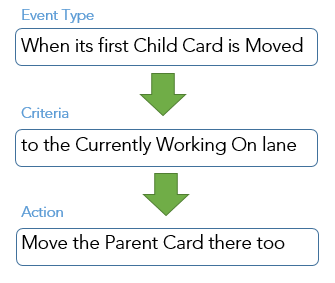
A Card Automation Formula
Add an automation
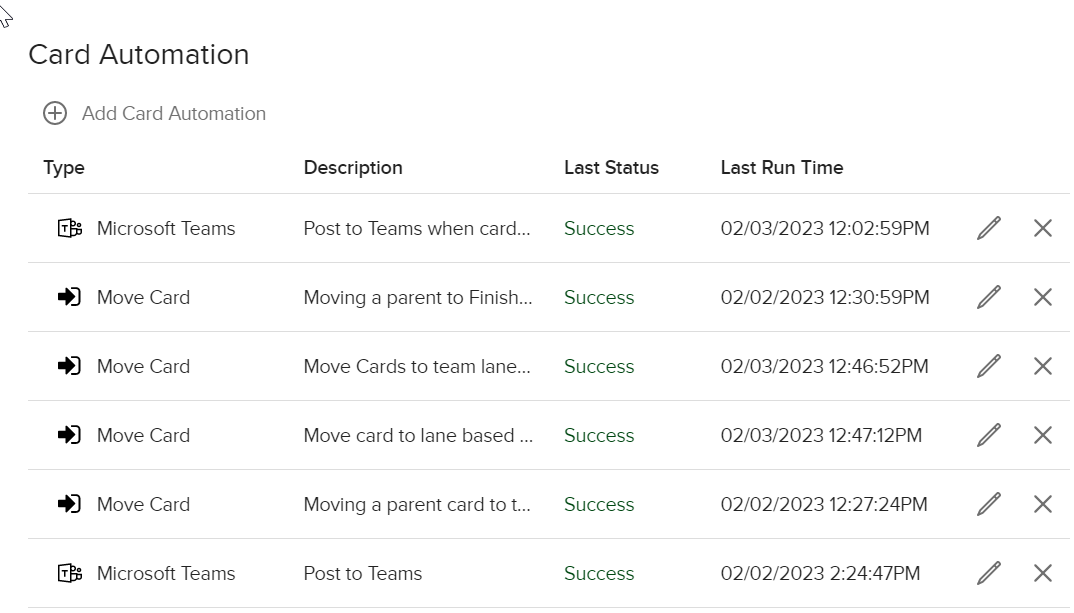
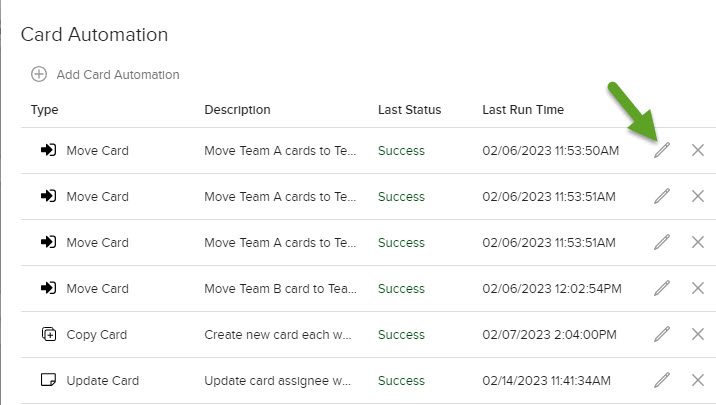
To begin adding a custom automation, navigate to a board's Action Menu  and click Card Automation. (You need to be a Board Administrator or Board Manager to do this.) This brings up the Card Automation Dialog, which shows you any/all current Card Automations that have already been configured for this specific board. Card Automations are per board.
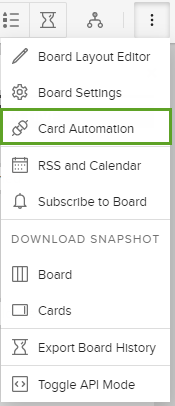
Action Menu dropdown and Card Automation Dialog
The dialog will list the Type of Automation (i.e., Move Card), Description, Last Status (was it successful or did it fail?), and Last Run Time. Once a Card Automation has been set up, the Last Run Time column in the Card Automation Dialog will show all the times your automation has been triggered.
Click +Add Card Automation.
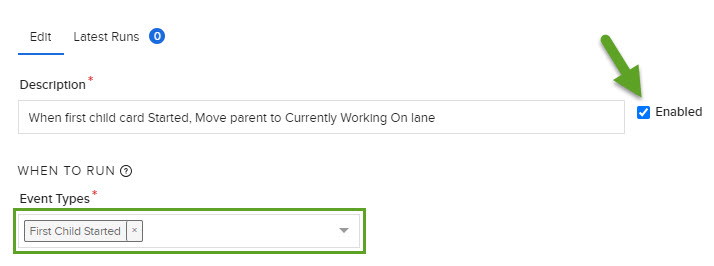
Step 1: Choose an Event Type
The first step in building your automation (after adding a description) is to pick a Event Type or "When this happens". Choose from the options presented in the dropdown. This would be an action or event (i.e. item created, moved, blocked, a scheduled time period, etc.). This is a multi-select, in the event you wish your automation to pay attention to multiple Event Types.
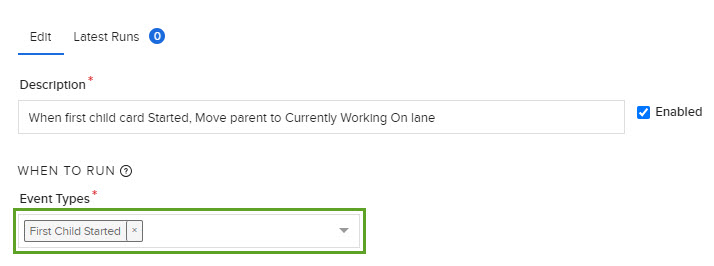
Event Type dropdown
In the example above, we've chosen the Event Type First Child Started. Now, it's time to select the Criteria for this Event Type.
Step 2: Select Criteria
Depending on the Event Type you've picked in step one, you will then need to select appropriate Criteria. In this example, we want to trigger an action when the child card is moved.
In the Criteria section, you can select a particular lane to include (for example, the lane the child card is moved from), choose a date for the trigger, and/or any of the other options on the screenshot below.
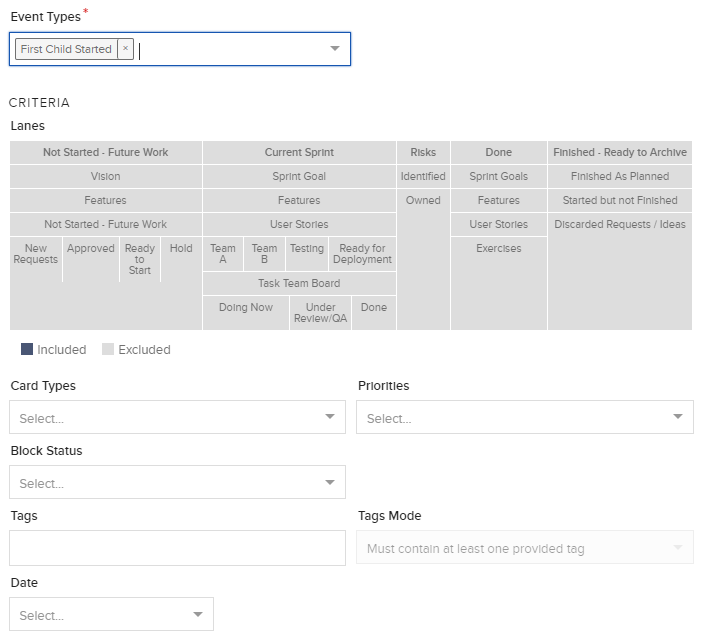
Criteria
a. Use the Lane Selector/Filter to only pay attention to certain lanes for those Event Types you’ve chosen. For example, if you wanted to create an automation for the Card Created Event Type, and you wanted to choose the Currently Working On lane, this card automation would only be triggered if a card was created within the Currently Working On lane. By default, if no lanes are selected, all lanes are included.
b. Choose Card Types you wish the automation to pay attention to.
c. Choose Card Priorities you wish the automation to pay attention to.
d. Enter any Tags on your board that you wish the automation to pay attention to.
e. Select from the Date Filter dropdown. (For all these filters, if no choices are selected, the card automation will look for at all cards on your board.)
f. Select from the Connections dropdown.
g. Add Custom Fields as part of your criteria.
Step 3: Set an action
Now that the first part of our automation (Event Type + Criteria) is ready, it is time to pick an action for it. To choose an action type, click Move Card from the dropdown menu. Select Destination Board and Destination Lane from their dropdown menus and click Save.
:
Actions chosen
a. Move Card - the ability to move a card to a specified lane on the same board or to a different board.
b. Update Card - the ability to update card details/attributes.
c. Copy Card – This allows you to choose the Destination Board where you want the card copied to, and you can choose the Lane as well. Under the Create Connection Options dropdown, which comes up when you select Copy Card, choose whether to copy card as a standalone card, create it as a child card of the card you’re copying, or to create it as a parent card of the card you’re copying.
d. Copy Fields - This allows you to copy some or all Parent Card fields to a Child Card or vice versa. (See example below.)
e. Manage Connections - the ability to remove all connections, remove parent connections, or remove child connections.
f. Delete Card - the ability to delete a card(s).
g. Post to Slack - the ability to post to a Slack channel.
h. Post to Microsoft Teams - the ability to post to a Teams channel.
i. Send an Email - the ability to send an email notification to assigned users on a card or manually selected users.
j. Trigger GitHub Action - initiate an action through GitHub.
k. Web service call – for any general third party tool that supports web service calls (web hooks).
The Copy card and Move card automations let you work across boards, so you can configure these to send to different boards than the one you're setting up the automation on. Card Automation does track some events on other boards.
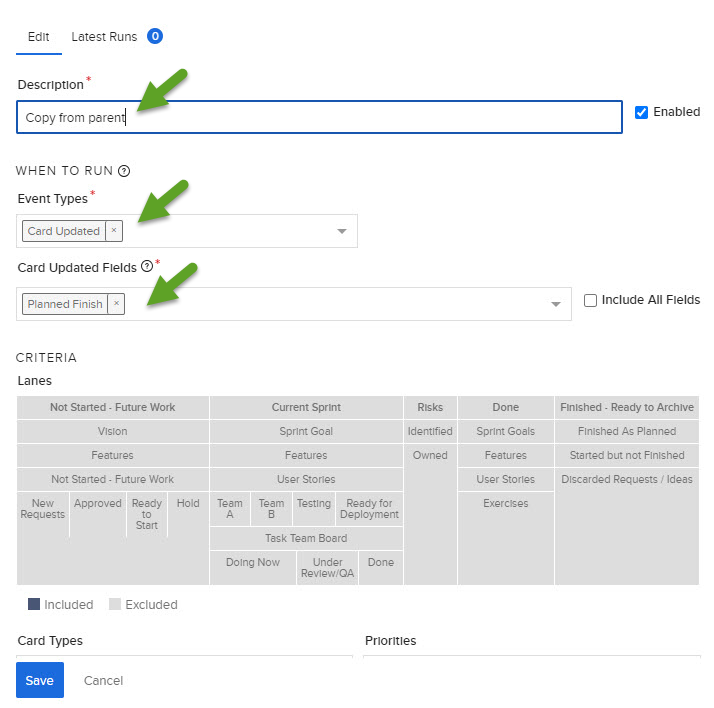
Copying Parent Card field values to a Child Card and vice versa
This example of the Copy Fields automation runs whenever a Child card's Planned Finish Date is updated.
- Add your Description.
- From Event Types, select Card Updated.
- From Card Updated Fields, select Planned Finish.
- Under Action Type, select Copy Fields.
- From the Copy Mode dropdown, select Copy from Parent (or Copy from Child if you wish).
- From the Fields to Copy dropdown, select Planned Finish. (All standard and custom fields are supported.)
- From the Overwrite Mode dropdown, select whether or not to overwrite with empty parent values.
- Save your automation.
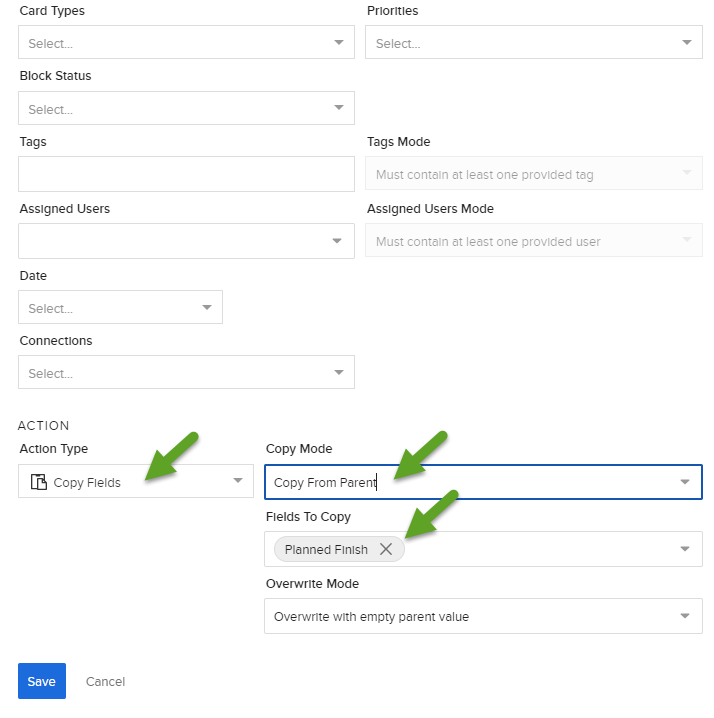
Thus, when changes are made to the Child card, the Planned Finish Date of the Parent card will be copied to the Child card in this example.
Disable, Edit, or Delete an automation
Disable/Enable an automation
Once you have added Automations to your board, you can click the Enabled checkbox to toggle Automations on and off.
Edit an automation
To edit the way you've configured your automation formula, click on board's Action Menu . Clicking the pencil icon next to an automation will open up the automation editor where you can add or remove conditions and actions, or reconfigure your formula as you wish.
Delete unwanted automations
Should you wish to delete an automation formula, you can also do so from the same menu by clicking the "X" next to the pencil icon (see above screenshot).
Time-based automations
How do time-based automations work? Let's look at our example Create a Card every week based on a Template Card in the Time field of its formula.
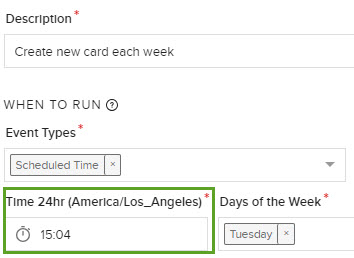
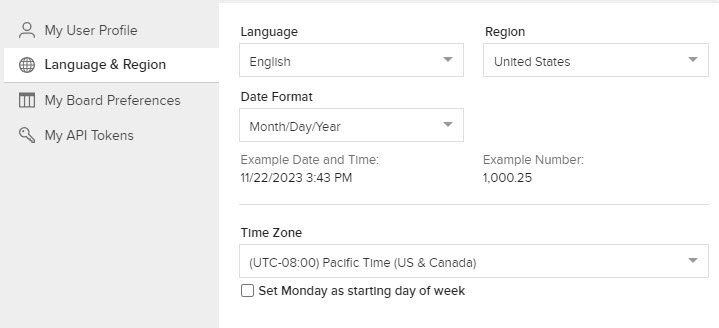
Card Automation Time field and Time Zone selector under User Profile in AgilePlace
The same time-based automation will run at different times for different users if they have different time zones configured in their desktop settings. Meaning, if your Time in the aforementioned formula is set to 9 am, San Francisco users will be notified at 9 am PST and Tel Aviv users will be notified at 9 am IDT.
As mentioned, time-based automations will run on your local desktop’s time zone. However, if your time zone settings under Avatar > User Profile > Language & Region are extremely different than your local time zone (more than a few hours), you may see an issue. If this is the case for you and it is essential that these two settings are different, please reach out to our support team and explain a bit about your use case so that we can pass on feedback about this to our team!
Other types of automations
Other automations are included in this topic:
Planned Finish Date Filter Automation
Move Card to Lane Based on Tag