
Edit Your Board Layout
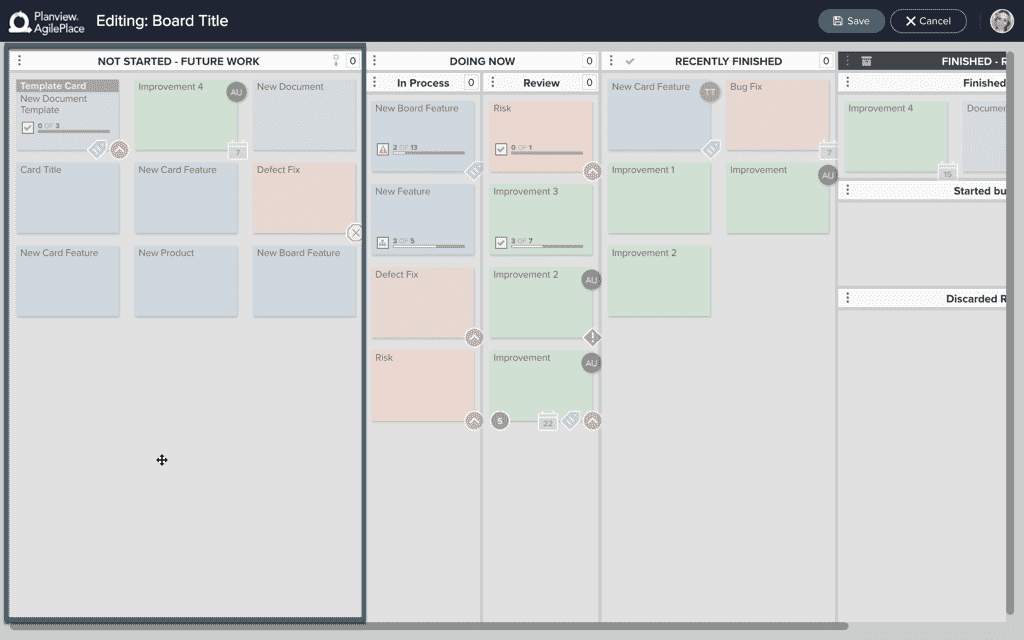
Planview AgilePlace lets you define and evolve your workflow process without restricting the way you work. Use the flexible Board Layout Editor to mirror the steps your team follows to get work done. Use vertical lanes to visualize each step in your flow and horizontal swimlanes to represent parallel processes on the same board. As your process changes, you can easily modify your board as you go.
Open the Board Layout Editor
Each board can quickly be edited or customized with only a few clicks. To do this, navigate to the board that you would like to customize, click the icon in the upper-right corner of the board, and select Board Layout Editor.
This will open the Board Layout Editor. From here, you can easily add, split (vertically or horizontally), move, resize, retitle, copy, and delete lanes. In addition, you can configure a lane’s settings or Work-In-Process (WIP) limits.
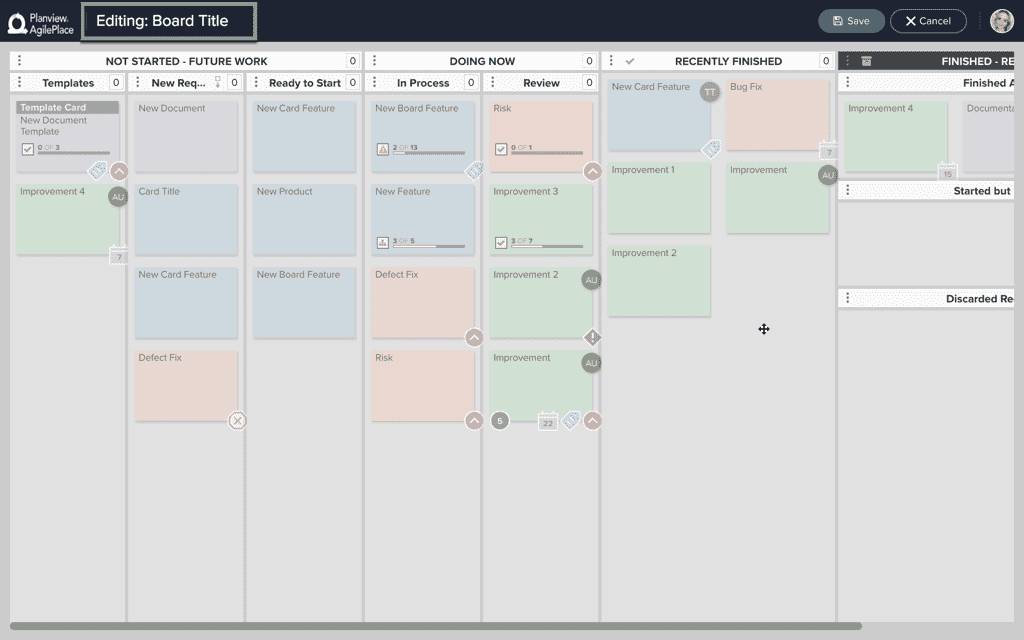
You’ll be able to easily tell that you’re in the Board Layout Editor by the “Editing:” preface before the board title.
Configure Your Board Layout
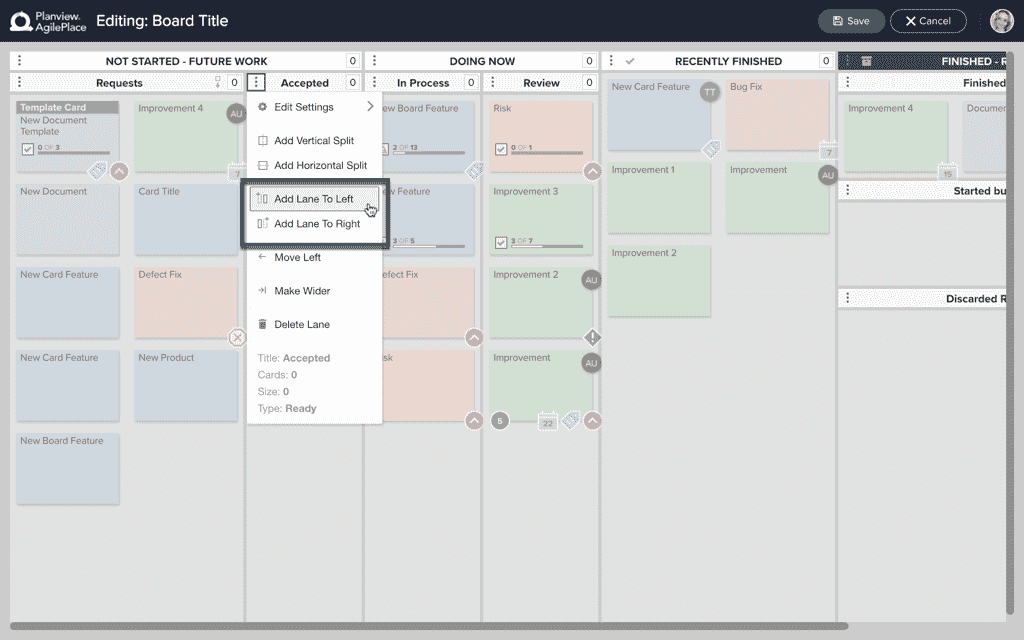
Add a Lane
To add a new lane or lanes, click the three dots in the upper, left-hand corner of any lane to open the lane editor menu. From there, click Add Lane To Left or Add Lane To Right to add a new lane in either direction.
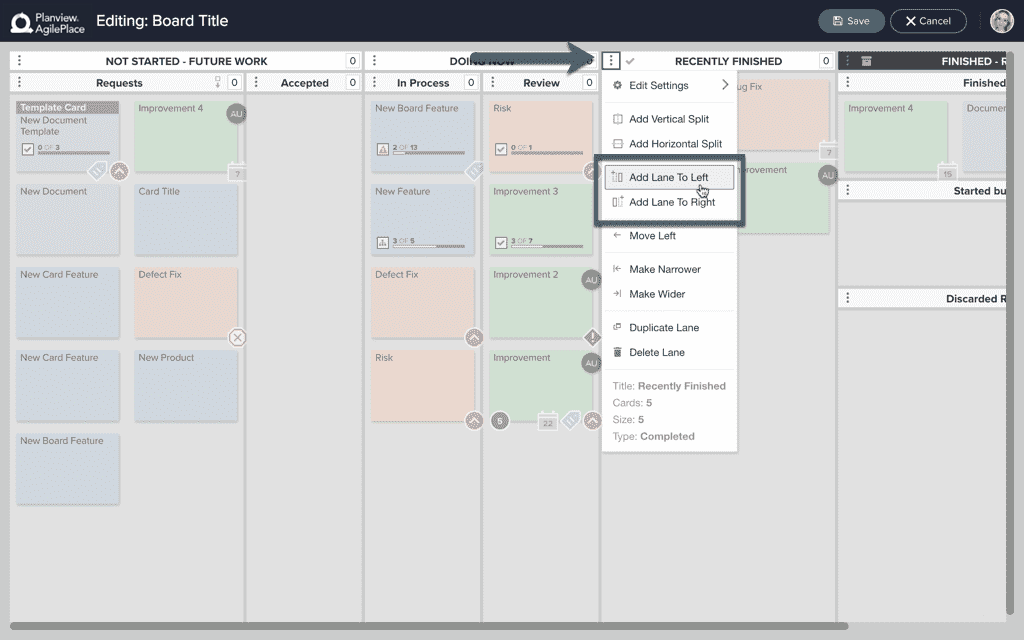
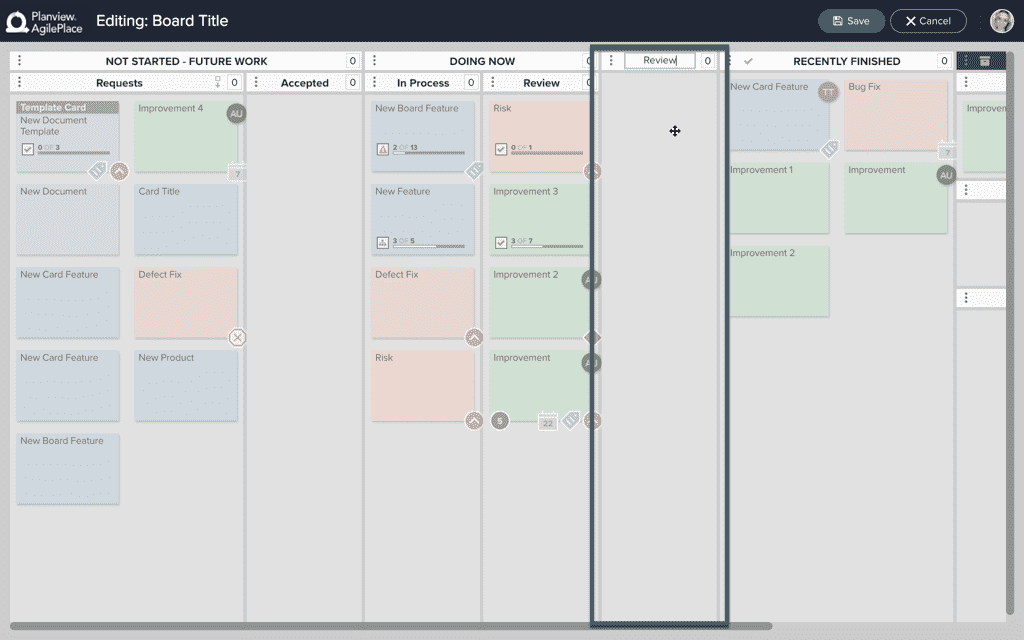
This will add a new lane in the direction of your choice, and you’ll have the option to give your new lane a title, which you can change at any time by clicking on the lane title bar.
Add a New Sublane or Split a Lane
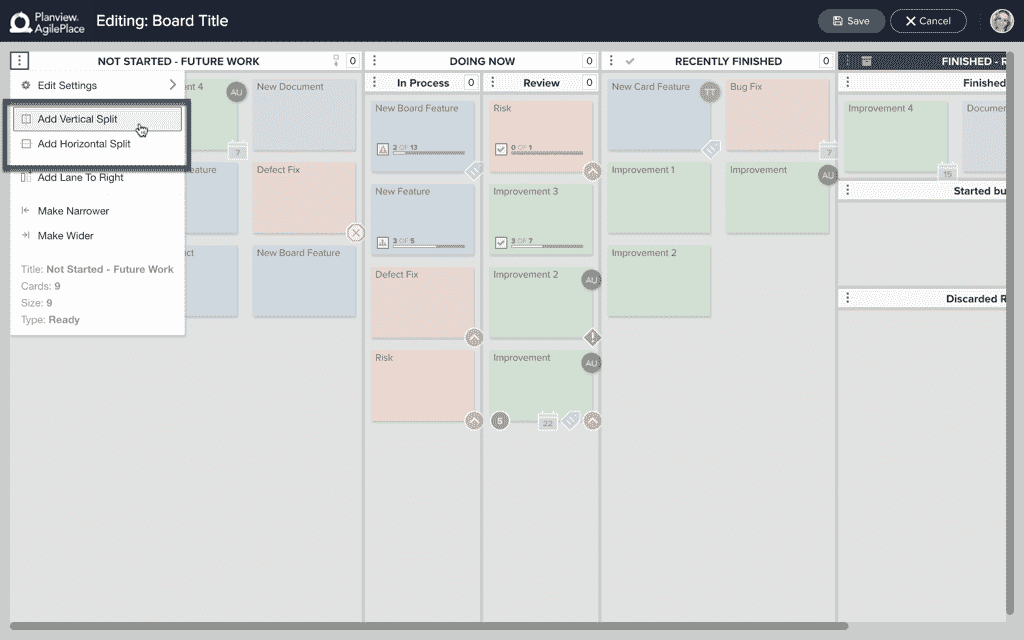
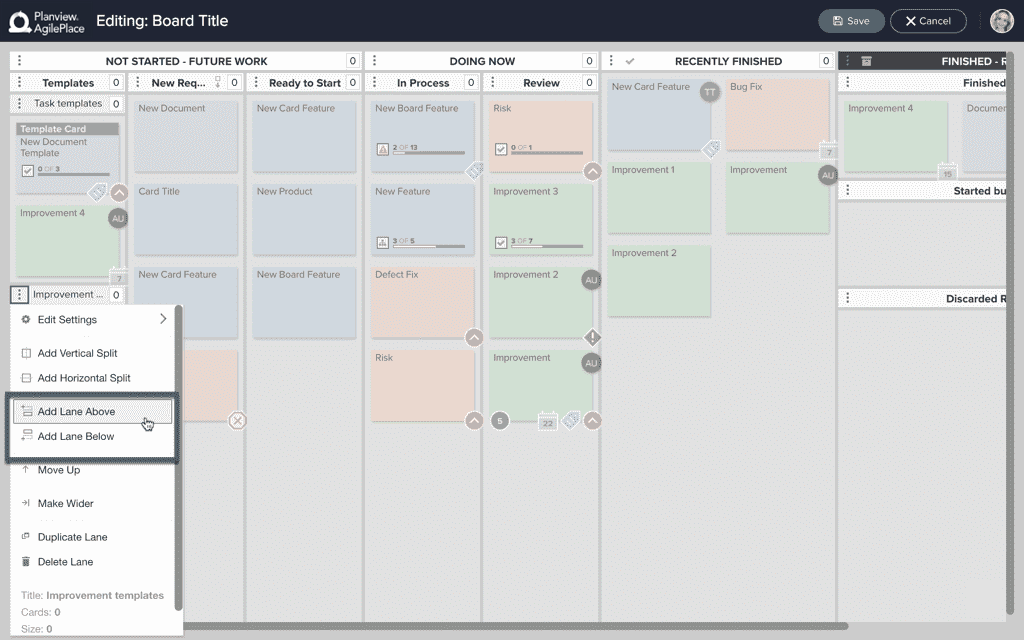
To add sublanes, or split a lane, click the three dot icon in the upper left-hand corner of the selected top-level lane and click Add Vertical Split if you want to add vertical sublanes or Add Horizontal Split if you want to add horizontal sublanes, also known as swimlanes.
After splitting a parent lane either horizontally or vertically, you may wish to add more sublanes within that split top-level lane. Once a top-level lane is split, you can simply select the three dots icon of any of its sublanes to add a lane to the left or right of the sublane if it’s vertical, by clicking Add Lane to Left or Add Lane to Right, or to the top or bottom of the sublane if it’s a horizontal swimlane, by clicking Add Lane Above or Add Lane Below.

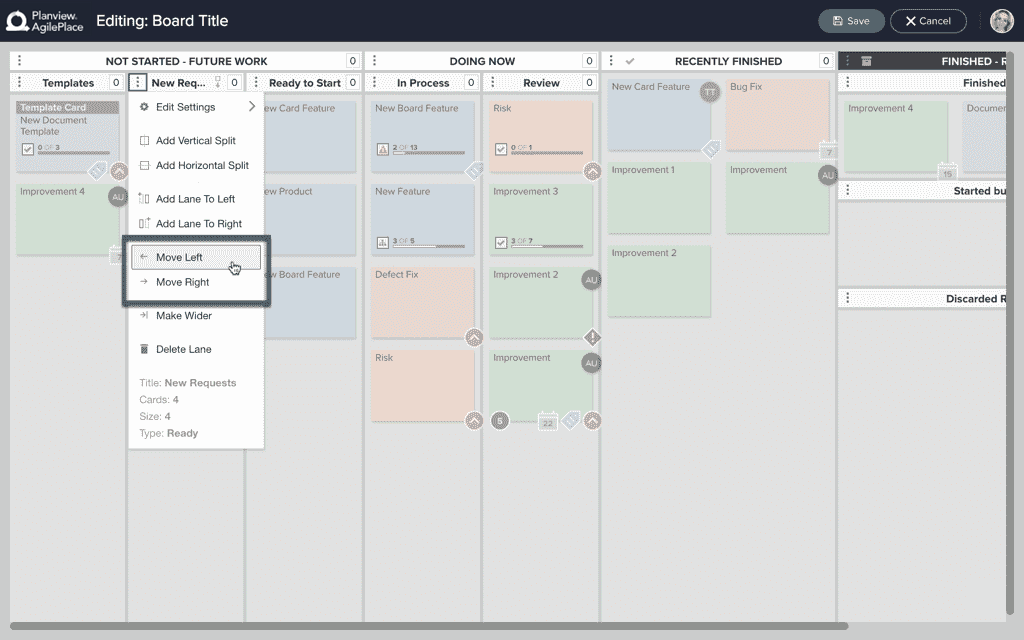
Move a Lane
To rearrange your lanes, first click the three dots in the upper, left-hand corner of any lane to open the lane editor menu. Then select whether to Move Left or Move Right from the menu.
Un-Split a Lane
If you wish to remove all child Lanes from a Parent Lane, first click the three dots in the upper, left-hand corner of any lane to open the lane editor menu. Then select Remove Split.
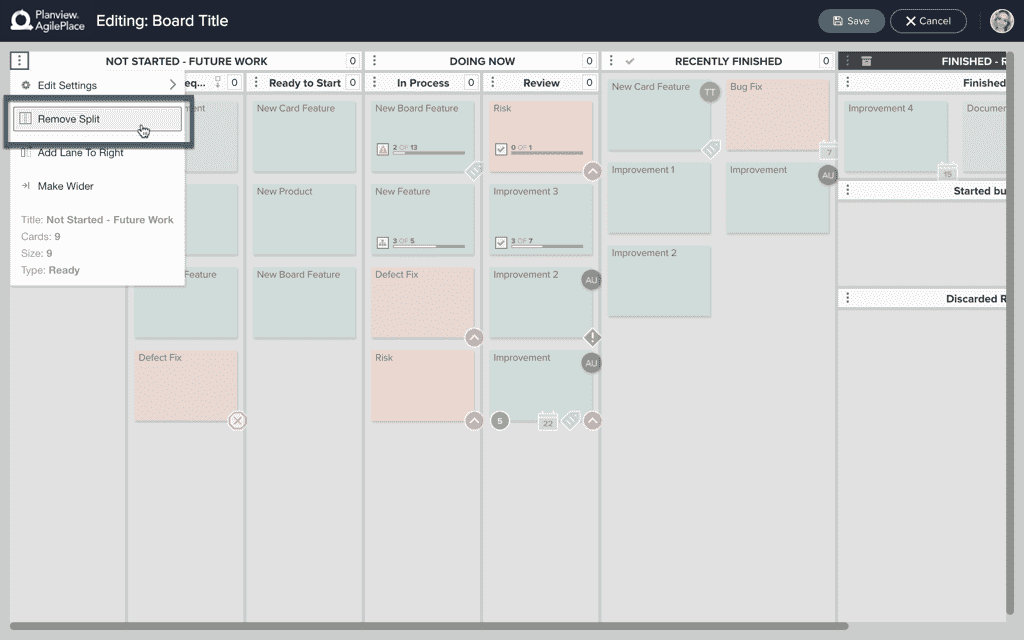
This will remove any horizontal/vertical splits within the selected lane.
Delete a Lane
If you wish to remove of a lane from your process, you may do so by first clicking the three dots in the upper, left-hand corner of any lane to open the lane editor menu, and then selecting Delete Lane.
The delete action can be performed on both top-level and sublanes.
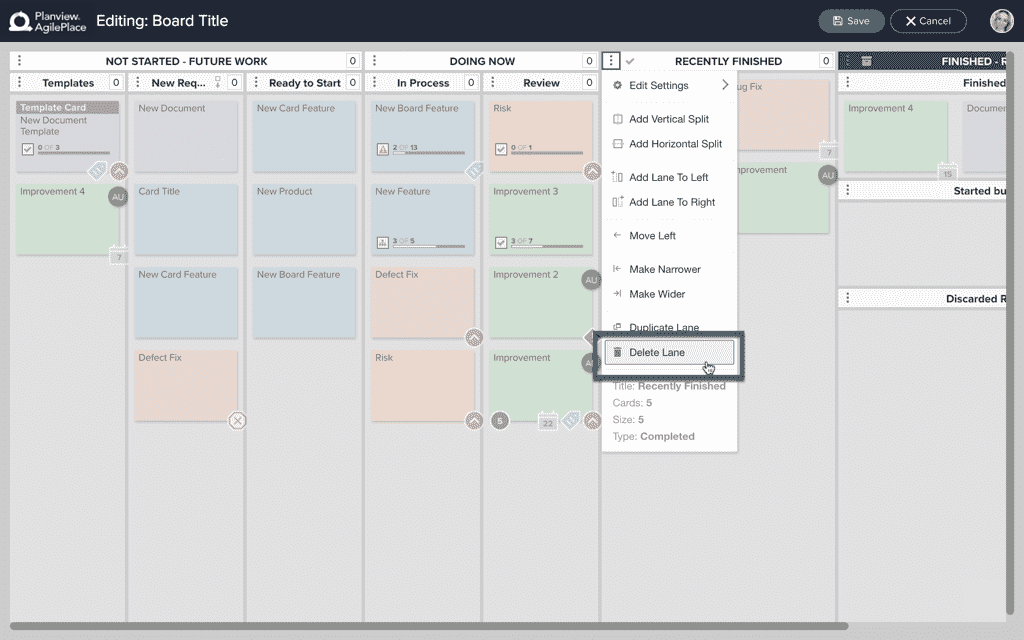
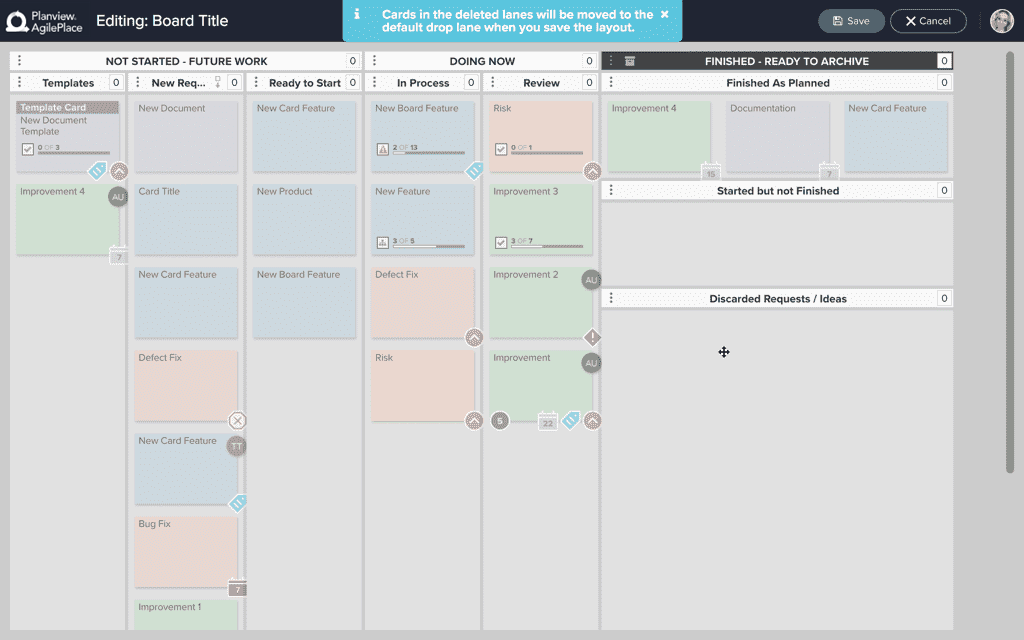
Deleting a top-level lane will delete all of the sublanes it houses. If you delete a lane that still has cards in it, those cards will be moved to the default drop lane once the that previously housed the card(s) is deleted.
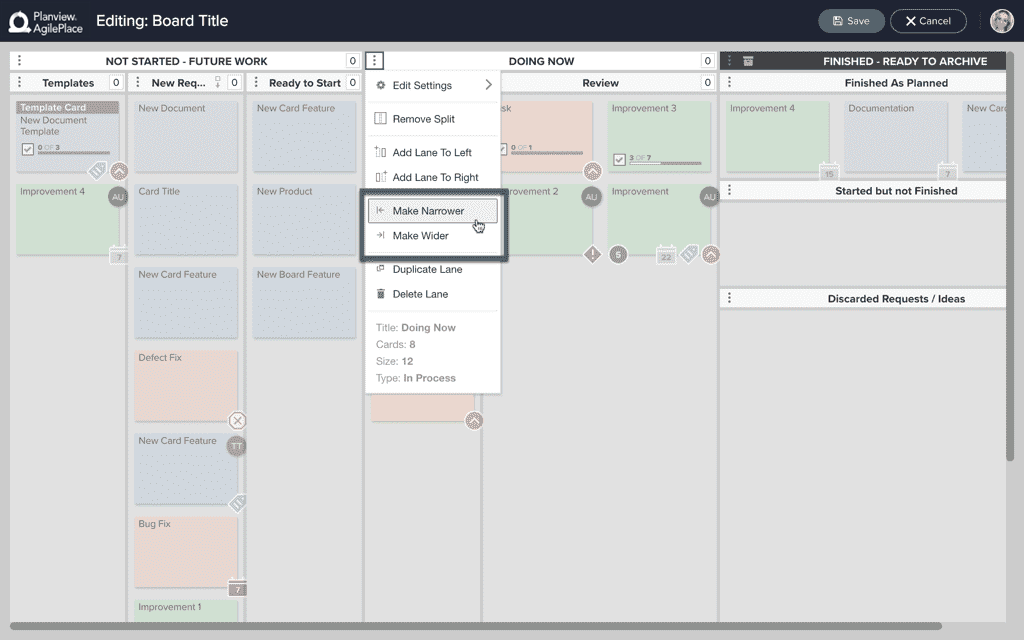
Increase/Decrease Lane Width
By default, new lanes will be one card wide. You can expand or contract the width of any lane by first clicking the three dots in the upper, left-hand corner of any lane to open the lane editor menu. From there, simply click Make Narrower or Make Wider to change the size of the lane.
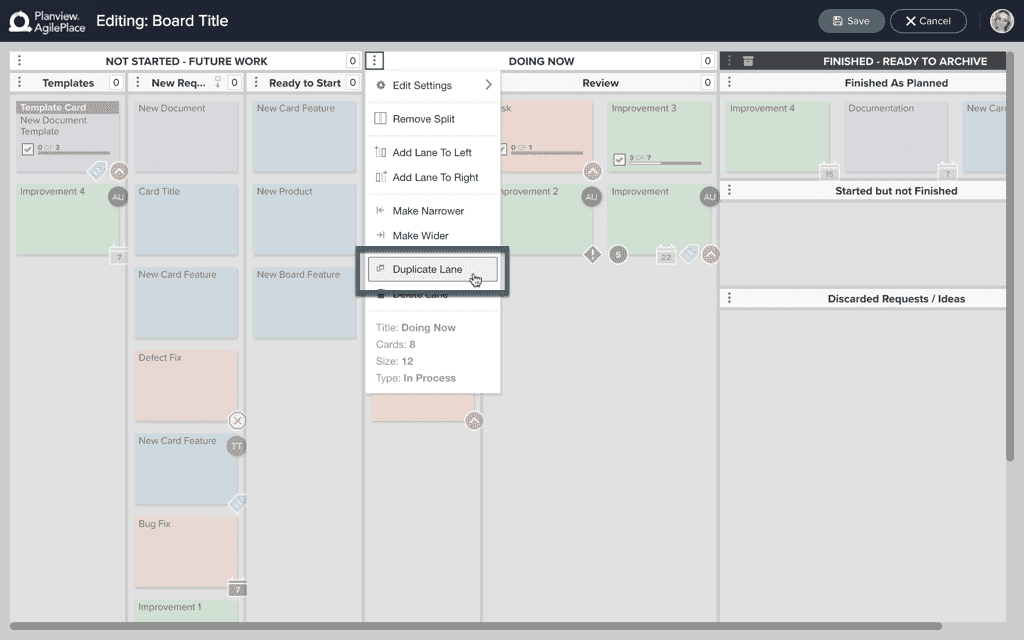
Duplicate a Lane
When creating horizontal swimlanes on the AgilePlace board, you often run across the need to create another copy of an existing horizontal lane. You are able to do so by first clicking the three dots in the upper, left-hand corner of any lane to open the lane editor menu. Then simply click Duplicate Lane to create a copy of the selected lane.
This will not duplicate the cards in the copied lane, only the lane itself and any sublanes within the lane.
Set a Lane WIP Limit
You can set limits on the number of cards (or total of card sizes) allowed in a lane. To do this, enter a number in the small field in the upper right-hand corner of any lane.
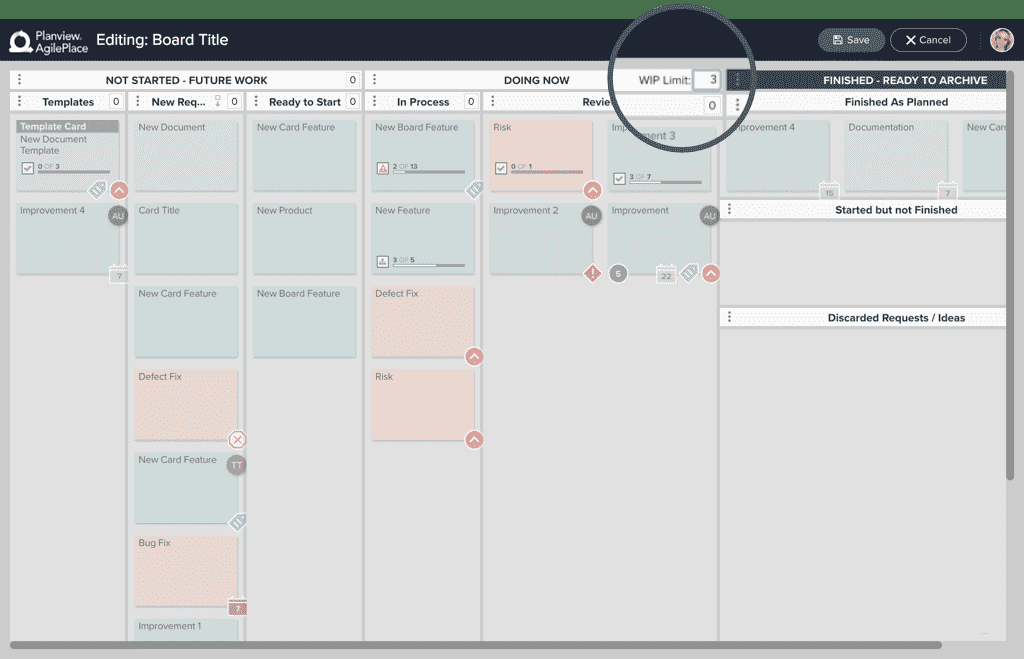
If the cards in a lane exceed this limit, the user is notified that they have exceeded the limit for this lane, and they must provide a reason why they exceeded this limit. The default WIP limit is 0, meaning that there is no limit to the number of cards (or total of Card Sizes) that can be placed in that lane.
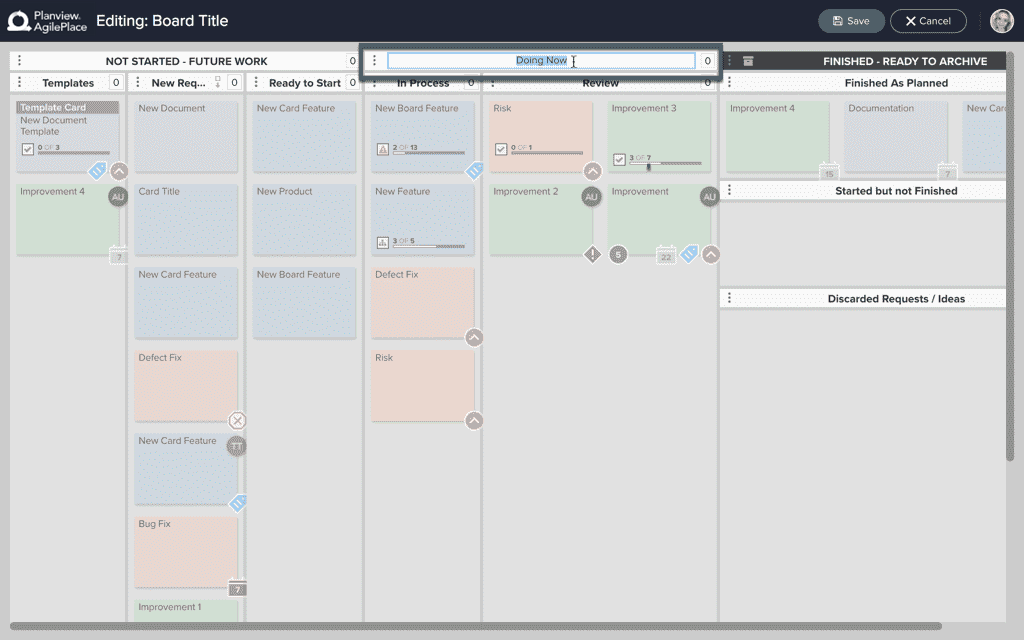
Change a Lane's Title
To change a lane's title, simply click on the lane’s current title and type your desired title text into the title field of the lane.
TIP
- Lanes in AgilePlace have a fixed width, so sometimes a lane title can be longer than what will fit in the lane header. In such cases, you'll see the lane title shrink and you'll notice the tooltip displayed above if you hover over the lane title with your mouse pointer.
- To prevent the font from shrinking, either make the lane wider to accommodate the text, or shorten the text so that it fits within the width of the lane.
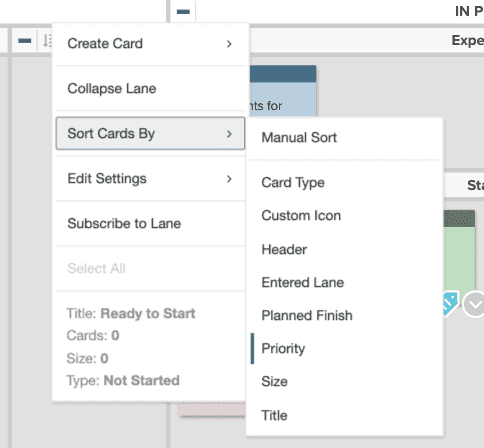
Lane Sorting
You can specify how cards are automatically sorted in a lane by right-clicking inside any top-level or parent lane to open the lane editor menu and selecting Sort Cards By.
This will reveal a secondary menu of options where you can specify how you would like cards to be sorted.
The Lane Details Dialog
You can configure the properties of each lane by right-clicking inside any lane to open the lane editor menu and selecting Edit Settings.
This will reveal a secondary menu of options where you can open Details… to edit the lane’s details, set the lane as a the default drop lane by clicking Set Default Drop Lane, or set the lane type.
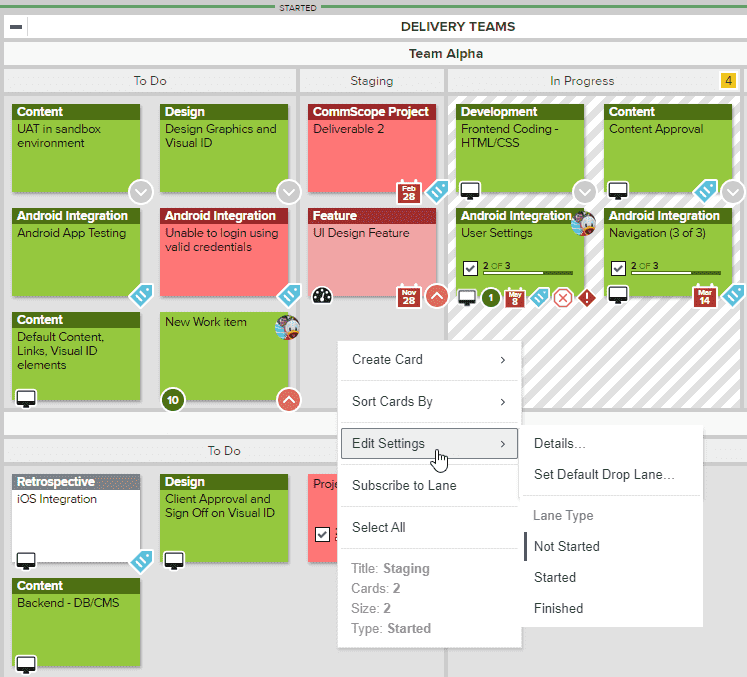
Specifying the Default Drop Lane will cause all cards created in an arbitrary lane to appear here.
When you open Details… the Lane Details dialog will open in the center of the Board Layout Editor.
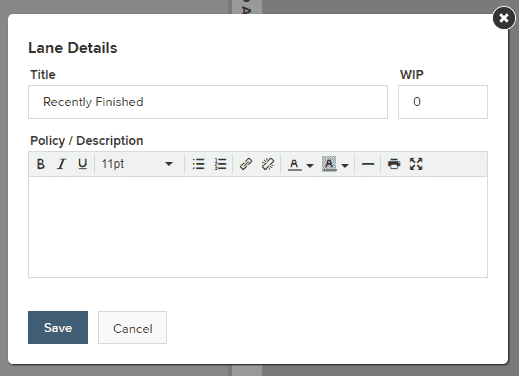
Here you can edit the lane’s title, set the lane’s WIP limit, and add or edit the lane’s policy/description.