
02. Installing Slide Publisher
Slide Publisher uses the following components:
- AdaptiveWork app – the Slide Publisher app can be installed by an admin from the AdaptiveWork App Marketplace. This app includes a custom action that is enabled on the relevant module level, and is used to publish the presentation using the template and AdaptiveWork data. After the app is installed, it must also be enabled.
- Microsoft PowerPoint add-in – the Slide Publisher add-on is a wizard for adding placeholder tags to templates. The placeholder tags are later replaced with data from your AdaptiveWork account. You can install the free add-in from the Microsoft Store or by manually downloading and installing the add-in file to your laptop or workstation.
To install the SlidePublisher add-in from the Microsoft Office Store
- In PowerPoint, click the Insert tab > Office Add-ins or My add-Ins (on a Mac > Store). This step may differ slightly depending on your version of PowerPoint.
- Search for AdaptiveWork Slide Publisher, and then click Add. The Slide Publisher button appears on the Insert ribbon.
To install the add-in to PowerPoint 365, see: https://support.microsoft.com/en-us/office/view-manage-and-install-add-ins-for-microsoft-365-programs-16278816-1948-4028-91e5-76dca5380f8d
To install the add-in in Powerpoint 2013 or 2016, see: https://support.microsoft.com/en-au/office/add-or-load-a-powerpoint-add-in-3de8bbc2-2481-457a-8841-7334cd5b455f
To install the SlidePublisher Add-In manually using the Manifest XML file
- Download this manifest.xml file, and save it on your computer.
- Share the folder that contains the manifest file:
- Right-click the folder and open the Sharing tab.
- Add the user or Everyone and grant Read permission (at a minimum).
To install the SlidePublisher Add-In manually on Windows
- To upload to my organization, go to Insert > Office Add-ins > My Organization.
- Click Upload My Add-in.
- Select the file and click Upload. The Slide Publisher button appears on the Insert ribbon.

-
If My Organization is not in the ribbon, you can add the location of the manifest.xml file manually:
- Click File > Options > Trust Center > Trust Center Settings > Trusted Ann-in Catalogs..
- in the Trusted Catalogs Table section, enter the location/path of the manifest.xml file in the Catalog Url field and then click Add catalog.
- Install the add-in by clicking the Insert tab > Office Add-ins or My add-Ins > Shared and then selecting Slide Publisher.
To install the SlidePublisher Add-In manually on a MAC
-
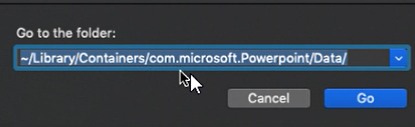
Copy the manifest.xml file, and go to
-/Library/Containers/com.microsoft.Powerpoint/Data/
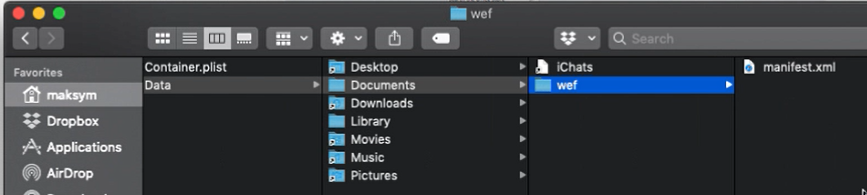
- In the Data folder, open the Documents folder and create a new folder called
wef. - Paste the manifest.xml file into the
weffolder.
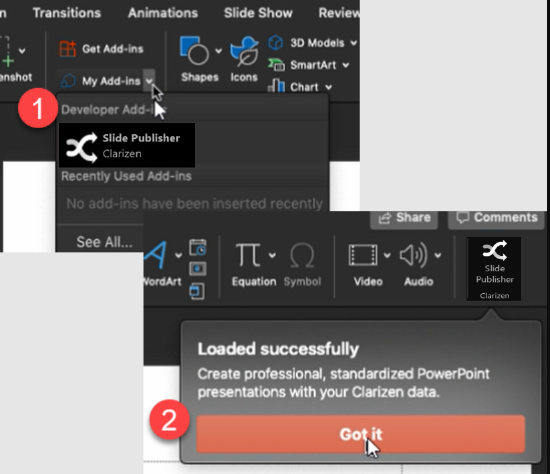
- Open your PowerPoint presentation. In the Insert tab, click My Add-Ins. You will see the Slide Publisher add-in as well as a confirmation message.
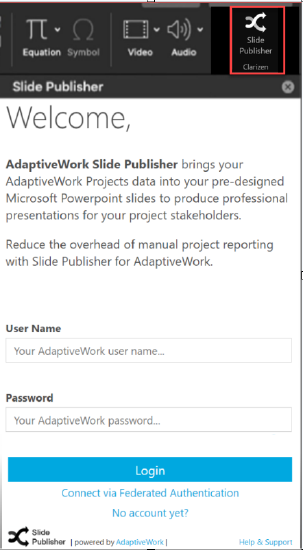
- Click Slide Publisher to log in and start creating slides.
SSO
Once the installation process is complete, future access to Slide Publisher is quick and easy. With the SSO (Single Sign-On) option you will go through a one time authentication process and then simply enter your username to log in. For more information regarding the Slide Publisher SSO click here.