
Zapier
Before You Begin
- This feature requires Admin support.
- The use of Zapier entails additional fees. Go to Zapier.com/pricing for more details.
- The Zapier connector and its use with any 3rd-party software is the customer's responsibility.
- The setup and implementation of zaps are the responsibility of the customer. Expert services for setting up zaps are available from Zapier.
- Zaps utilize Business Rule quotas. Each Zap counts towards one Workflow rule.
- AdaptiveWork is not responsible for the Zapier service, and does not monitor the status. Go to status.zapier.com for more details.
- Issues arising from the use of Zapier are not managed or addressed by the AdaptiveWork support channel or AdaptiveWork Professional Services.
Introduction to AdaptiveWork’s Zapier Connector
Zapier is a 3rd-party cloud-based solution that allows you to connect AdaptiveWork with 2000+ platforms using a simple no-code interface. The solution makes use of AdaptiveWork’s Web Services, providing users with a lot of flexibility in setting up bi-directional workflows betweenAdaptiveWork and many popular systems such as ServiceNow, Zendesk, Hubspot, and more.
Intended Audience
This connector is intended for AdaptiveWork administrators to build simple workflows between their instances of AdaptiveWork and 3rd-party systems.
Jump to:
Example Use Cases for AdaptiveWork’s Zapier Connector
AdaptiveWork’s Zapier connector is best used in cases when there is a trigger on one end, which then creates or updates an item on the other end. Here are a few examples of how Zapier is used by AdaptiveWork customers:
- When a new request is created in AdaptiveWork, push a message to a user in Slack with all the corresponding details
- When a ticket is created in Zendesk, create a corresponding request object in AdaptiveWork with all the corresponding details
- When a billable milestone is completed, trigger an invoice in Quickbooks
- When a risk is created, update a Google Sheet
Examples of use cases where it is not recommended to use the Zapier connector:
- Creating / synching calendar events in systems like Outlook or Gmail, with triggers or events in AdaptiveWork
- Using Zapier to continuously sync data across AdaptiveWork and other systems
- Synching the entire WBS (Work Plan) of a project in AdaptiveWork to another system
- Setting up workflows that will trigger many times at short intervals of time, for example 100+ times per day
Getting Started with Zapier
To use AdaptiveWork’s app for Zapier, you need to have the following:
- A valid full user license to your AdaptiveWork environment with admin privileges enabled
- A Zapier account (create an account here: https://zapier.com/sign-up/)
- Access to the AdaptiveWork app for Zapier - please contact your AdaptiveWork account manager for access to the connector
Setting Up a Zap
In Zapier terms, a ‘zap’ is a workflow built in Zapier that connects two or more systems. A zap is essentially composed of two parts, in an ‘if this, then that’ structure:
Part 1 - The Trigger (“if this..”)

Part 2 - The Action (“..then that”)

To begin, go to https://zapier.com/app/dashboard
Click the + icon or MAKE A ZAP.
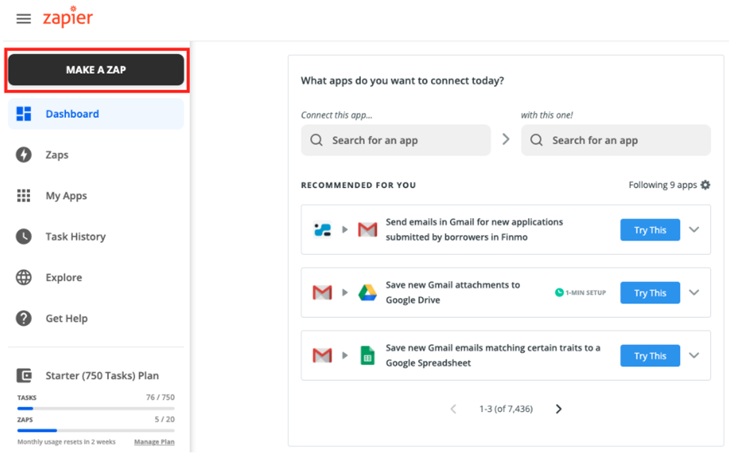
In the top-left part of the screen, give your zap (workflow) a meaningful name.
![]()
For example

In the trigger section, you must select the appropriate Zapier app. For example, if the trigger is Zendesk, you must look up Zendesk: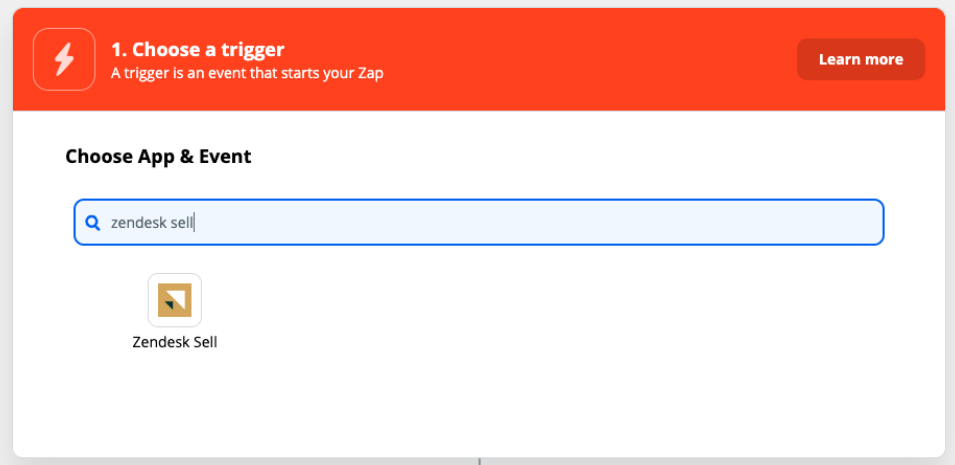
Scenario 1 - AdaptiveWork is the Trigger
Let’s imagine a scenario where AdaptiveWork is the triggering system in your zap. Type AdaptiveWork and select the Zapier app for AdaptiveWork.
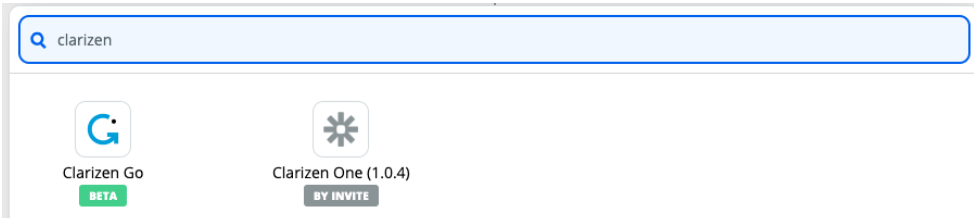
Note: If the Zapier app for AdaptiveWork does not appear, please contact your AdaptiveWork account manager to enable the app.
Select your AdaptiveWork account and follow the on-screen prompts to log in to your AdaptiveWork account.

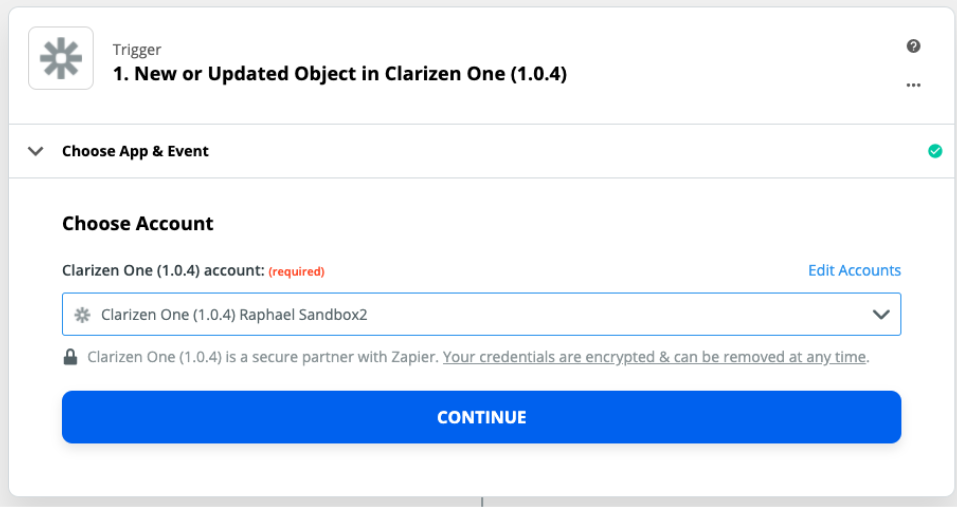
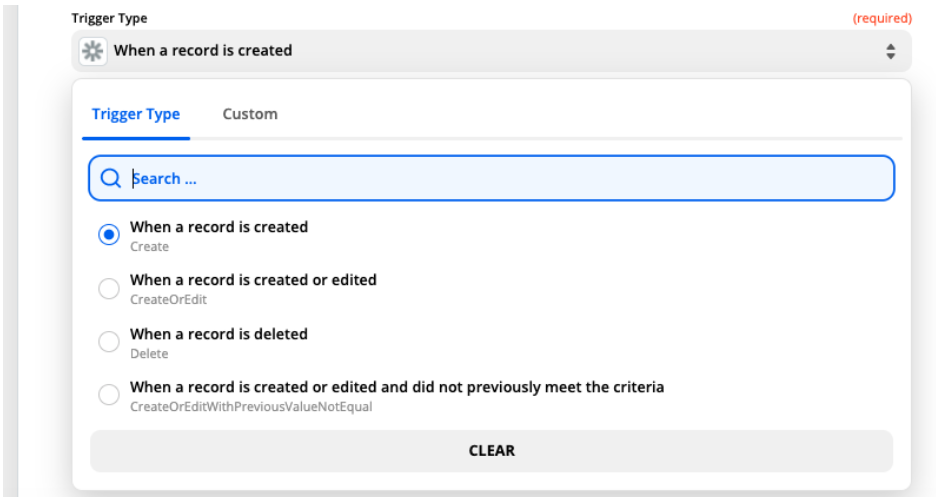
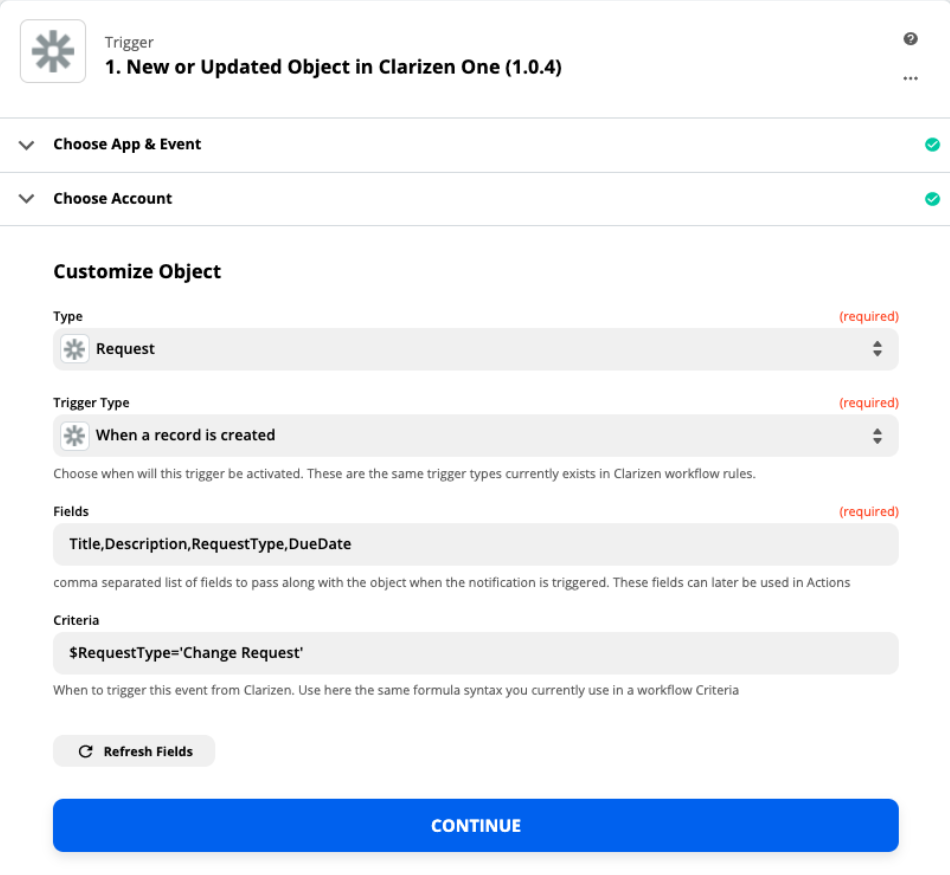
In the next screen, you are prompted to fill out the fields to define the trigger:
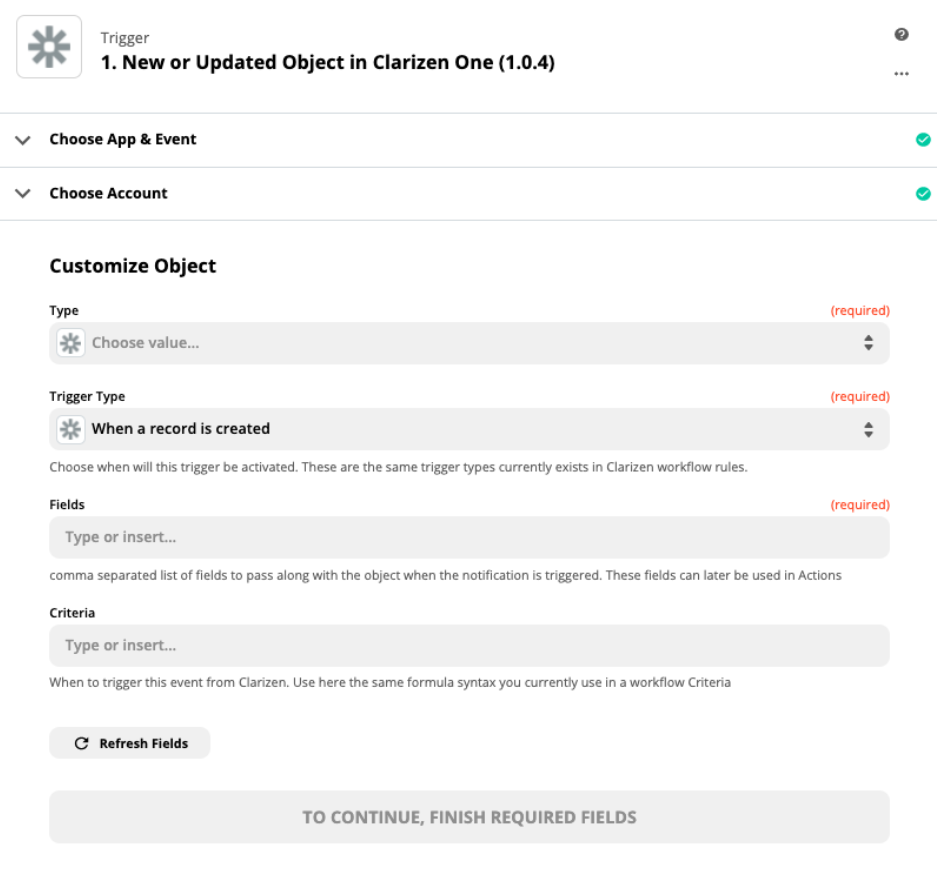
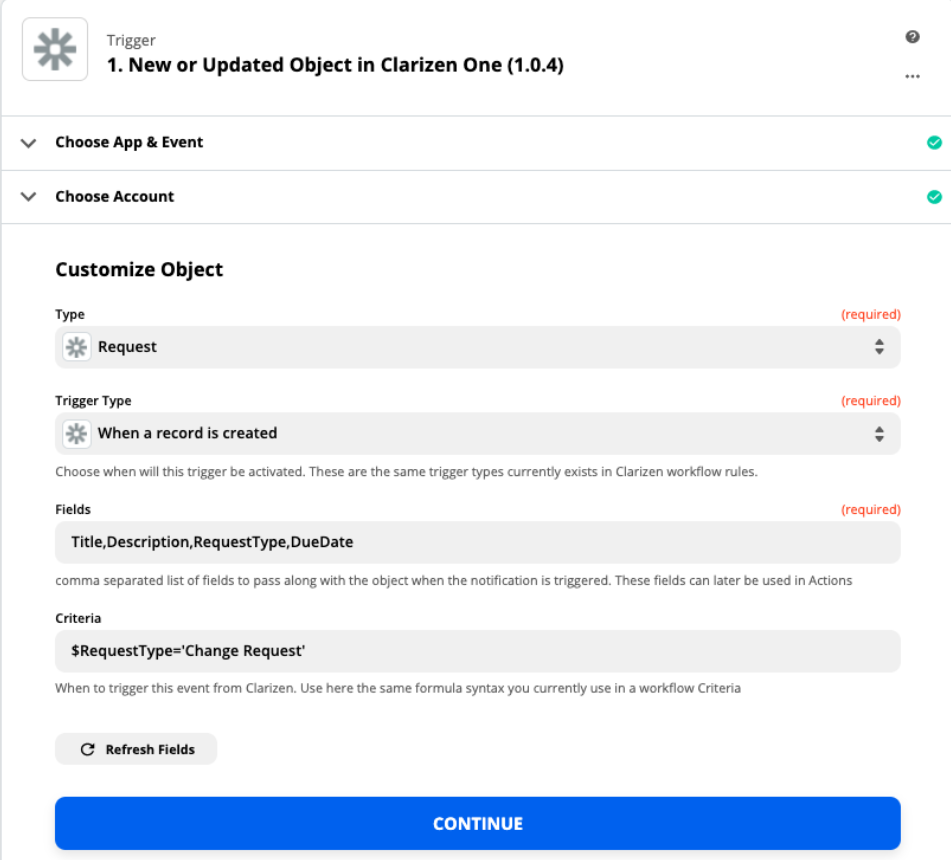
For example, the trigger is the creation of a Change Request in AdaptiveWork:
Notes
Fields Section

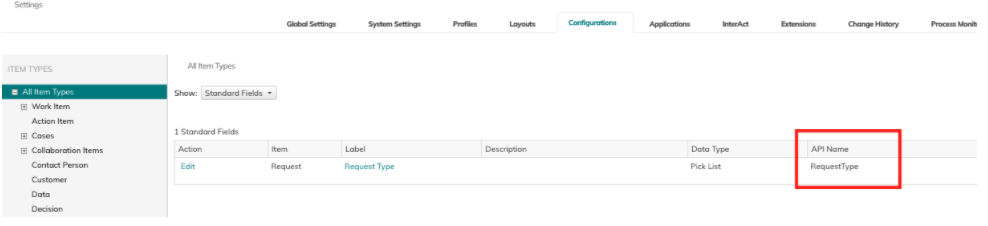
- You must use the API name of the field. If you are unsure of the API name of the field, you can look it up in the Configuration panel in AdaptiveWork:
For picklists, you can find available values in the REST Metadata API Reference Guide, which is available here: - Fields must be comma-separated.
- Do not include spaces between fields (e.g. Name,DueDate NOT Name,_DueDate).
- Do not add the $ before the field name, just the fieldname.
Criteria Section
- The criteria determines when this zap is triggered.
- If AdaptiveWork is your trigger, then you must use the exact syntax that you would use in AdaptiveWork to create a condition for a workflow, for example, $RequestType=”Change Request”
- You must use $ before field names.
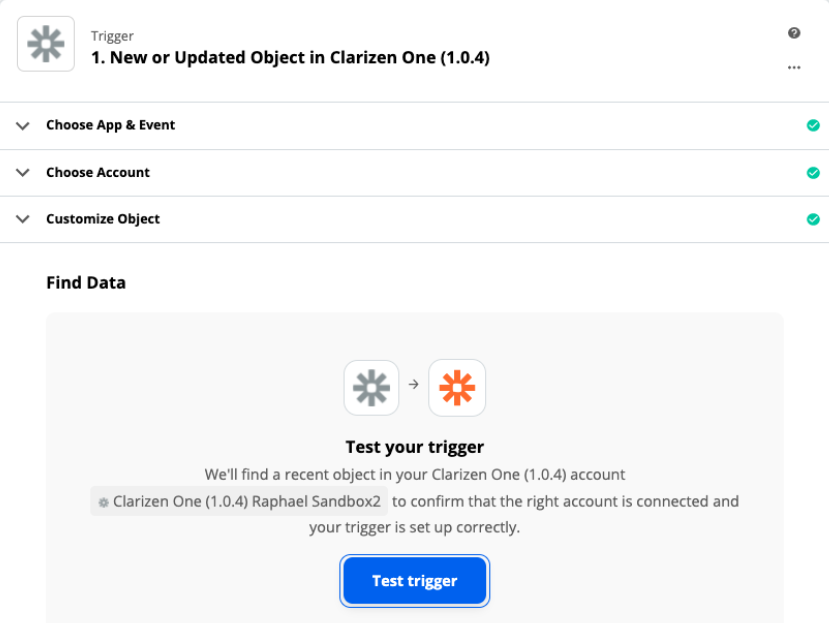
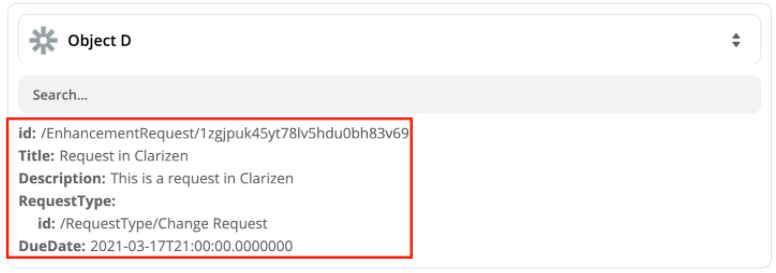
If you have items in your AdaptiveWork environment that meet the condition defined, then testing the trigger will pull in data from AdaptiveWork to Zapier when you press TEST TRIGGER:
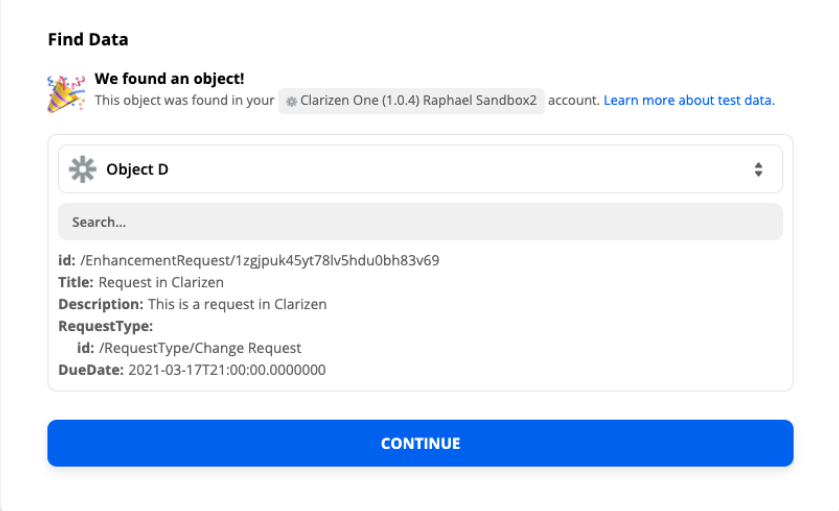
The data that is pulled in from AdaptiveWork and displayed in Zapier will be used as placeholders in the next section. For example, if your workflow pushes a AdaptiveWork request to Slack, then you will be able to display the title and description of the request in Slack, because the first part of the zap now gives you access to these fields:
Congratulations!
You have finished setting up AdaptiveWork as the trigger in your zap. You can now proceed to select another app (for example: Slack, Google Sheets, Zendesk, Gmail, etc.) for the second part of your zap.
Note: You should now notice a workflow rule created in AdaptiveWork called Zapier Hook:

This is because creating a trigger in Zapier creates a corresponding Workflow in AdaptiveWork that is triggered each time the condition is met. There is no need to manually enable or disable the workflow in AdaptiveWork. Zapier will automatically enable/disable the workflow rule depending on whether you enable or disable the zap.
Scenario 2 - AdaptiveWork Is the Action in The Zap
In this scenario, we will consider that a different app is the trigger (for example, Zendesk), and AdaptiveWork is the action. For example, “if a ticket is created in Zendesk (trigger), then create a request in AdaptiveWork (action)”.
In the action section of the zap, select the AdaptiveWork app, and the action event
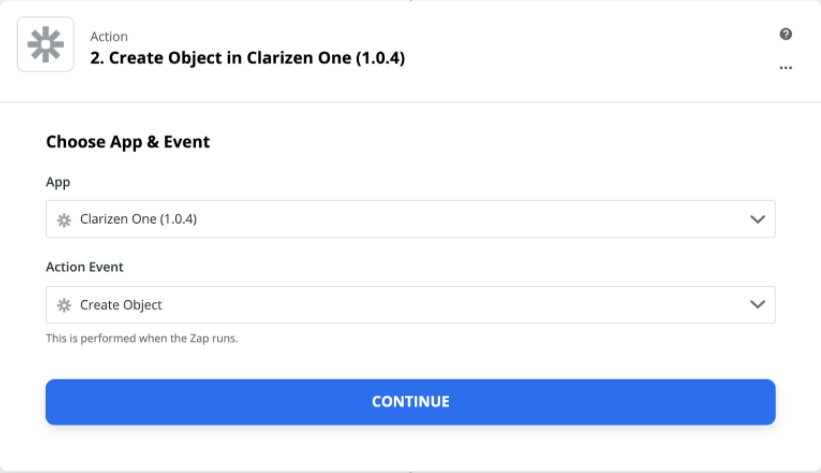
Under the Action Event you have 4 options:
- Create Post - the action will be able to create a post in AdaptiveWork
- Create Object - the action will be able to create an object in AdaptiveWork, for example, a new Request, or a new Project
- Update Object - the action will be able to update an existing object in AdaptiveWork, for example, a specific Request based on its ID
- Create Object from template - the action will be able to create an object from a template in AdaptiveWork, such as a Project from a template stored in AdaptiveWork
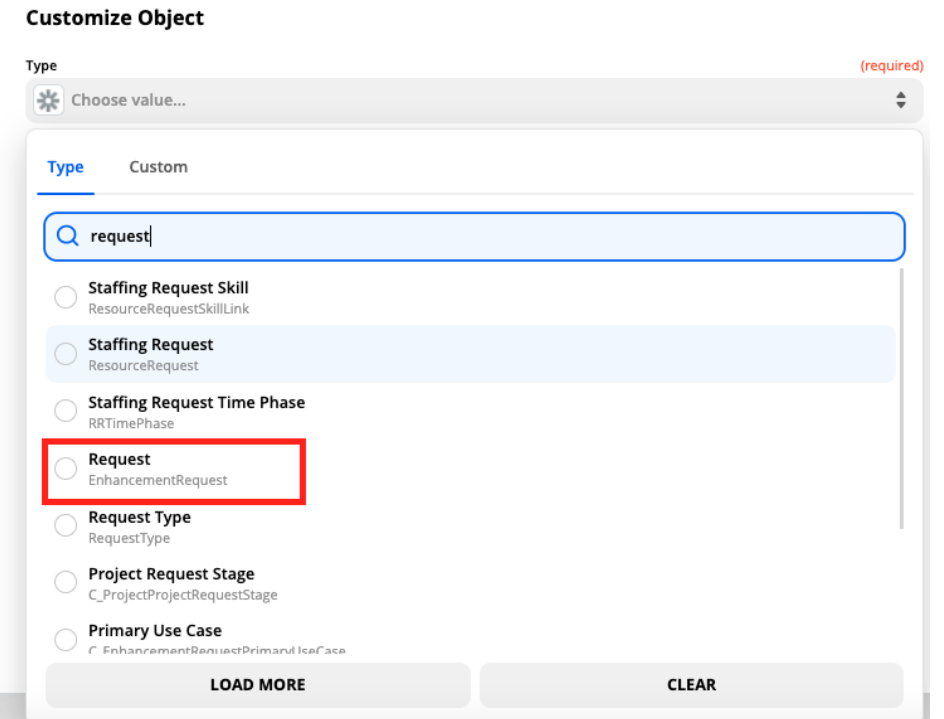
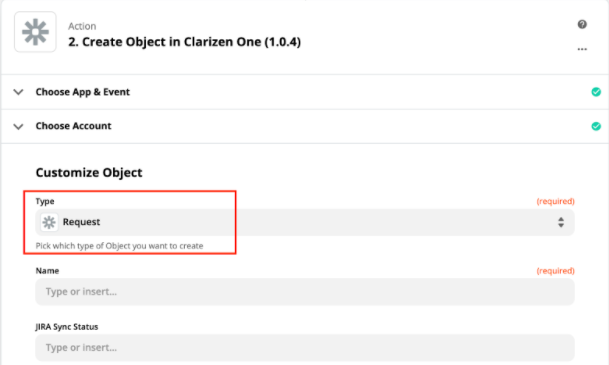
In the Customize Object section, choose the type of object in AdaptiveWork that is to be created or updated, for example, a request:
Finally, you need to fill in the required fields and any additional fields you would like, using either a hard-coded value, or variables found in the first part of the zap. For example, to always give the request the title “request from Zendesk” each time the zap is triggered, use the following:
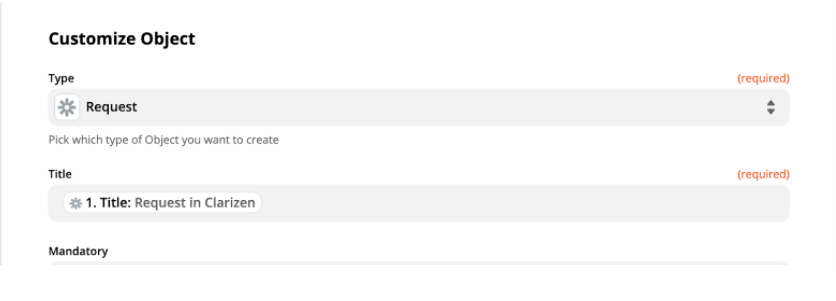
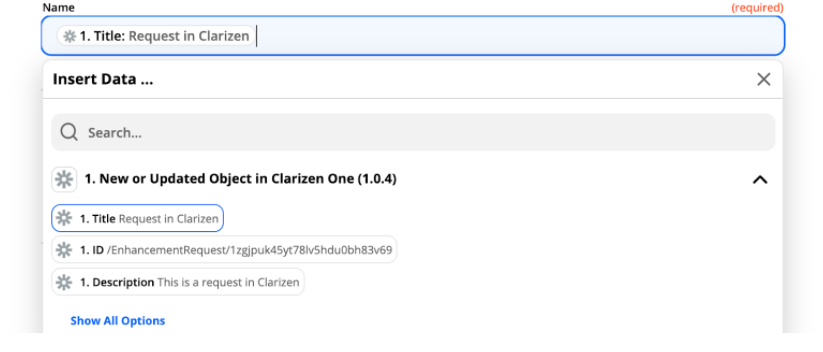
To use a variable for the title, click on the box below the Name field and select one of the options.
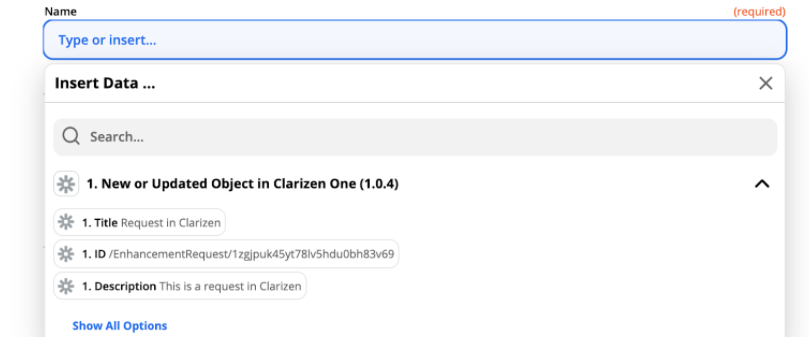
For example:
For criteria with picklists, you can find available values in the REST Metadata API Reference Guide, which is available here:
Keep in mind this is simply a placeholder. The real value will be determined each time the zap is triggered. For example, if a ticket is opened in Zendesk and the title of the ticket is “problem with my laptop”, then a request will be created in AdaptiveWork with the title “problem with my laptop”.
When you are done filling in all required and any optional fields, click TEST & CONTINUE.
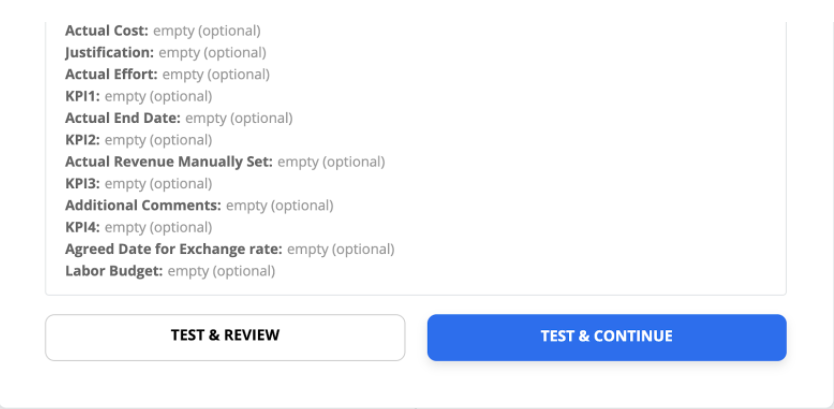
Note: This part of the process actually creates or updates an object in your AdaptiveWork environment.
If the workflow is set up correctly, you should see the following success message: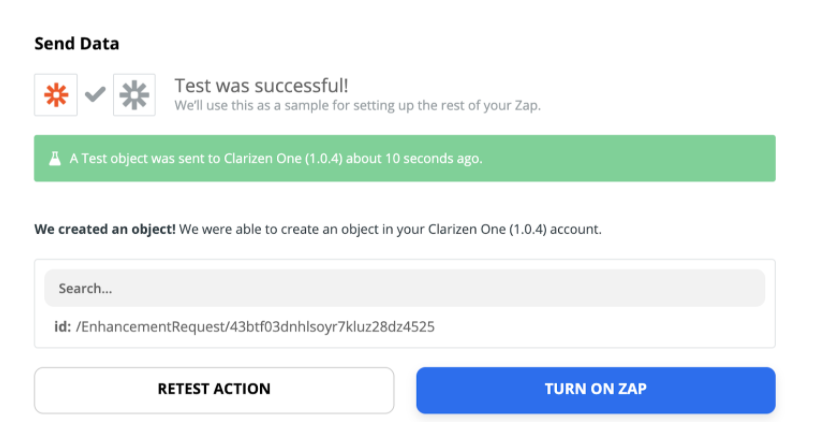
Troubleshooting Your Zap
Below are some common mistakes that generate errors in Zapier, and prevent you from activating your zap.
Incorrect syntax in the Fields section
If AdaptiveWork is your trigger, make sure that in the fields section, you type the names of the fields without the $ symbol, and without any spaces between the names or commas.
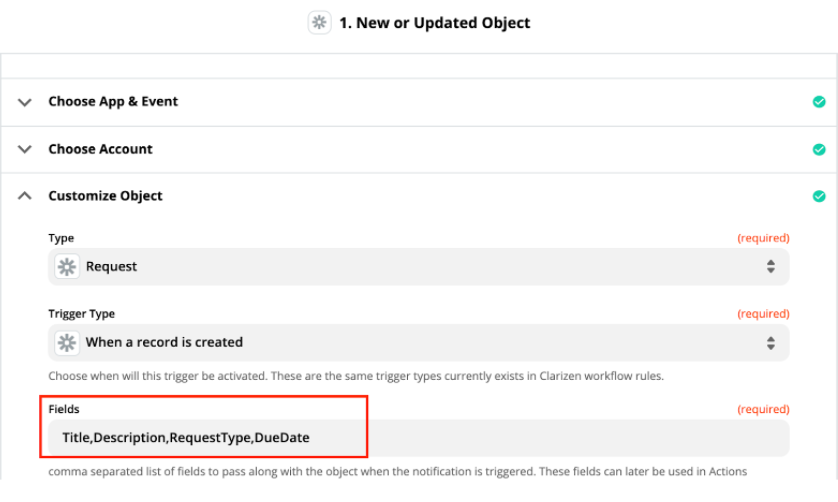
A common mistake is to type $Title,_$Description,_$RequestType. If should be Title,Description,RequestType
Incorrect syntax in the Criteria section
In the Criteria section, be sure to use the exact syntax that you would use when building a AdaptiveWork workflow:

A common mistake is to forget the $ before the field name in this section.
Note: For picklists, you can find available values in the REST Metadata API Reference Guide, which is available here:
Incorrect fields displayed in the Customize Object section
Assuming AdaptiveWork is the app you select in the second part of the zap (the action), then a common mistake is to select an object type, which pulls in field names, and then to change the object type, but the field names do not refresh automatically. For example, if we select Project as our object type, these are the fields that appear:

This is fine. But if we then change our mind and instead want to create a Request in AdaptiveWork, then changing the object type to Request will continue to display Project fields, which is wrong!
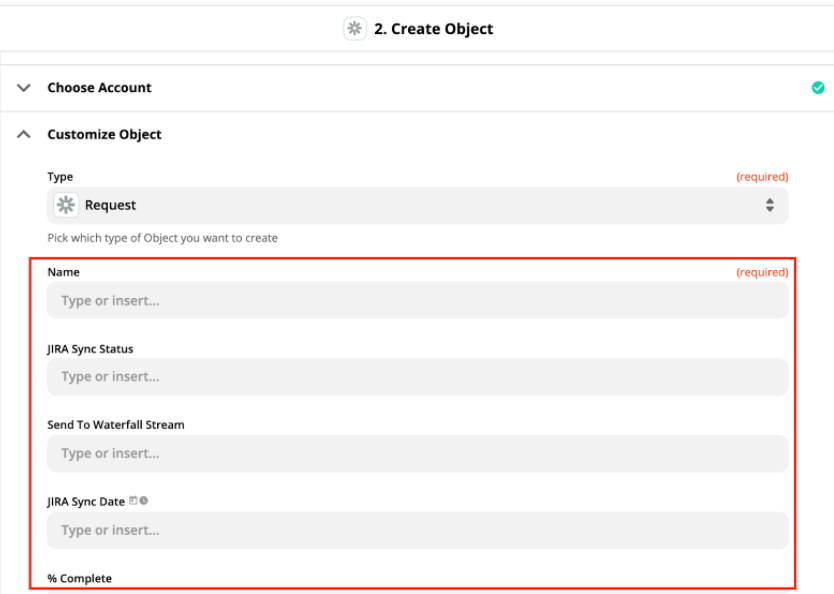
The request object in AdaptiveWork does not have the field Name. To correct this, scroll down to the bottom of the page and click Refresh Fields.
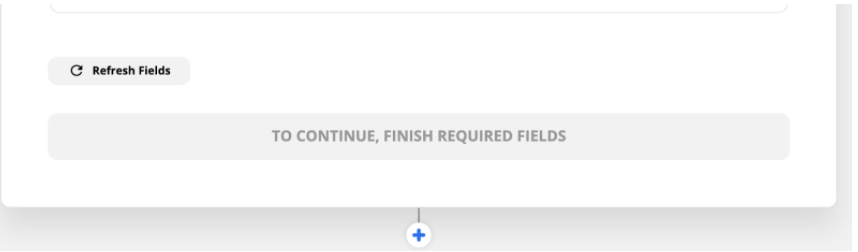
This will pull the correct fields for the object, and then you can populate the fields with values.