Assigning resources for a project by time period
Opening a project in the Resource planning view
Note: The Project Resource Planning functionality must be enabled to access the Resource planning view. Learn more about how to enable the functionality.
To open the Resource planning view:
- In the Projects module, open a project.
- Switch to the resources planning view in one of the following ways:
- If you are in the Work Plan view, click the Gear for Work Plan and select the Resource planning option.
The page now displays two panels: Work Plan (in the Grid or Gantt view) and Resources (with the project timeline).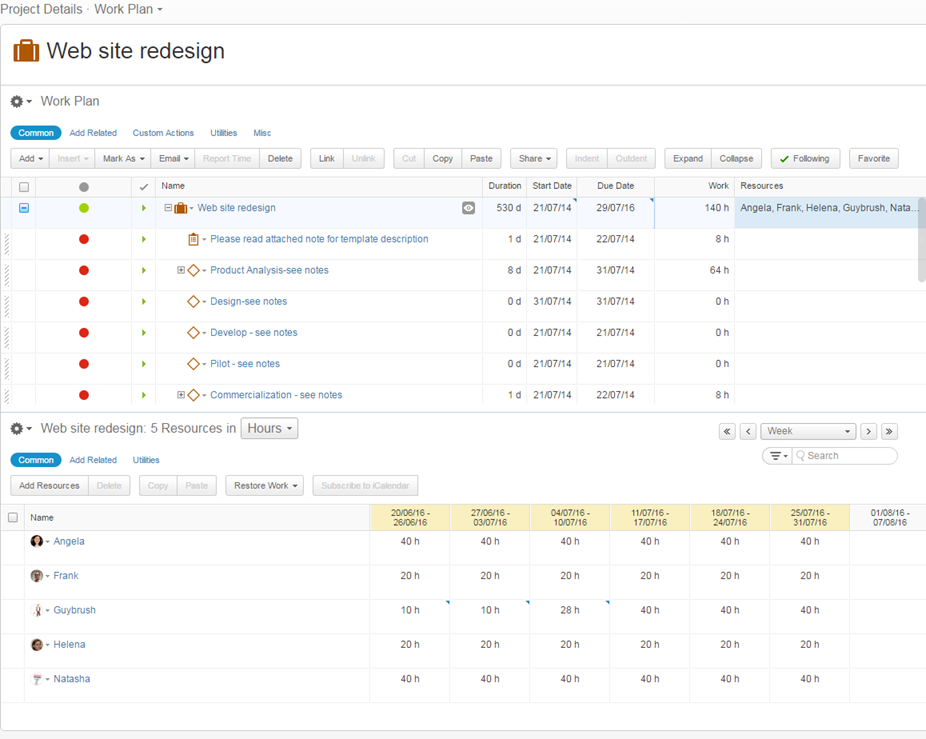
- If your project has multiple panels, expand the Resources panel, click the Gear for the Project Resource and select the Resource planning option.
The page now displays the Resources panel with the project timeline.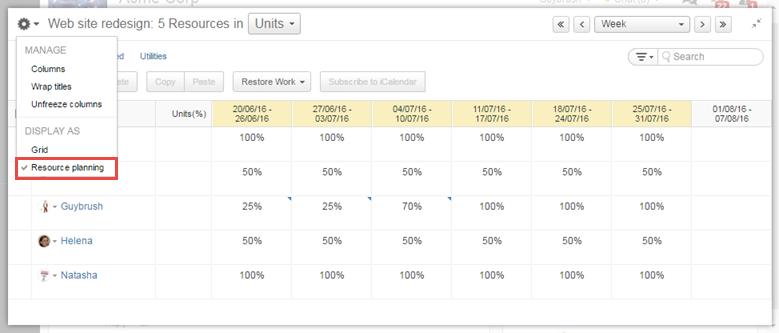
- If you are in the Work Plan view, click the Gear for Work Plan and select the Resource planning option.
Adding or removing resources
To add or remove resources:
- Switch to the Resource planning
- In the ribbon, click the Add Resources button.
- Add or remove users as necessary.
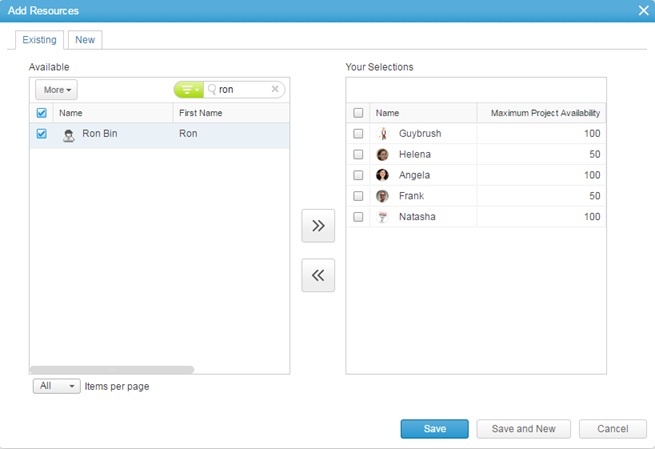
- Optionally, specify user's maximum project availability in percentage.
- Click Save.
Allocating resources by time period
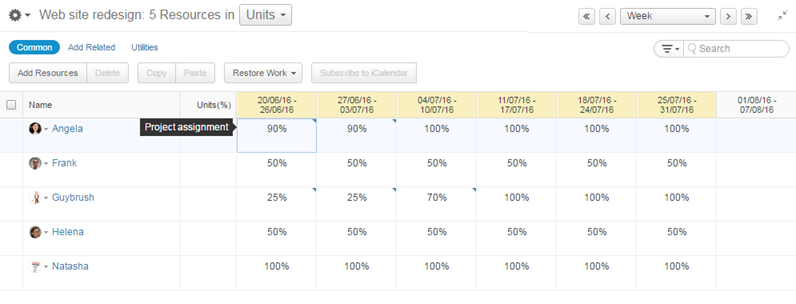
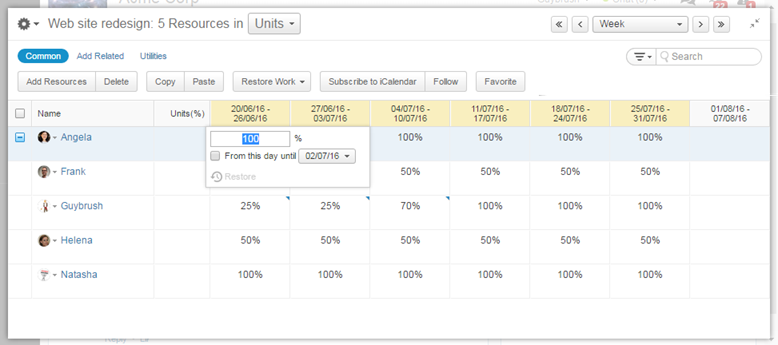
The Resource planning view displays a list of users assigned to the project with the timeline. The timeline displays project duration in yellow. You can only set resource assignment for the duration of the project.
On mouse over, the timeline displays:
- User’s project assignment in the top row, which, by default is based on the user’s calendar availability (e.g. 8 hours per day, or 100%).
- User’s total load (if applicable) from all assigned tasks in the project.
To assign resources by time period:
- In the top-right corner, select the desired time mode (i.e. day, week, or month).
By default, when you specify project assignment by day, the entered assignment is applied for the specific day, while when you specify project assignment by week or month, the same value is applied for the entire week or month. You can overwrite this value. - At the top of the Resources panel, select the units for assignment. Available values include Units (1 is 100%), Hours, FTE, or Persons Days.
- Click a time period for a user to specify user’s project assignment. The value is set for the whole time period that is selected. You can apply the same assignment to the next period by selecting the checkbox and the desired time-span.