
Comment Configuration
Introduction
Once you have completed your Person Reconciliation configuration, your next step will be to review your collection's Comment Configuration. On this screen, you will be able to apply an extension to comment handling for your collection.
Configuring Comments
First, create and save your comment extension on the Extensions screen. It will be a custom data transformation extension.
Note: You can learn best practices for configuring a comment extension here.
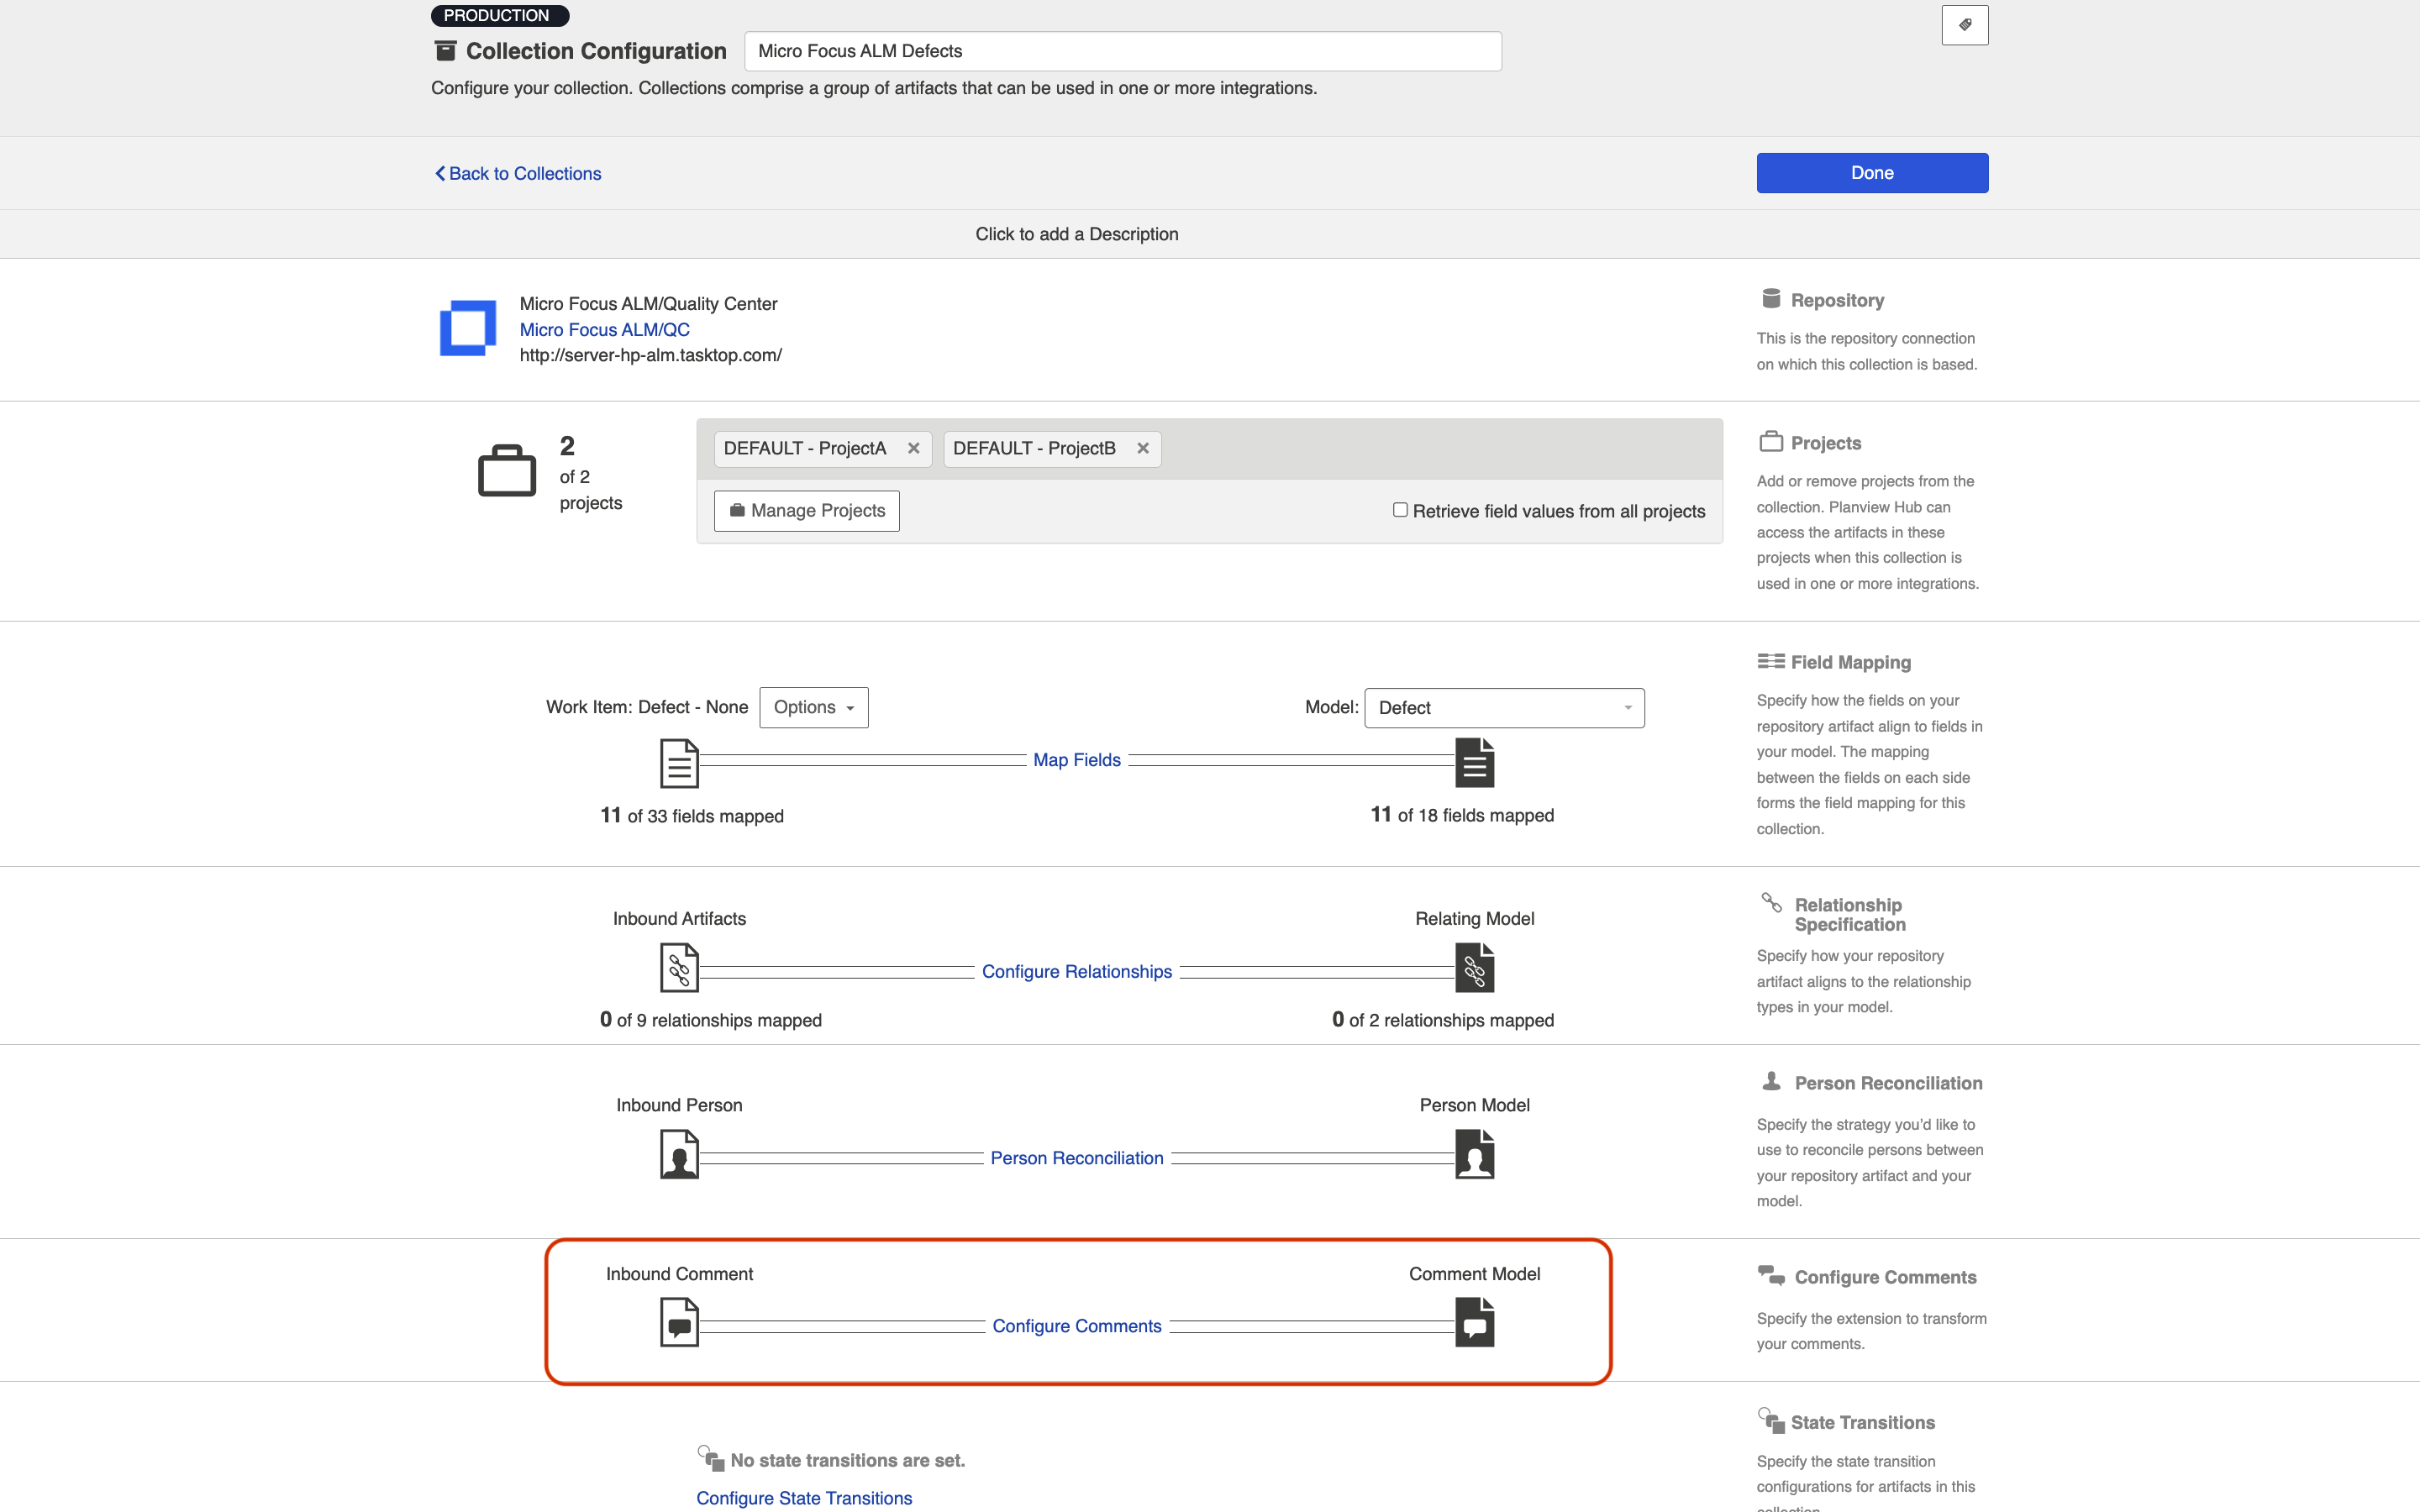
Next, navigate to the Comment Configuration screen from the Collection Configuration screen.
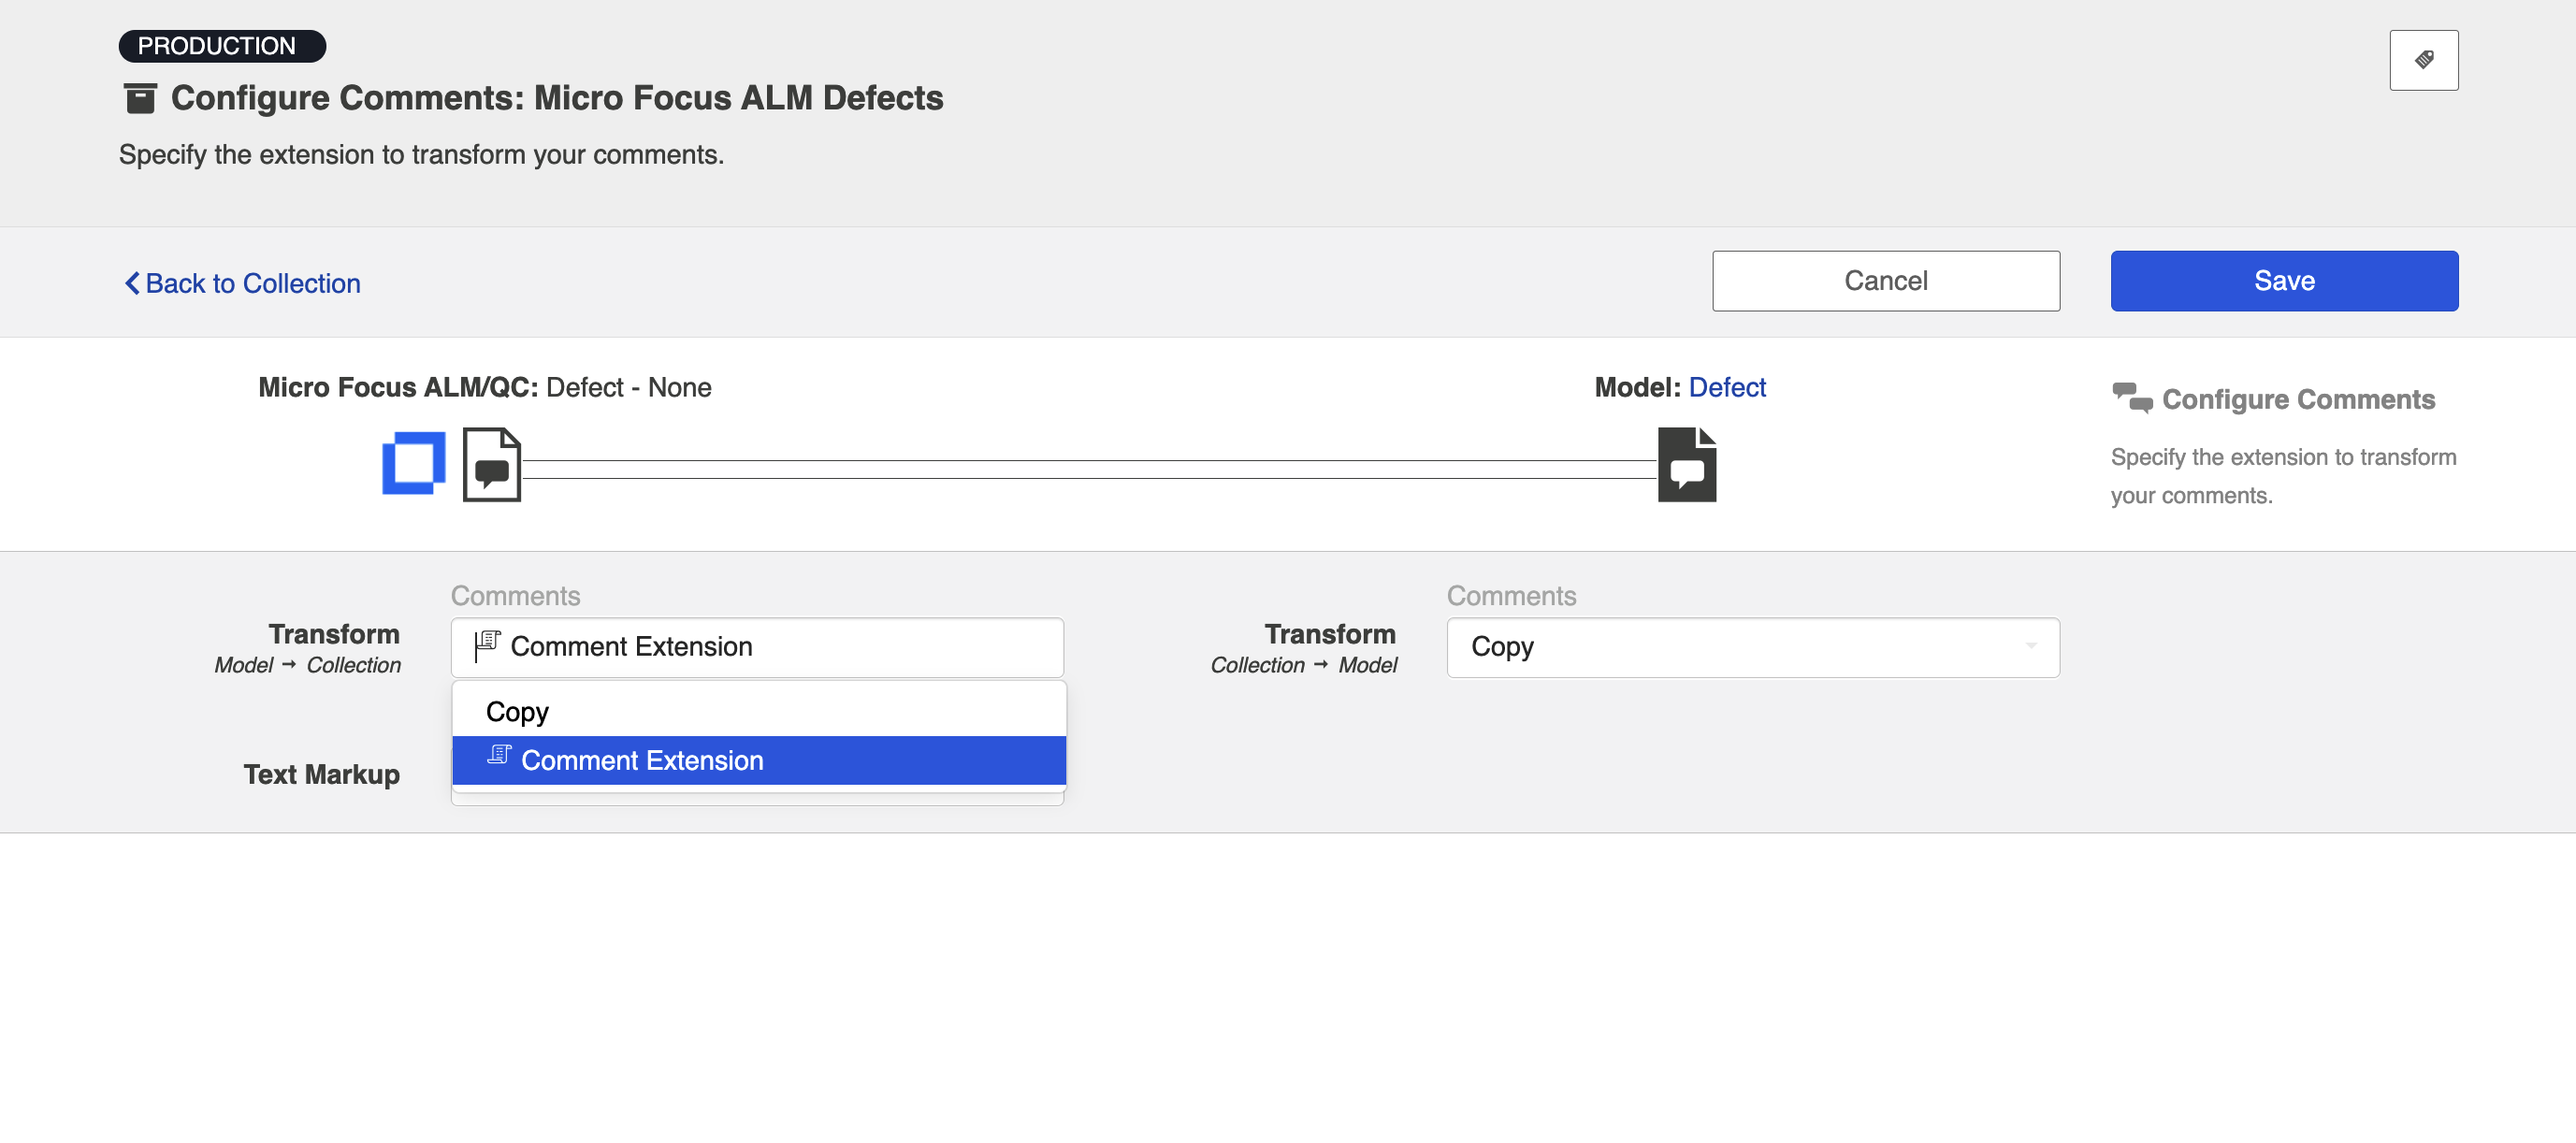
Select the comment extension on the desired side (either impacting data flowing from model → collection or collection → model):
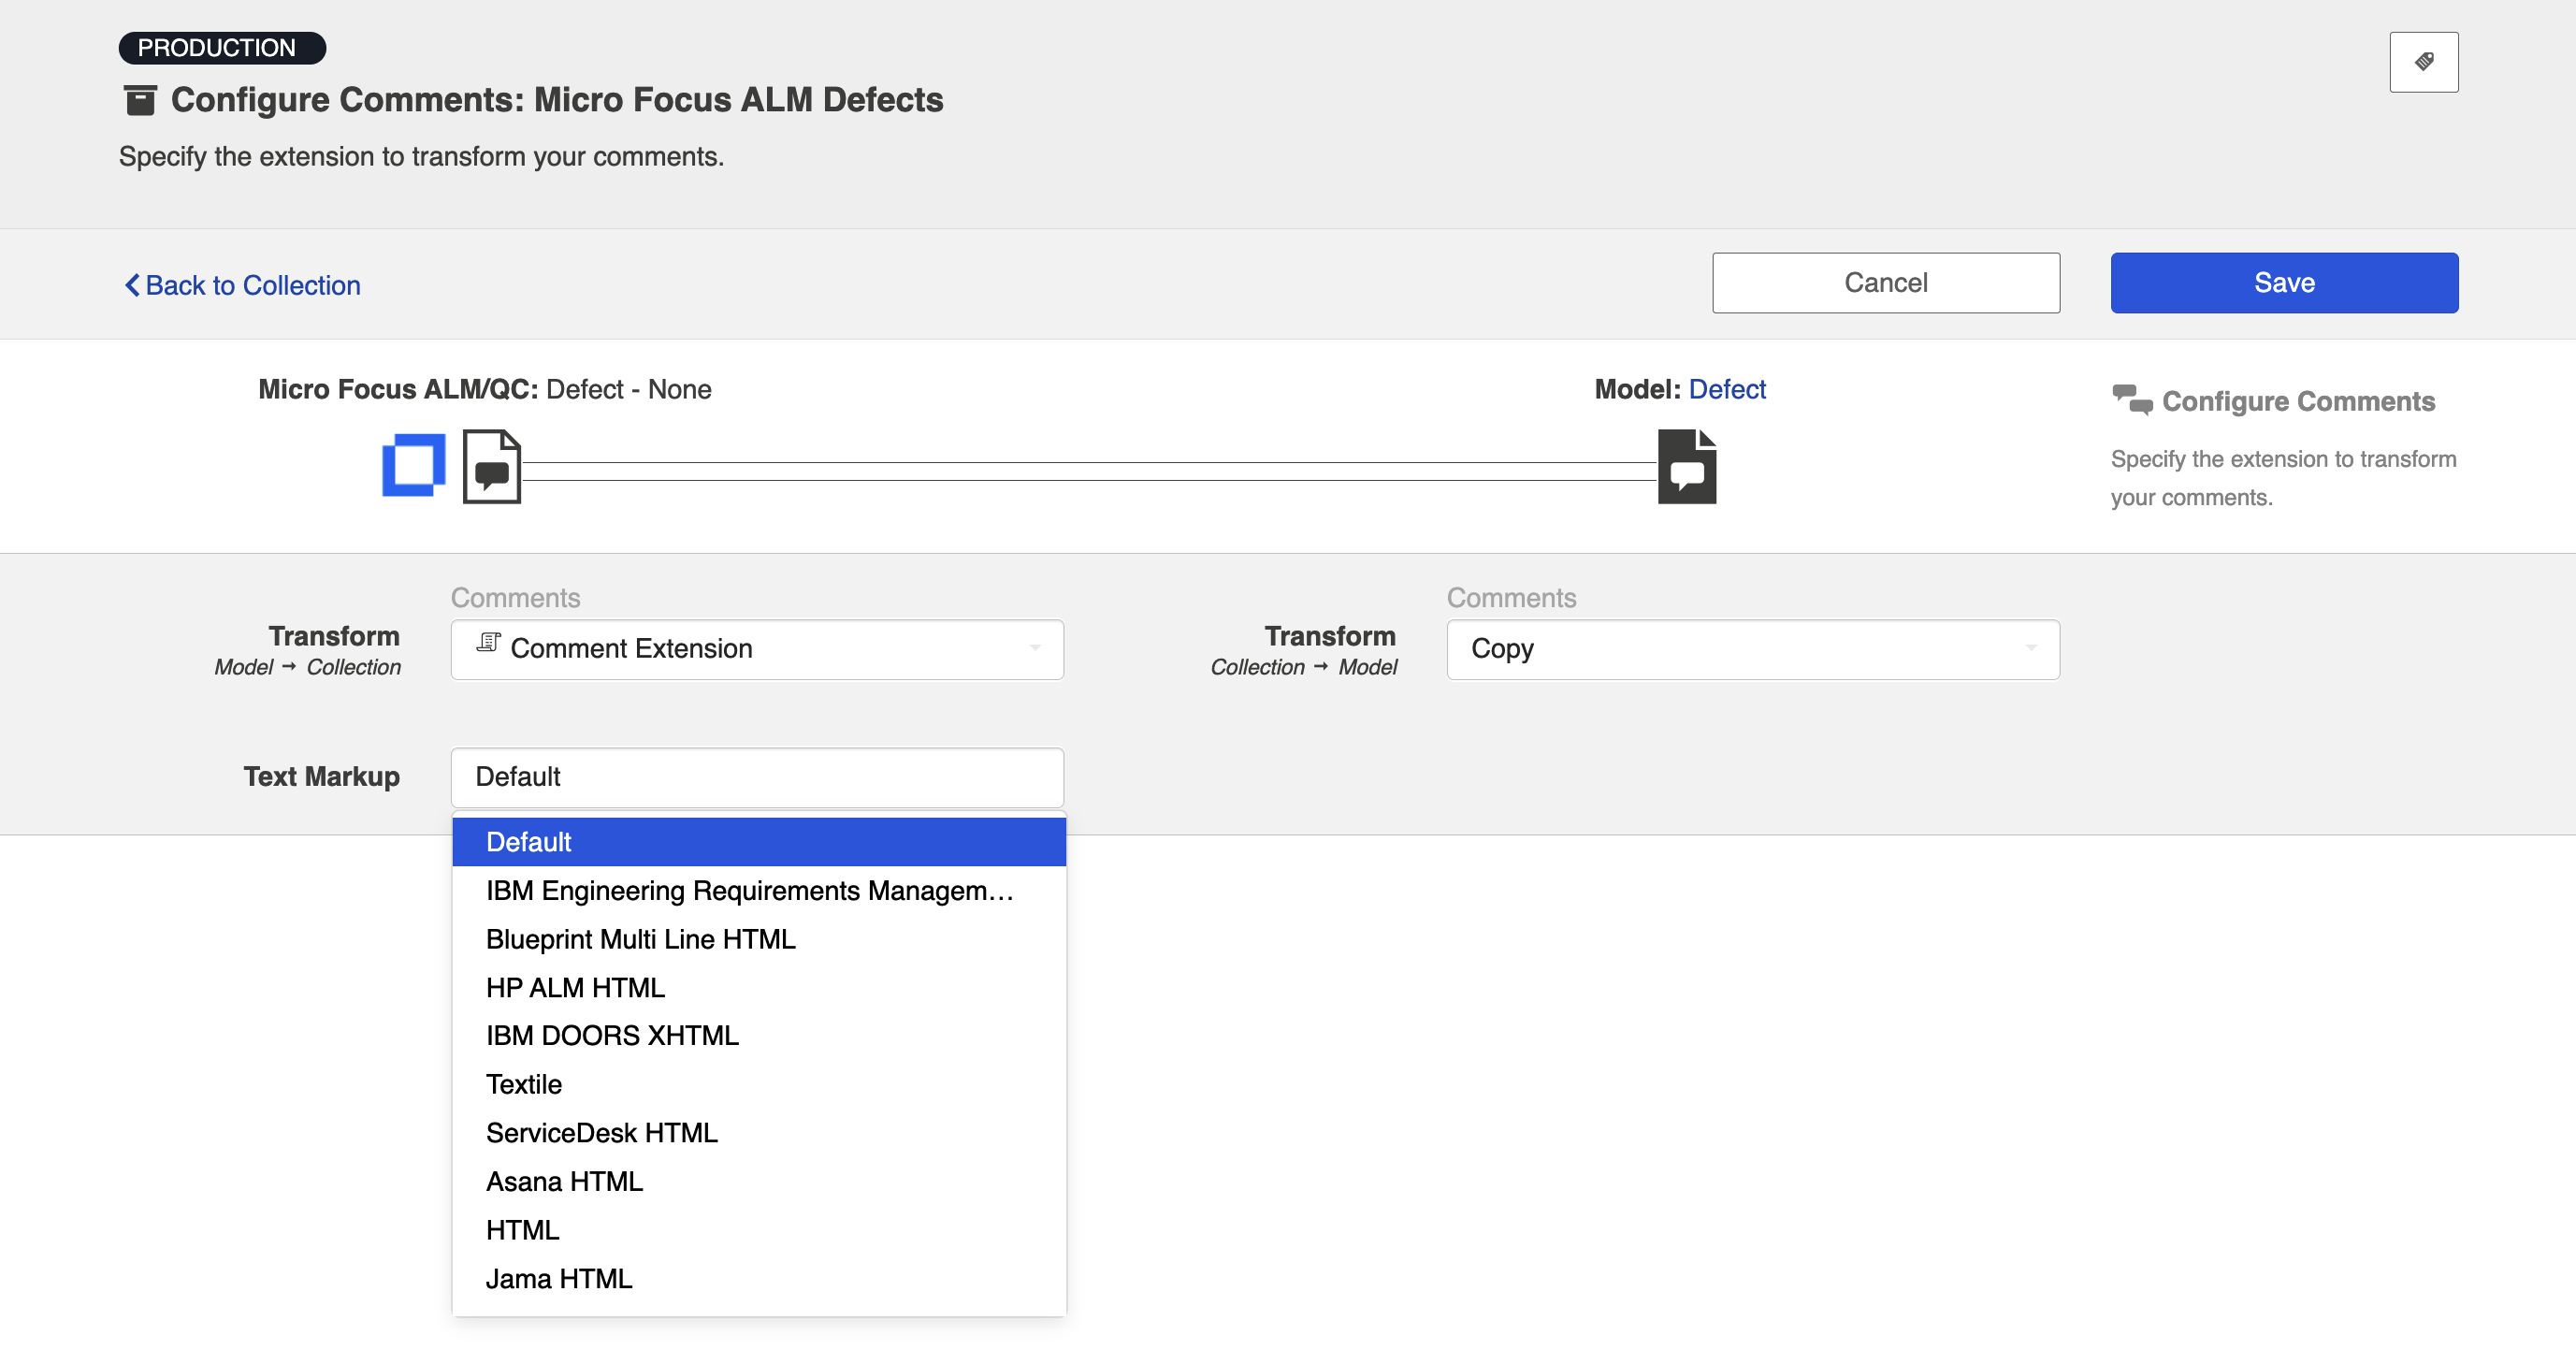
You can also select the text markup language to preserve rich text when flowing comments into and out of your collection.
Note: This field is automatically set to default. Hub's default text markup configuration should cover most rich text scenarios.
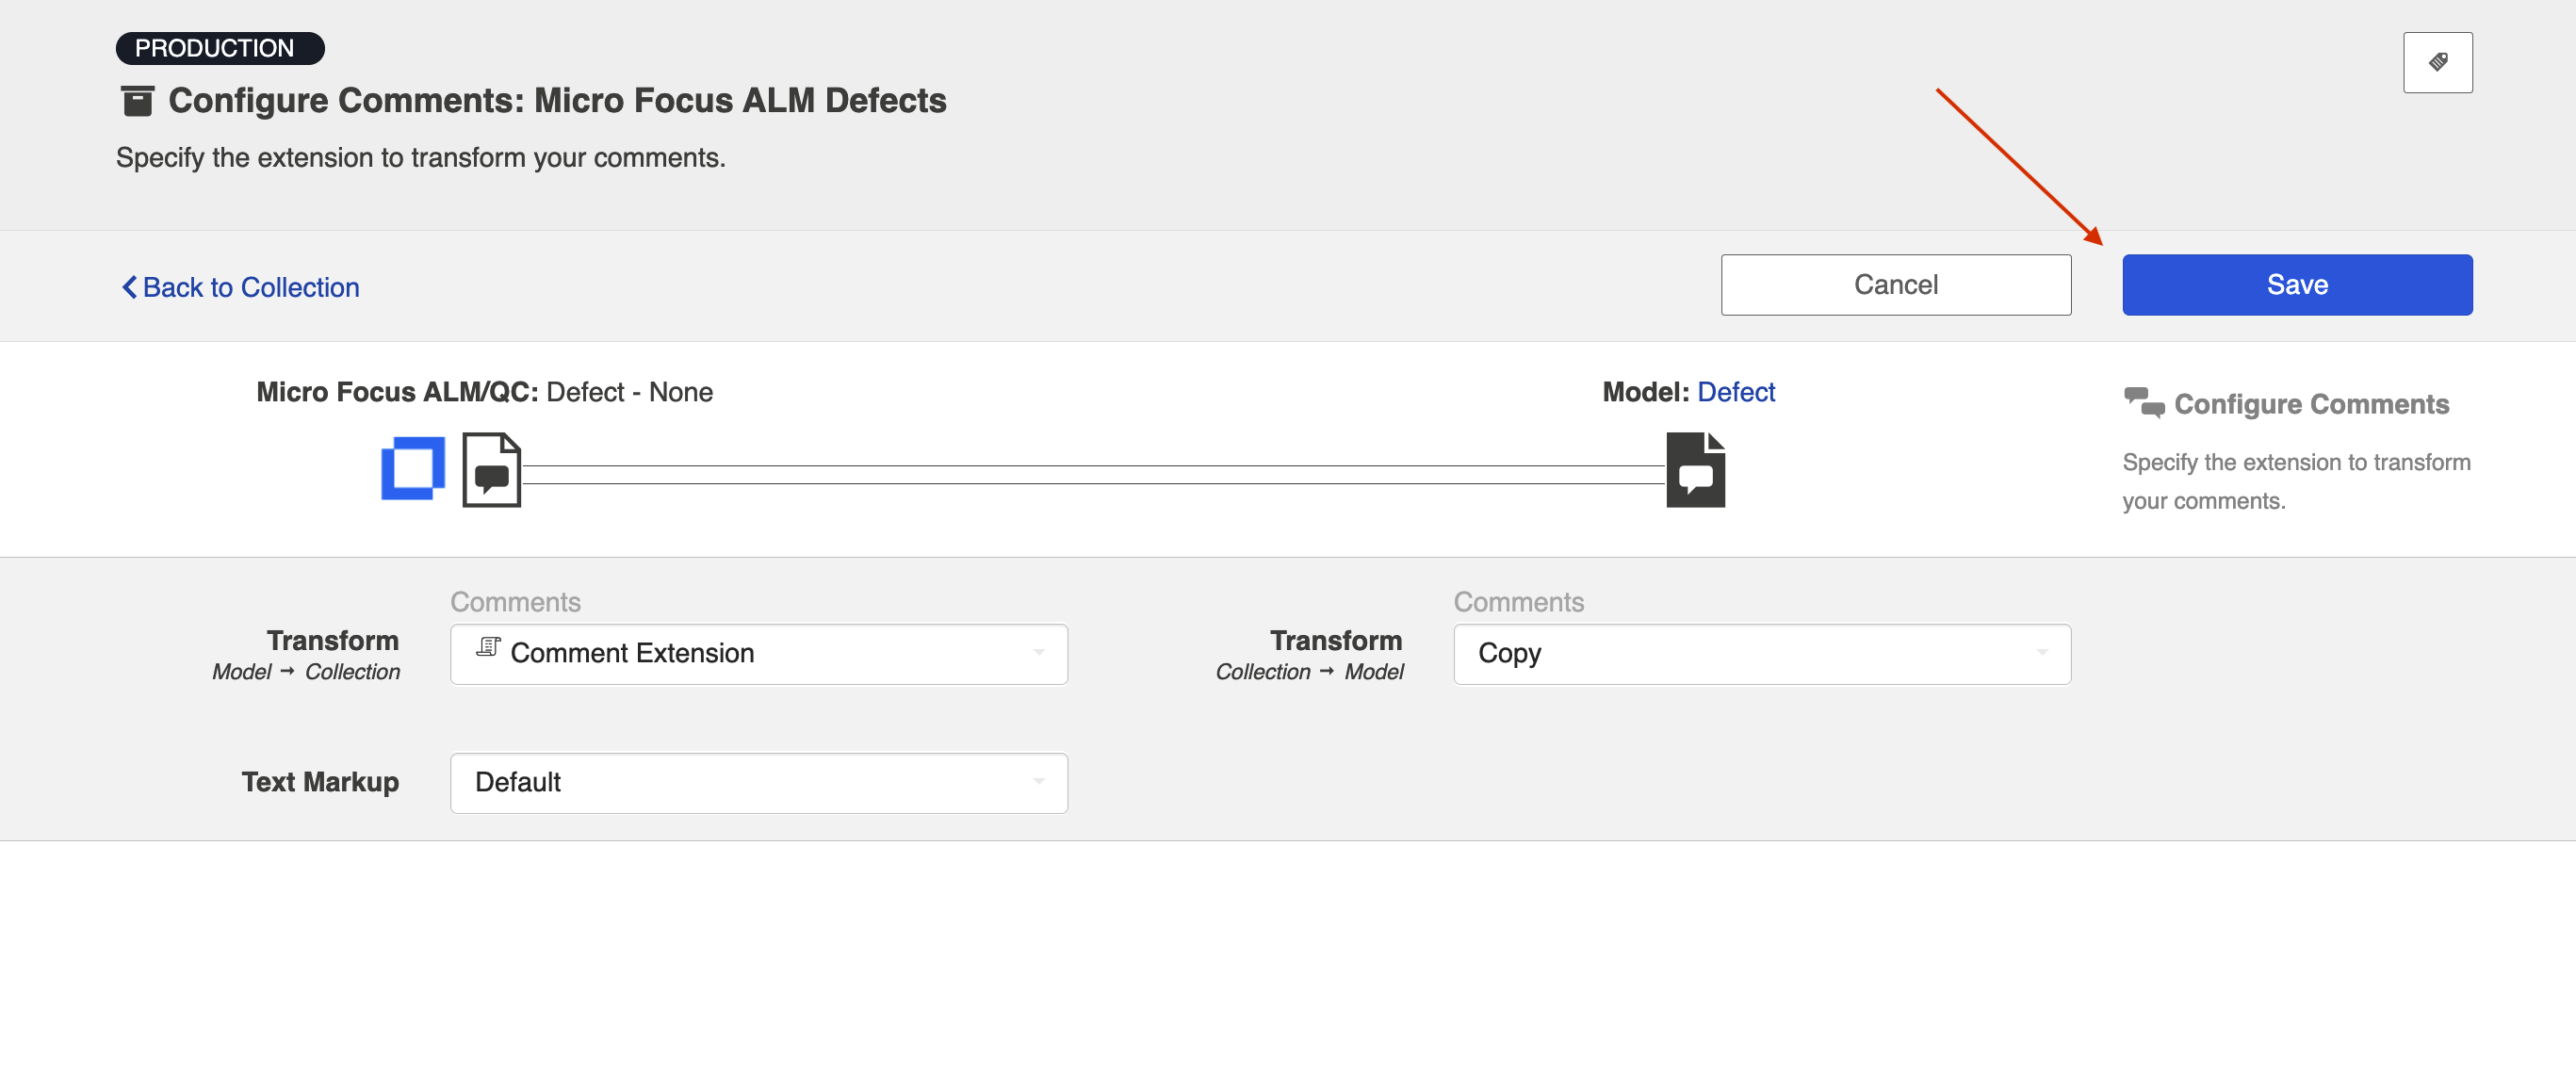
After you have configured your collection's comment settings, click Save and Done to save your changes.
Tip: Clicking ctrl+s on Windows and cmd+s on macOS will save your configuration.
You can enable comment flow for your integration on the Comment Flow screen.
Next Steps
Once Comment Configuration is complete, your next step will be to configure State Transitions, if your repository utilizes state transitions or workflows. If not, your collection configuration is complete, and you can move on to Step 4: Configure your Integration.