Installation
This page is not applicable to Planview Hub Cloud.
Sandbox Environment
It is recommended that you prepare a sandbox environment to test your Planview Hub configuration before deploying it in production.
The sandbox environment should include the following:
- A sandbox server to install Hub on
- Sandbox instances of all repositories you will be integrating
- These instances should include the same project structure and customizations as your production repositories.
- These instance should also include a comparable number of artifacts to your production repositories.
After you have configured Hub on the sandbox server and are satisfied with the way it is running with your sandbox repositories, you can install Hub on your production server and recreate the configuration for your production repositories.
Downloading Planview Hub
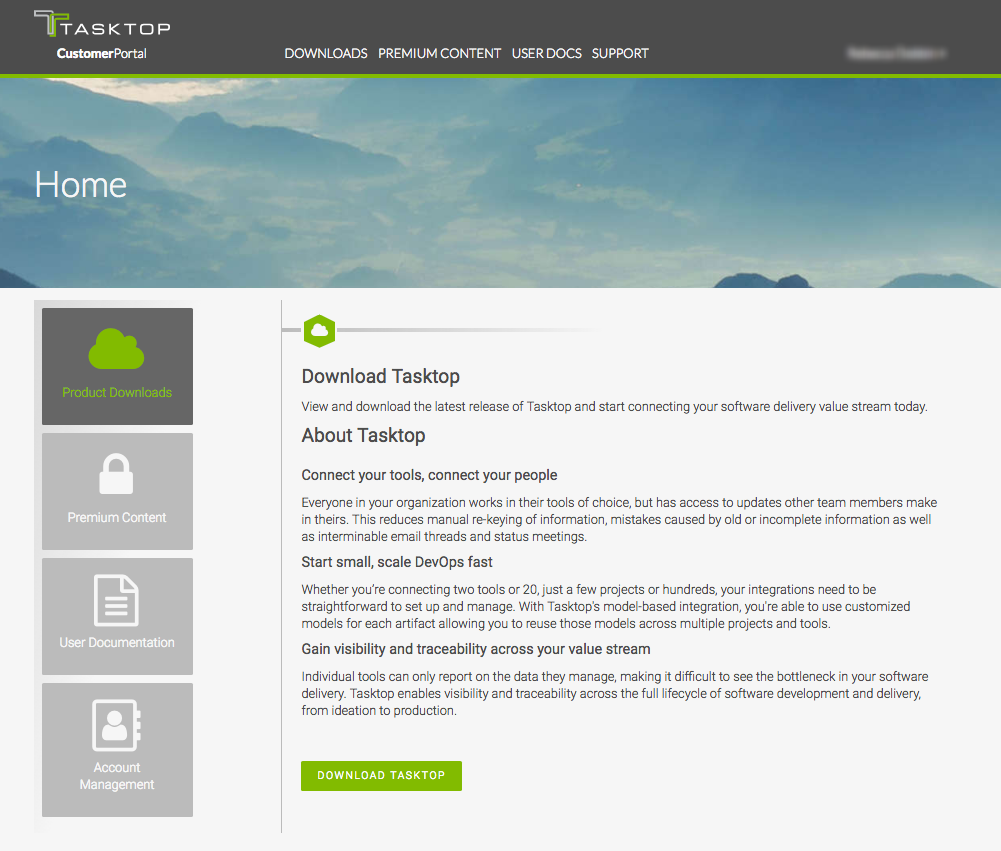
To get the latest version of Planview Hub, create an account on our Customer Portal, then contact your Solutions Architect or customer care.
Once logged in to the Customer Portal, click Product Downloads.
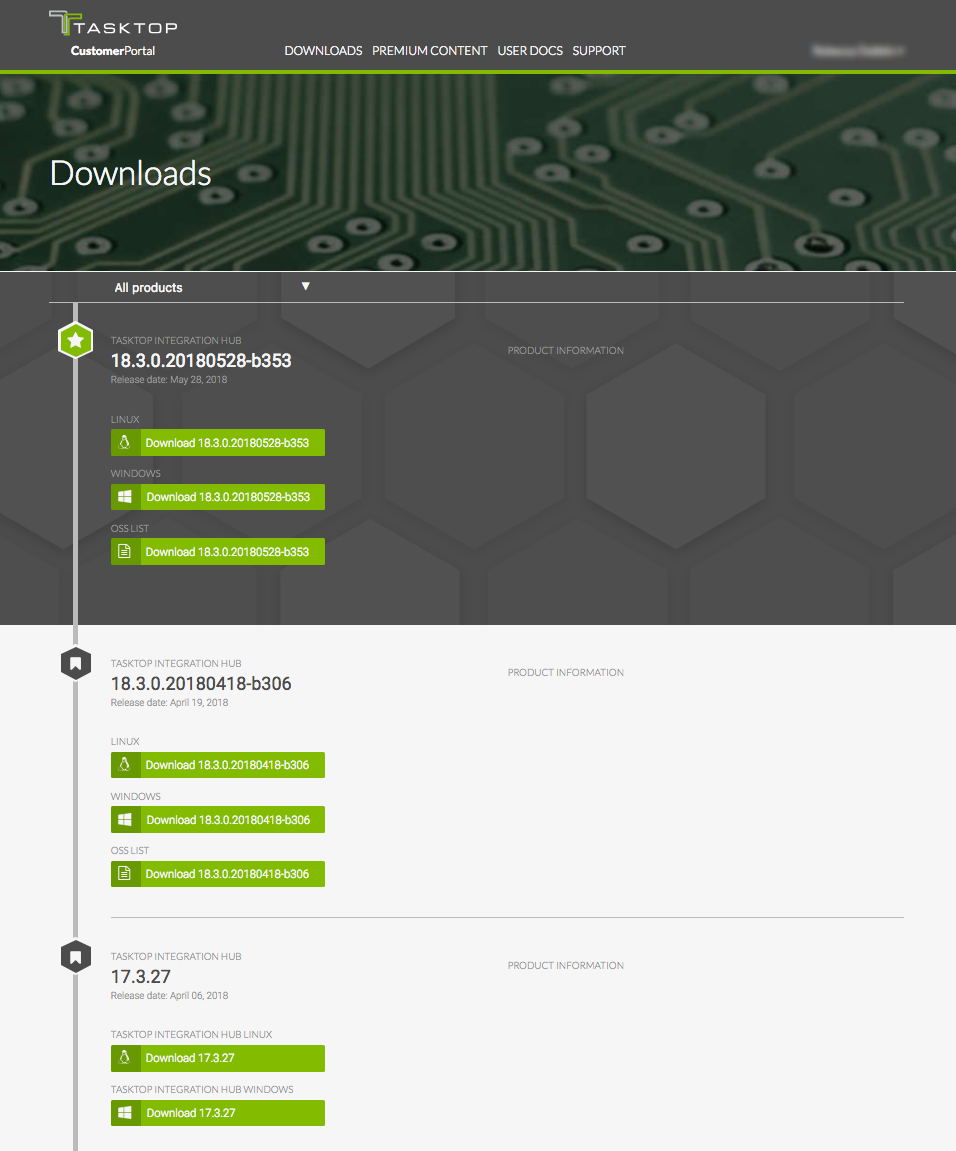
This will lead you to the Downloads section, where you can download the latest version of Planview Hub.
Installation on Windows
Click the Windows download link on the Product Downloads page of the Customer Portal.
You will be provided with an installation package for Hub as a standard Windows MSI installer.
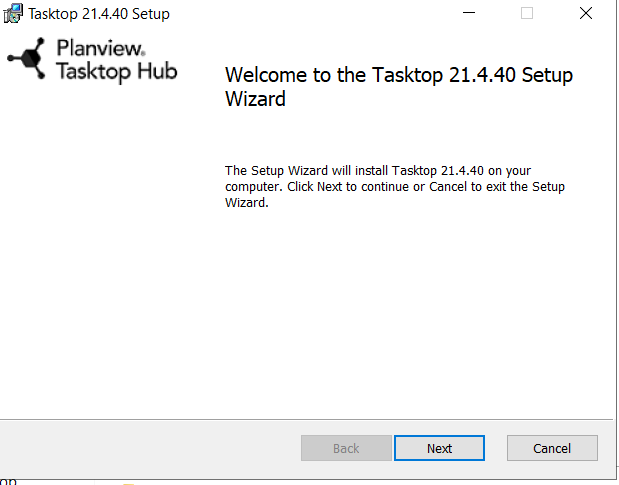
If prompted, click Save File and open the file once downloaded.
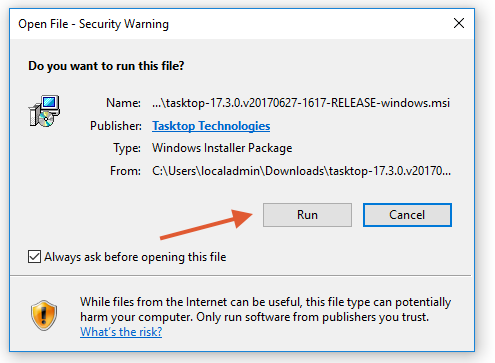
The Setup Wizard will guide you through the installation process.
Note: If you decide to change the location of the ProgramData directory, do not include spaces in the new directory name. If the directory includes spaces, Hub's UI will not be accessible.
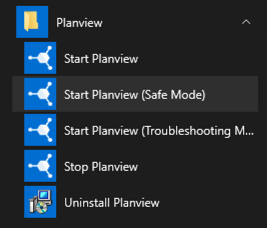
After installing Hub, open the Start menu and click Start Planview to start both Hub and User Management services.
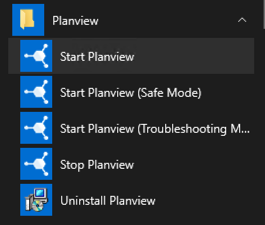
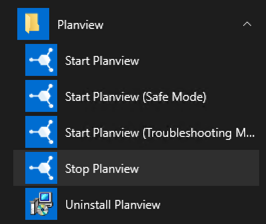
To stop both Hub and User Management services, click Stop Planview.
Note: The Planview Hub application is available via HTTPS on port 8443. A default SSL certificate is provided for testing purposes, however this SSL certificate is insecure. Before using in a production environment, the provided SSL certificate must be replaced. Please see details in the SSL Certificate Installation page.
Please follow the steps in the Getting Started section when starting Hub for the first time.
Powershell
Planview Hub supports Windows environments that require PowerShell scripts to be signed, but Tasktop must be added to the Trusted Publishers store to run on such environments. To do this, see the steps below.
- Install the latest version of Hub on the machine.
- Log in as the user that will be used to run Hub.
- Run PowerShell as administrator and navigate to
C:\Program` Files\Tasktop\container\bin\setenv.ps1 - Type 'A' and press enter.
Alternatively, PowerShell commands can be used to add Tasktop to the Trusted Publishers store for the entire machine.
Note that the following commands can be run by any user once Hub is installed and must be entered into a PowerShell terminal and not run as a PowerShell script.
$Cert = New-Object System.Security.Cryptography.X509Certificates.X509Certificate2
$Cert.Import((((Get-AuthenticodeSignature "C:\Program Files\Tasktop\container\bin\setenv.ps1").SignerCertificate).Export([System.Security.Cryptography.X509Certificates.X509ContentType]::Cert)))
$store = Get-Item "cert:\LocalMachine\TrustedPublisher"
$store.Open([System.Security.Cryptography.X509Certificates.OpenFlags]"ReadWrite")
$store.Add($Cert)
$store.Close()
Installation on Linux
You will receive a .bin installation package for Hub.
Note: Starting in version 25.4, the installer grants Hub permissions and file ownership to the user running it. Always run the installer as a dedicated Planview Hub user account for proper security isolation.
To execute the file, run these commands:
chmod +x tasktop-linux-x64.bin
./tasktop-linux-x64.bin
After approving the End User License Agreement, the user needs to provide the path to the existing Planview Hub installation location for upgrading the existing one. Otherwise, pass this step by pressing the Enter key. The file will automatically unzip, allowing you to run Hub.
Run the start-tasktop.sh script from the installation directory (see note on permissions below) to start Tasktop and Keycloak User Management services.
To stop Tasktop and User Management services, use the stop-tasktop.sh script in the same folder.
Note: The Planview Hub application is available via HTTPS on port 8443. A default SSL certificate is provided for testing purposes, however this SSL certificate is insecure. Before using in a production environment, the provided SSL certificate must be replaced. Please see details on the SSL Certificate Installation page.
Please follow the steps in the Getting Started section when starting Planview Hub for the first time.
Note on Permissions
We recommend creating a dedicated user for running Planview Hub. We do not recommend running Planview Hub as root, as it may create files that cannot be accessed when running Hub as another user. Running an application on a Linux system as root may also interfere with your system's security.
For this reason, start-tasktop.sh will not start if it detects the current user is root.
If you would like to run Planview Hub as root despite these risks, you can do so by deleting or commenting lines 3-7 of call-catalina.sh in the installation directory as shown below:
!/bin/sh
#if [ "`id -u`" -eq "0" ]
#then
#    echo "Tasktop should not be run as root"
#    exit 1
#fi
Planview Hub Service on Linux
There are several ways to configure a Planview Hub Service that starts automatically on system startup. We recommend using a dedicated account for running Planview Hub.
You can see the examples below for Systemd and SysVinit.
Planview Hub Service with Systemd
-
Paste the following into the file:
# Systemd unit file for tasktop
[Unit]
Description=Tasktop Hub
After=syslog.target network.target

[Service]
Type=forking

ExecStart=/path/to/tasktop/start-tasktop.sh
ExecStop=/path/to/tasktop/stop-tasktop.sh

User=user

[Install]
WantedBy=multi-user.target
a. Change both instances of
/path/to/tasktopto the full path to your Planview Hub installation directory
b. Change the User and Group variables to the username and group of the account you want to run the Hub service -
Reload Systemd
$ systemctl daemon-reload
1. Navigate to /etc/systemd/system
2. Create a file named tasktop.service
3. Enable the new Planview Hub service to start on system startup
$ systemctl enable tasktop
To manually start and stop the Planview Hub Service, use the following commands:
$ systemctl start tasktop
$ systemctl stop tasktop
Planview Hub Service with SysVinit
-
Paste the following into the file:
#!/bin/bash
# description: Tasktop Start Stop Restart
# processname: tasktop
# chkconfig: 2345 20 80
TASKTOP_HOME=/path/to/tasktop
case $1 in
start)
sh $TASKTOP_HOME/start-tasktop.sh
;;
stop)
sh $TASKTOP_HOME/stop-tasktop.sh
;;
restart)
sh $TASKTOP_HOME/stop-tasktop.sh
sh $TASKTOP_HOME/start-tasktop.sh
;;
esac
exit 0
a. Change the TASKTOP_HOME variable to the full path to your Planview Hub installation directory
b. If you'd like, you can change thechkconfigrun levels and start and stop priorities -
Set the permissions of Hub to make it executable. It is recommended to set file permissions to 700 for the dedicated user account created specifically for Planview Hub.:
$ chmod 700 tasktop
- Navigate to
/etc/init.d - Create a file named
tasktop -
Use the
chkconfigutility to enable Planview Hub start at system startup$ chkconfig --add tasktop $ chkconfig --level 2345 tasktop on
- If you'd like, you can change the run levels in this command
To manually start and stop the Planview Hub Service, use the following commands:
$ service tasktop start
$ service tasktop stop
$ service tasktop restart
Getting Started
Once installation is complete, you can begin using Hub by opening https://localhost:8443/ in any of our supported browsers.
Before logging on to Hub, you must log into the User Administration Console in order to create your admin user(s). The User Administration Console can be accessed via the User Administration Console link at the bottom of the Hub login page. Please review the User Management section for detailed instructions on how to create a user, login, and manage your user accounts.
Once logged in, you will be prompted to set a Master Password, which will be used to encrypt your repository credentials.
You will also need to apply your license before configuring your integrations. You can learn how to apply your license here.
Providing Limited Public Access to Hub
To ensure optimal protection, we recommend only allowing intended traffic to access your Hub instance. Numerous network techniques and scenarios exist for configuring a web application with restricted public access.
Port Forwarding
Port forwarding enables traffic from the internet or an external network to reach a specific device or service within a private local network.
Planview offers limited support for configuring port forwarding. See details here to learn more.
Reverse Proxies
A reverse proxy acts as an intermediary between clients (typically web browsers) and backend servers, working on behalf of the backend servers to handle client requests. It serves as a robust protective barrier within networking techniques, making it a widely adopted solution for enhancing security and safeguarding backend servers from direct exposure to external clients.
Planview offers limited support for configuring reverse proxies. See details here to learn more.
Default File Locations
Windows
When Planview Hub is installed on Windows using the MSI installer, the program files (i.e., the executable files and binaries) are located in C:\Program Files\Tasktop; configuration files and logs are located in C:\ProgramData\Tasktop.
Tip: ProgramData may be a hidden folder, so you will need to change your Windows Explorer settings to show hidden files and folders to find it.
Note: If you change the location of the ProgramData directory to an alternate location, do not include spaces in the name of the new directory. If the directory has spaces in its name, Hub's UI will not be accessible.
Linux
When Planview Hub is installed on Linux, the program files (i.e., the executable files and binaries), configuration files, and logs are all located in the installation directory where you extracted the distribution archive.
Note: You must choose a location with no spaces in its path, or Hub's UI will not be accessible.
Repository Preparations
Preparing Your Repositories
In Hub, the term repository refers to the external tools Hub connects to (e.g., Atlassian Jira, ServiceNow, BMC Remedy, etc).
Before connecting Hub to your external repositories, you will need to perform some simple preparation on each repository you will be integrating. This preparation includes creating a user account for Hub with the appropriate permissions. Please refer to our Connector Documentation for detailed instructions for each repository.
Firewalls and Proxies
If Planview Hub is installed behind a firewall, you may need to connect to external repositories (e.g., hosted or cloud ALM tools) through a proxy. To create a connection to such external repositories in Planview Hub, you can make Hub connect through your proxy by configuring the proxy settings when creating a new repository connection. It is recommended to create login credentials specifically for Hub on the proxy server.
Note: The Proxy Location must be a URL in order for the proxy connection to work. If a .pac script is used in your browser, you will need to open the script and find the URL/port to enter in the Location field.
To use a proxy server, check the user proxy server box and fill in your proxy details in the Proxy Server section on the New Repository Screen:

Troubleshooting
Troubleshooting Mode
Troubleshooting Mode allows you to turn on verbose logging when the UI doesn't appear due to issues upon startup.
To start Hub in Troubleshooting Mode, see the following instructions:
-
For Linux: Run the following script from the command line in the installation folder:
start-tasktop-troubleshooting-mode.sh
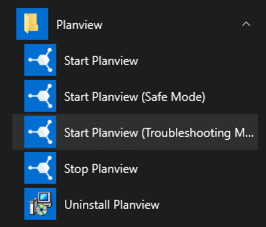
- For Windows: Click Start Planview (Troubleshooting Mode) in the Start menu.
Note: The default troubleshooting duration is set to two hours when Troubleshooting Mode is enabled. You can view the Troubleshooting timer in the Troubleshooting tab on the Settings screen
SafeMode
SafeMode allows you to start Hub without running your integrations (i.e., no synchronization or change detection will occur).
To start Hub in SafeMode, see the following instructions:
-
For Linux: Run the following script from the command line in the installation folder:
-
start-tasktop-safe-mode.sh
-
-
For Windows: Click Start Planview (Safe Mode) in the Start Menu.
-