
Advanced User Management
This page is not applicable to Planview Hub Cloud.
Advanced User Management
Planview Hub has advanced user management capabilities that are not accessible via the Hub interface.
To access advanced user management capabilities, click the User Administration Console link at the bottom of the Hub login screen.
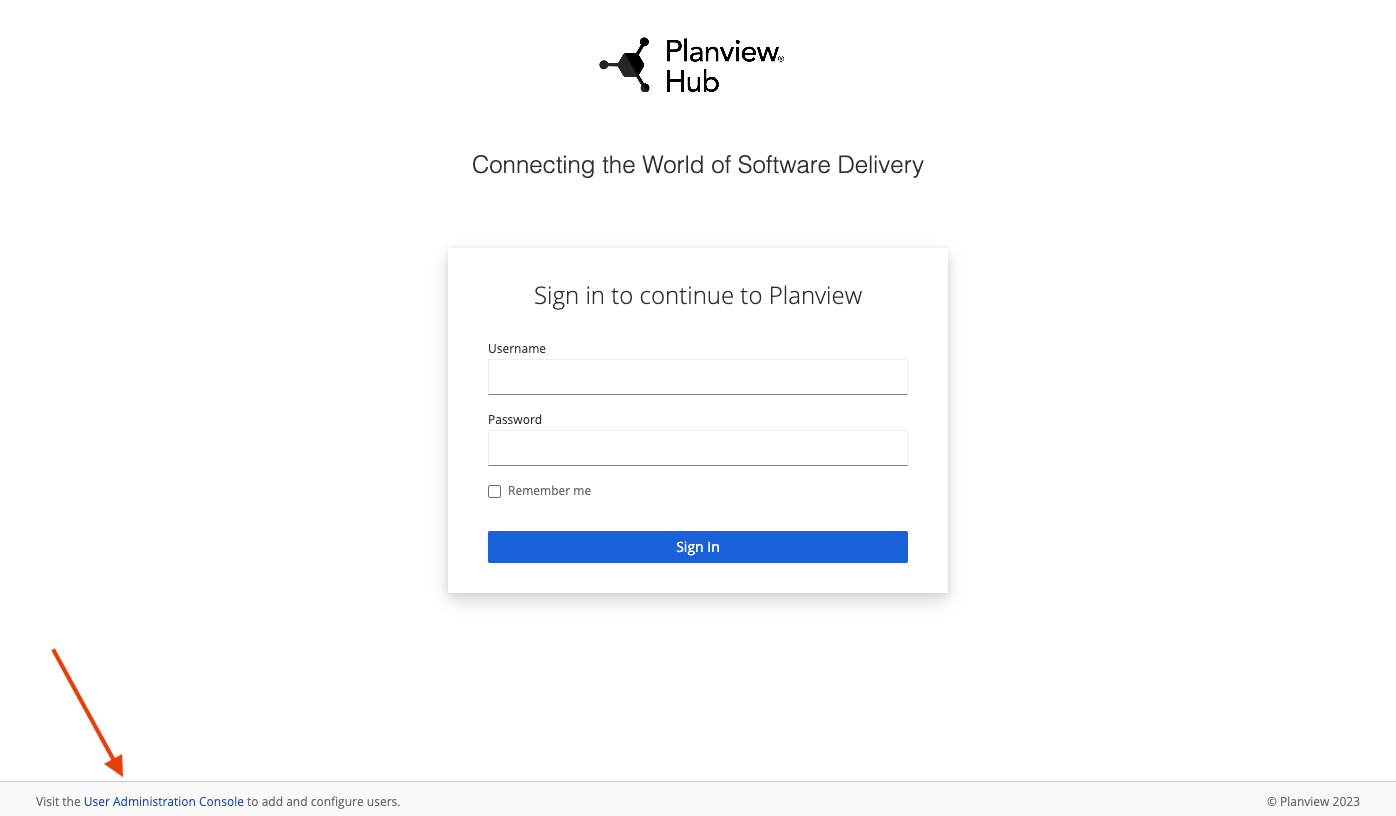
You can log in using the credentials you set when you first installed and began using Planview Hub.
WARNING: There is only one initial root user. If the credentials for this user are lost, access to the advanced User Management features will be lost. All functionality of Planview Hub, however, will continue uninterrupted.
Some of the advanced features include:
- User Federation Configuration for:
- LDAP
- Kerberos
- Identity Provider login for:
- SAML v2.0
- OpenID Connect v1.0
- Enforcing custom password policies such as:
- Set password expiration
- Require special characters
- Setting minimum password length
Note: While Planview Hub officially supports LDAP, other advanced features (including but not limited to Kerberos Federation and IDP) are not supported or tested by Planview.
To learn more about these advanced features, click here.
WARNING: Do not make changes or updates to the Roles or Groups section. Altering these settings may prevent your Planview Hub users from accessing the tool.
Creating and Managing Root Users
A root user refers to a user who can log in to the User Administration Console. Hub comes with one root user, but if you'd like to create additional root users or to manage existing users, you can do so from the User Administration Console.
Once logged in, click the arrow next to Tasktop (in the upper left panel) and select master.
![]()
Next, click Users in the left panel.
From here, you can follow the same instructions used to create Hub users to create and manage root users.
Creating the Troubleshooting User Role using a Script
To configure the troubleshooting user role, we provide a script that will create the TasktopTroubleshootingUser role in your Keycloak instance, and replace the default TasktopUsers group with the TasktopTroubleshootingUsers group.
Note: This script can only be used if you have provided a valid SSL certificate as described in the SSL Certificate Installation section. If you have not provided such a certificate, skip to the Creating the troubleshooting user role via the Keycloak admin console section below.
Windows
Run the add-troubleshooting-user.bat script in C:\Program Files\Tasktop\utility-scripts, providing the relevant information when prompted.
Linux
Run the add-troubleshooting-user.sh script in <installation location>/Tasktop/utility-scripts, providing the relevant information when prompted.
Creating the Troubleshooting User Role via the Keycloak Admin Console
If you have not provided a valid SSL certificate, you can create a troubleshooting user via the User Administration Console. This console can be accessed by following the instructions in the Getting Started section.
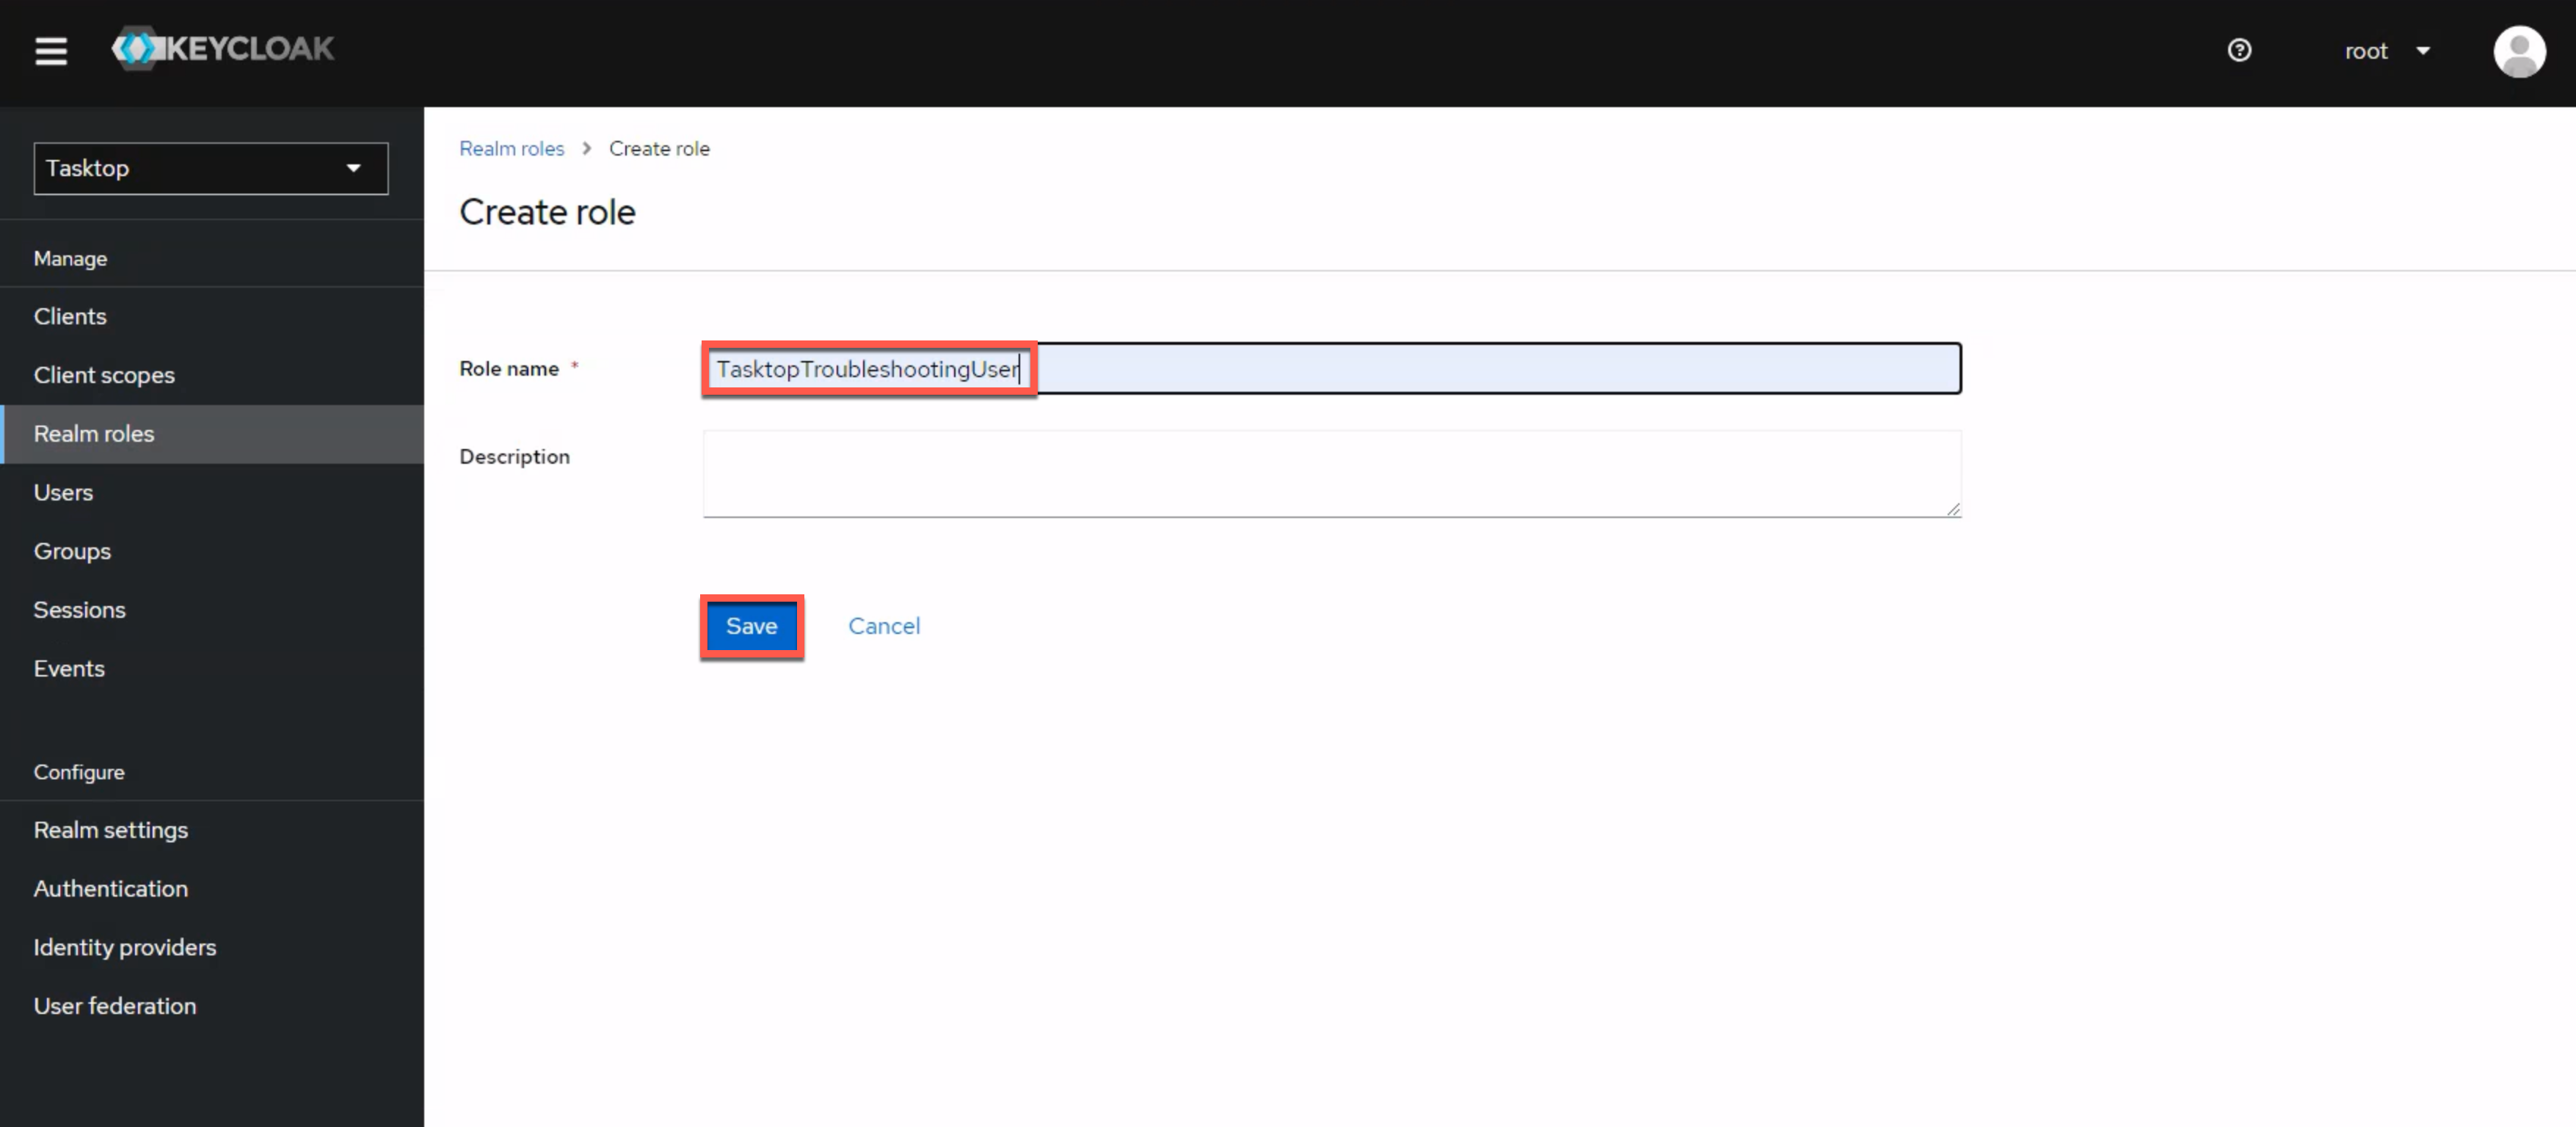
After logging in, navigate to the Realm roles section in the left column and click Create role.
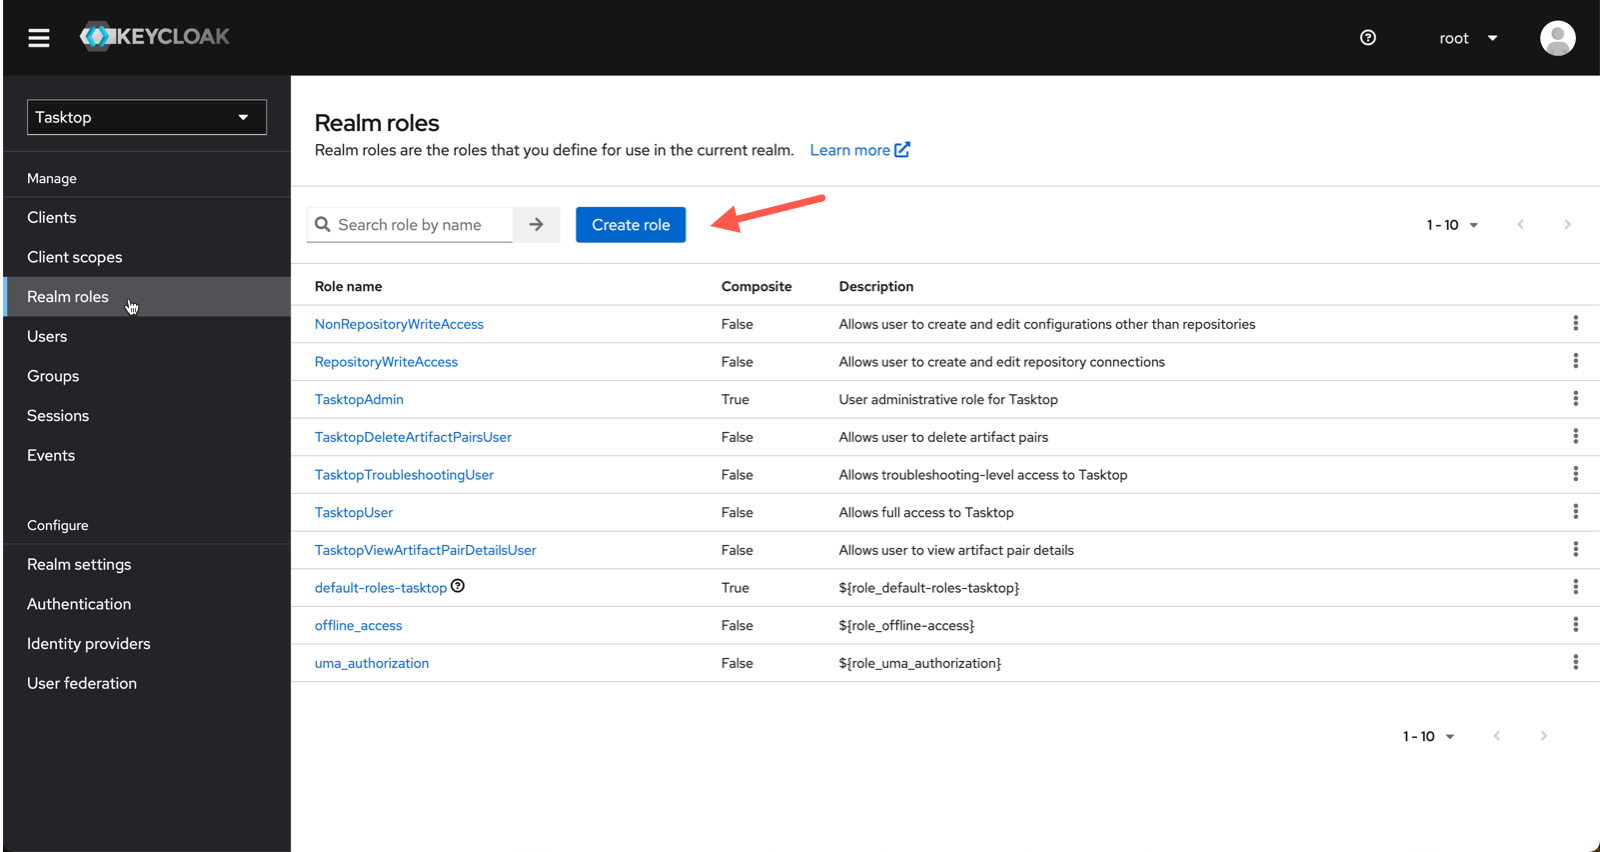
On this screen, enter TasktopTroubleshootingUser in the Role name field. Then, click Save.
Tip: The Role name is case-sensitive and must match exactly.
That's it! The troubleshooting user role has been created. Next, you'll need to add the troubleshooting user to a group.
Adding Troubleshooting Users to a Group
We recommend that you create a group for troubleshooting users and set it as the default group.
To do this, navigate to the Groups section in the left column and click Create group.
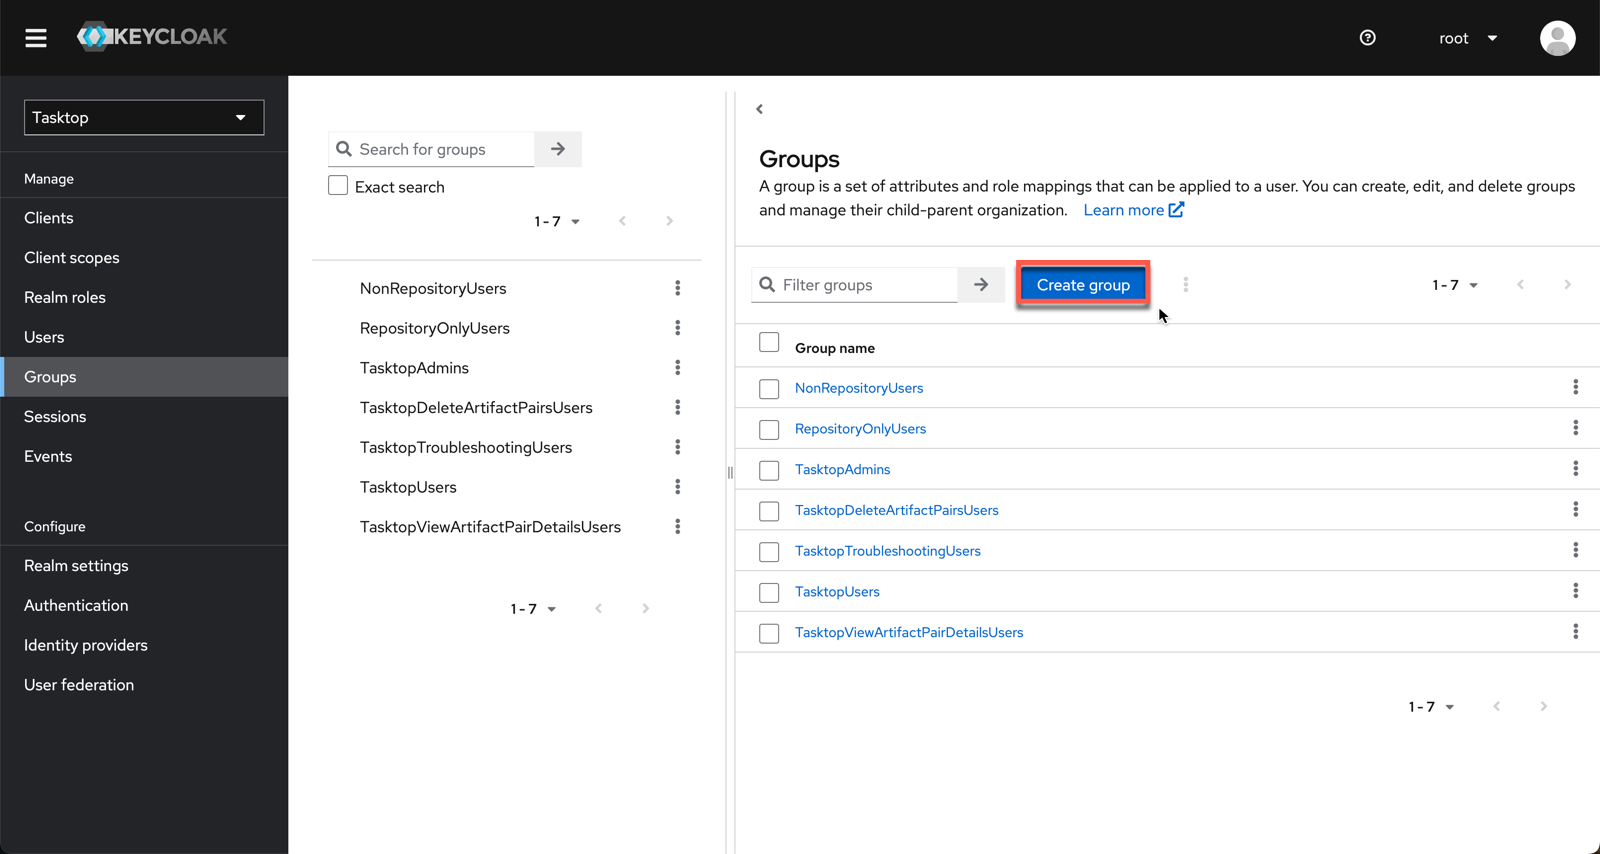
On the Create a group screen, enter TasktopTroubleshootingUsers in the Name field. Then, click Create.
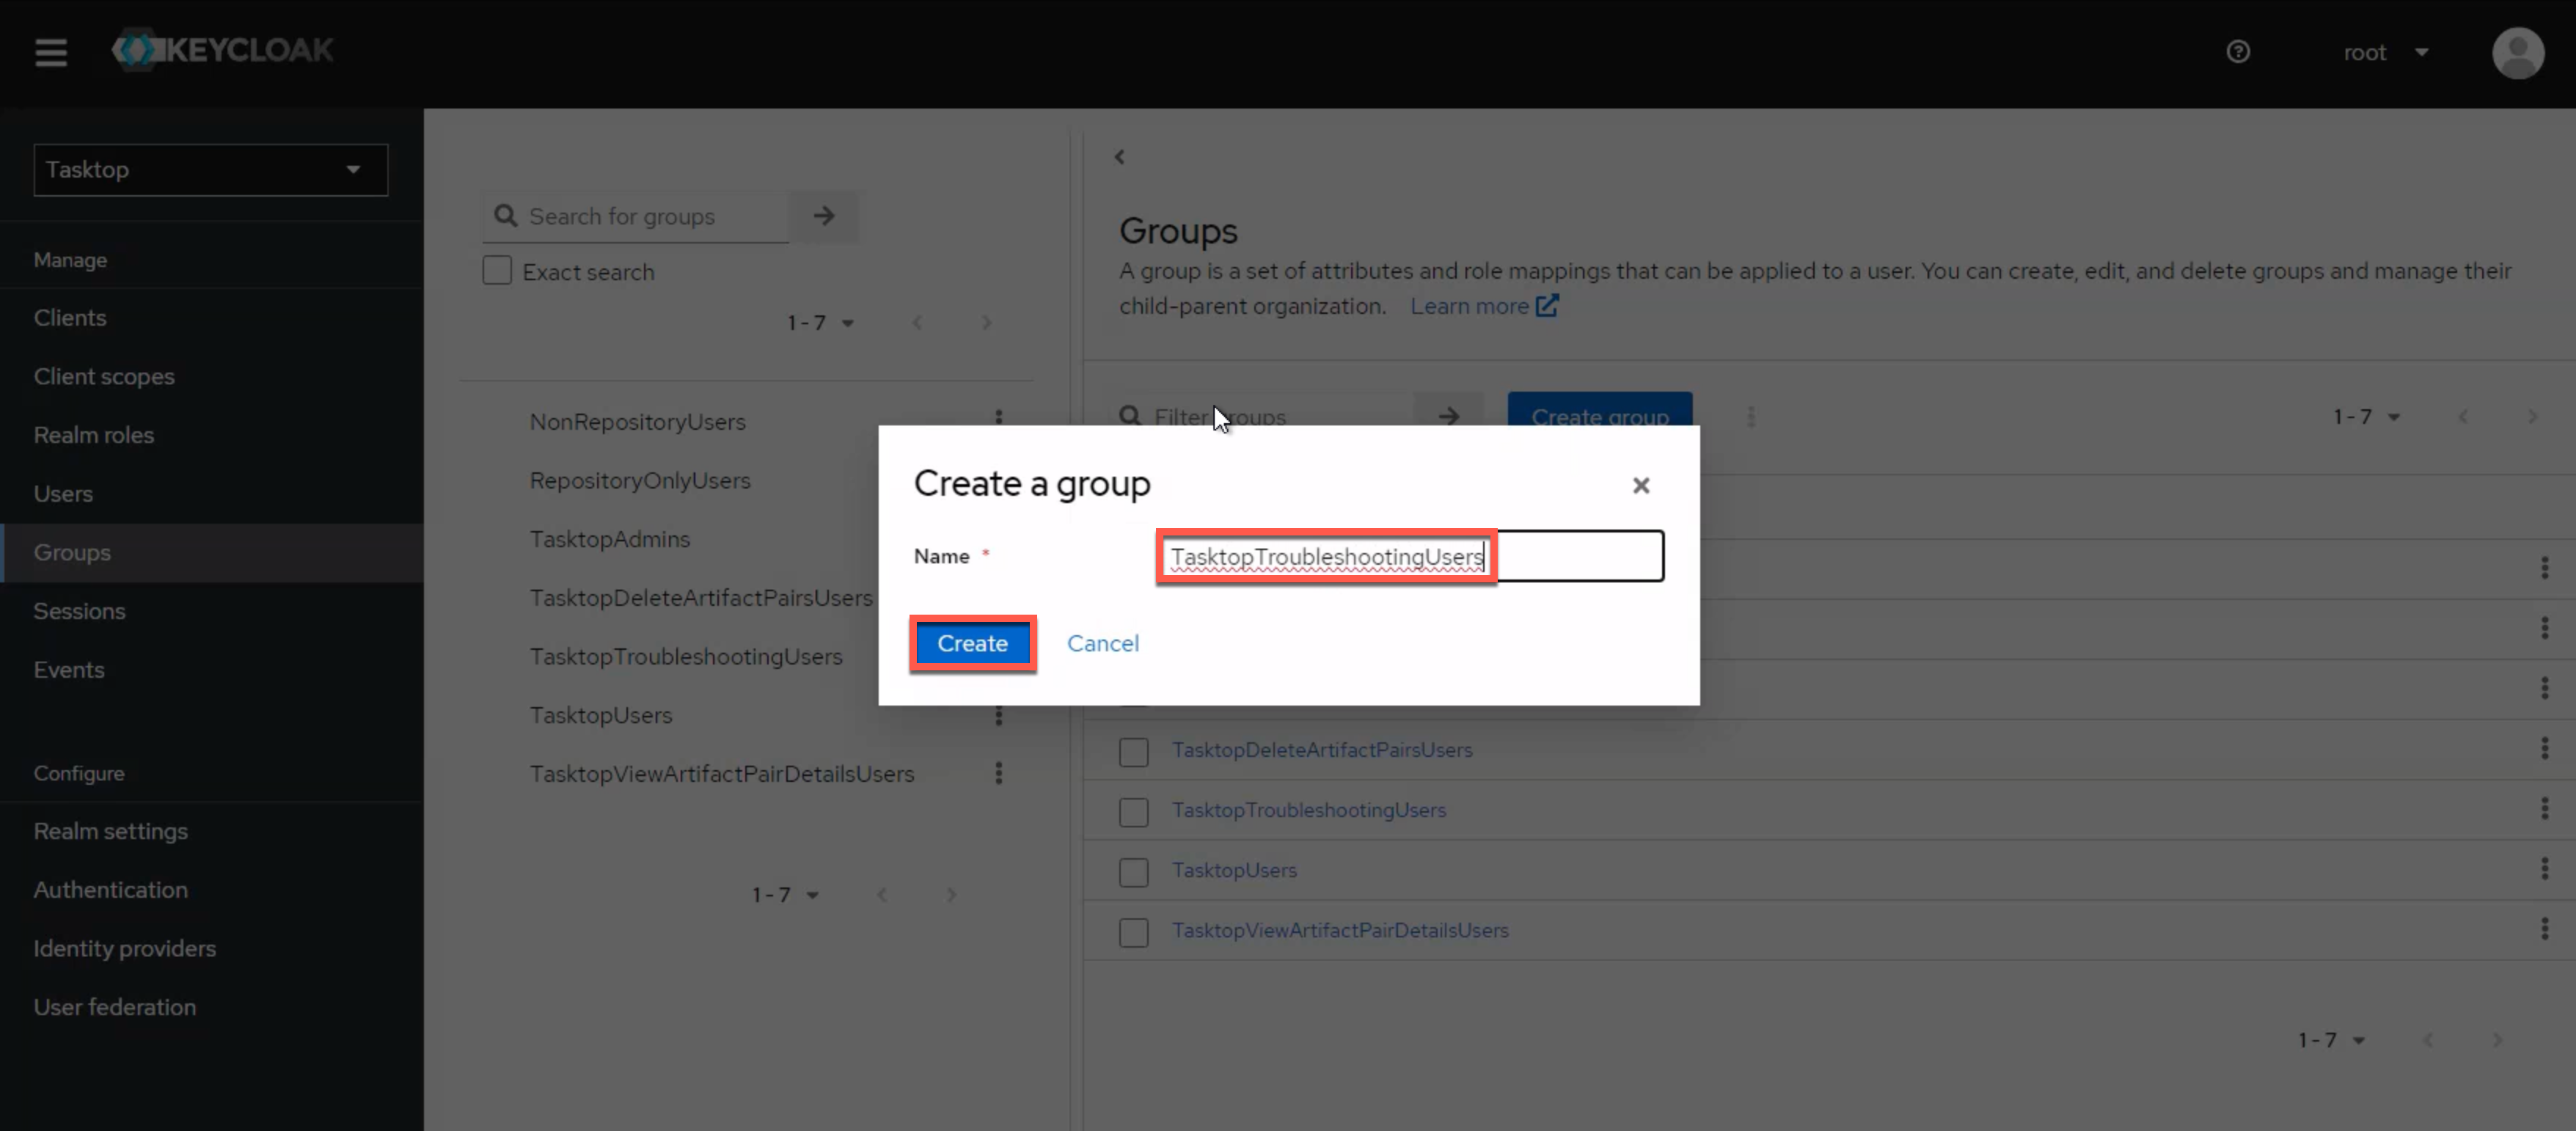
After saving the group, the new group screen will appear.
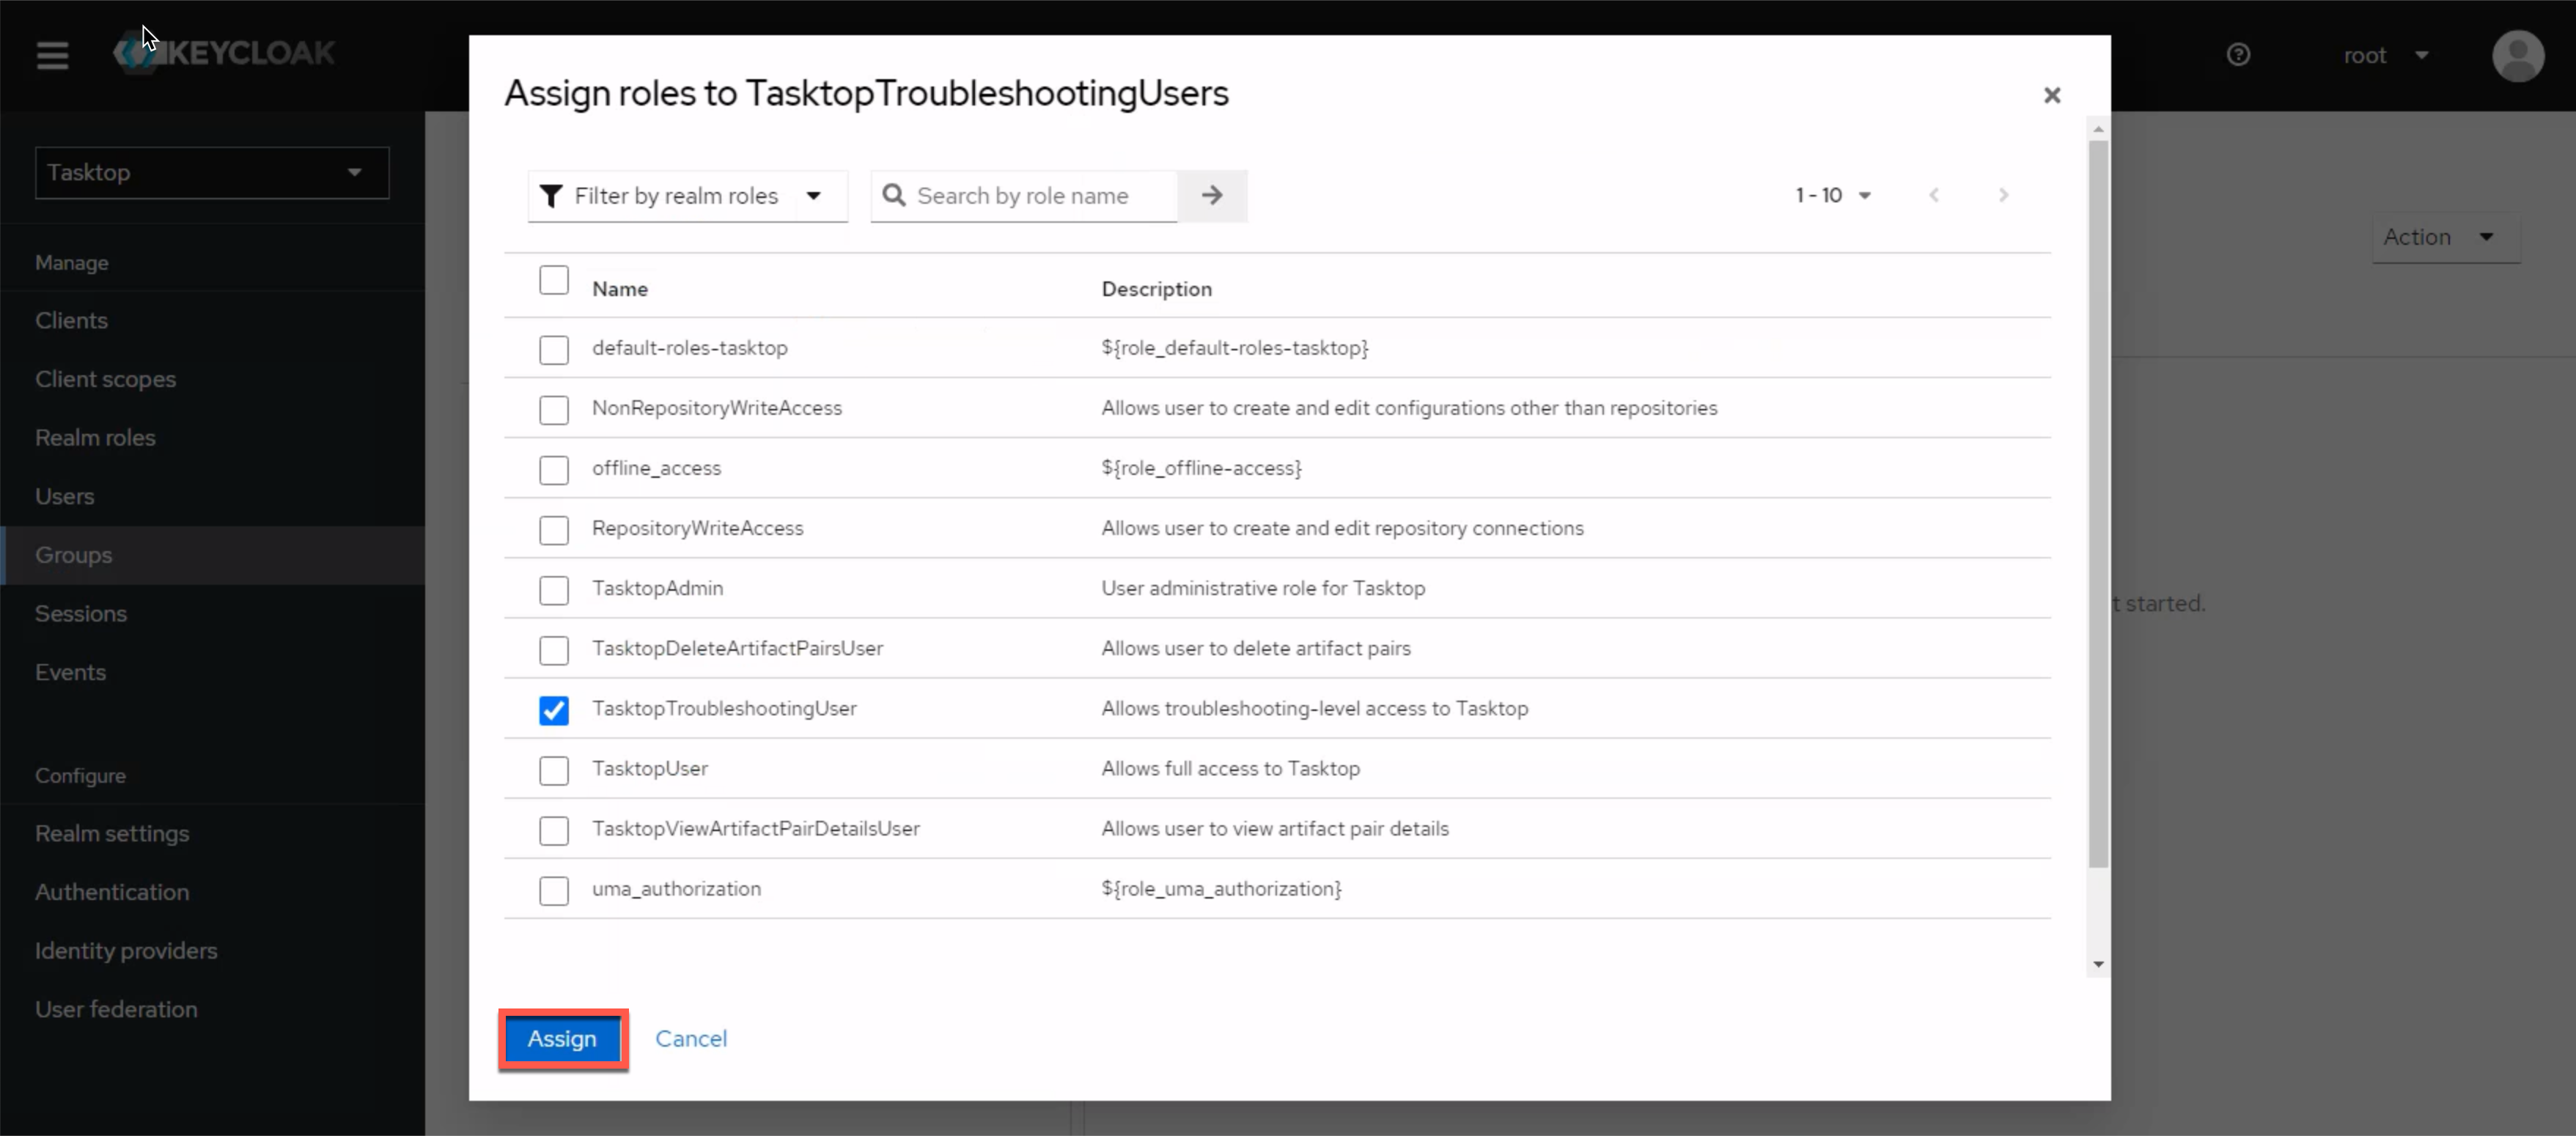
Next, click on the newly-created TasktopTroubleshootingUsers, select the Role mapping tab at the top and then click on the Assign role button below.
![]()
Check the box next to TasktopTroubleshootingUser and click Assign.
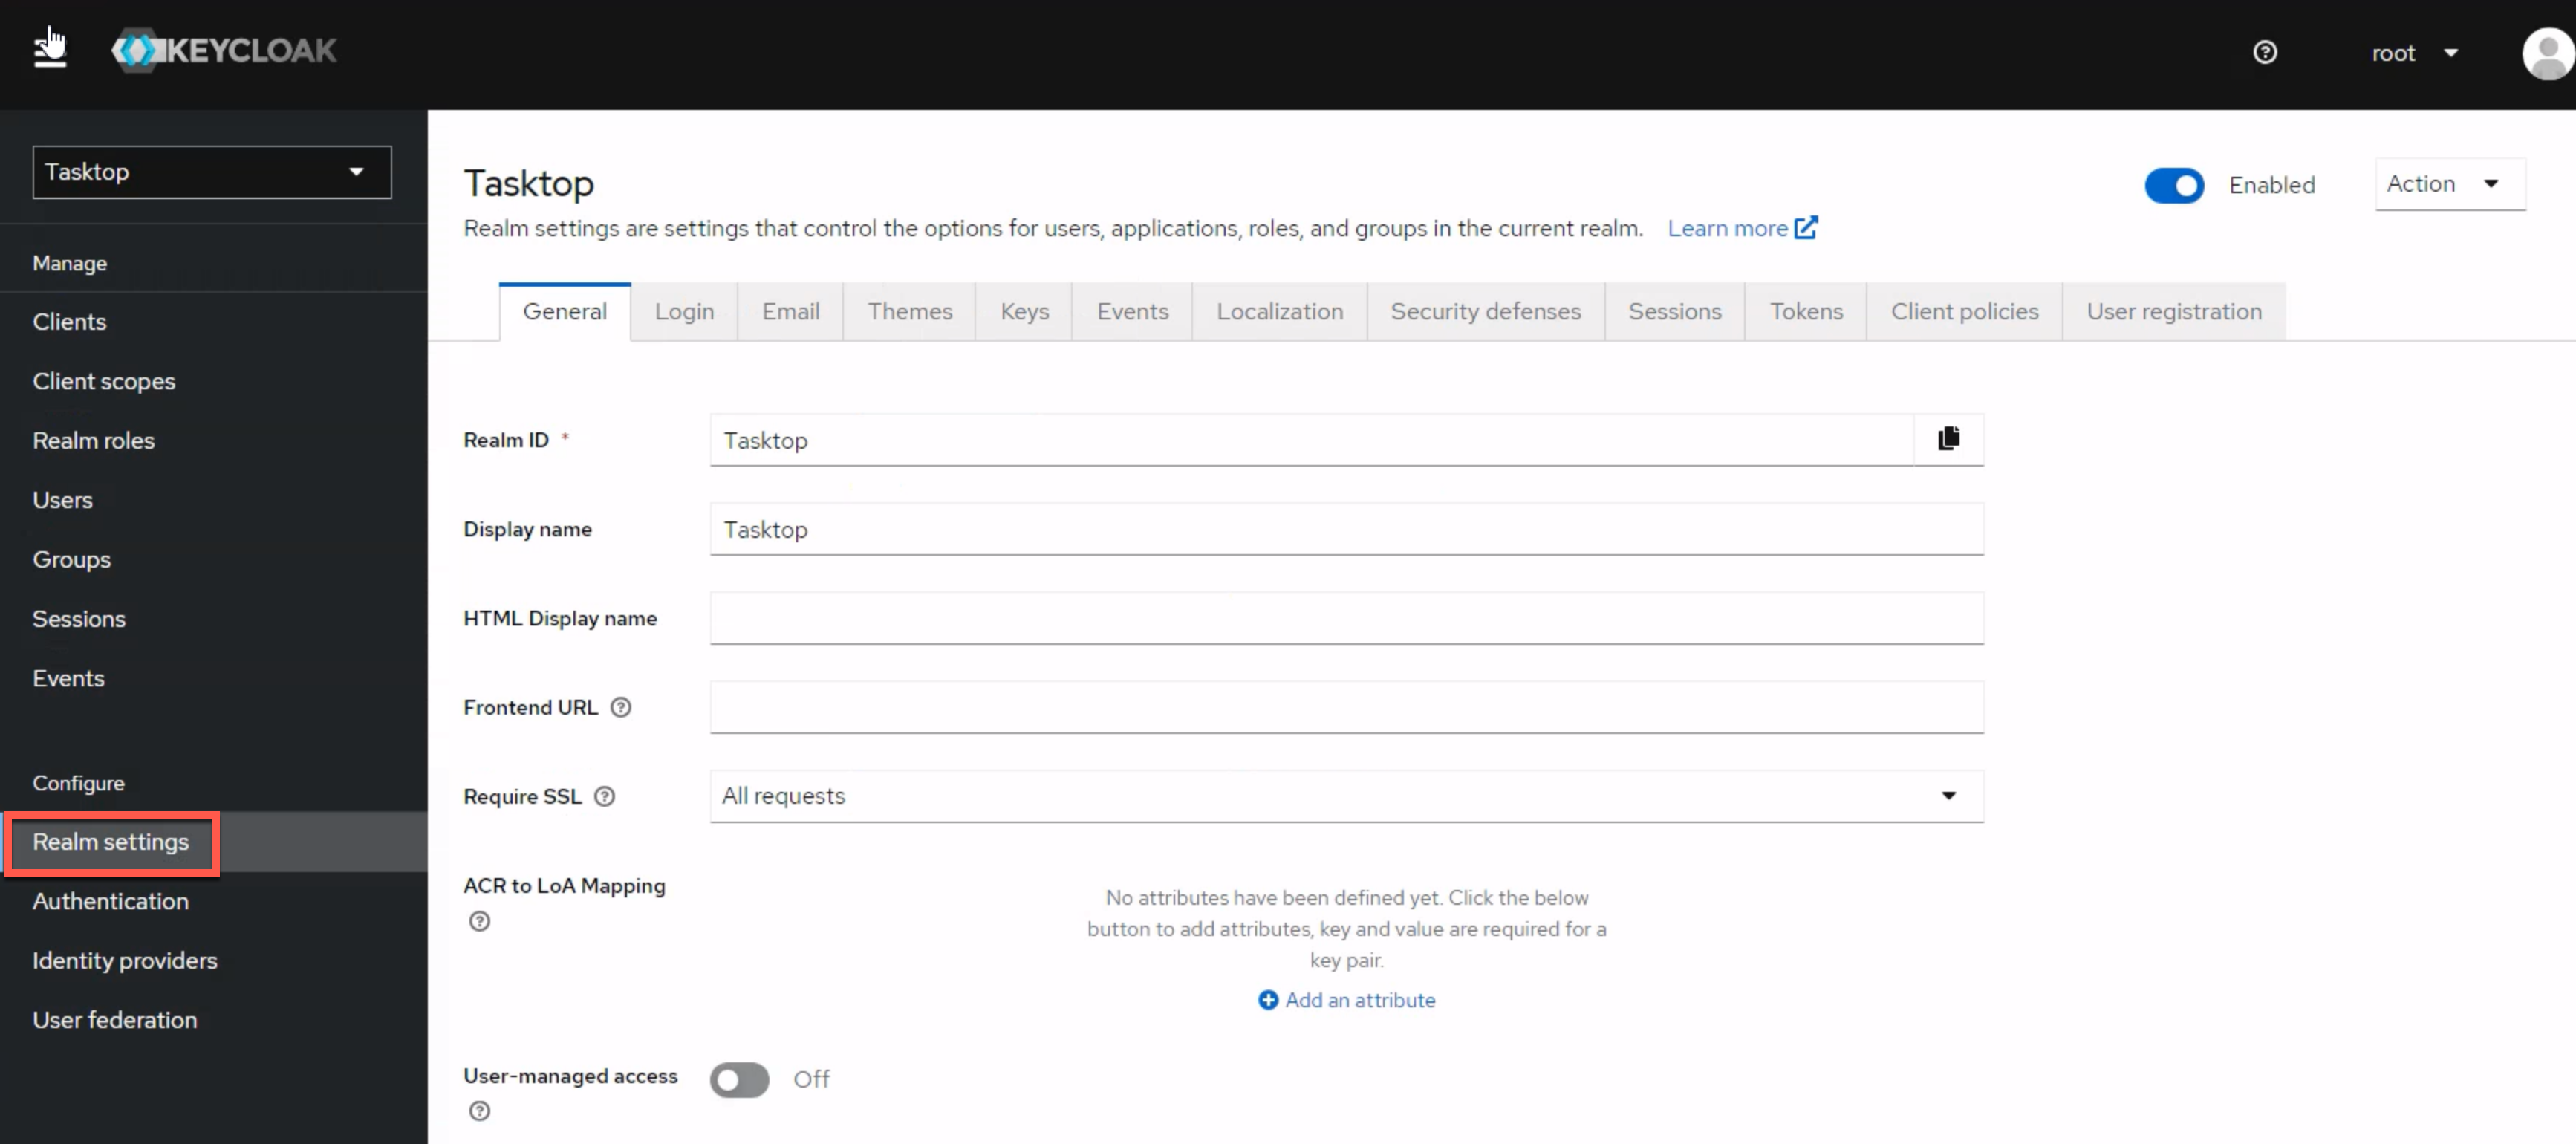
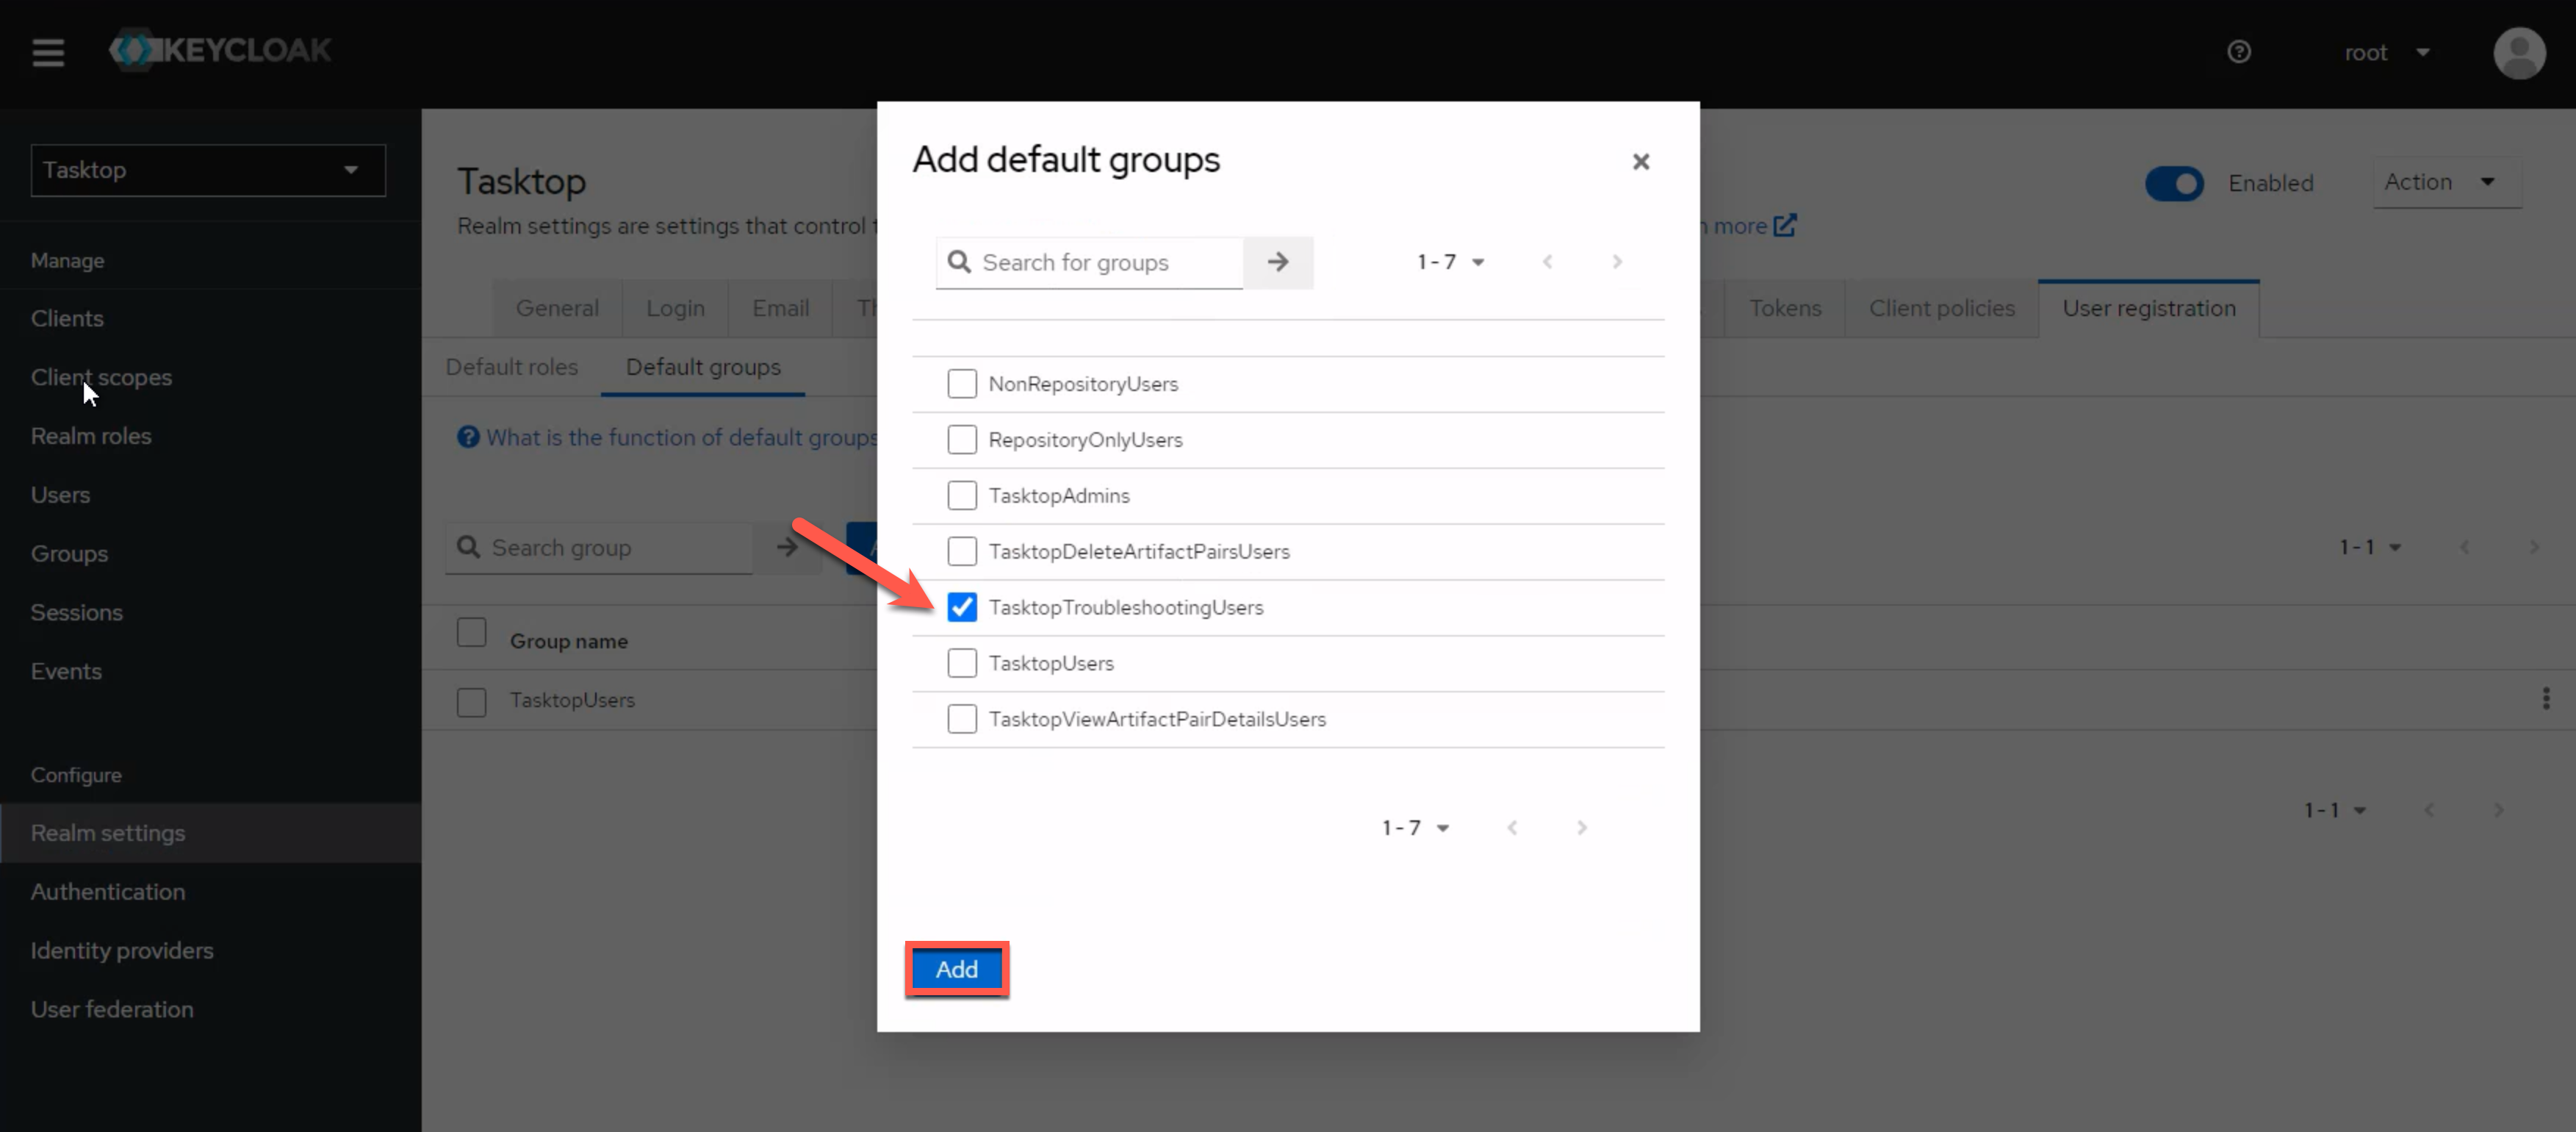
After you have added the user to Assigned Roles, select Realm settings in the left column.
Click the User registration tab at the top, and then the Default groups option below.Remove any existing groups under Default groups.
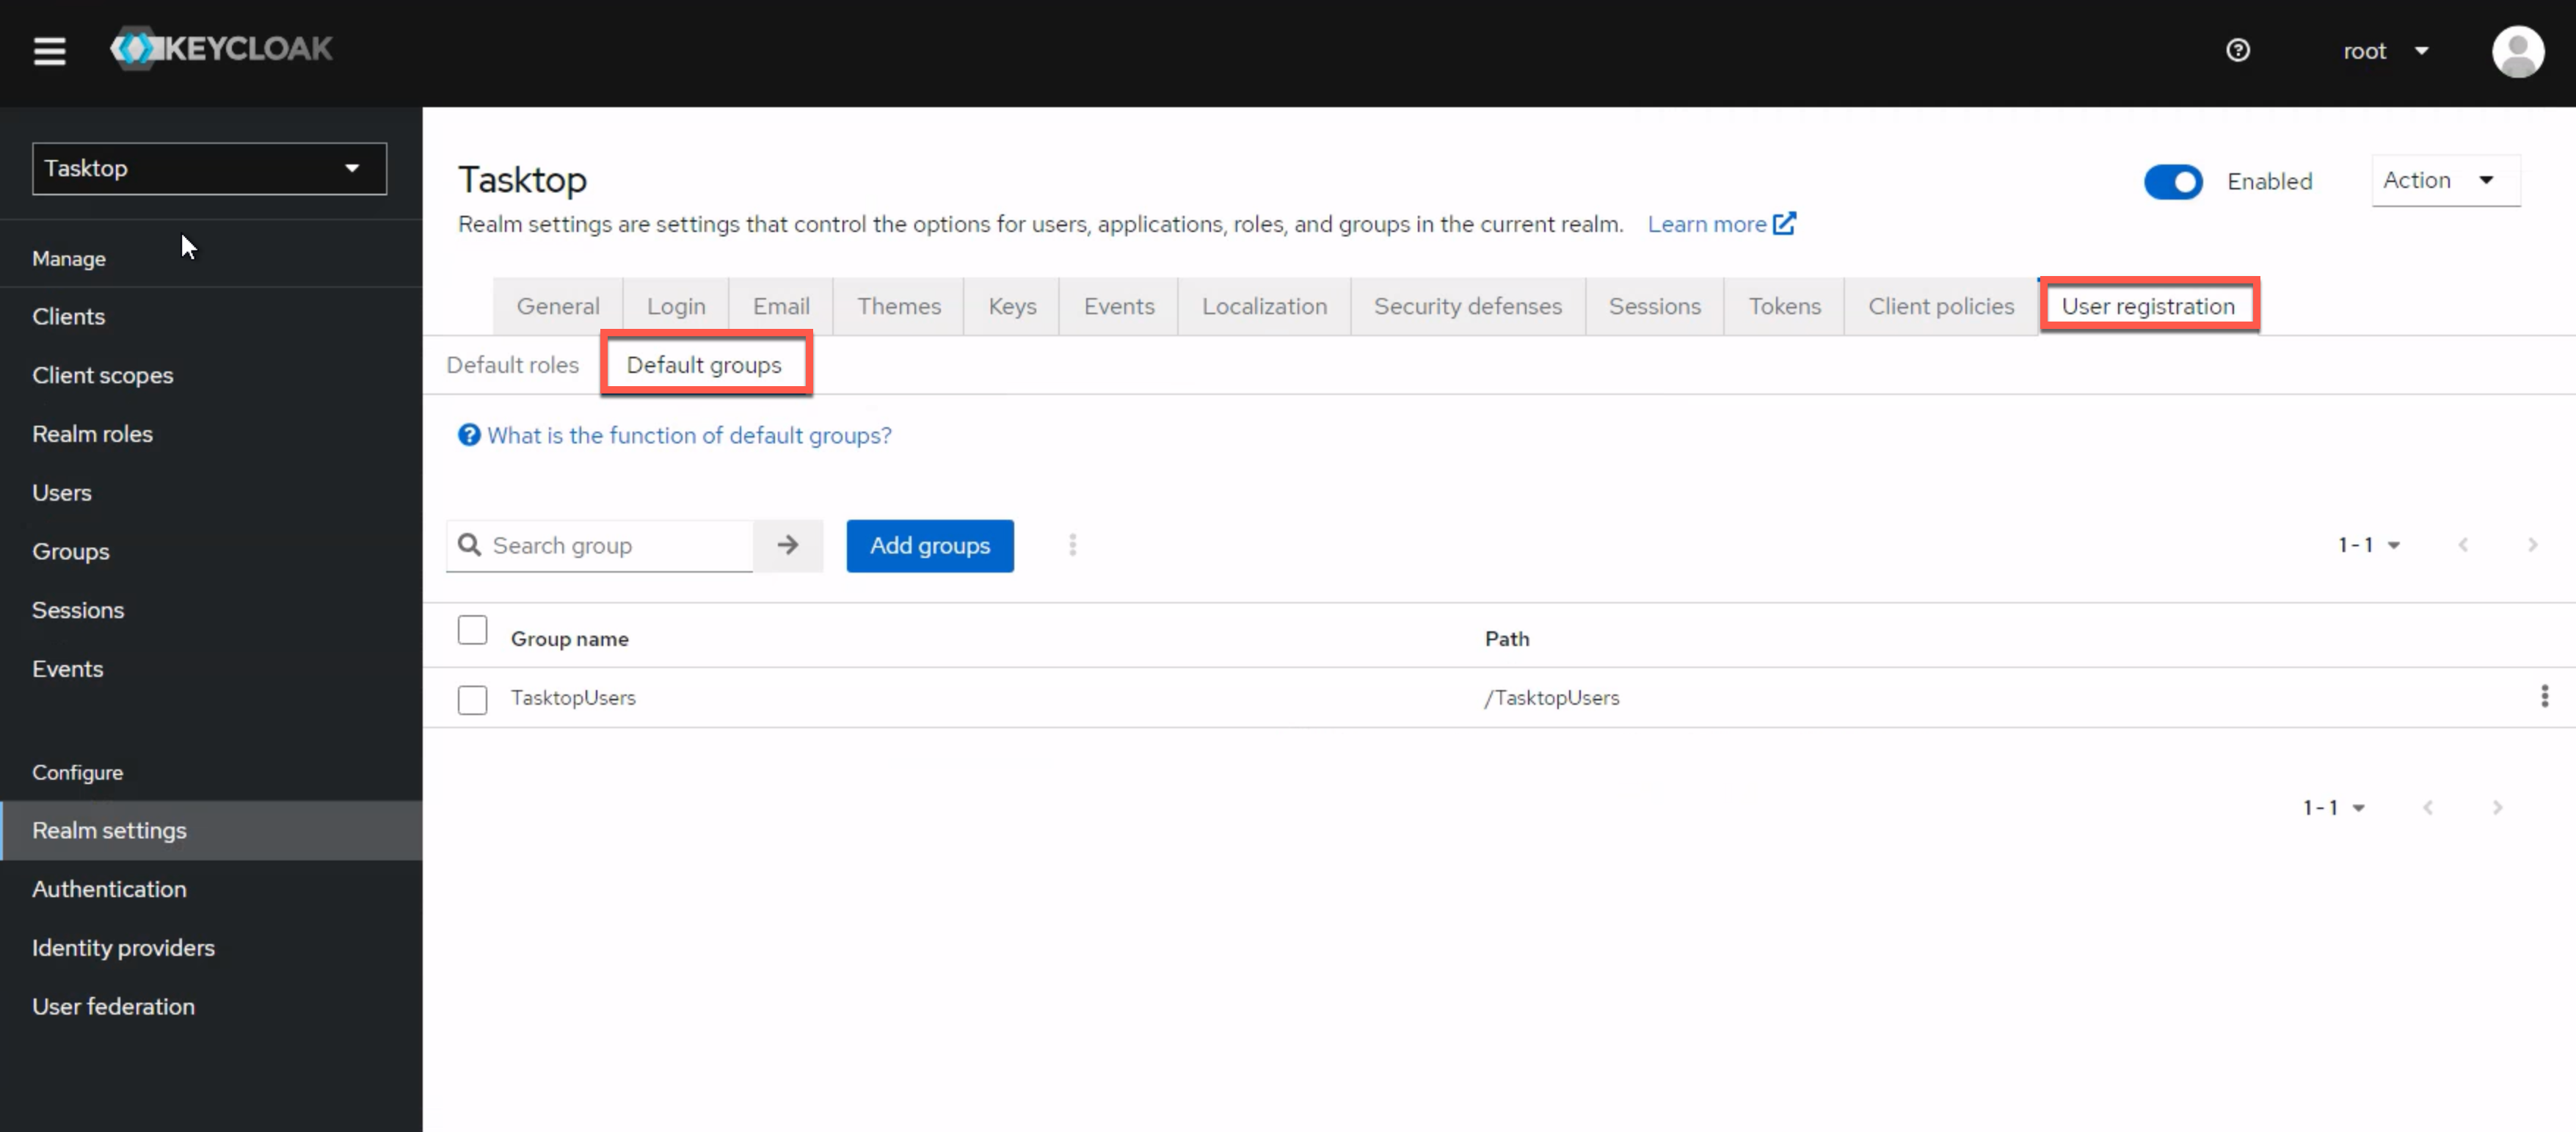
TasktopTroubleshootingUsers.
19.4 - 21.1
This section is only applicable to Planview Hub version 19.4 - 21.1.
Upon installation, new users will default to having the TasktopUser role. If you'd like to set the default to TasktopTroubleshootingUser, please follow either set of instructions below.
Setting the Default Troubleshooting User Group Using a Script
To configure the troubleshooting user role, we provide a script that will create the TasktopTroubleshootingUser role in your Keycloak instance, and replace the default TasktopUsers group with the TasktopTroubleshootingUsers group.
Note: This script can only be used if you have provided a valid SSL certificate as described in the SSL Certificate Installation section. If you have not provided such a certificate, skip to the Creating the troubleshooting user role via the Keycloak admin console section below.
Windows
Run the add-troubleshooting-user.bat script in C:\Program Files\Tasktop\utility-scripts, providing the relevant information when prompted.
Linux
Run the add-troubleshooting-user.sh script in <installation location>/Tasktop/utility-scripts, providing the relevant information when prompted.
Setting the Default Troubleshooting User Group via the Keycloak Admin Console
If you have not provided a valid SSL certificate, you can set the troubleshooting user group as the default via the User Administration Console. The console can be accessed by following the instructions in the Getting Started section.
After logging in, navigate to the Realm settings section in the left column.
Select the User registration tab, and then the Default groups option below. Remove any existing groups under Default groups.
TasktopTroubleshootingUsers.
21.2 and later
This section is only applicable to Planview Hub version 21.2 and later.
Upon installation, new users will default to having the TasktopUser role. If you'd like to set the default to TasktopTroubleshootingUser, please follow the instructions below.
Setting the Default Troubleshooting User Group via the Keycloak Admin Console
If you have not provided a valid SSL certificate, you can set the troubleshooting user group as the default via the User Administration Console. The console can be accessed by following the instructions in the Getting Started section.
After logging in, navigate to the Realm settings section in the left column.
Select the User registration tab, and then the Default groups option below. Remove any existing groups under Default groups.
Configuring LDAP User Management
Required Directory Information
Before configuring LDAP, please check you have the following required pieces of information available for your specific Active Directory (AD) domain.
-
The fully qualified domain name (FQDN) for the AD service,
- example: 'demo.tasktop.com'
- An AD user account and credentials; The user will need read / view access to Users, Groups and Organizational Units (OU). We suggest a specific restricted account be setup in AD for this purpose.
- example: 'service_tasktop'
- An AD user group; The group(s) will be used to store specific users, who will have access to Planview Hub.
- example: 'Tasktop Users'
- A tool such as ADSIEdit, which is able to give your the specific information about the structure of your AD domain setup.
- ADSIEdit is part of Microsoft Windows Remote Server Administration Toolset (RSAT). This can be downloaded from Microsoft RSAT page, or enabled on a server by adding the RSAT feature.
- Alternatively, ask your Domain Administrators for all of the following information:
- CN/DN for Hub User (mentioned above)
- CN/DN for the Hub User Group (mentioned above)
- User, mail; username and name attributes (the specific name for each attribute)
- OU root for all users
- LDAP FQDN server URL
Importing SSL Certificates
If you would like to connect to an LDAP server, you will need to import the SSL certificate into the keystore of your Hub product and restart it. To import the certificate to the keystore, see the following:
- Shut down your Planview Hub instance (including Keycloak)
- Obtain the certificate and certificate chain for your LDAP server. You may be able to do this using a command like the following on Linux
- echo -n | openssl s_client -connect <ldap-server>:636 | sed -ne '/-BEGIN CERTIFICATE-/,/-END CERTIFICATE-/p' > ldapserver.pem
- In command prompt enter the following:
- <path_to_jre>/bin/keytool -import -trustcacerts -keystore <path_to_keystore> -storepass <password> -alias ldap -file ldapserver.pem
- <path_to_jre> refers to the jre folder in the Hub install location.
- <path-to-keystore> refers to the path to the truststore referenced here.
- <password> is the password of your keystore or changeit if you are using the default
- the keytool command should be run for each certificate exported. Each will need to have a unique alias.
- the default password is: changeit
- <path_to_jre>/bin/keytool -import -trustcacerts -keystore <path_to_keystore> -storepass <password> -alias ldap -file ldapserver.pem
- Start your Hub product.
- Try again to connect to LDAP Server.
Accessing Keycloak Configuration Tool
1. To access advanced user management capabilities, click the User Administration Console link at the bottom of the Planview Hub login screen.
2. Log in using the default credentials listed in the Getting Started section.
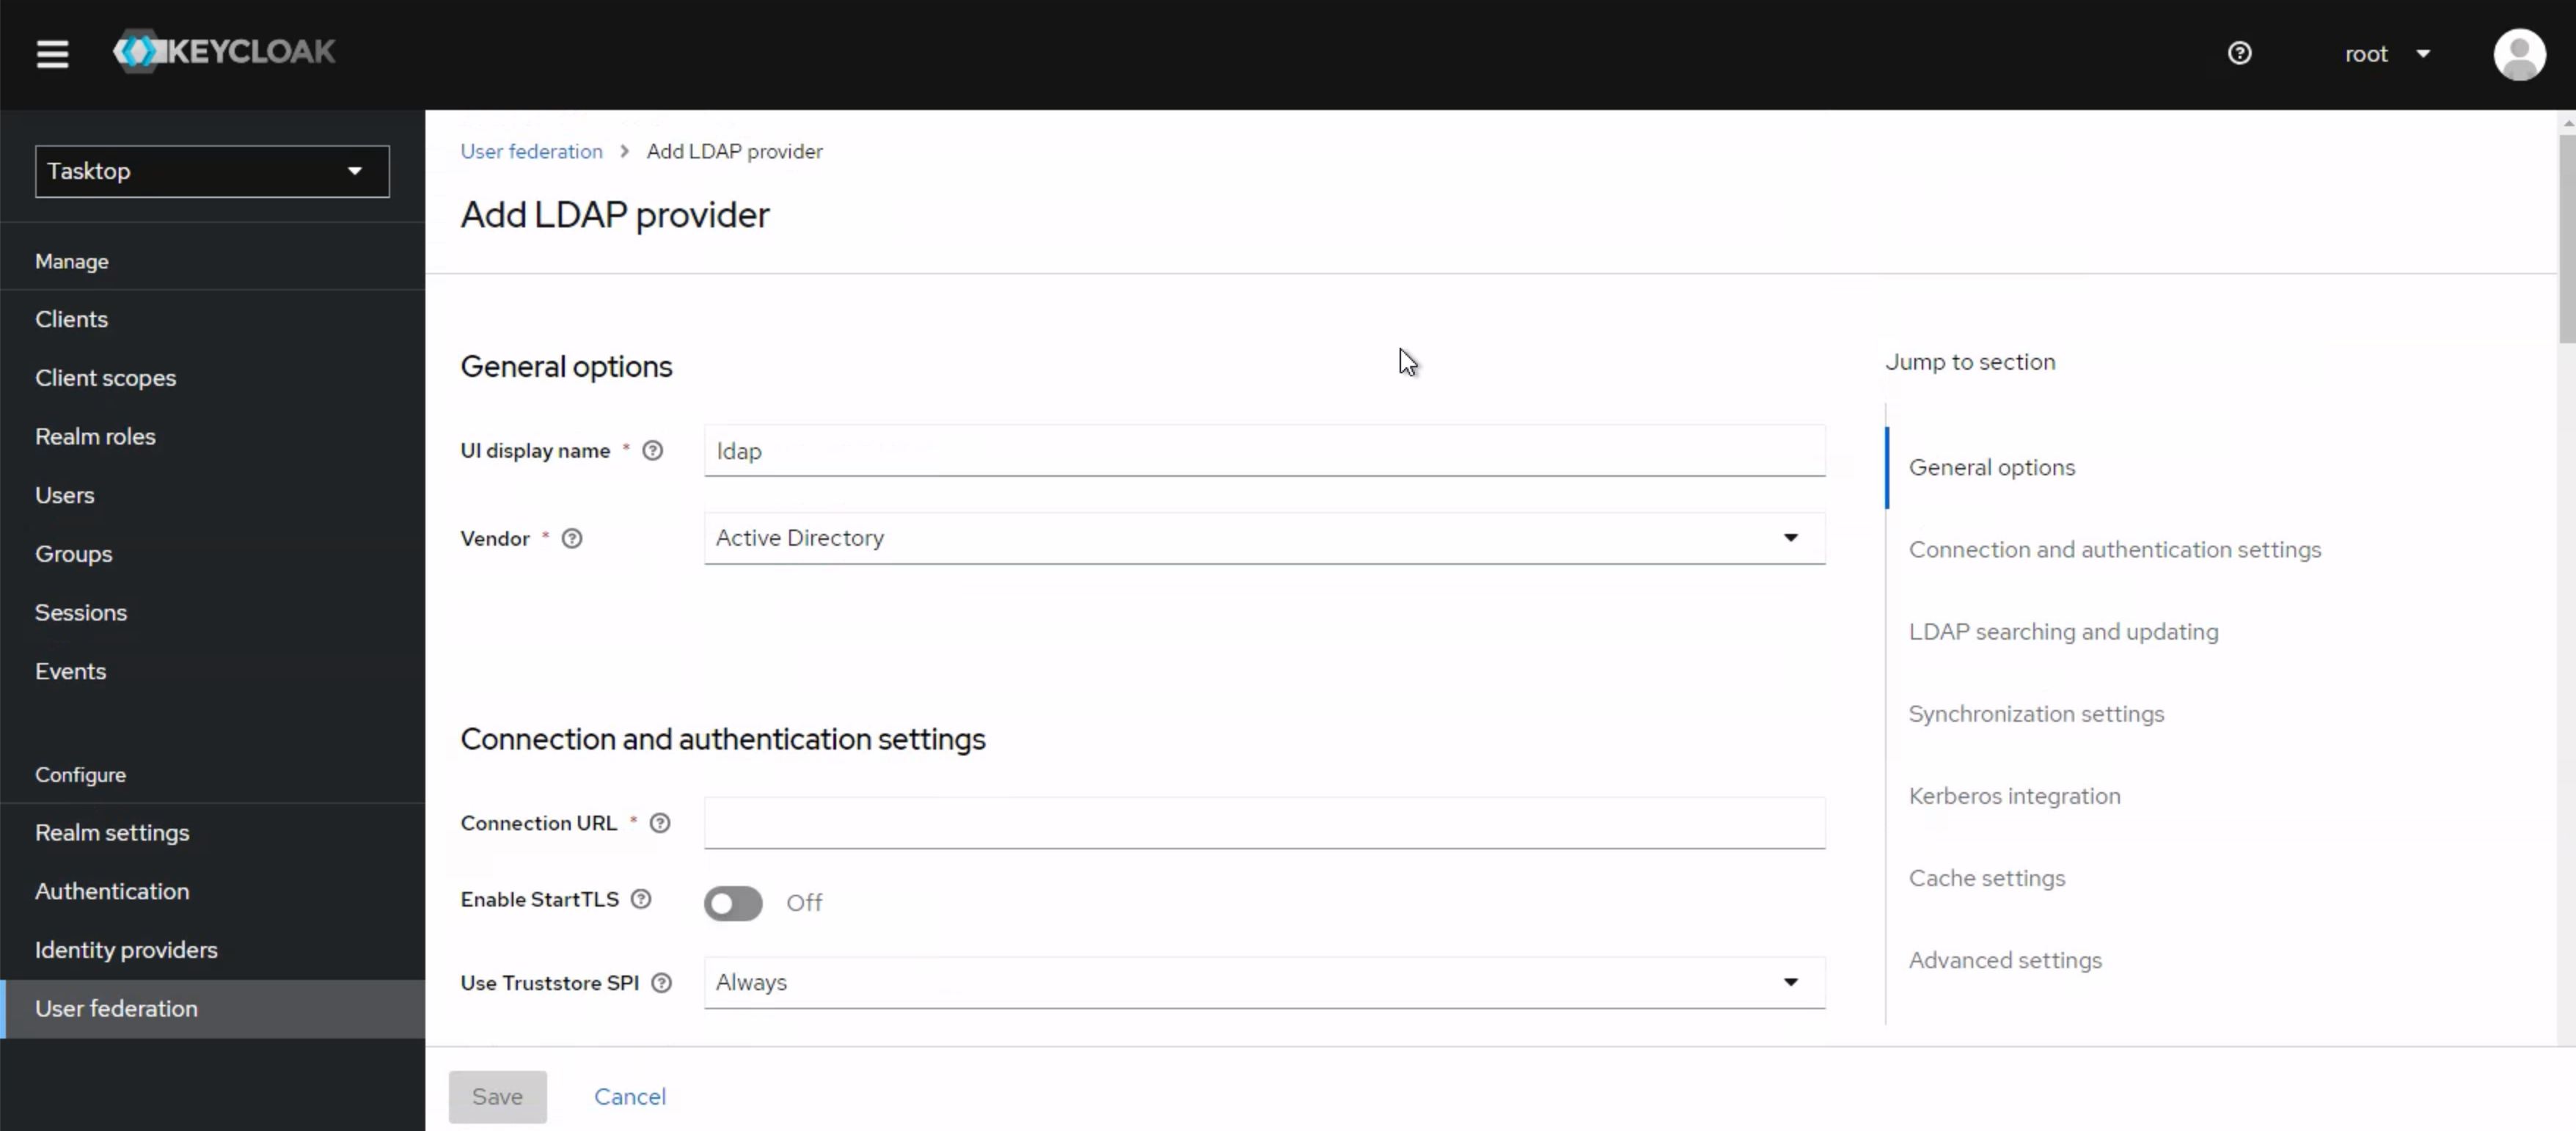
3. Select the User Federation link from the left side panel, then click on Add Ldap providers.

4. The LDAP configuration screen should now be displayed.
Configuring LDAP for Active Directory
This section will guide you through creating a connection to an LDAP authentication server.
Note: Images provided are only a sample of settings — please ensure that you enter information specific for your environment.
Required Settings
Note: Follow the steps above to access the LDAP configuration page.
See the required settings below:
- Console Display name: This is the name you'd like to give your connection.
- Priority: If you have more than one User Federation configured, this setting specifies in which order to search each user federation service, 0 is first.
- Edit Mode:
- READ_ONLY: This setting reads the attributes from Active Directory (AD). It will not attempt to modify the AD service or store any local changes to user information.
- WRITABLE: This setting may enable some changes to be written back to AD. The user account communication with AD will need access to modify the specific objects attribute.
- UNSYNCED: This setting reads the attributes from AD and synchronizes them to a local store in the internal Keycloak database. Users and Administrators can make changes to the user objects, but those changes will only be stored for the local Hub instance. This will not write back to Active Directory.
- Tip: The recommended mode is READ_ONLY.
- Sync registrations: If a new user is created in Planview Hub, this will allow that user to also be created in AD if you have WRITABLE selected and access to create user objects in the AD domain. The default setting is OFF.
- Vendor: Specifies which vendor software to use for this LDAP configuration. If you are using something other than Active Directory, the attributes and locations may be different. This will also pre-fill some default values.

- Username LDAP attribute: This should be the default username attribute as specified in your domain. The default for Microsoft AD is sAMAccountName.

- RDN LDAP attribute: The Relative Distinguished Name LDAP attribute is a list of attributes which will be searched when a user attempts to authenticate to Planview Hub. The attributes listed here should be unique within an OU level or unique within a domain. The following options are a good base to use:
- cn (canonical name): the full name (e.g., John Doe)
- sAMAccountName: the username (e.g., john.doe)
- mail: the email address (e.g., john.doe@demo.tasktop.com)

- UUID LDAP attribute: The User Unique Identification attribute is a complicated long string of characters which uniquely identify a single object within AD. For unix based LDAP this is often uid. The default for Microsoft AD is objectGUID.

- User Object Classes: These are the 'types' of objects which can be used to authentication against. You can specify more if your organization has other specific identifiers such as 'staff' or 'contractor'. The default for Microsoft AD is: person, organizationalPerson, user.

- Connection URL: This is the specific string which should be the FQDN of your LDAP service. It's default format for AD will be 'ldap://demo.tasktop.com'. If you have SSL configured then you can also use ldaps://demo.tasktop.com (SSL is not enabled by default in Microsoft AD).

Tip: At this point, we recommend selecting the Test connection button to check that Planview Hub is able to communicate with your LDAP server. You should see a green message at the top of your screen indicating a successful connection to your LDAP server.
- Users DN: This is the Distinguished Name for the location where you can find your users. You can find the Users DN (and any other Distinguished Names) via the ADSIEdit tool in Windows. Once the tool is open, you will need to connect to the AD domain for your organization. Once connected, the domain will be presented in a tree-view on the left, where you can drill down to the specific branches until you find the specific OU or User object you want details for. We recommend using this utility as it will allow you to copy/paste the specific DN information directly (any typing mistakes will result in error when testing).

The format for this string will be a number of OU= followed by a number of DC= separated by a comma.
Tip: Spaces are allowed in this string if they exist in your structure.
- Authentication Type: If using Microsoft Active Directory, you will be required to authenticate. Some non-Microsoft systems do not require authentication— if this is the case, select none.
- Bind DN: This is the Distinguished Name for the user account which you will use to authenticate against your LDAP service to allow Planview Hub to authenticate users. The Bind DN user account can be anywhere within the AD domain, however, we suggest that you have a dedicated account specifically for Planview Hub. The format for this string will be a singular CN= for the Canonical Name of the user account, followed by possible OU= which is followed by the DC= items all separated by a comma.
Tip: Spaces are allowed in the string if they exist in your structure.

- Bind Credential: This is the password for the user account configured in the Bind DN.
Tip: Once you have entered the password, click Test authentication to confirm that Planview Hub is successful in authenticating itself against your Active Directory domain. You should see a green message at the top of your page as an indication of a successful authentication.
- LDAP Filter: This is where you will configure a filter to specify which user accounts will have access to authenticate in Planview Hub. If you leave this blank, all users within your Users DN OU in the AD environment will have access. The structure of the string is as follows:
- () : braces to start and finish
- Either
- &() : for performing an 'AND' operation (i.e., all items must match)
- |() : for performing an 'OR' operation (i.e., where any items can match)
- Specific attribute related condition (e.g., matching objects in a group)
- Users in a specific group can use memberOf=
- memberOf=CN=Tasktop Hub Users,OU=Resource Groups,OU=Groups,OU=Tasktop,DC=demo,DC=tasktop,DC=com
- Users and (nested) Groups in a specific group require memberOf:1.2.840.113556.1.4.1941:=
- memberOf:1.2.840.113556.1.4.1941:=CN=Tasktop Hub Users,OU=Resource Groups,OU=Groups,OU=Tasktop,DC=demo,DC=tasktop,DC=com
- You can also specify that a particulate attribute is equal to some value (e.g., objectCategory=Person)

- Search Scope: The Configuration of this depends on whether you have all of your AD users in a single OU, or if you'd like to search through the OU hierarchy structure. If searching, the Users DN field configured above will need to be the root or lowest-level OU.
- If all users are in a single OU, set this to One Level.
- If users are hierarchically organized in OUs, set this to Subtree.

- Use Trusted SPI: This is used if your environment uses SSL and a client certificate is required. This is not a default AD configuration.
- Connection Pooling: This will allow connections to your AD server to remain open if set to ON, (for specific timeframe) rather than creating a new connection each time a user authenticates.
- Pagination: This allows you to page (or cache) information for active connections from your AD servers.
- Mappers: Go to the Mappers tab at the top of the LDAP user federation you just created. Click Username. Ensure that LDAP Attribute is the same as what you entered in Username LDAP attribute.
Kerberos
Note: Hub does not include instructions for Kerberos setup.
Sync Settings
- Batch Size: Indicates how many accounts will process at once
- Periodic Full Sync: Allows for a sync of all users to occur between Planview Hub and Active Directory. If you have a large number of users constantly authenticating into Hub, it may be useful to enable this. Default is set to OFF.
- Periodic Changed Users Sync: Allows for newly created or updated users to be synced from Active Directory to Planview Hub. If you have the Periodic Full Sync enabled, you should also enable this. Default is set to OFF.
Tip: Save your configuration by clicking Save at the bottom of the page. A green message at the top will indicate that your save was successful.
Additional LDAP Information
Testing
Note: The configuration utility for LDAP requires its own internal authentication. As such, when you test account access it is recommended that you use a separate browser or select a private or incognito browser. If you are already logged in to Planview Hub, you will first need to log out before testing.
- Direct your browser to the default web address of your Hub server, such as https://demo.tasktop.com/
- Enter credentials which should be allowed access to authenticate from the LDAP connection you have just setup
- Retry with a set of credentials which should not have access to Hub. If you are able to log in, check the filter settings again.
Default User Access
By default, all LDAP users will be granted user level access to Planview Hub. If you have configured the troubleshooting user functionality (by running the script or performing manual configuration through the admin console), LDAP users will by default be granted troubleshooting user level access instead. If desired, you can set all new accounts, including LDAP user accounts, to default into a specific group. You can also assign different members to either of the TasktopUsers or TasktopAdmins groups.
To change the default group, use the following instructions:
- Select Groups (under the Manage section) of the right-side bar menu.
- Select the Default Groups tab.
- Add or Remove the TasktopUsers and/or the TasktopAdmins groups to the Default Groups list.
User Management and Security Constraints
Planview Hub's User Management uses Security Constraints as described in the Java Servlet Specification to limit access to authenticated users. Adding additional Security Constraints to the Apache Tomcat configuration can interfere with Security Constraints provided by Planview and enable unauthenticated users to access Planview Hub.
DNS Settings
The server Planview Hub in installed on must be able to resolve the hostname clients will use to access it. This can be accomplished through the DNS configuration. A less preferred option is to configure using the server's hosts file.
The hostname clients use to access Planview Hub must be a valid hostname according to RFC 952. This means it may only contain letters, digits, hyphens, and periods, and may not contain underscores.
Alternative User Management
By default, Planview Hub comes with a user management solution. In the rare scenario where your organization decides not to use Planview Hub's provided user management solution and you still need to ensure that only authorized users are able to access your Planview Hub instance, you can set up Basic Authentication for the Tomcat web server.
Additional information on configuring Tomcat authentication can be found here.
Note: Using this style of user management will mean that all of your users will have the exact same permissions within Planview Hub. There will be no separate roles or permissions within the application.