
General
Introduction
General (Settings) can be accessed by clicking the General tab on the Settings screen.

- Configuration
- Master Password Configuration
- Storage Settings
Configuration
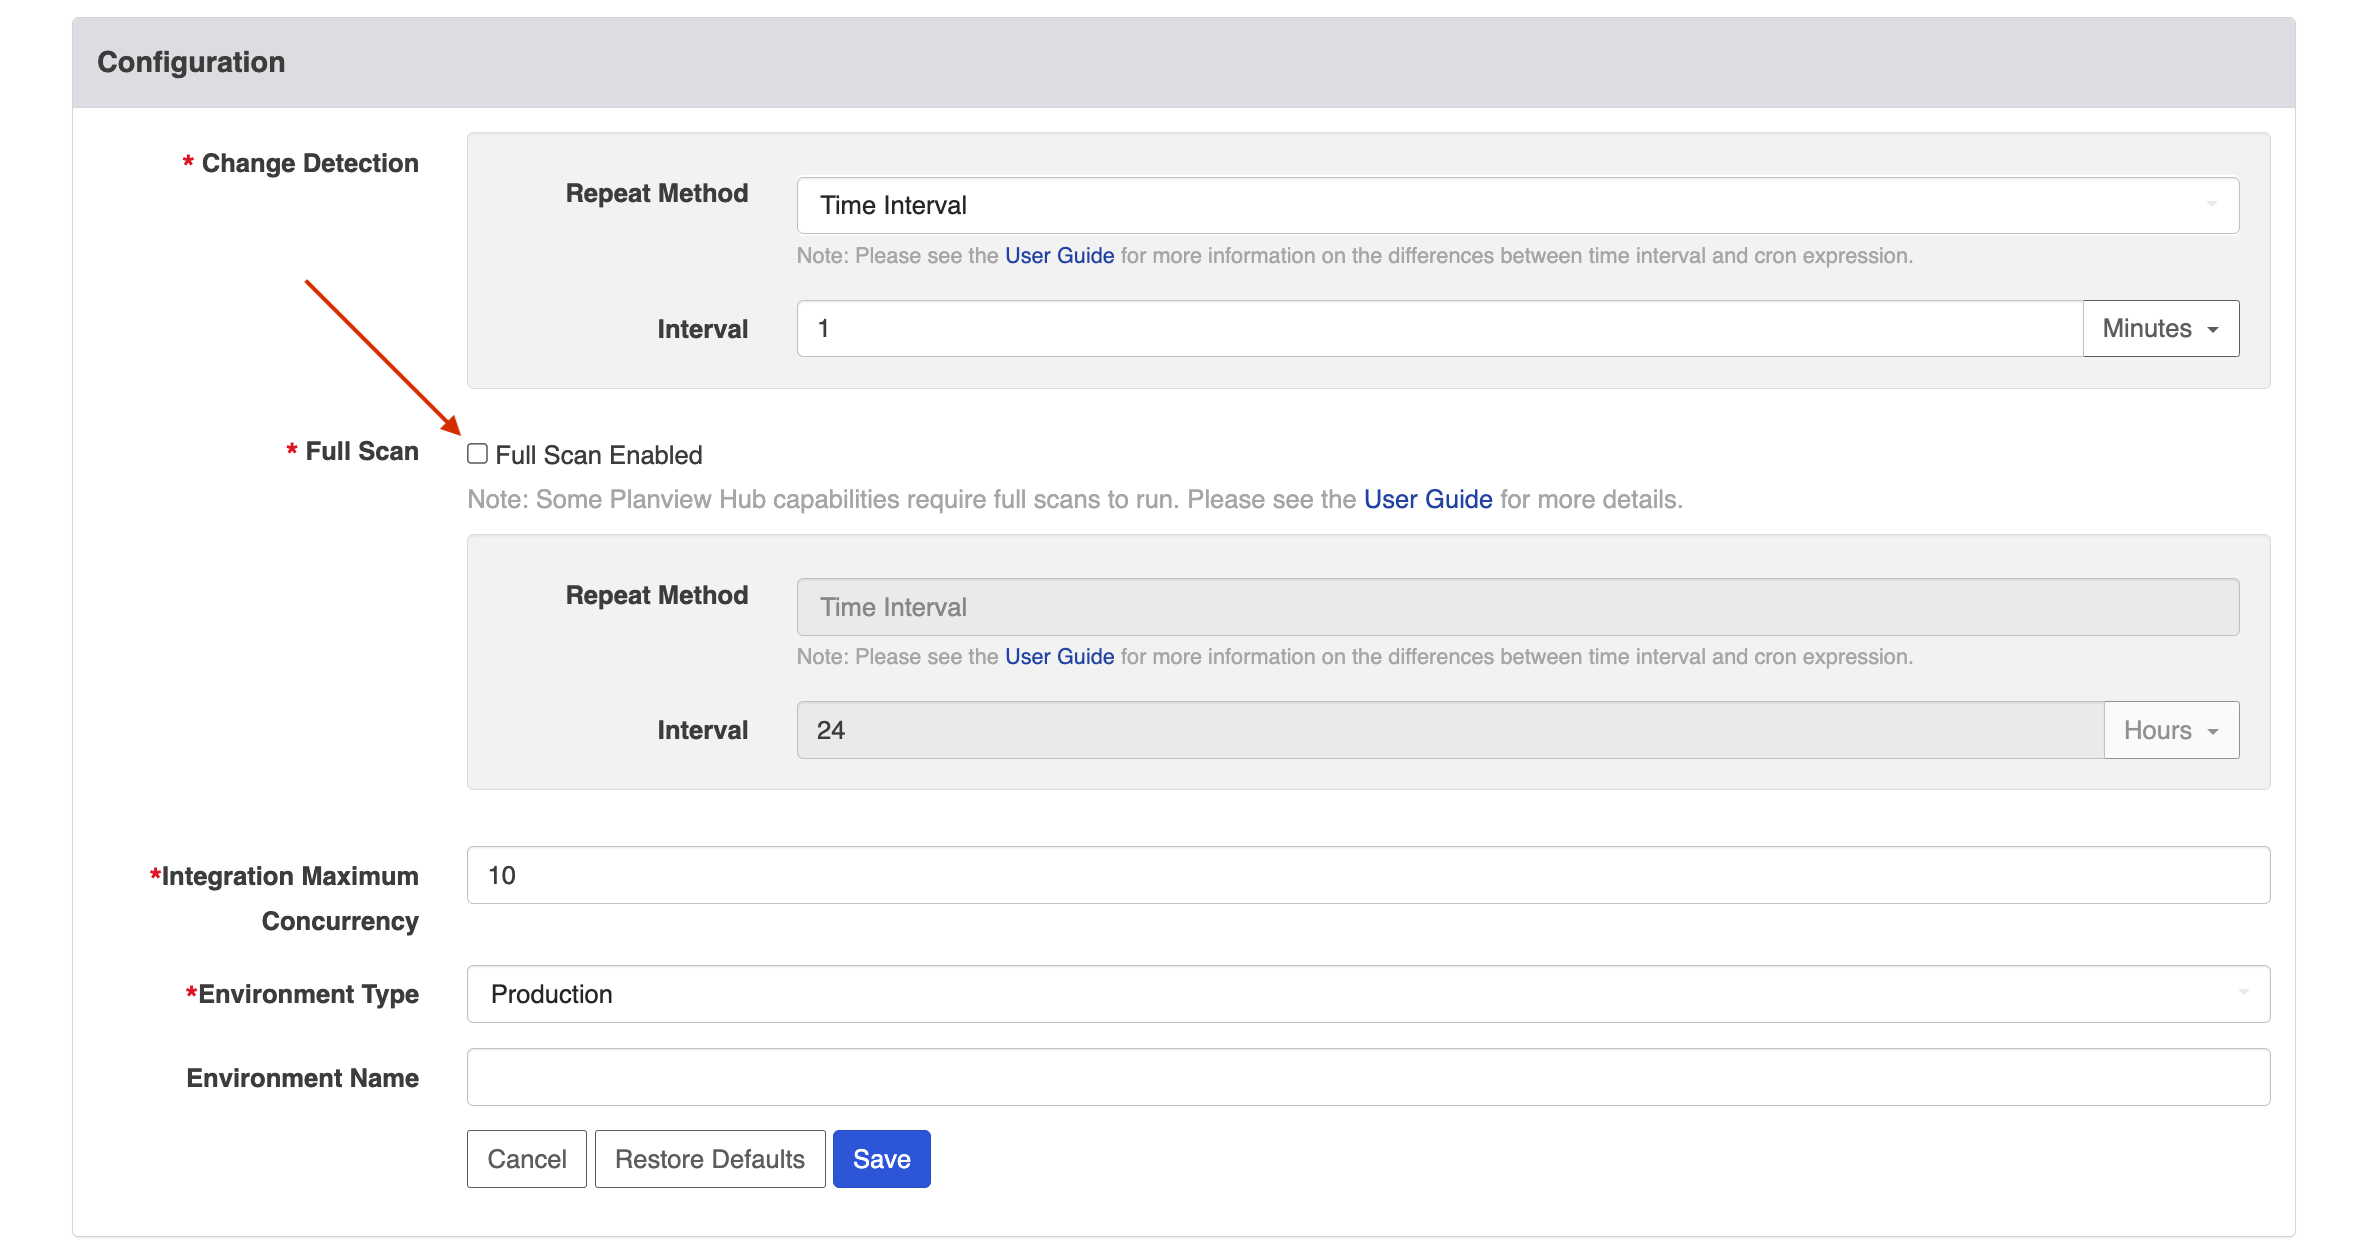
The Configuration section allows the administrator to set the change detection intervals of the connected repositories and to create a label for their Planview Hub instance identifying the environment name and type (i.e., testing or production).
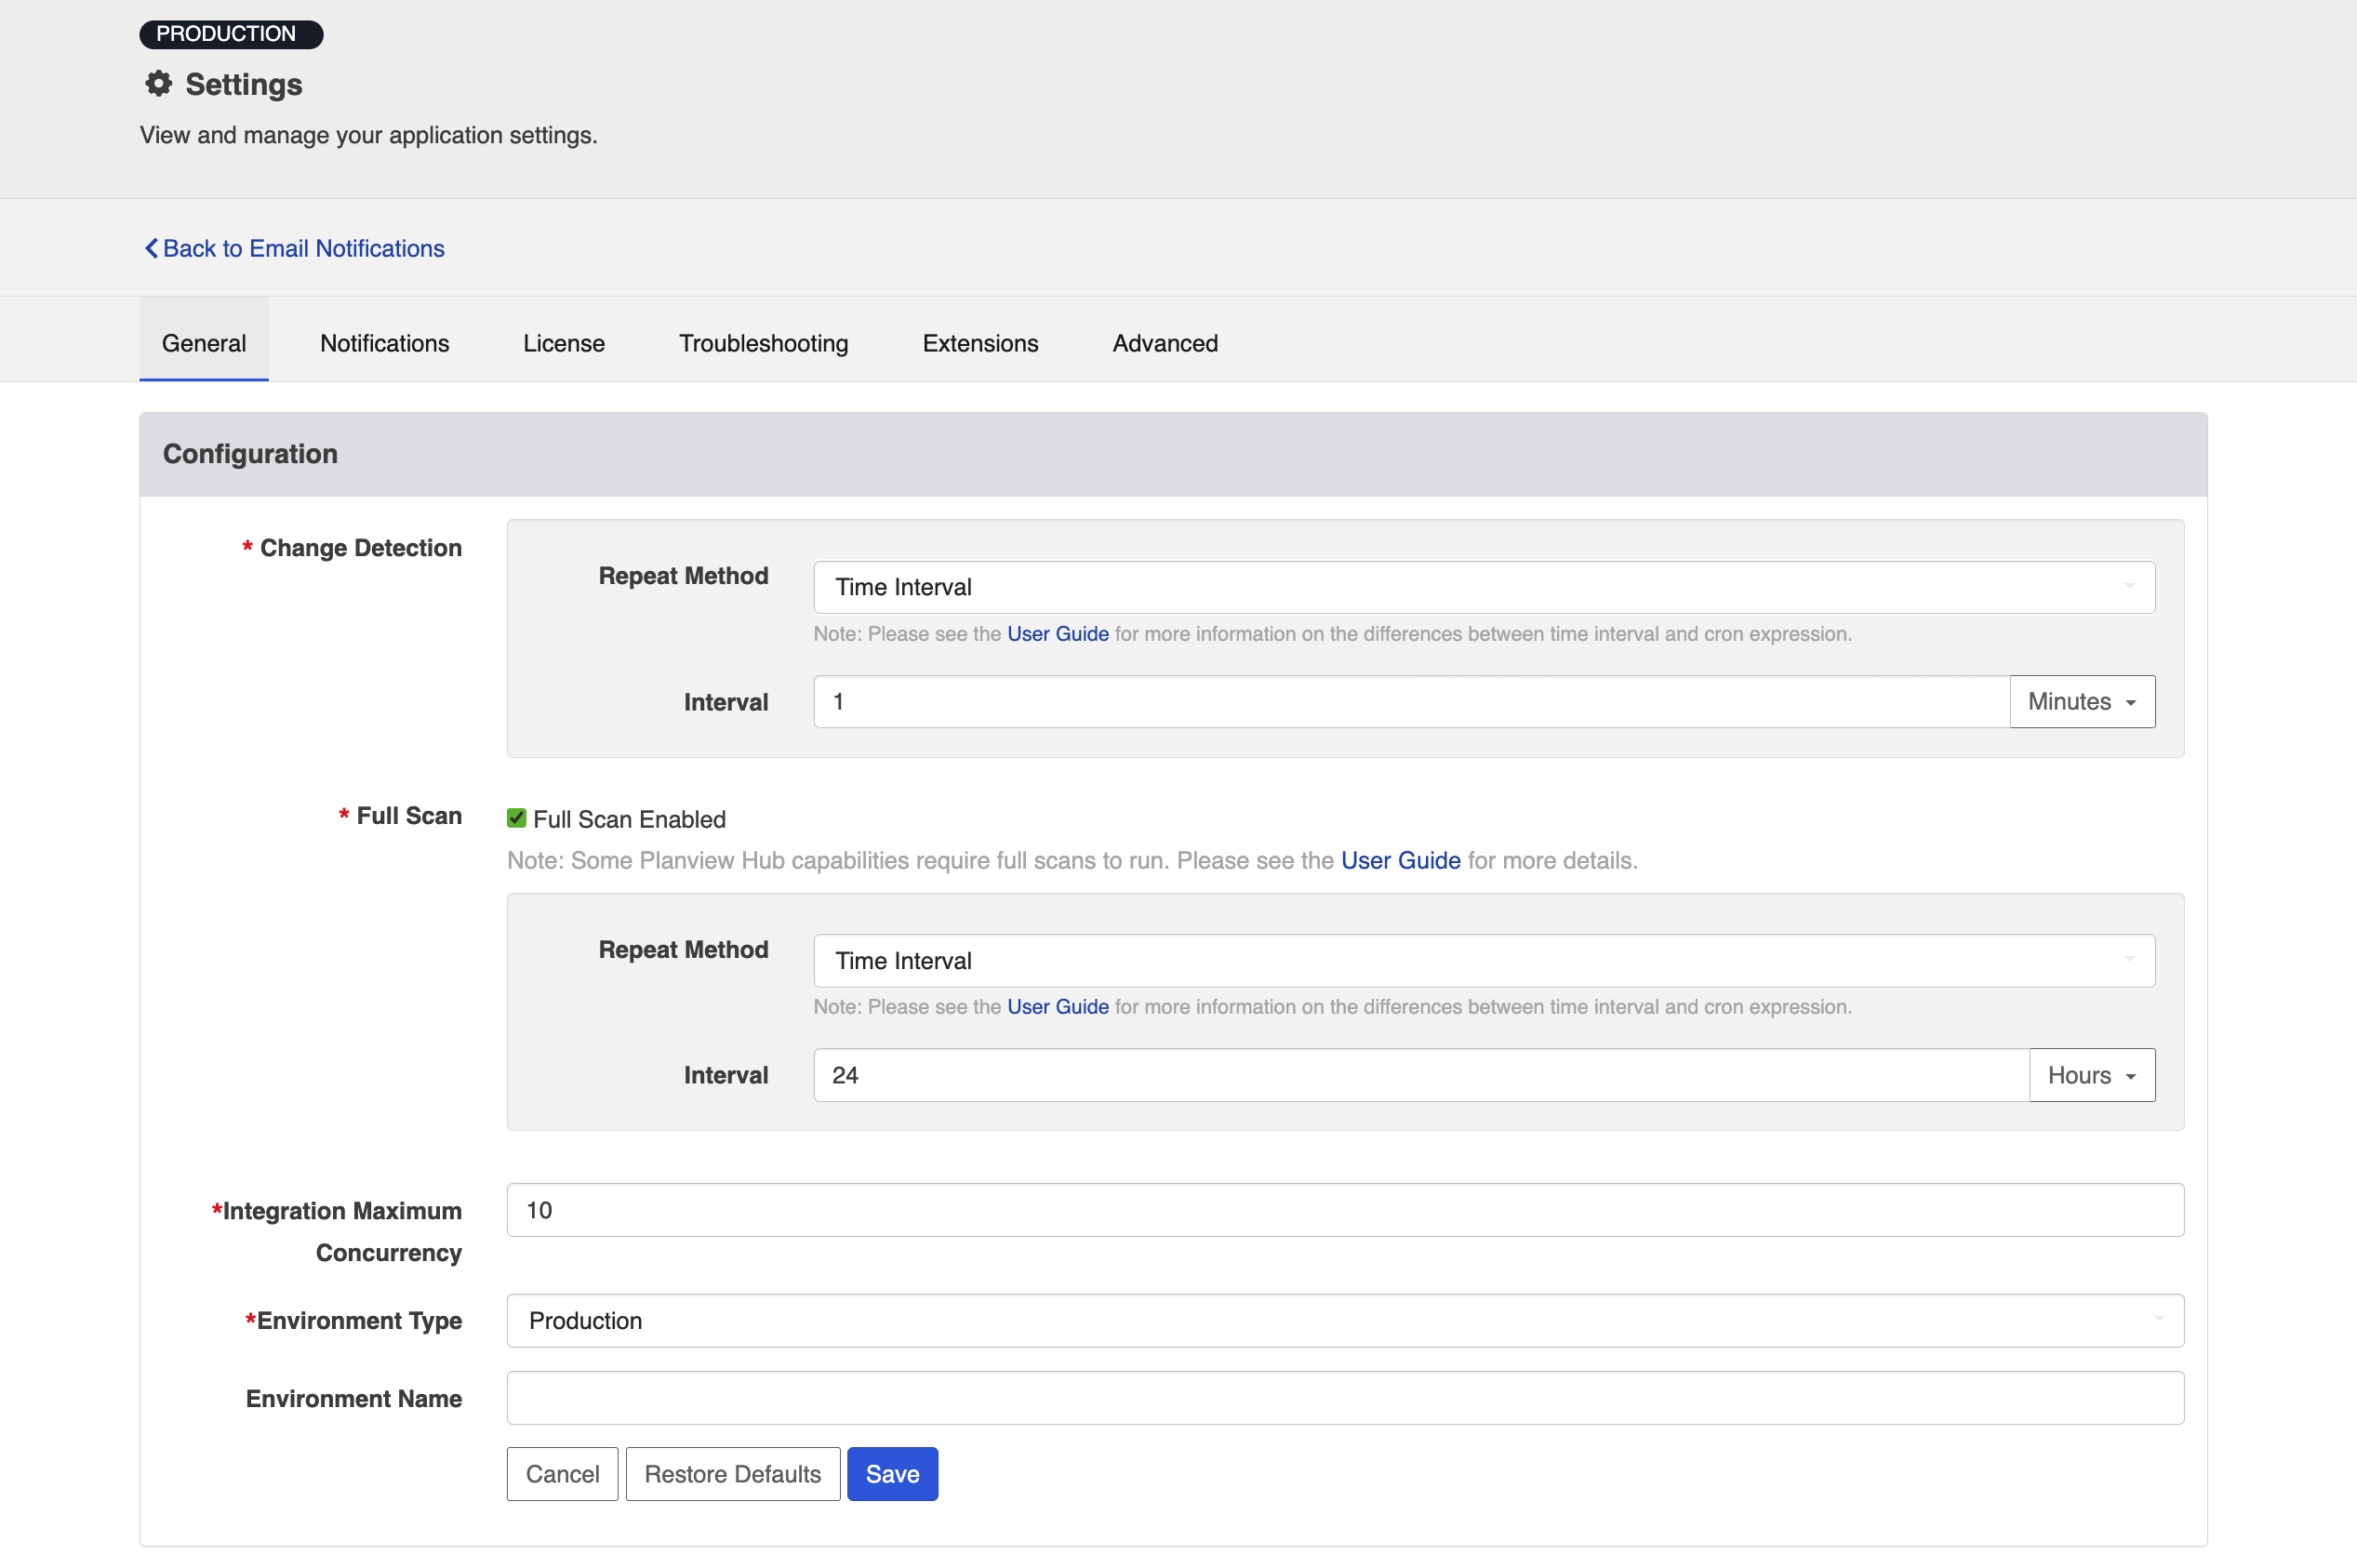
Change Detection
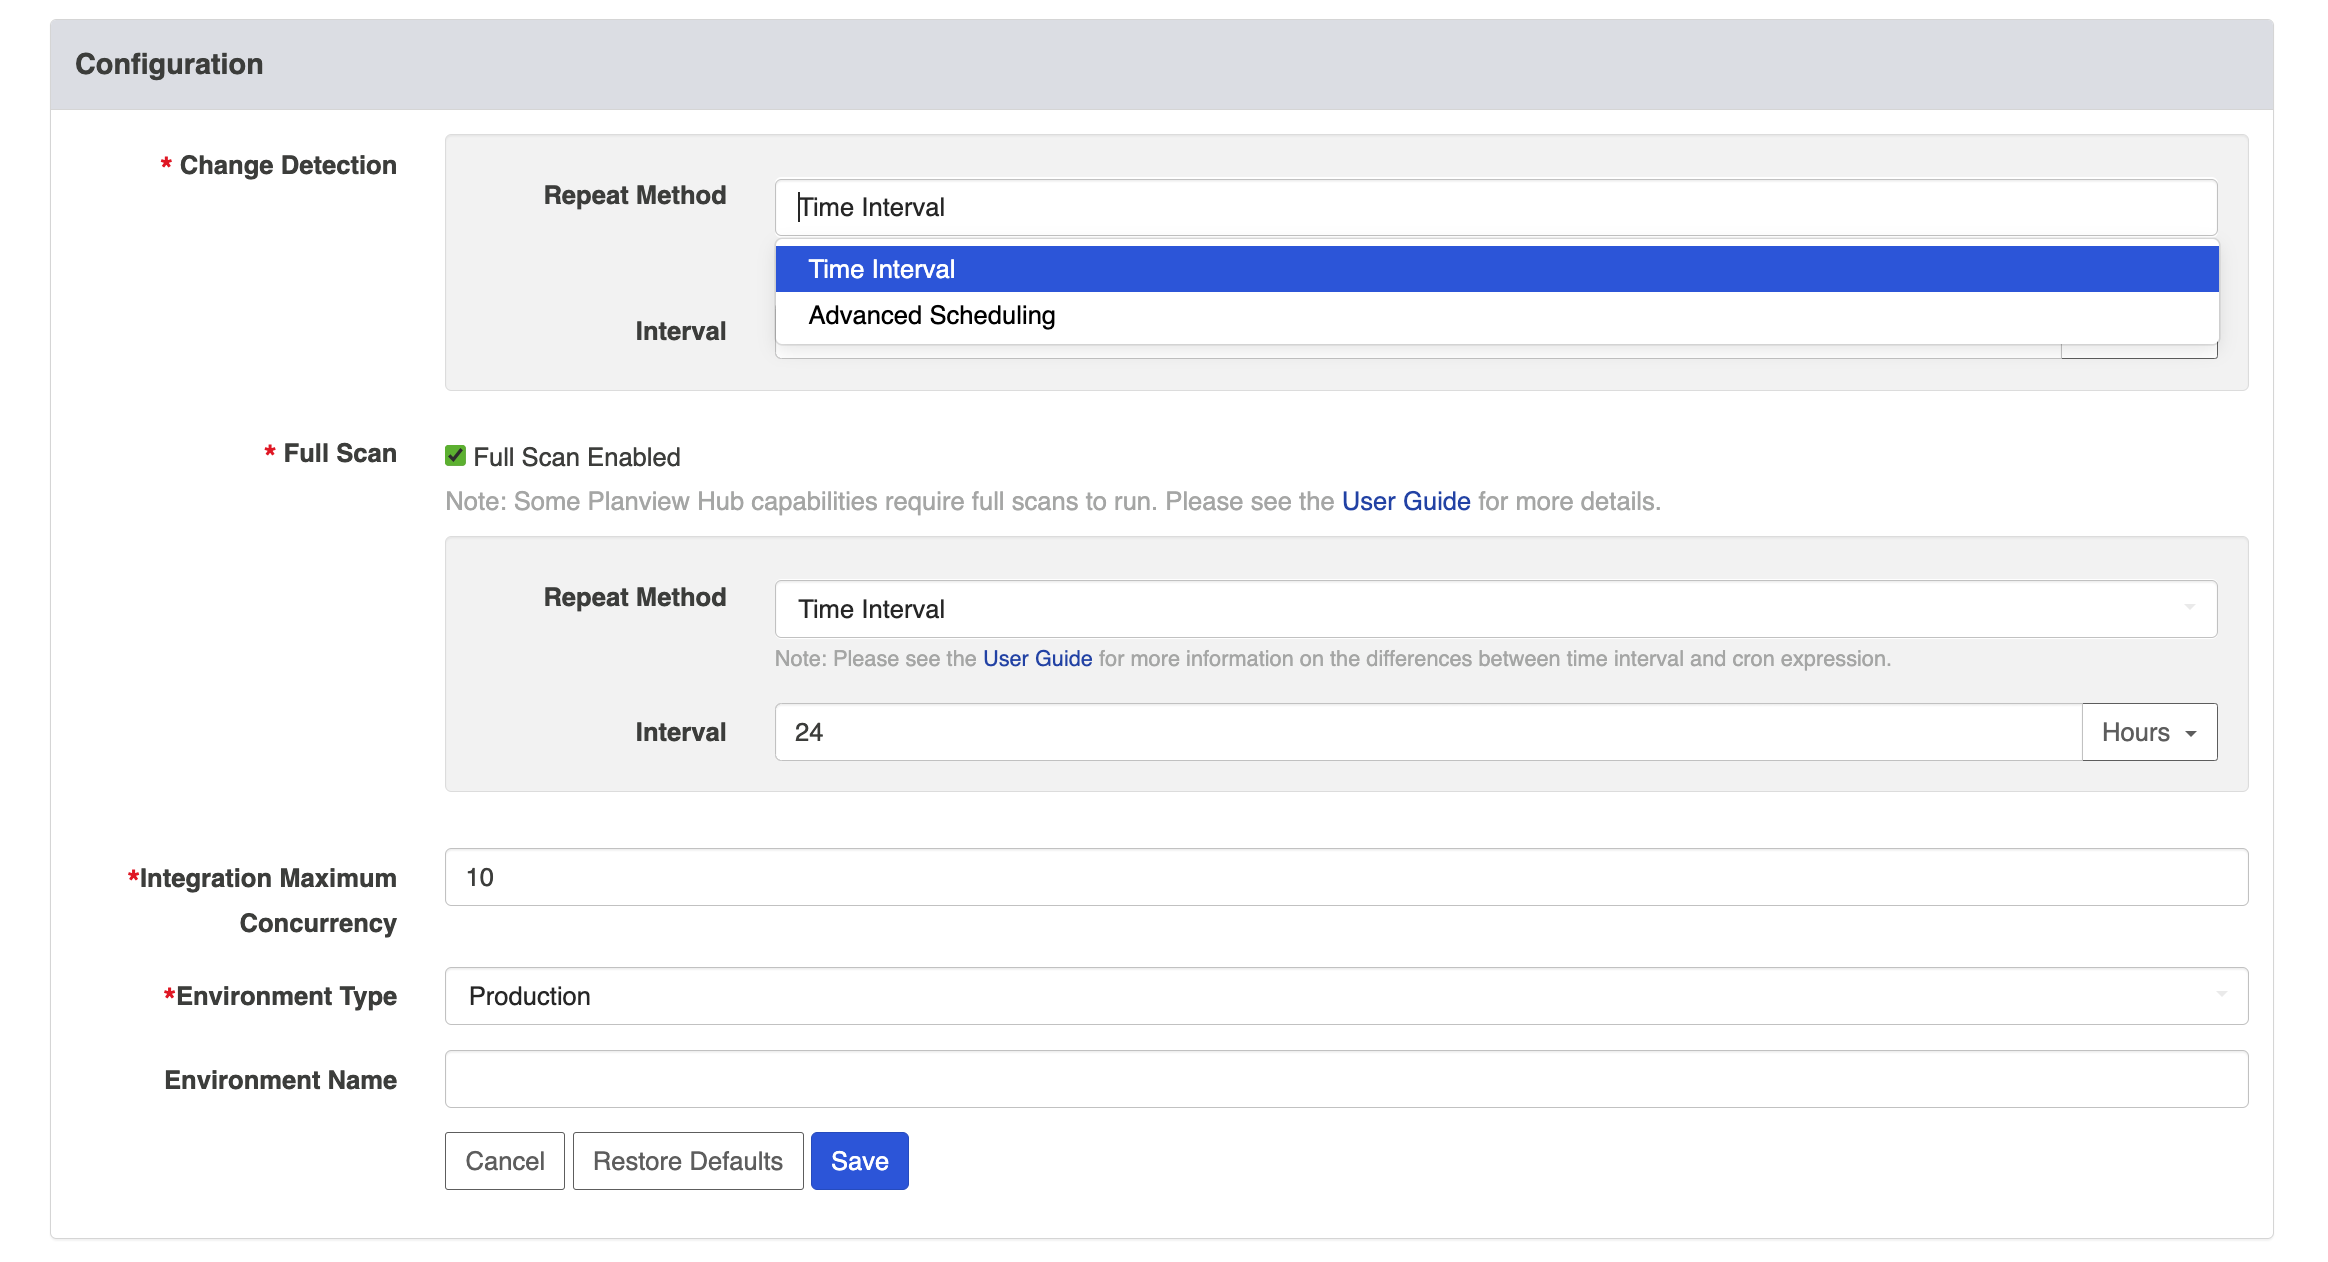
Repeat Method
This is the method in which Hub detects changed artifacts in your external repositories.
You can configure repeat method to run on a time interval (e.g., 1 minute or 5 minutes) or an advanced schedule using cron expression (e.g., every 30 minutes from 9am-5pm from Monday to Friday).
Change Detection Interval
This is the time between polling requests made by Hub to your external repositories to detect only changed artifacts.
Note: This defaults to 1 minute, but can be customized as desired. This global setting can also be overridden with an integration-specific change detection interval, by updating the Change Detection settings for that integration.
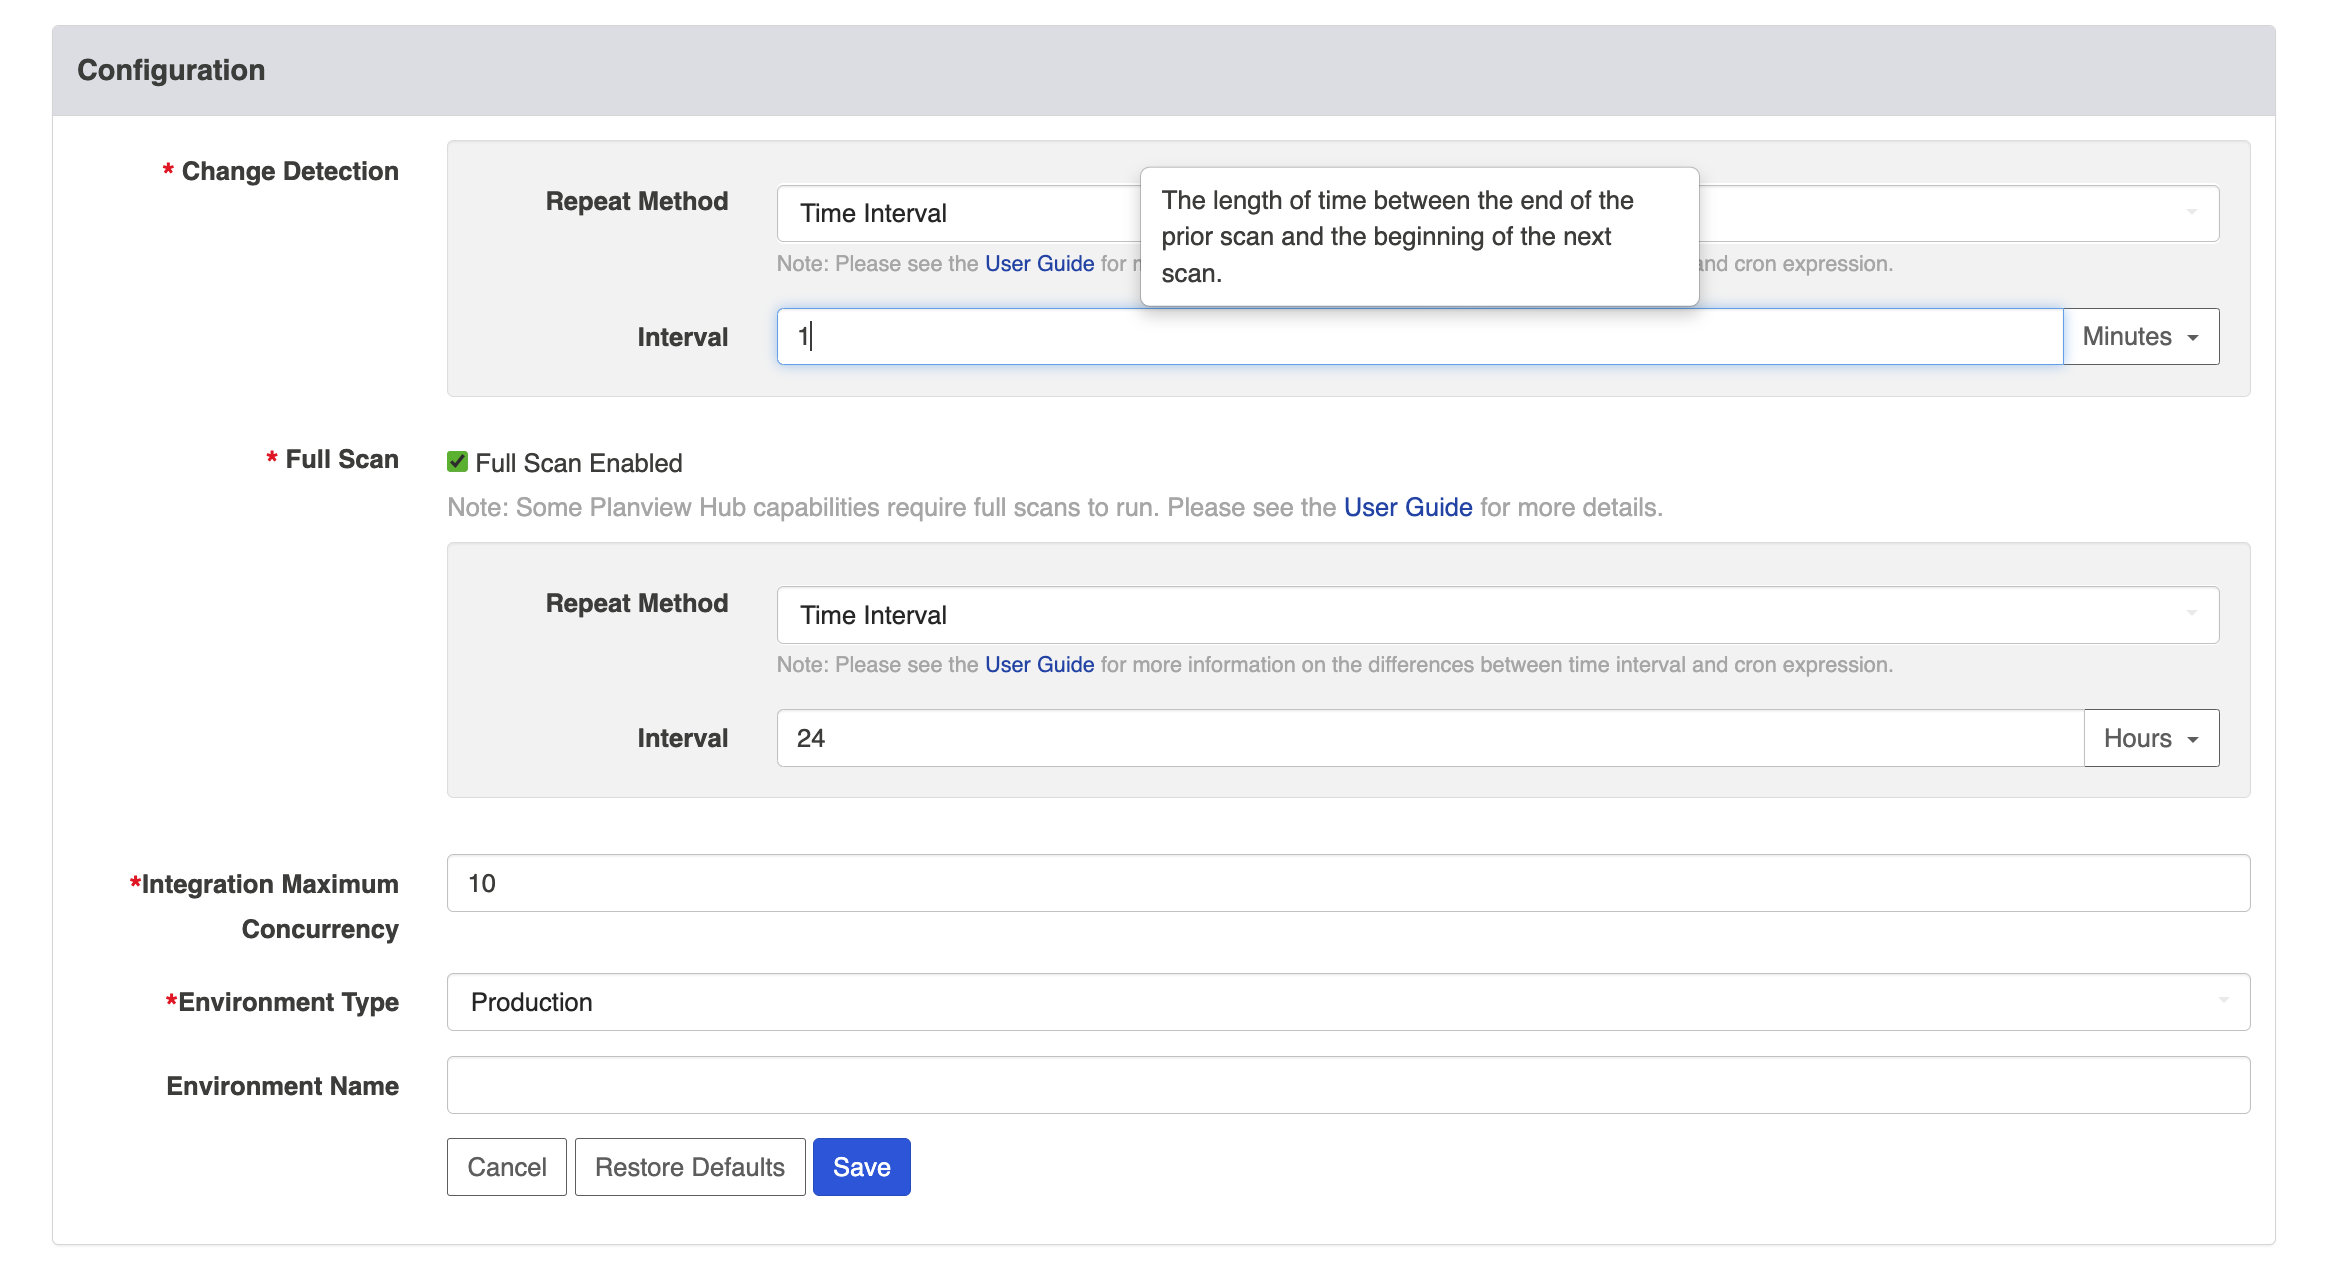
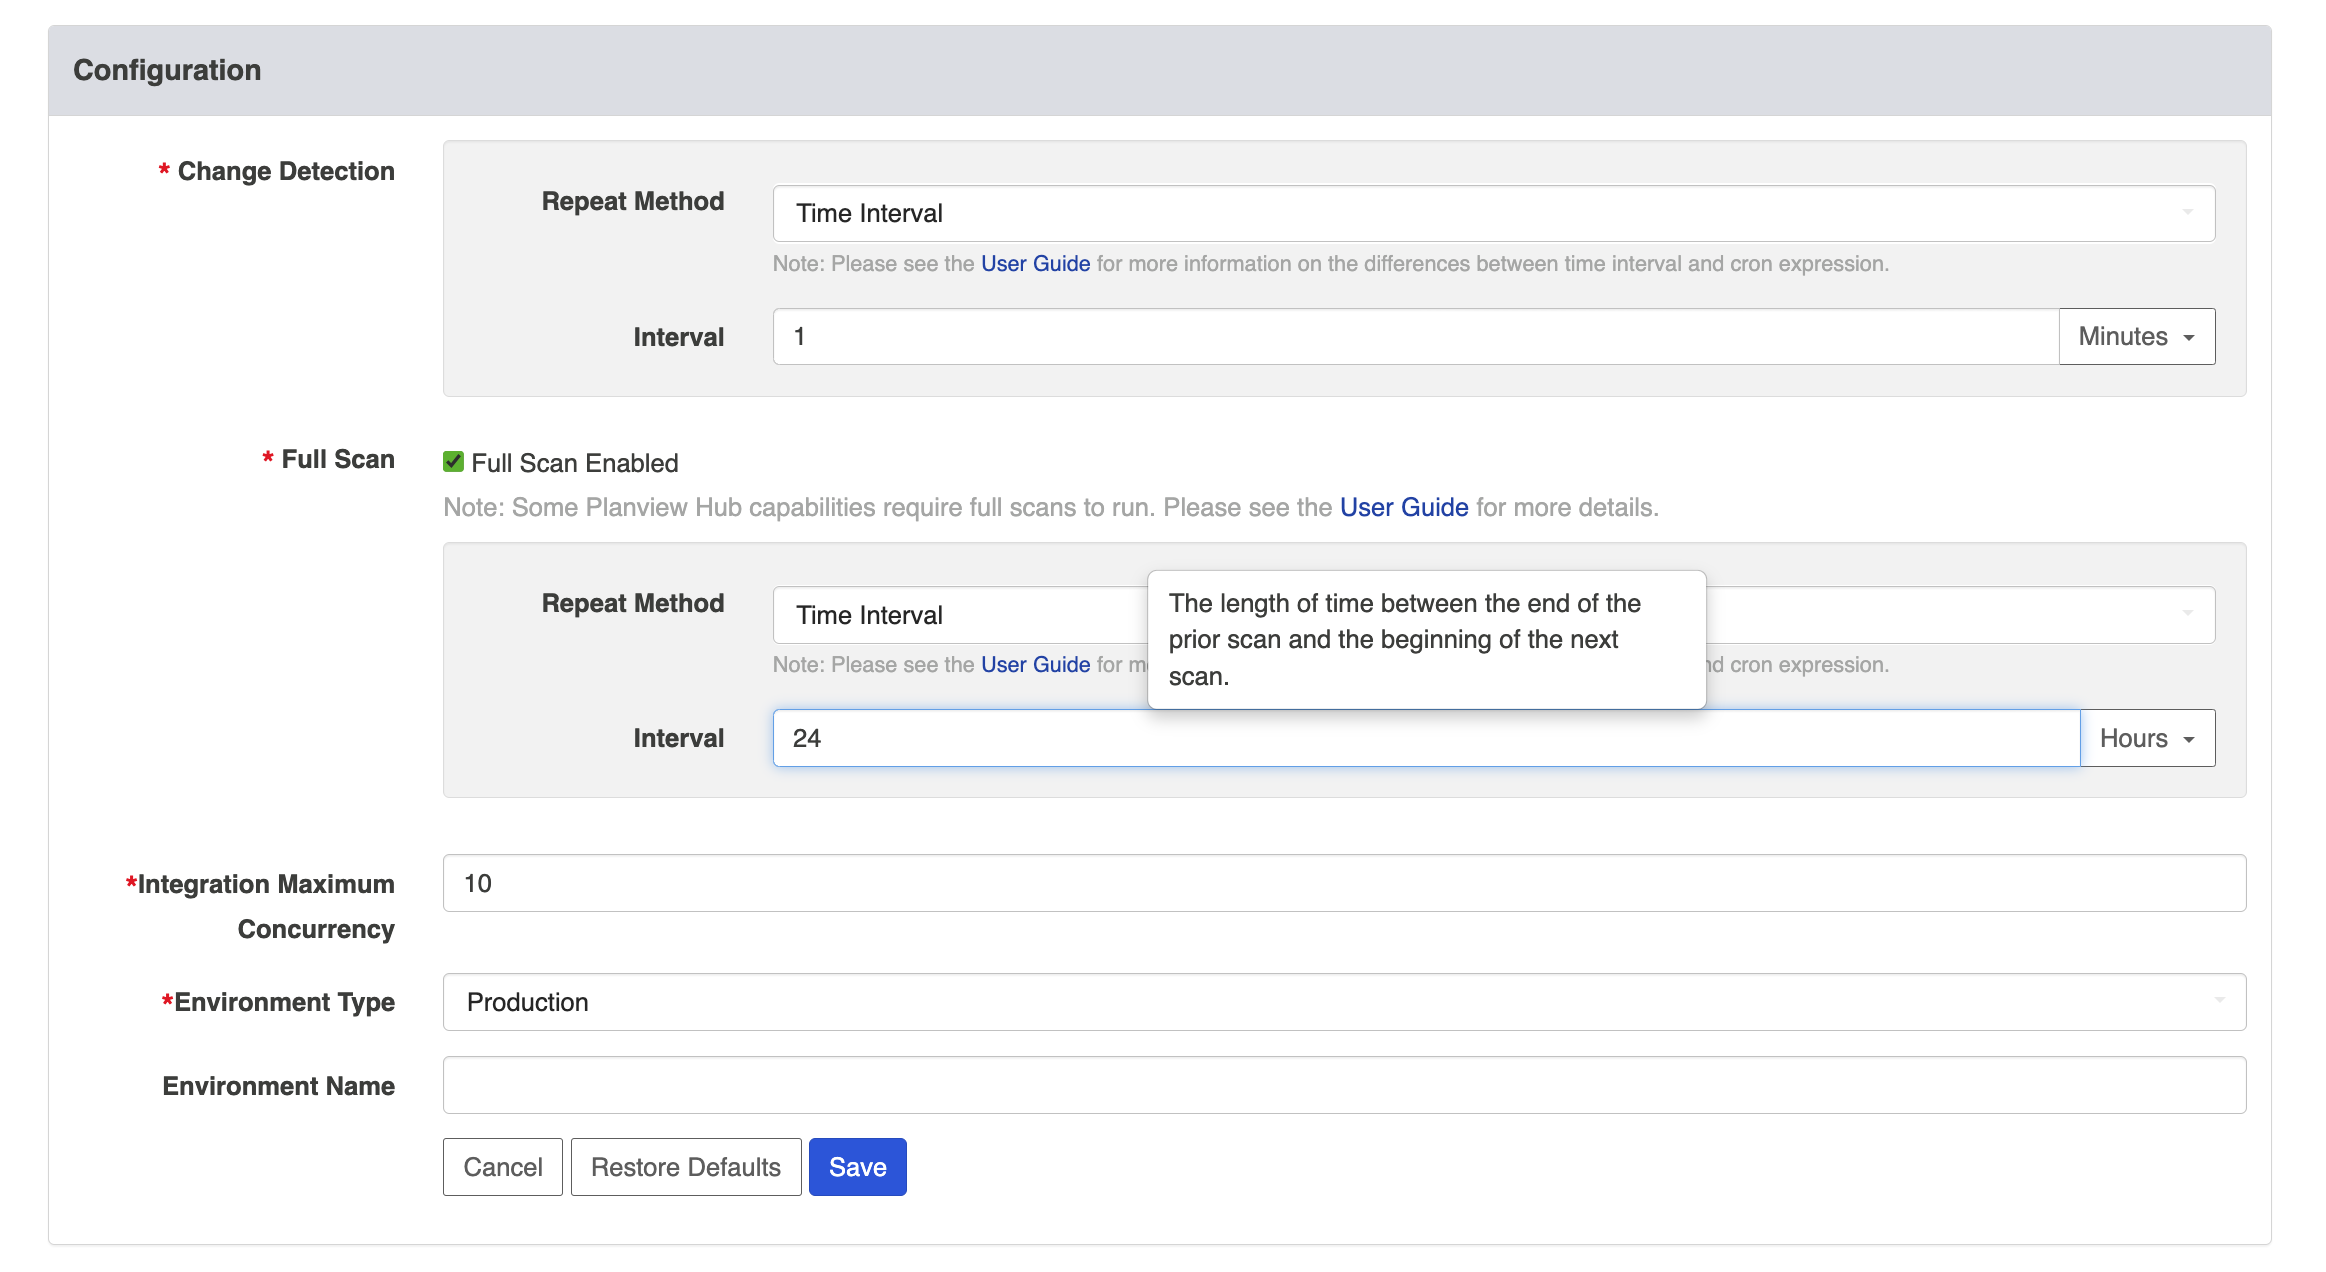
Full Scan Interval
This is the time between polling requests to detect changed artifacts, in which all artifacts that have previously synchronized in the integration are scanned.
Note: The Full Scan Interval defaults to 24 hours on the General (Settings) screen, but can be overridden with an integration-specific full scan interval, by updating the Change Detection settings for that integration.
Not all changes to an artifact will register as a change. Some repositories do not mark items as changed — for example, when a relationship is added or an attachment has changed. These changes may not be picked up by regular Change Detection, but will be picked up by a Full Scan.
Tip: Review our connector docs to determine the type of updates that will require a full scan.
Disable Full Scan
Full scans can be disabled globally on the General (Settings) screen, or on a per-integration basis via the Change Detection screen. This feature is especially useful for users that do not want to overload their repositories.
To disable full scan, uncheck the Full Scan Enabled box for the desired collection.
Note: If you choose to disable full scans, Twinless Artifact Updates will not work and some artifact updates may be missed.
Process All Artifacts
Since the Full Scan only scans artifacts that have previously synchronized, artifacts that are newly eligible for synchronization due to updated artifact filtering or routing will not be picked up by the Full Scan.
These artifacts will only be processed by clicking Process All Artifacts on the Field Flow screen, or when a new integration-eligible change is made to them.
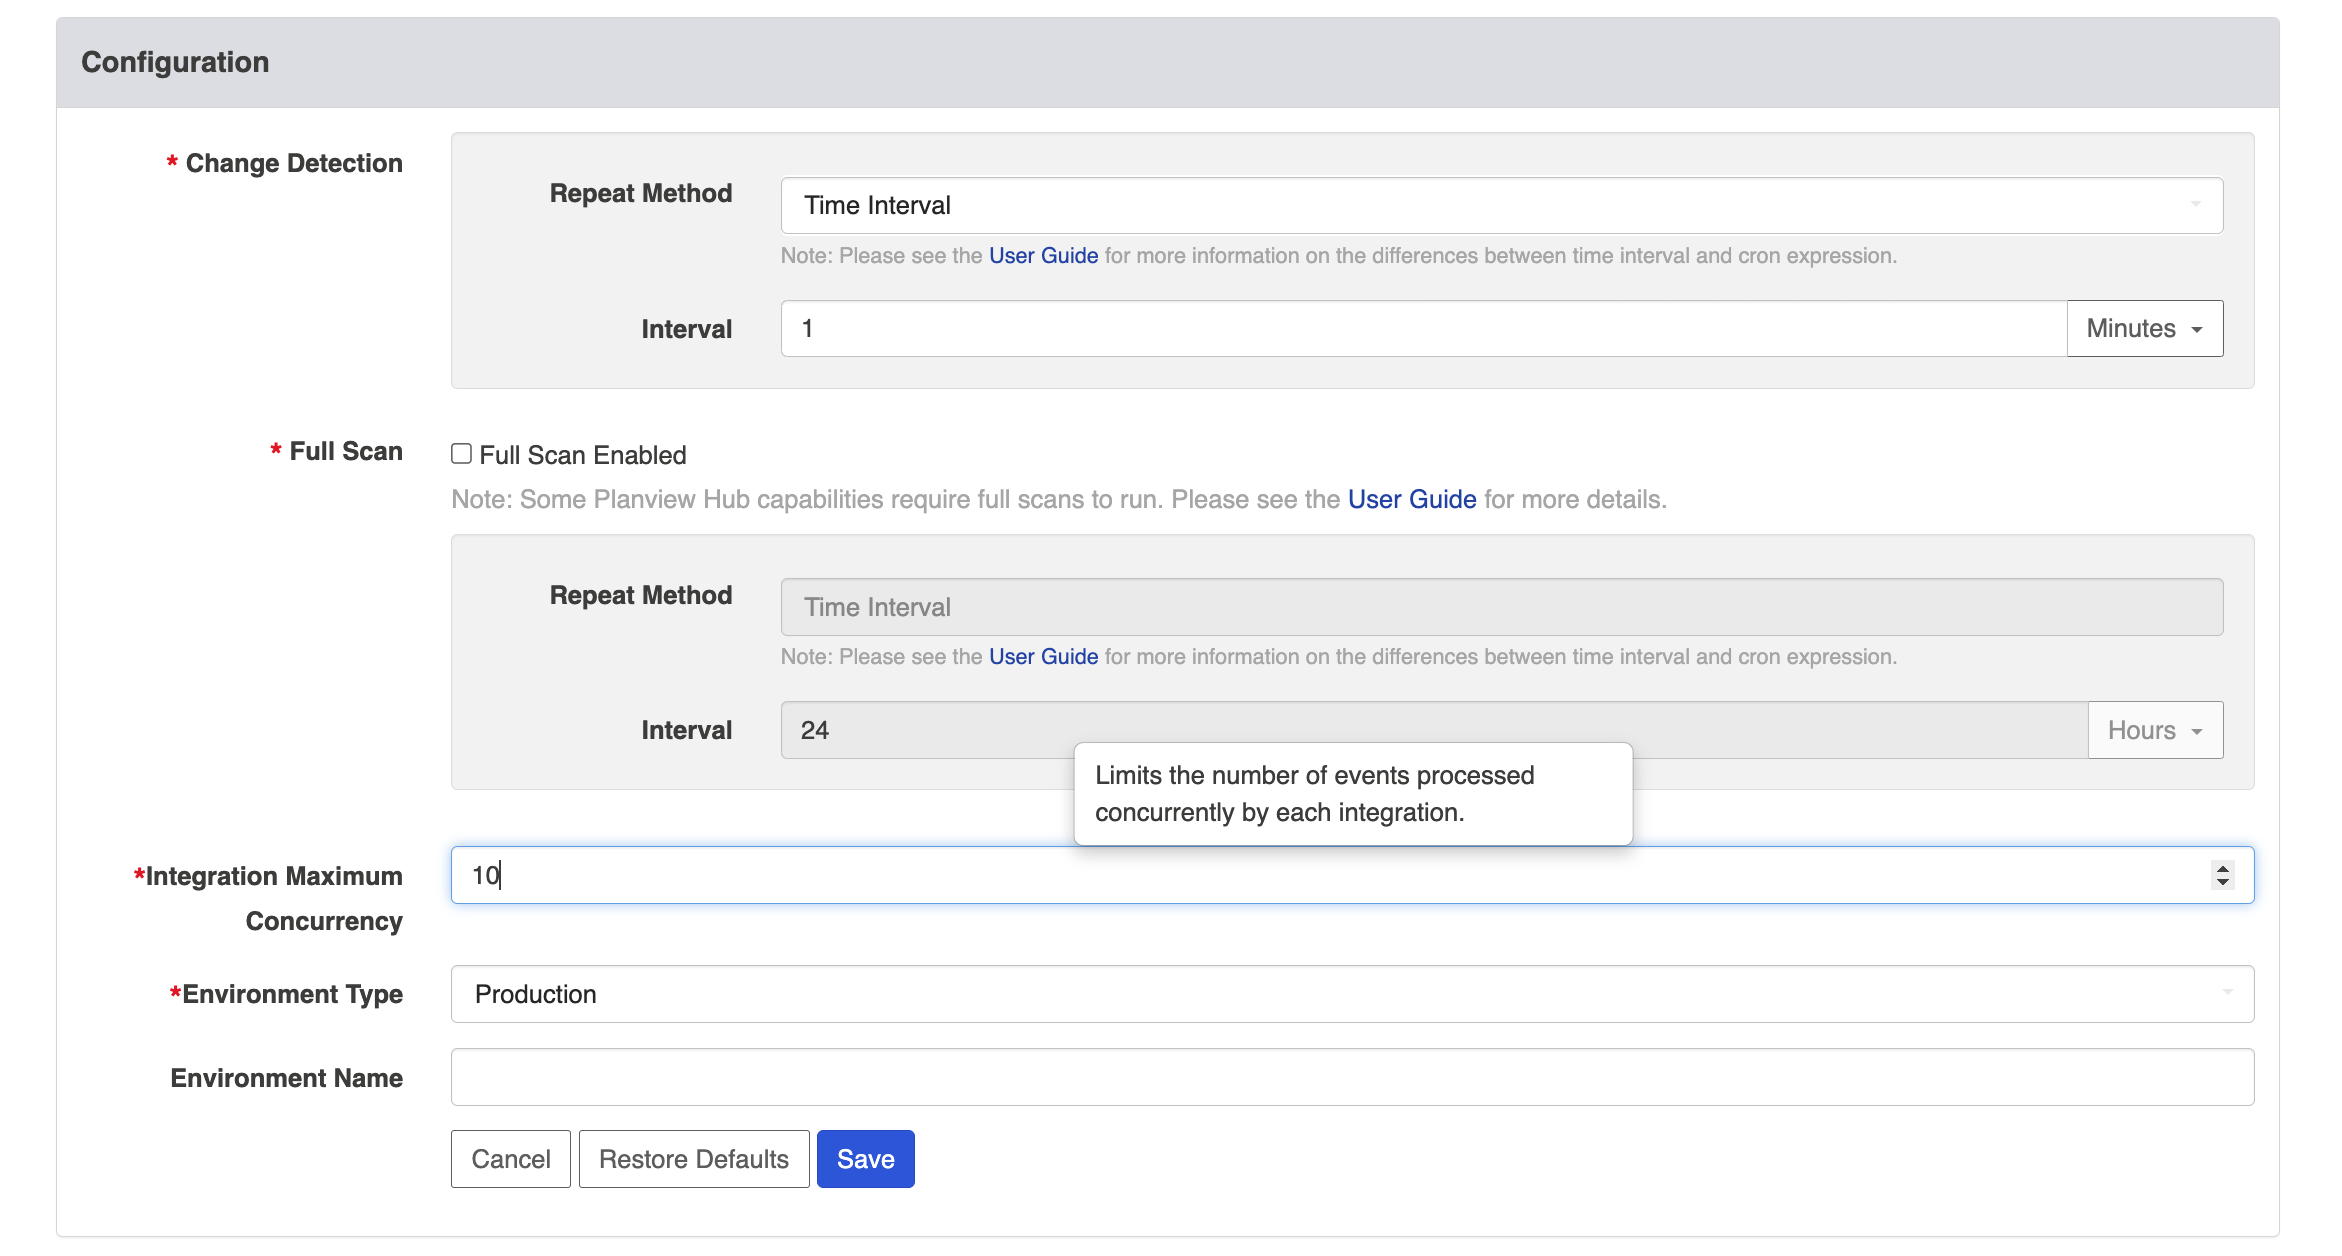
Integration Maximum Concurrency
This limits the number of events processed concurrently by each integration. Increasing this value will enable more artifact changes to flow concurrently, whereas decreasing this value will reduce the level of concurrent changes. Changing this value has the potential to affect the load on the end-points of an integration, and may have an adverse effect on performance if set too high.
Note: The default setting is 10, and should be used unless advised otherwise by customer care.
Environment Type and Name
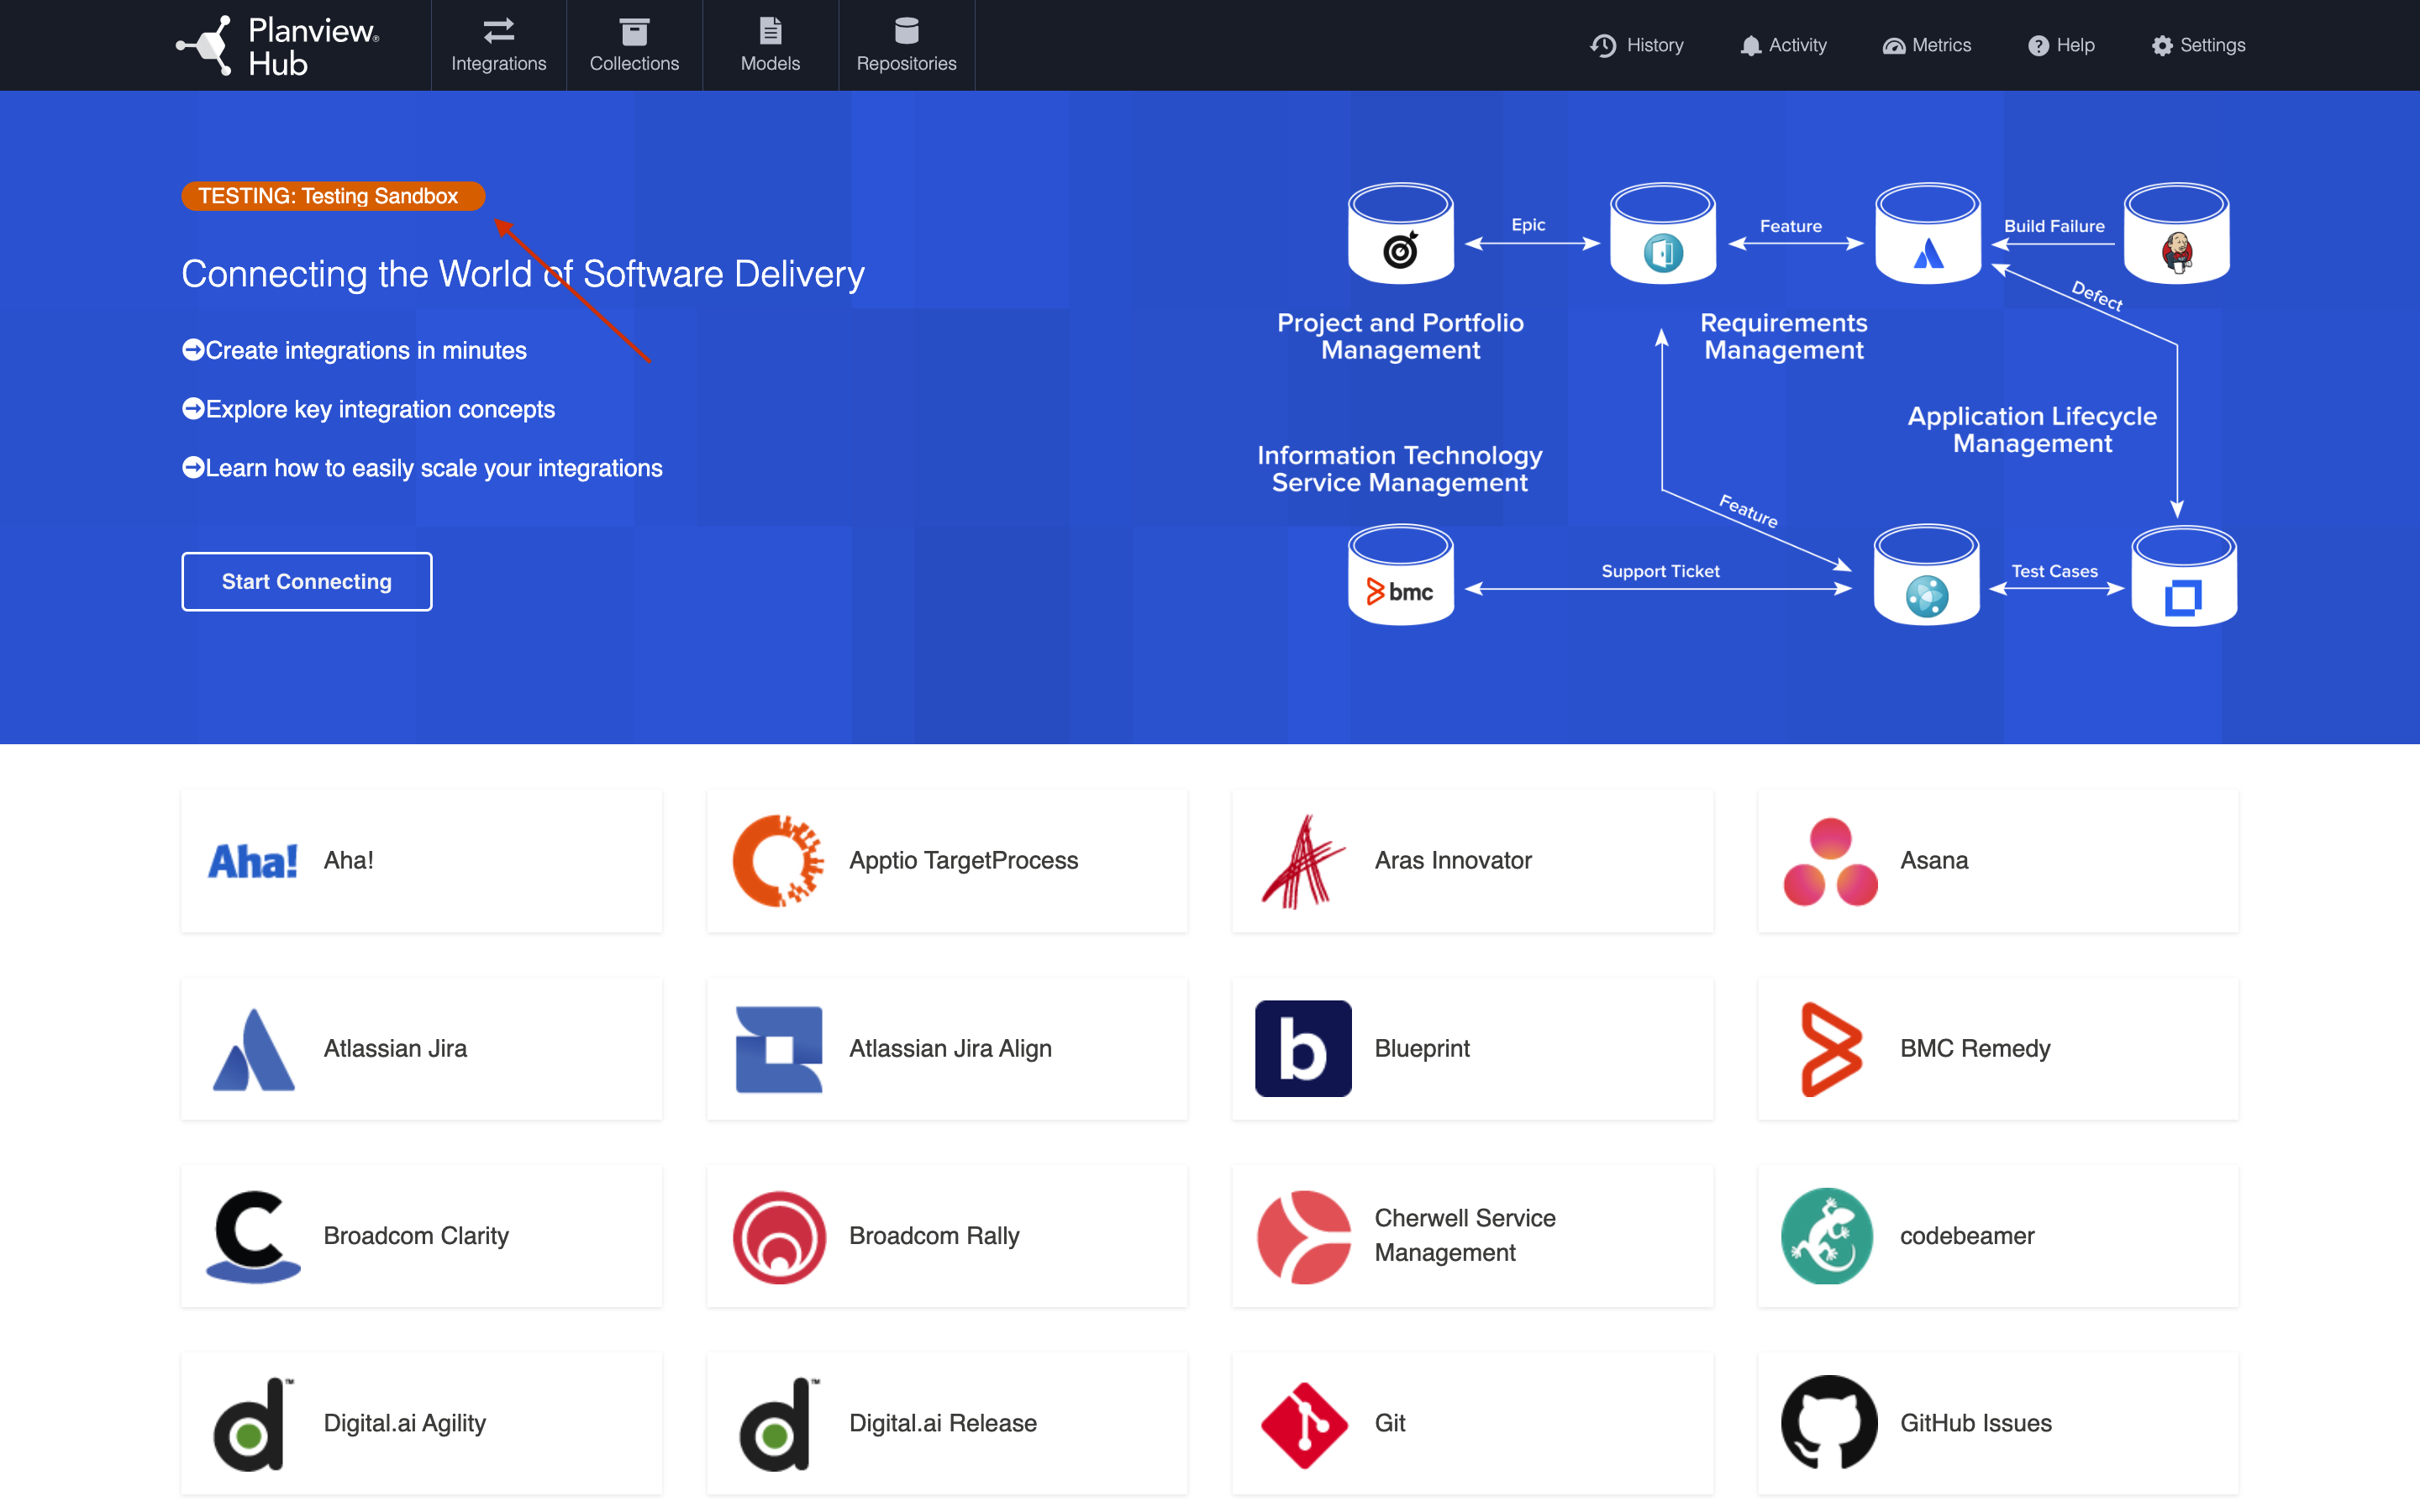
Hub administrators can also set an environment type (testing or production) and name for their instance in the Configuration panel. This will create a label visible in the upper left corner of the screen while navigating throughout the Hub UI, to allow users to easily identify which Hub instance they are utilizing.
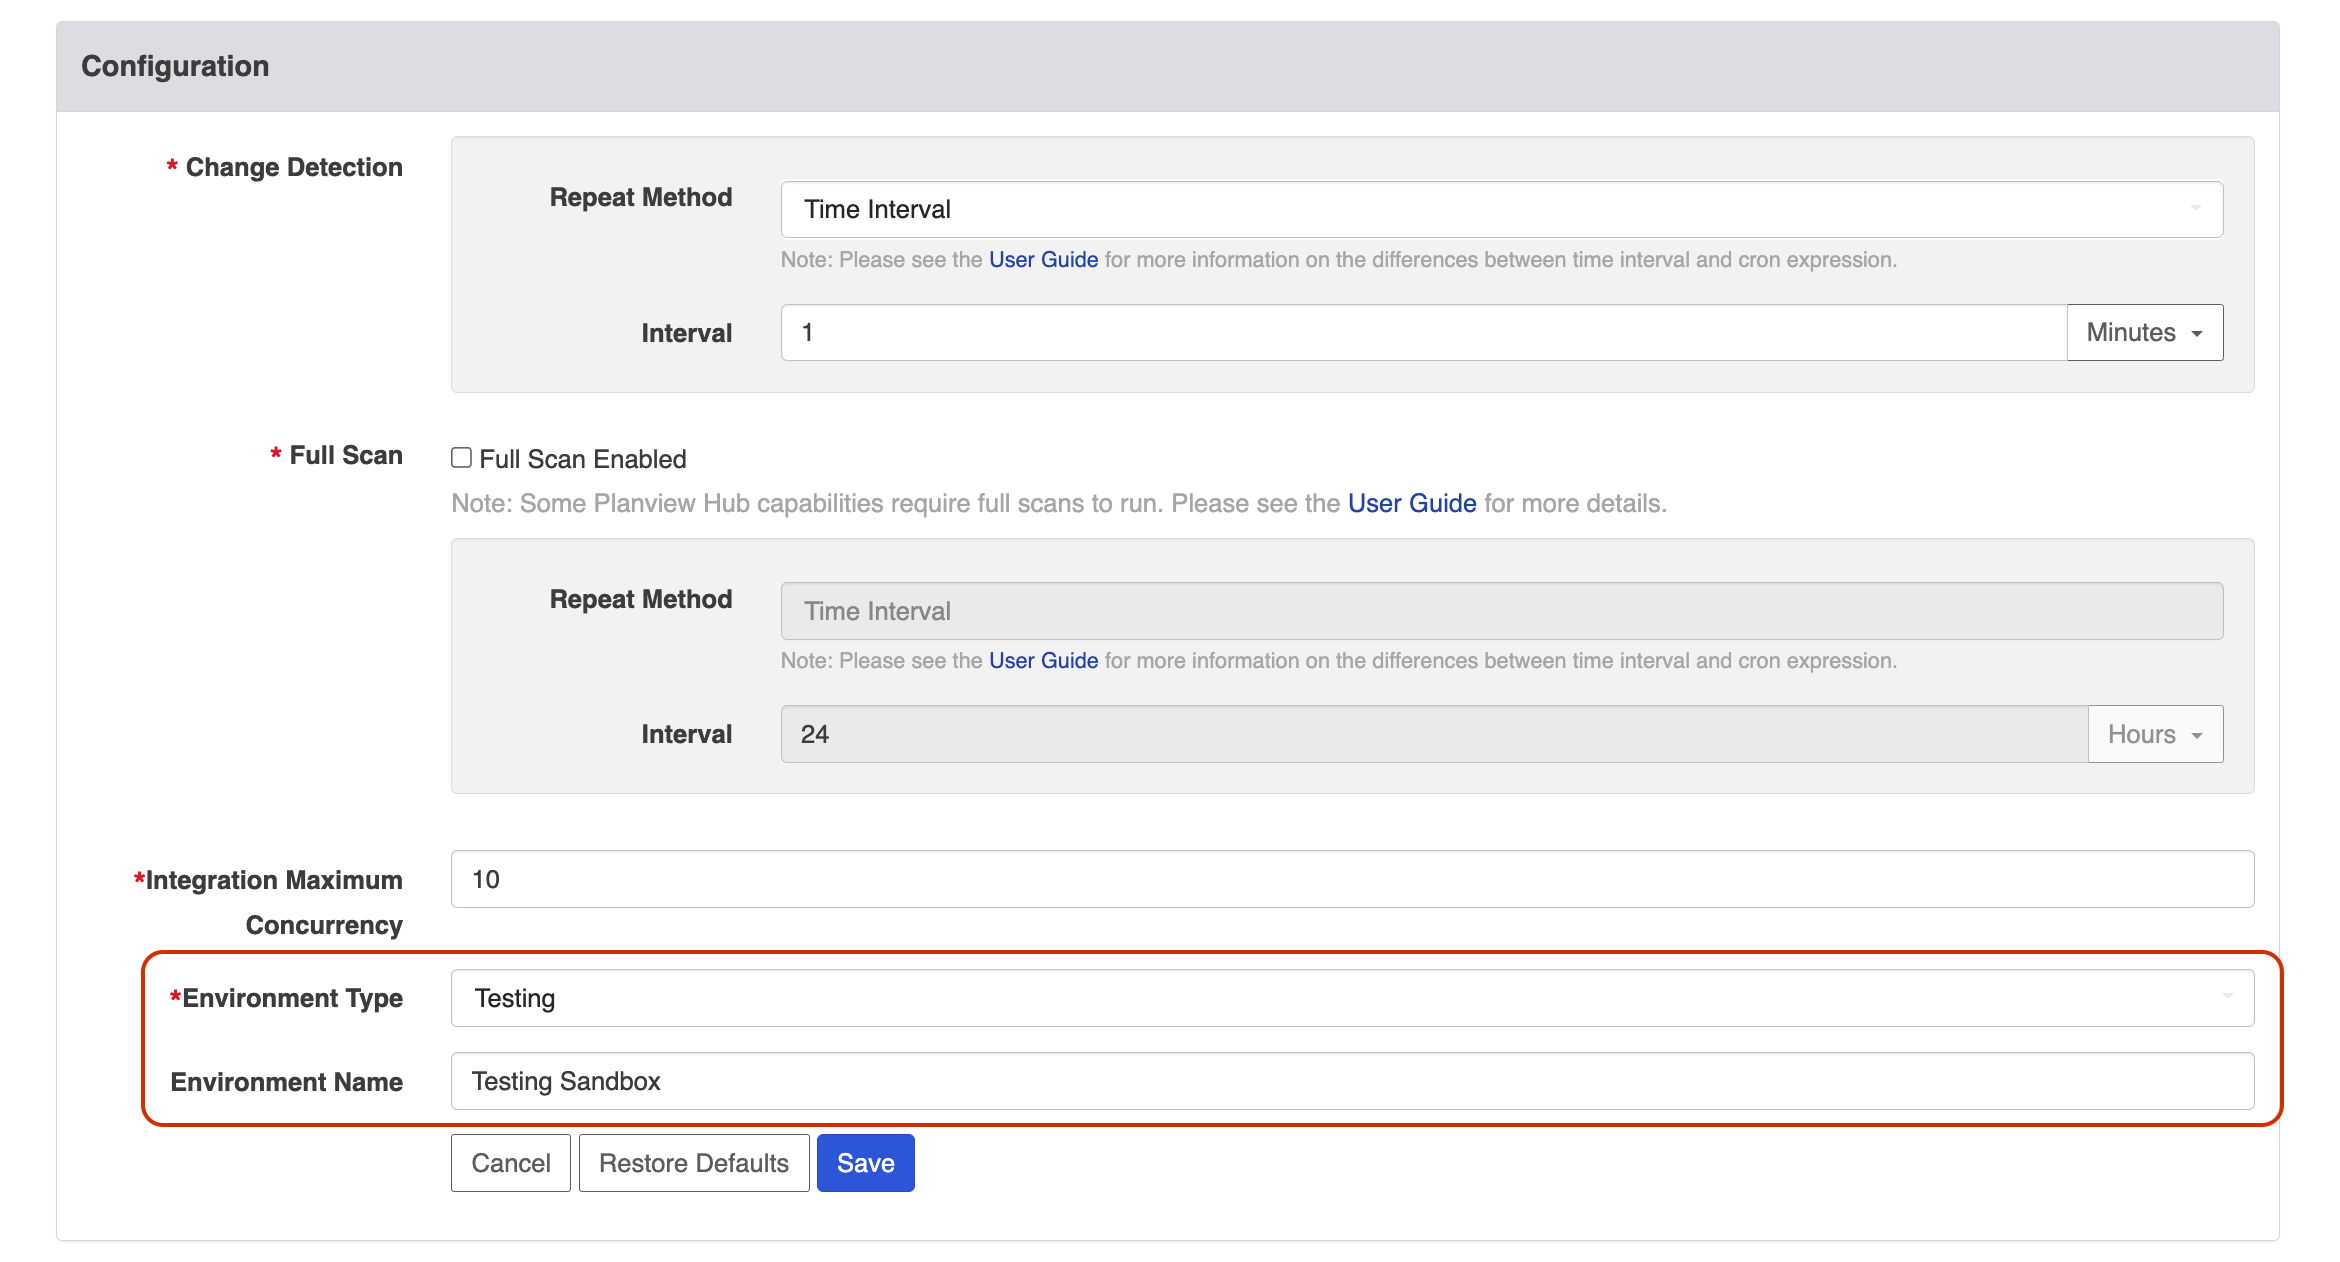
Once set, you will see the environment type and name label displayed in Hub.
Master Password Configuration
This feature is not applicable to Planview Hub Cloud.
After installation, you will be prompted to set a Master Password.
The Master Password is used to encrypt the credentials used in your repository connections and proxy settings, along with any other configuration values that are considered secret, which could include API keys and tokens.
Note: 256 bit AES encryption is used.
Hub will automatically use the stored Master Password to decrypt repository credentials.
Normally you will not need to re-enter your Master Password. However, if the stored Master Password is missing, or if you'd like to change your Master Password from the General (Settings) screen, you will need to enter your current Master Password.
The Master Password is encrypted and stored separately from the encrypted repository credentials.
- On Windows, the encrypted Master Password is stored in the Windows Registry, encrypted using the Windows Data Protection (DPAPI).
- On Linux, the encrypted Master Password is stored in the Home Directory of the User running Hub.
If desired, you can change or reset the Master Password from the General (Settings) screen.
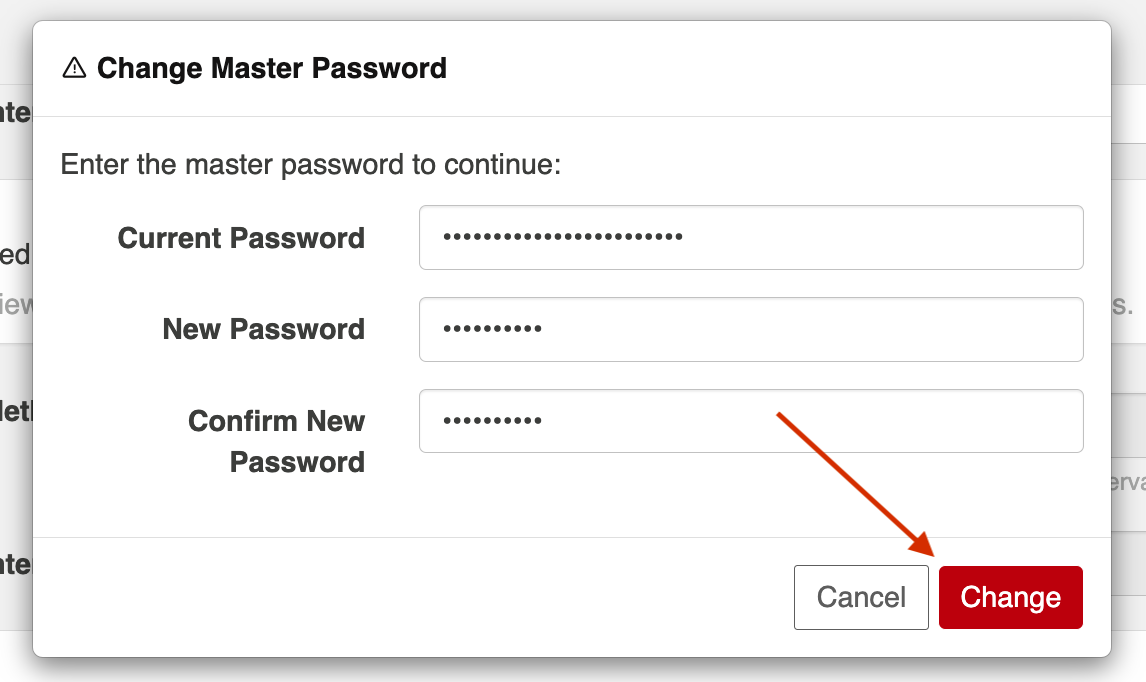
To do this, click Change Master Password.

Enter your current Master Password and new Master Password.
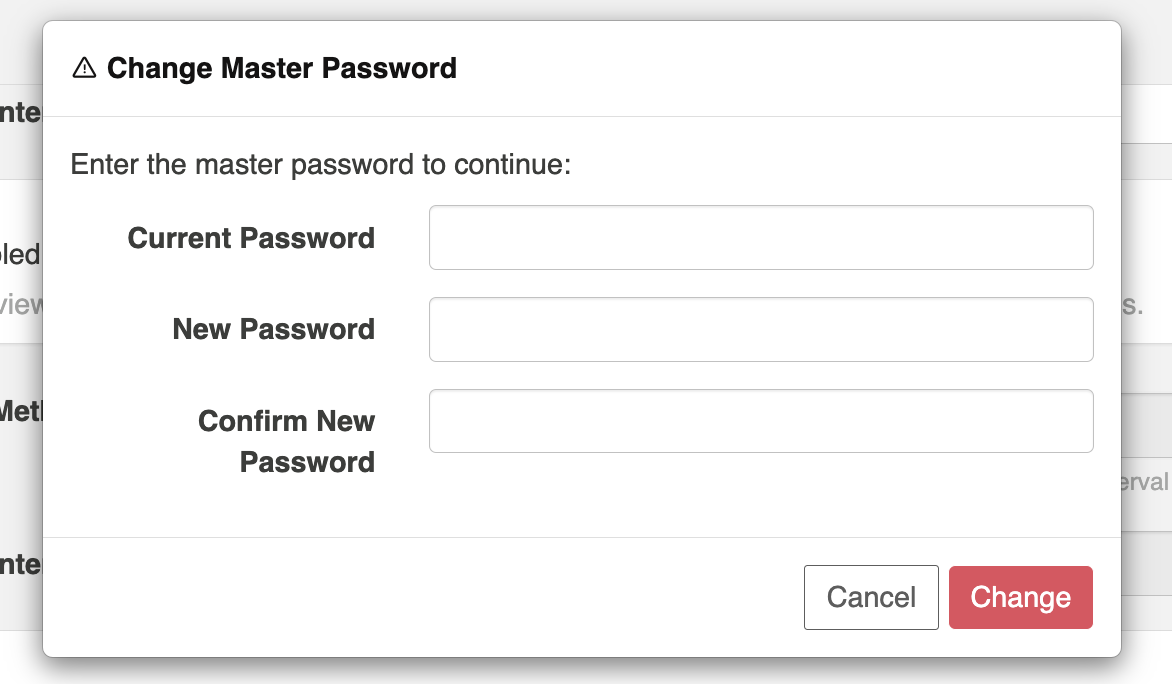
Click Change to update the Master Password.
To reset your master password, click Reset.
Note: If resetting the Master Password, you will not need to enter your current Master Password, but previously encrypted repository passwords will be lost, and must be provided after resetting.

Storage Settings
This feature is not applicable to Planview Hub Cloud.
Planview automatically stores operational data to a pre-configured Derby database. This is suitable for evaluation purposes only, and is not supported for production environments. Configuring Hub to utilize an external database will enable you to perform frequent back-ups without having to stop Hub, and ensure that your Hub practices are consistent with your existing disaster and recovery process.
Tip: See our Hardware Requirements to determine which databases are supported for storing operational data.
Migrating Databases
Internal to External
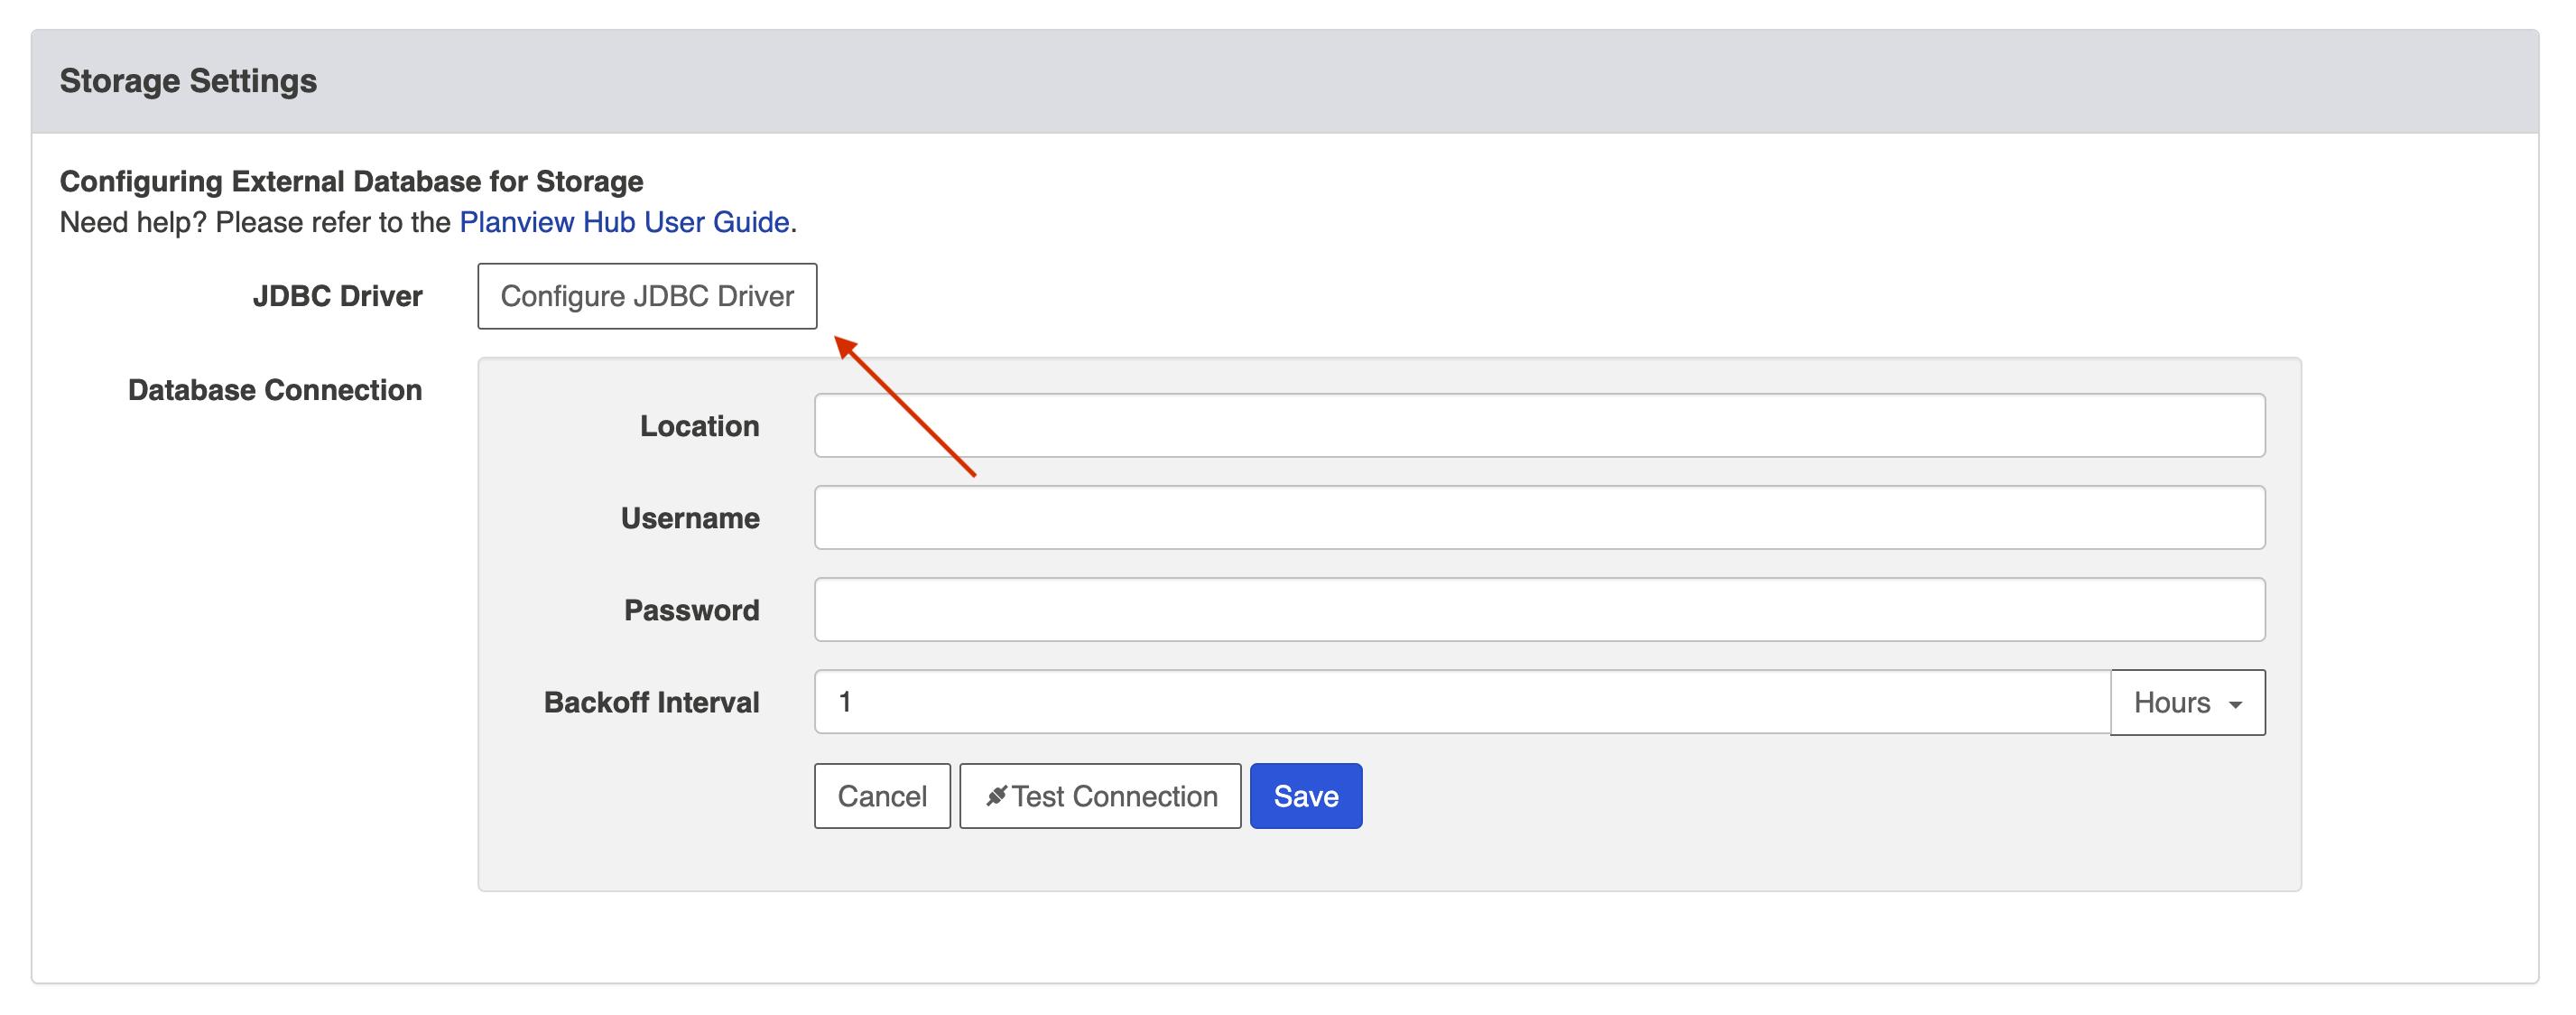
To migrate your Hub operational data from the internal database to an external database, click Use External Database.

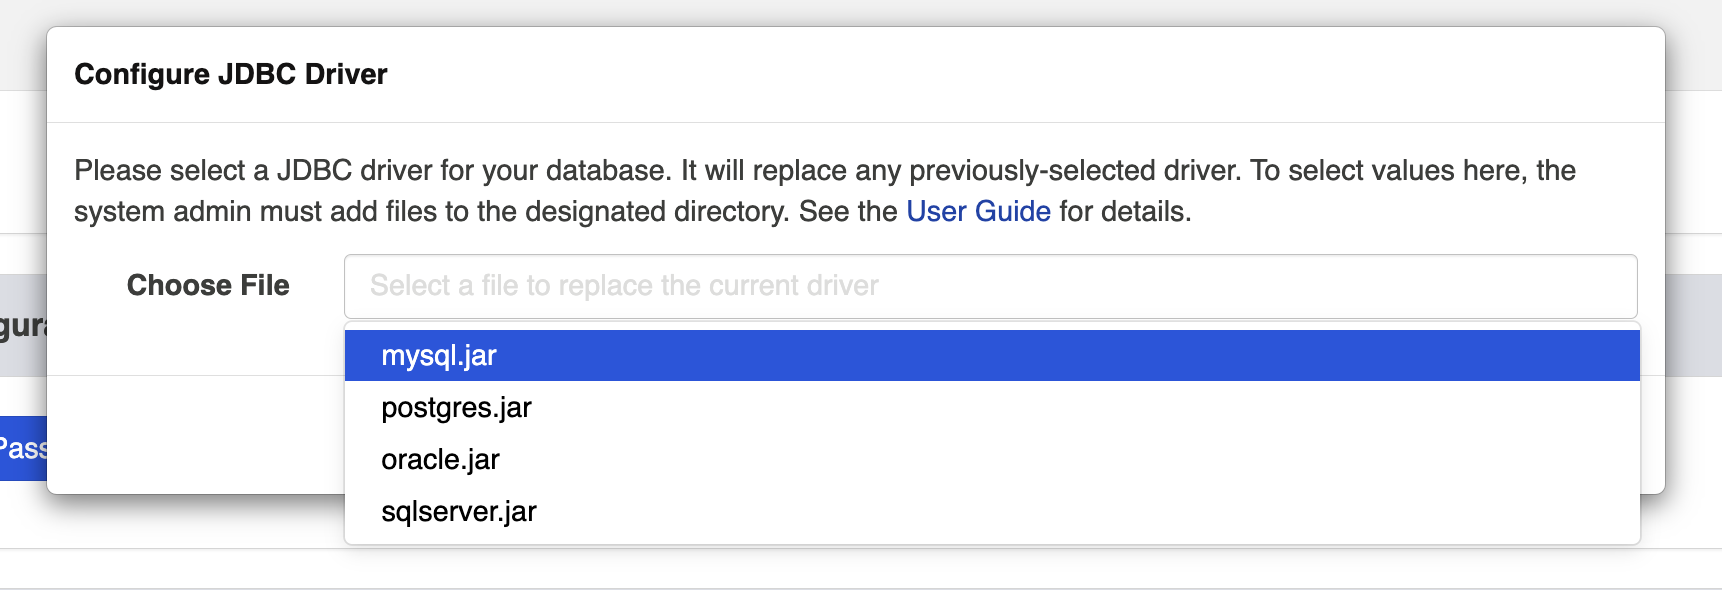
Next, click Configure JDBC Driver to select the JDBC driver for your database.
To download the JDBC driver:
Microsoft SQL Server
Note: For information on configuring Azure Entra (Azure Active Directory) managed accounts with Azure SQL, refer to this FAQ.
The JDBC driver for Microsoft SQL Server can be downloaded from the Microsoft support site.
MySQL
The JDBC driver for MySQL can be downloaded from the MySQL download site.
Note: Upon downloading the JDBC driver from the MySQL download site, select Platform Independent to download the correct file.
Oracle
The JDBC driver for Oracle can be downloaded from the Oracle support site. Note that it is best if the Oracle JDBC driver that is used matches the version of the Oracle server that you are connecting to.
PostgreSQL
The JDBC driver for PostgreSQL can be downloaded from the PostgreSQL download site.
To upload the JDBC driver to Hub, a system administrator (a user with file system access to the machine that hosts Hub) must extract the *.jar file from the downloaded driver file and add the file to the designated directory:
- On Windows, the default folder is
C:\ProgramData\Tasktop\jdbc-drivers - On Linux, the
jdbc-driversfolder can be found in the Hub installation directory
Note: If needed, the user can change the location in which Hub looks for the files. This is done by changing the system property jdbc.libraries.path
Once the JDBC driver is uploaded, select it from the Choose File field on the Configure JDBC Driver pop-up.
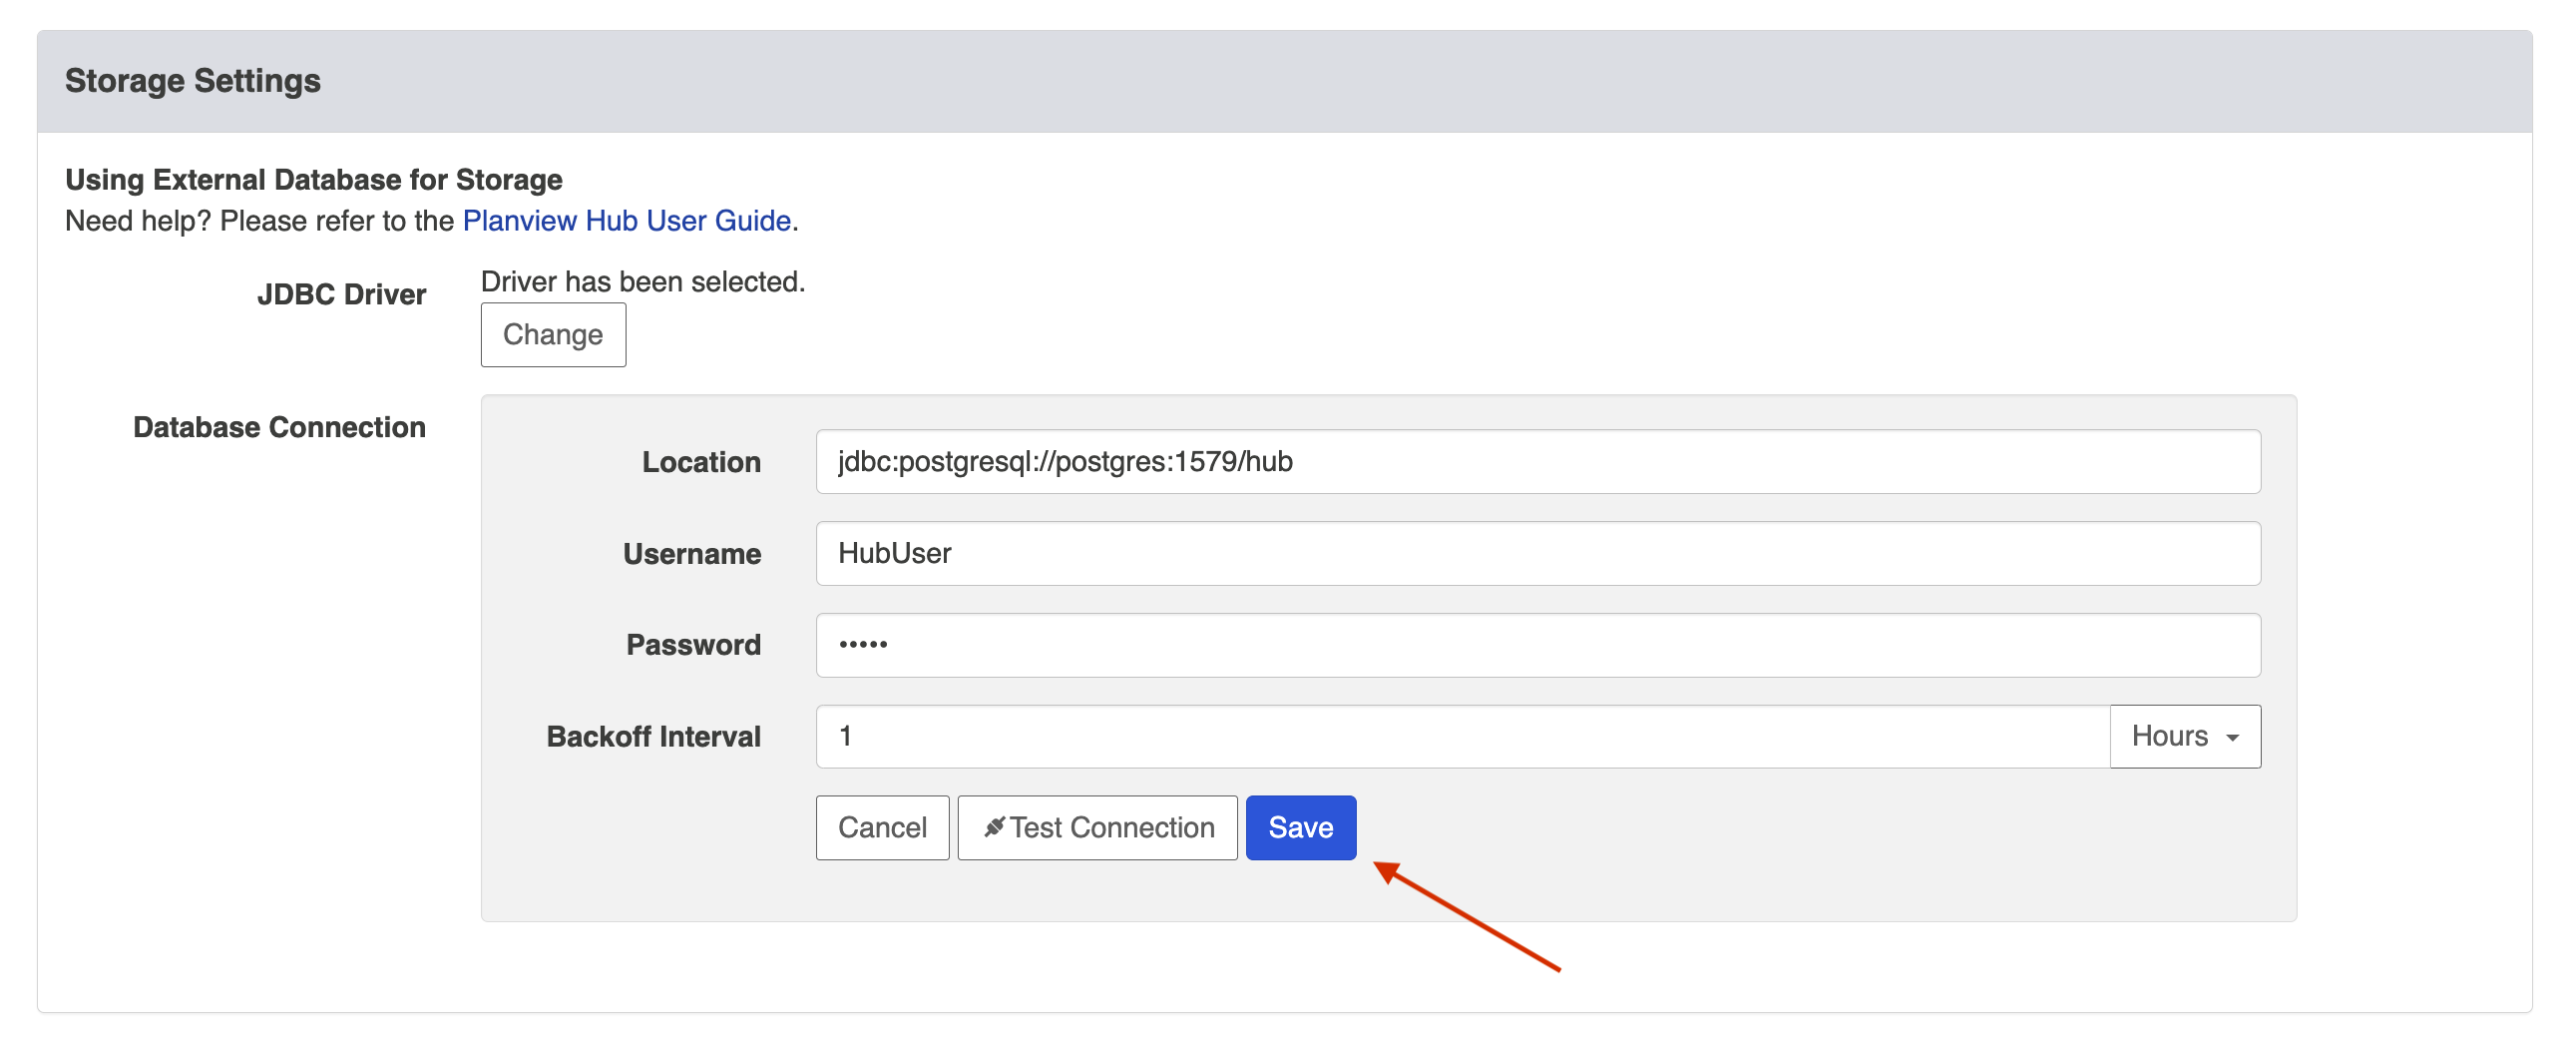
Next, fill out the Database Connection credentials — enter the location, username, and password.
Note: Authentication credentials must be in SQL server authentication mode (i.e., mixed-mode with SQL credentials). Windows authentication mode is not supported.
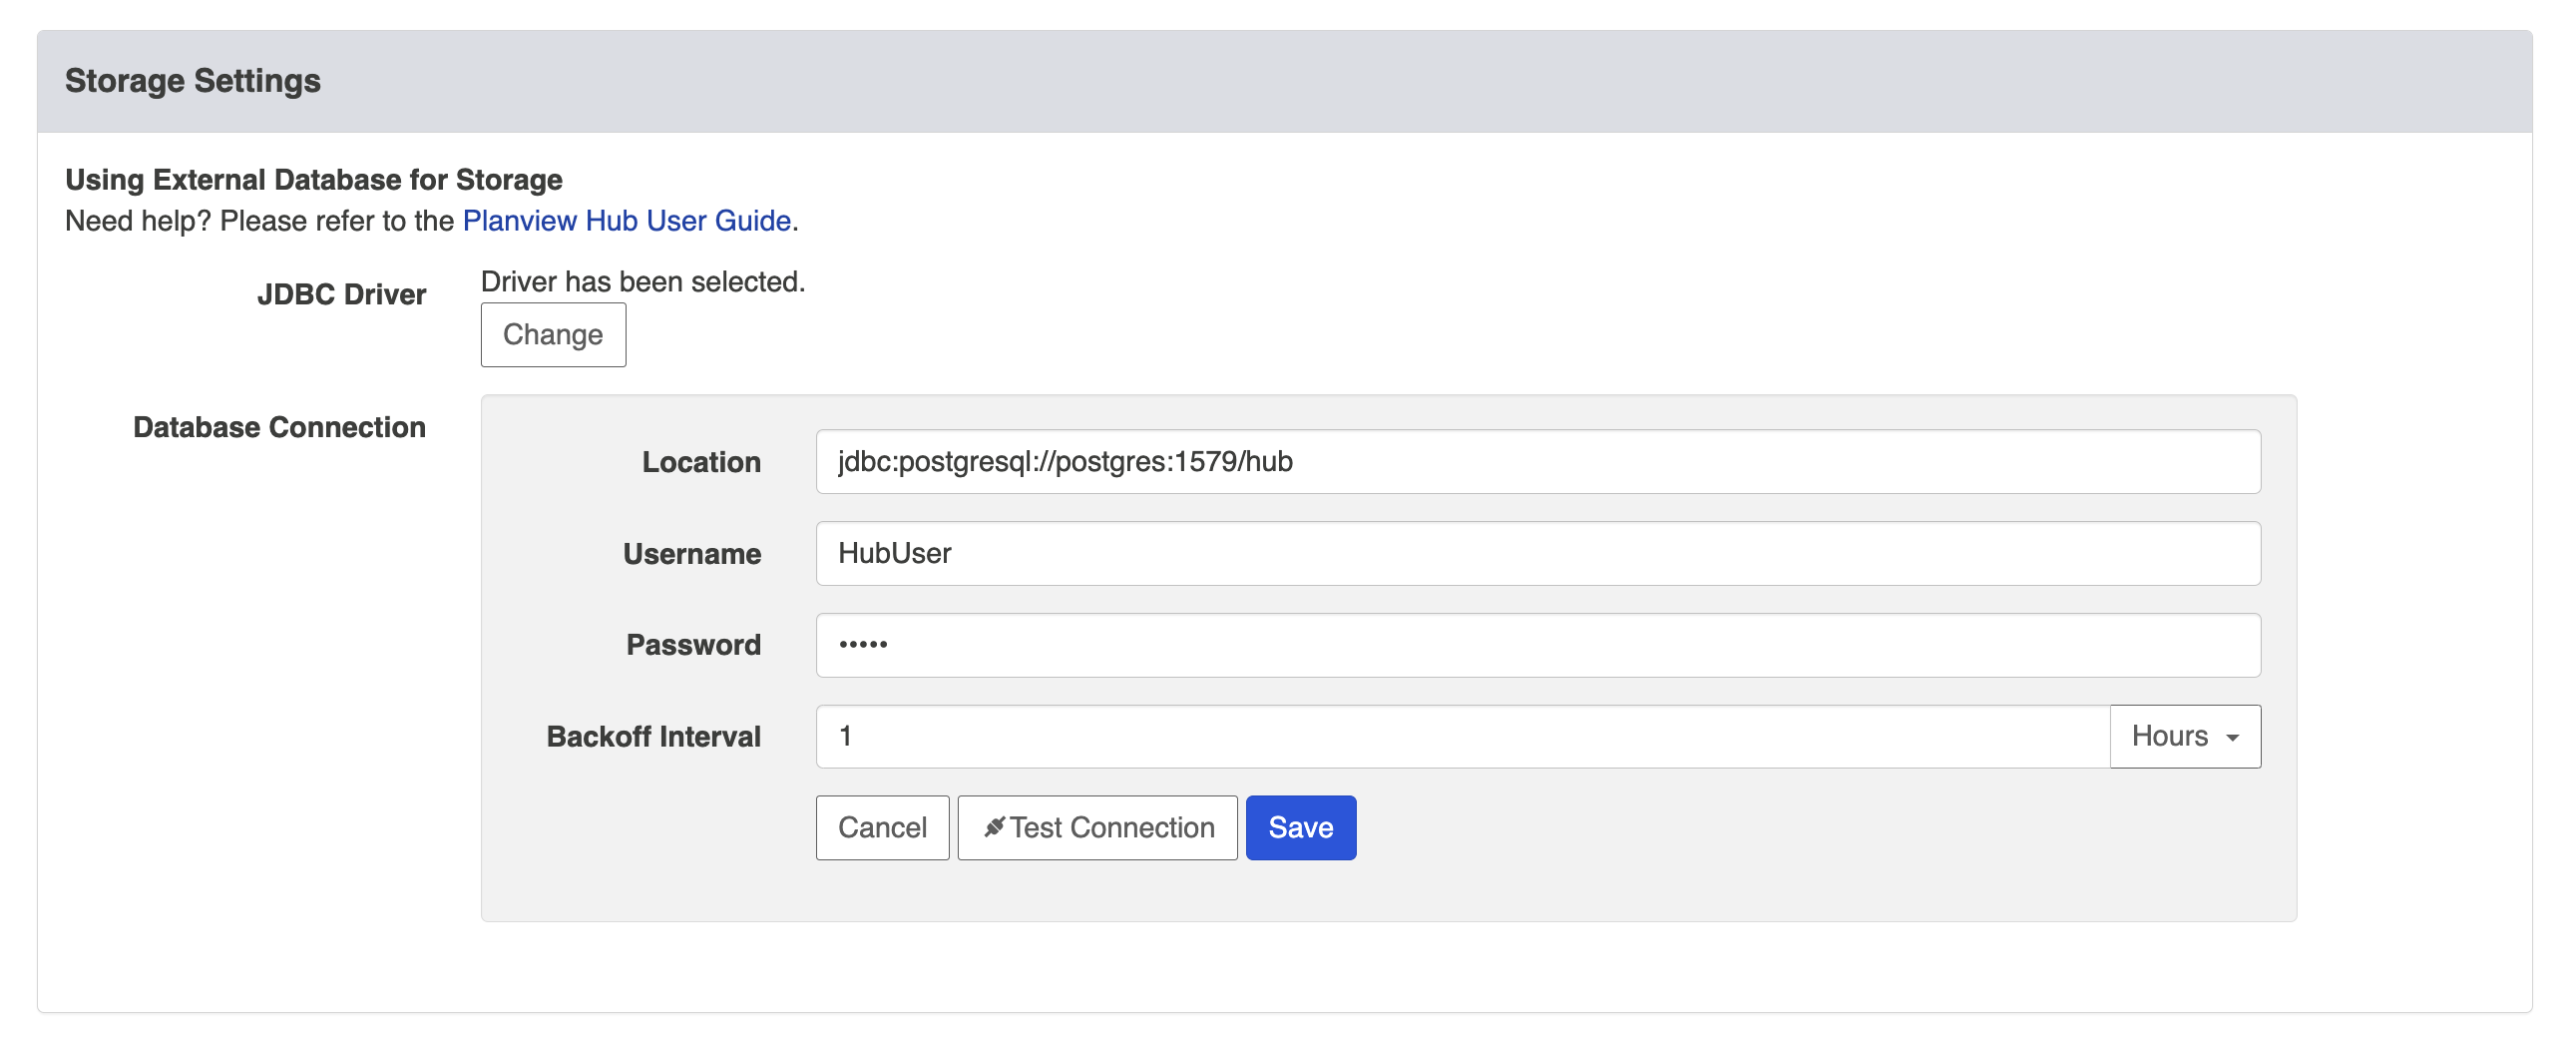
Location formats are as follows:
Microsoft SQL Server
jdbc:sqlserver://hostServerName;instanceN...MyDatabaseName
MySQL
jdbc:mysql://hostServerName:mysqlServerPort/MyDatabaseName
Oracle
jdbc:oracle:thin:@hostServerName:oracleServerPort/SID
PostgreSQL
jdbc:postgresql://hostServerName:postgreSqlServerPort/MyDatabaseName
Note: If you use a custom schema, you will need to add ?currentSchema=tasktop to the URL (e.g., jdbc:postgresql://example.com:5432/dbName...Schema=tasktop).
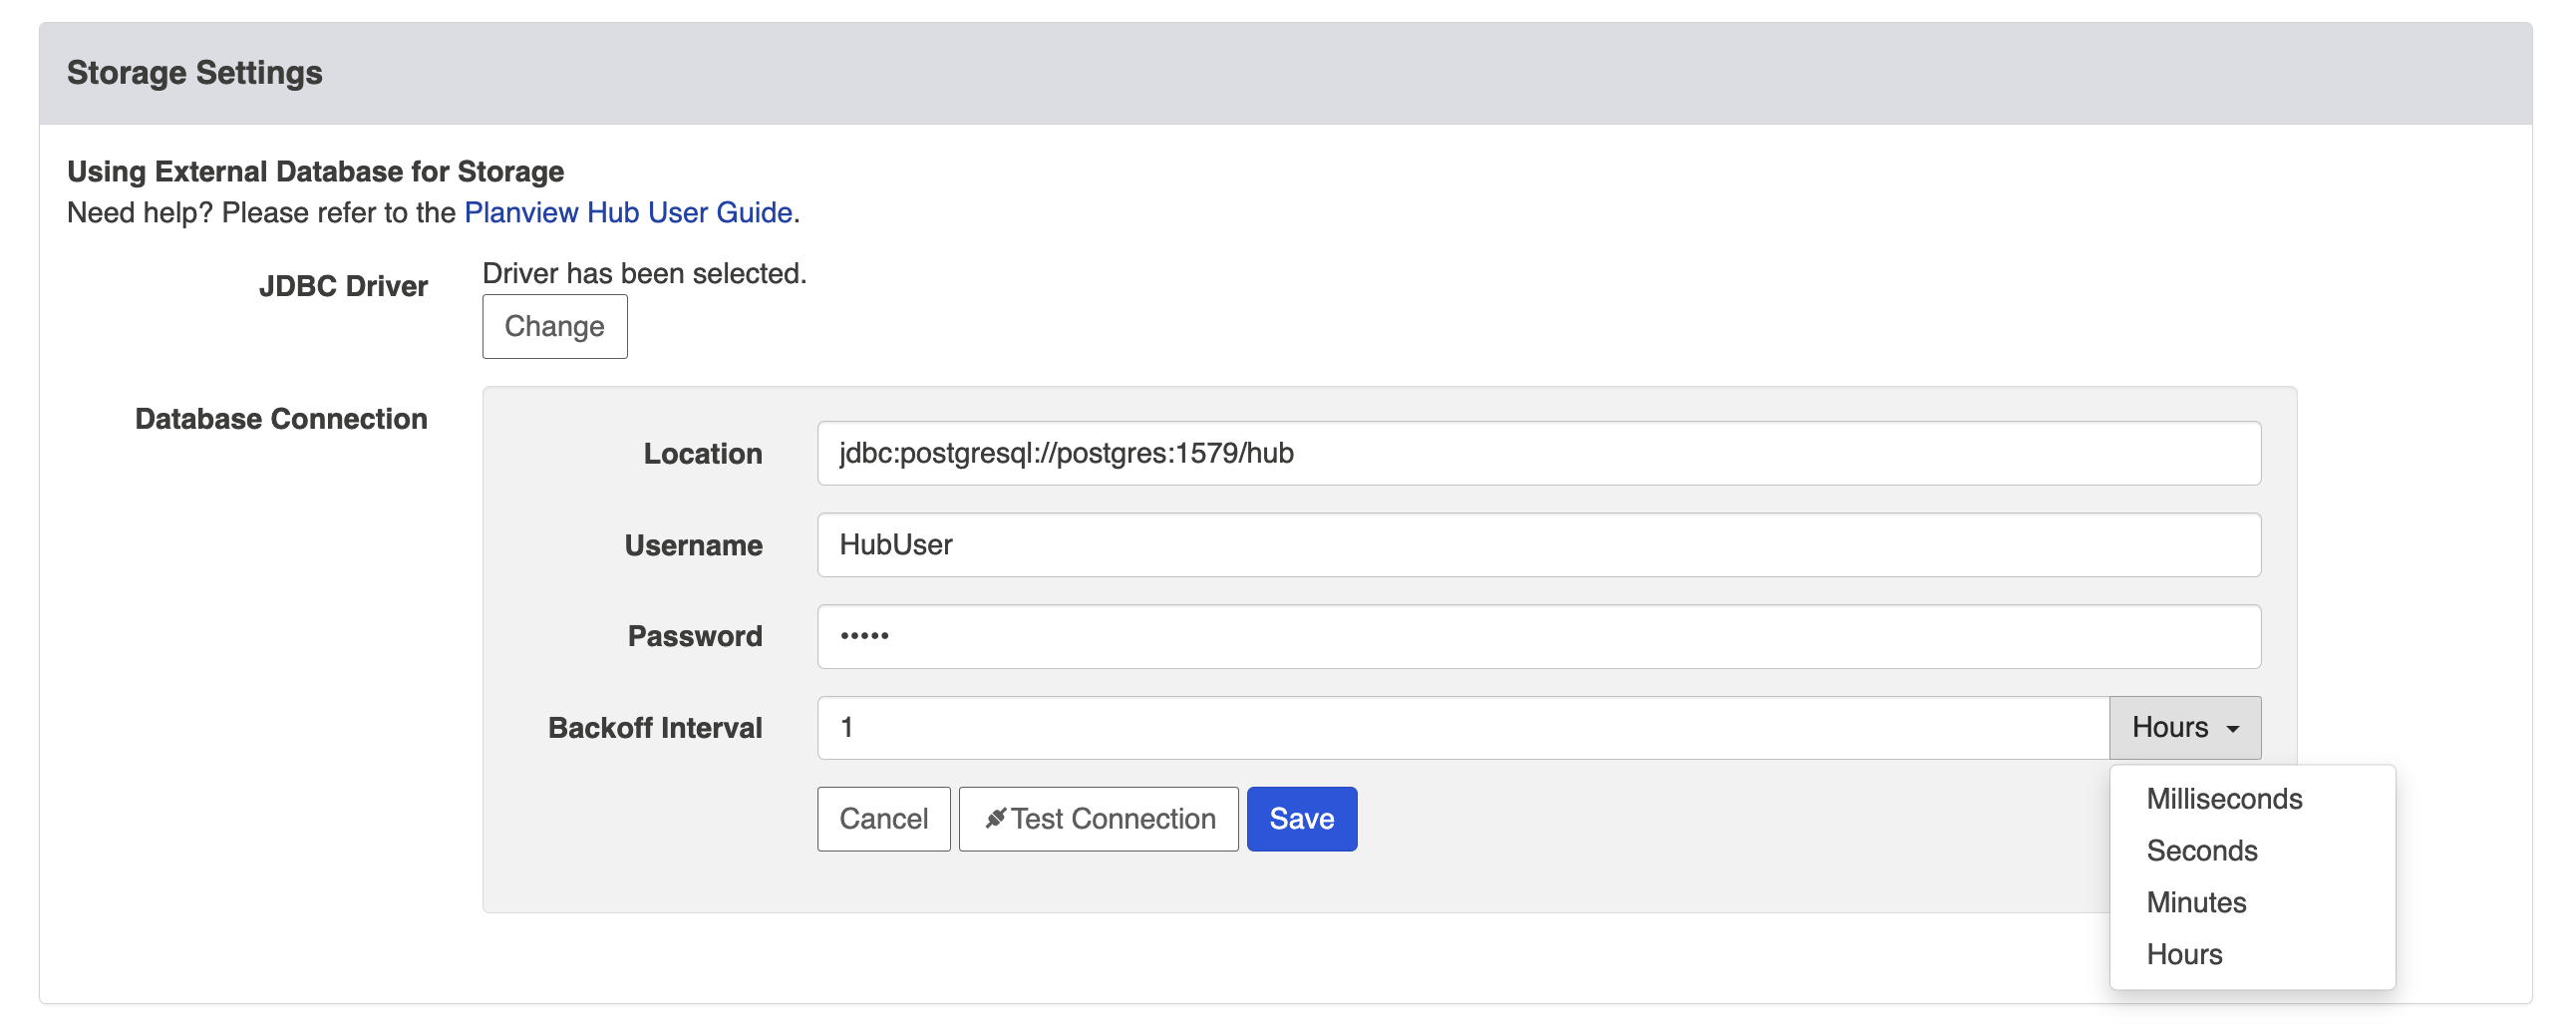
Backoff Interval
If you'd like, you can also update the Backoff Interval setting.
The Backoff Interval is the time Hub will wait after a database connection failure (e.g., invalid username or password) before retrying the connection. This feature is especially useful for databases with a lockout or brute force policy configured.
Note: While backoff is in effect, processing artifacts will display an error and some operations may not work (e.g., you may be automatically redirected to the Settings screen). Once the backoff interval expires, artifacts will resume processing and operations will return to normal.
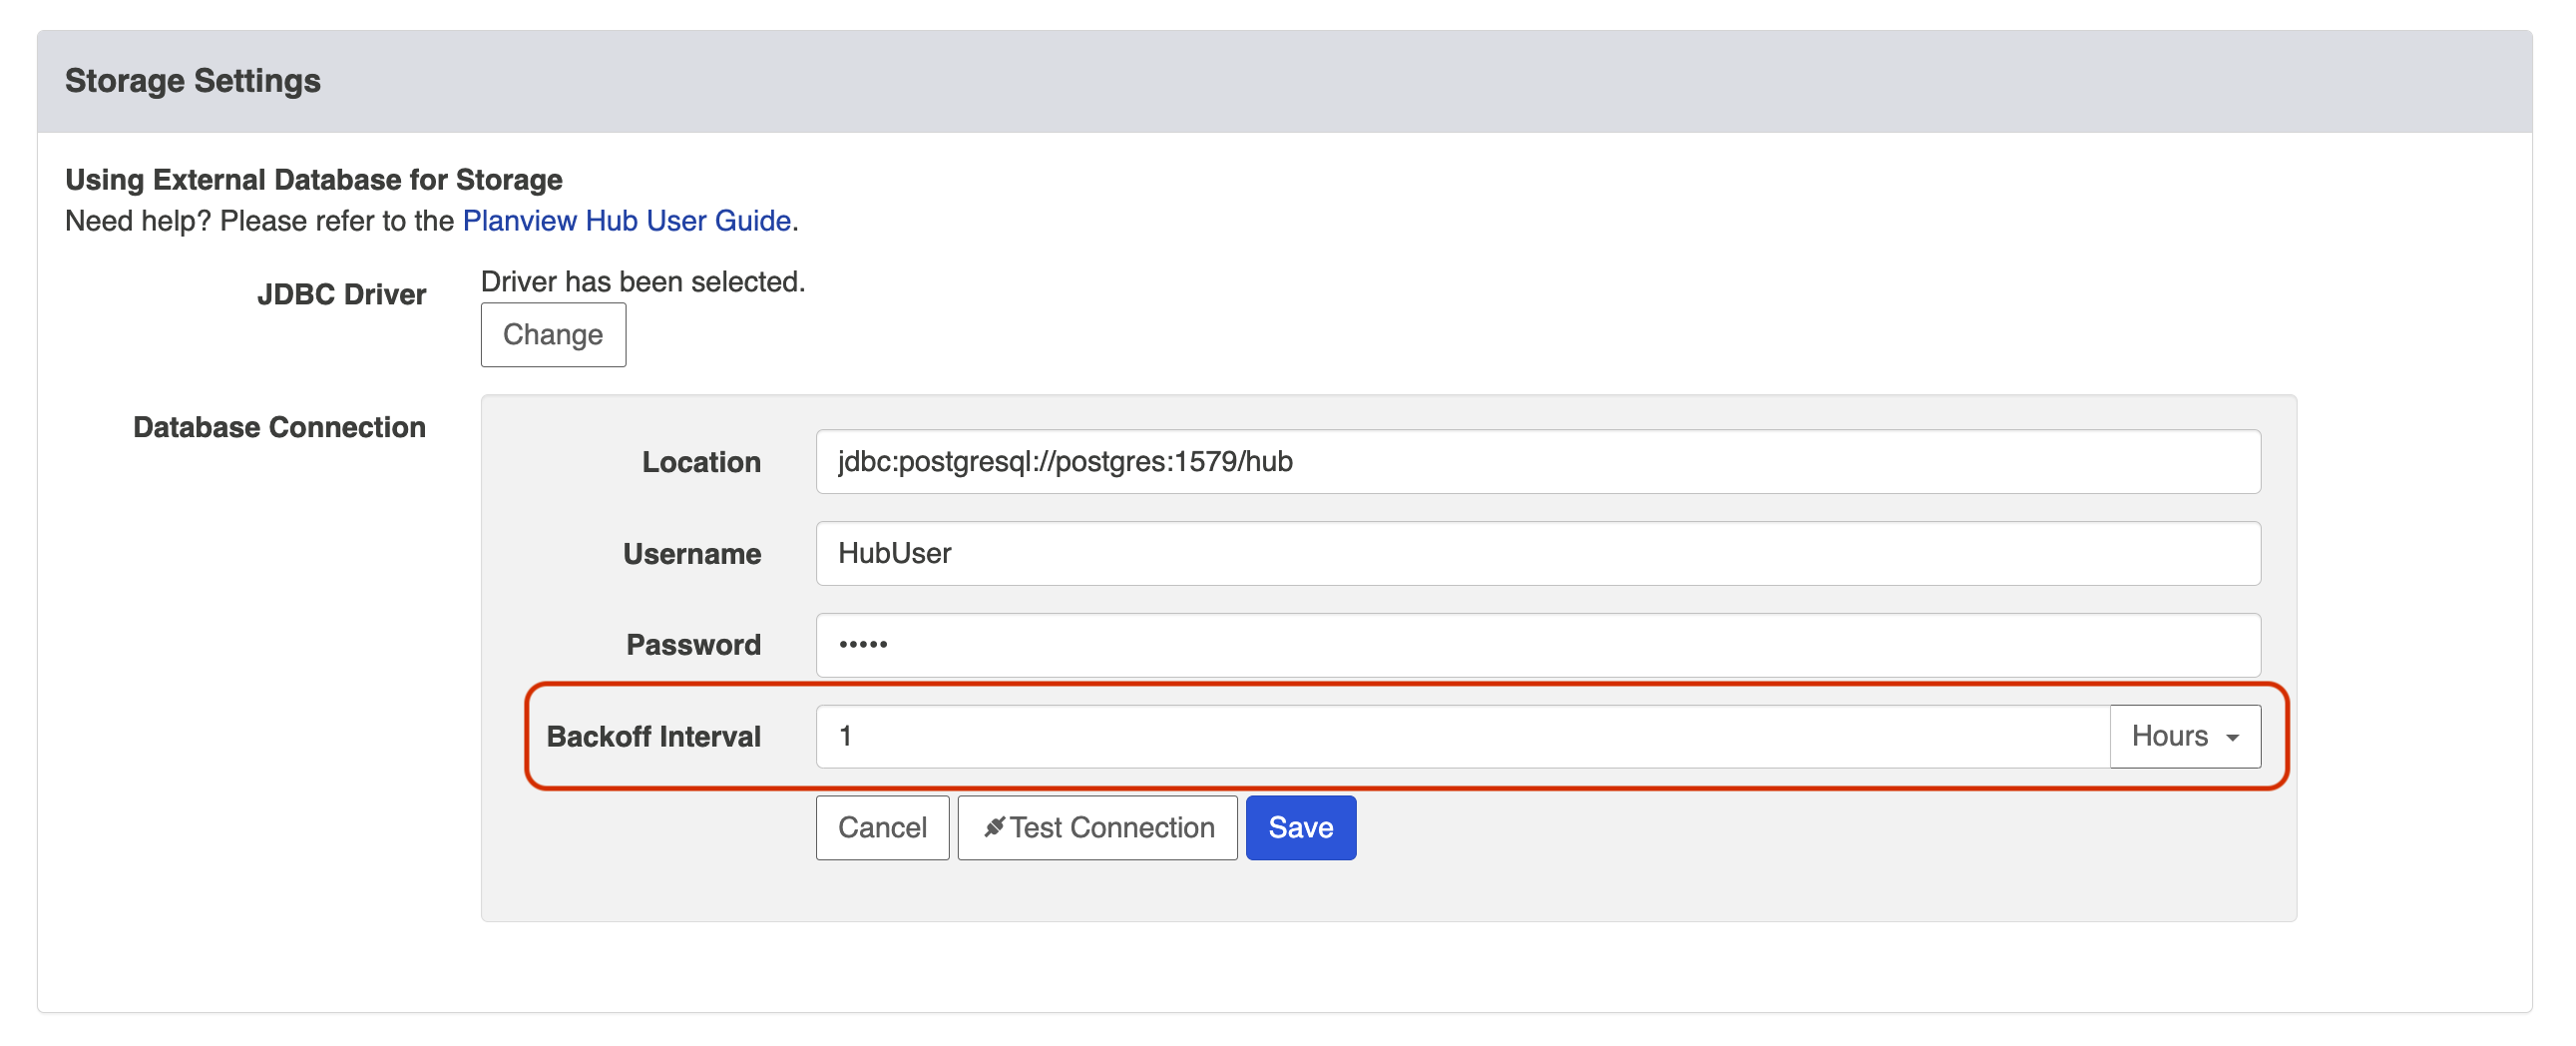
The backoff interval defaults to one hour, but can be customized as desired.
After you've added your database connection credentials, click Test Connection to confirm that your credentials have been accepted by Hub.
Note: If backoff is in effect, the Test Connection button will continue to work so you can test and save updated credentials.
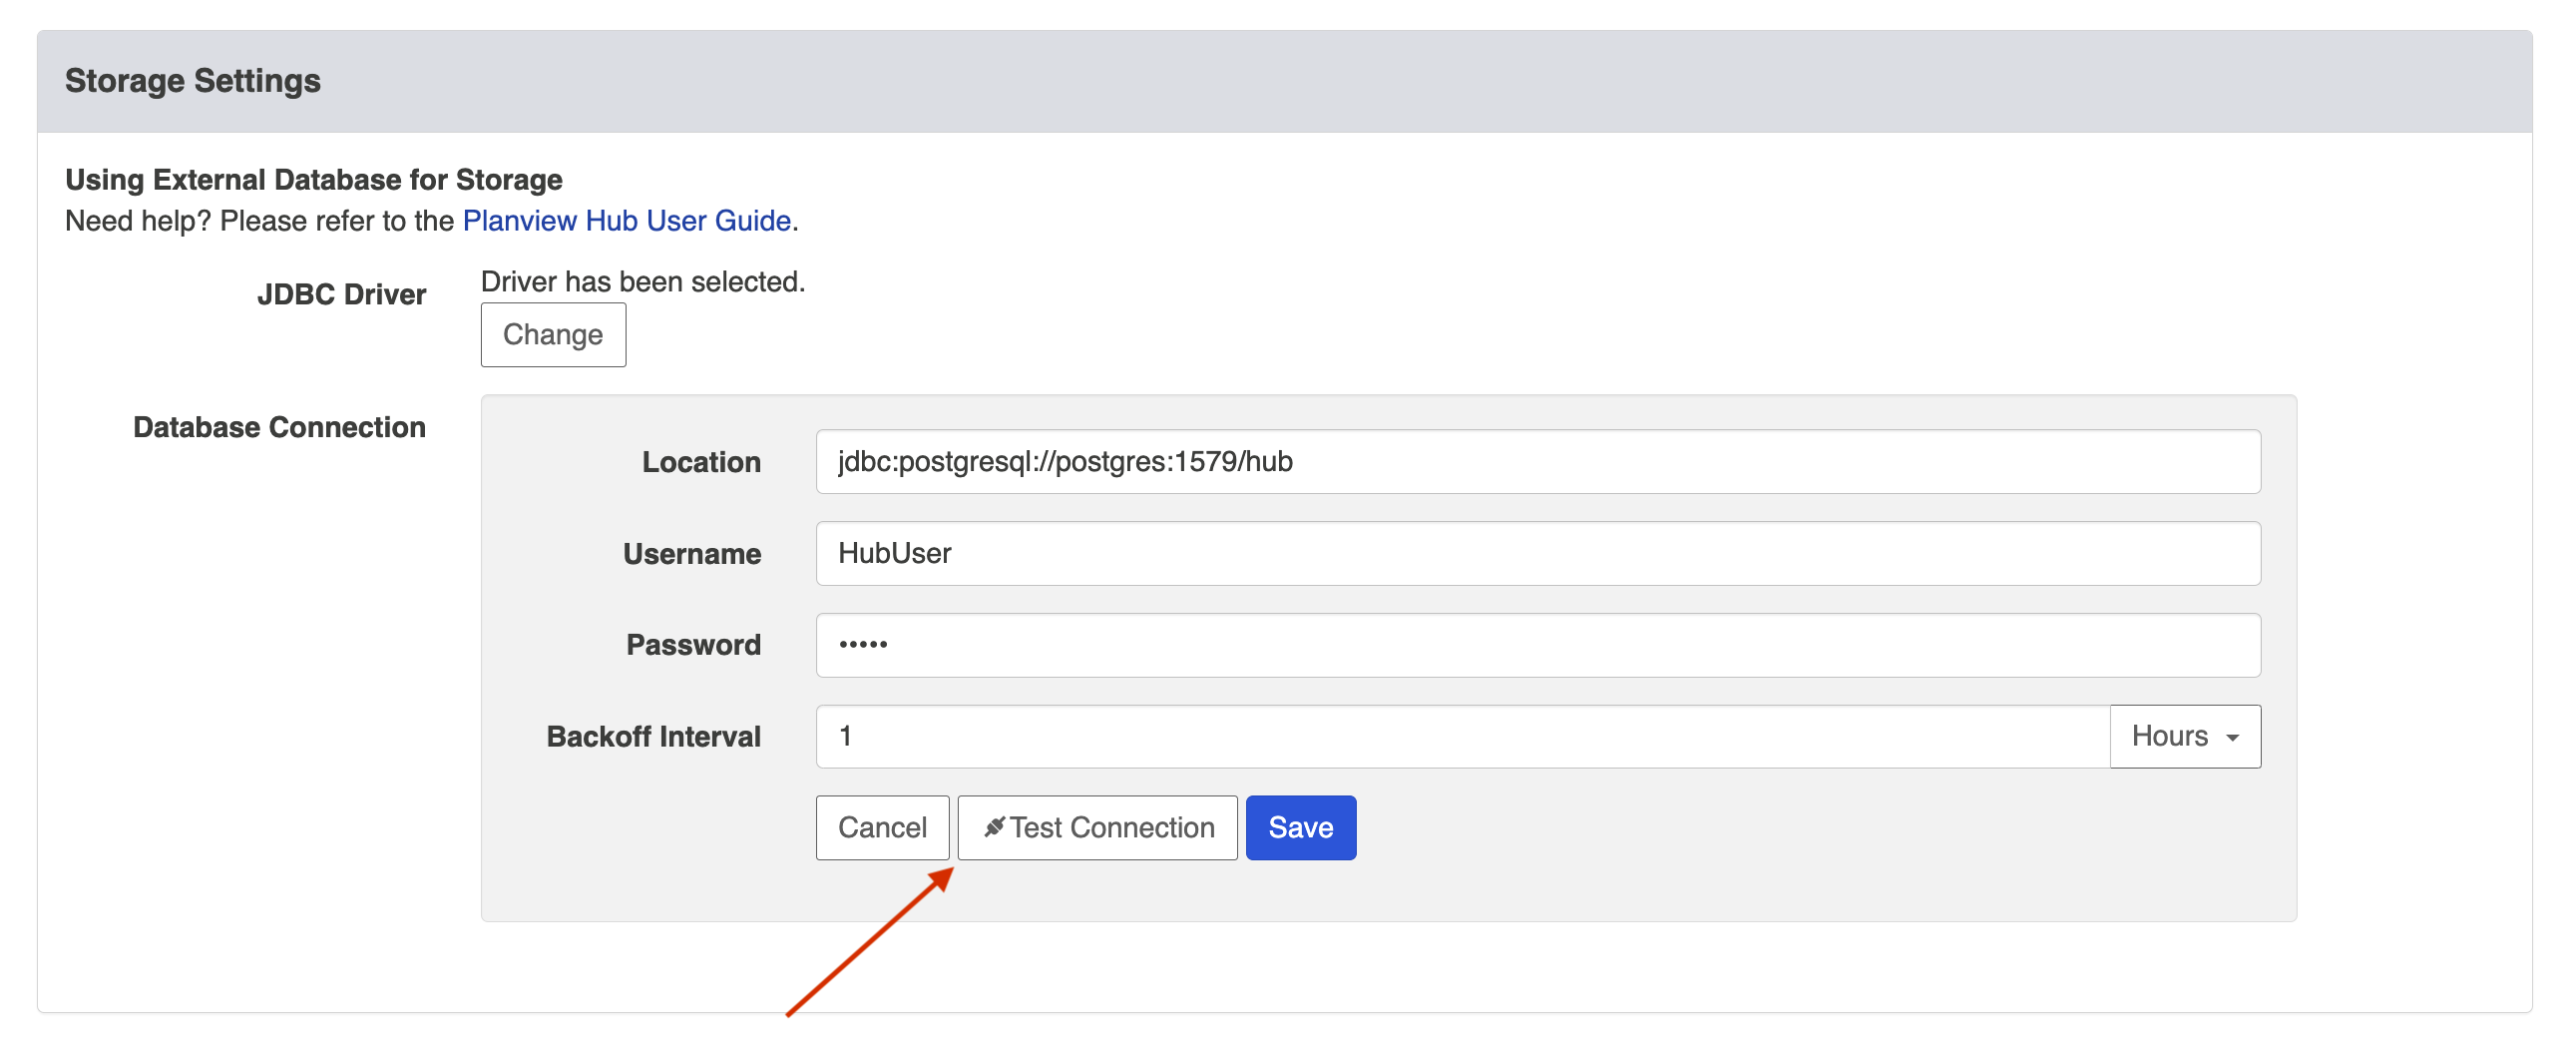
Once confirmed, click Save.
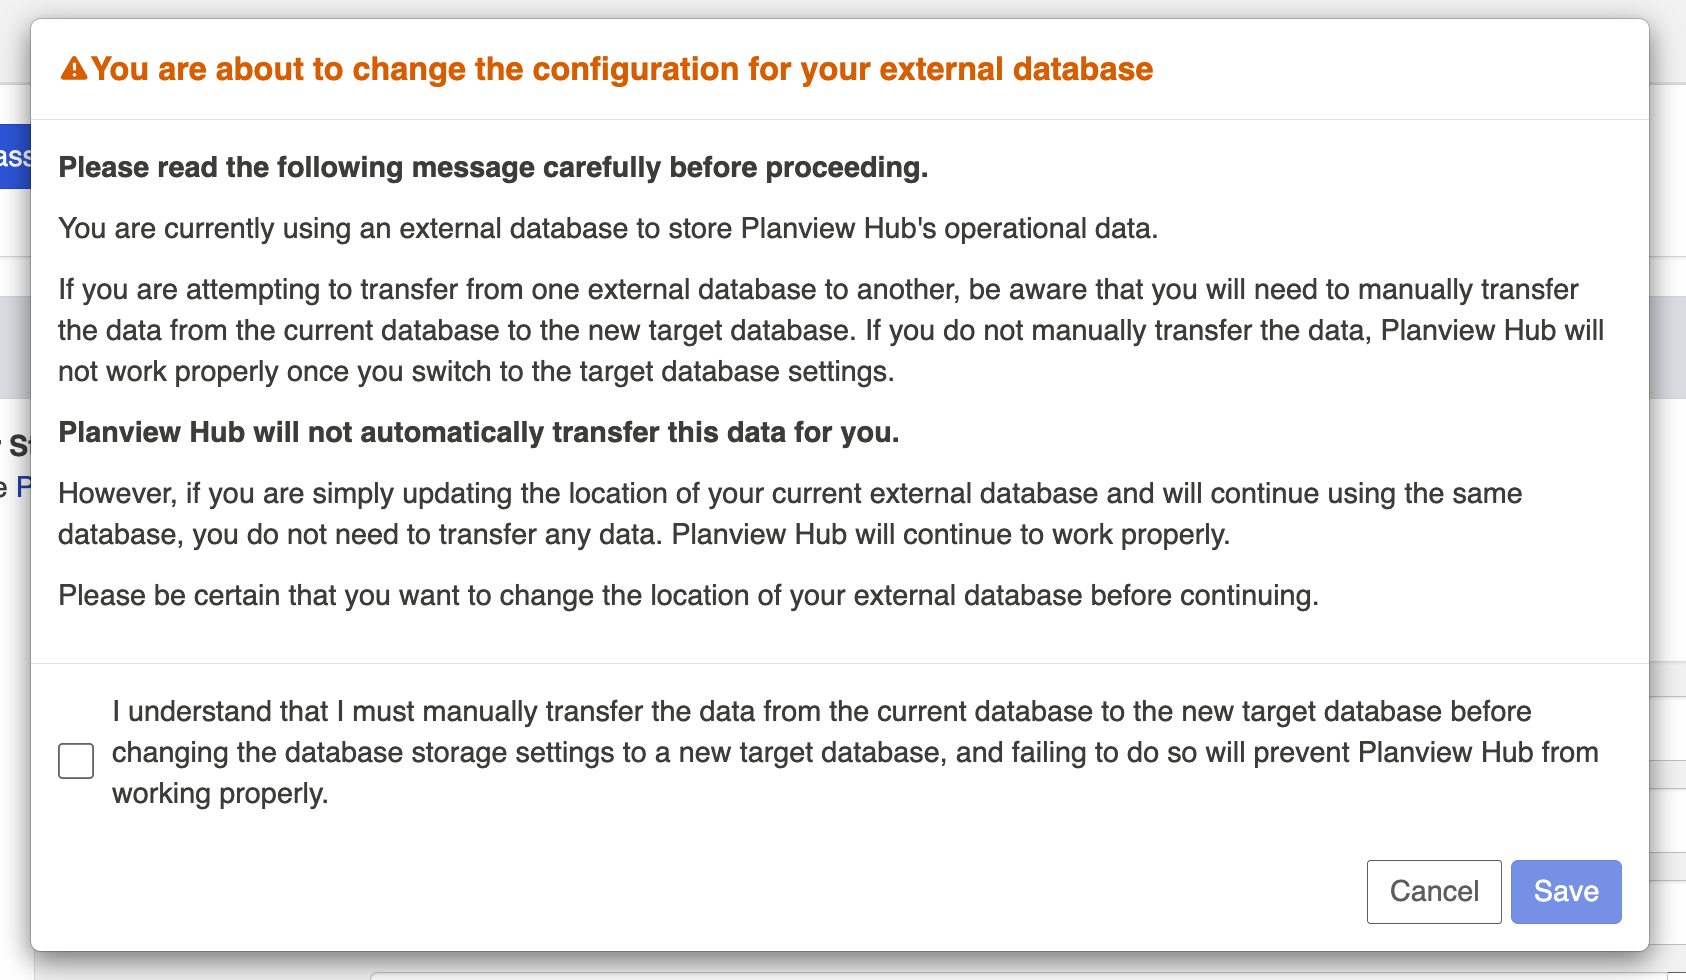
A warning message will appear telling you that you are about to transfer to an External Database. Review the entire message, ensuring that you have performed the recommended data back-up.
If you'd like to continue the transfer, click the checkbox and then click Save.
A Database Transfer Completed message will appear once the transfer is complete, informing you that your operational data has been successfully transferred from Hub's internal database to your own external database.
External to External
If you'd like to migrate your data from one external database to a different external database, you will need to manually transfer the data from the current database to the new target database. If you do not manually transfer the data, Hub will not work properly once you switch to the target database settings. Hub will not automatically transfer this data for you.
If you are simply updating the location or credentials of your current external database and will continue using the same database, you do not need to transfer any data. Hub will continue to work properly.
Moving between databases of the same type...
If you are migrating to a database of the same type (e.g., moving from one MySQL database to a different MySQL database), follow the instructions below:
- Transfer data from the old database to the new database.
- Update the Location, Username, and/or Password fields in the Database Connection section.
- Click Test Connection and then Save.
- A warning message will then appear, ensuring you have taken all necessary steps. After reviewing the message, click the checkbox and then Save.
Moving between databases of different types...
If you are migrating to a database of a different type (for example, moving from a MySQL database to an Oracle database), follow the instructions below:
- Create a new empty database in the new database.
- Stop Hub.
- Manually replace the jdbc driver jar in
<program data>/Tasktop/driverswith the correct driver for the new database (not in<program data>/Tasktop/jdbc-drivers, because the new driver cannot be selected in the UI), and make sure it is nameddatabase-driver.jar. - Manually edit
<program data>/Tasktop/db/tasktop-db.jsonwith the URL and credentials for the new database. - Start Hub.
- Hub will create new empty tables in the new database.
- Stop Hub.
- Copy all the data from the tables in the old database to the tables in the new database, except the tables
DATABASECHANGELOGandDATABASECHANGELOGLOCK(copying data for these two tables will cause errors). - Start Hub.
If your Database Transfer Fails or is Aborted
If your database transfer fails or is aborted, Hub will continue to use its internal database to store operational data. The internal database is not cleared until a successful transfer is completed, so you should not notice any change in performance.
However, we do recommend reviewing the external database and clearing any data and tables that were created as part of the failed data transfer before starting the transfer process again.
Overriding Database Access
In order to prevent risk of collisions, duplicates, and other errors, Hub has functionality to ensure that multiple Hub instances cannot run on the same operational database.
If you connect your instance to a database that is already in use by Hub (this is not recommended), upon start-up of the new instance, the prior instance will lose database access and stop processing events. When you login to the prior instance, you will see an error message prompting you to either update your credentials to connect to a different database, or to override database access. If you override database access, this means that the other instance of /hub will lose access to that database.
When overriding, be sure to confirm that no other Hub instance is using the database before moving forward. If another Hub instance is actively using the database, it is recommended that you shut down the other instance of Hub before proceeding.
