
SSL Certificate Installation
This page is not applicable to Planview Hub Cloud.
SSL Certificate Installation
The Planview Hub application is available via HTTPS on port 8443. A default SSL certificate is provided for testing purposes and should be replaced after installation.
Replacing the default SSL certificate used by Planview Hub involves the following:
- Preparing a Java keystore file with all keys and certificates
- The Hub and Keycloak SSL configuration require a JKS format keystore.
- If your corporate CA provides a JKS keystore file, you can skip to the Configure Hub to use the keystore section and follow the steps using the JKS keystore file from your CA.
- If your CA requires you to provide a CSR and returns a certificate response to you, use the following steps to generate your own keystore file and CSR:
- Create a Java keystore file and generate a new key pair
- Generate a certificate request file
- Submit the file to a Certificate Authority (CA) and obtain the certificate and CA certificate trust chain
- Import the certificates to the keystore file
- The Hub and Keycloak SSL configuration require a JKS format keystore.
- Configuring Hub to use the keystore (i.e., new key and certificate)
The SSL certificate should contain DNS names where the Hub server is accessible. The user's browser will verify that the name in the address bar matches the names listed in the certificate. Certificate Authority may be your internal corporate service, or you may use a public CA (e.g., Comodo, Let’s Encrypt). If you are planning to use a certificate from a public CA, your Planview Hub instance must have a publicly recognizable DNS name that is owned by your organization.
Running Portecle for SSL certificate installation
To run Portecle for SSL certificate installation, see the instructions below:
- Download and unzip Portecle.
- Open the command prompt.
- For Windows, navigate to
C:\Program Files\Tasktop\jre\bin\ - For Linux, navigate to
<tasktop-install>/jre/bin/
- For Windows, navigate to
- Run the following command (changing
/path/to/portecle/ to the location where you unzipped Portecle):-
java -jar /path/to/portecle/portecle.jar
-
Prepare a Java keystore file with all the keys and certificates
To replace Hub's default SSL certificate using Portecle, follow the instructions below:
Tip: Details on accessing Portecle can be found in the section above.
-
Create a key pair and keystore:
-
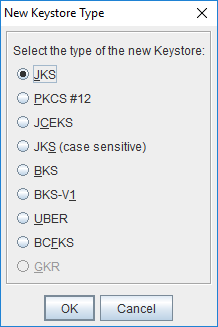
Start Portecle and click New Keystore in the toolbar and select JKS as the keystore type.
-
-
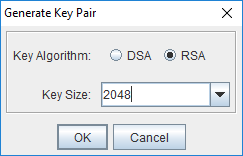
Click Generate Key Pair in the toolbar. You can leave the default settings for 2118 bit RSA key, or choose different settings if required by your company’s security policy.
-
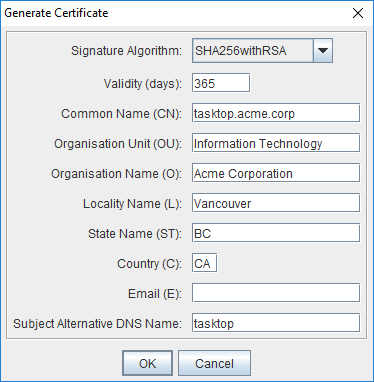
In the Generate Certificate pop-up, enter the Fully Qualified Domain Name (FQDN) of your Hub server in the Common Name (CN) field and enter other fields as needed.
-
In the Subject Alternative DNS Name field, enter the alternative domain name of the server, if one exists. Your certificate should include all DNS names that your users may use to connect to Hub. For internal corporate CA you can also use “short” names (i.e., tasktop, in addition to tasktop.acme.corp). In CA, these additional DNS names are called Subject Alternative Names, or SAN. You can specify one SAN at this point, and can usually add more names later when submitting your request to the CA.
-
-
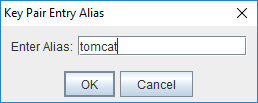
Enter tomcat as alias.
-
-
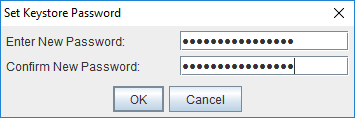
Create a new password for the key pair.
-
Tip: You will need this password later when configuring Tomcat.

-
-
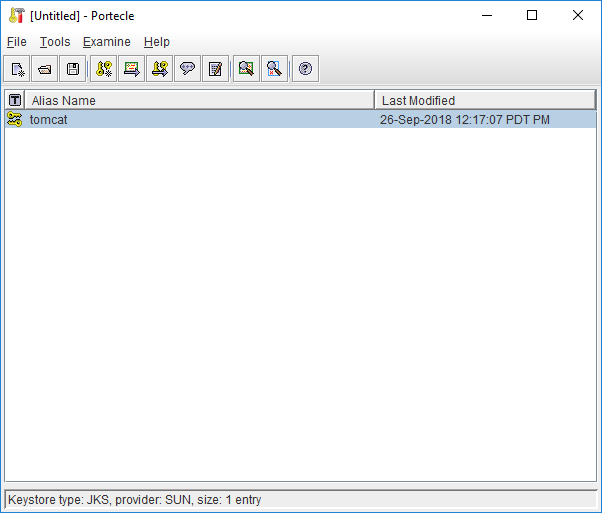
You will see your newly created key pair in the list.
-
Click Save Keystore in the toolbar to save the newly created keystore file. Here, use the same password that you entered for the key pair earlier.
-
-
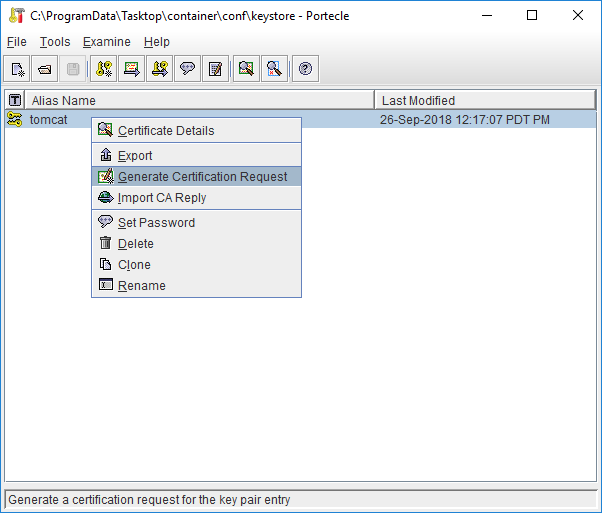
To generate a certificate request file (also known as Certificate Signing Request or CSR), right click on the tasktop key and select Generate Certification Request and save it to a file.
-
-
Submit your CSR to a CA to obtain a Certificate.
Note: For some CAs you will need to provide the list of all DNS names for your Hub server separately as they will ignore the SAN values in the certificate request. See your CA's documentation for more information. -
Import the certificates to the keystore file.
-
If your CA provided a separate file with the CA certificate or trust chain, import it by selecting Import Trusted Certificate in the toolbar. If your CA provided only one file in response to your CSR, skip to 4b.
-
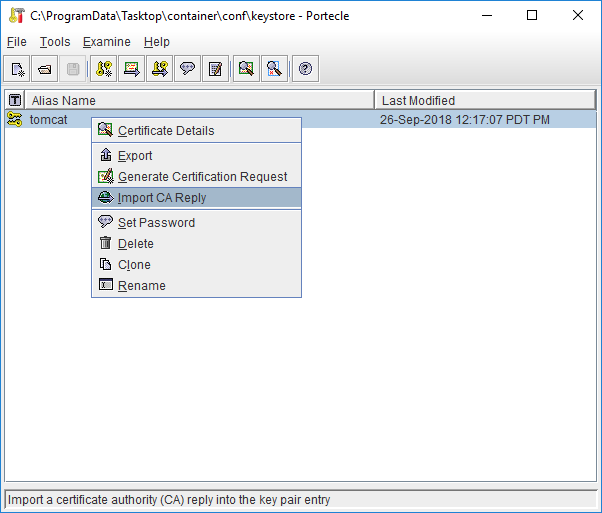
Import the server certificate by right clicking on the tasktop key, selecting Import CA Reply and choosing the server certificate file received from the CA.
-
To verify the certificate chain, click Tools and then click Keystore Report.
-
Configure Hub to use the keystore and enable SSL validation
By default, Planview Hub is configured to skip SSL handshake verification. As the SSL handshake would fail without a properly configured keystore. To avoid this issue, we have set ssl.skip-verification to true by default, effectively disabling SSL handshake verification between Hub to Keycloak.
To enable full SSL validation in product environments, it is REQUIRED to set ssl.skip-verification to false in the tasktop-hub.properties file and provide valid keystore file information created from the previous step by following the below configuration steps:
-
Place your keystore file in a protected location that will not be wiped on Hub upgrade. We suggest using Hub's data directory (default
C:\ProgramData\Tasktop, or the home directory of the user that Hub service is running as on Linux). -
Open the
tasktop-hub.propertiesfile and configure the following properties:-
ssl.skip-verification= false -
server.ssl.key-store- Location where the keystore file exists -
server.ssl.key-store-password- Password of keystore file -
server.ssl.key-store-type- Type of keystore file (e.g., JKS, PKCS12) -
server.ssl.key-alias- Alias of keystore (e.g. tomcat)
-
-
Restart Hub Service
To learn more about creating a tasktop-hub.properties file, please see here.
By default, the SSL configuration has been configured to disable known weak ciphers. As new security information becomes available, the list of enabled ciphers should be updated accordingly.
Configure Keycloak User Management to use and trust Hub's keystore
In Planview Hub version 20.4, both Tomcat and Keycloak share the same properties in the tasktop-hub.properties file as they share the same keystore file. See more details above.
To learn more about creating a tasktop-hub.properties file, please here.