
User Management
Getting Started
Once installation is complete, you can begin using Planview Hub by opening https://localhost:8443/ in any of our supported browsers.
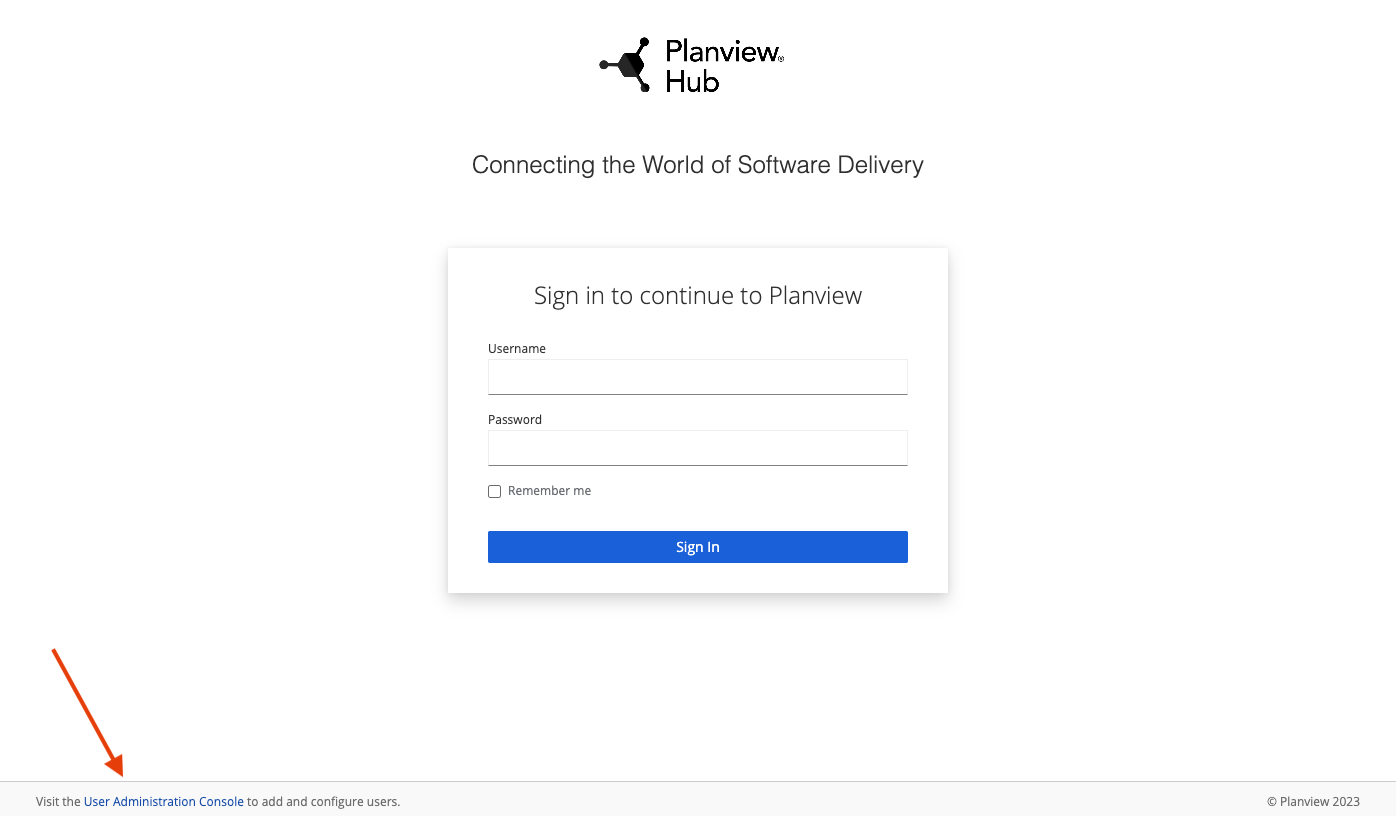
Before logging in to Hub, you must log in to the User Administration Console to create your admin user(s). This can be accessed via the User Administration Console link at the bottom of the Hub login screen.
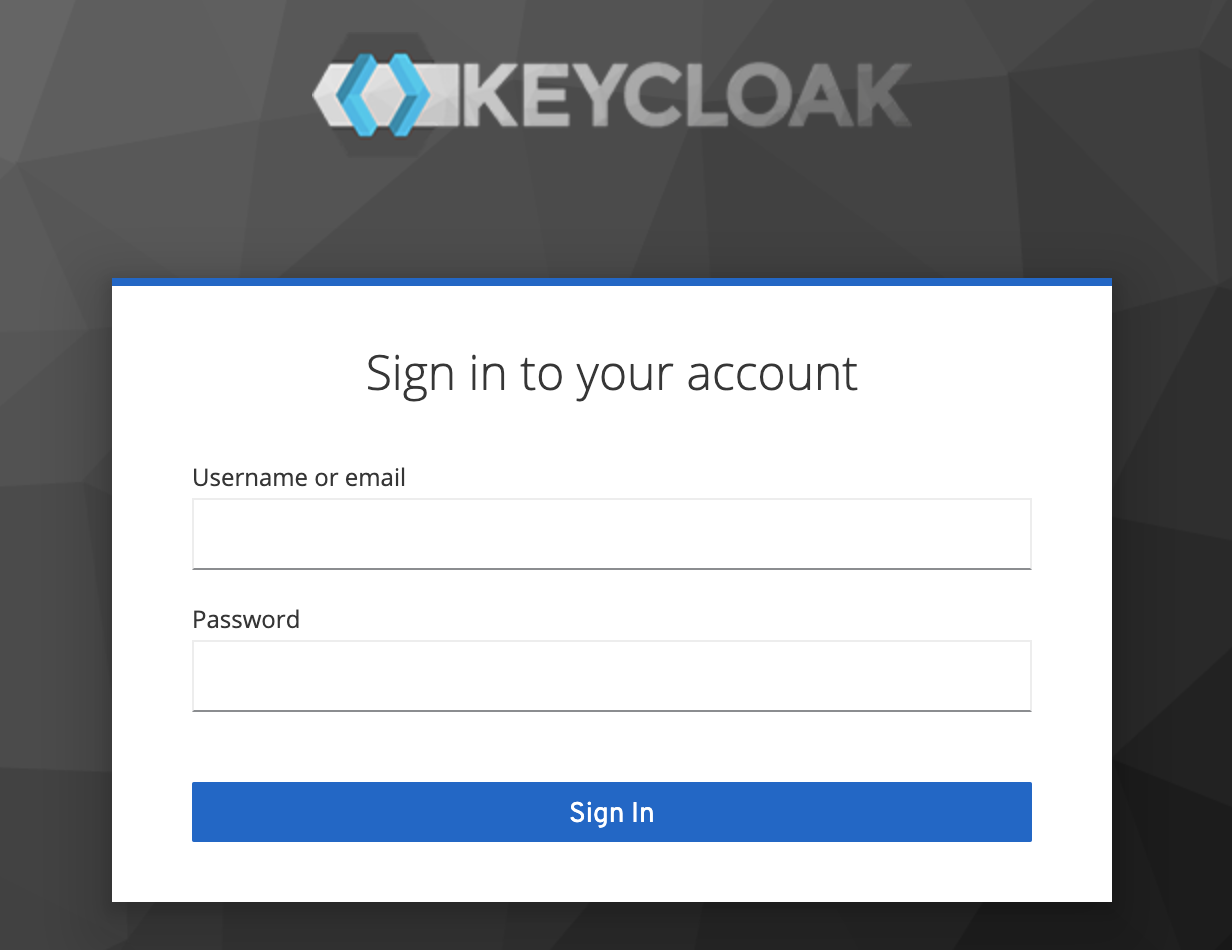
After clicking the link, the Keycloak login screen will appear.
The Hub User Administration Console comes pre-configured with a root user and password. You can use the following credentials to log in to Keycloak:
- Username: root
- Password: Tasktop123
Note: There is only one initial root user. If the credentials for this user are lost, access to the advanced User Management features will also be lost. All functionality of Hub will continue uninterrupted. You can learn how to create additional root users and manage existing root users here.
After logging in, you will be prompted to change your root password and you will need to make at least one new Hub Admin user for Planview Hub. After this first user is created, you can create additional users directly from the Hub interface.
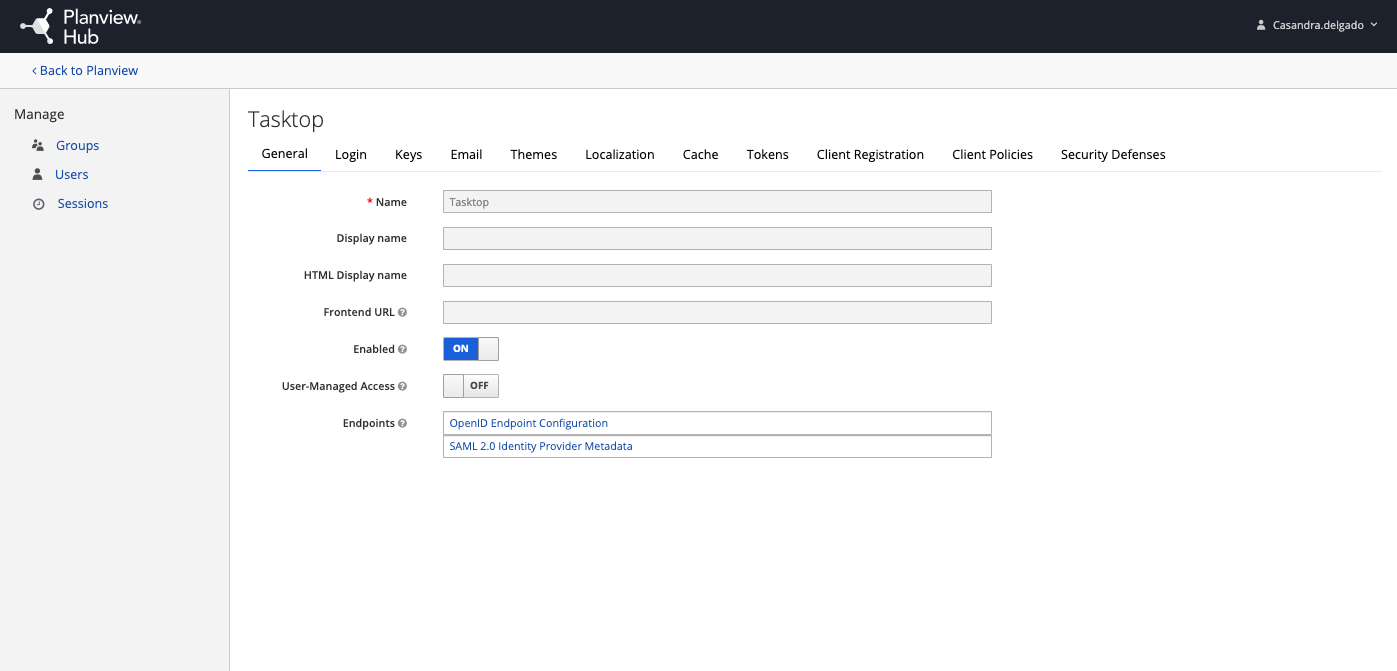
To create a Hub Admin, ensure the Tasktop realm is selected here:
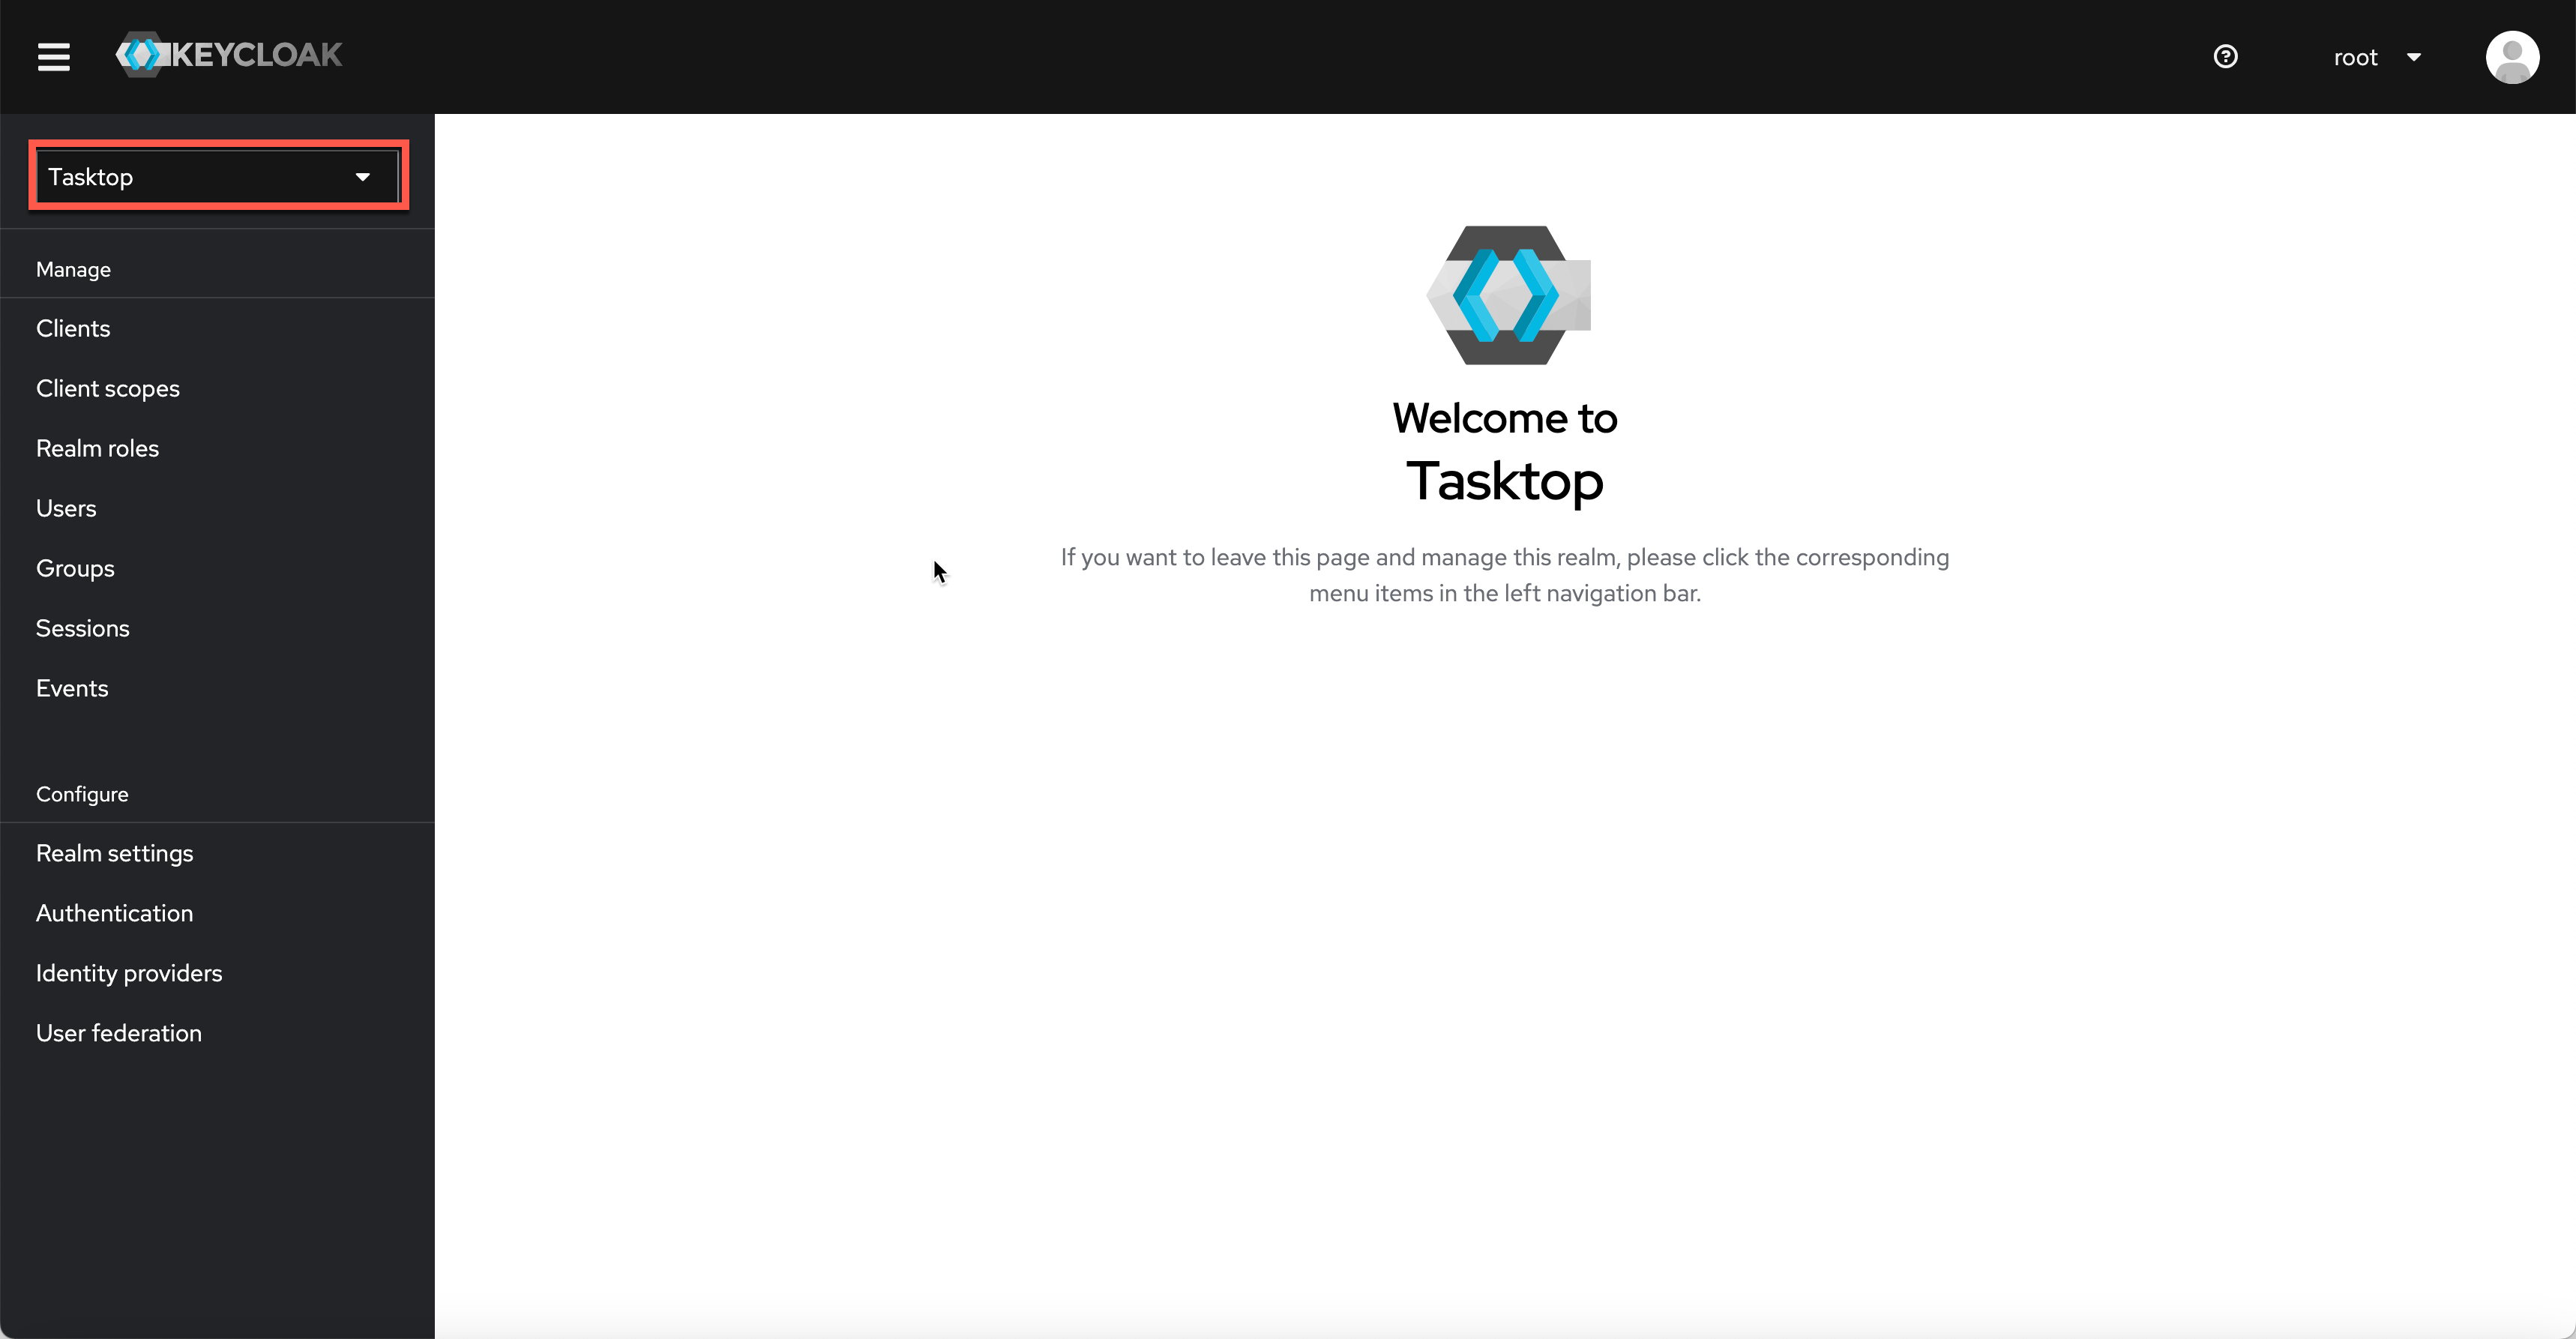
Note: Do not rename the realm (Tasktop), as this will result in errors upon Hub log in. If you must rename the realm, please also edit {tasktop workspace}/webapps/ROOT/WEB-INF/keycloak.json, update the 'realm' parameter, and then restart Hub.
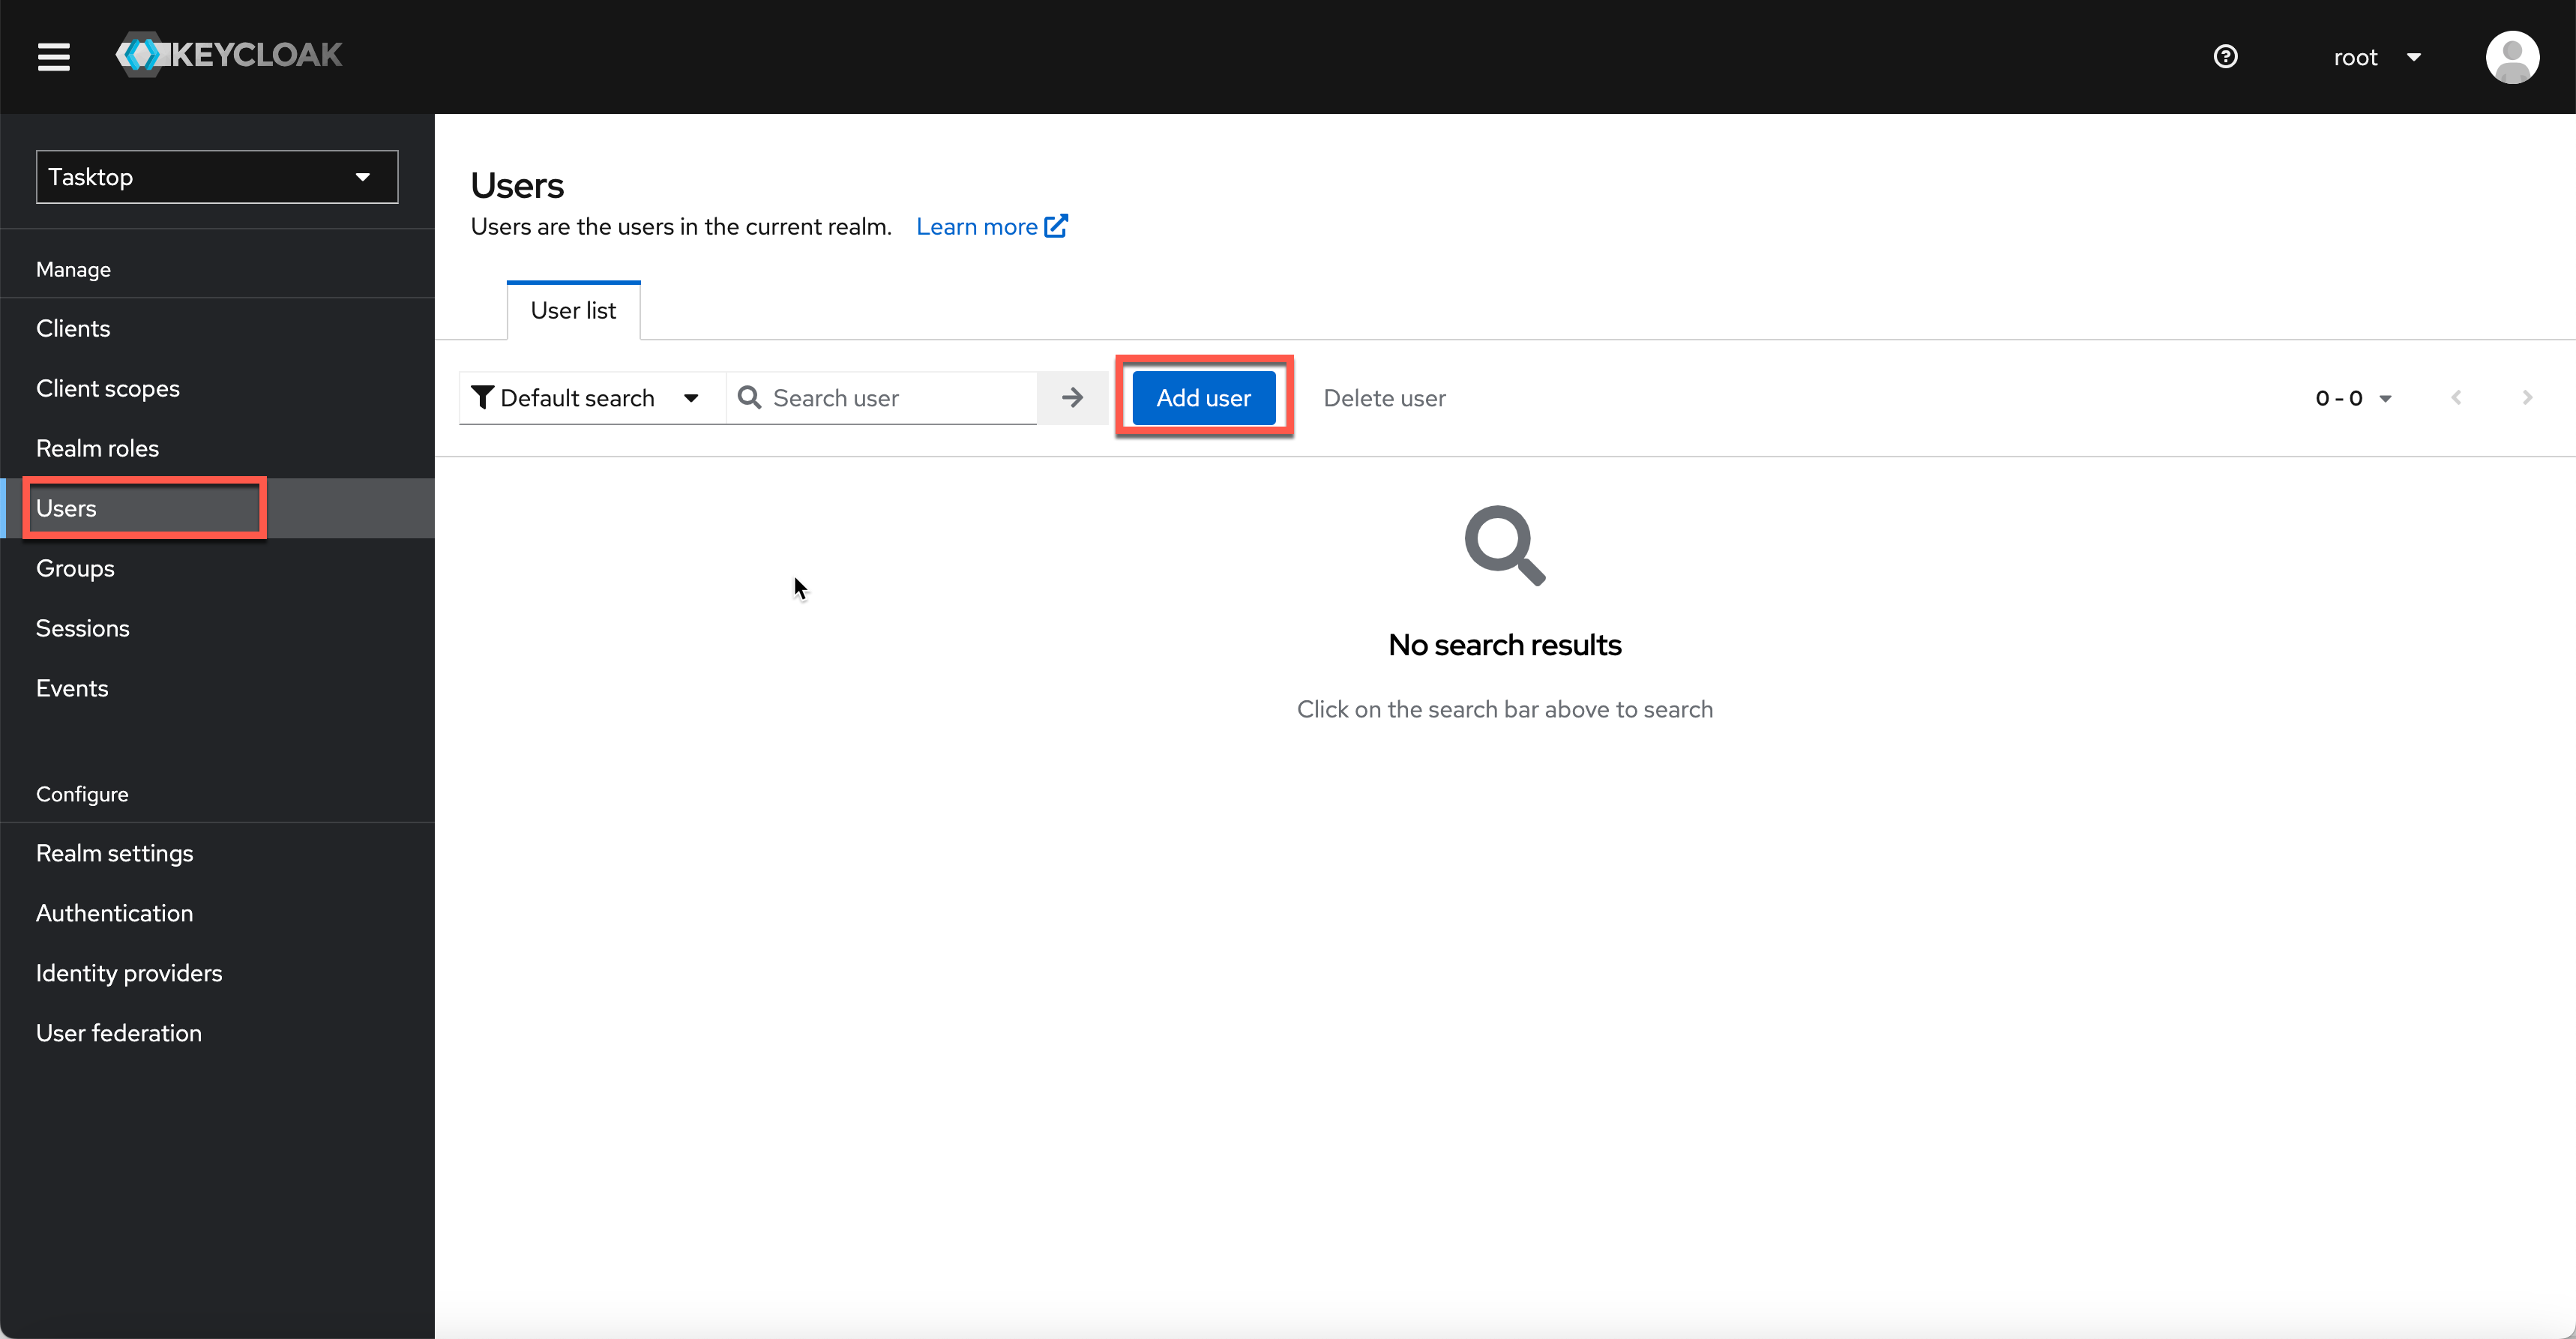
Select the User section in the left column and click Add user.
On this screen, enter the username, email, first name, and last name for your new user — the rest of the fields are not required. Once you've entered the required fields, click Create.

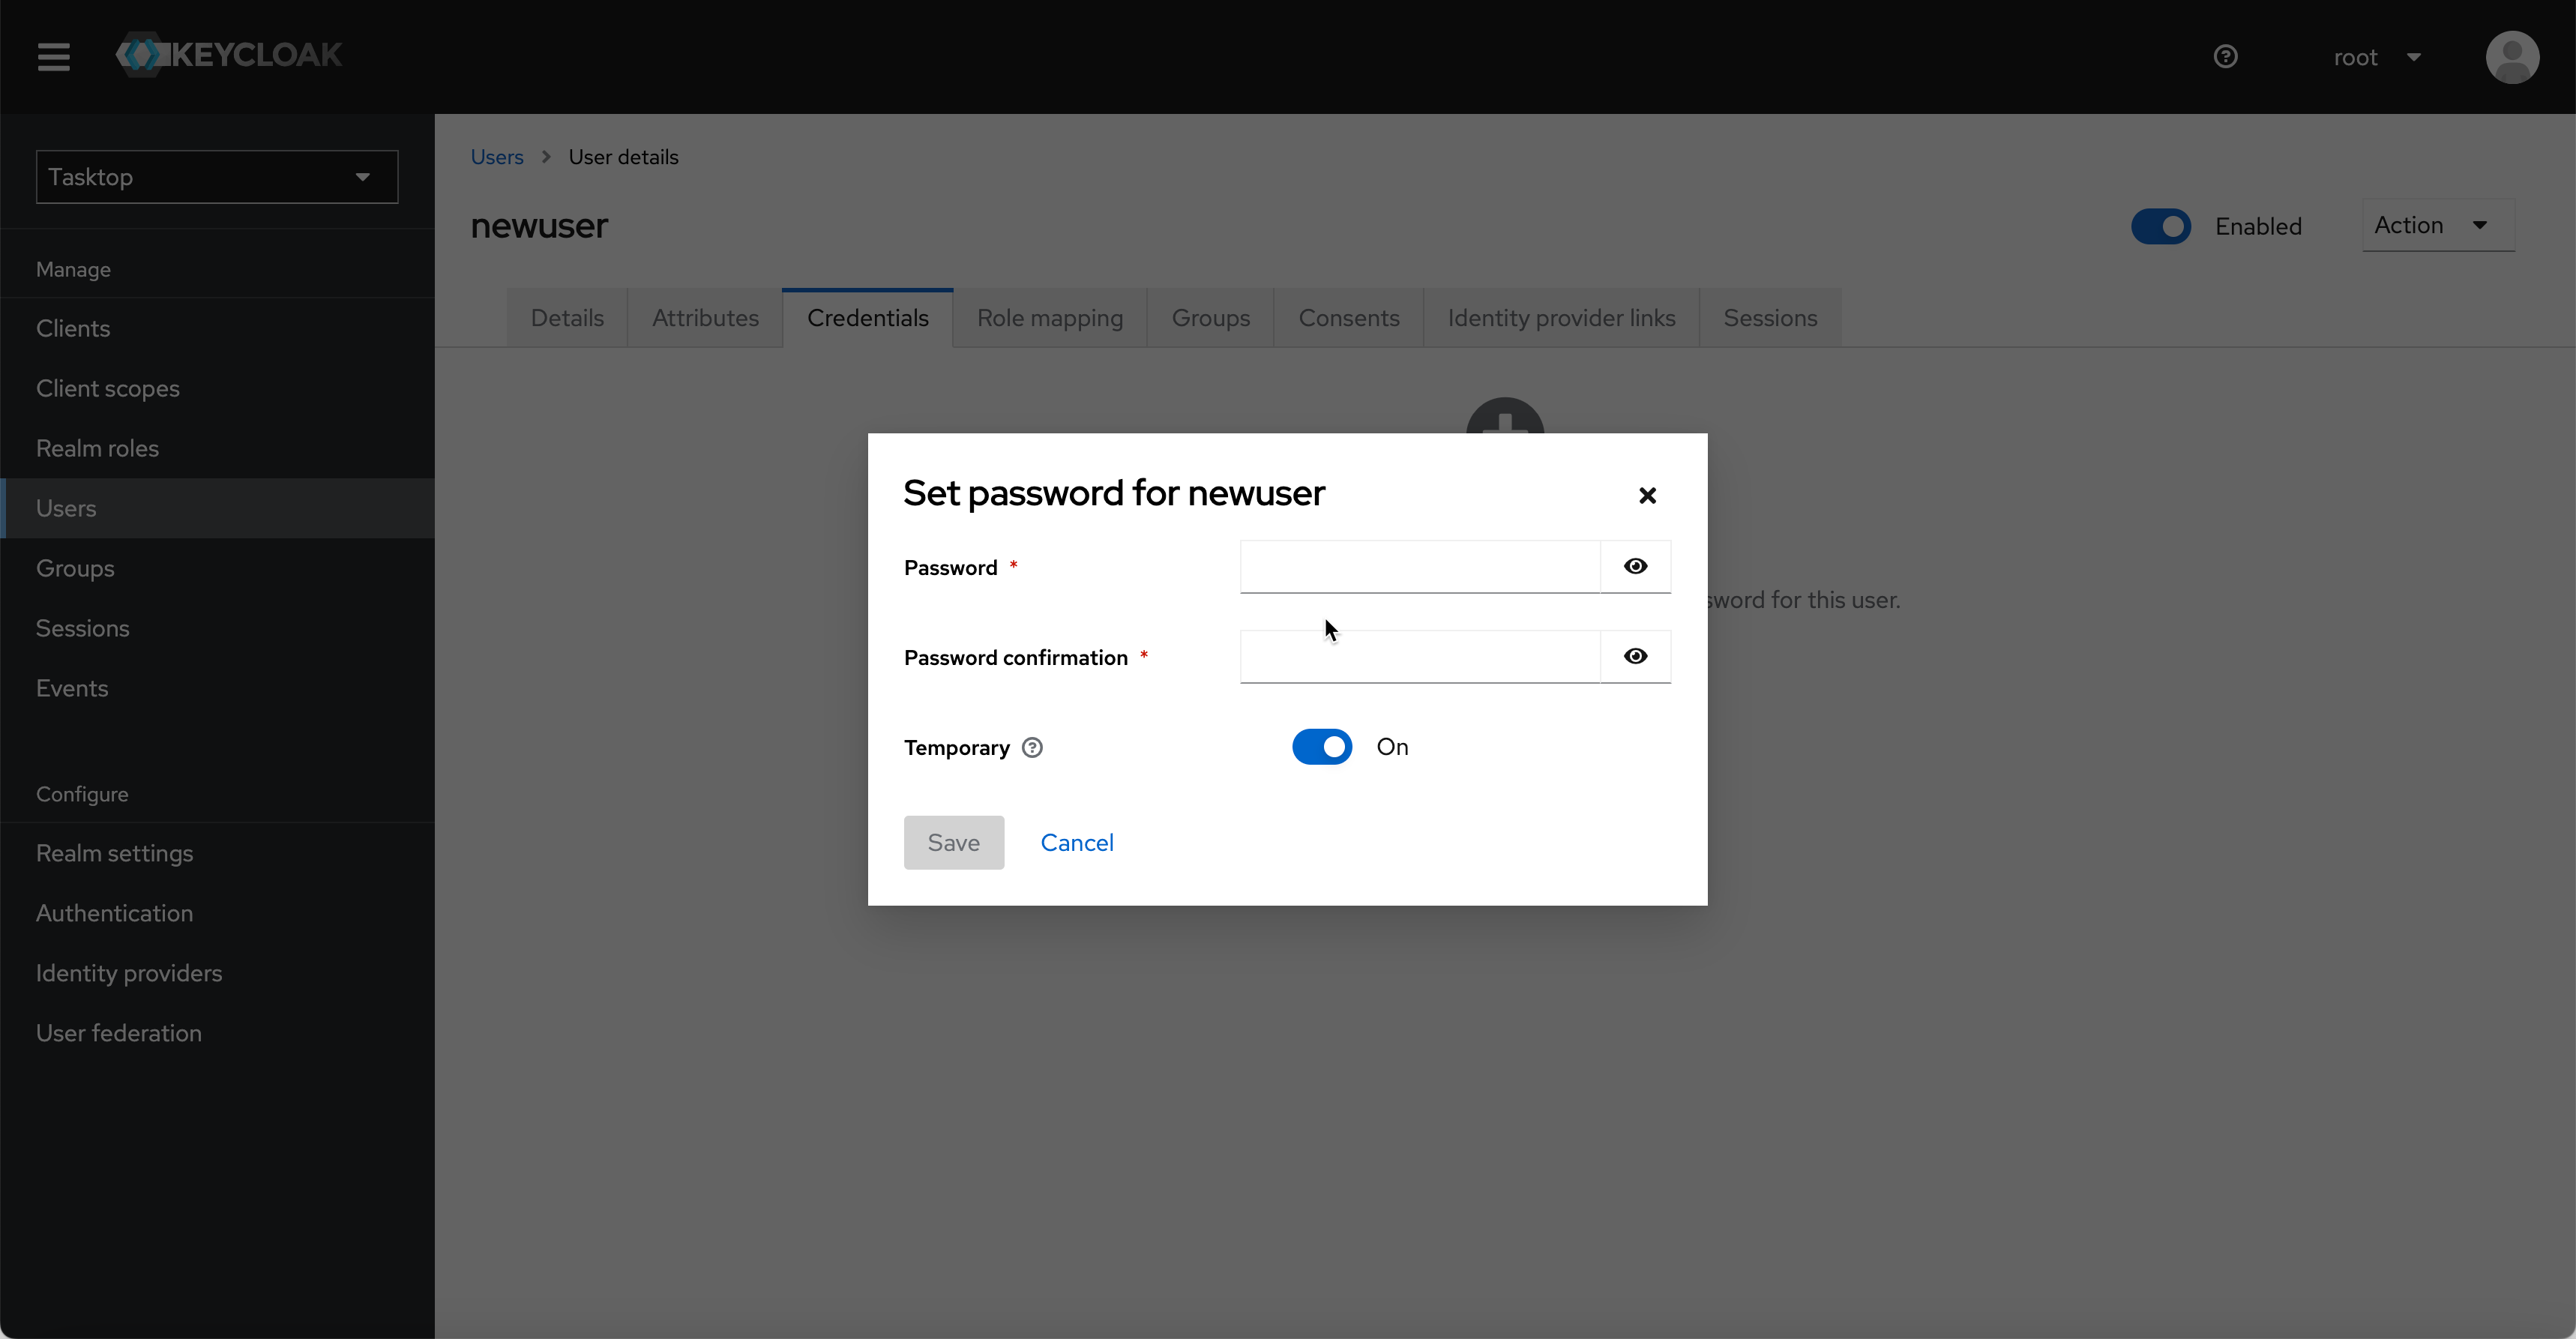
After you have saved the user, select the Credentials tab and click Set Password to provide a temporary password for the new user.
Tip: Please ensure the Temporary toggle is set to On. This will allow the user to set a new password upon their first log in.
Once you have entered the temporary password, click Save.
Next, select the Groups tab to assign the user as a Hub Admin. Click Join Group and check the TasktopAdmins option in the pop-up menu, then click Join. By becoming a Hub Admin, the user can add new users directly from the Hub interface.
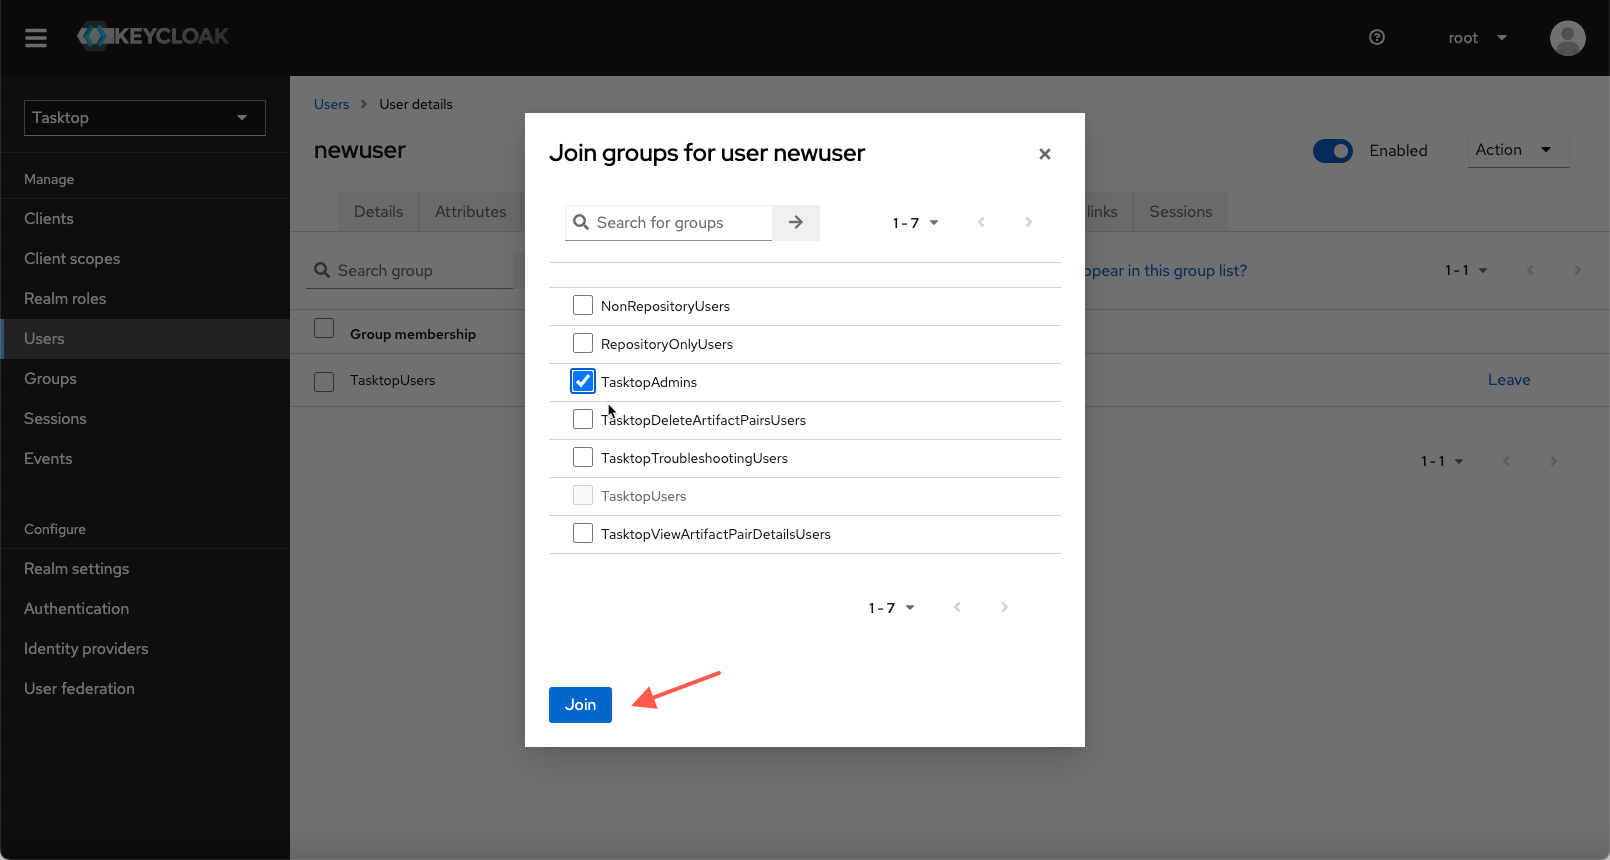
Tip: You can ignore the Attributes, Role Mappings, Consents and Sessions tabs.
That's it! Your Hub Admin user has been added.
Now, you can sign out of the User Administration console, navigate to https://<server>:8443, and log in with your newly created user account.
Types of Users
On the Types of Users page, you can learn about:
- Types of user roles in Hub
- Best practices for configuring users
- User role permissions
User Administration
On the User Administration page, you can learn about:
- Creating additional users
- Resetting a user's password
- Modifying user information
Managing Groups
On the Managing Groups page, you can learn about:
- Viewing members of a group
- Adding or removing users from a group
Advanced User Management
On the Advanced User Management page, you can learn about:
- Creating and managing root users
- Configuring the troubleshooting user
- Configuring LDAP user management
- User management and security constraints
- DNS settings
- Alternative user management
Getting Started
Once installation is complete, you can begin using Planview Hub by opening https://localhost:8443/ in any of our supported browsers.
Before logging in to Hub, you must log in to the User Administration Console to create your admin user(s). This can be accessed via the User Administration Console link at the bottom of the Hub login screen.
After clicking the link, the Keycloak login screen will appear.
The Hub User Administration Console comes pre-configured with a root user and password. You can use the following credentials to log in to Keycloak:
- Username: root
- Password: Tasktop123
Note: There is only one initial root user. If the credentials for this user are lost, access to the advanced User Management features will also be lost. All functionality of Hub will continue uninterrupted. You can learn how to create additional root users and manage existing root users here.
After logging in, you will be prompted to change your root password and you will need to make at least one new Hub Admin user for Planview Hub. After this first user is created, you can create additional users directly from the Hub interface.
To create a Hub Admin, ensure the Tasktop realm is selected here:
Note: Do not rename the realm (Tasktop), as this will result in errors upon Hub log in. If you must rename the realm, please also edit {tasktop workspace}/webapps/ROOT/WEB-INF/keycloak.json, update the 'realm' parameter, and then restart Hub.
Select the User section in the left column and click Add user.
On this screen, enter the username, email, first name, and last name for your new user — the rest of the fields are not required. Once you've entered the required fields, click Create.
After you have saved the user, select the Credentials tab and click Set Password to provide a temporary password for the new user.
Tip: Please ensure the Temporary toggle is set to On. This will allow the user to set a new password upon their first log in.
Once you have entered the temporary password, click Save.
Next, select the Groups tab to assign the user as a Hub Admin. Click Join Group and check the TasktopAdmins option in the pop-up menu, then click Join. By becoming a Hub Admin, the user can add new users directly from the Hub interface.
Tip: You can ignore the Attributes, Role Mappings, Consents and Sessions tabs.
That's it! Your Hub Admin user has been added.
Now, you can sign out of the User Administration console, navigate to https://<server>:8443, and log in with your newly created user account.
Types of Users
On the Types of Users page, you can learn about:
- Types of user roles in Hub
- Best practices for configuring users
- User role permissions
User Administration
On the User Administration page, you can learn about:
- Creating additional users
- Resetting a user's password
- Modifying user information
Managing Groups
On the Managing Groups page, you can learn about:
- Viewing members of a group
- Adding or removing users from a group
Advanced User Management
On the Advanced User Management page, you can learn about:
- Creating and managing root users
- Configuring the troubleshooting user
- Configuring LDAP user management
- User management and security constraints
- DNS settings
- Alternative user management
Getting Started
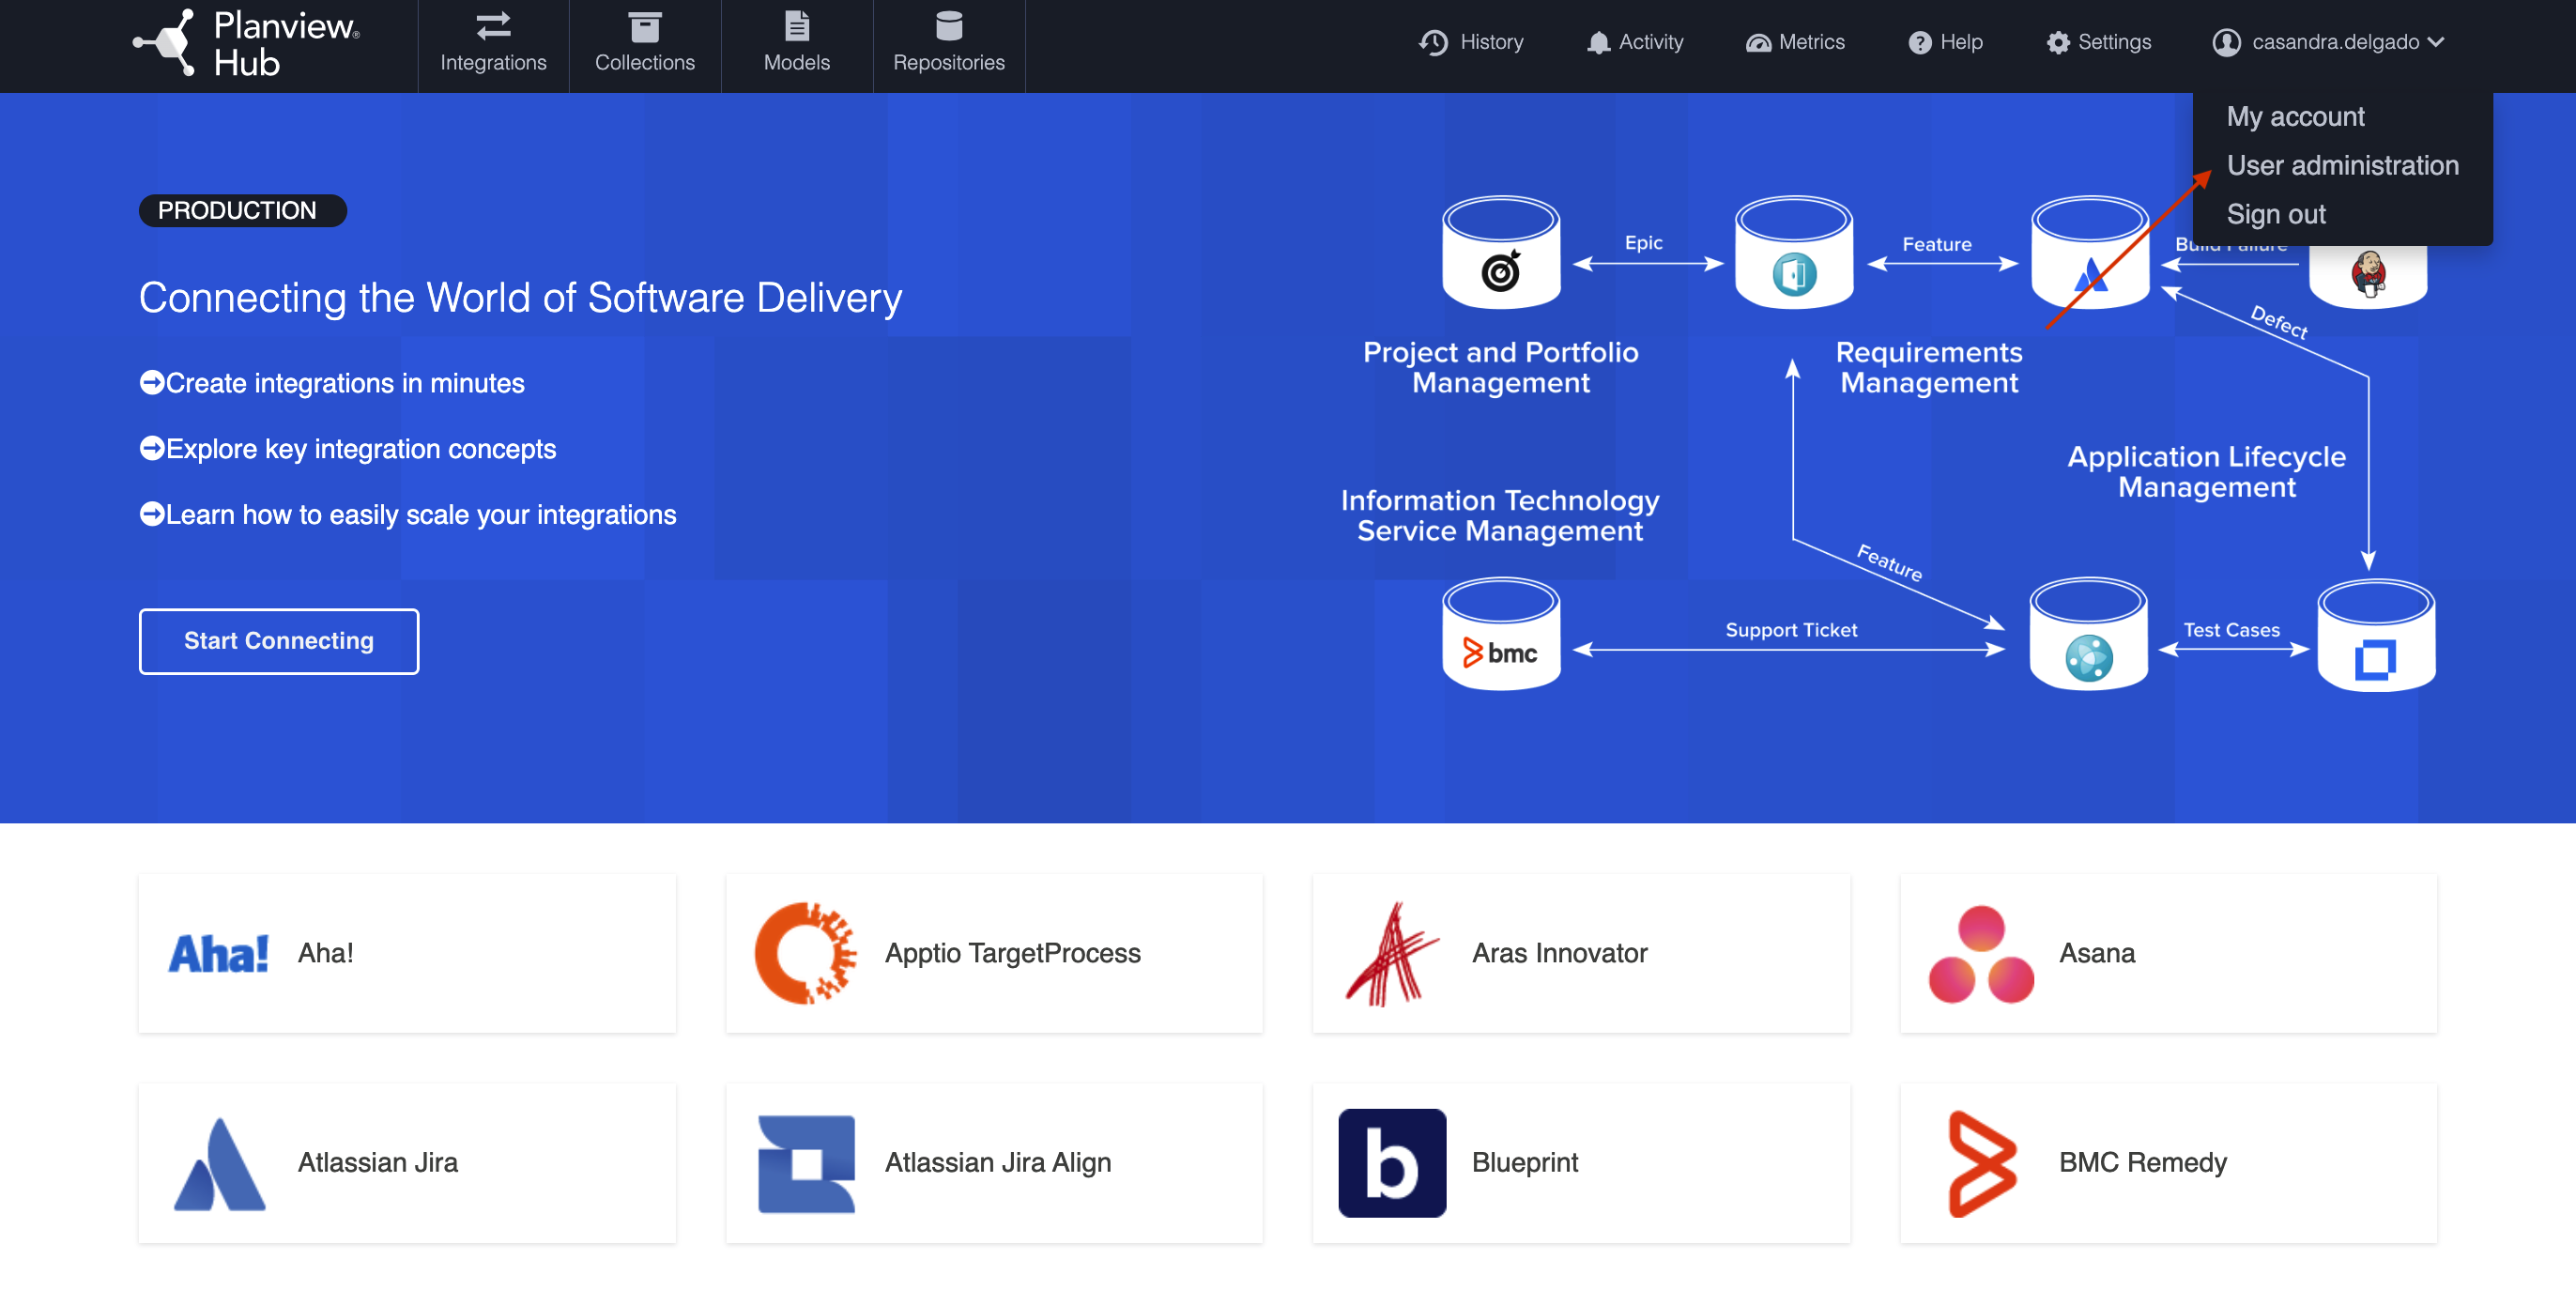
To access user administration, click the User administration link in the dropdown menu.
Types of Users
On the Types of Users page, you can learn about:
- Types of user roles in Hub
- Best practices for configuring users
- User role permissions
User Administration
On the User Administration page, you can learn about:
- Creating additional users
- Resetting a user's password
- Modifying user information
Managing Groups
On the Managing Groups page, you can learn about:
- Viewing members of a group
- Adding or removing users from a group
Advanced User Management
On the Advanced User Management page, you can learn about:
- Creating and managing root users
- Configuring the troubleshooting user
- Configuring LDAP user management
- User management and security constraints
- DNS settings
- Alternative user management
Getting Started
Once installation is complete, you can begin using Planview Hub by opening https://localhost:8443/ in any of our supported browsers.
Before logging in to Hub, you must log in to the User Administration Console to create your admin user(s). This can be accessed via the User Administration Console link at the bottom of the Hub login screen.
After clicking the link, the Keycloak login screen will appear.
The Hub User Administration Console comes pre-configured with a root user and password. You can use the following credentials to log in to Keycloak:
- Username: root
- Password: Tasktop123
Note: There is only one initial root user. If the credentials for this user are lost, access to the advanced User Management features will also be lost. All functionality of Hub will continue uninterrupted. You can learn how to create additional root users and manage existing root users here.
After logging in, you will be prompted to change your root password and you will need to make at least one new Hub Admin user for Planview Hub. After this first user is created, you can create additional users directly from the Hub interface.
To create a Hub Admin, ensure the Tasktop realm is selected here:
Note: Do not rename the realm (Tasktop), as this will result in errors upon Hub log in. If you must rename the realm, please also edit {tasktop workspace}/webapps/ROOT/WEB-INF/keycloak.json, update the 'realm' parameter, and then restart Hub.
Select the User section in the left column and click Add user.
On this screen, enter the username, email, first name, and last name for your new user — the rest of the fields are not required. Once you've entered the required fields, click Create.
After you have saved the user, select the Credentials tab and click Set Password to provide a temporary password for the new user.
Tip: Please ensure the Temporary toggle is set to On. This will allow the user to set a new password upon their first log in.
Once you have entered the temporary password, click Save.
Next, select the Groups tab to assign the user as a Hub Admin. Click Join Group and check the TasktopAdmins option in the pop-up menu, then click Join. By becoming a Hub Admin, the user can add new users directly from the Hub interface.
Tip: You can ignore the Attributes, Role Mappings, Consents and Sessions tabs.
That's it! Your Hub Admin user has been added.
Now, you can sign out of the User Administration console, navigate to https://<server>:8443, and log in with your newly created user account.
Types of Users
On the Types of Users page, you can learn about:
- Types of user roles in Hub
- Best practices for configuring users
- User role permissions
User Administration
On the User Administration page, you can learn about:
- Creating additional users
- Resetting a user's password
- Modifying user information
Managing Groups
On the Managing Groups page, you can learn about:
- Viewing members of a group
- Adding or removing users from a group
Advanced User Management
On the Advanced User Management page, you can learn about:
- Creating and managing root users
- Configuring the troubleshooting user
- Configuring LDAP user management
- User management and security constraints
- DNS settings
- Alternative user management
Getting Started
Once installation is complete, you can begin using Planview Hub by opening http://localhost:8080/ or https://localhost:8443/ in any of our supported browsers.
Before logging in to Hub, you must log in to the User Administration Console to create your admin user(s). This can be accessed via the User Administration Console link at the bottom of the Hub login screen.
After clicking the link, the Keycloak login screen will appear.
The Hub User Administration Console comes pre-configured with a root user and password. You can use the following credentials to log in to Keycloak:
- Username: root
- Password: Tasktop123
Note: There is only one initial root user. If the credentials for this user are lost, access to the advanced User Management features will also be lost. All functionality of Hub will continue uninterrupted. You can learn how to create additional root users and manage existing root users here.
After logging in, you will be prompted to change your root password and you will need to make at least one new Hub Admin user for Planview Hub. After this first user is created, you can create additional users directly from the Hub interface.
To create a Hub Admin, ensure the Tasktop realm is selected here:
Note: Do not rename the realm (Tasktop), as this will result in errors upon Hub log in. If you must rename the realm, please also edit {tasktop workspace}/webapps/ROOT/WEB-INF/keycloak.json, update the 'realm' parameter, and then restart Hub.
Select the User section in the left column and click Add user.
On this screen, enter the username, email, first name, and last name for your new user — the rest of the fields are not required. Once you've entered the required fields, click Create.
After you have saved the user, select the Credentials tab and click Set Password to provide a temporary password for the new user.
Tip: Please ensure the Temporary toggle is set to On. This will allow the user to set a new password upon their first log in.
Once you have entered the temporary password, click Save.
Next, select the Groups tab to assign the user as a Hub Admin. Click Join Group and check the TasktopAdmins option in the pop-up menu, then click Join. By becoming a Hub Admin, the user can add new users directly from the Hub interface.
Tip: You can ignore the Attributes, Role Mappings, Consents and Sessions tabs.
That's it! Your Hub Admin user has been added.
Now, you can sign out of the User Administration console, navigate to http://<server>:8080, and log in with your newly created user account.
Types of Users
On the Types of Users page, you can learn about:
- Types of user roles in Hub
- Best practices for configuring users
- User role permissions
User Administration
On the User Administration page, you can learn about:
- Creating additional users
- Resetting a user's password
- Modifying user information
Managing Groups
On the Managing Groups page, you can learn about:
- Viewing members of a group
- Adding or removing users from a group
Advanced User Management
On the Advanced User Management page, you can learn about:
- Creating and managing root users
- Configuring the troubleshooting user
- Configuring LDAP user management
- User management and security constraints
- DNS settings
- Alternative user management