Configuration History
Introduction
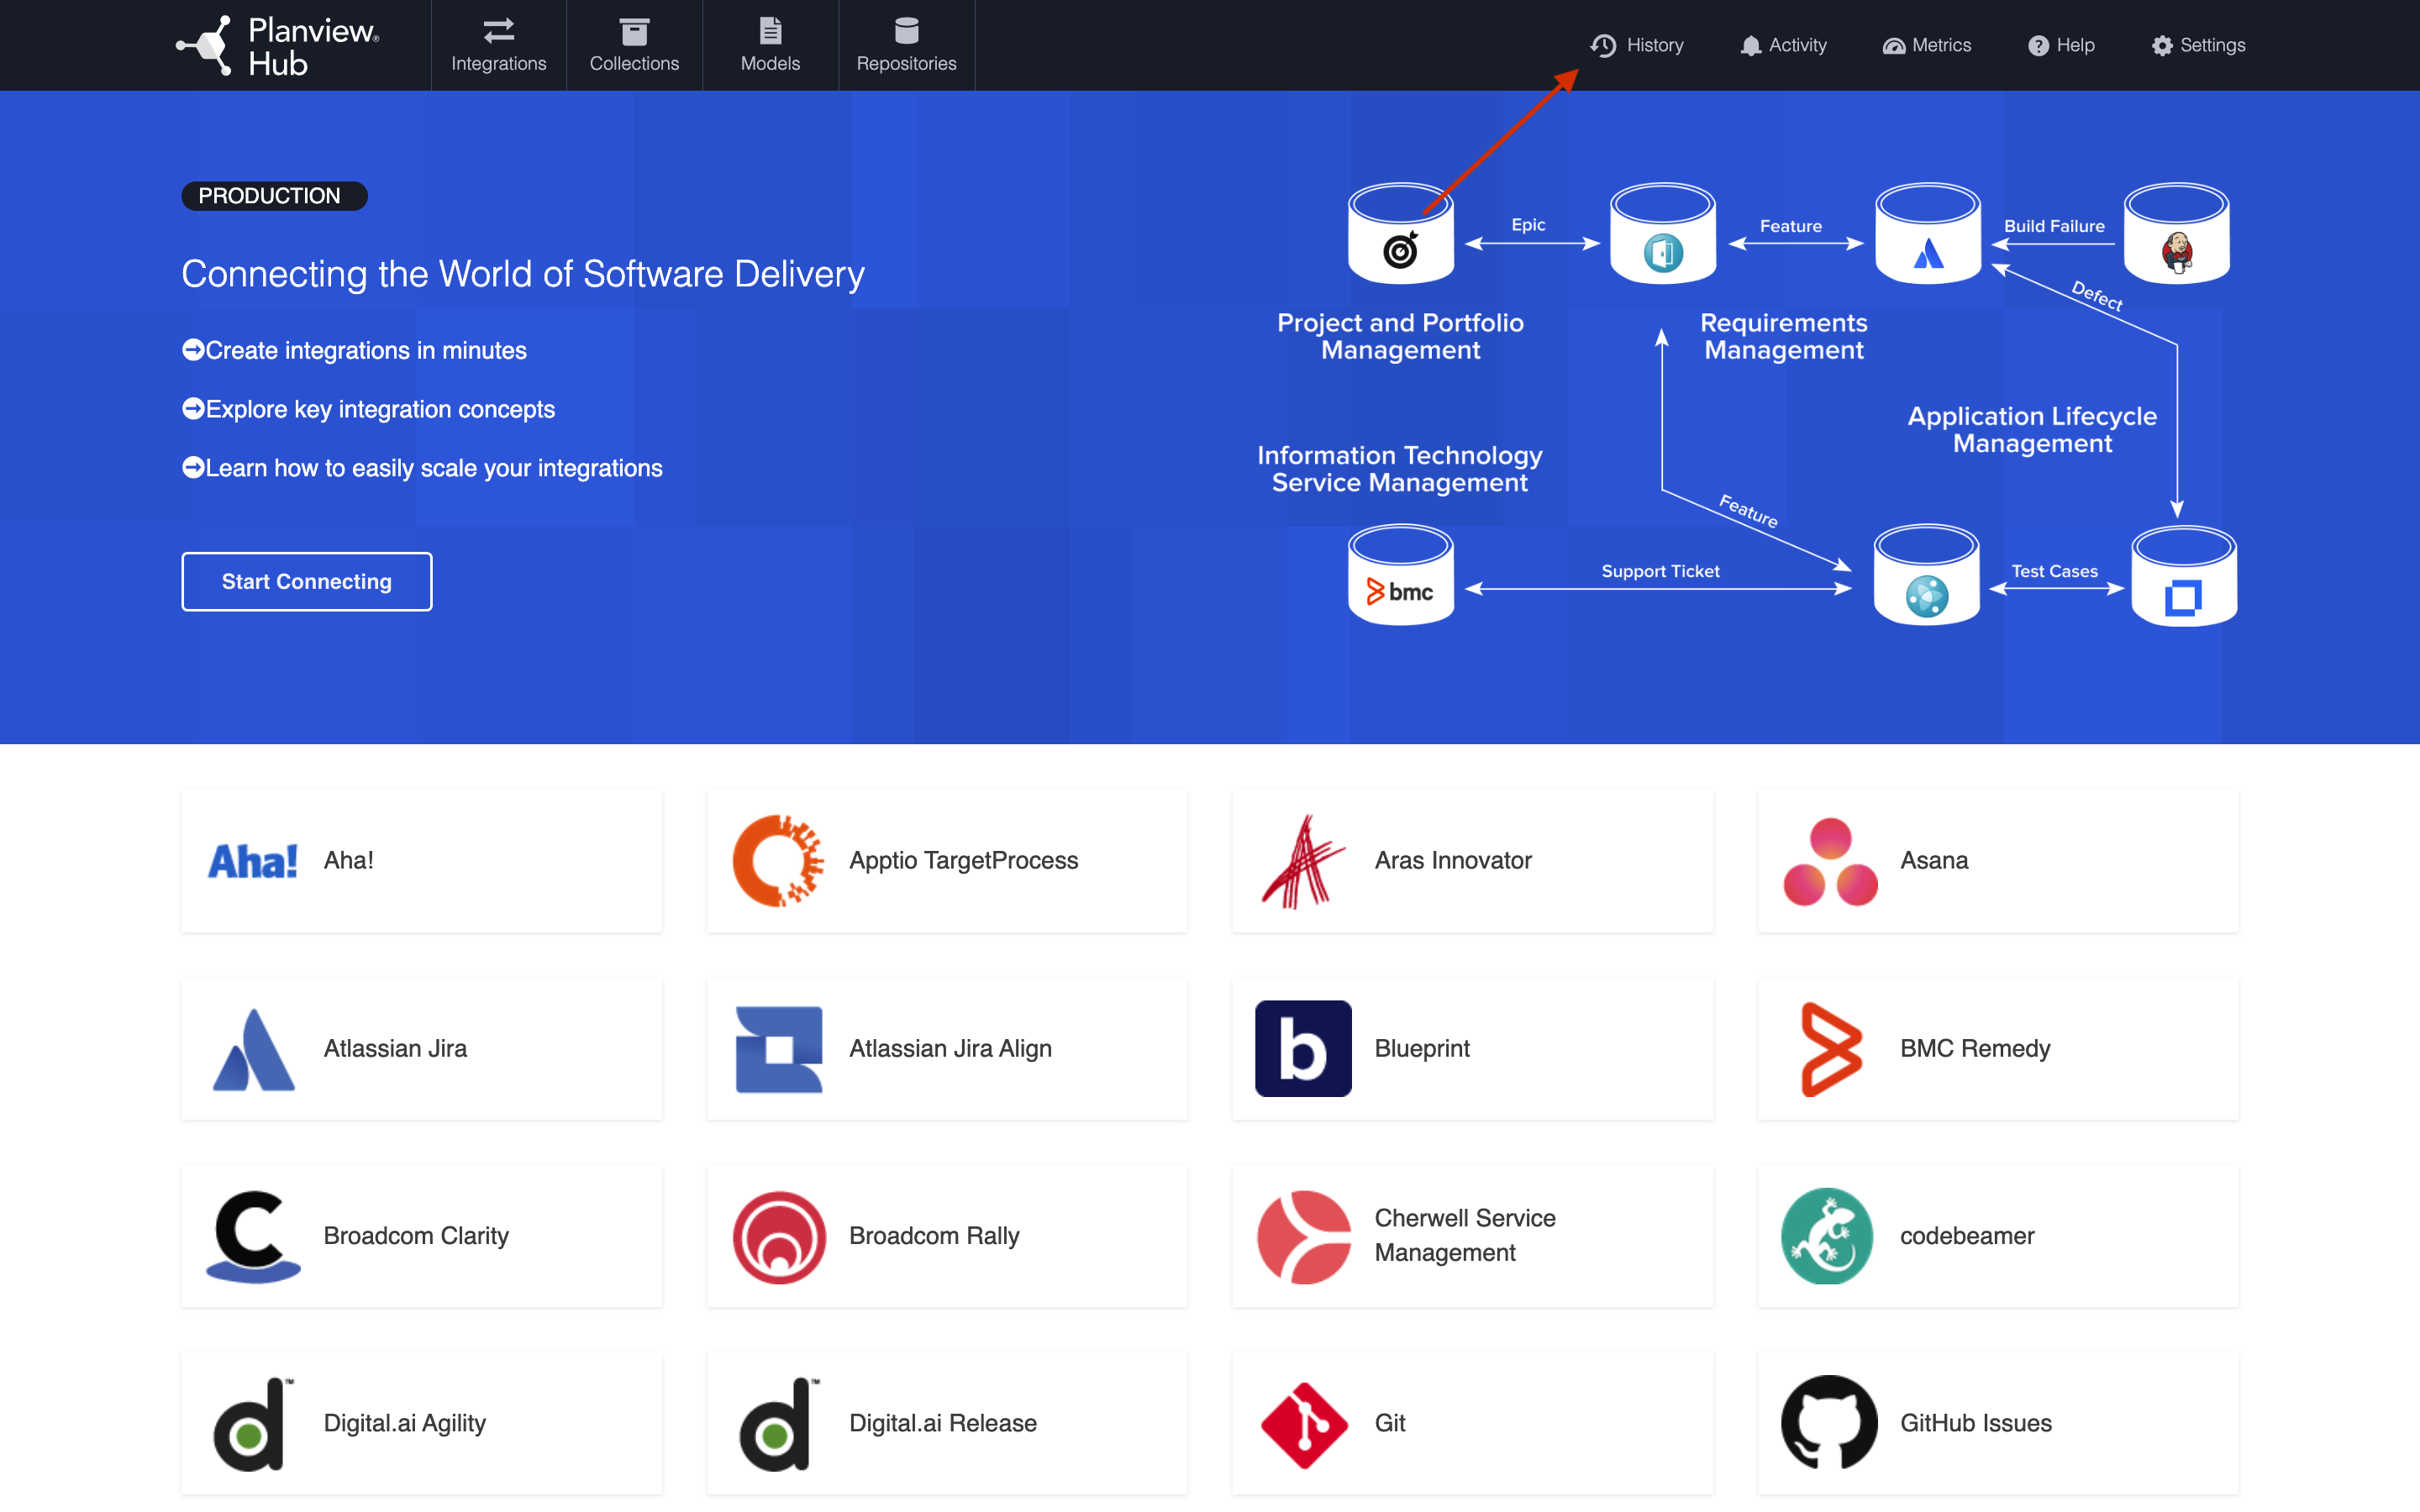
The Configuration History screen shows you up to six months of changes that have been made on your general settings or configuration elements (e.g., integrations, models, collections, mappings, etc).
To view your Configuration History, click the History icon in the upper right corner.
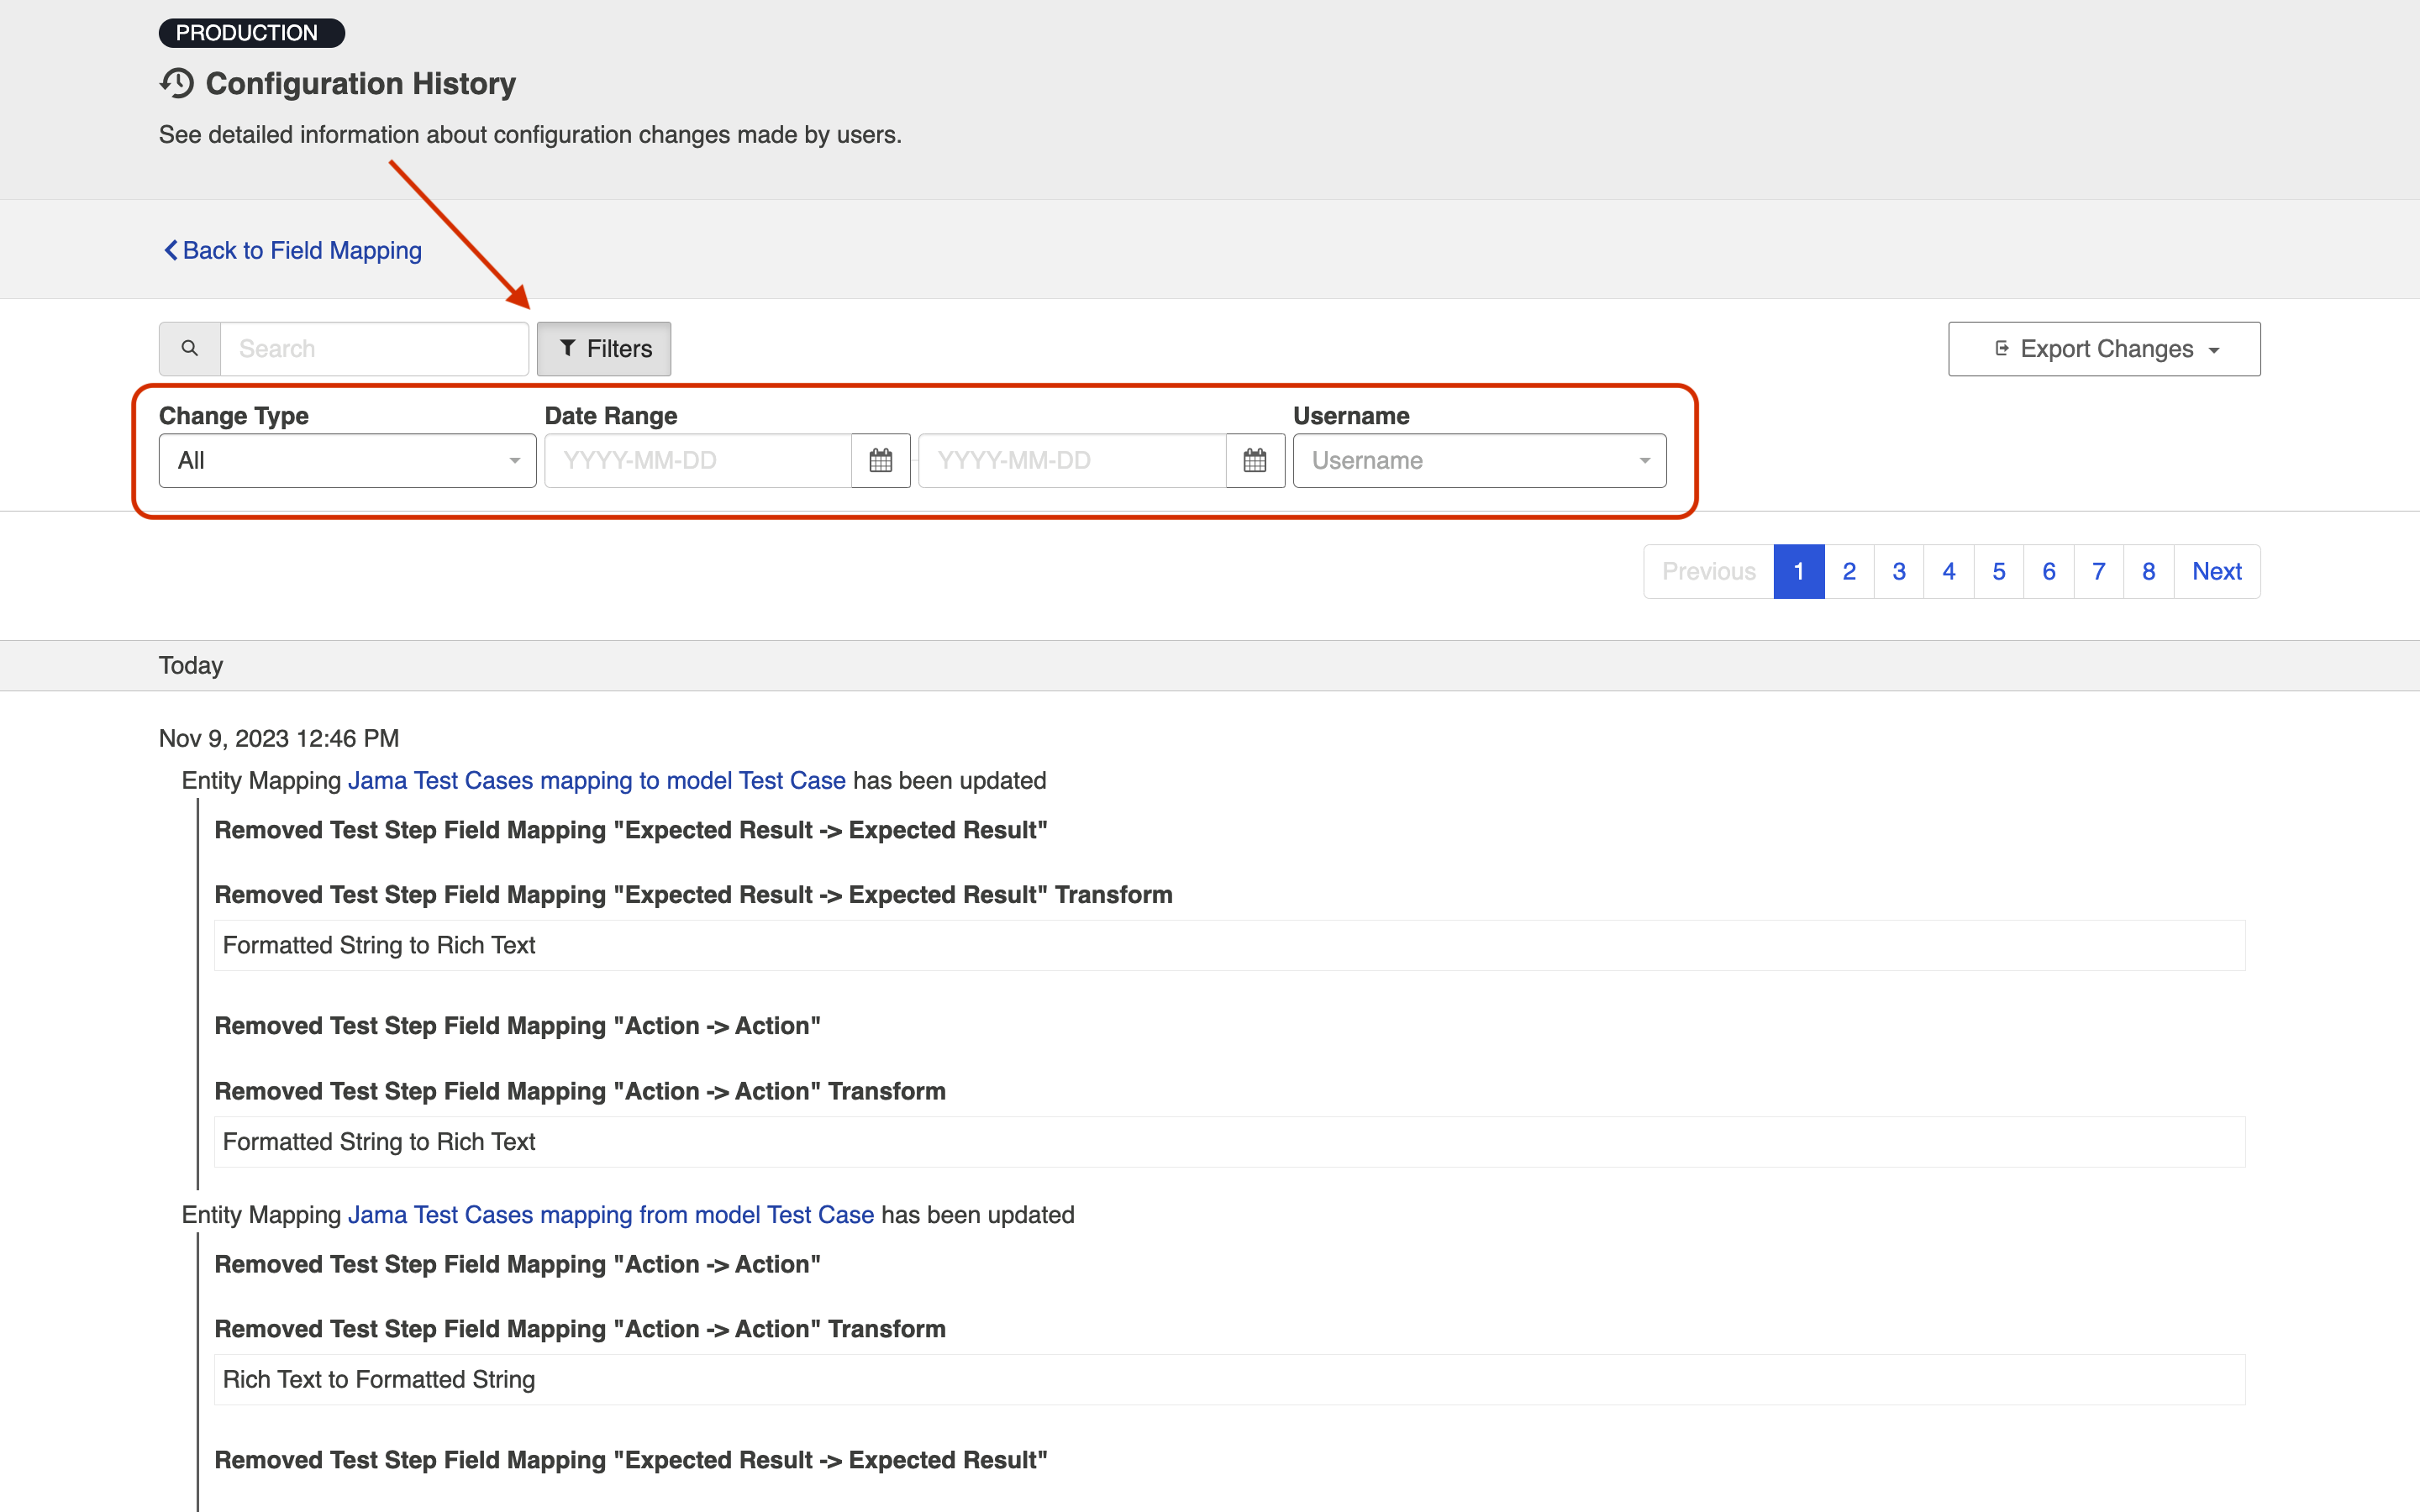
On this screen, you can see detailed information about the configuration changes and filter these changes by name, date, and the user who initiated the change.
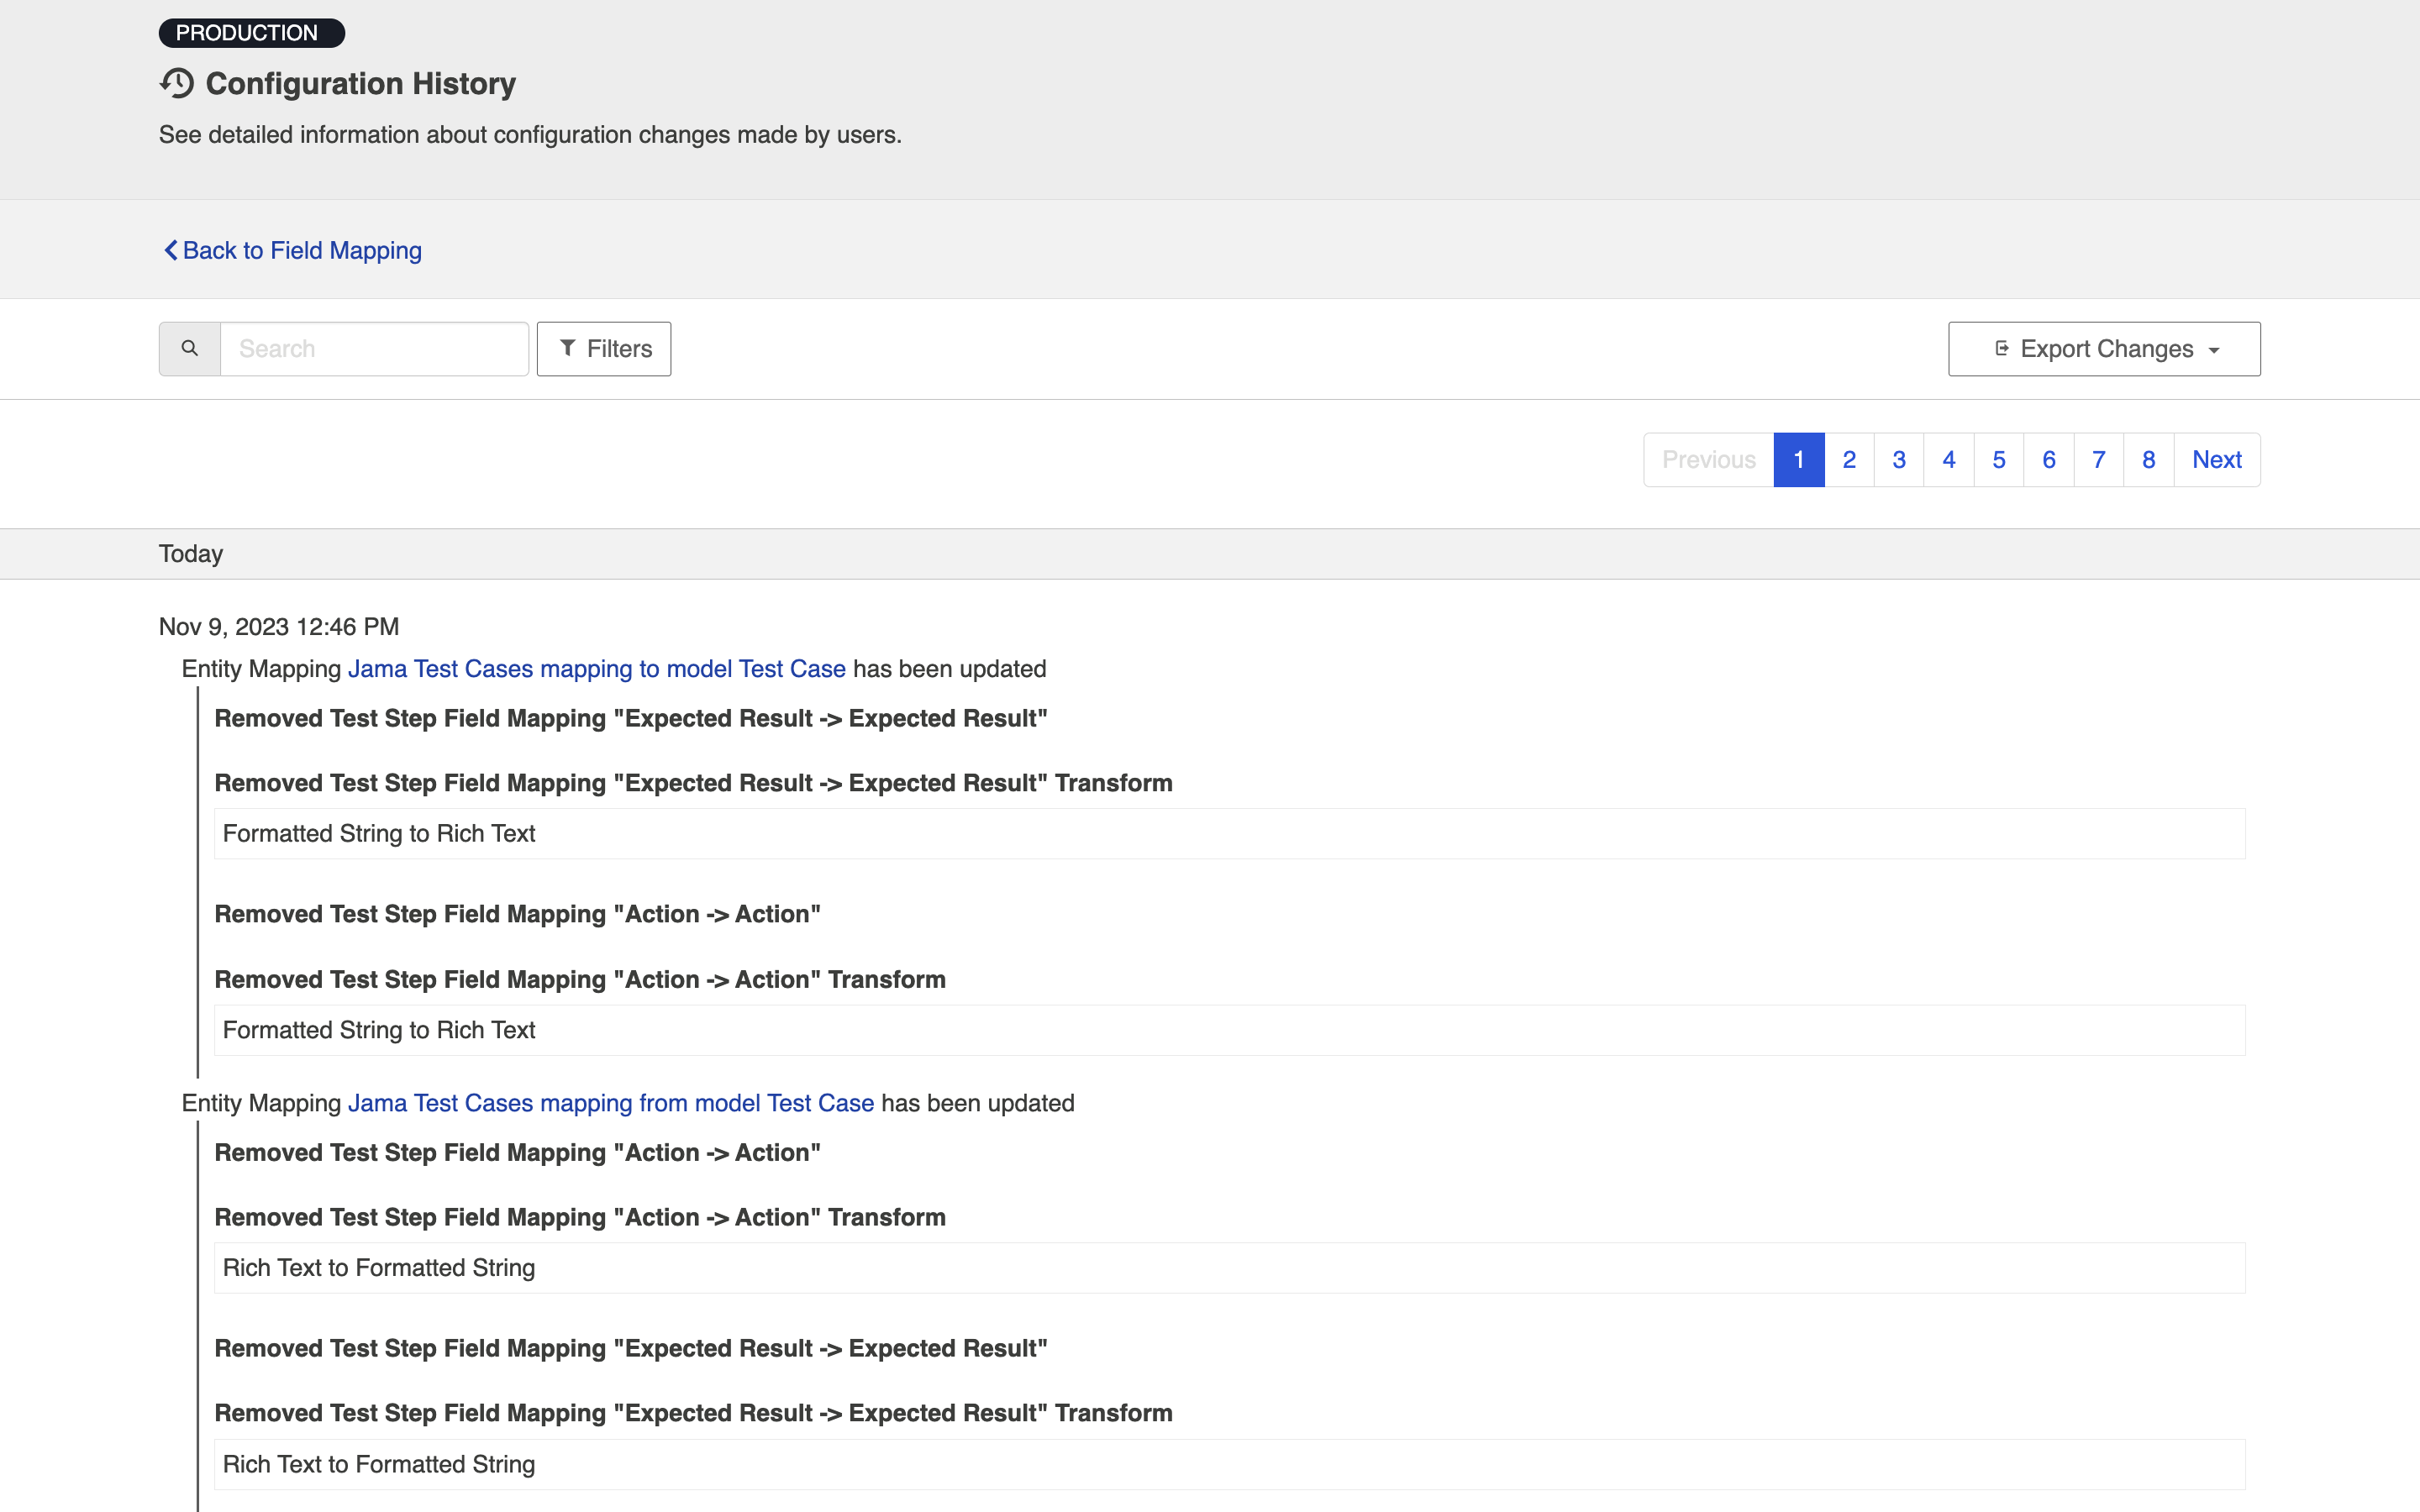
Tip: To easily view an updated configuration element, just click on the hyperlink on the element.
Migrating Configuration Changes
This feature allows you to export configuration changes and migrate them to another Hub instance. For example, during testing or major upgrades, changes made in a test environment may need to be replicated in the production environment. Manually replicating these changes is often tedious and time-consuming.
With this feature, you can easily move configuration changes from one instance to another in just a few clicks.
Before you Begin
Before using this feature, please review the following requirements:
-
The source environment version should match the target environment version.
-
The source configuration element should mirror the target configuration element as closely as possible.
- Note: Changes are applied based on the names/labels of configuration elements in Hub. For example, if you export a change that adds Artifact Filtering to an integration named Jira to ServiceNow, upon import Hub will search for an integration named Jira to ServiceNow and apply the change.
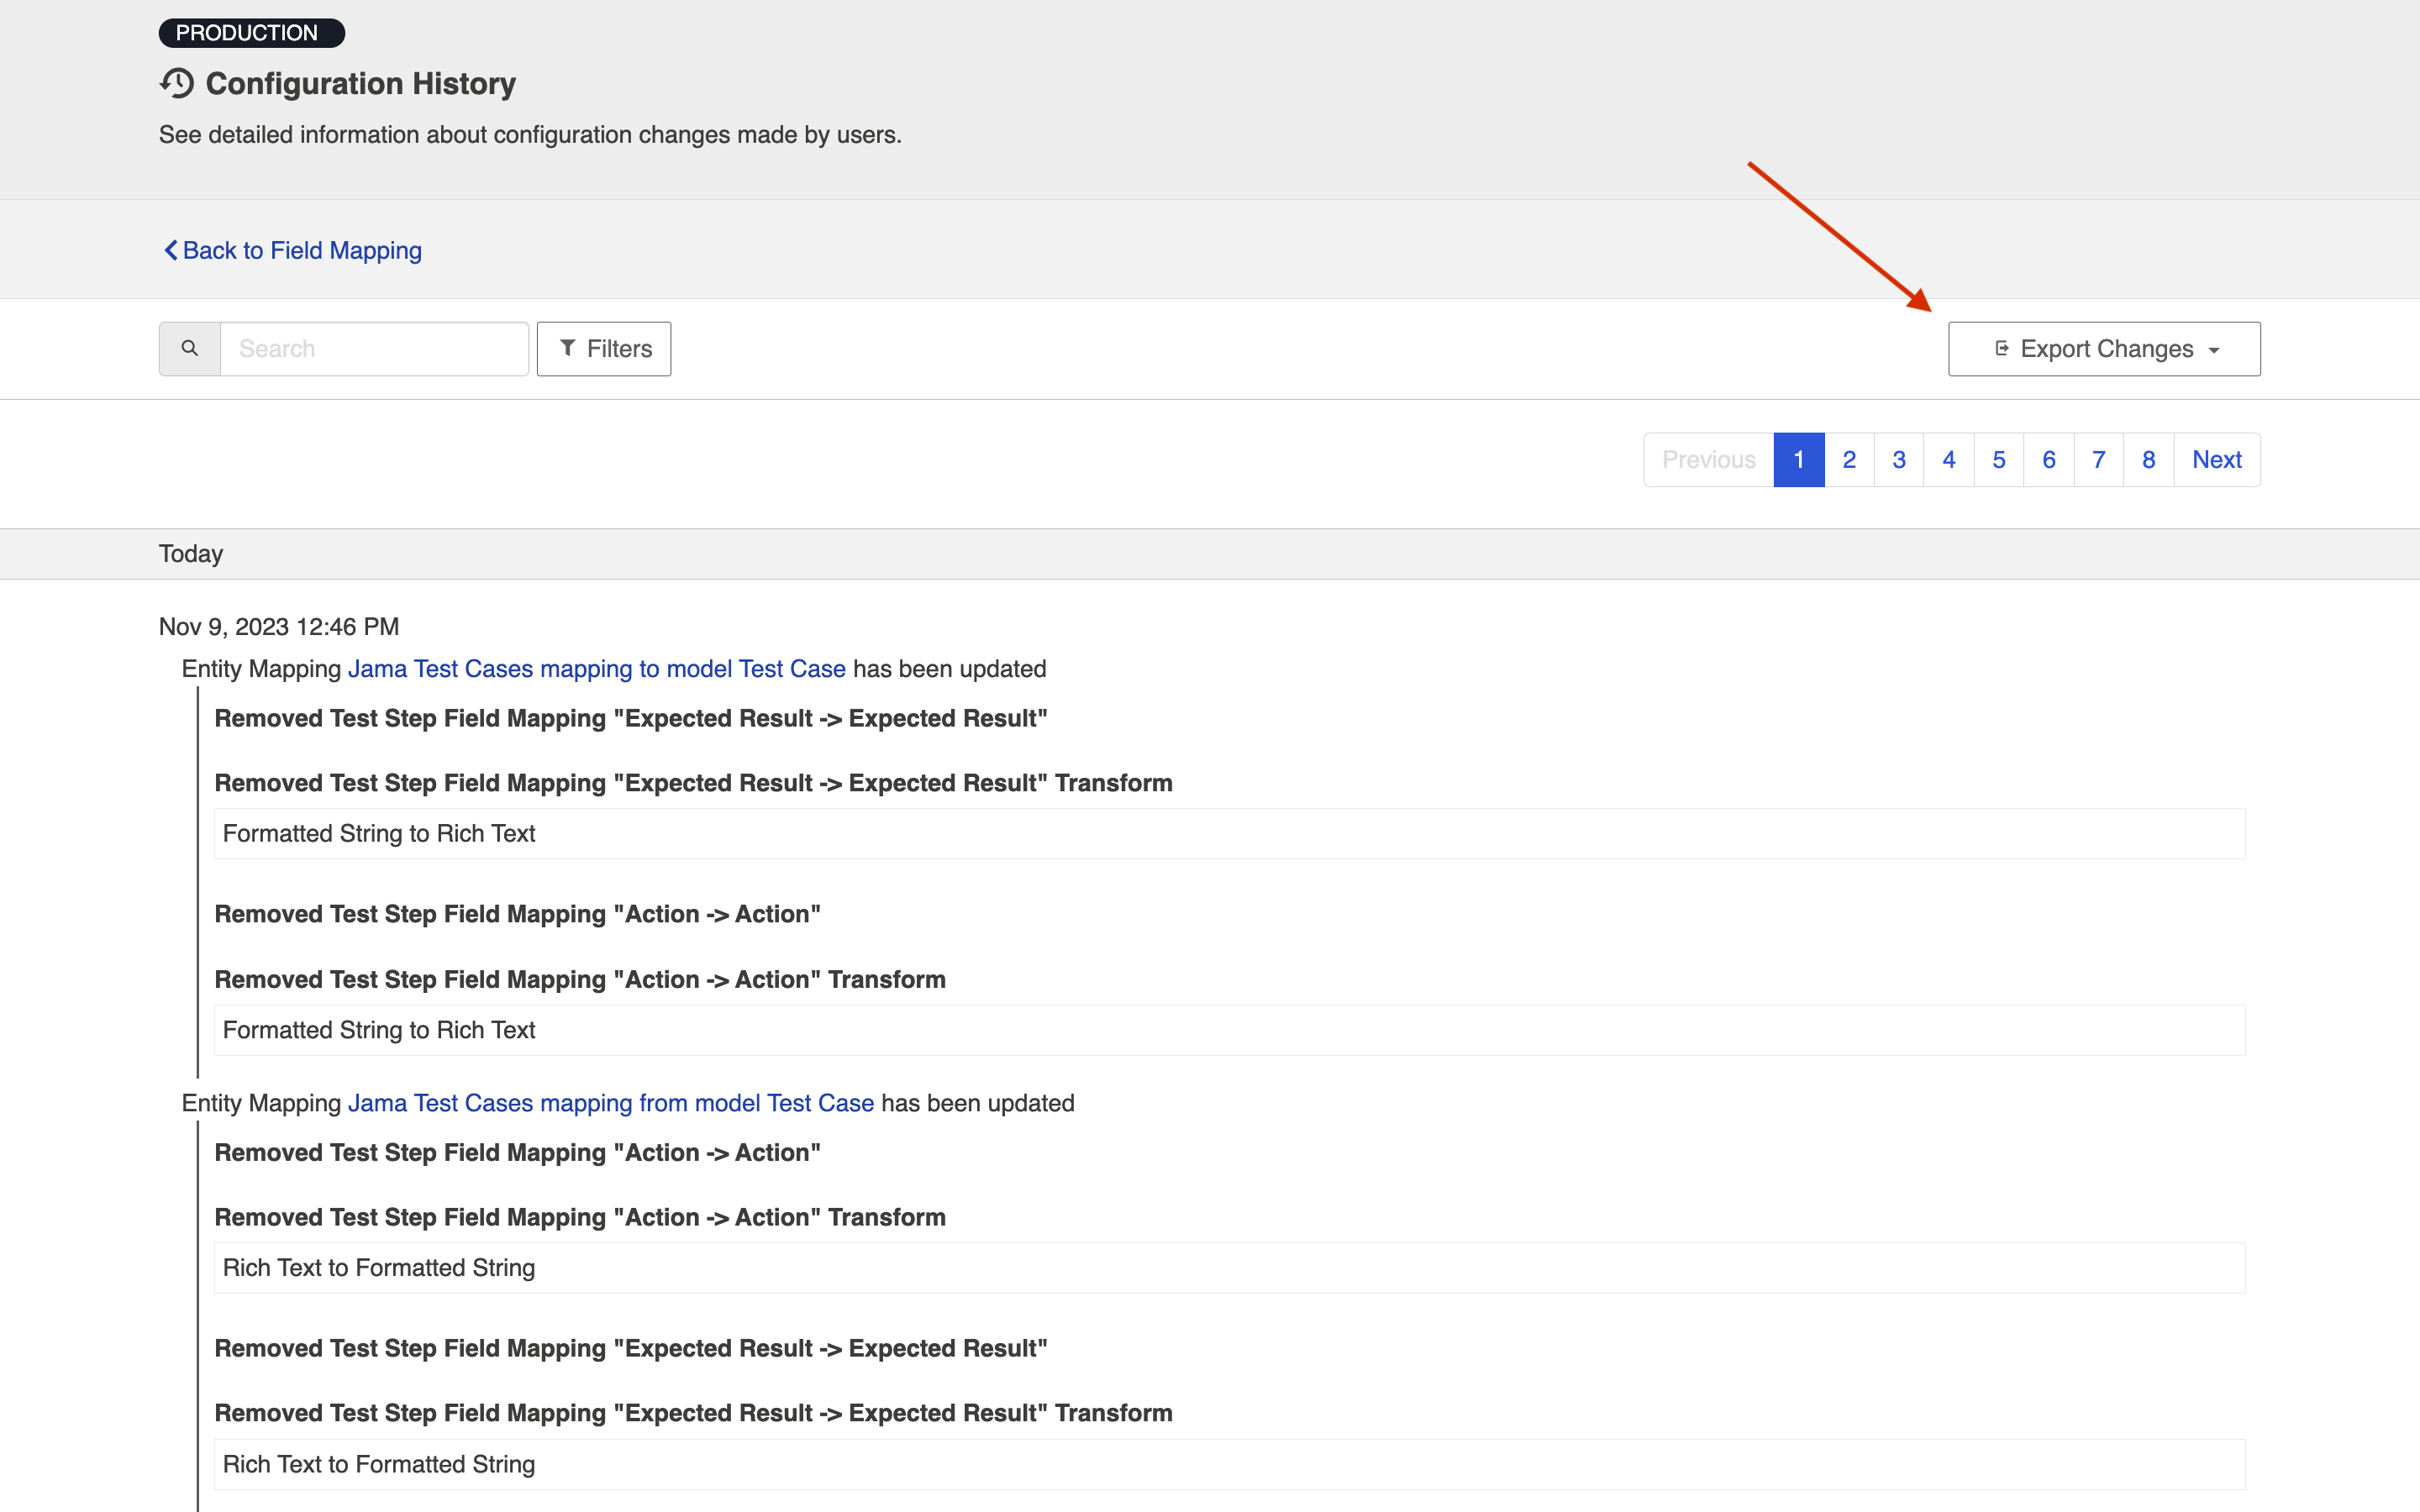
Exporting Changes
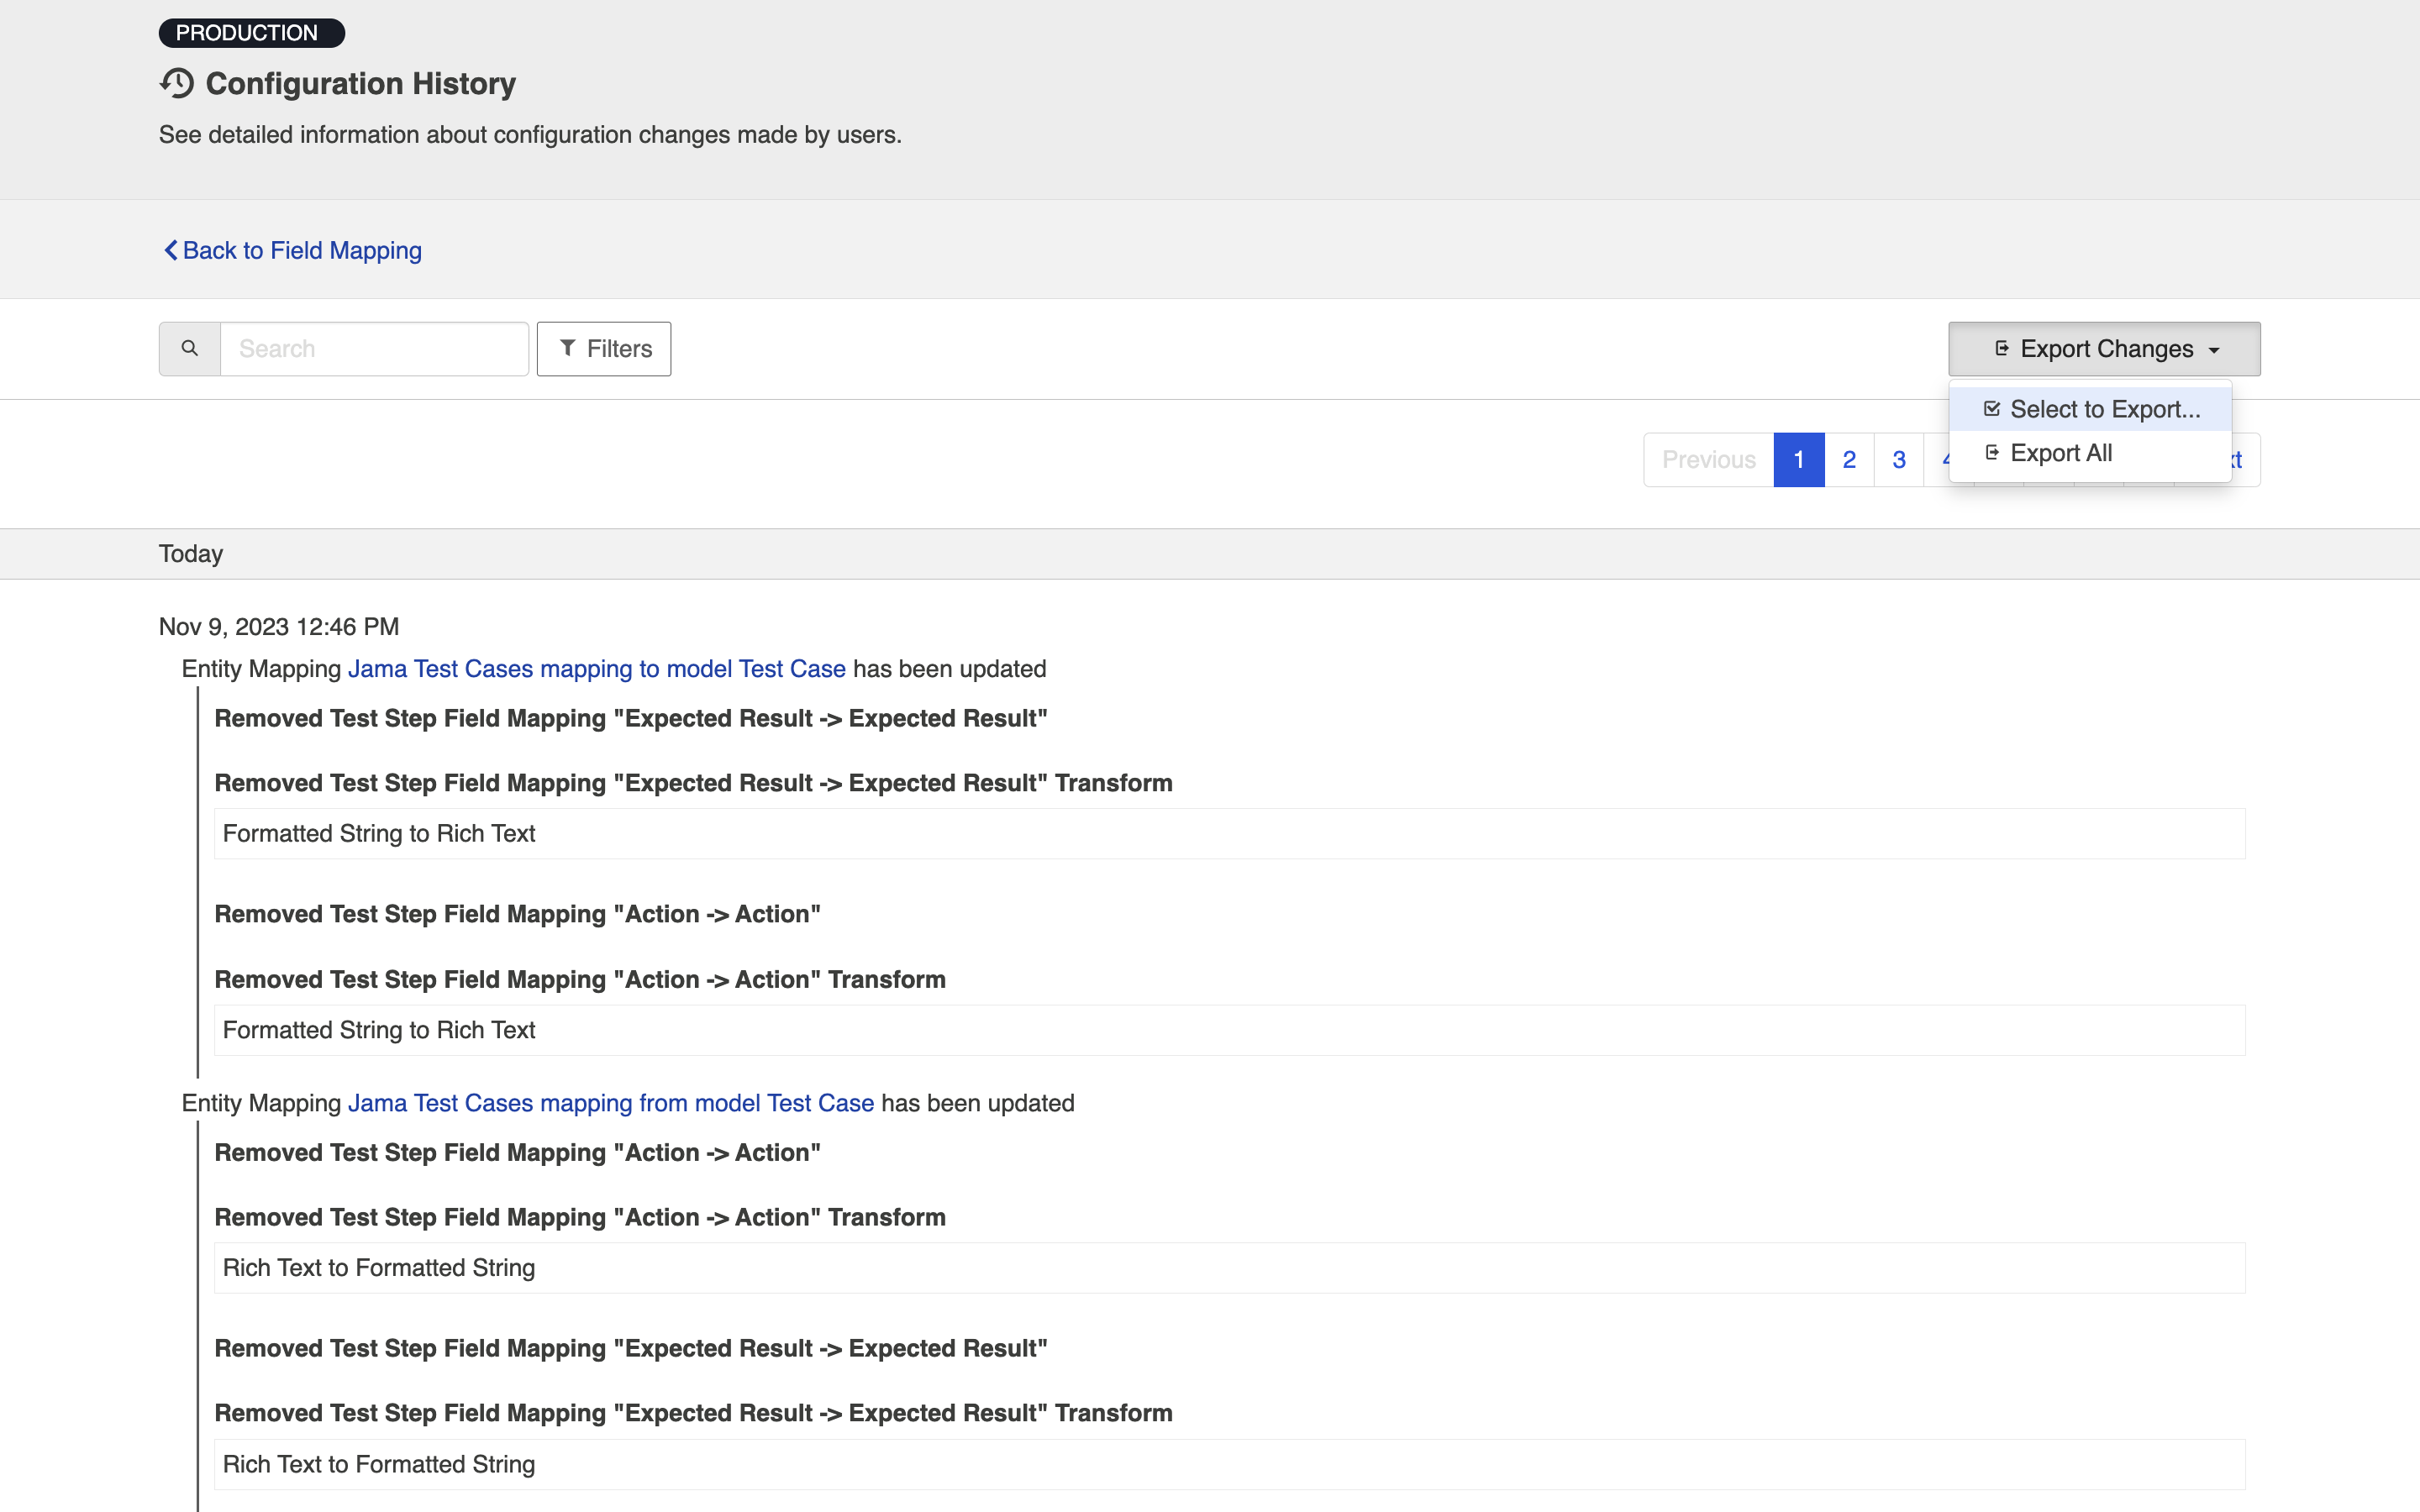
To begin exporting configuration changes, click Export Changes.
Click Select to Export to export selected changes or Export All to export all configuration changes.
Note: Any changes made on the Settings screen cannot be exported (e.g., adding a license or updating the change detection interval). Additionally, any credentials will not be exported and will need to be re-entered upon import.
If you'd like to narrow down changes, you can filter by change type, date range, and username.
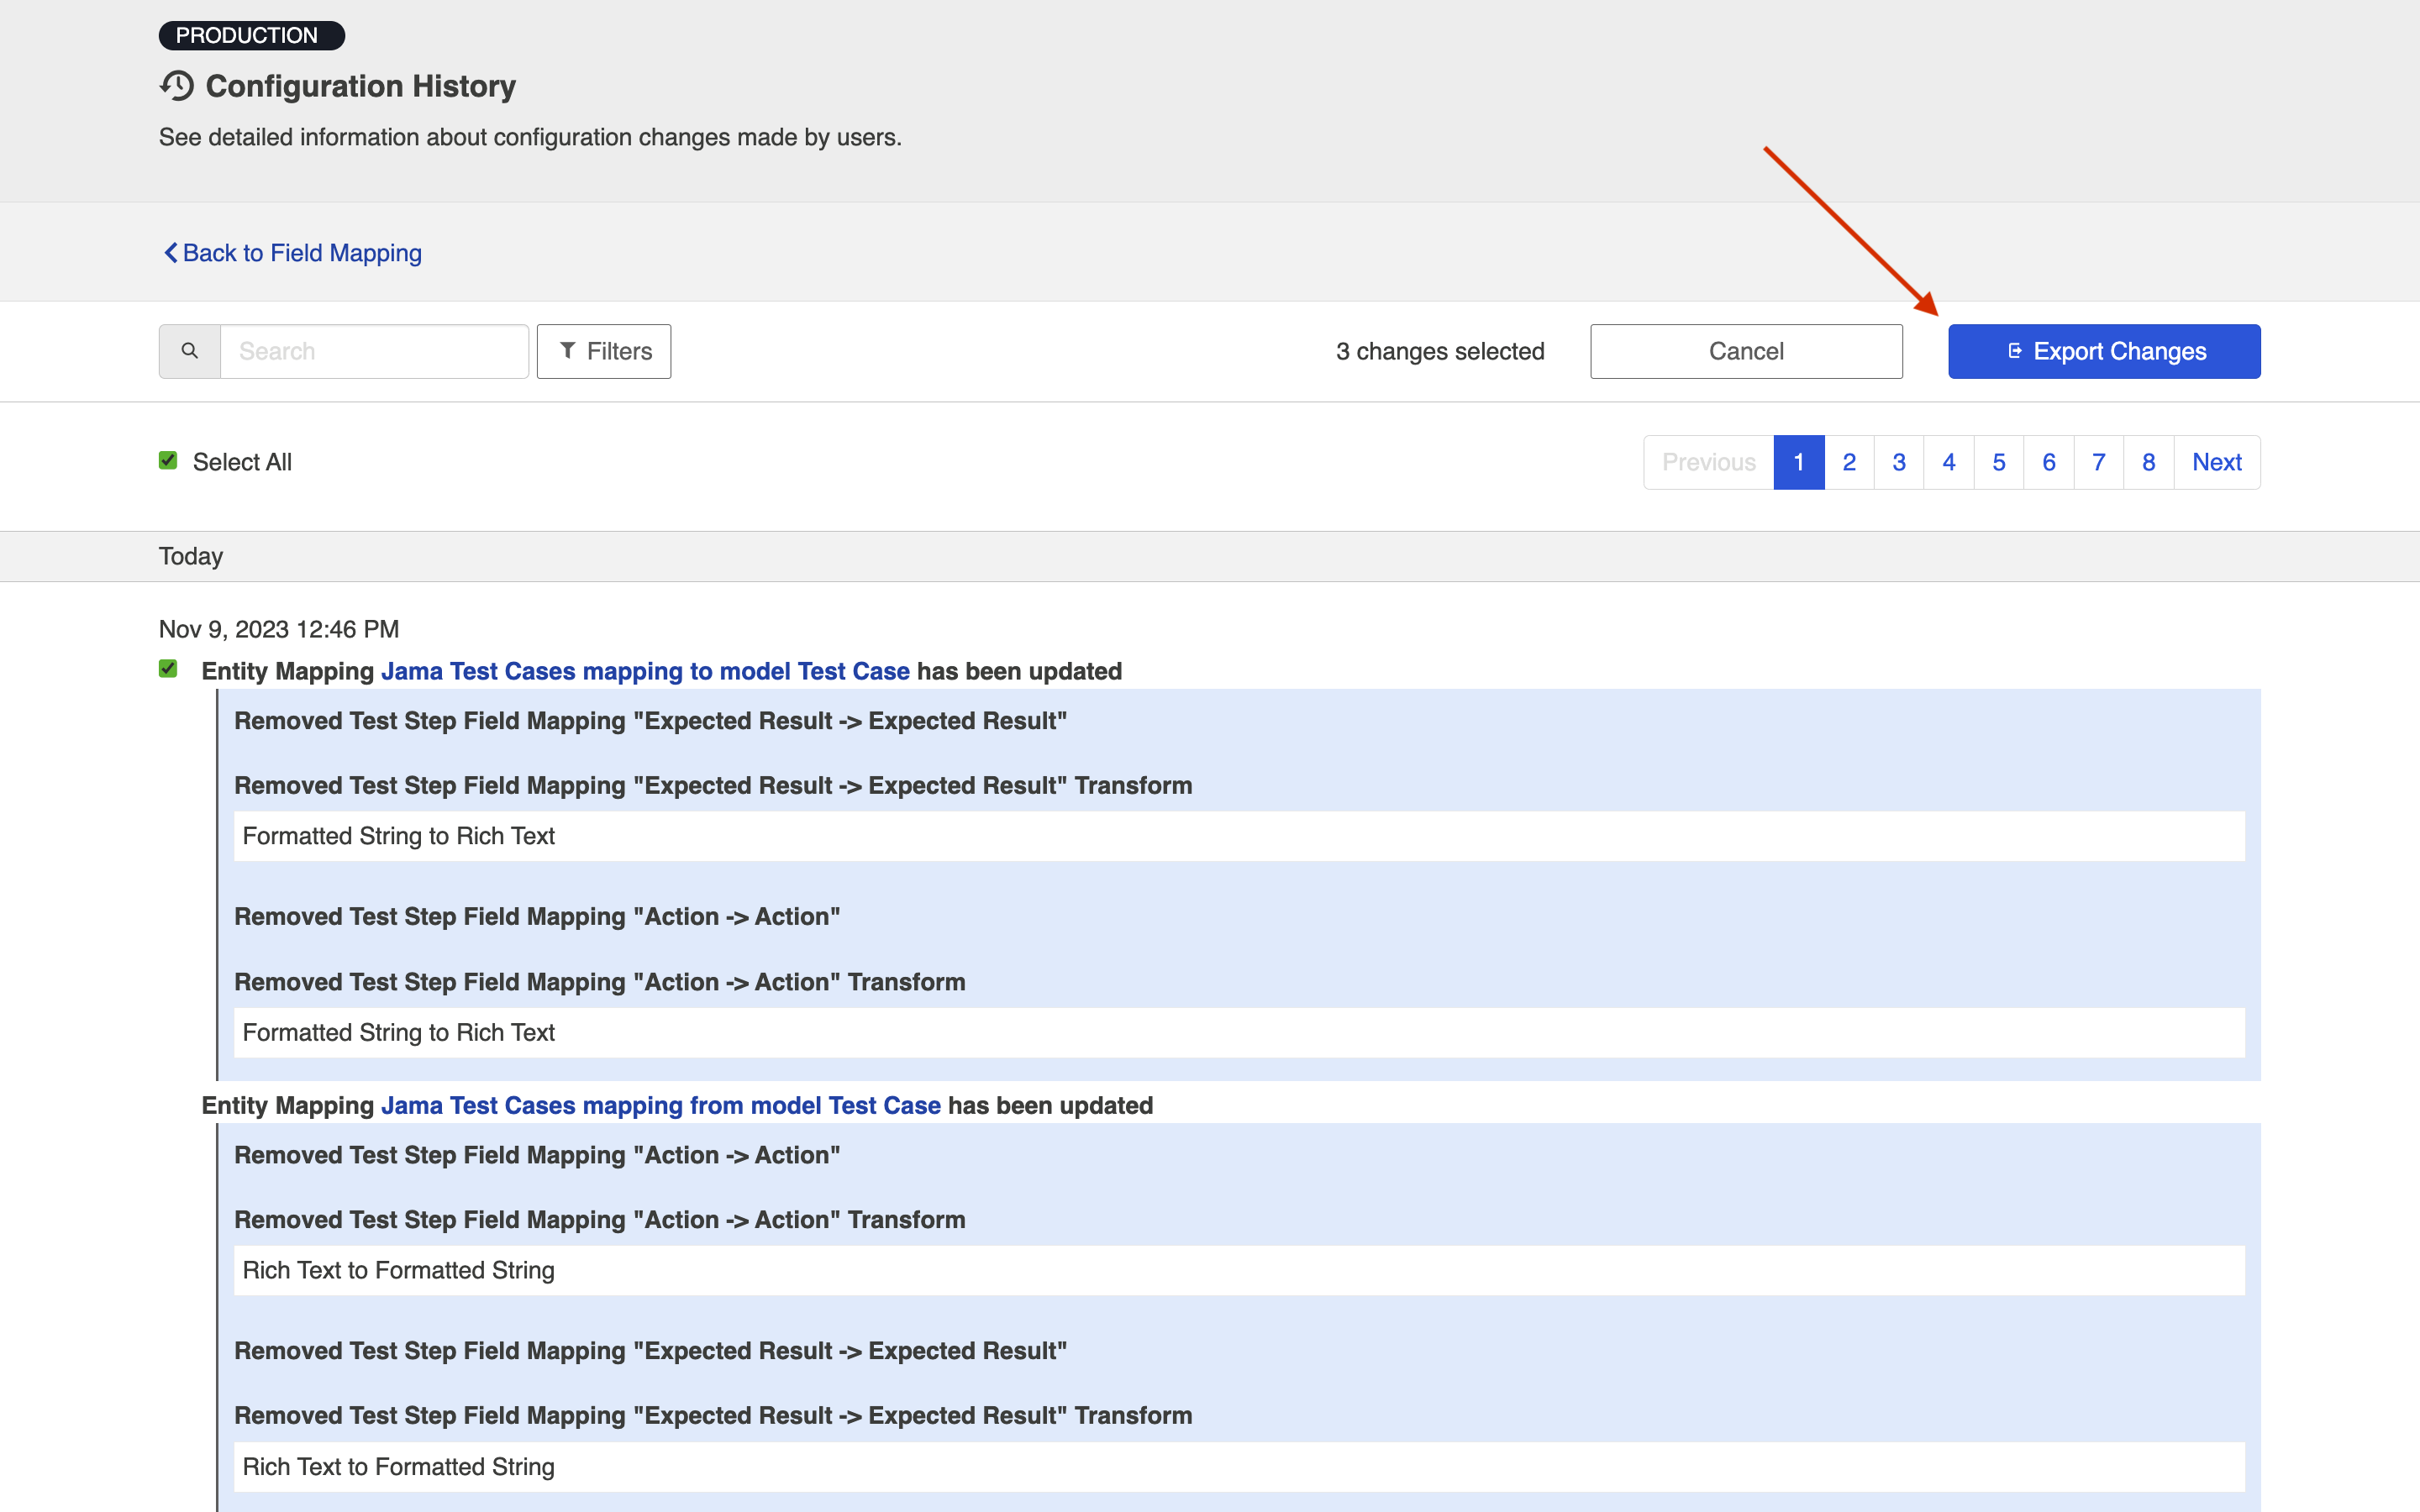
After you've selected the desired changes, click Export Changes and a .zip file will be generated with the changes.
Note: If you attempt to modify the contents of the .zip file, you may encounter issues upon import.
Importing Changes
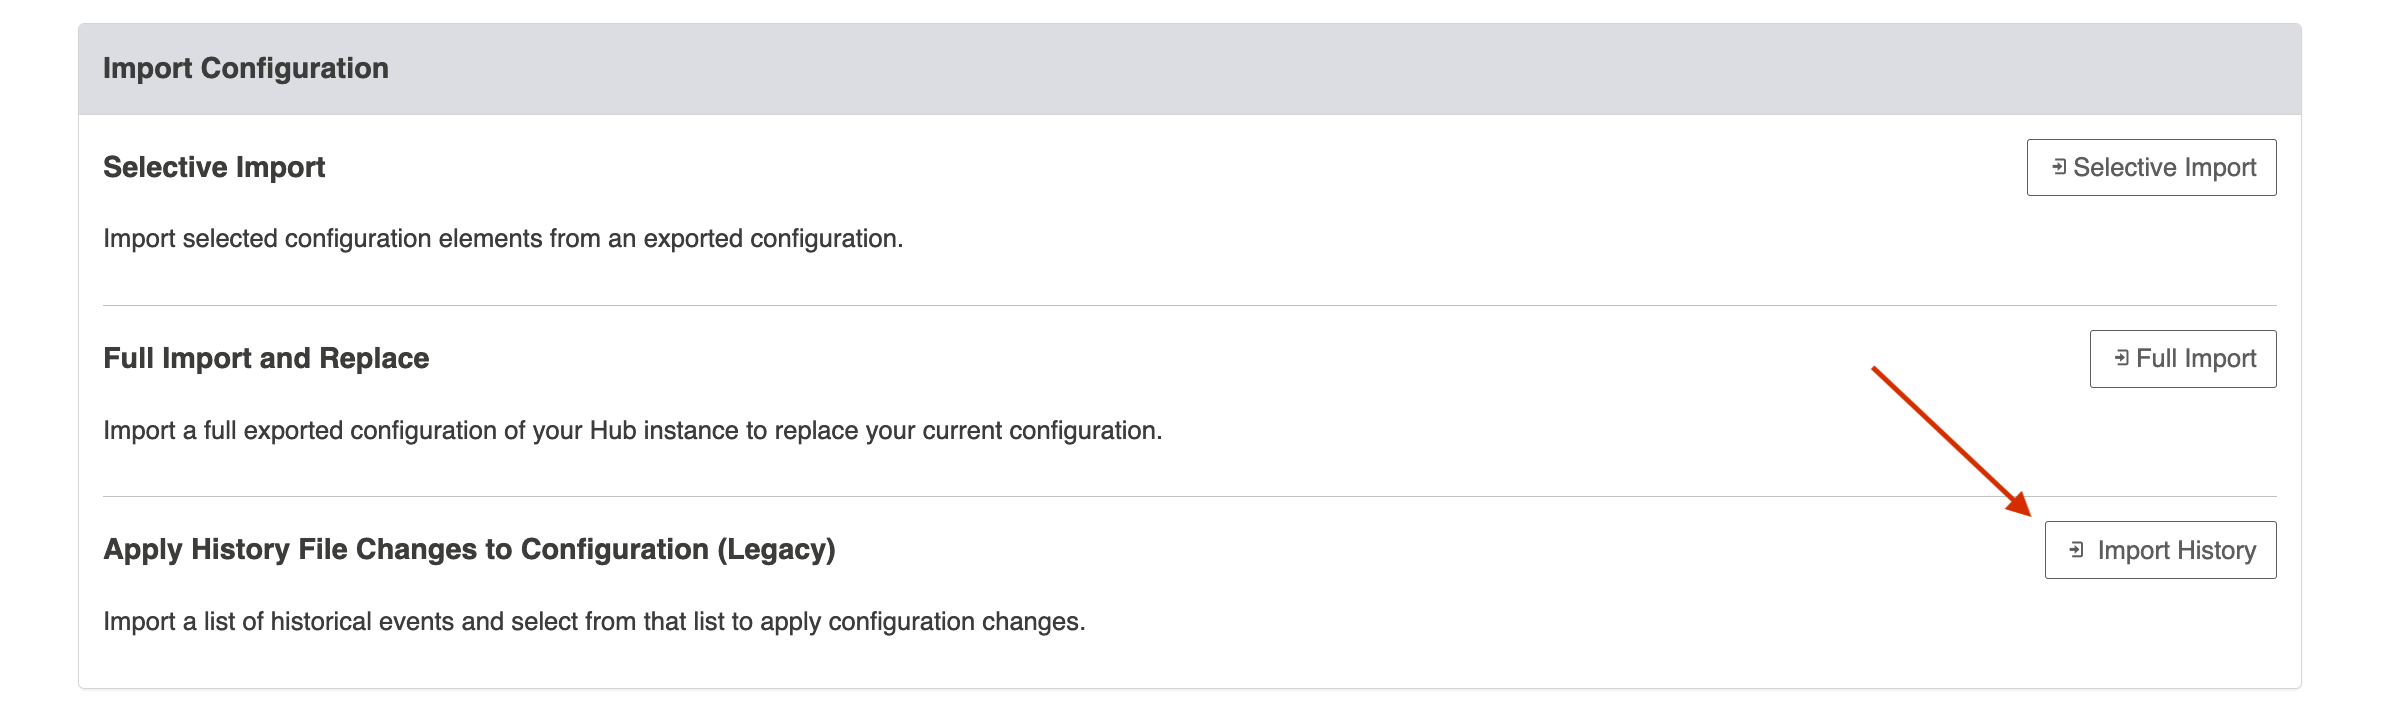
You can import the exported changes in the Advanced tab on the Settings screen.
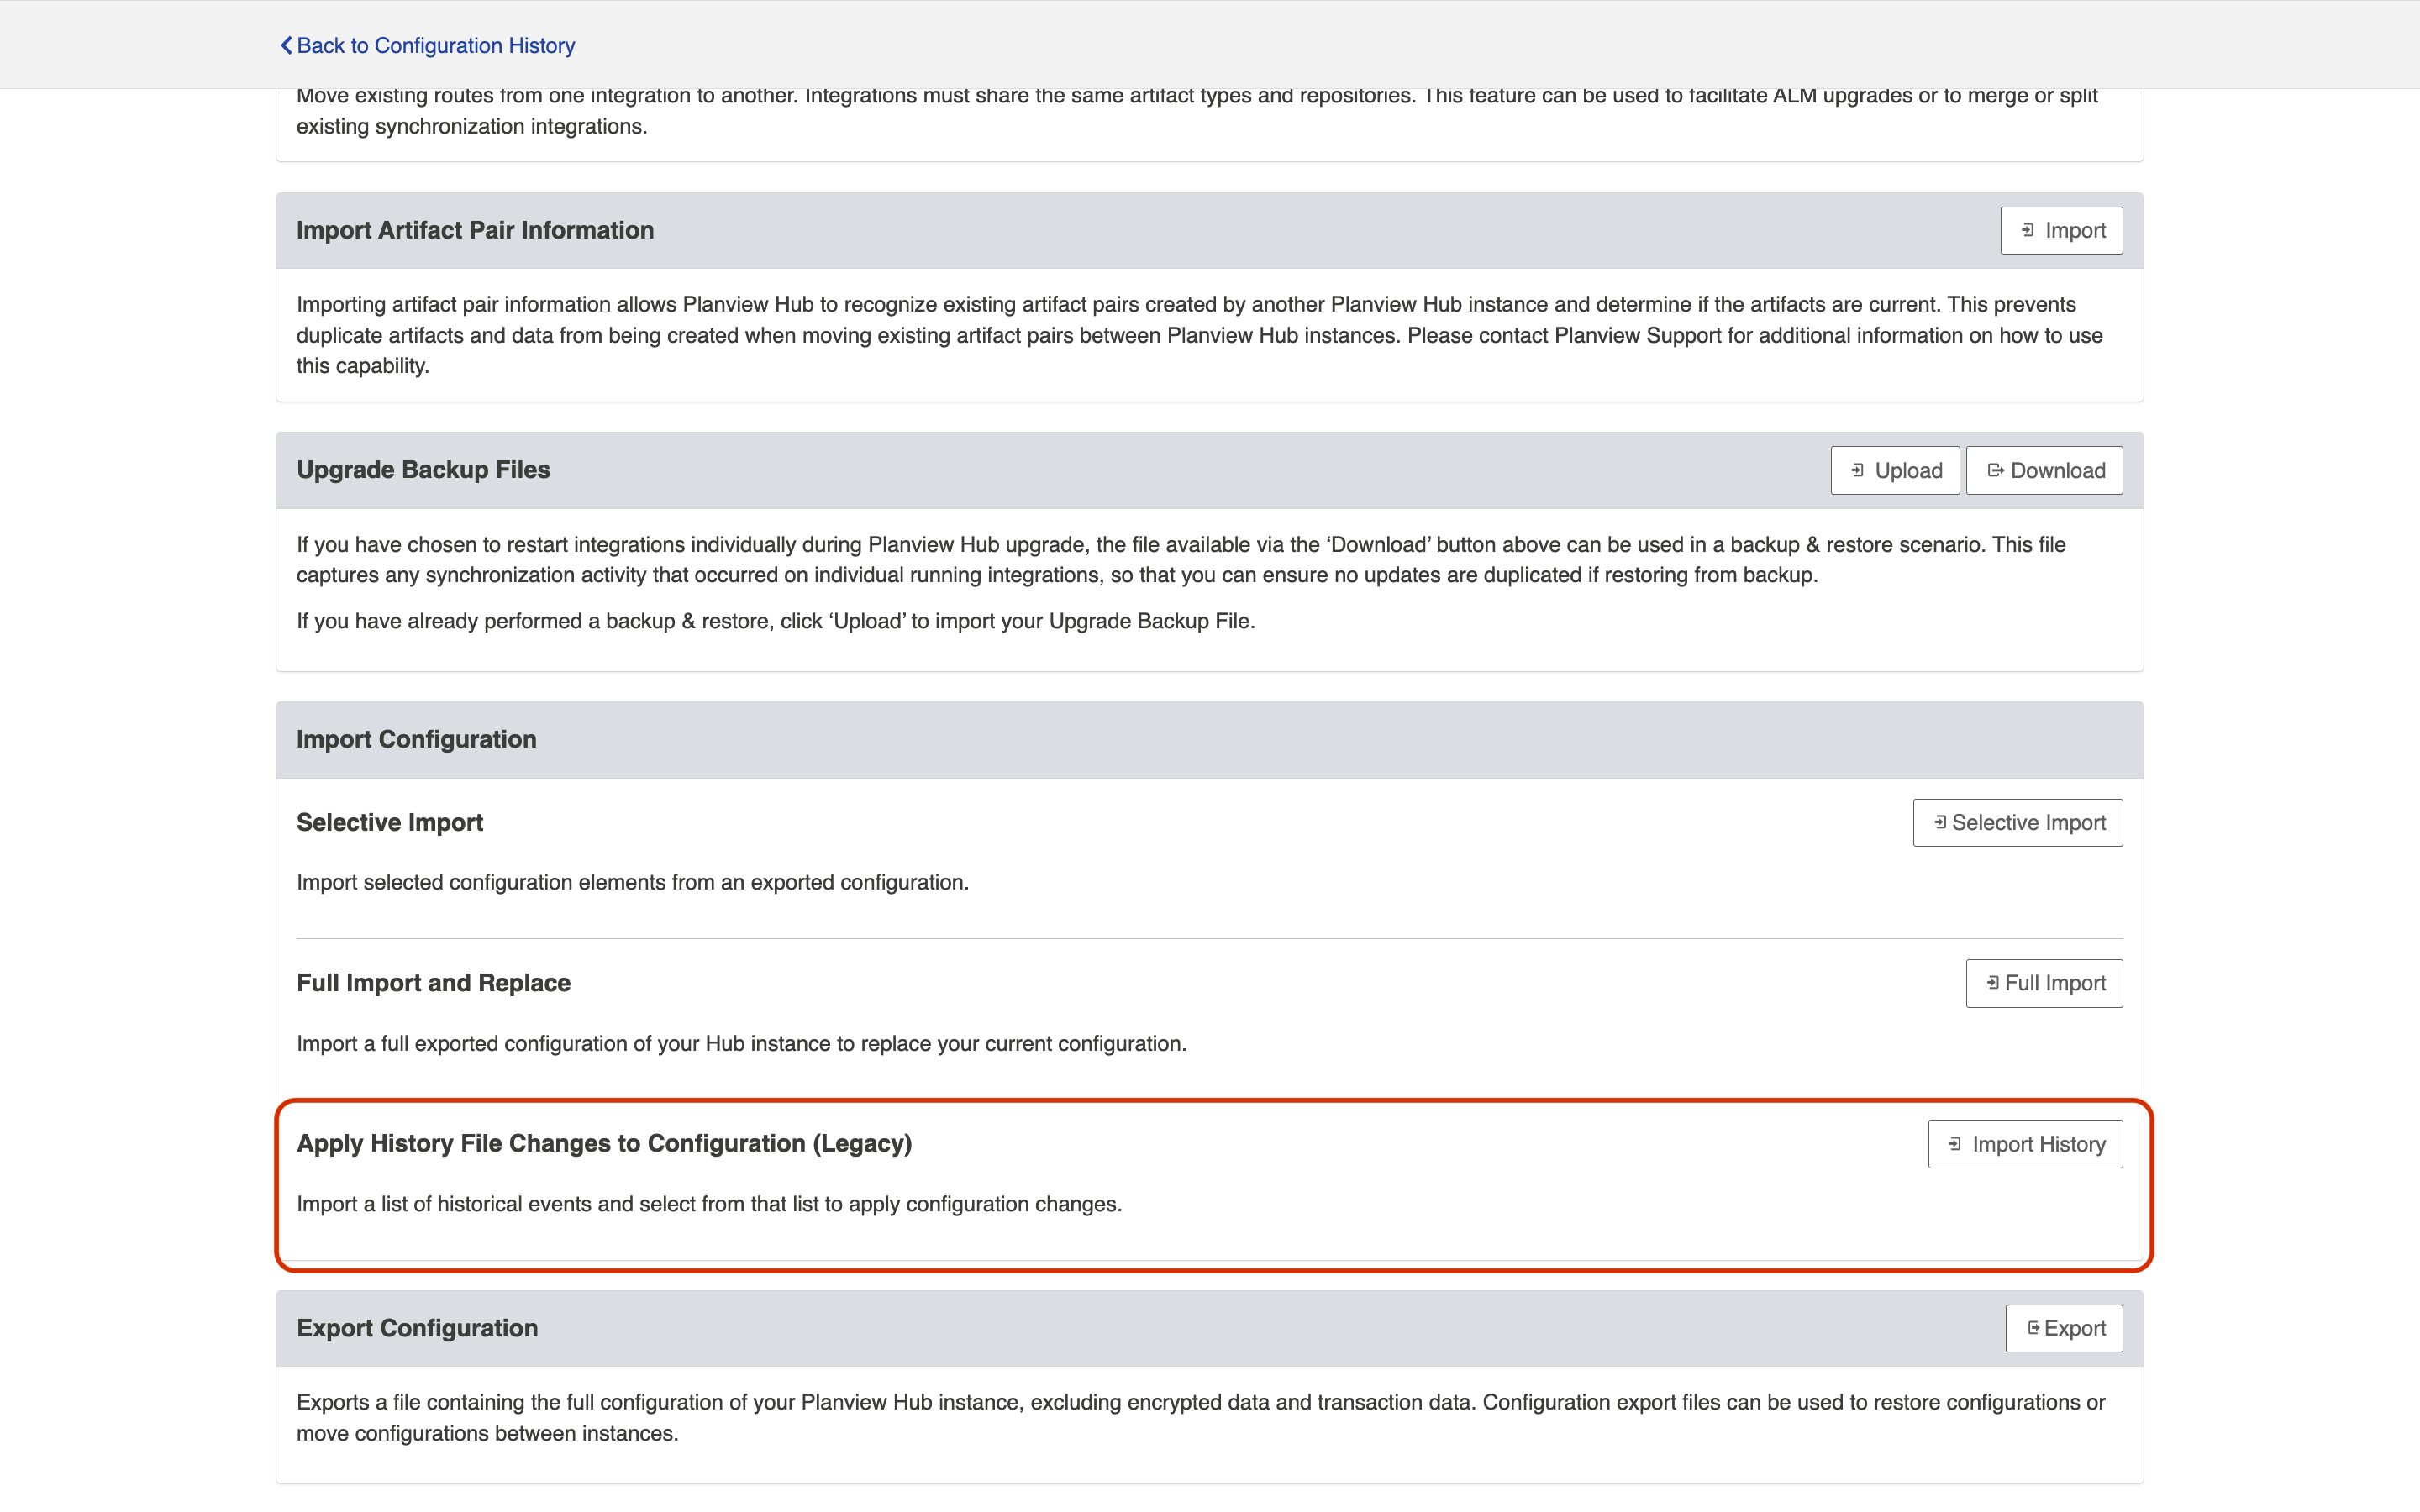
Click Import History in the Apply History File Changes to Configuration (Legacy) section.
On the Import Configurations screen, select the .zip file with the changes you'd like to import.
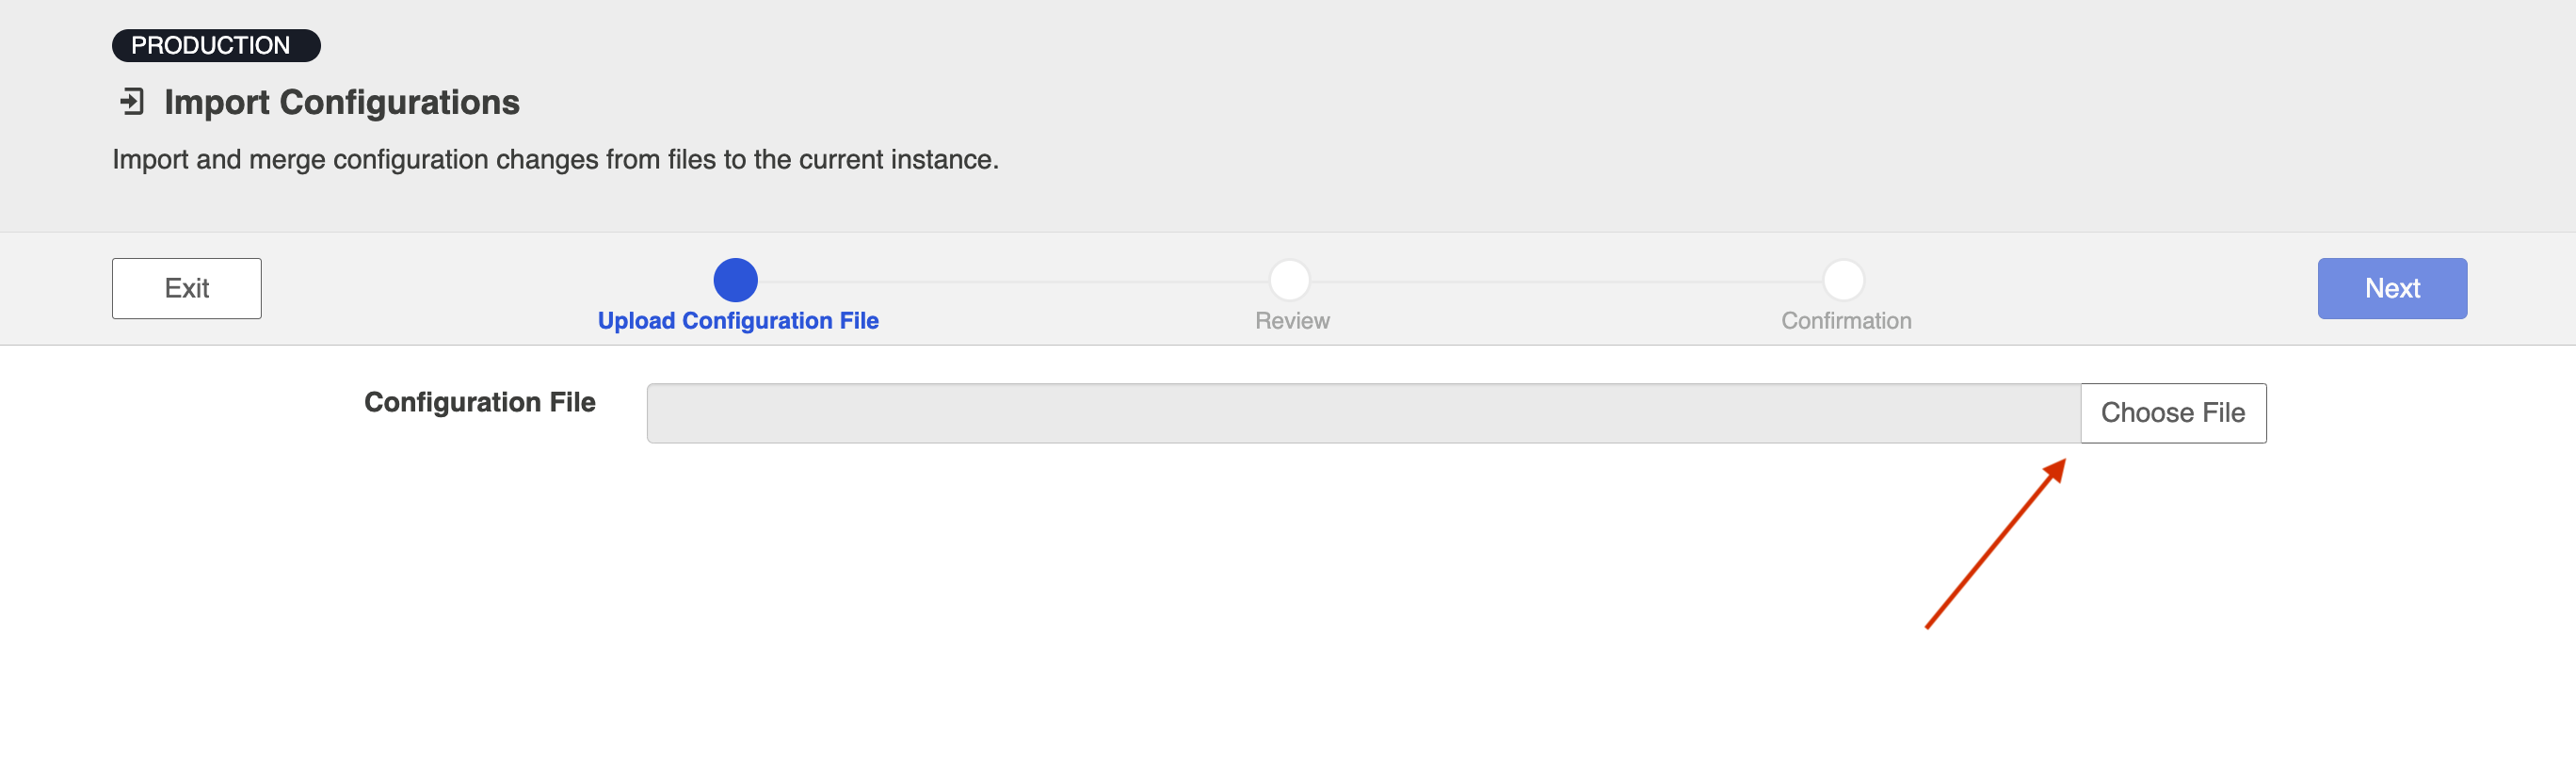
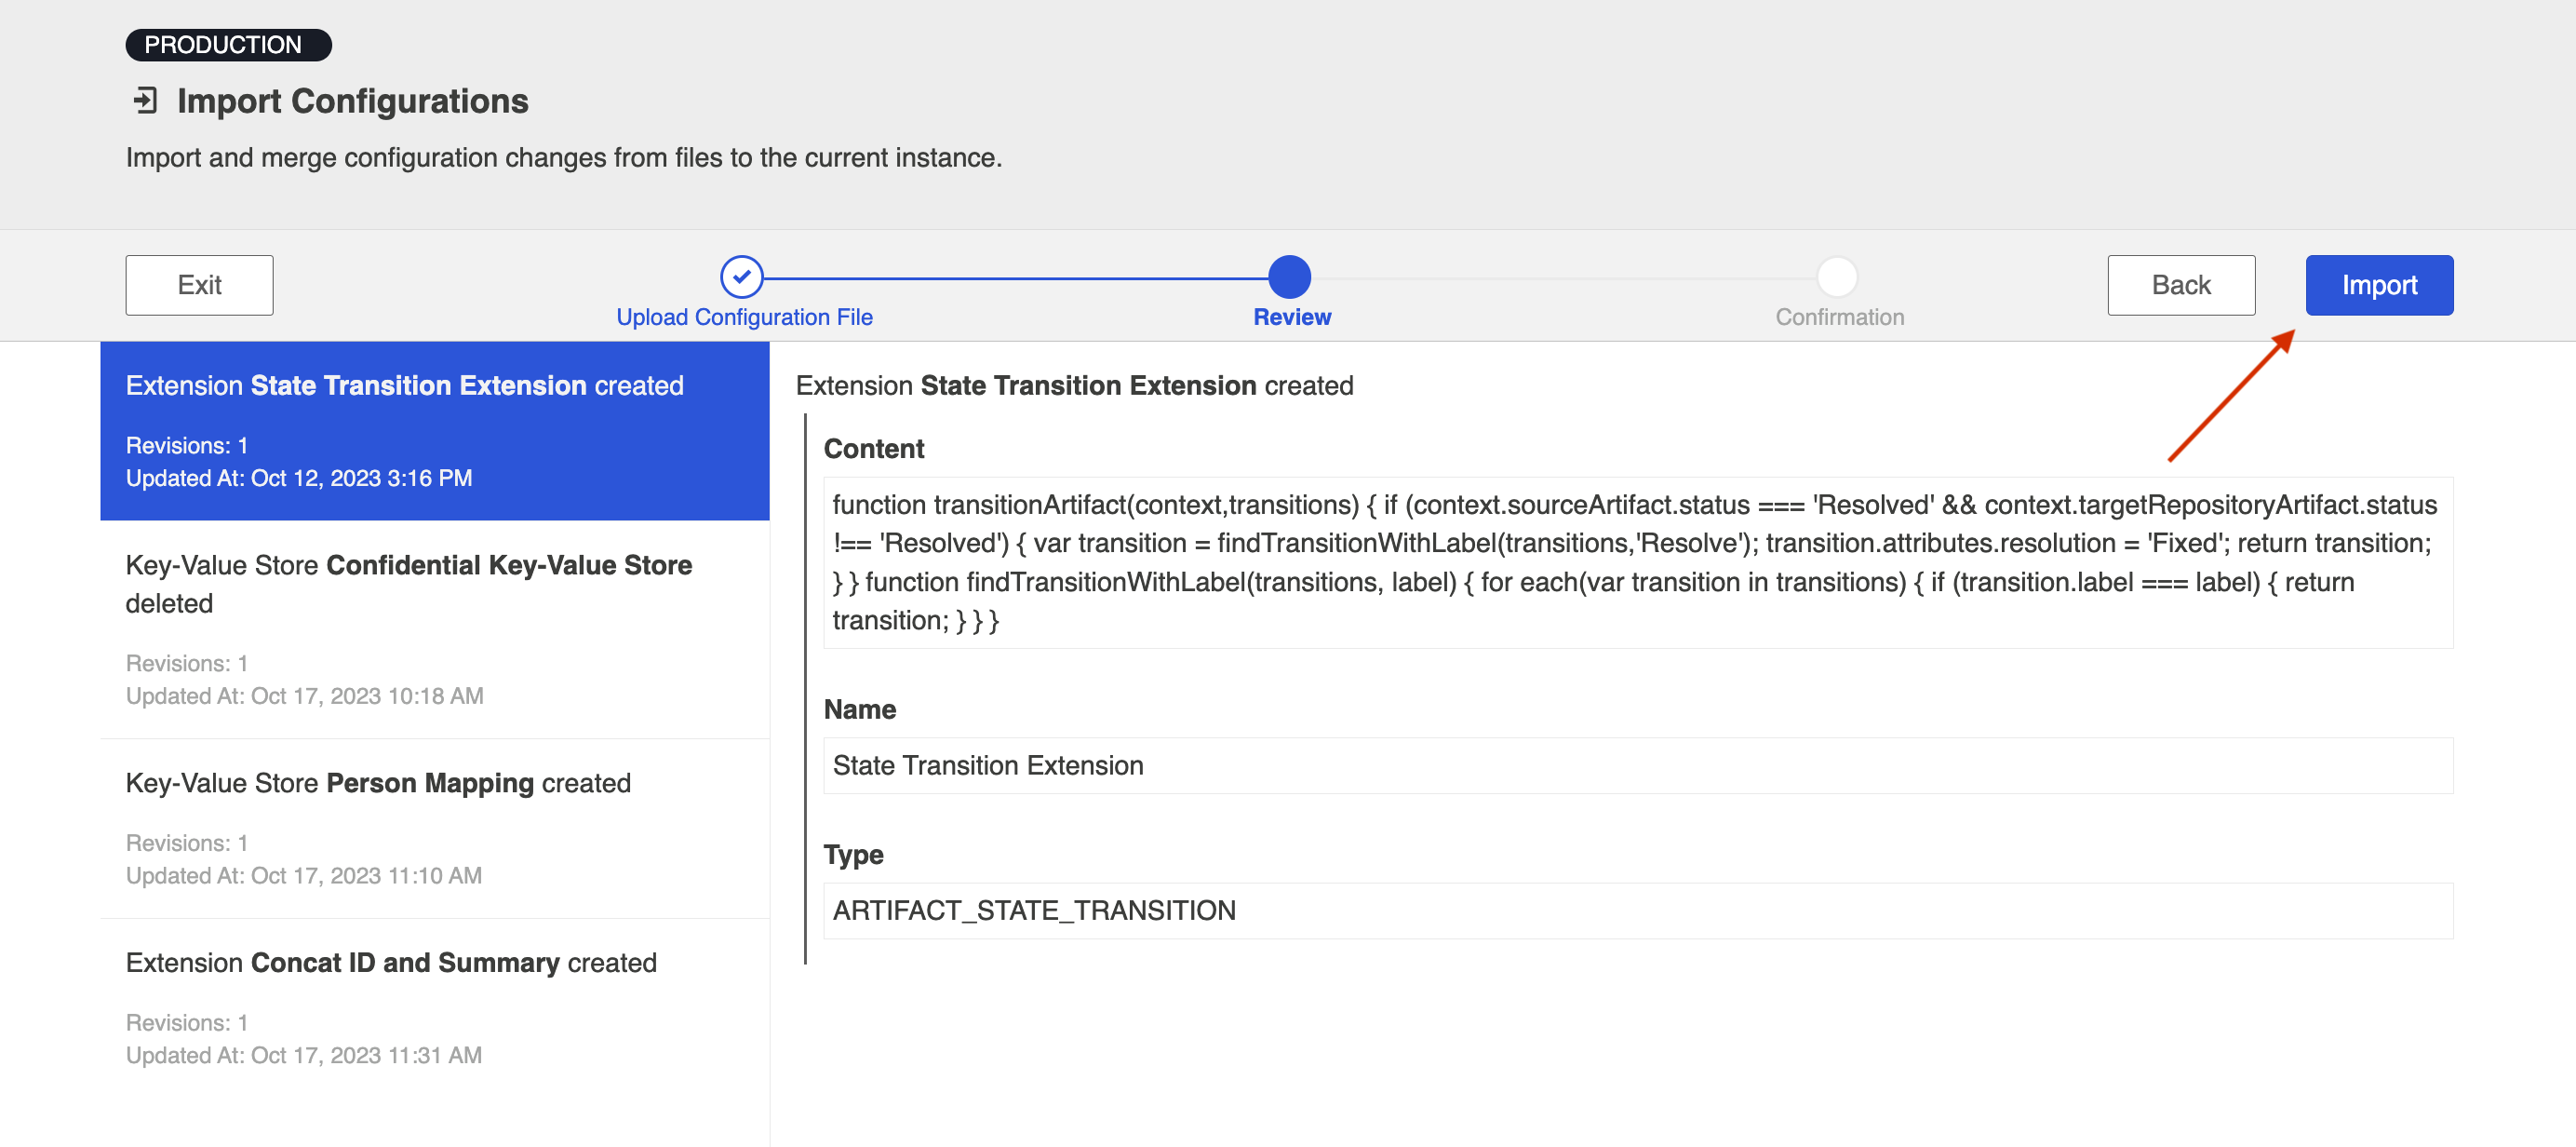
Click Next to review the changes before importing.

After reviewing, click Import to apply the changes.
If a change fails to import, an error message will appear to explain why the change failed. Once a change fails to import, Hub will not attempt to import the subsequent changes and will provide a new .zip file containing the remaining changes to import after troubleshooting the failed change.
Possible causes of import failure:
- Missing element in the target Hub instance. This error can be resolved by manually creating the missing required element in the target system or importing the changes that created that element from the source Hub instance to the target Hub instance.
- Element already exists in the target Hub instance. This error can be resolved by deleting the element, or not exporting the changes that try to create the duplicate element.

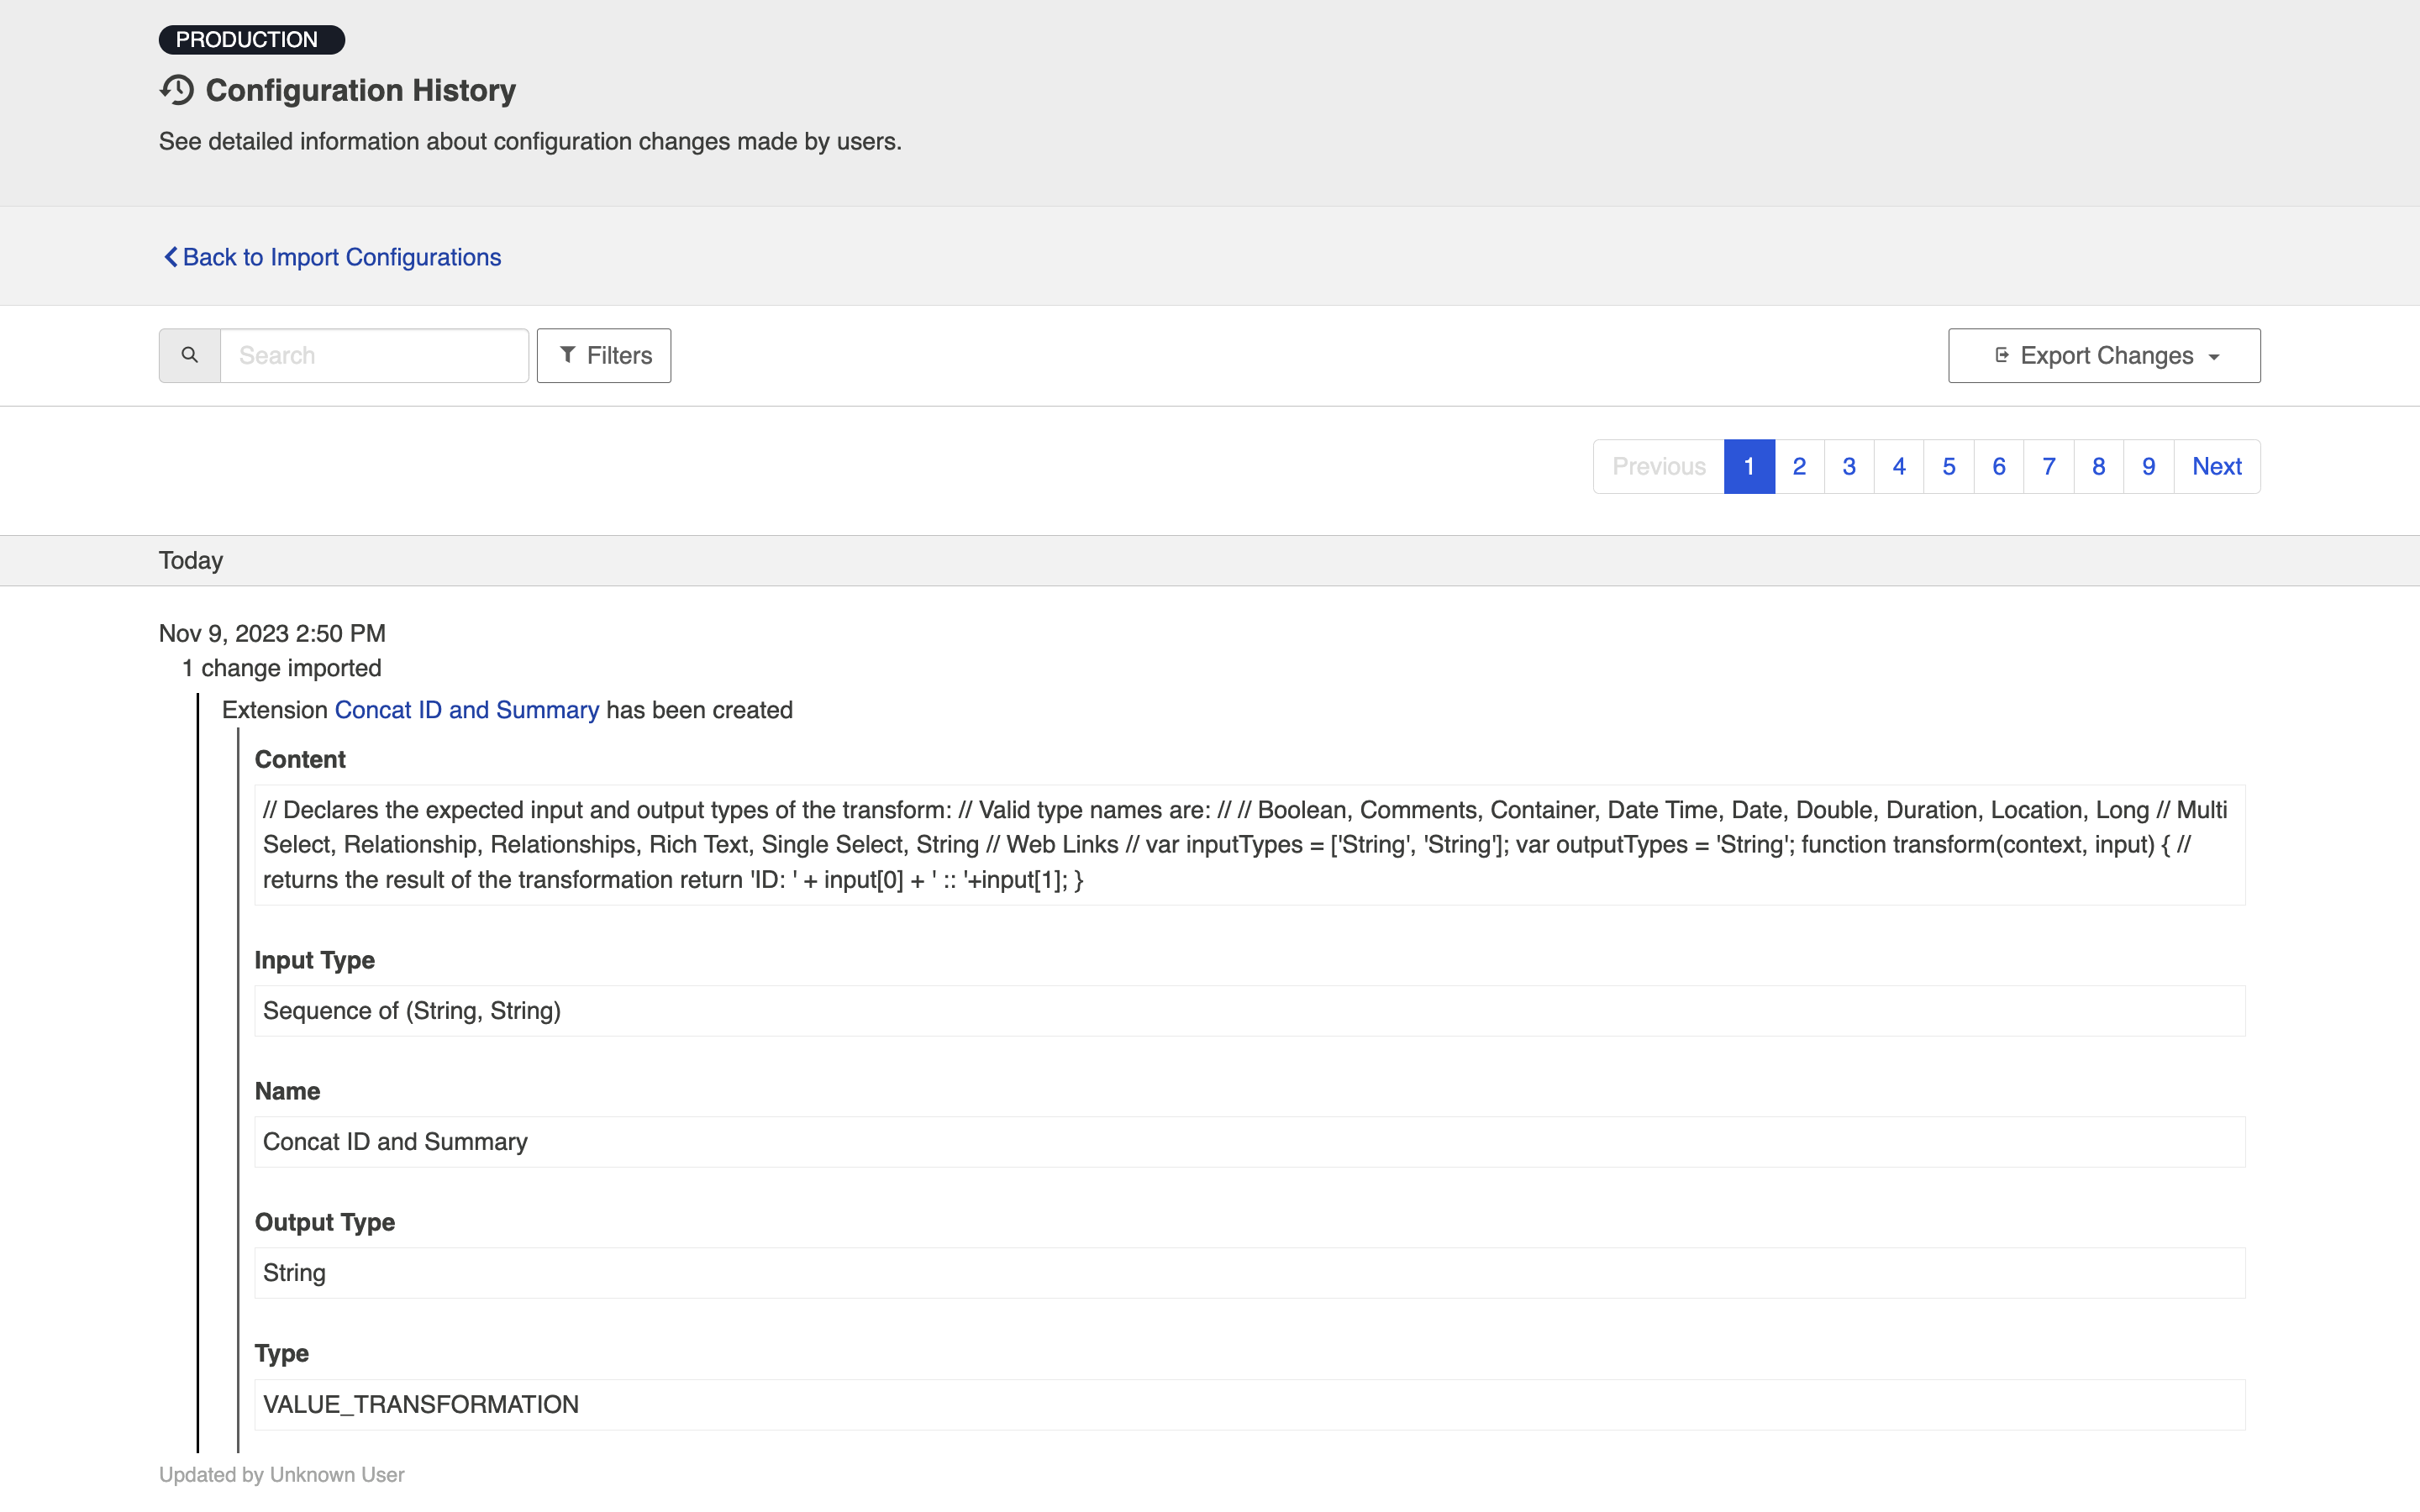
Once you're finished importing configuration changes, click Done.
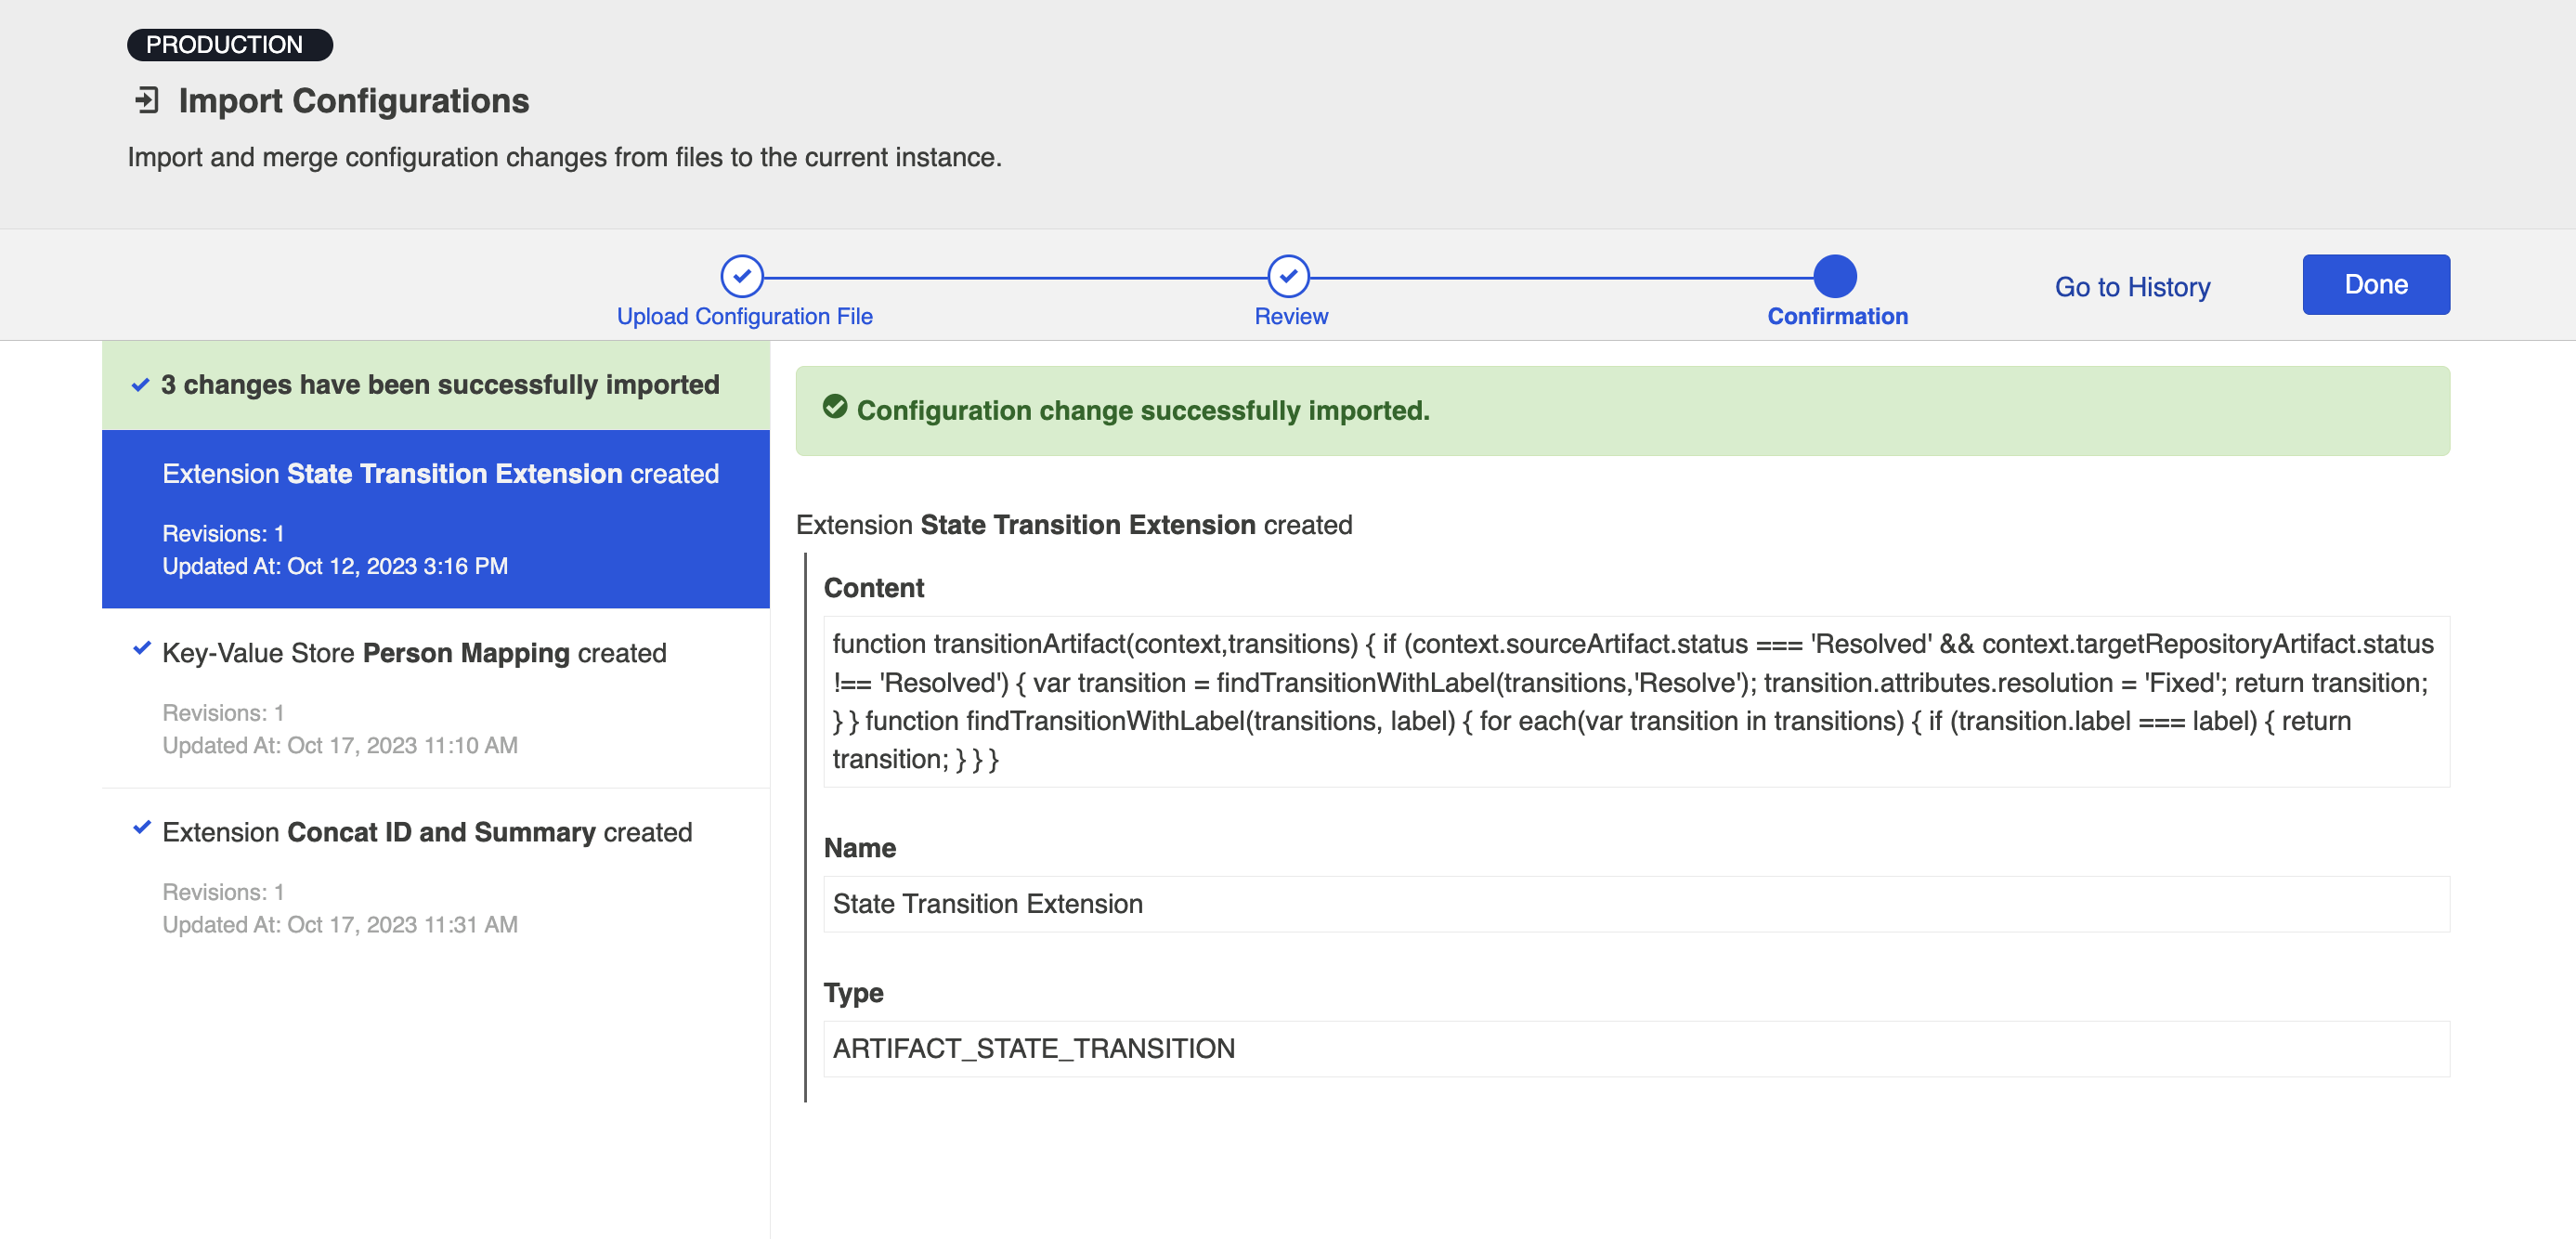
The imported changes will be visible on the Configuration History screen.