Modify via Gateway
The Modify via Gateway Integration template is only available in Editions that contain the Gateway add-on. See the Planview Hub Editions table to determine if your edition contains this functionality.
What is a Modify via Gateway Integration?

An integration is quite simply the flow of information between two or more collections. A Modify via Gateway Integration, specifically, locates and modifies existing artifacts in a work item or container collection that connects to a repository, when they are sent to Hub via a gateway collection. A gateway collection accesses event-based information in an external tool, such as Git or Jenkins, via an inbound webhook.
These types of events are “fire and forget” — they can modify something in your repository, but they don’t expect anything back. As such, they don’t mandate a full-blown two way synchronization; a lighter one-way integration can do the trick.
Here is an example of what you can do with the Modify via Gateway integration template:

When you configure a Modify via Gateway integration, you can customize the field flow and artifact filtering.
Video Tutorial
Check out the video below to learn how to configure the Modify via Gateway Integration template.
Note: This video assumes that you have already configured your repositories, models, and collections as outlined in the Quick Start Guide.
Use Case and Business Value
The Modify via Gateway integration creates traceability between artifacts across the software development lifecycle. Already existing artifacts in a repository collection will be located and modified in a specified way when artifacts are sent to Hub via a gateway collection.
For example, if your development team uses Gerrit for code review and Jira for its agile work management, but would like to know which defects in Jira a given code review affects, or conversely which code reviews are associated with a given defect, you could set up an integration that would find an already-existing defect in Jira anytime a code review is sent in and append one of its fields with that code review’s URL. The integration can even include updating other Jira artifacts to which code reviews might pertain, such as stories and tech debt.

Template Affordances
The Modify via Gateway Integration Template allows you to update already-existing artifacts in target work item (repository) or container (repository) collection when artifacts are sent to Hub via a gateway collection.

Configuring a Modify via Gateway Integration
Configuring your Repository Collection
Before you begin configuring the integration itself, there are some steps that must be taken at the repository collection level:
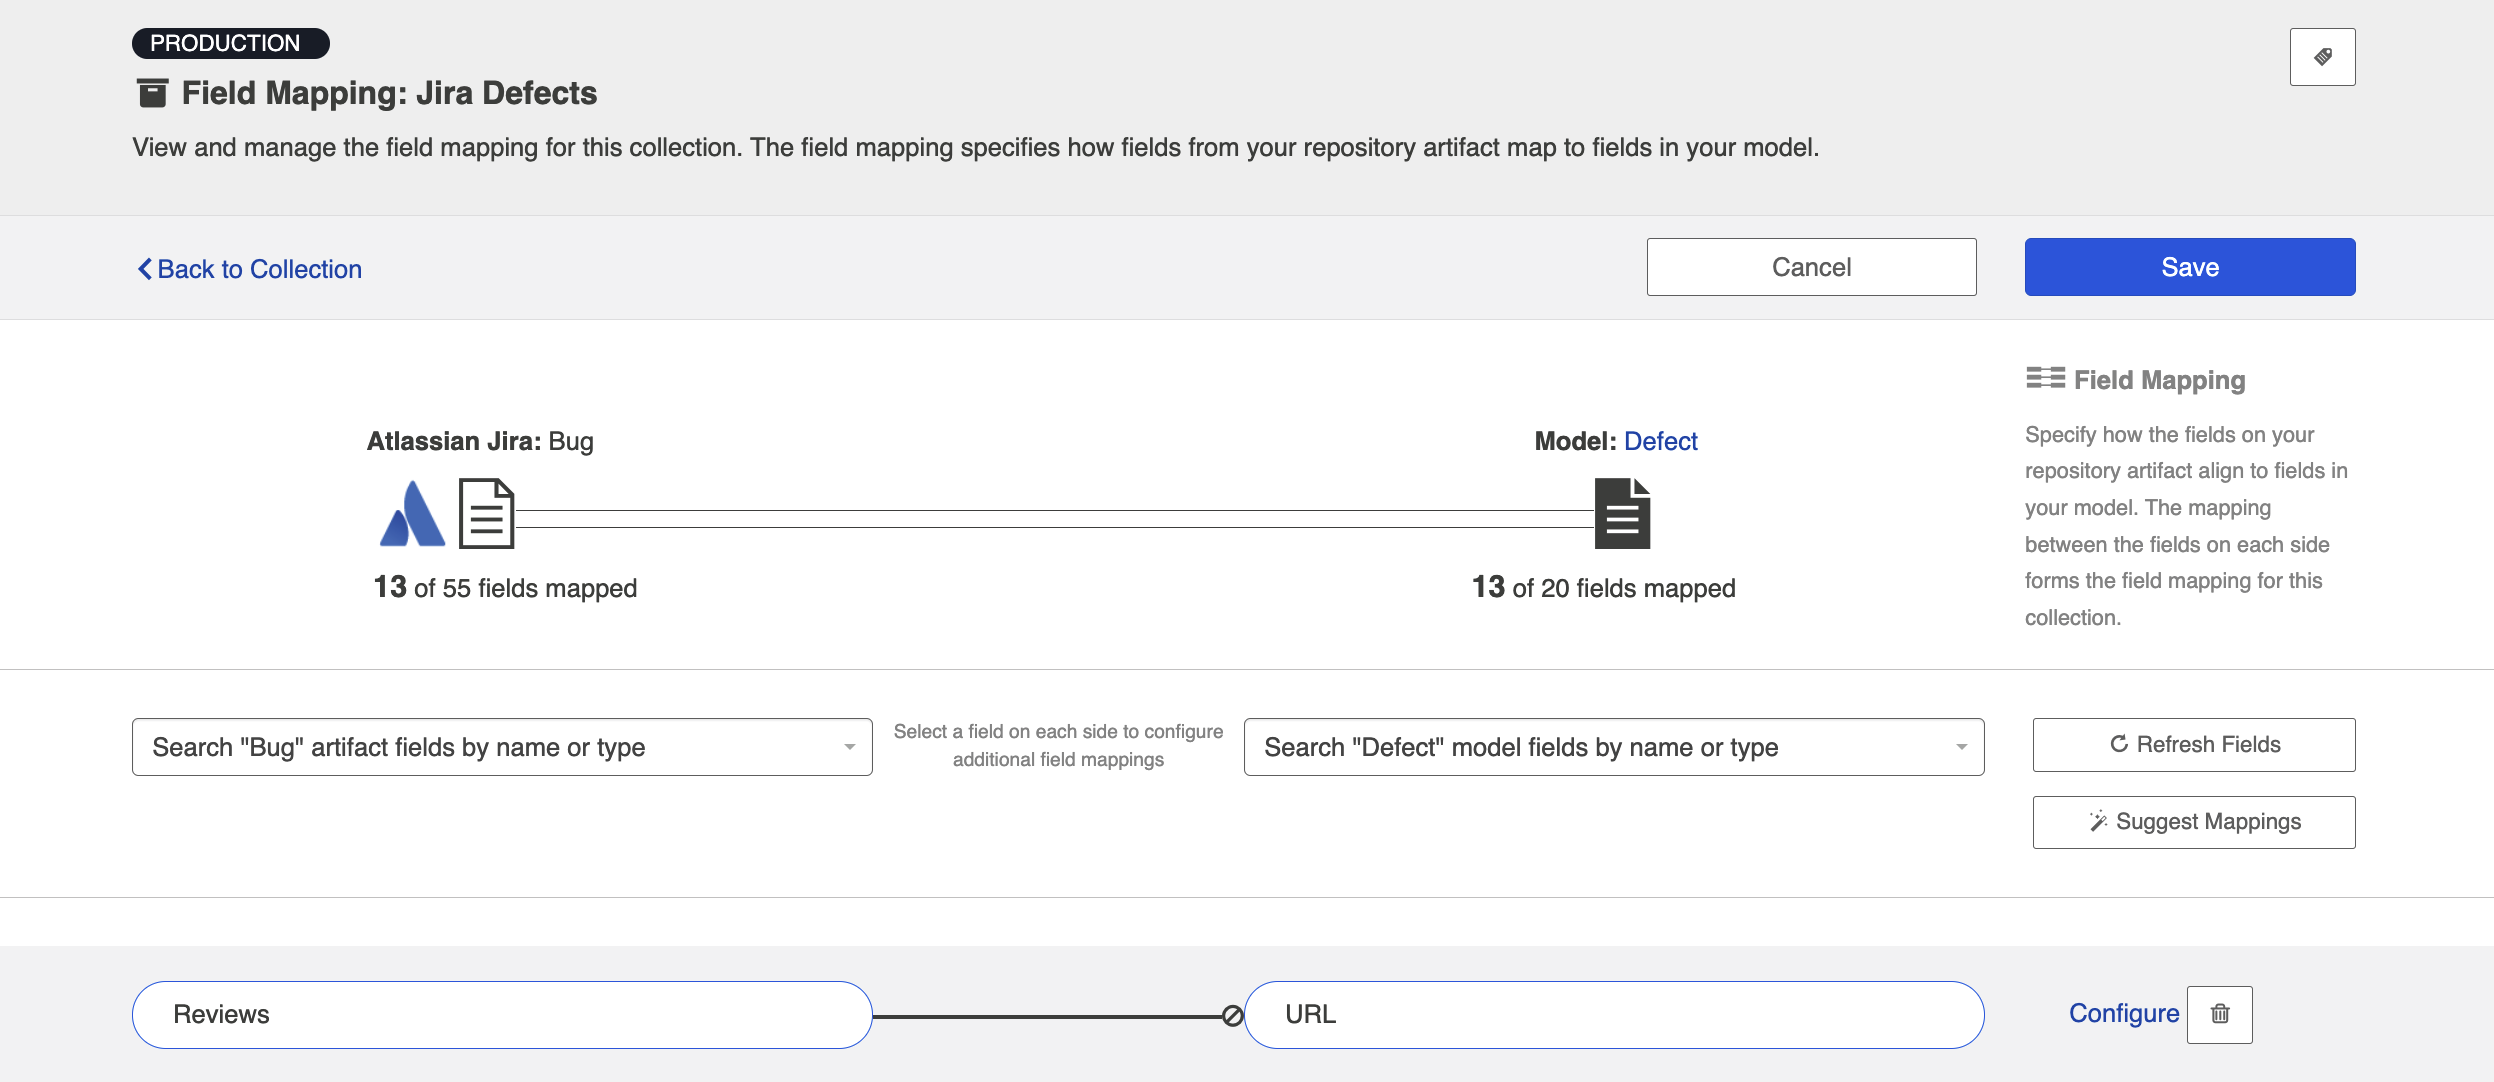
To specify just how you would like incoming artifacts from your gateway collection to modify already existing artifacts in your repository collection, you need to identify which field(s) on your already-existing artifacts you would like to modify and then configure how the field(s) should be changed. In the example above, the URL to any incoming code reviews from a gateway collection is being added to the review field of the Jira defect.
This means that the Jira collection-to-model mapping is configured as such:
And here are how the transformations are configured between these fields:
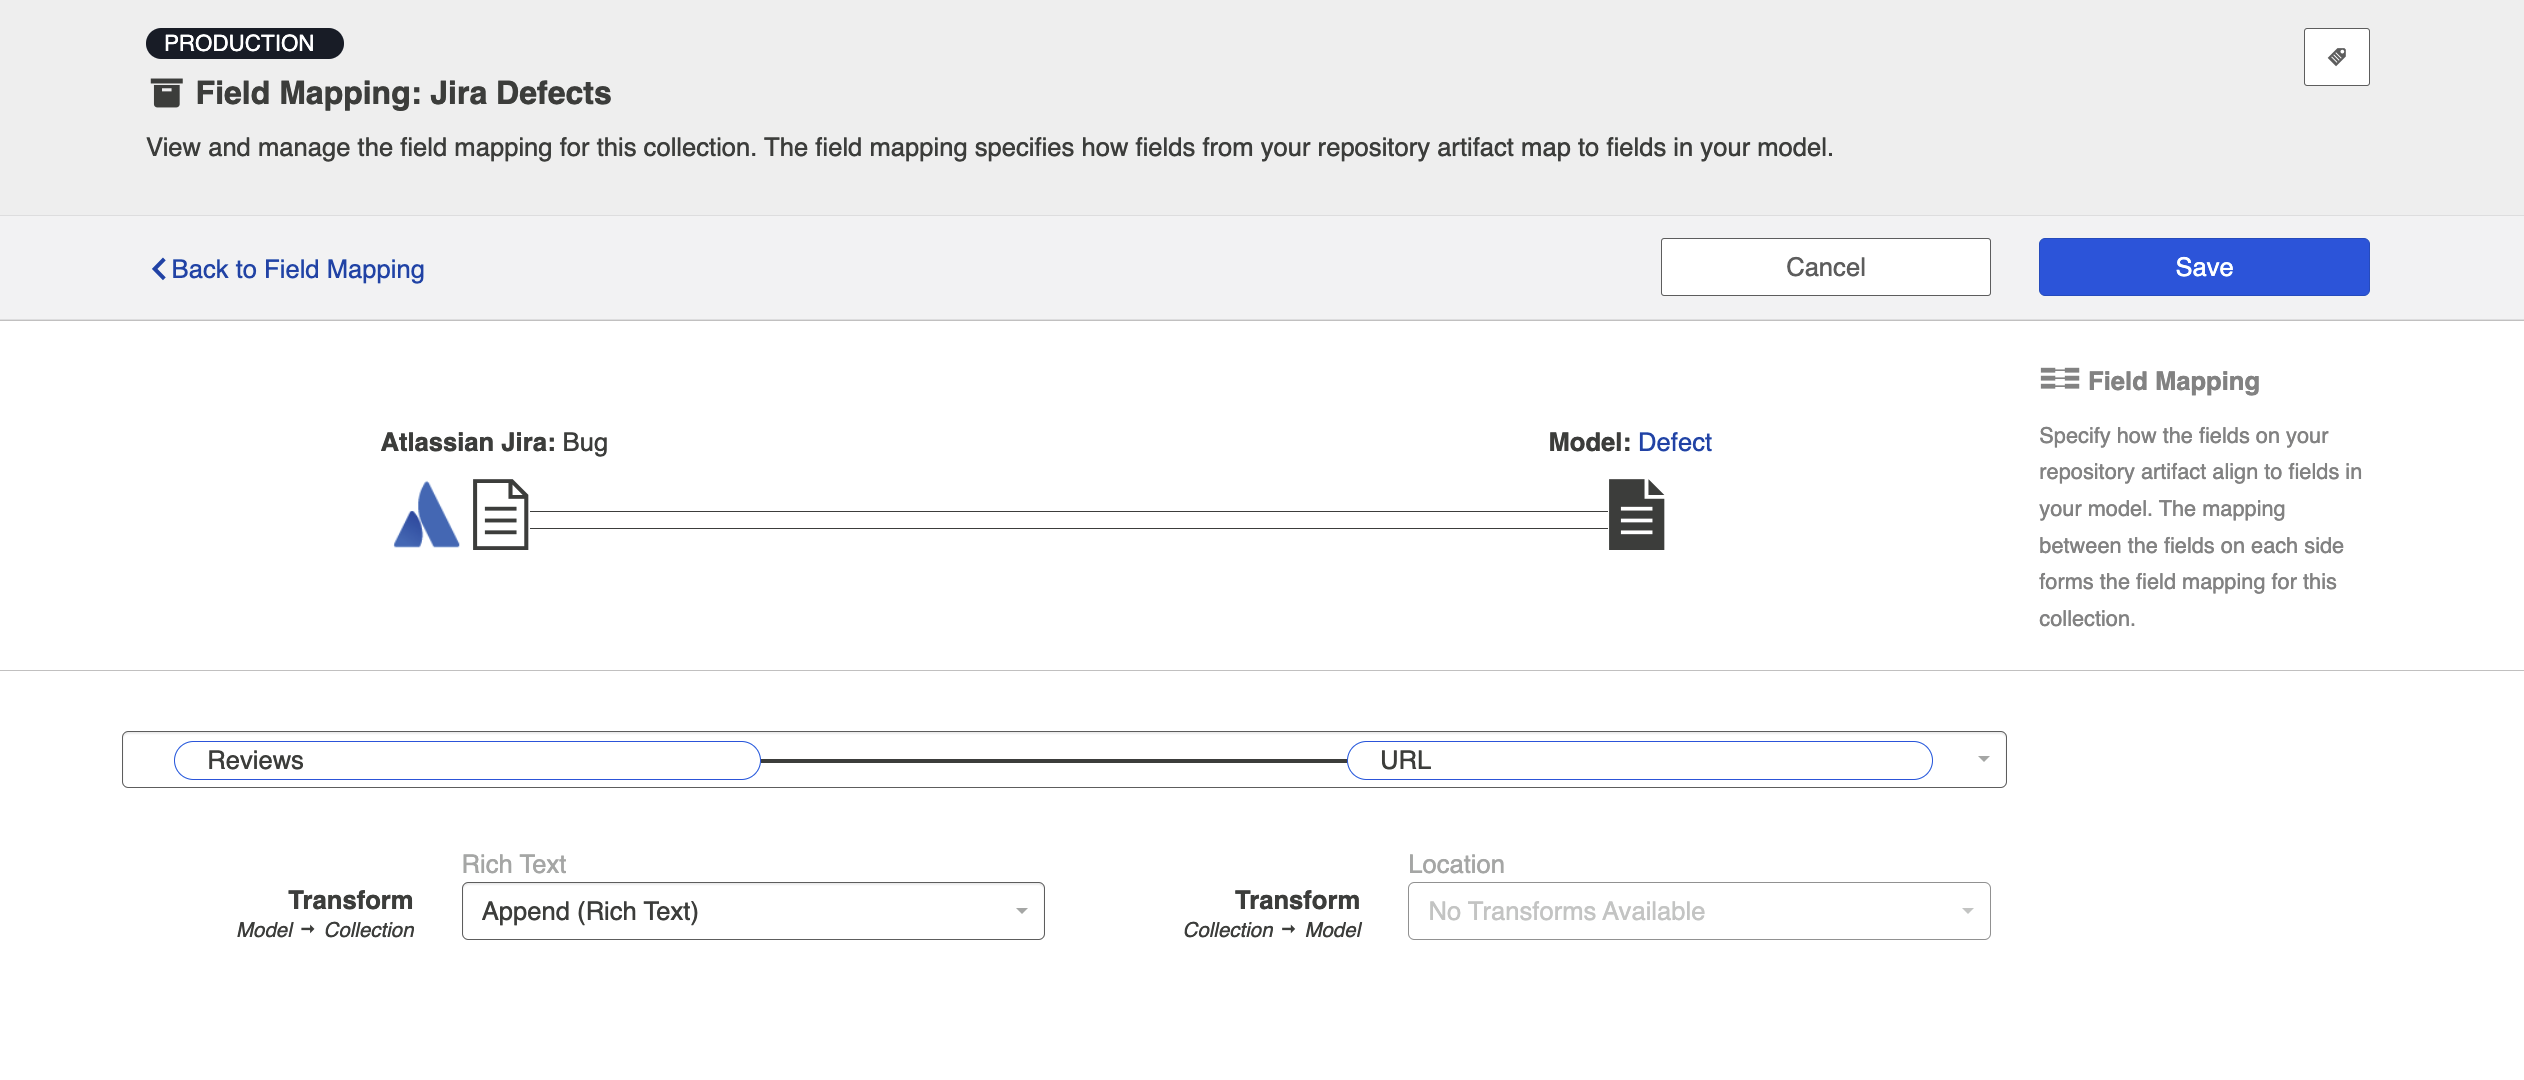
The Append transform means that new values will be added to the field value, rather than overwriting it, leaving the Jira artifact itself looking like this:

Configuring Your Integration
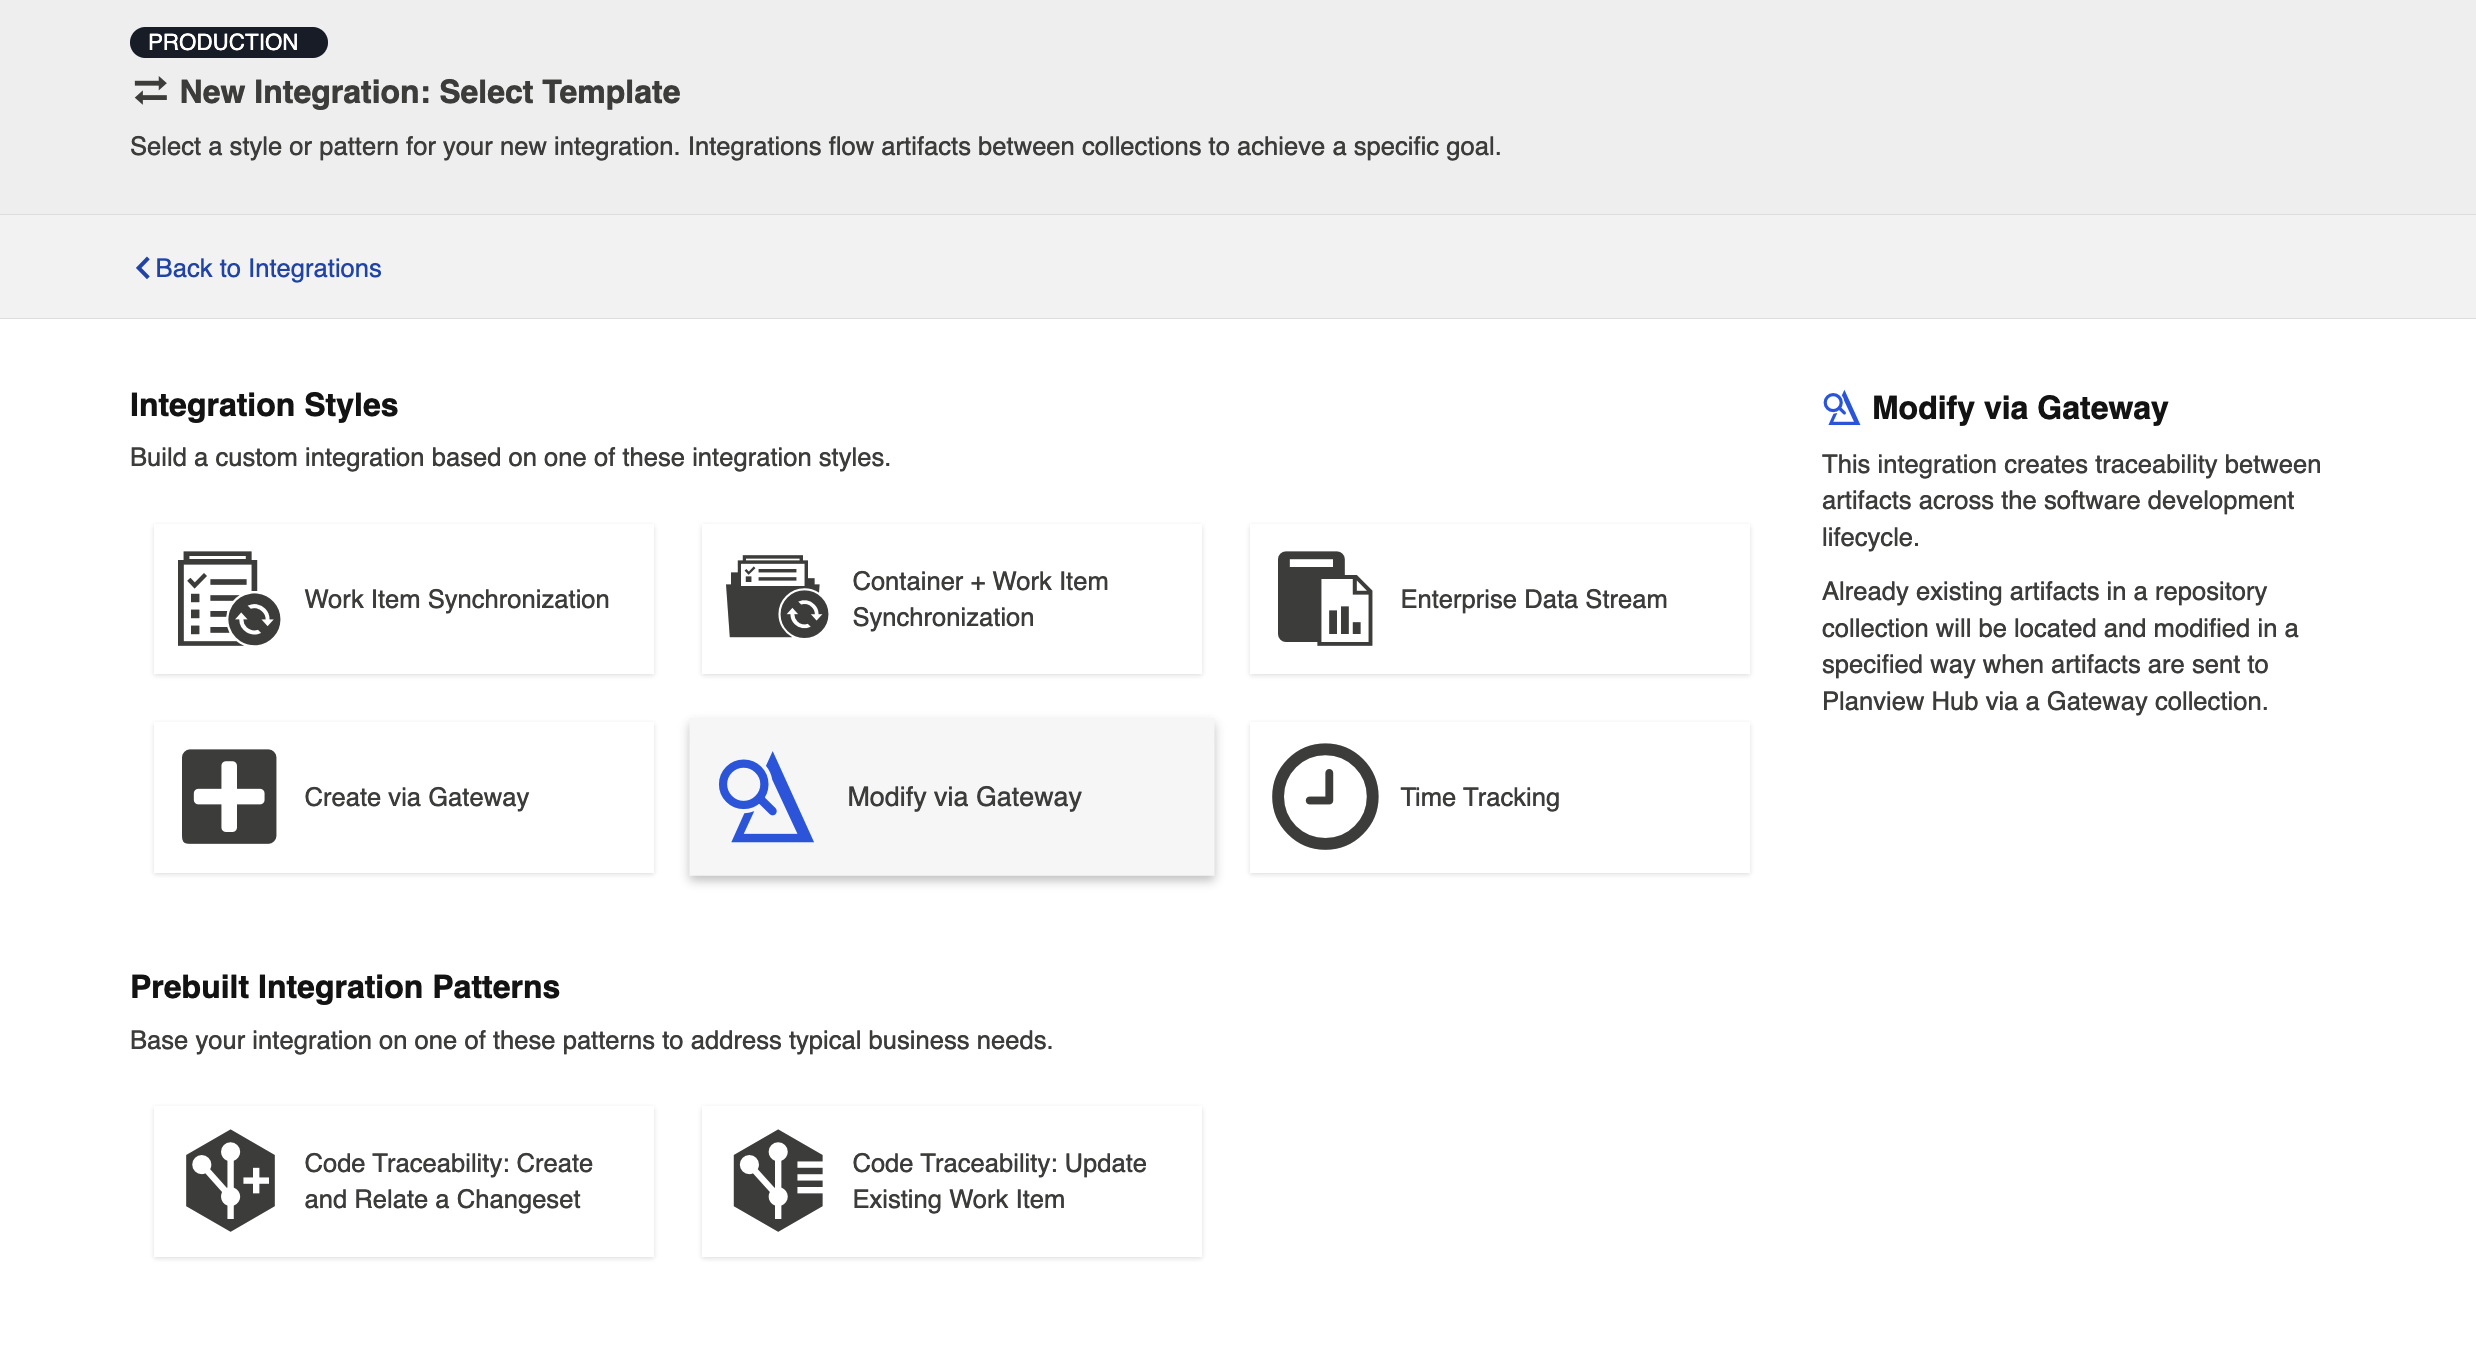
To configure your integration, select Integrations at the top of the screen, then click New Integration.
Select the Modify via Gateway template.
Note: Depending on the edition of Hub you are using, you may not have all options shown here.
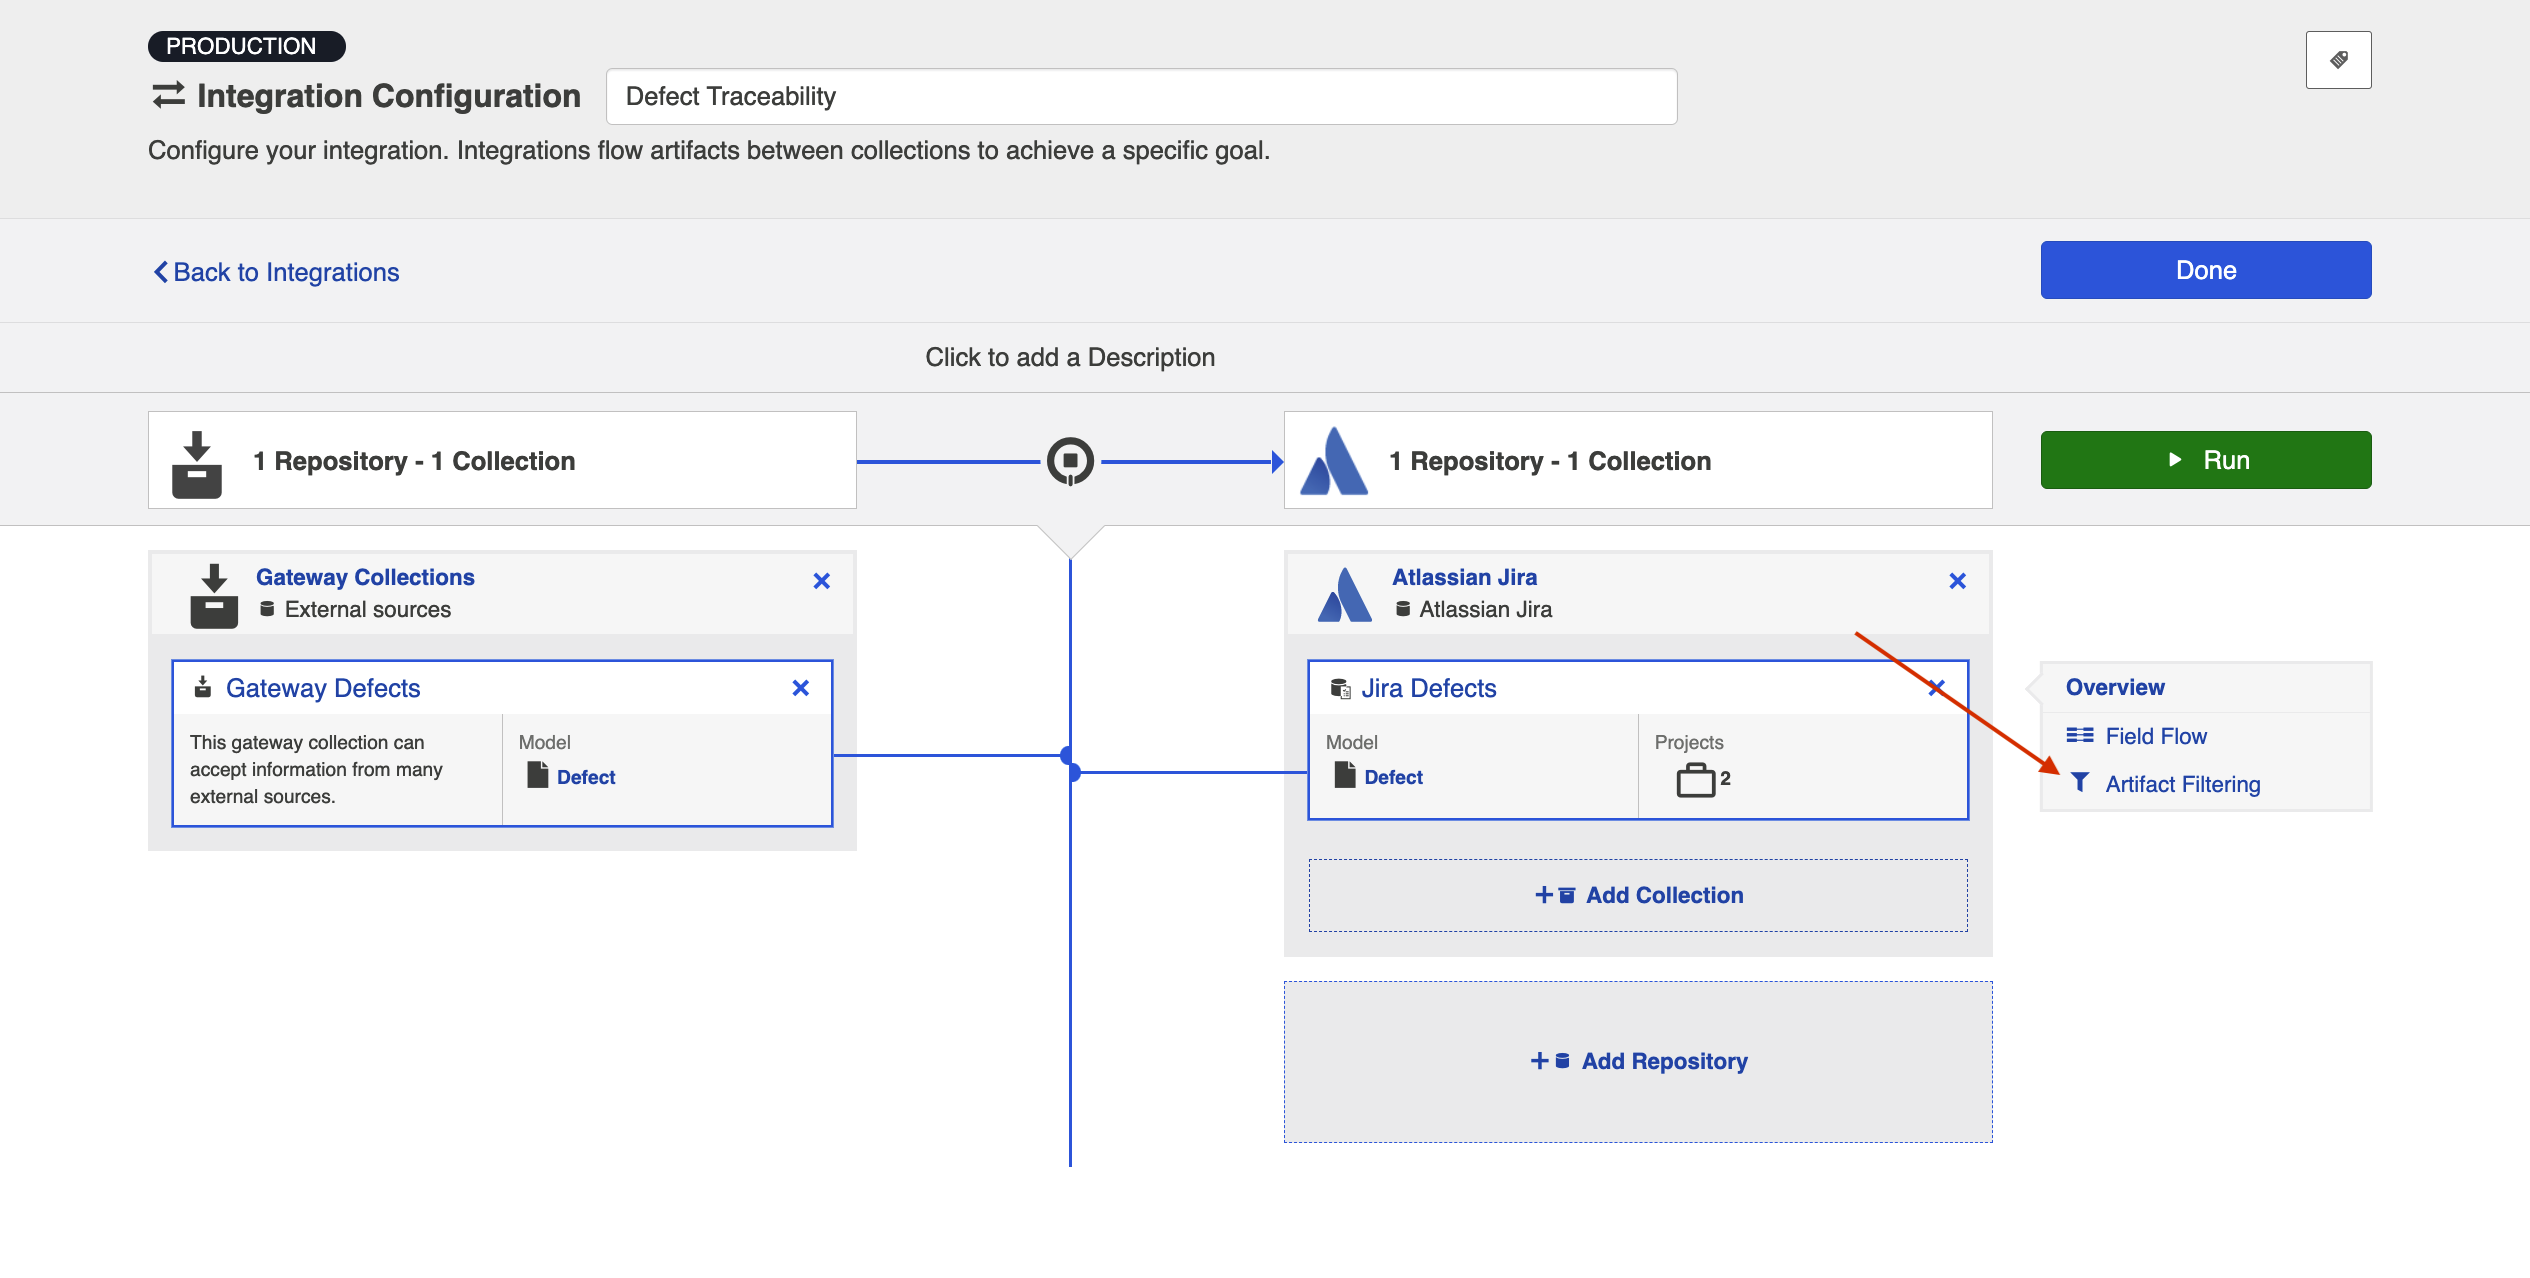
This will bring you to the New Integration screen:
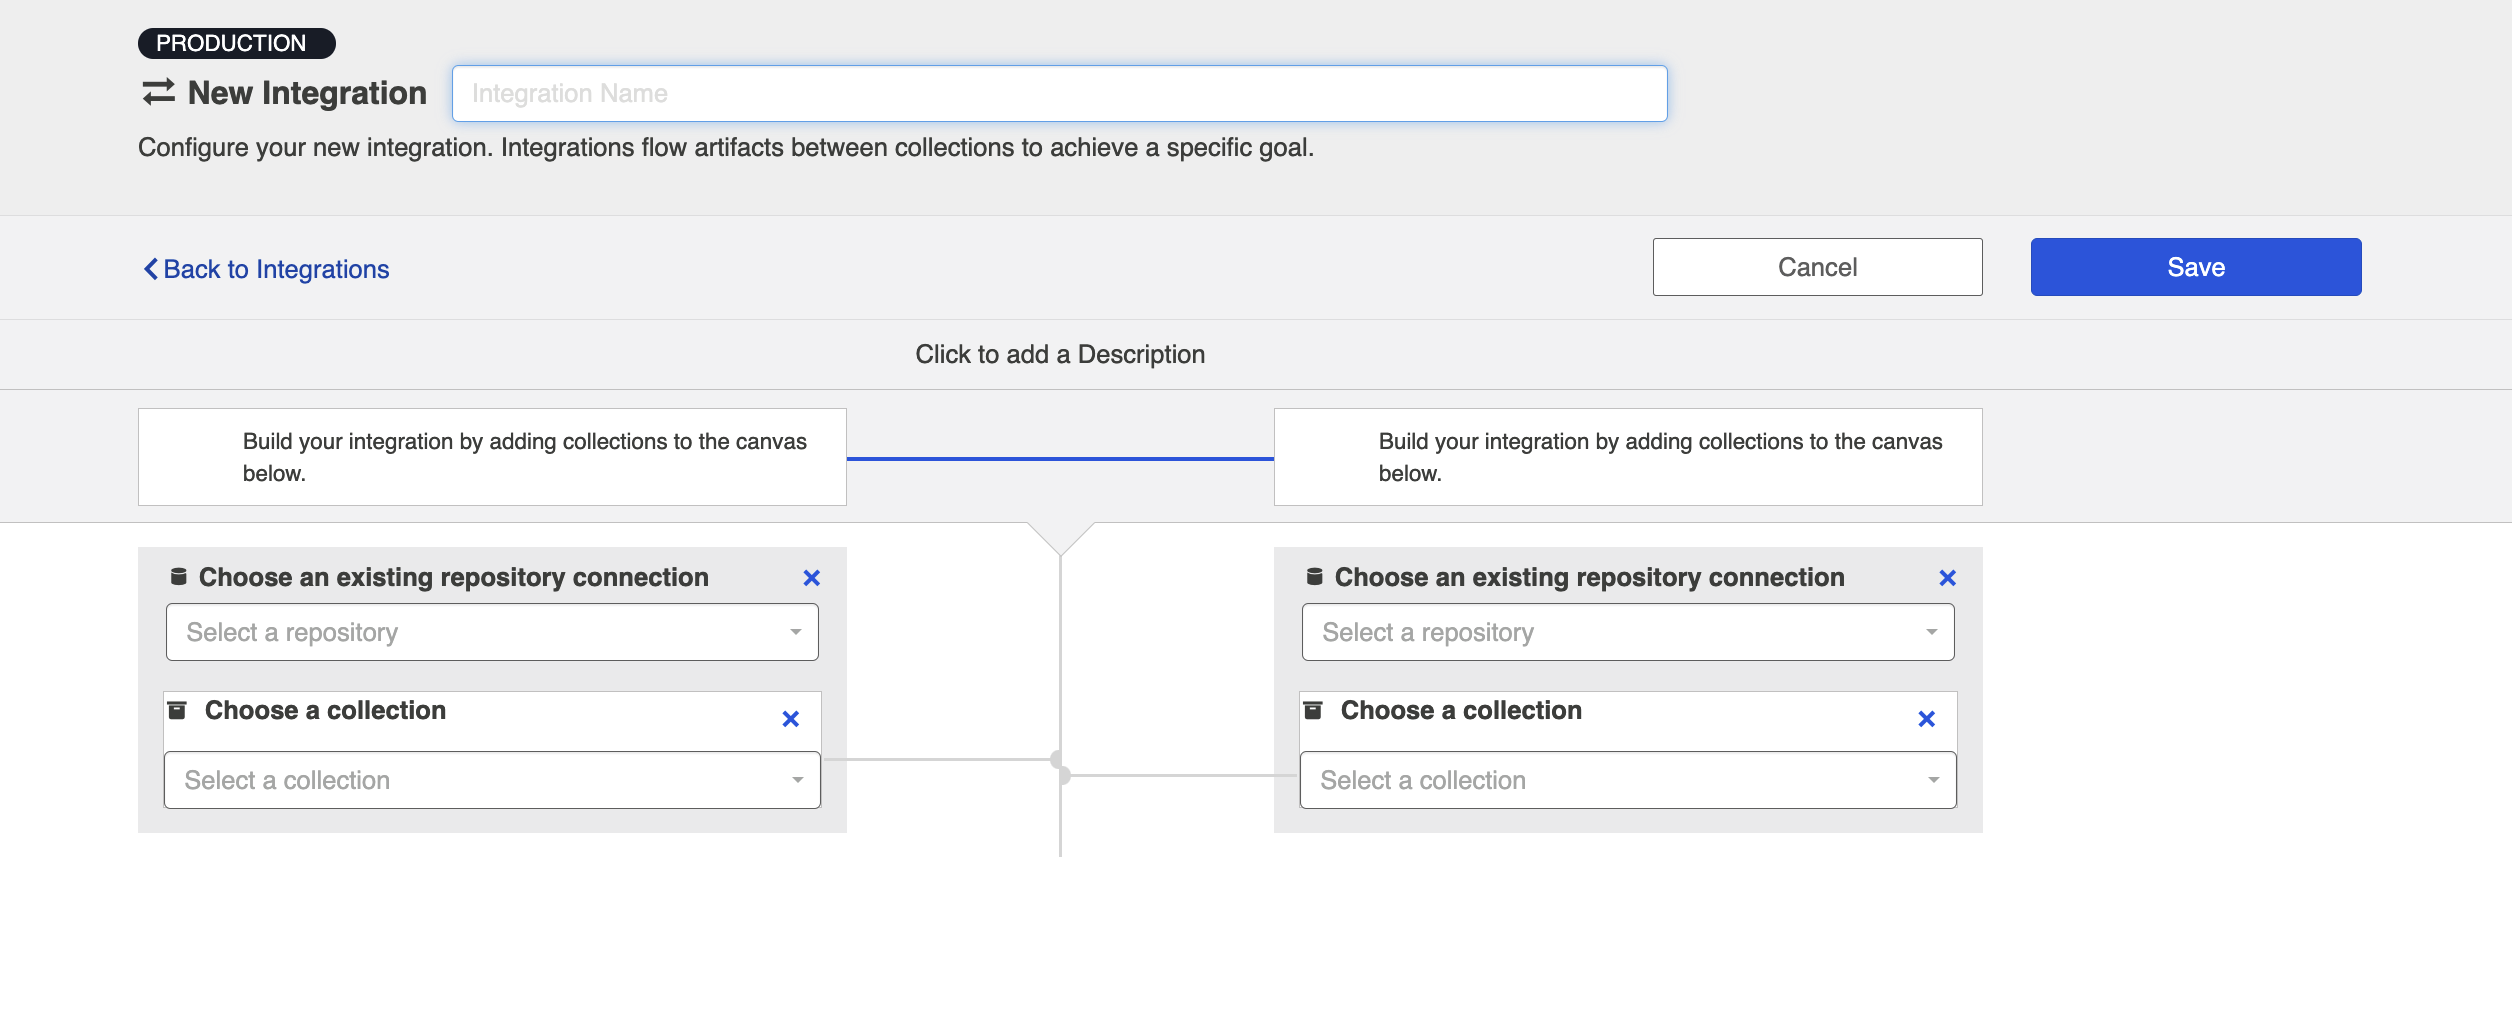
Name your integration and select your repositories and collections:
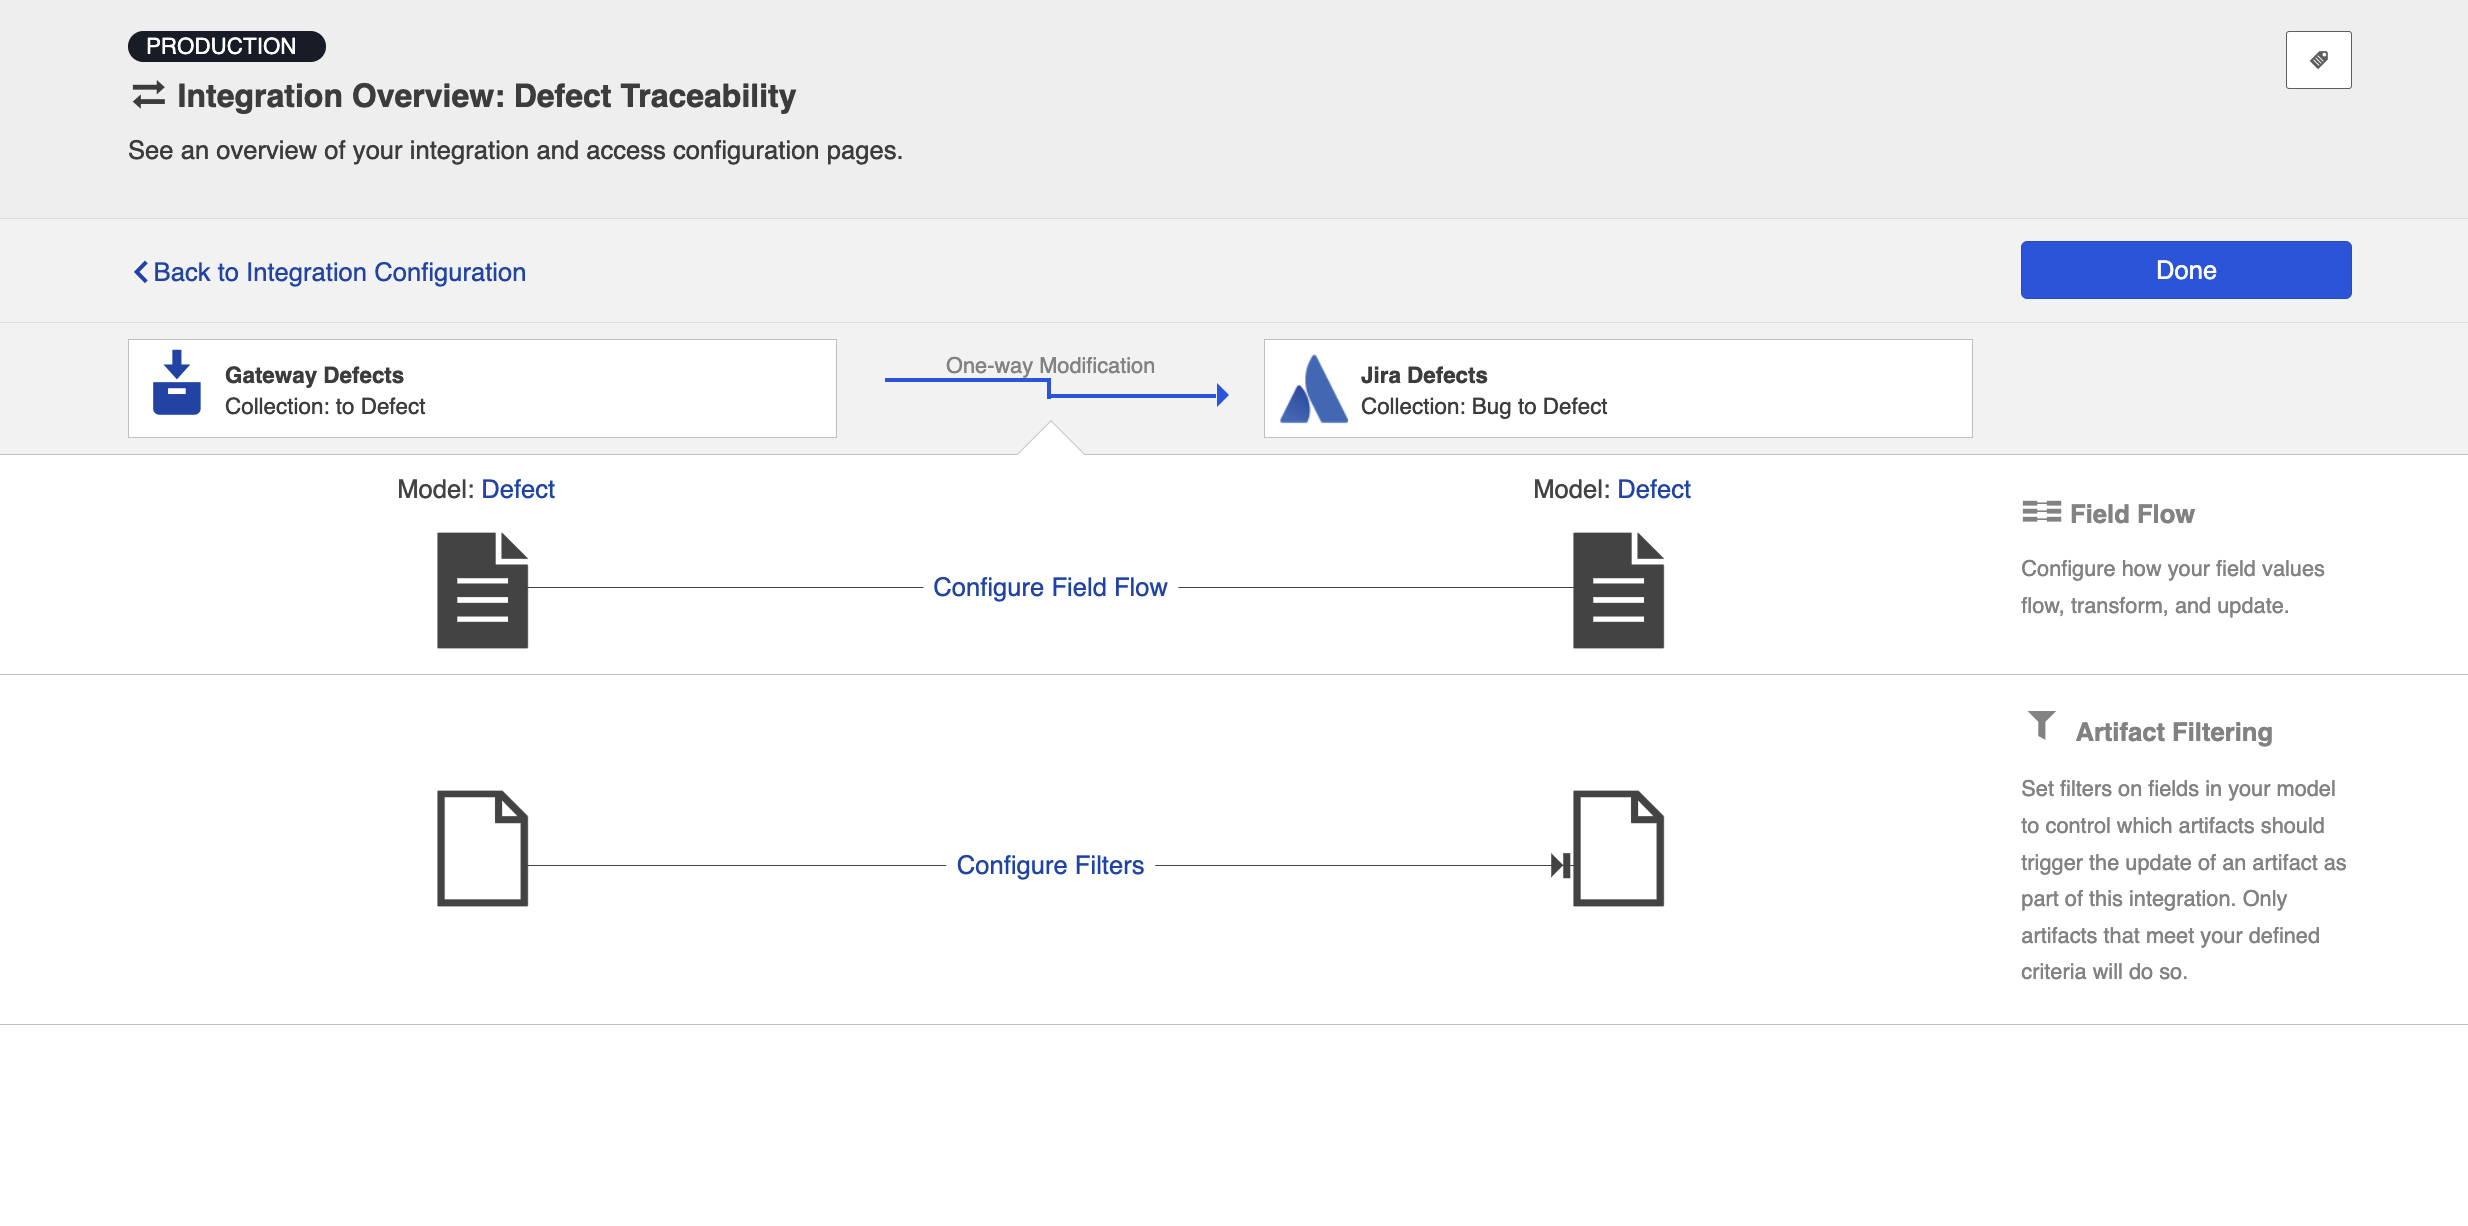
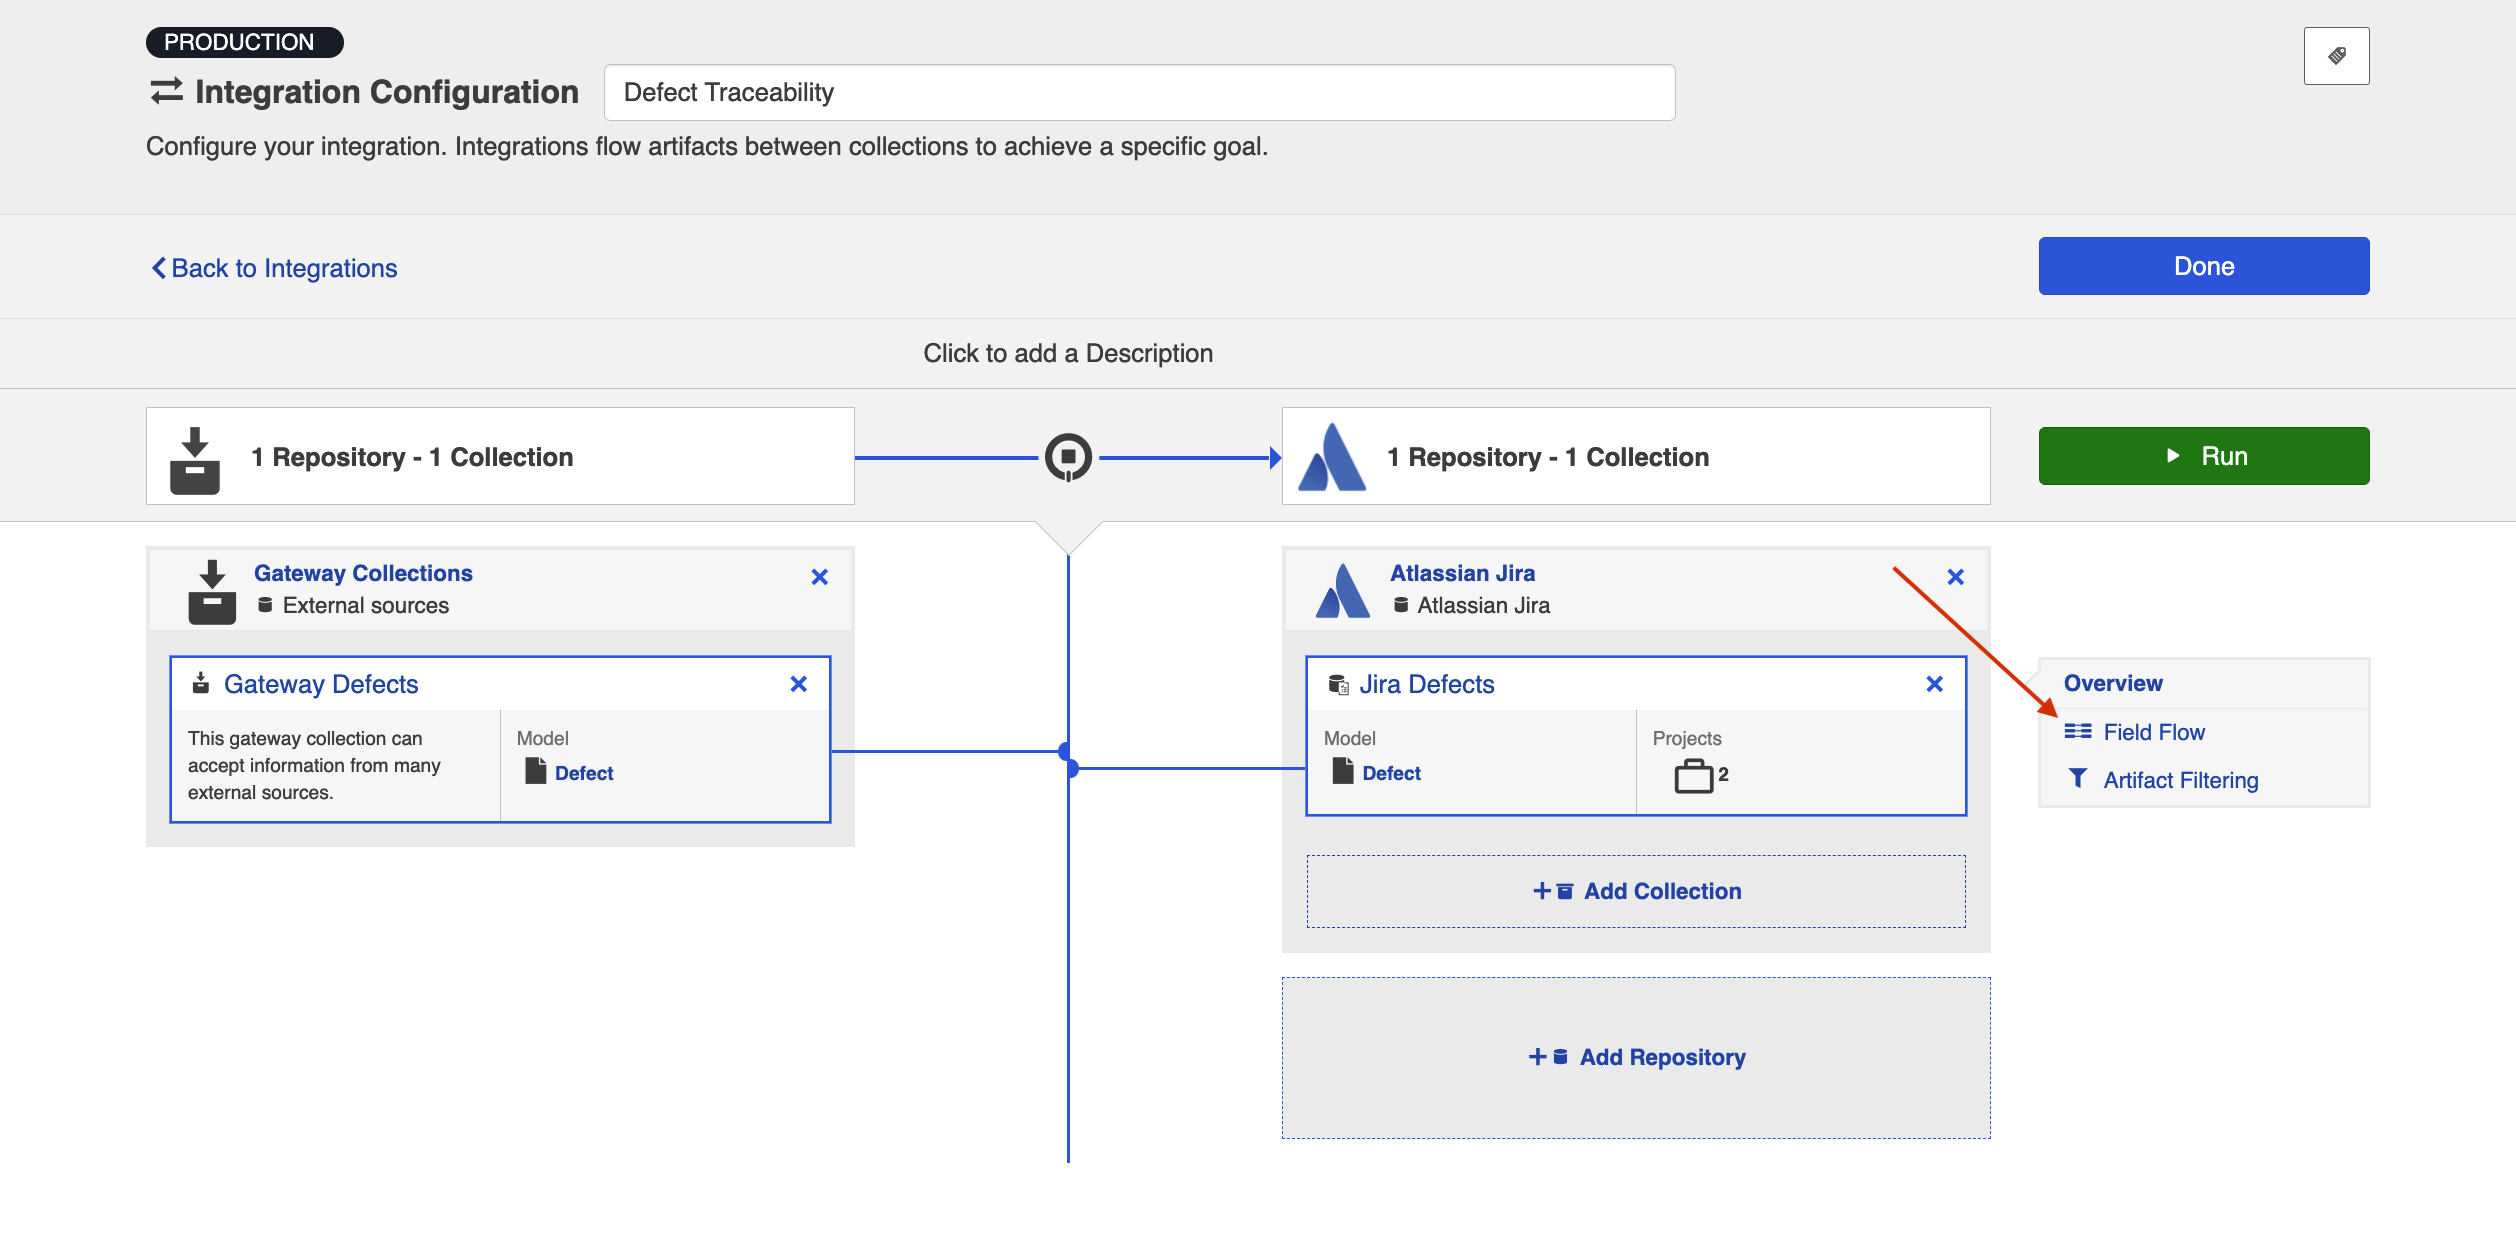
You can click the Overview link on the right side of the Integration Configuration screen to get to the main display page.

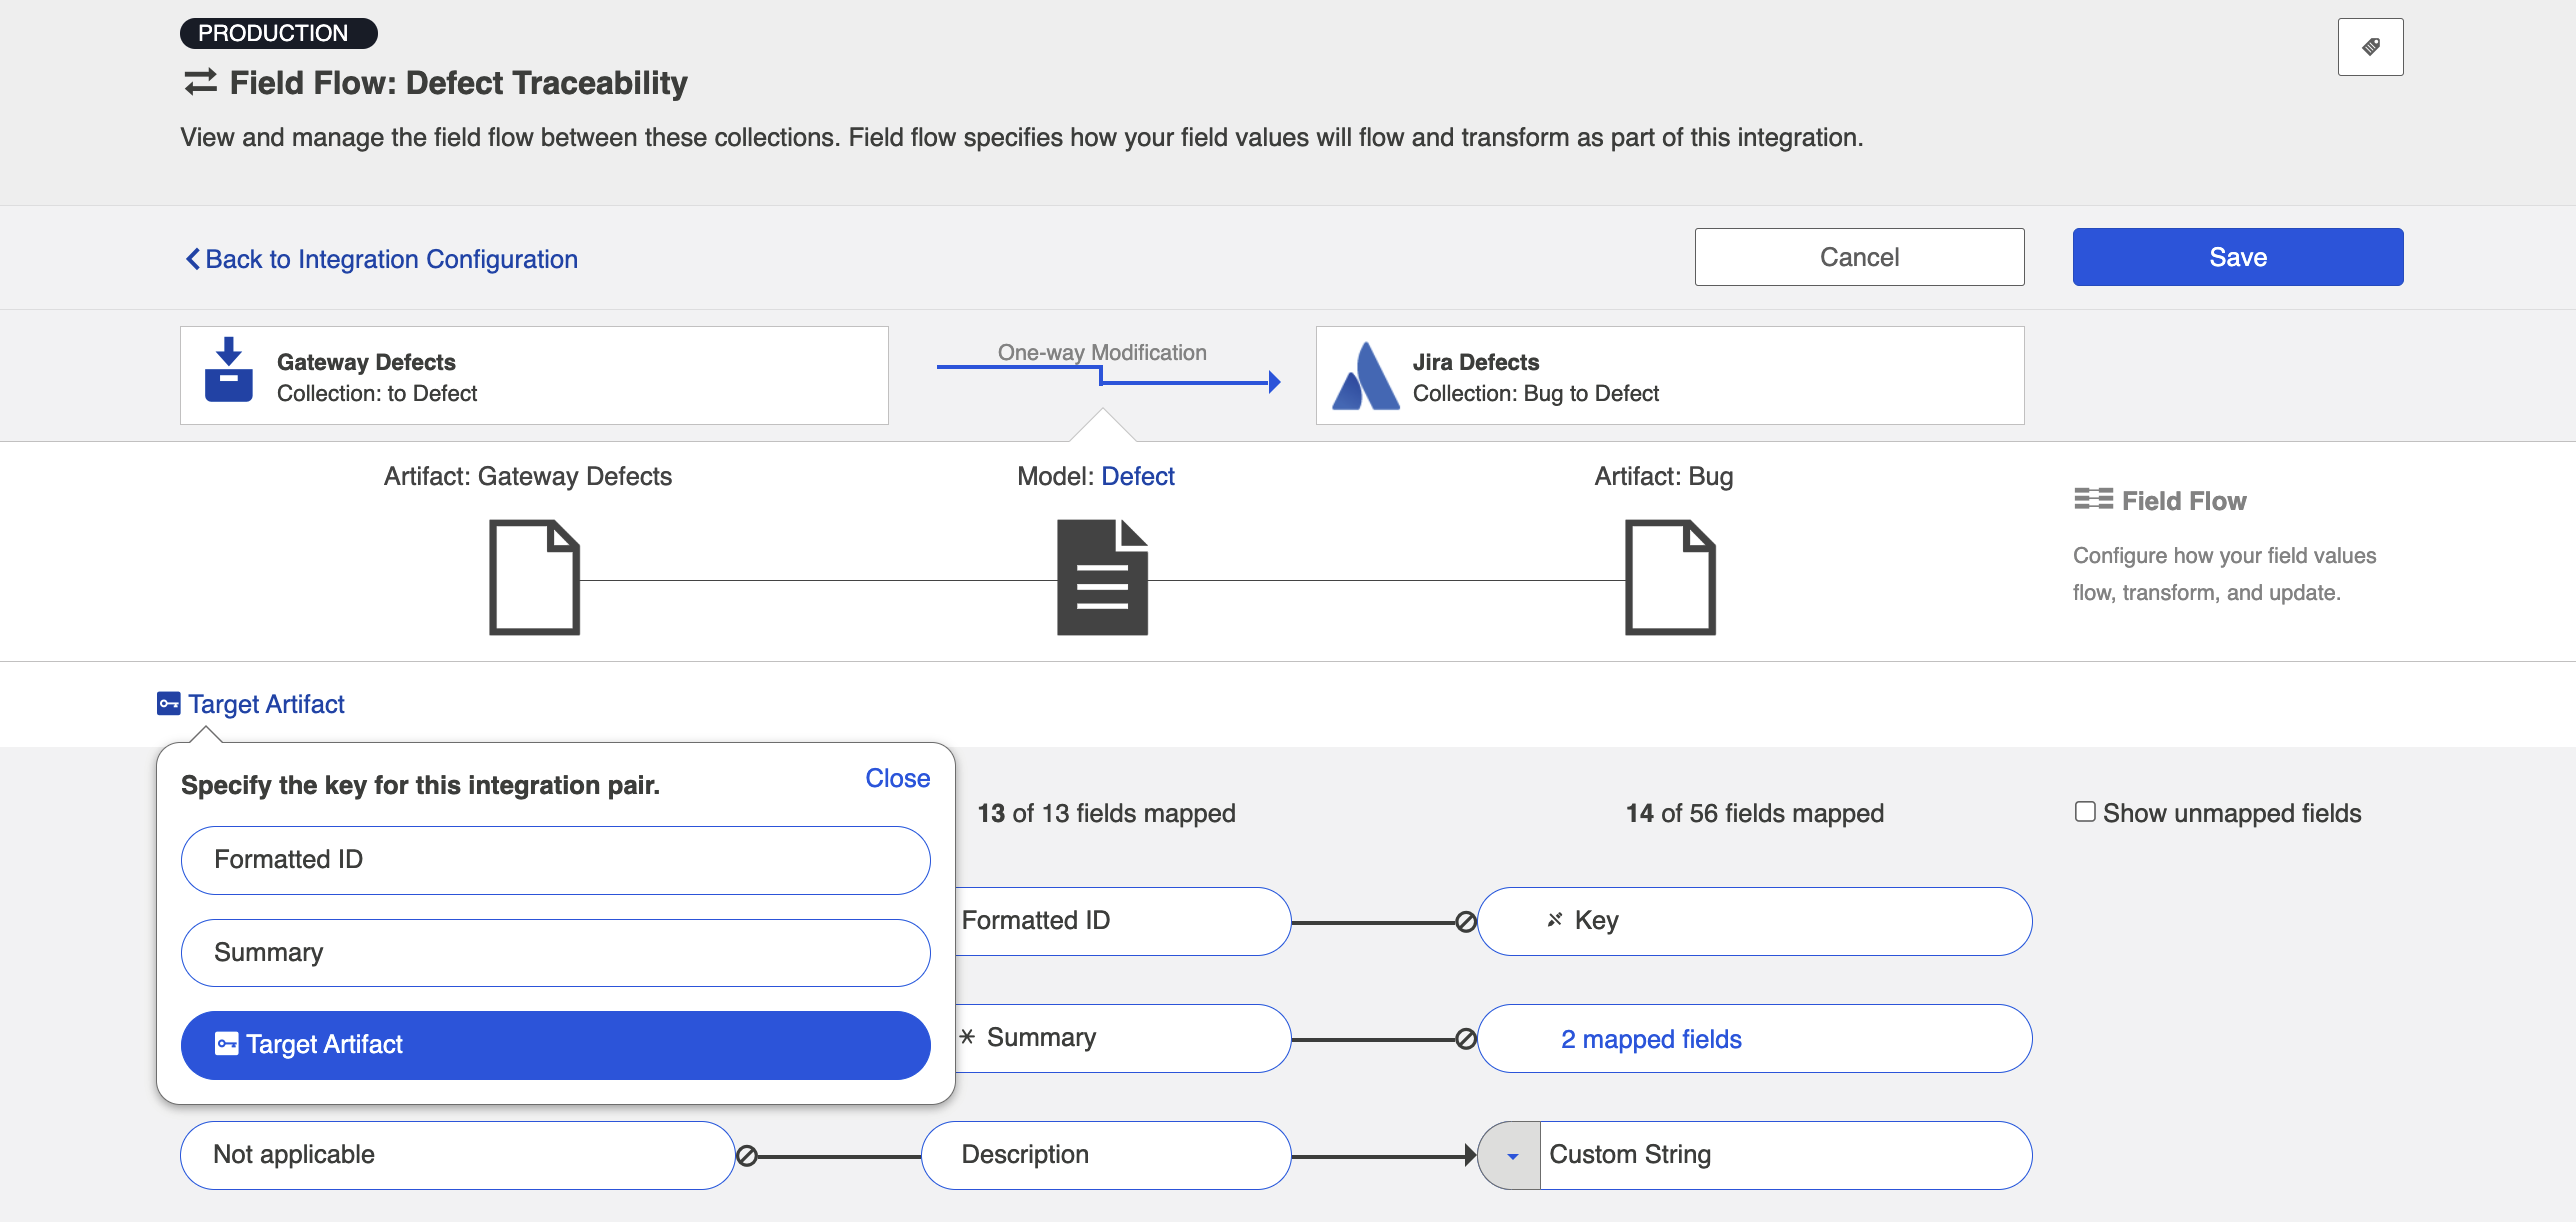
Field Flow
The field flow configured for a given integration specifies which fields should flow in that integration. For Modify via Gateway integrations, you can choose to flow a given field (Update Normally) or to not flow a given field (No Update).
To get to the Field Flow screen, click Field Flow on the right side of the Integration Configuration screen.
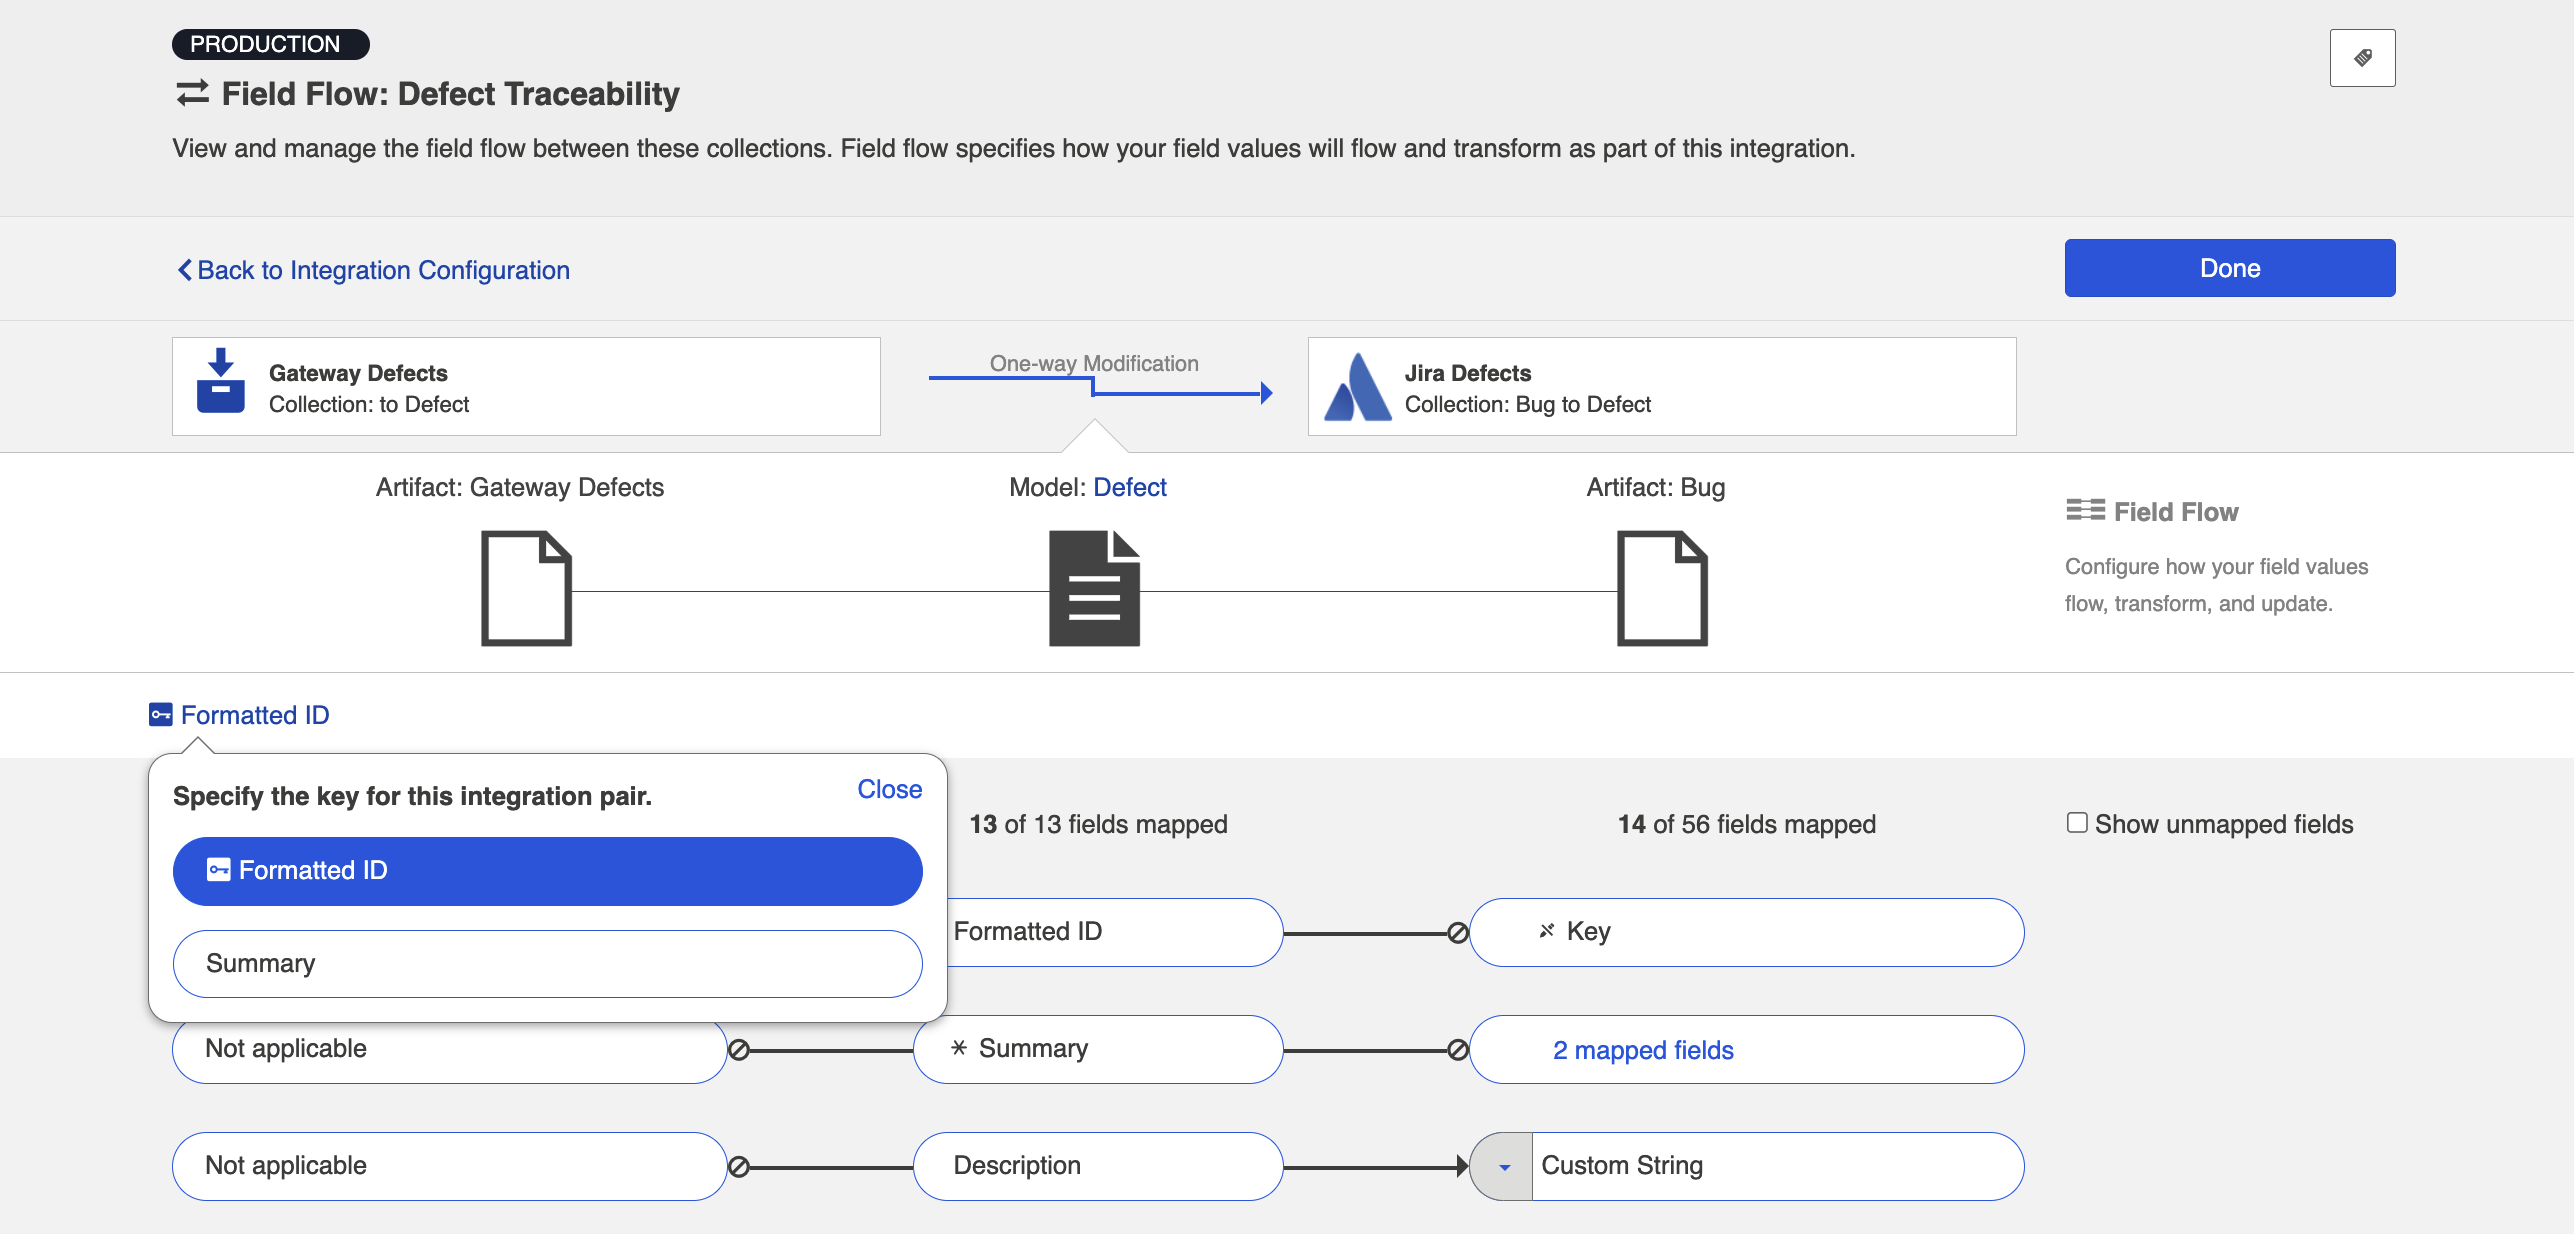
Specifying your Key
The first thing you will need to do when you get to the Field Flow screen is to specify your key.
Specifying a key will enable Hub to find the existing artifact in your repository collection that is to be modified by the incoming gateway payload(s). The key can be a string or relationship field from the model.
If the key is a string field, then the value sent to that model field from the gateway payload will be used to look up the target artifact by Formatted ID. For this reason, the recommended field to use is the Formatted ID field.
If the key is a relationship field, then the artifact it references in the gateway payload will be used as the target artifact.
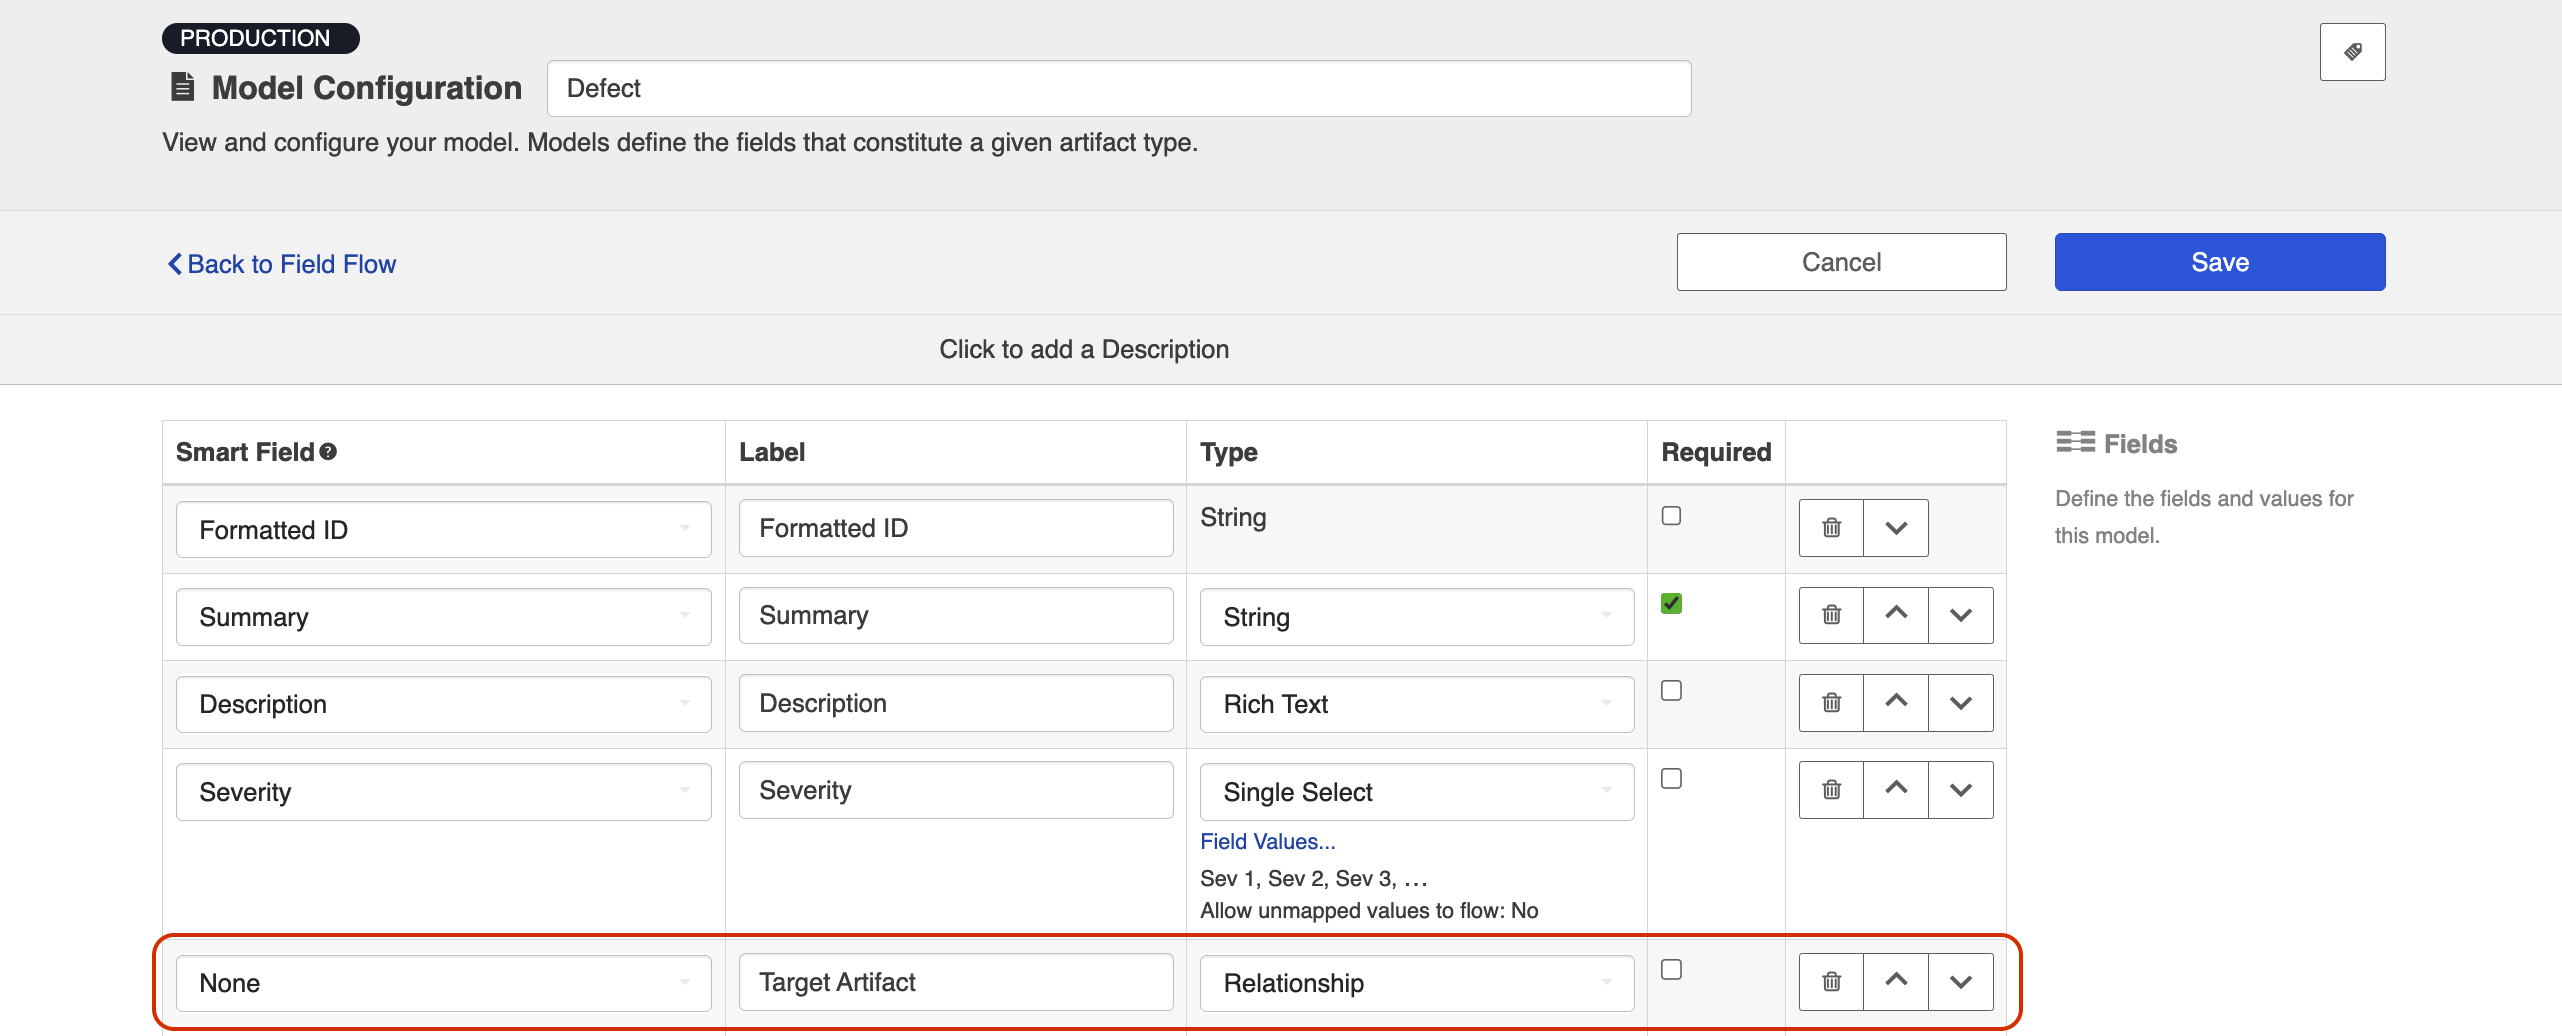
Note: Some repositories require extra information in order to uniquely identify a single artifact across multiple projects. One prime example is ALM. To ensure that enough information is sent in via your gateway collection to allow Hub to find the specific artifact you would like to modify, please take these steps:
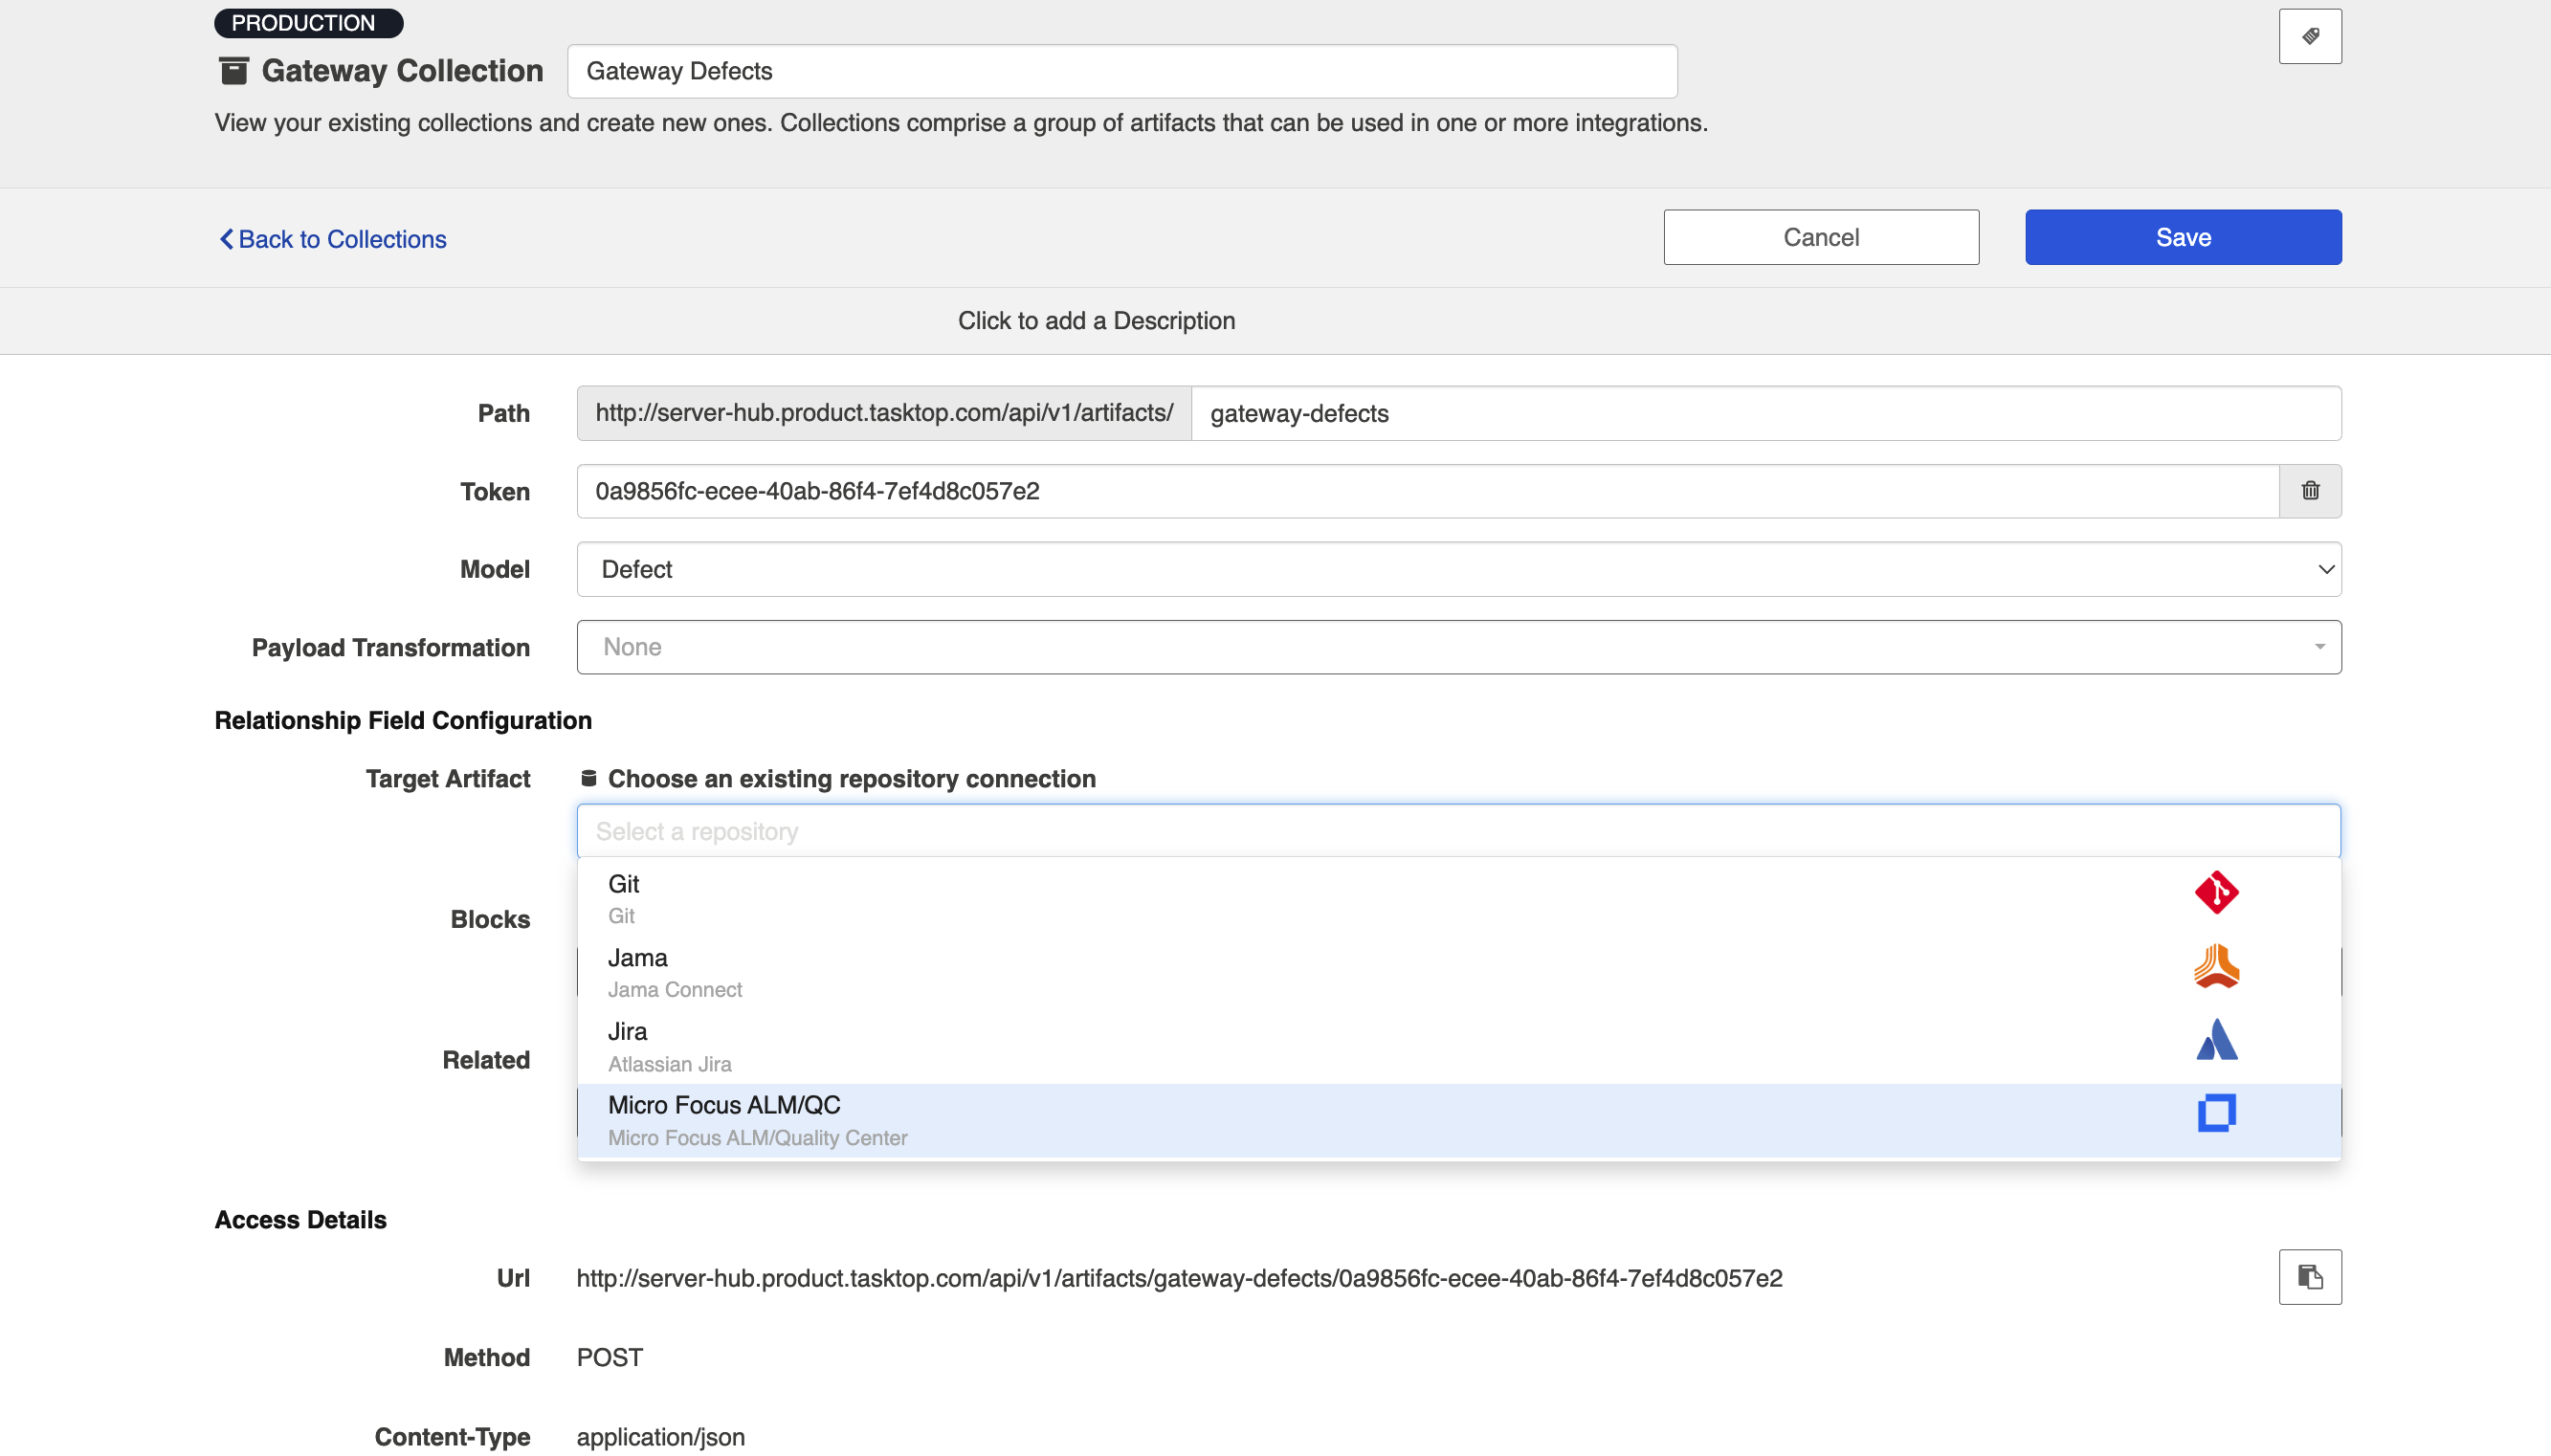
- Add a field in your model of type relationship.
- In your gateway collection, notice that for the new field you are prompted to pick a target repository. Select the repository you'd like to target in this gateway integration.
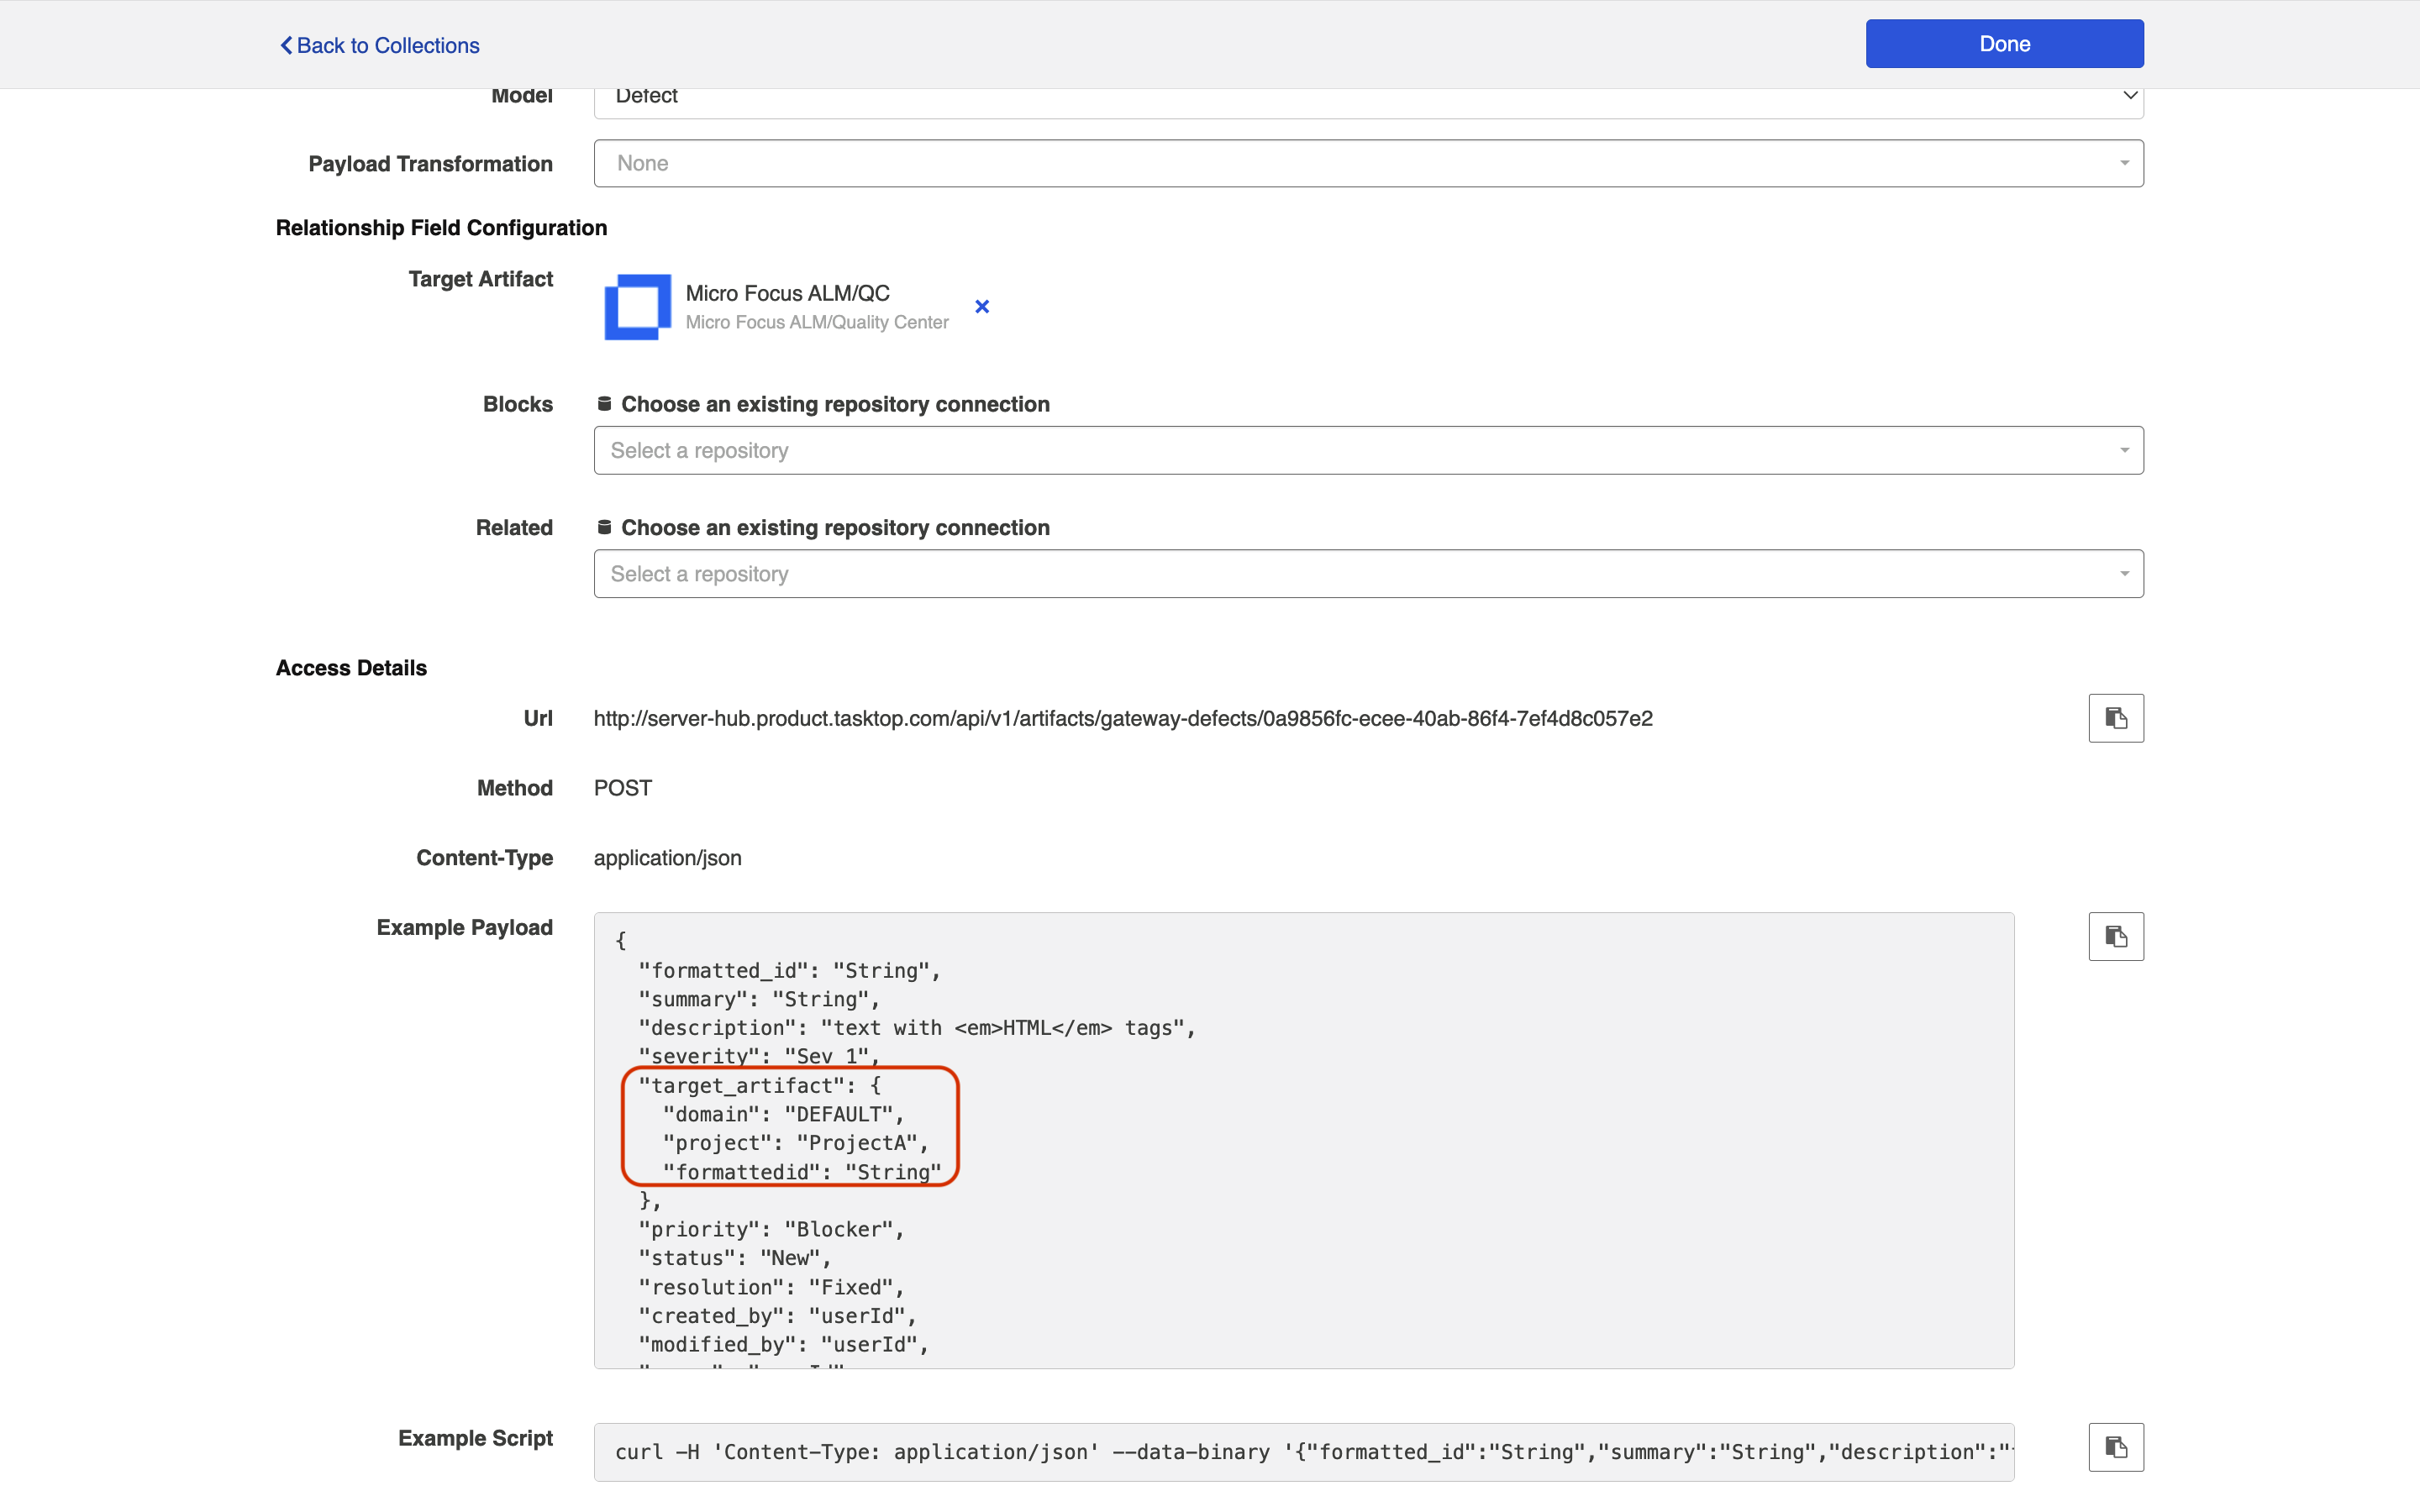
- When you save, note that the example payload will be updated to include the pieces of information we need for that field to uniquely find artifacts.
- Finally, in your integration select that field as your key on the Field Flow screen.
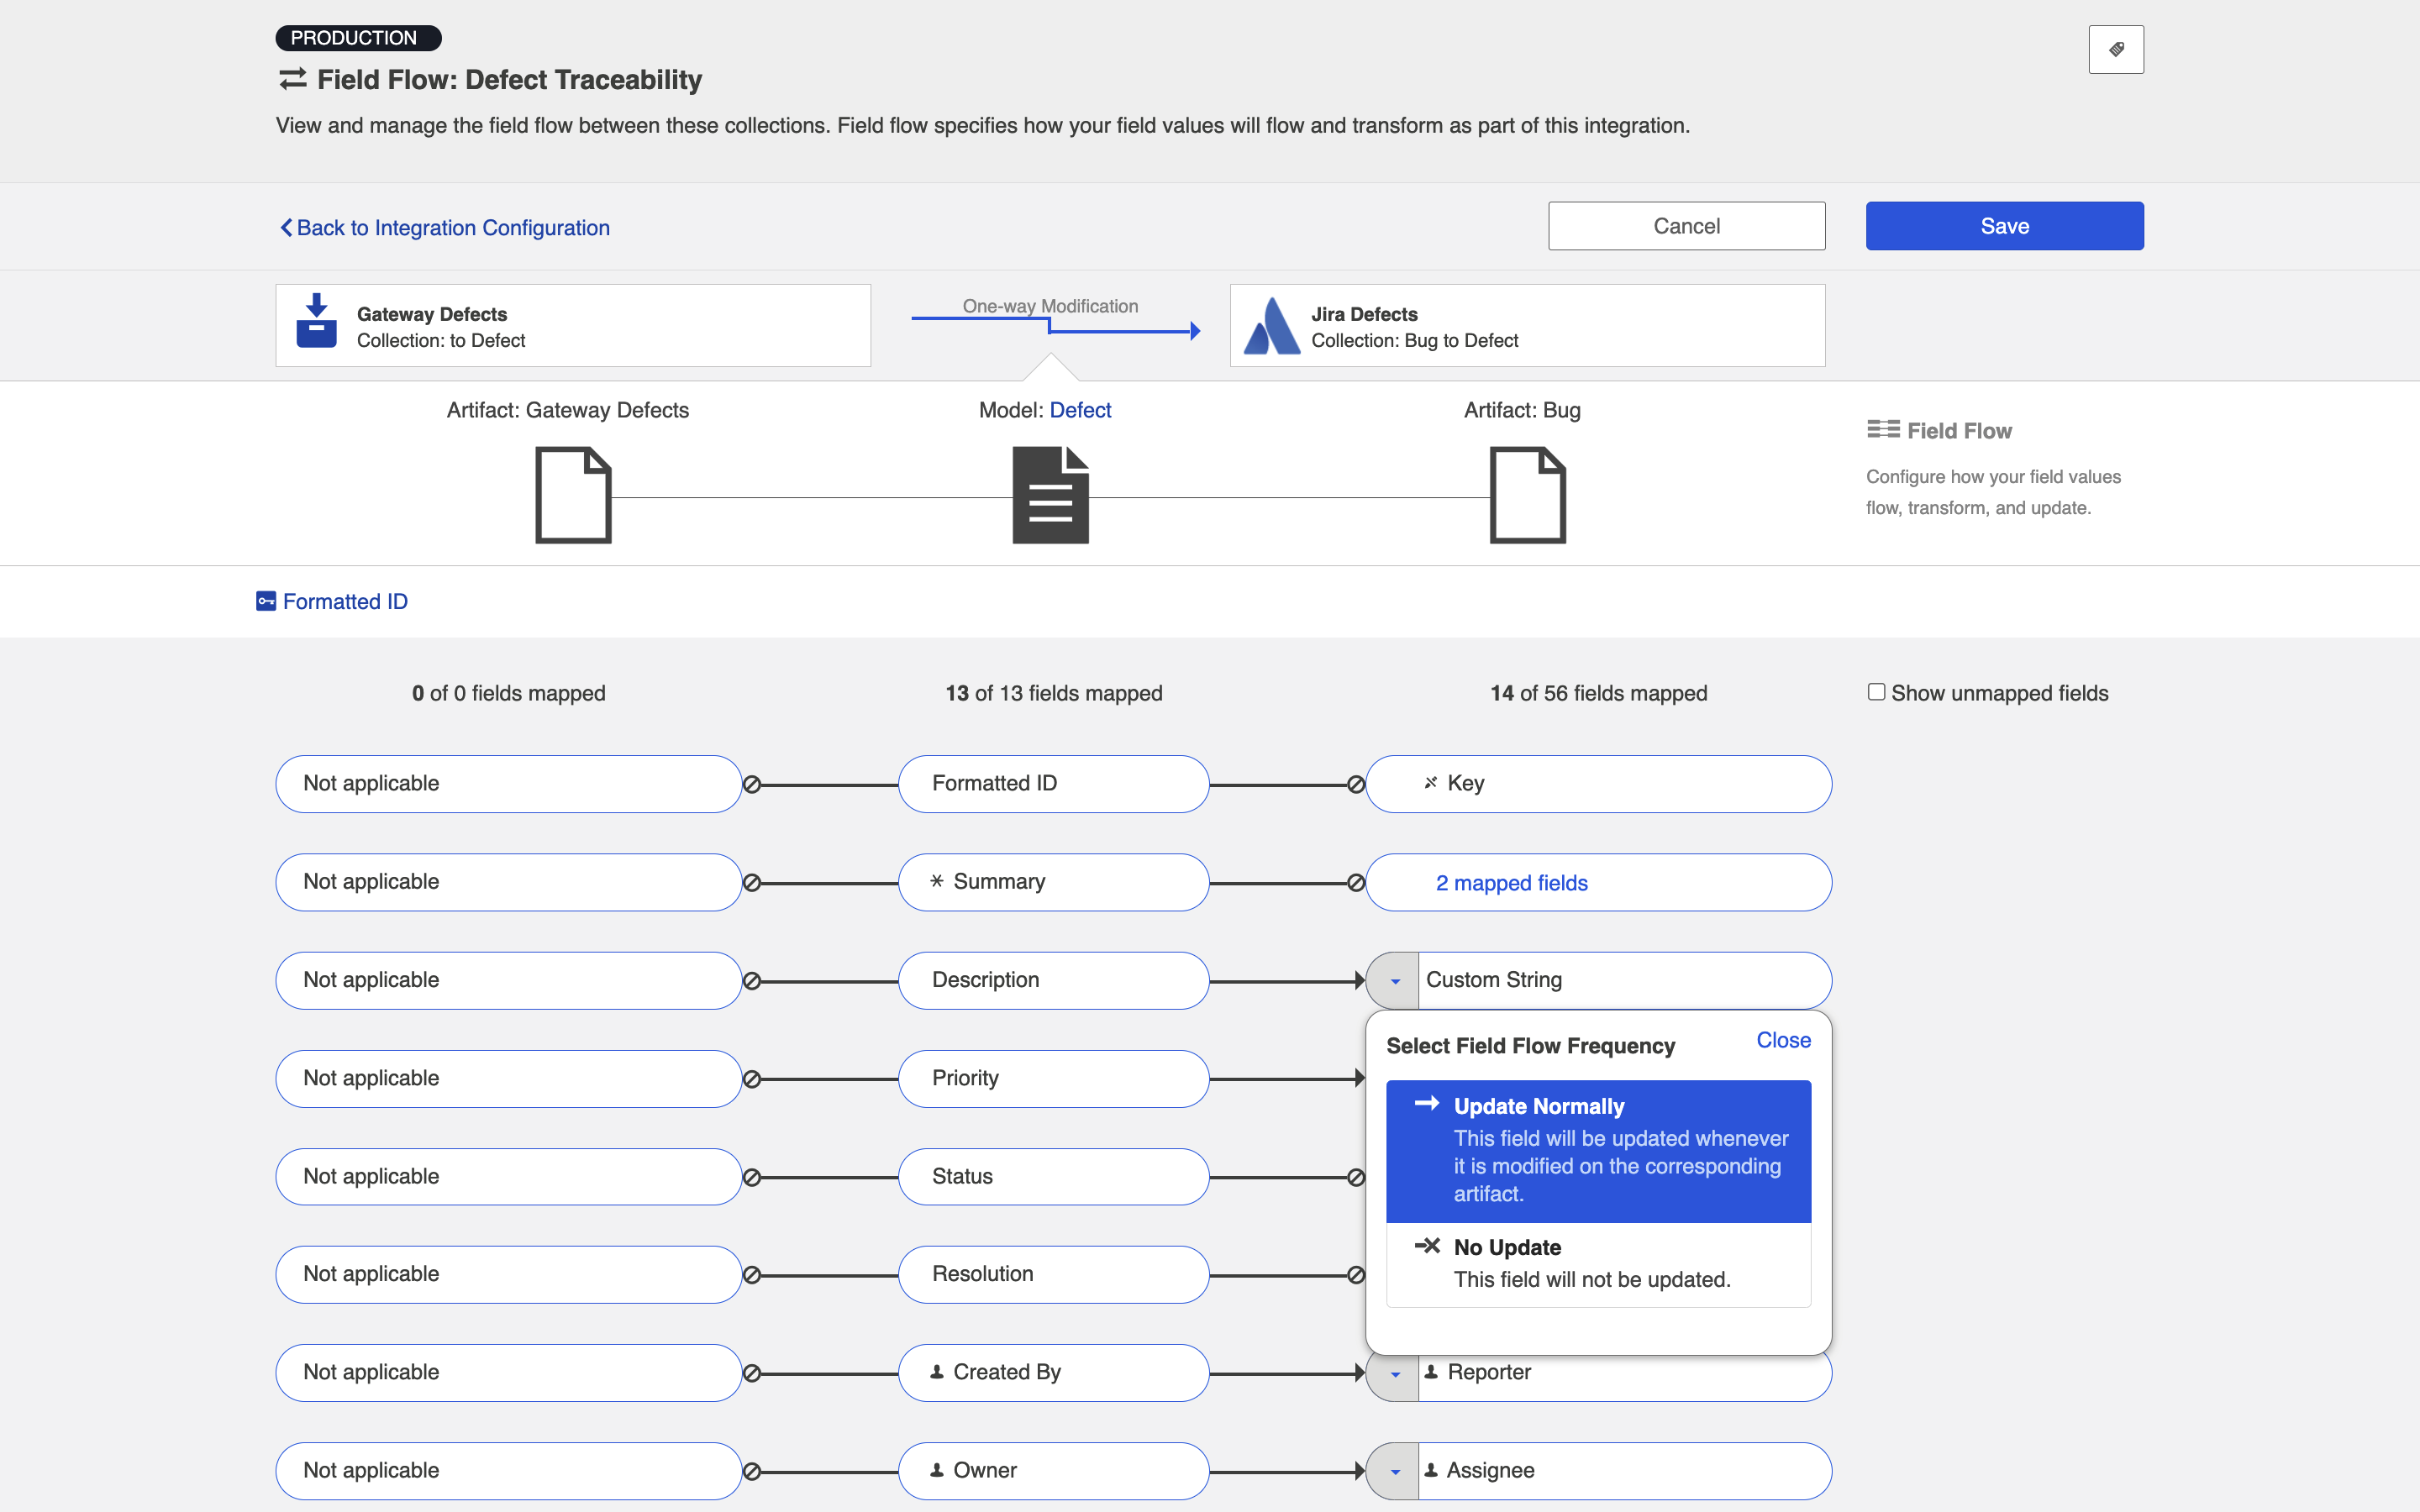
Configure Field Flow
Once you have specified your key, you can configure your field flow. For each field, you can choose to flow information ('update normally') or not flow information ('no update'). You'll notice that field flow goes in one direction only — from the gateway collection into the repository or database collection.
You can see the names of the mapped artifact fields for each collection on the far left and far right, with the model fields displayed in the middle. By default, model fields without mapped repository fields are hidden. You can see all model fields by checking the Show unmapped fields checkbox. Constant values will be identified by a grey box and the constant value icon.
Field Flow Icons
On the Field Flow page, you will see a number of icons, which will help you understand any special properties or requirements for each field. If you hover your mouse over an icon, you will see a pop-up explaining what the icon means. You can also review their meanings in the legend below:
| Icon | Meaning |
|---|---|
|
|
A constant value will be sent. Note that:
|
|
|
Collection field is read-only and cannot receive data. |
|
|
To create artifacts in your collection, this field must be mapped to your model. |
|
|
This is a required field in your model; it must be mapped to your collection. |
|
|
This field will not be updated as part of your integration, due to how you have configured it. This field flow configuration can be changed if you'd like. |
|
|
This field will not be updated as part of your integration because the mapping would be invalid. You do not have the option of changing this. |
|
|
This field will update normally as part of your synchronize integration; this means it will be updated whenever it is modified on the corresponding artifact. |
Artifact Filtering
Artifact Filtering enables you to set filters on an integration in order to limit which artifacts are eligible to flow in your integration.
To use a field for artifact filtering, it must:
- Be a part of your model, and be mapped to the collection you are filtering from
- Be one of the following field types:
- Single Select
- Note that in cases where 'allow unmapped values to flow' is enabled in the model, only fields that are already a part of the model will be considered for artifact filtering
- Multi-Select
- Note that in cases where 'allow unmapped values to flow' is enabled in the model, only fields that are already a part of the model will be considered for artifact filtering
- Date
- Date/Time
- Duration
- String
- Single Select
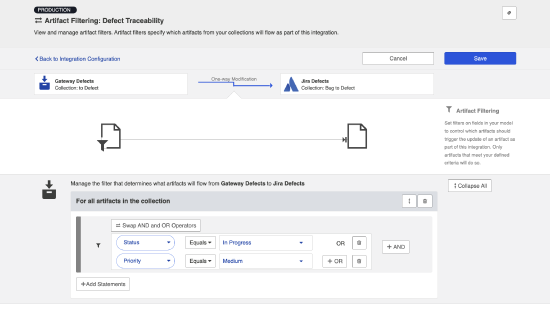
To configure Artifact Filtering, select Create filters (optional) from the Integration Configuration Overview screen, or select Artifact Filtering from the right pane of the Integration Configuration screen.
This will lead you to the Artifact Filtering Configuration screen, where you can configure one or more criteria for artifact filtering.
Note: You can click the Collapse All button to view an easy-to-read summary of your artifact filtering statements.
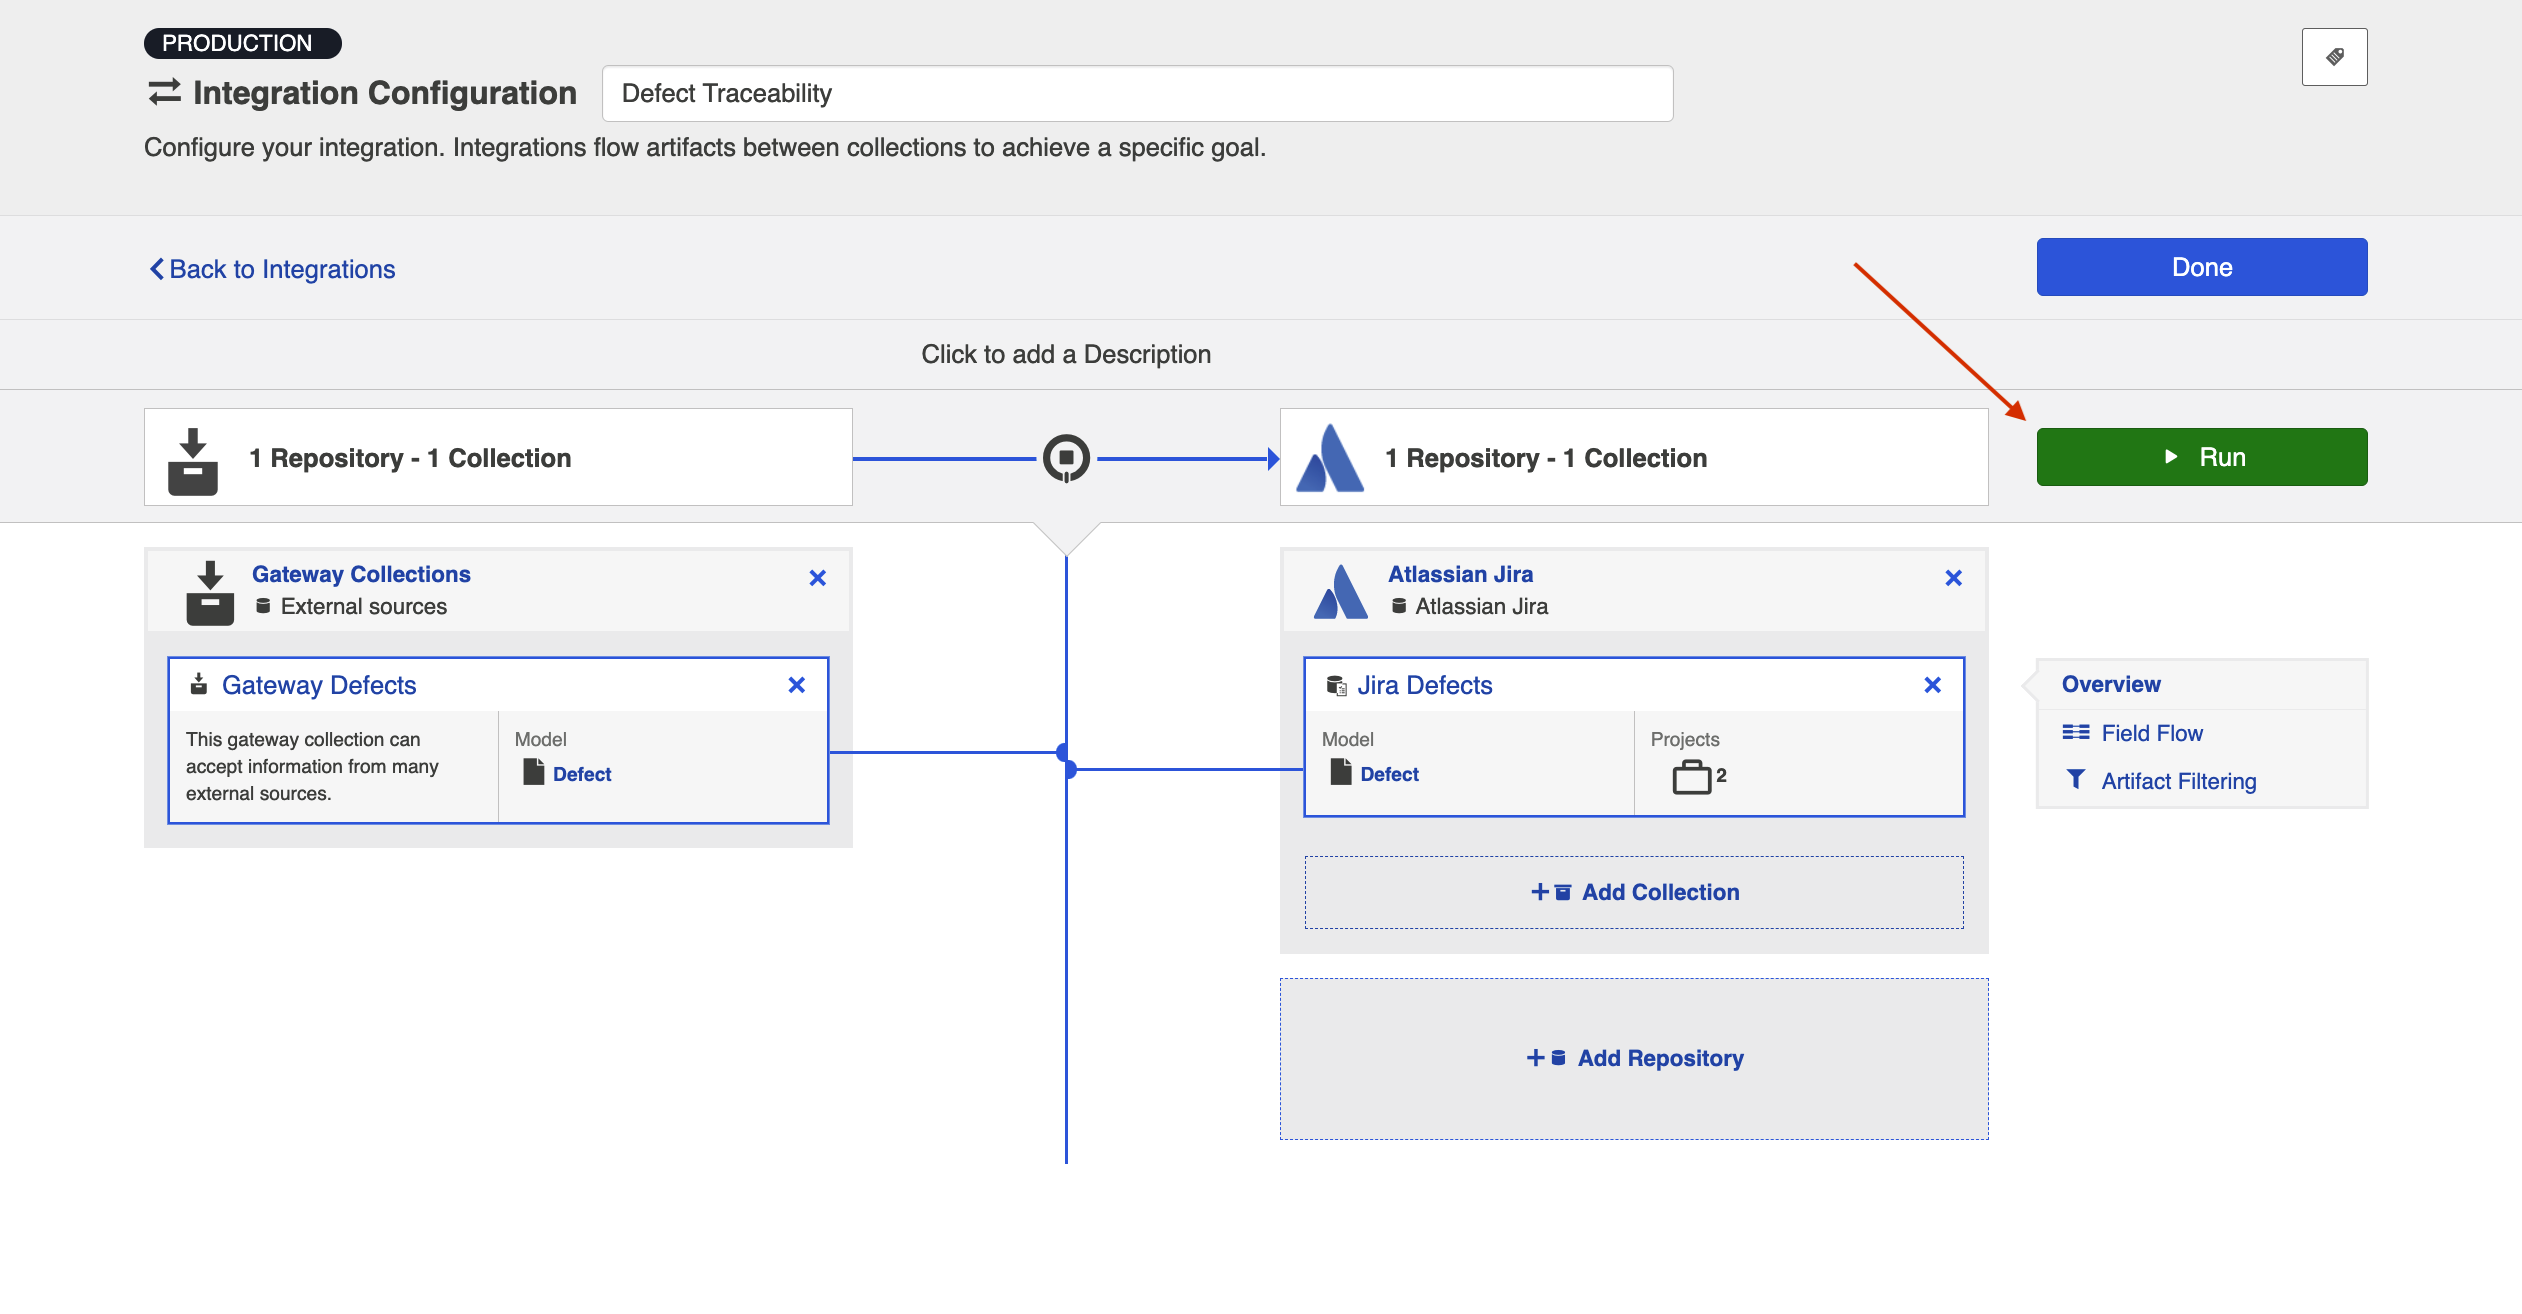
Running your Integration
Note: Please be aware that integrations will trigger changes in your end repositories and that misconfiguration can cause items to be duplicated or modified in unexpected ways. Additionally, there is no 'undo' in Hub or the repositories. If you have any questions, please contact customer care.
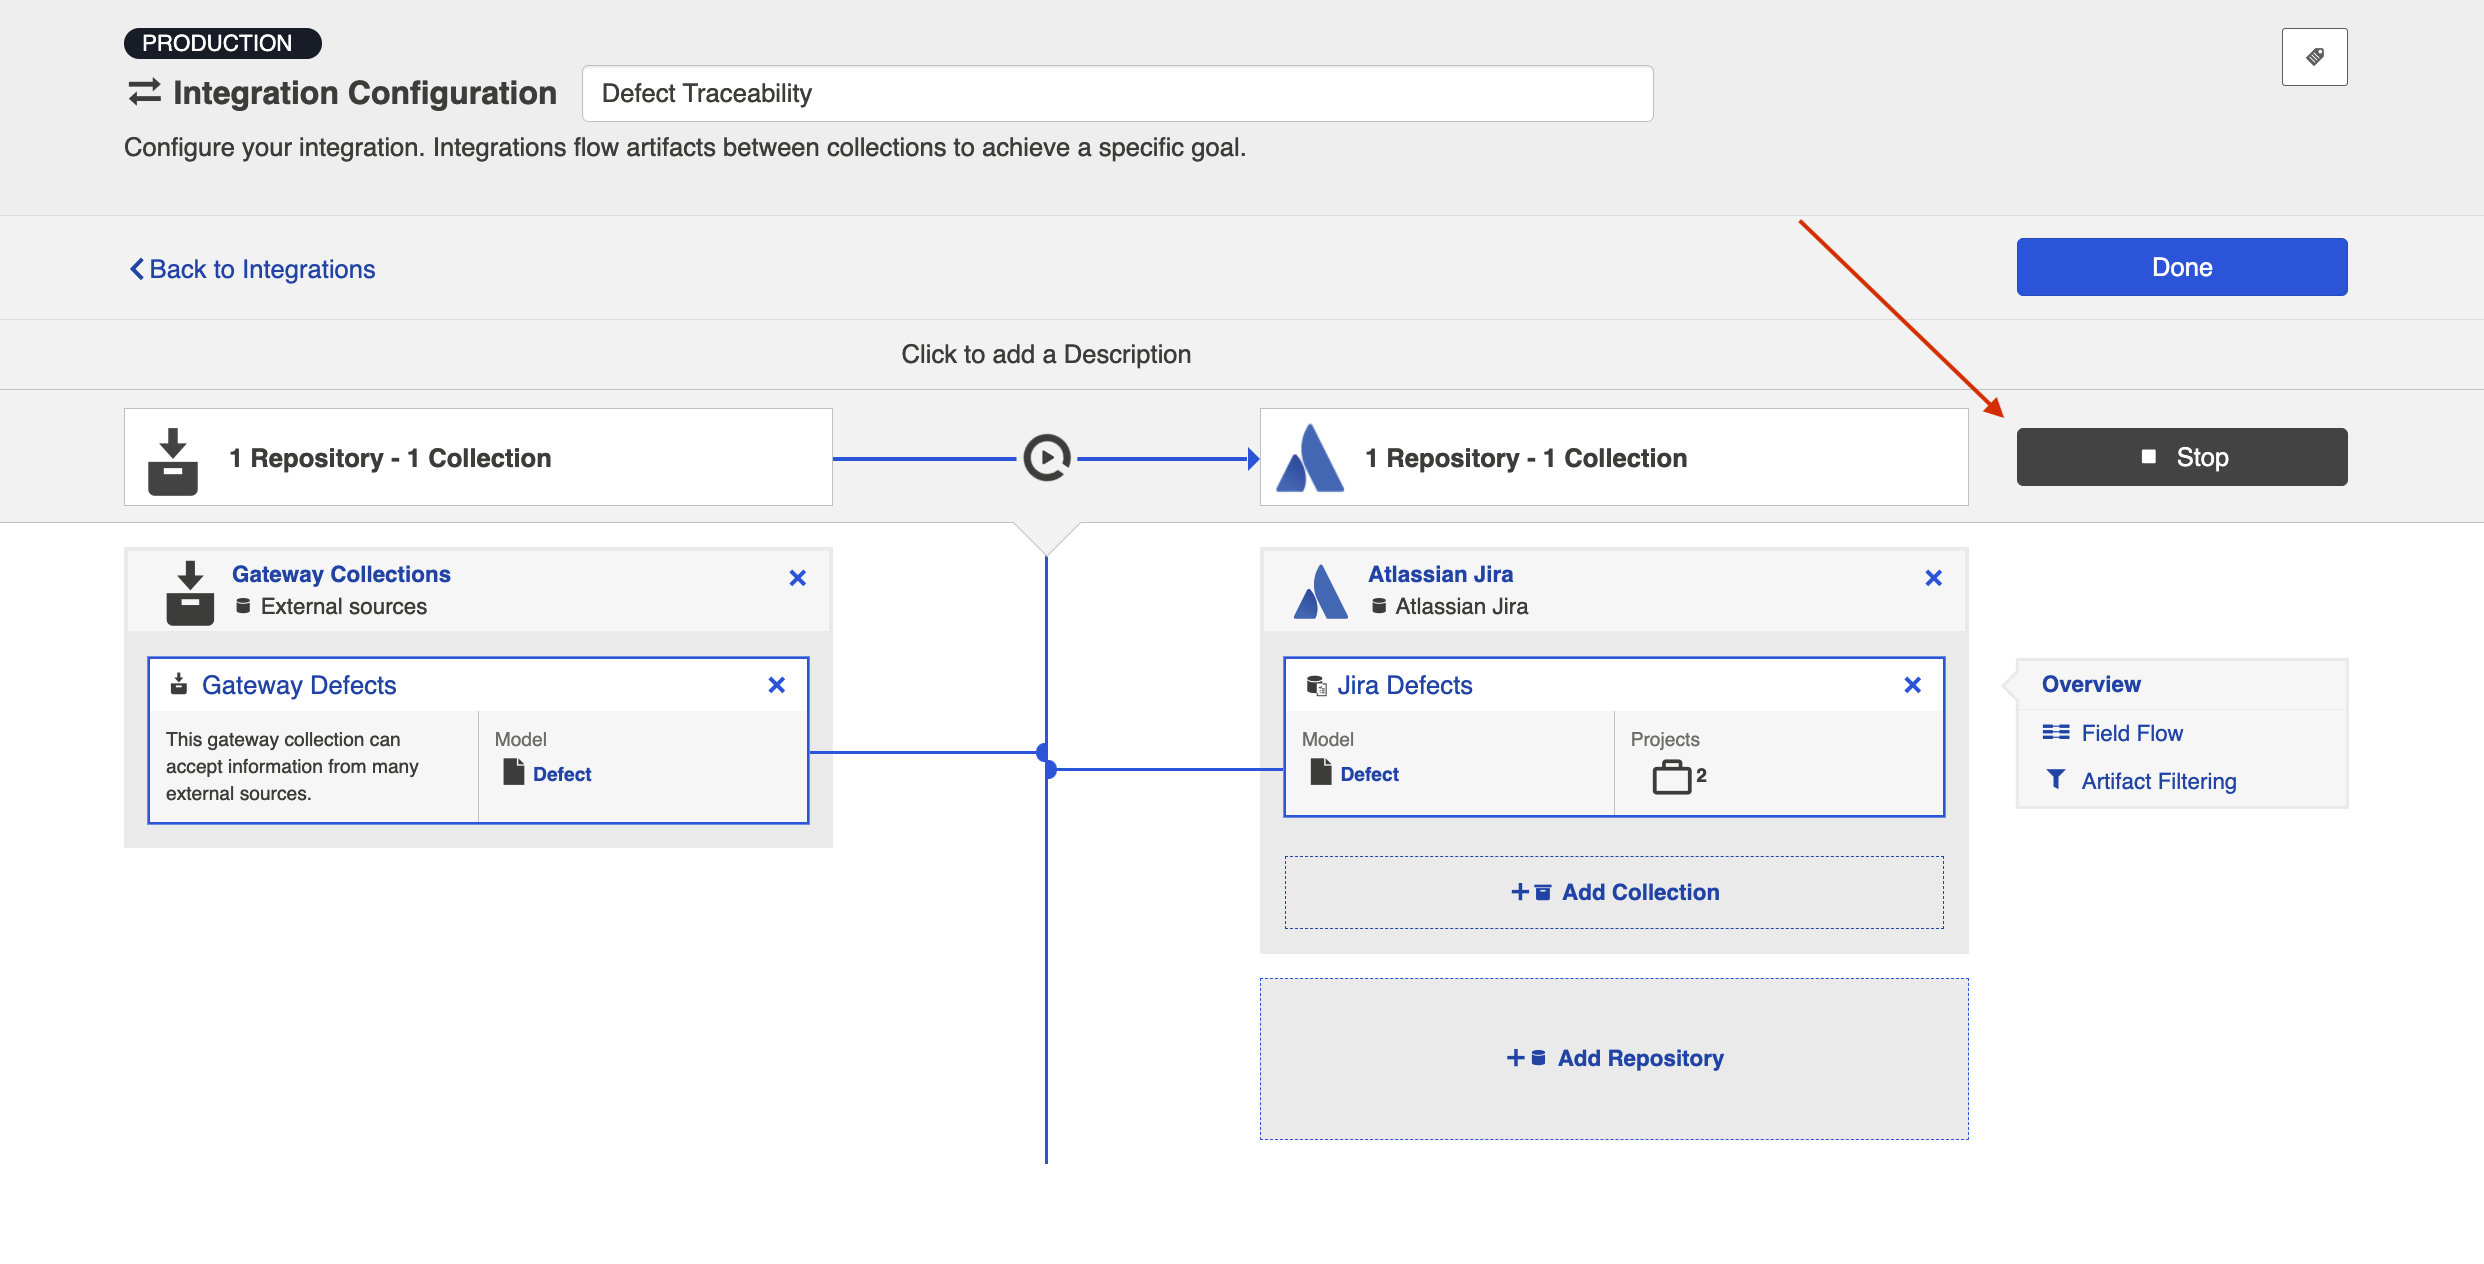
There are two ways to start or stop your integration:
From the Integration Configuration Screen
Simply click the Run button to run the integration, and the Stop button to stop the integration.
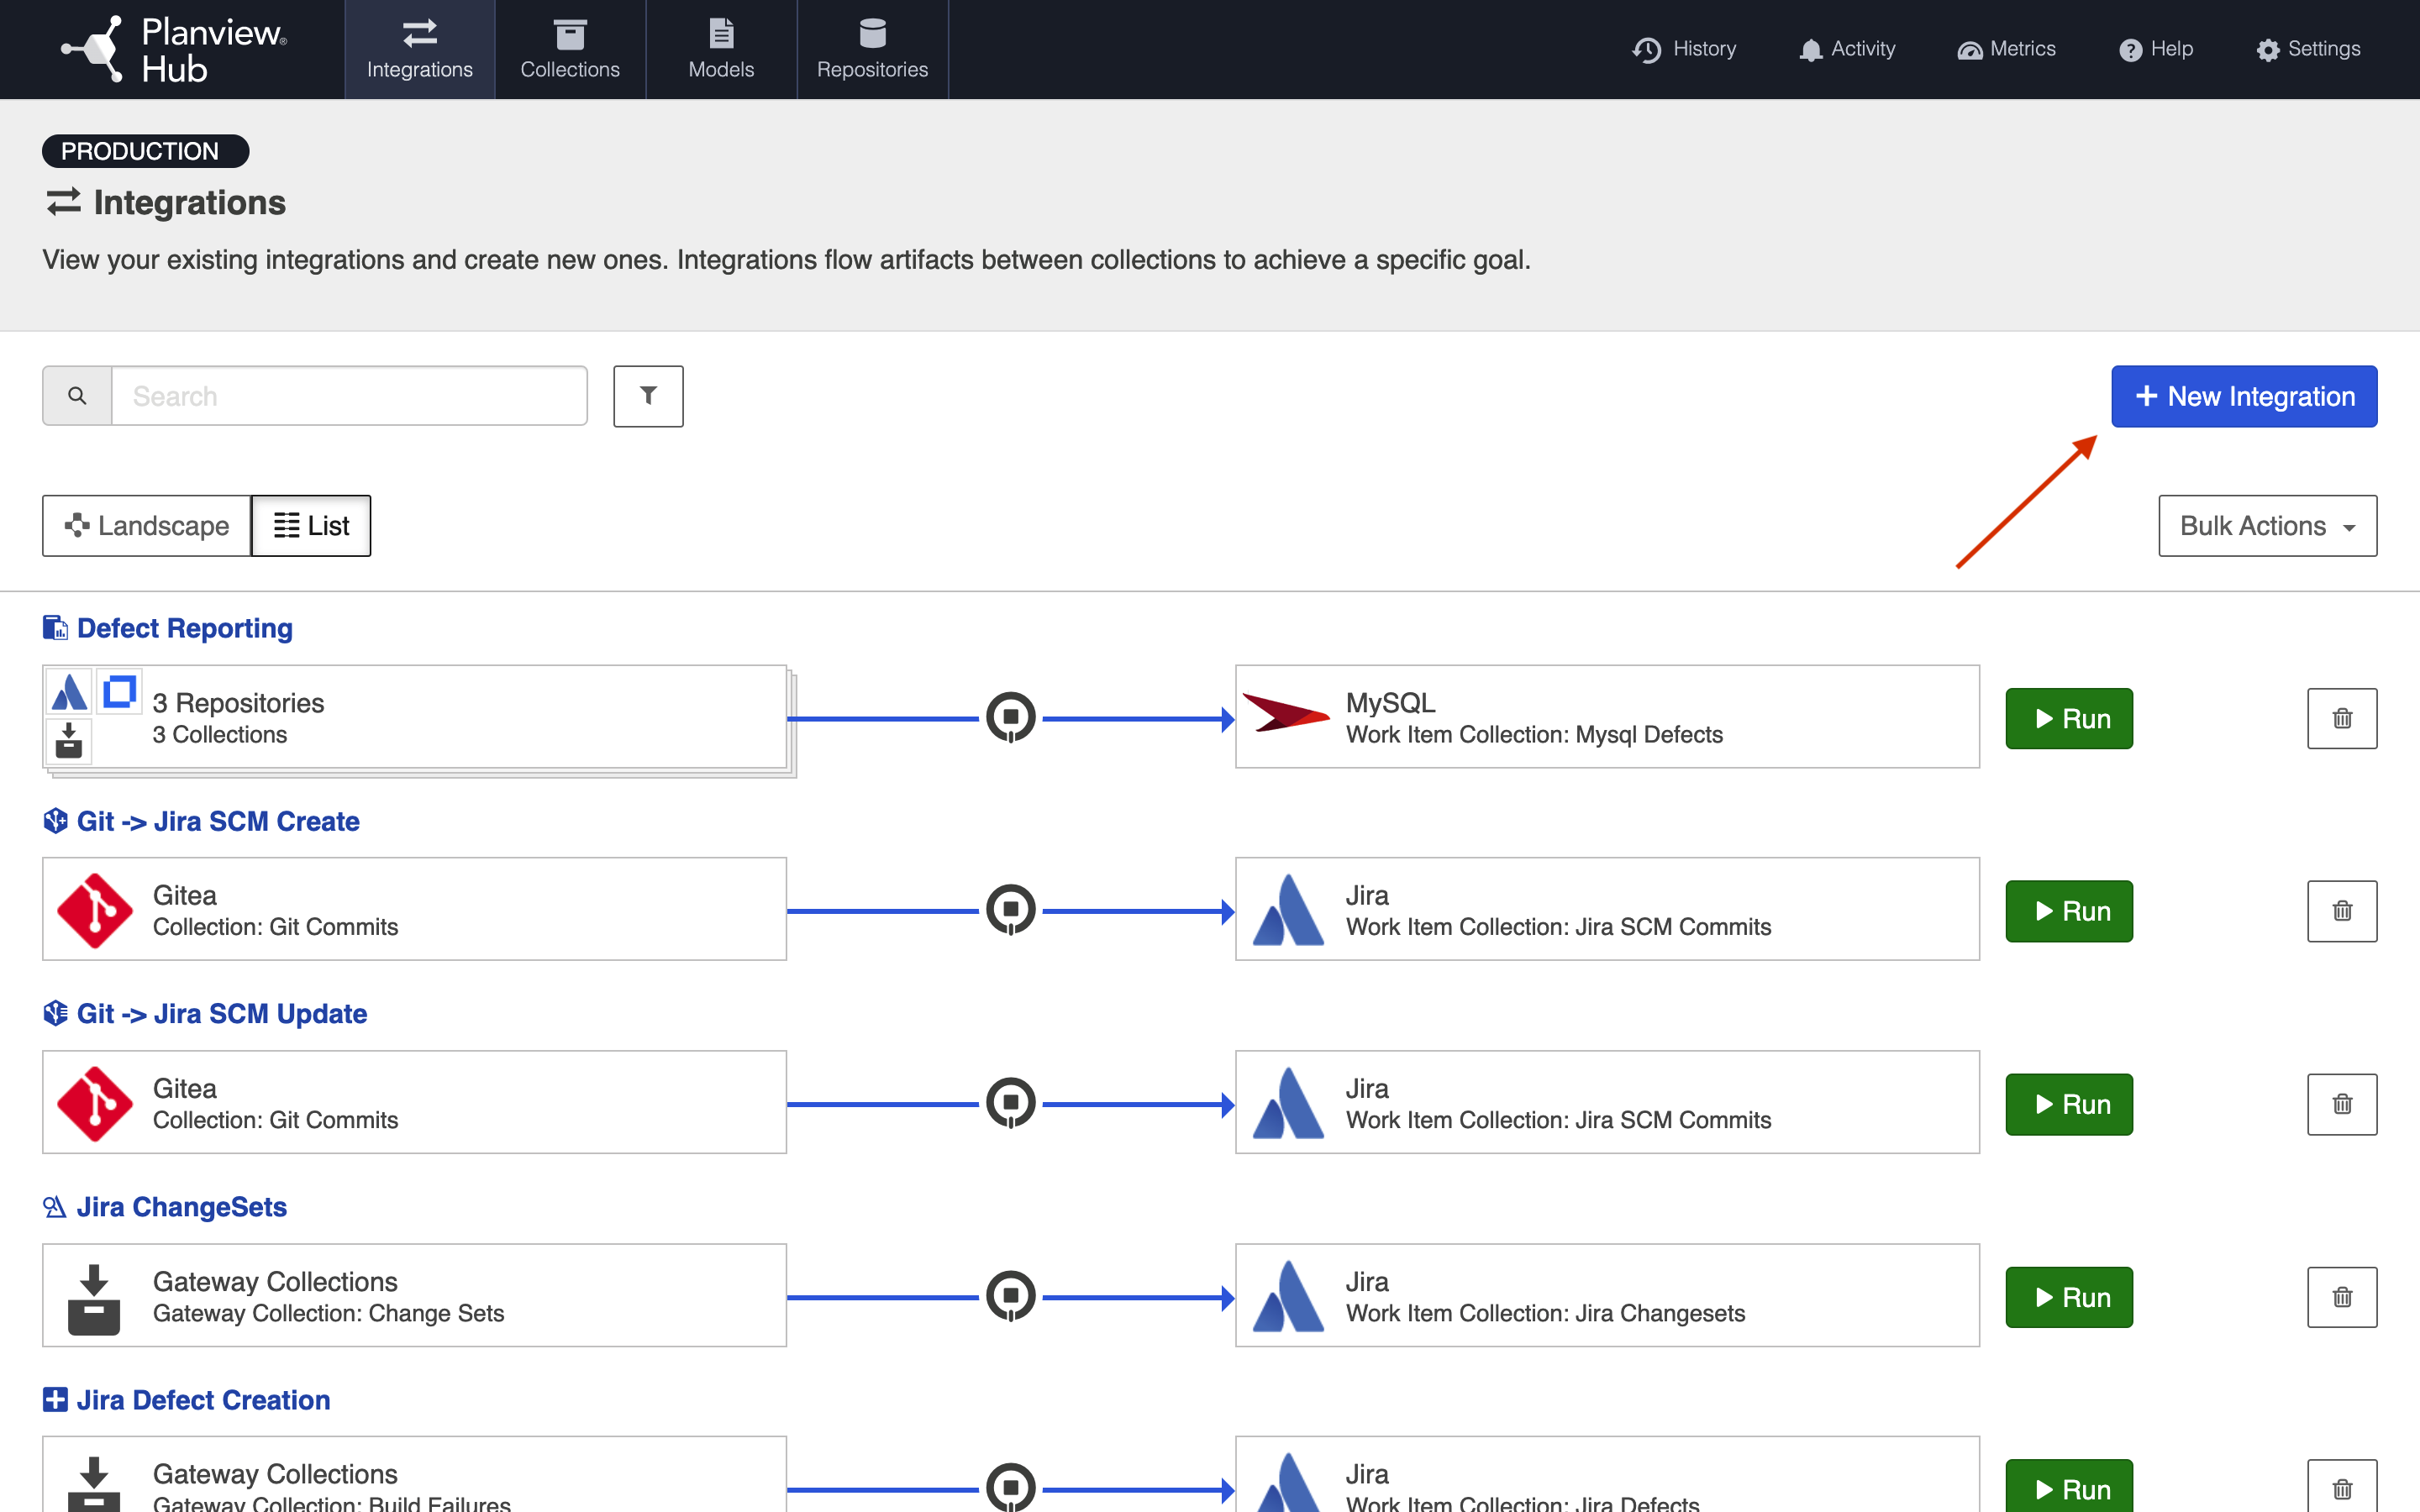
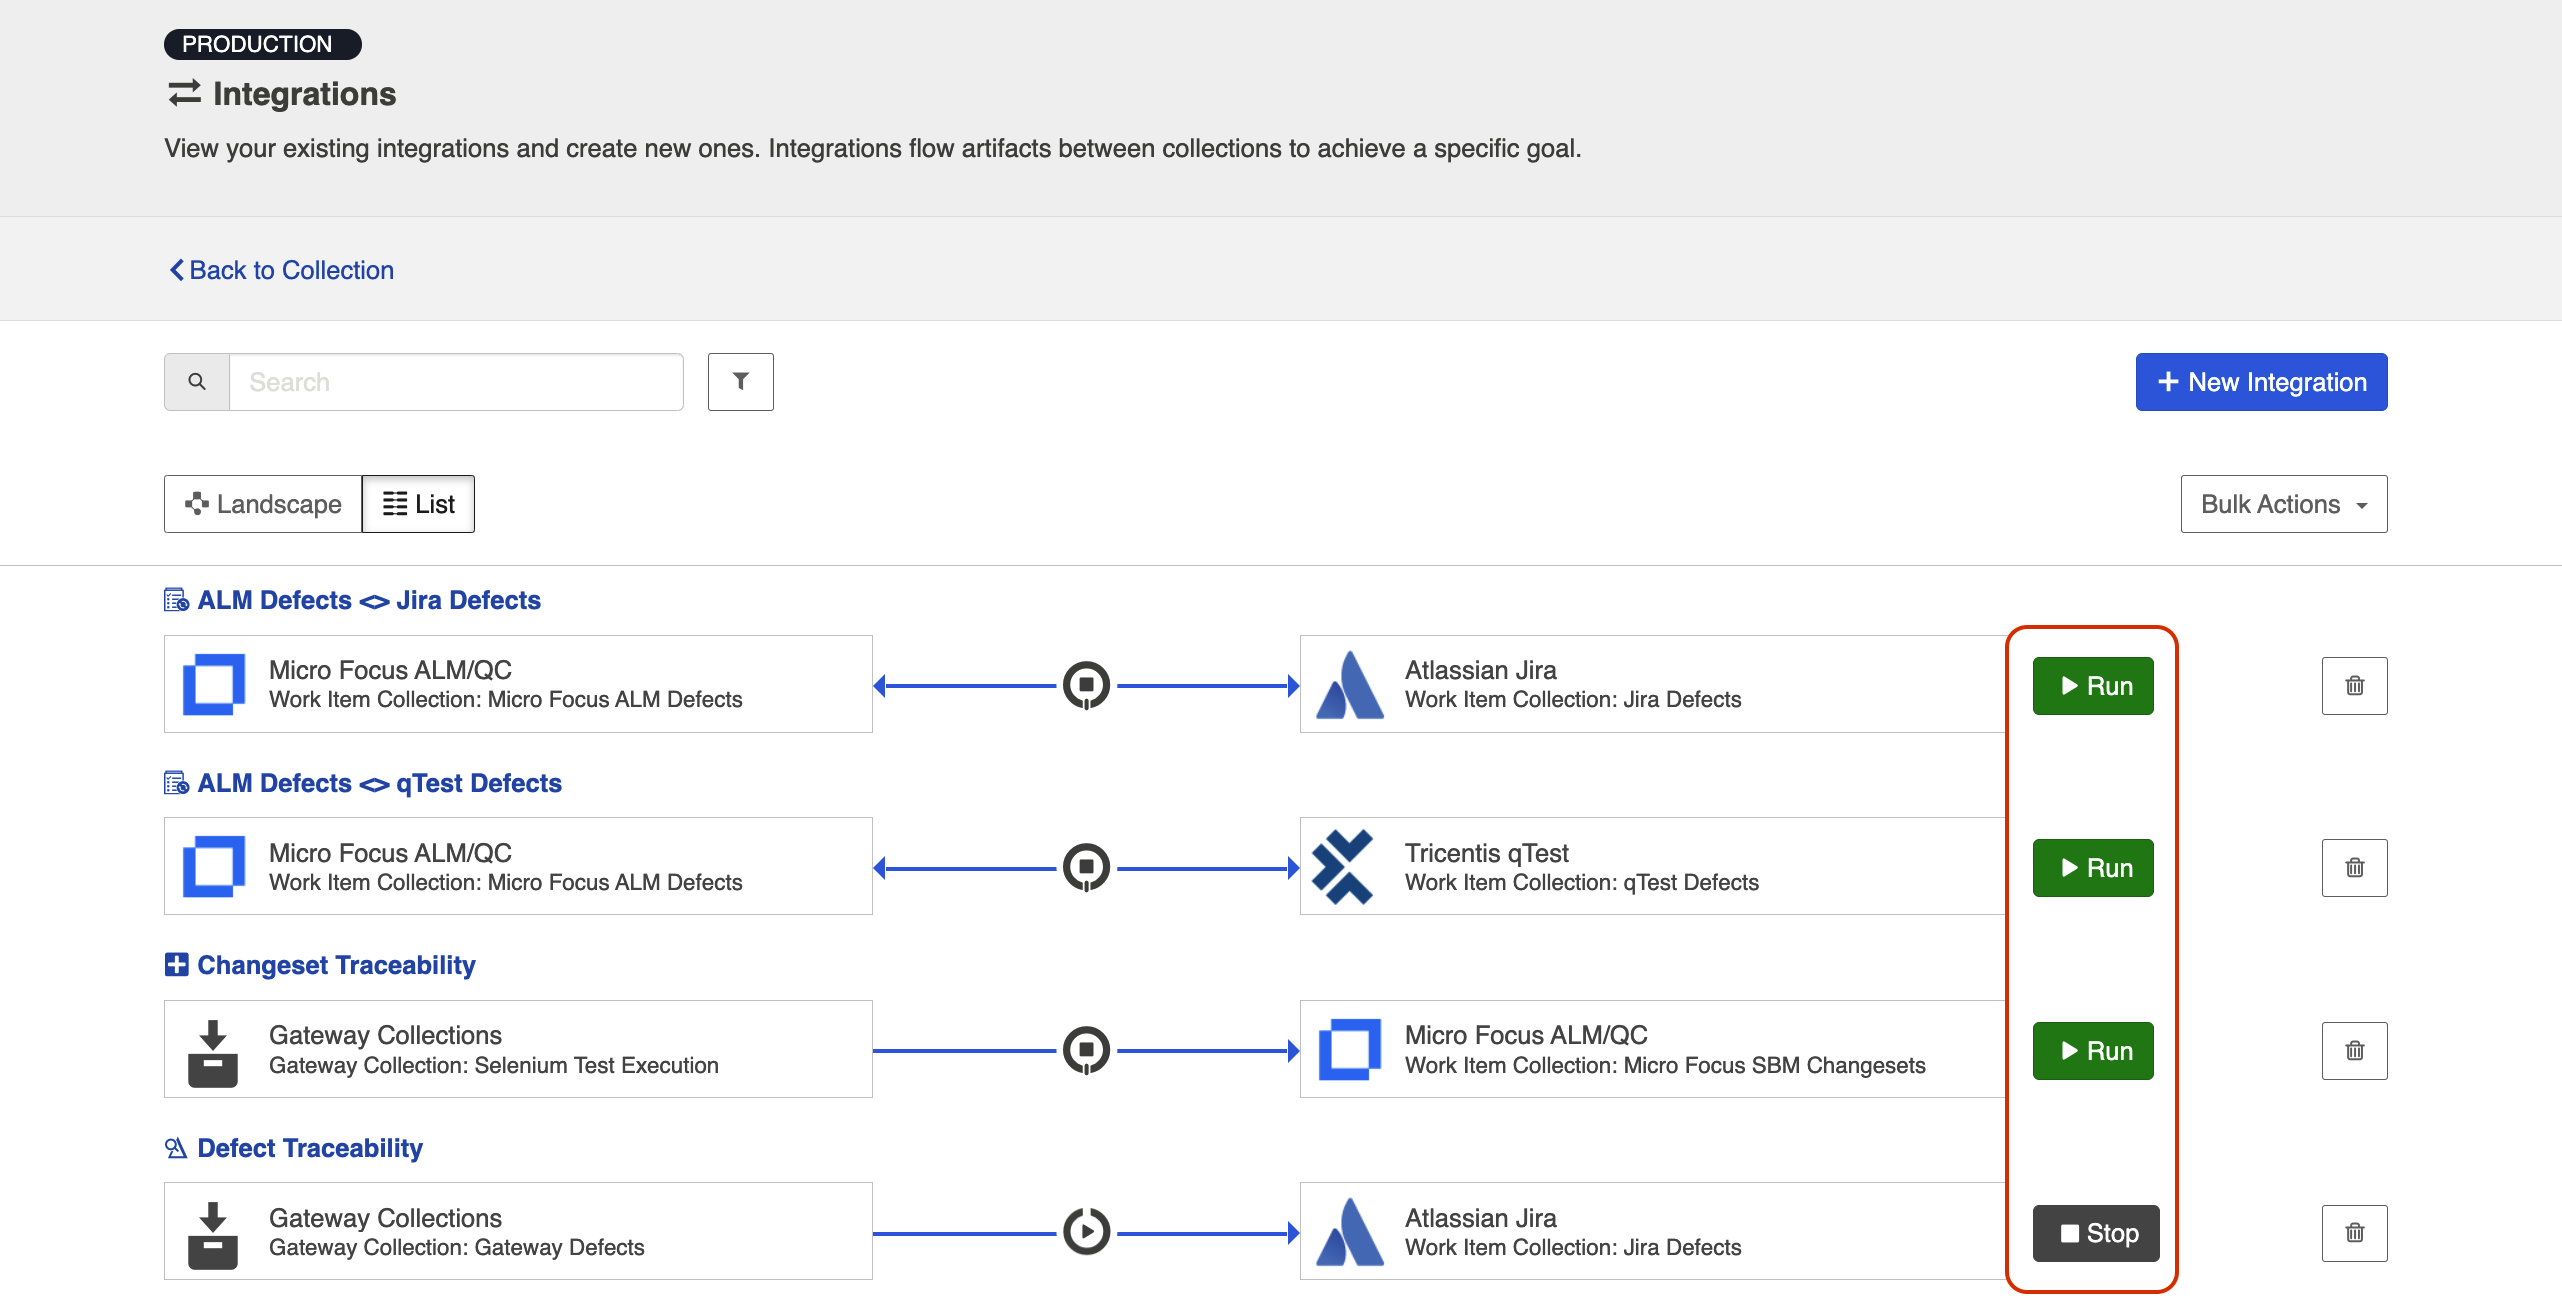
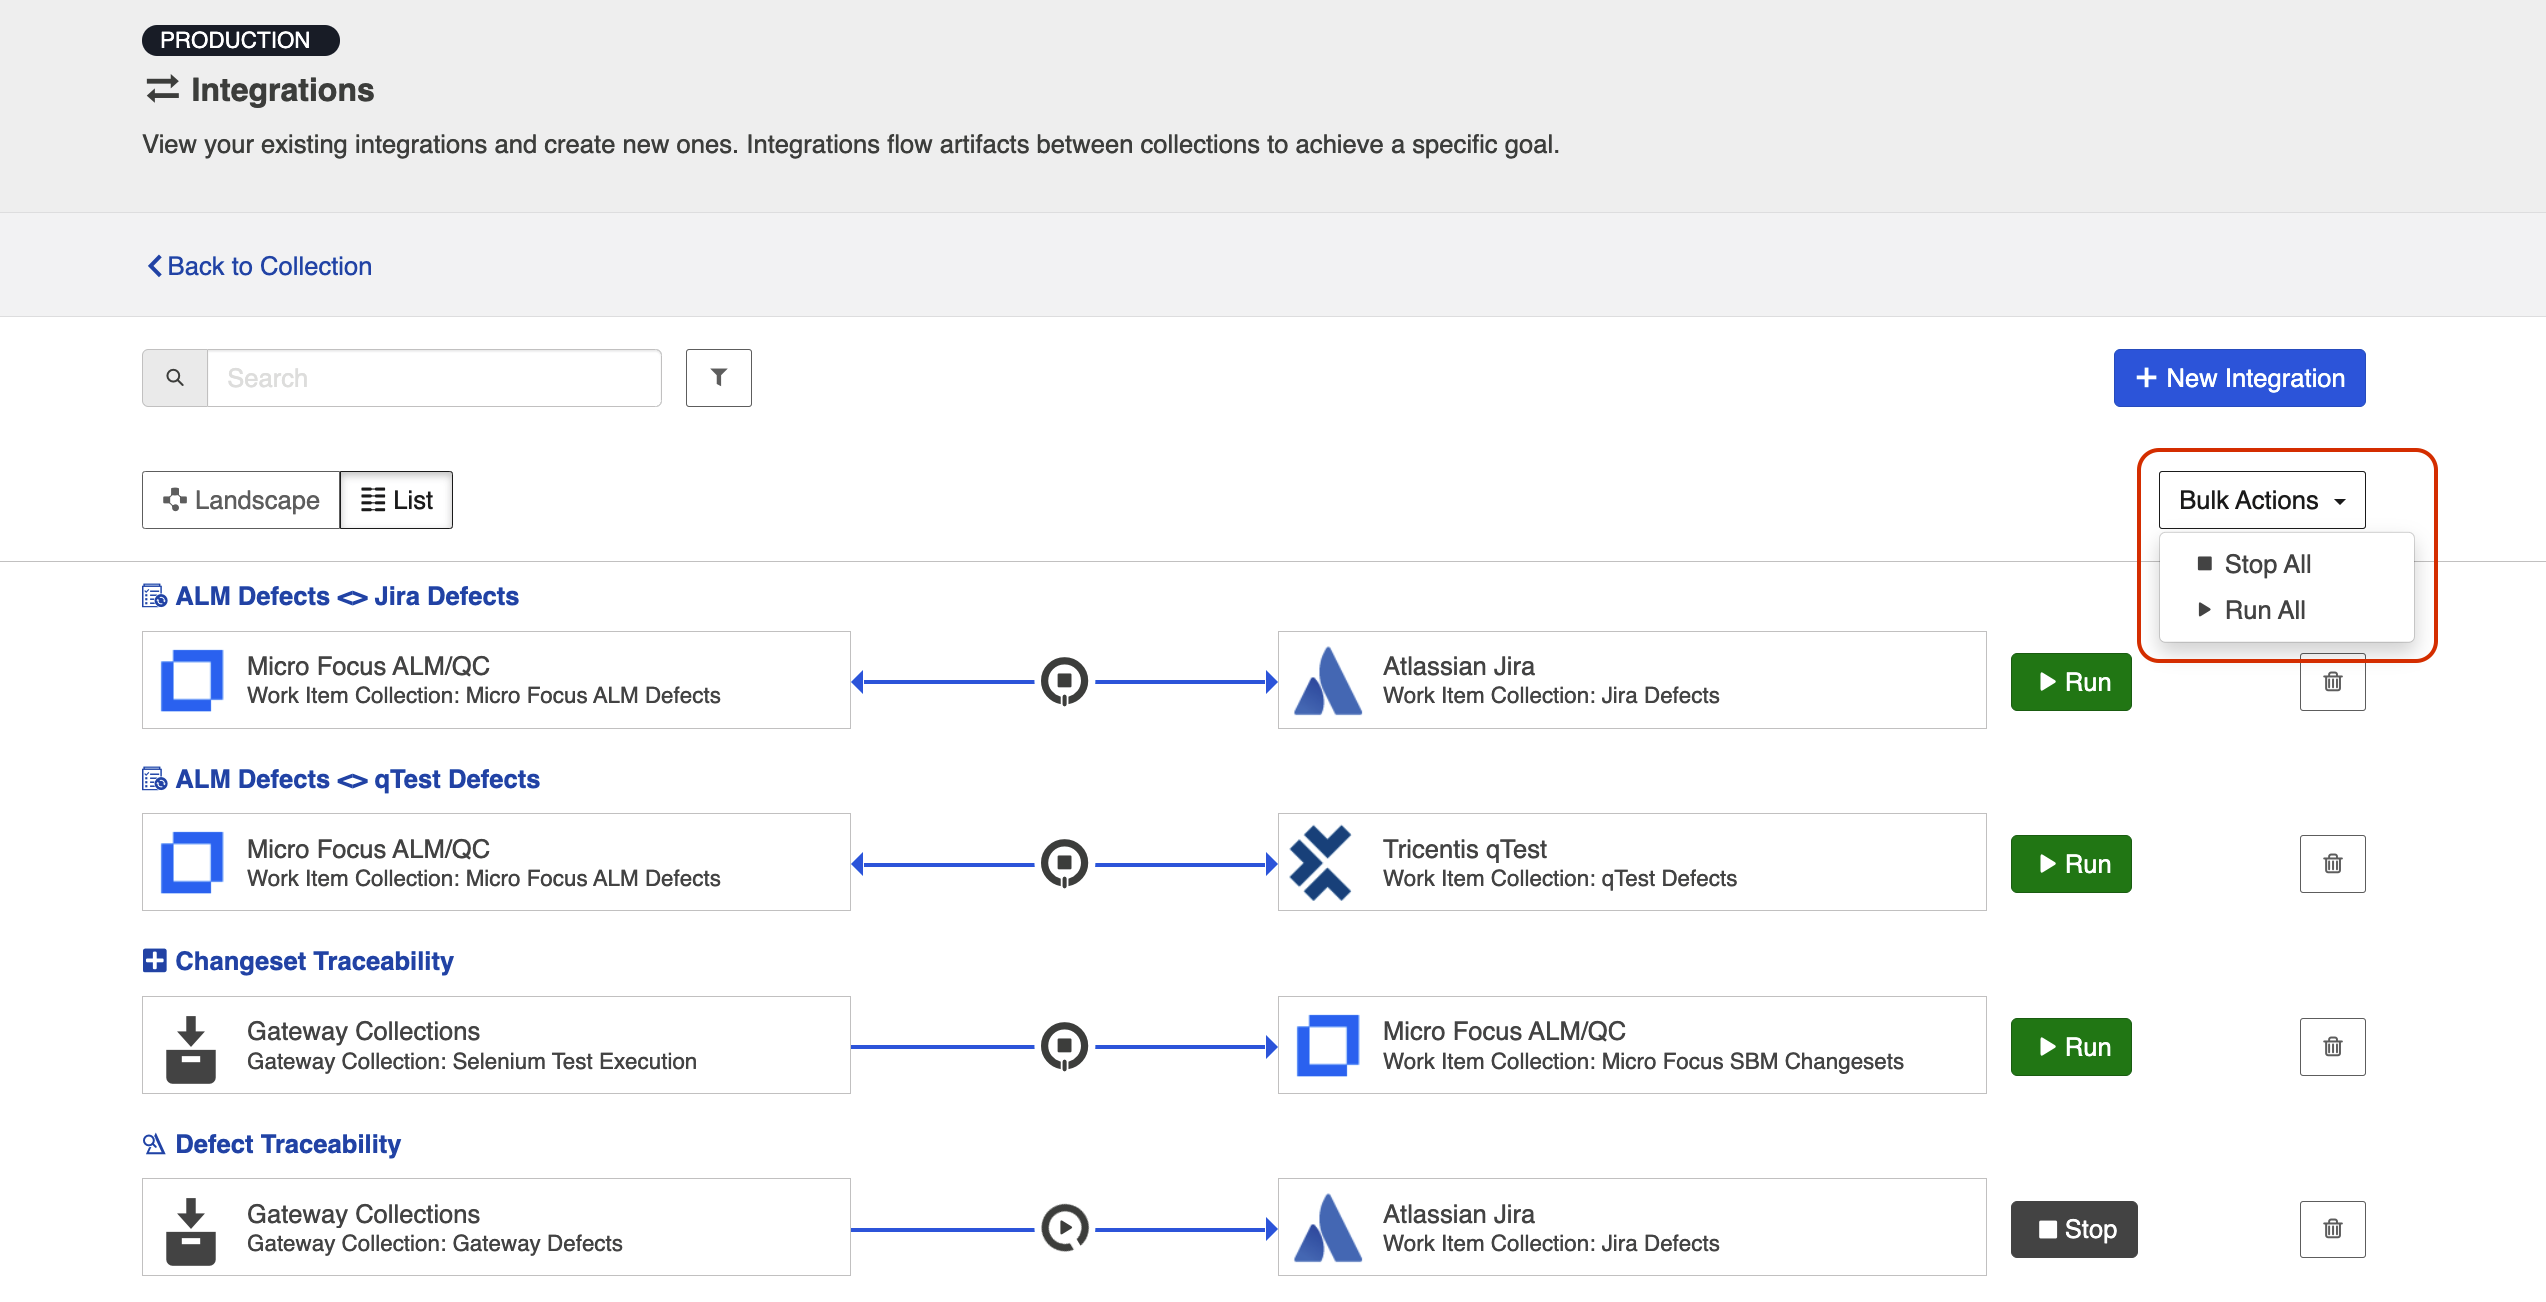
From the Integrations List Screen
Click Run or Stop next to each integration you would like to update. You can also use the Bulk Actions button to run or stop all integrations.
Viewing Your Integrations
See the Planview Hub Editions table to determine if your edition contains Integration Landscape View functionality.
When viewing your integrations, you have the option of viewing them in either Landscape or List mode.


Landscape View
See the Planview Hub Editions table to determine if your edition contains Integration Landscape View functionality.
Learn more about the Integration Landscape view in the video below:
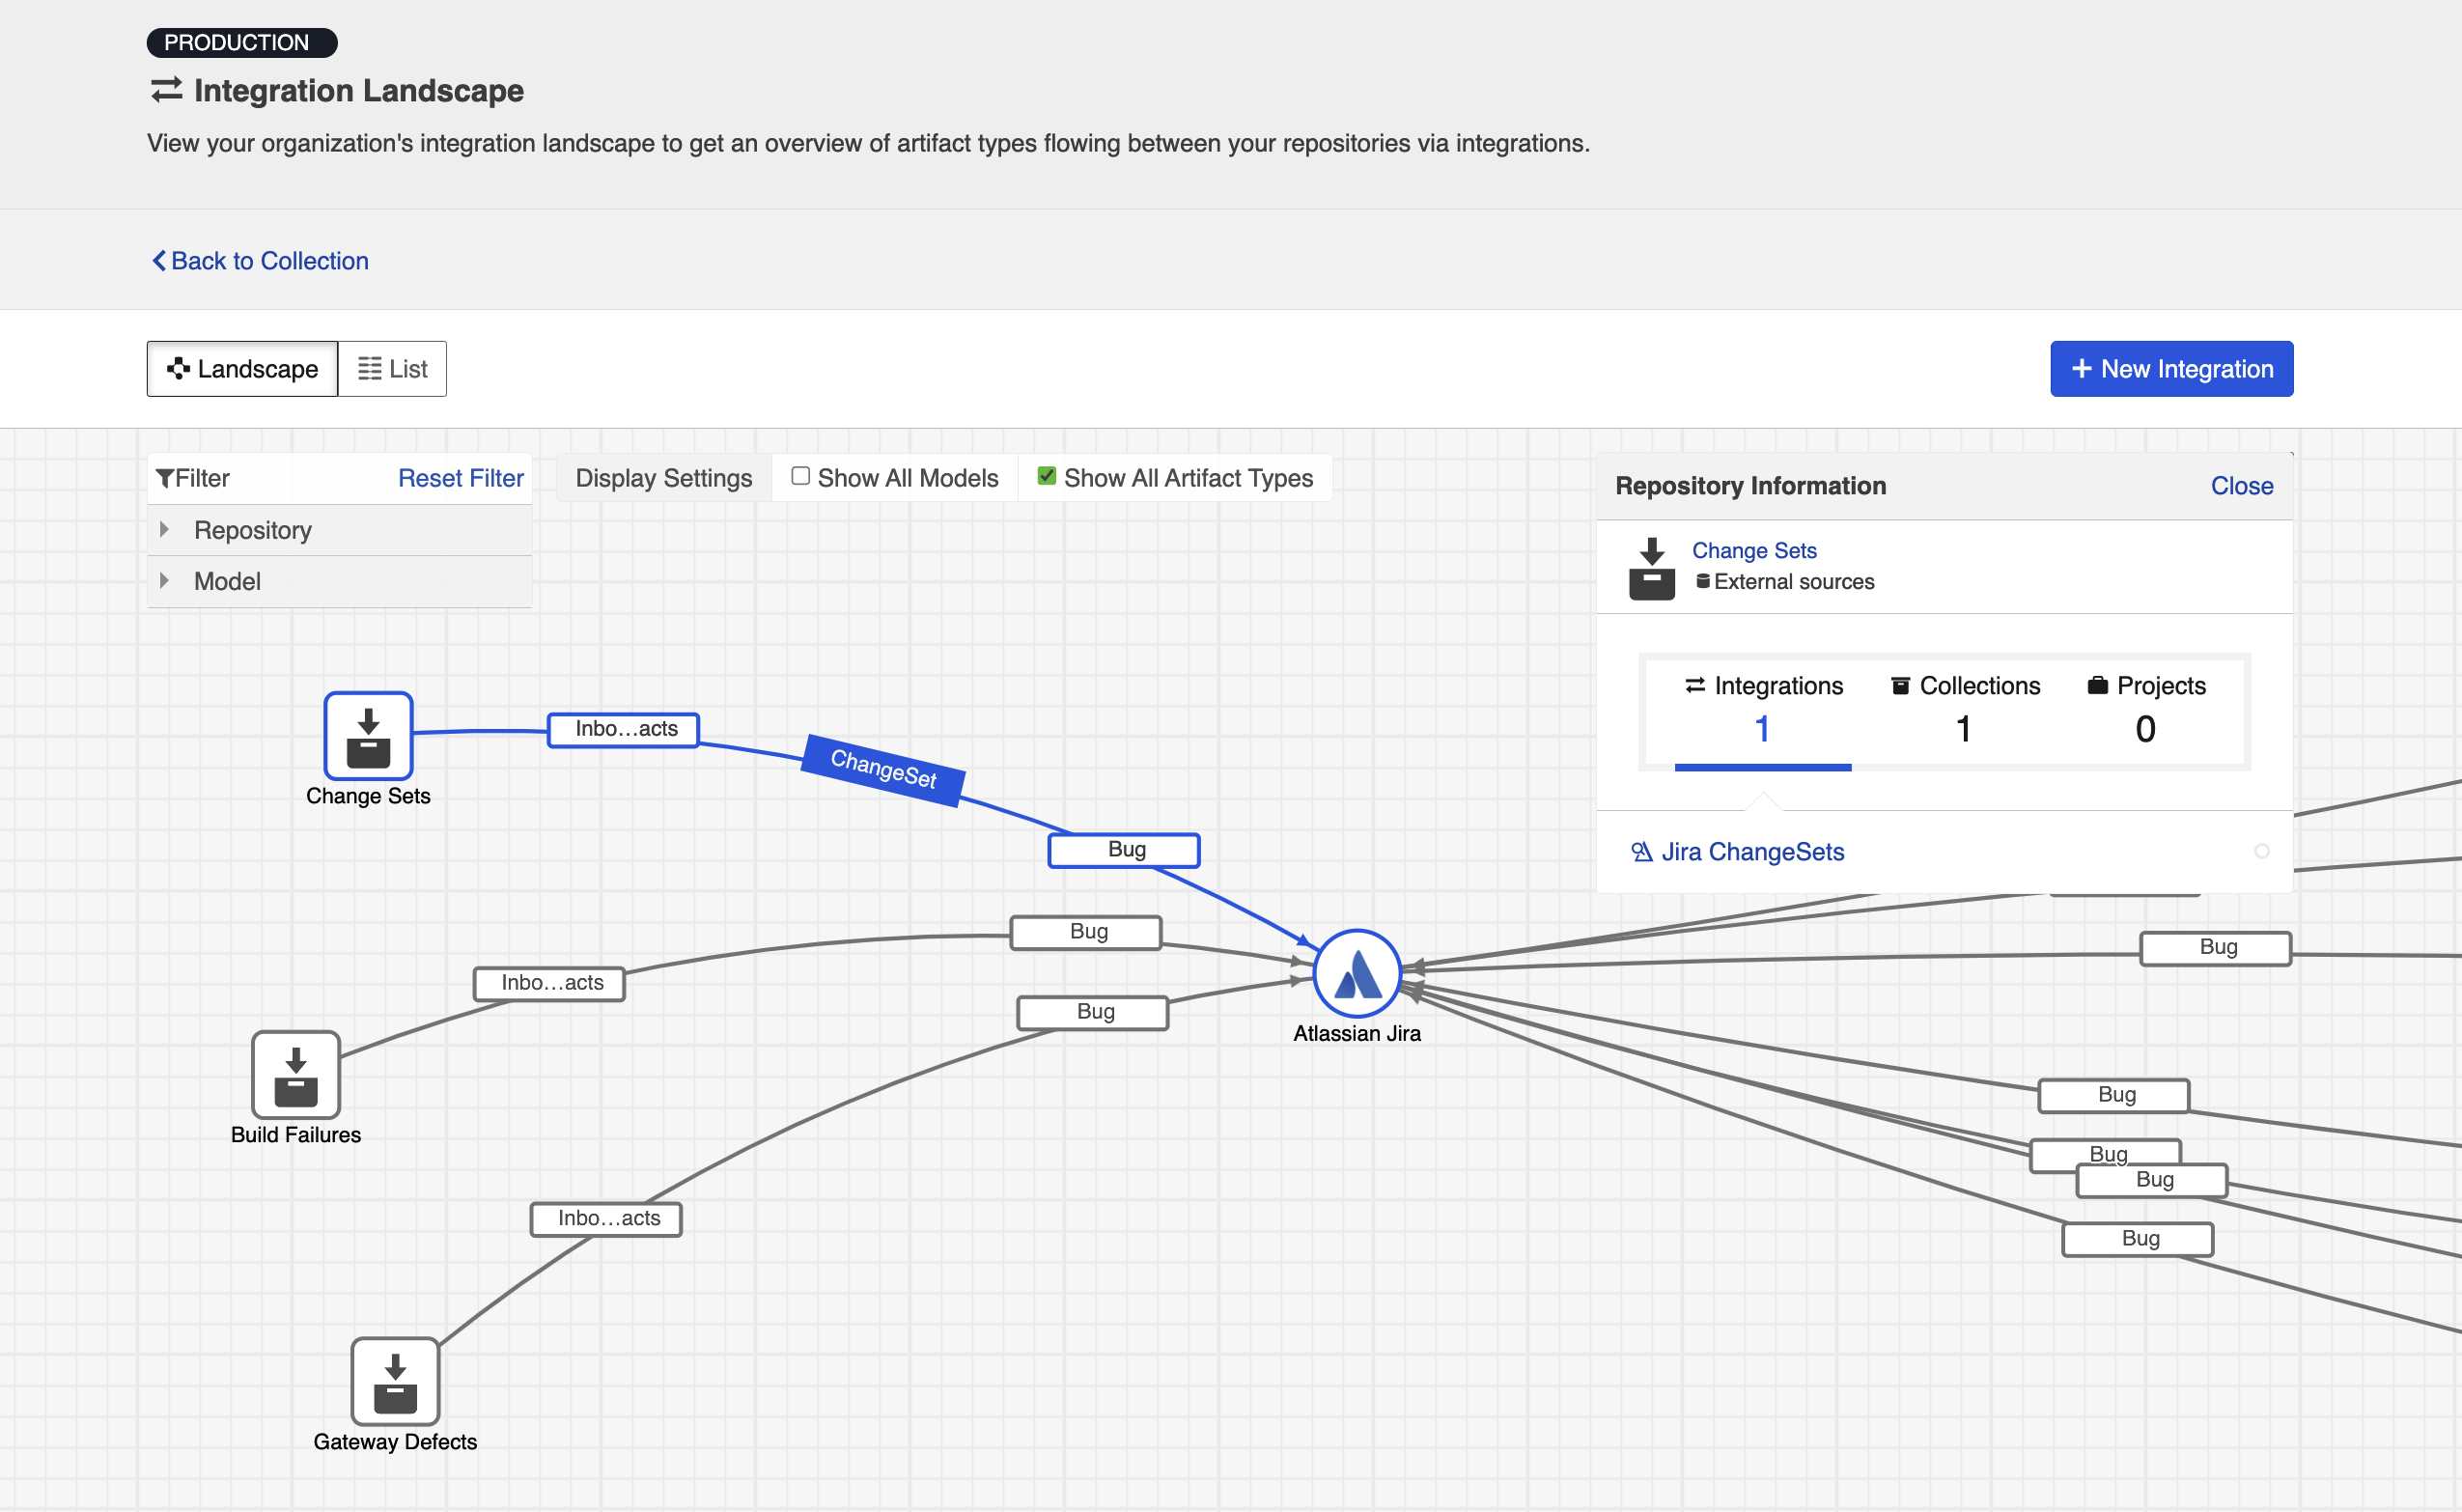
Hub will default to the Landscape view, which enables you to visualize your entire integration landscape and see how your integrations relate to one another. Use our built-in filters to see as little or as much information as you'd like!
Here's a simplified view:
If you'd like to see additional information, you can utilize the filters, or click on a repository node to modify which information is shown.
Some examples of additional information you can see are:
- Models
- Artifact Types
- Artifact Creation Directionality Arrows
- List of all relevant integrations (see this by clicking on the repository node)
- Indicator of whether each integration is running or not
- Collections
- Projects
Here's an example of a more detailed view:
List View
If you'd like, you can toggle to List view, which will show you a list of all integrations you have created.
You can use this view to:
- Start an Integration
- Stop an Integration
- Delete an Integration
- Click into an Integration and modify its configuration
Example Use Case
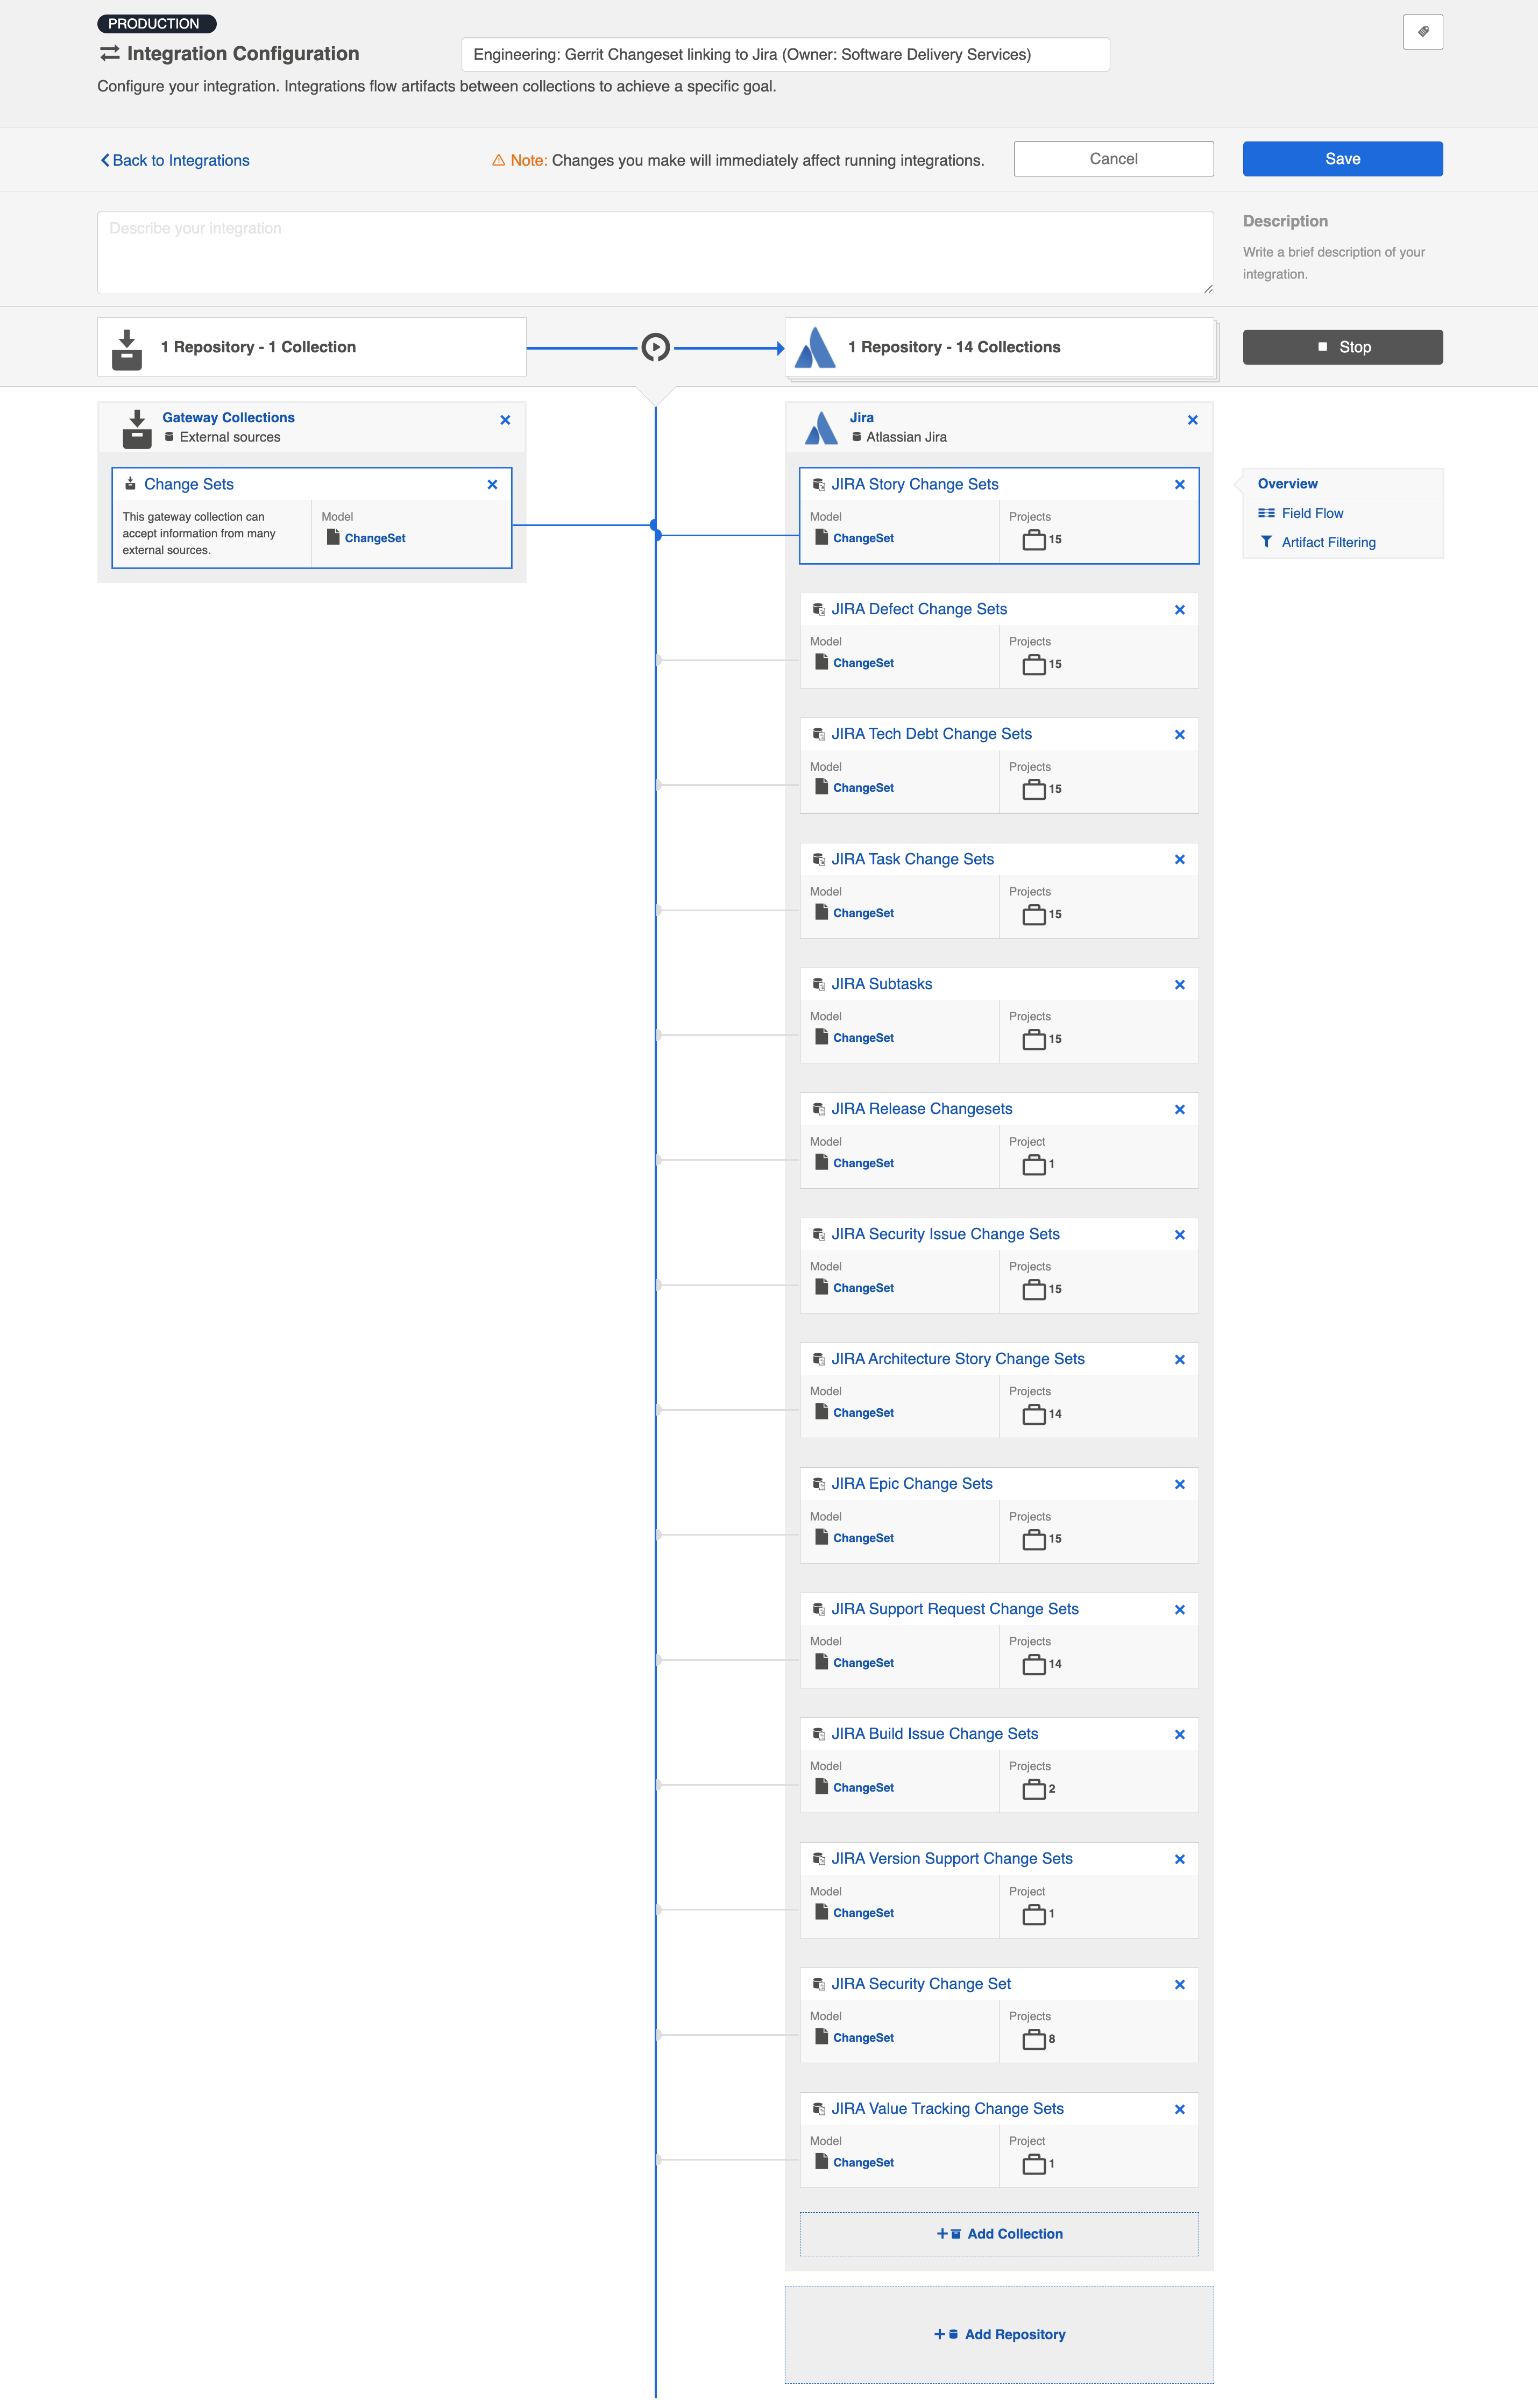
This is an example of how we at Planview utilize the Modify via Gateway template. Our integration flows changeset links and other information from Gerrit to a field on already-existing artifacts (such as stories, epics, and defects) in Jira.
Here's how the integration configuration screen looks for that integration:
The image below illustrates how the changeset is sent to Hub after the developers’ normal workflow:

This is an example of the script that we use to automate the changesets being sent to Hub:
#!/usr/bin/ruby

require 'rubygems'
require 'logger'
require 'net/http'
require 'openssl'
require 'json'

def getOption(name)
  return ARGV[ARGV.index("--"+name)+1]
end

def sendToLink(data)
  request = Net::HTTP::Post.new(LINK_URL)
  request.body = JSON.generate(data)
  request.content_type = 'application/json'
  request.basic_auth "tasktop", "tasktopSecret"
  uri = URI.parse(LINK_URL)
  response = Net::HTTP.start(uri.hostname, uri.port, :use_ssl => uri.scheme == 'https', :verify_mode => OpenSSL::SSL::VERIFY_NONE) do |http|
      http.request(request)
  end
  if ! response.kind_of? Net::HTTPSuccess
    LOGGER.warn "Error sending to link: #{response.body}"
  end
end

LINK_URL = "https://tt-data350:8443/api/v1/artifacts/changesets"
TASK_ID_PATTERN =  /Task-Url:\s*https:\/\/tasktop.atlassian.net\/browse\/([^\s]*)/
REVIEW_URL_PATTERN = /.*Reviewed-on:\s+([^\s]*)/m
LOGGER = Logger.new('/shared/gerrit/tasktop-site/logs/hook-change-merged.log','monthly')
ENABLED_PROJECT_KEYS = ["APPS", "SYN", "SDK", "PLAT", "OPS", "CON", "DEV", "QA", "RLIASE"]

project = getOption('project')
commit = getOption('commit')
branch = getOption('branch')

LOGGER.debug("Processing merge for commit #{commit} on project #{project}")

gitPath = ENV['GIT_DIR']
message = `git --git-dir #{gitPath} show -s --format=%B  #{commit}`
taskIdMatch = TASK_ID_PATTERN.match(message)
if taskIdMatch
  taskKey = taskIdMatch.captures[0]
  LOGGER.debug("Detected taskKey: #{taskKey}")
  taskKeyMatches = ENABLED_PROJECT_KEYS.any? { |project| taskKey.start_with?(project + "-")}
  if ! taskKeyMatches
    LOGGER.info("#{taskKey} project not enabled, skipping");
    exit()
  end
  reviewUrlMatch = REVIEW_URL_PATTERN.match(message)
  webUrl = nil
  if reviewUrlMatch
    webUrl = reviewUrlMatch.captures[0]
  else
    LOGGER.error("Could not get webUrl from commit #{commit}")
    webUrl = "commit #{commit}"
  end
  firstLineOfMessage = message.lines.first.chomp
  firstLineOfMessage = firstLineOfMessage.gsub(/#{taskKey}:? /,'')
  sendToLink({"formatted_id" => taskKey, "info" => "#{webUrl} [#{branch}] (#{firstLineOfMessage})"})
else
  LOGGER.debug("No task key found")
end
This image more clearly highlights how these changesets are reflected on the Jira artifacts:

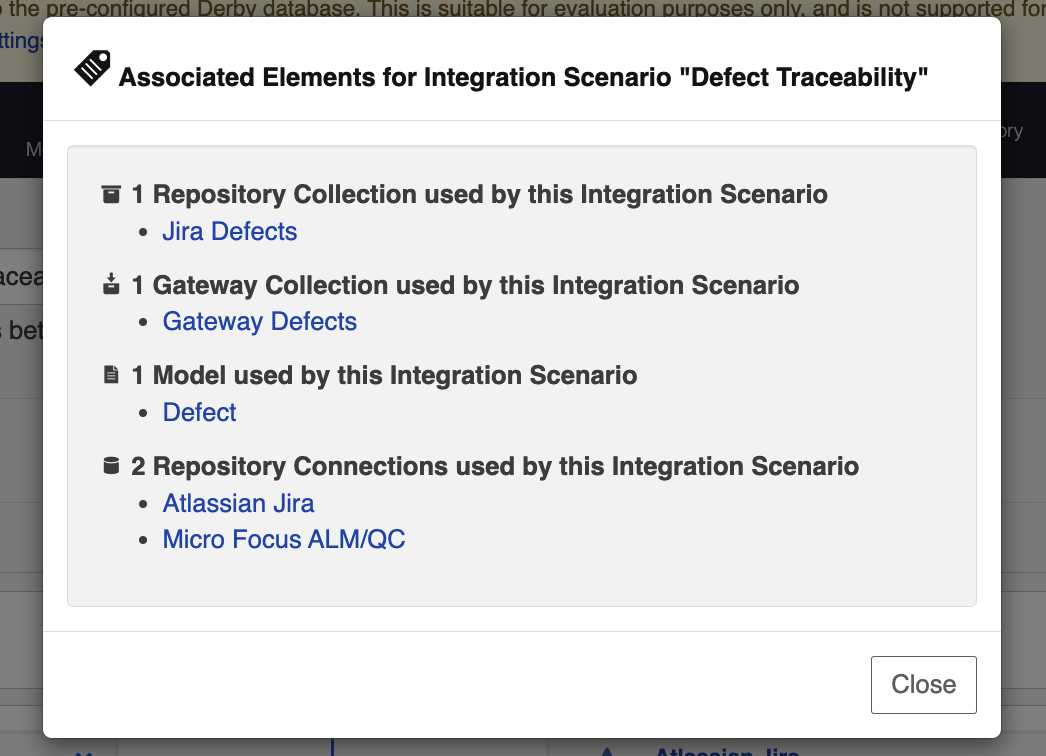
Viewing Associated Configuration Elements
To view associated configuration elements (such as collections or models that utilize the integration you are viewing), click the Associated Elements tag in the upper right corner of the screen.