
Artifact Routing
Introduction
Once you've configured your Field Flow, your next step will be to configure Artifact Routing.

Artifact Routing is needed when artifacts are being created as part of an integration. In addition to knowing the repository in which artifacts should be created, Hub also needs to know which container (i.e., project, module, folder, etc) a given artifact should be created in. Specifying the artifact routing does this.
Initially, the artifact routing will determine where an artifact gets created. Over time, if an artifact on either side moves, Hub will move the artifact to the corresponding container of the new route, if this is allowed in your repository. If you are moving between lower-level containers, such as sets or folders, this is generally possible. Suppose the move on one side crosses the bounds of the top-level container in the collection. In that case, Hub will only attempt to move the artifact if the target repository has writable collection fields. Otherwise, the artifact will remain in the same route, and all non-containment fields will continue to flow as usual.
Note: If you update the artifact routing on a running integration to include additional lower-level containers, such as sets or folders, please click the 'process all artifacts' button on the Field Flow screen to ensure that all relevant updates are processed.
Configuring Artifact Routing
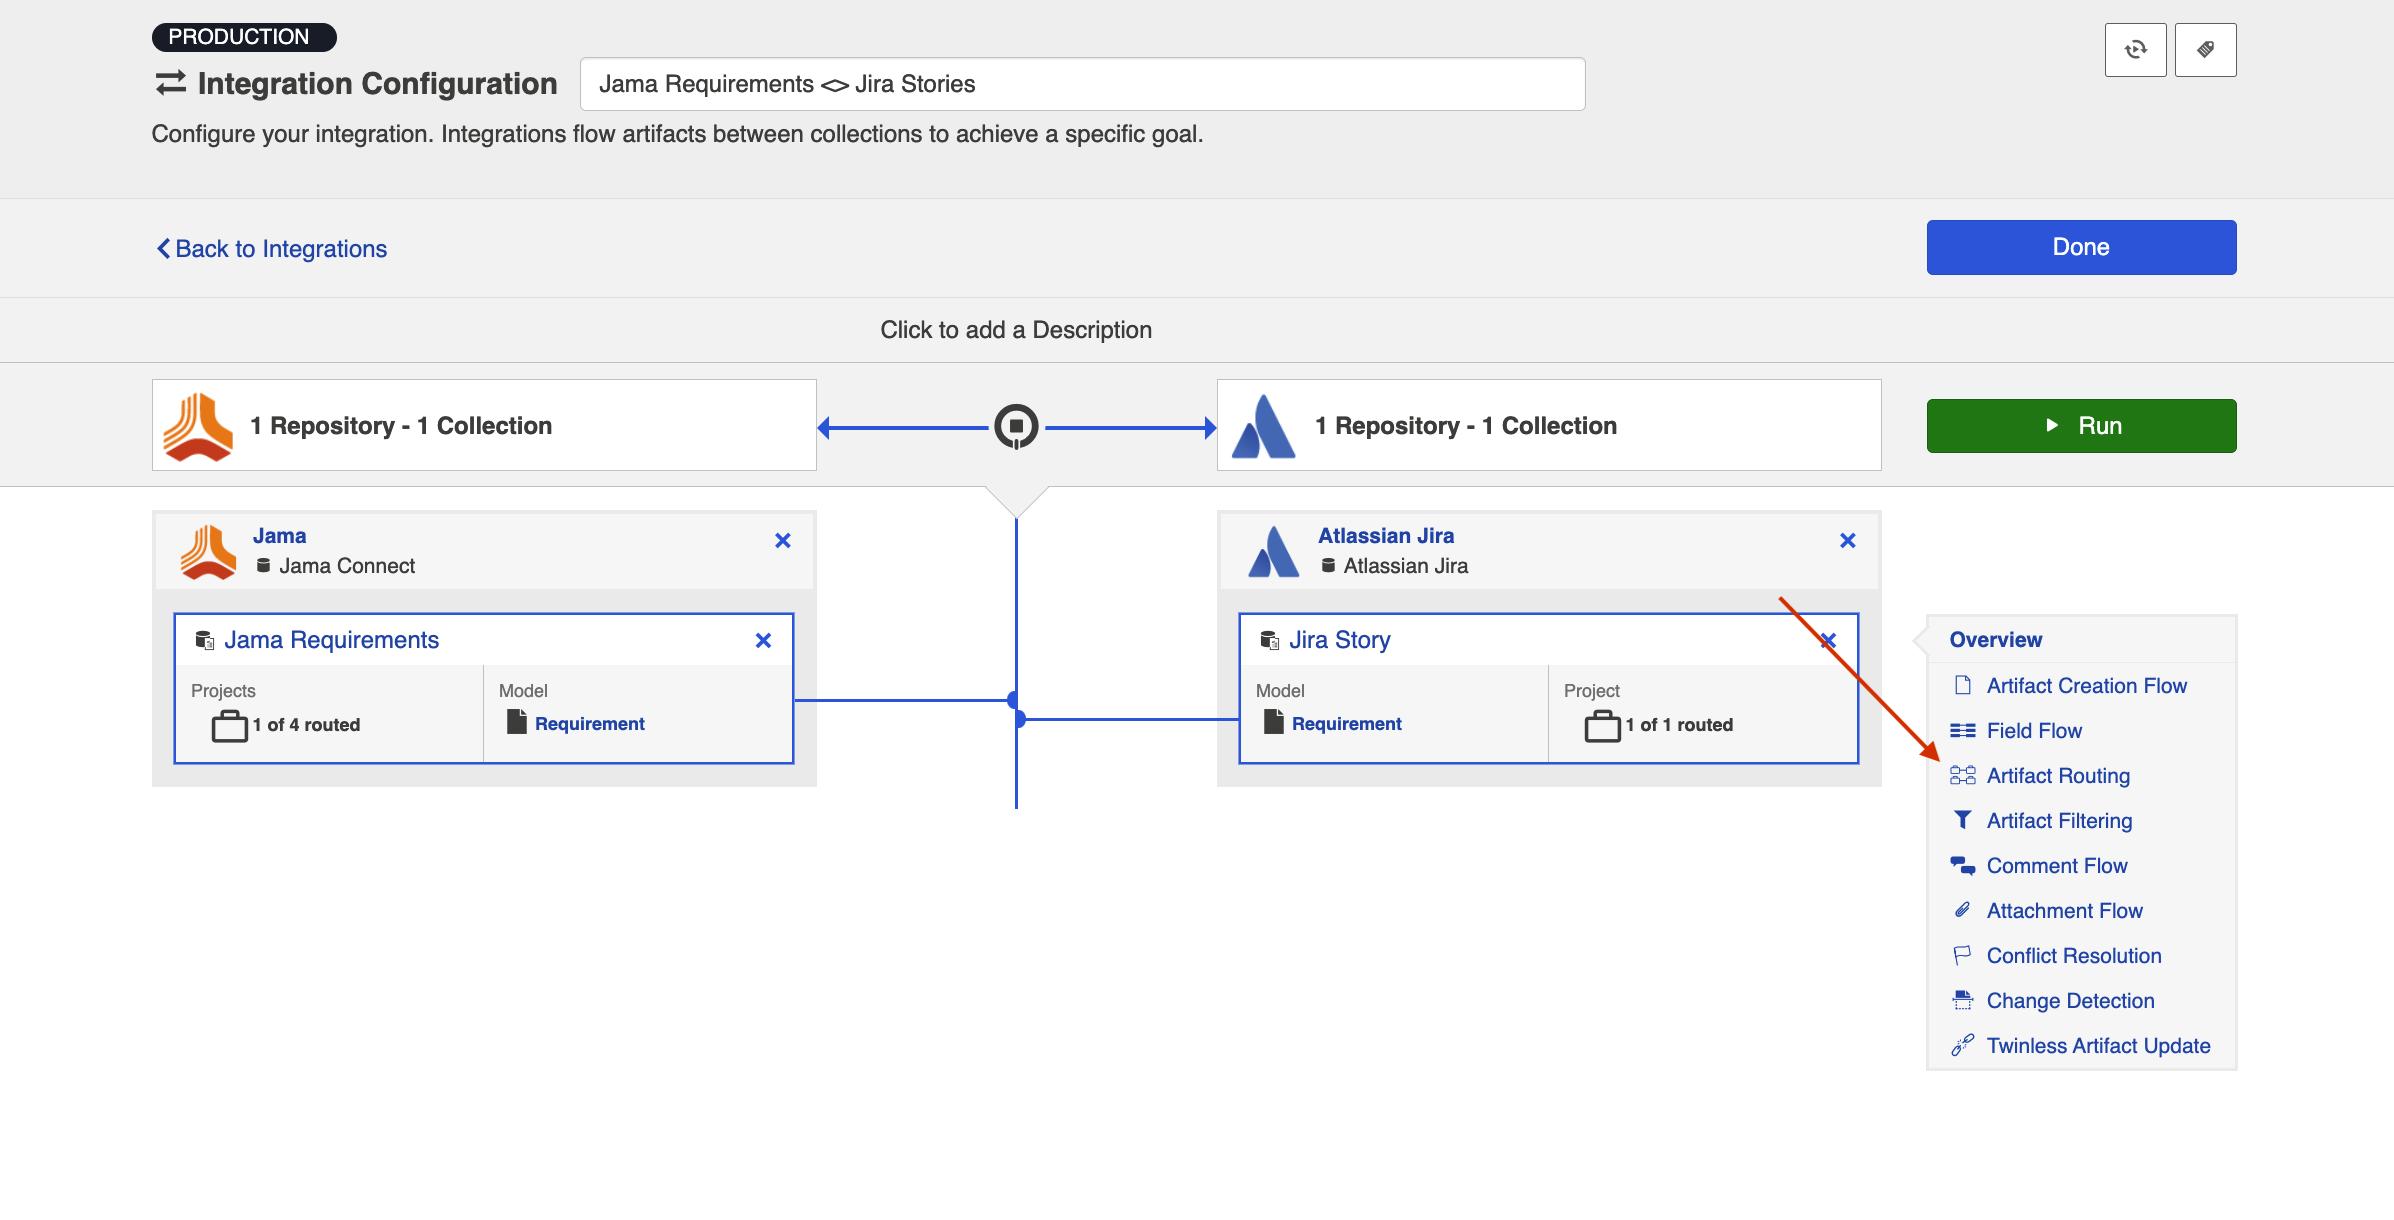
To configure Artifact Routing, click the Artifact Routing link on the right pane of the Integration Configuration screen.
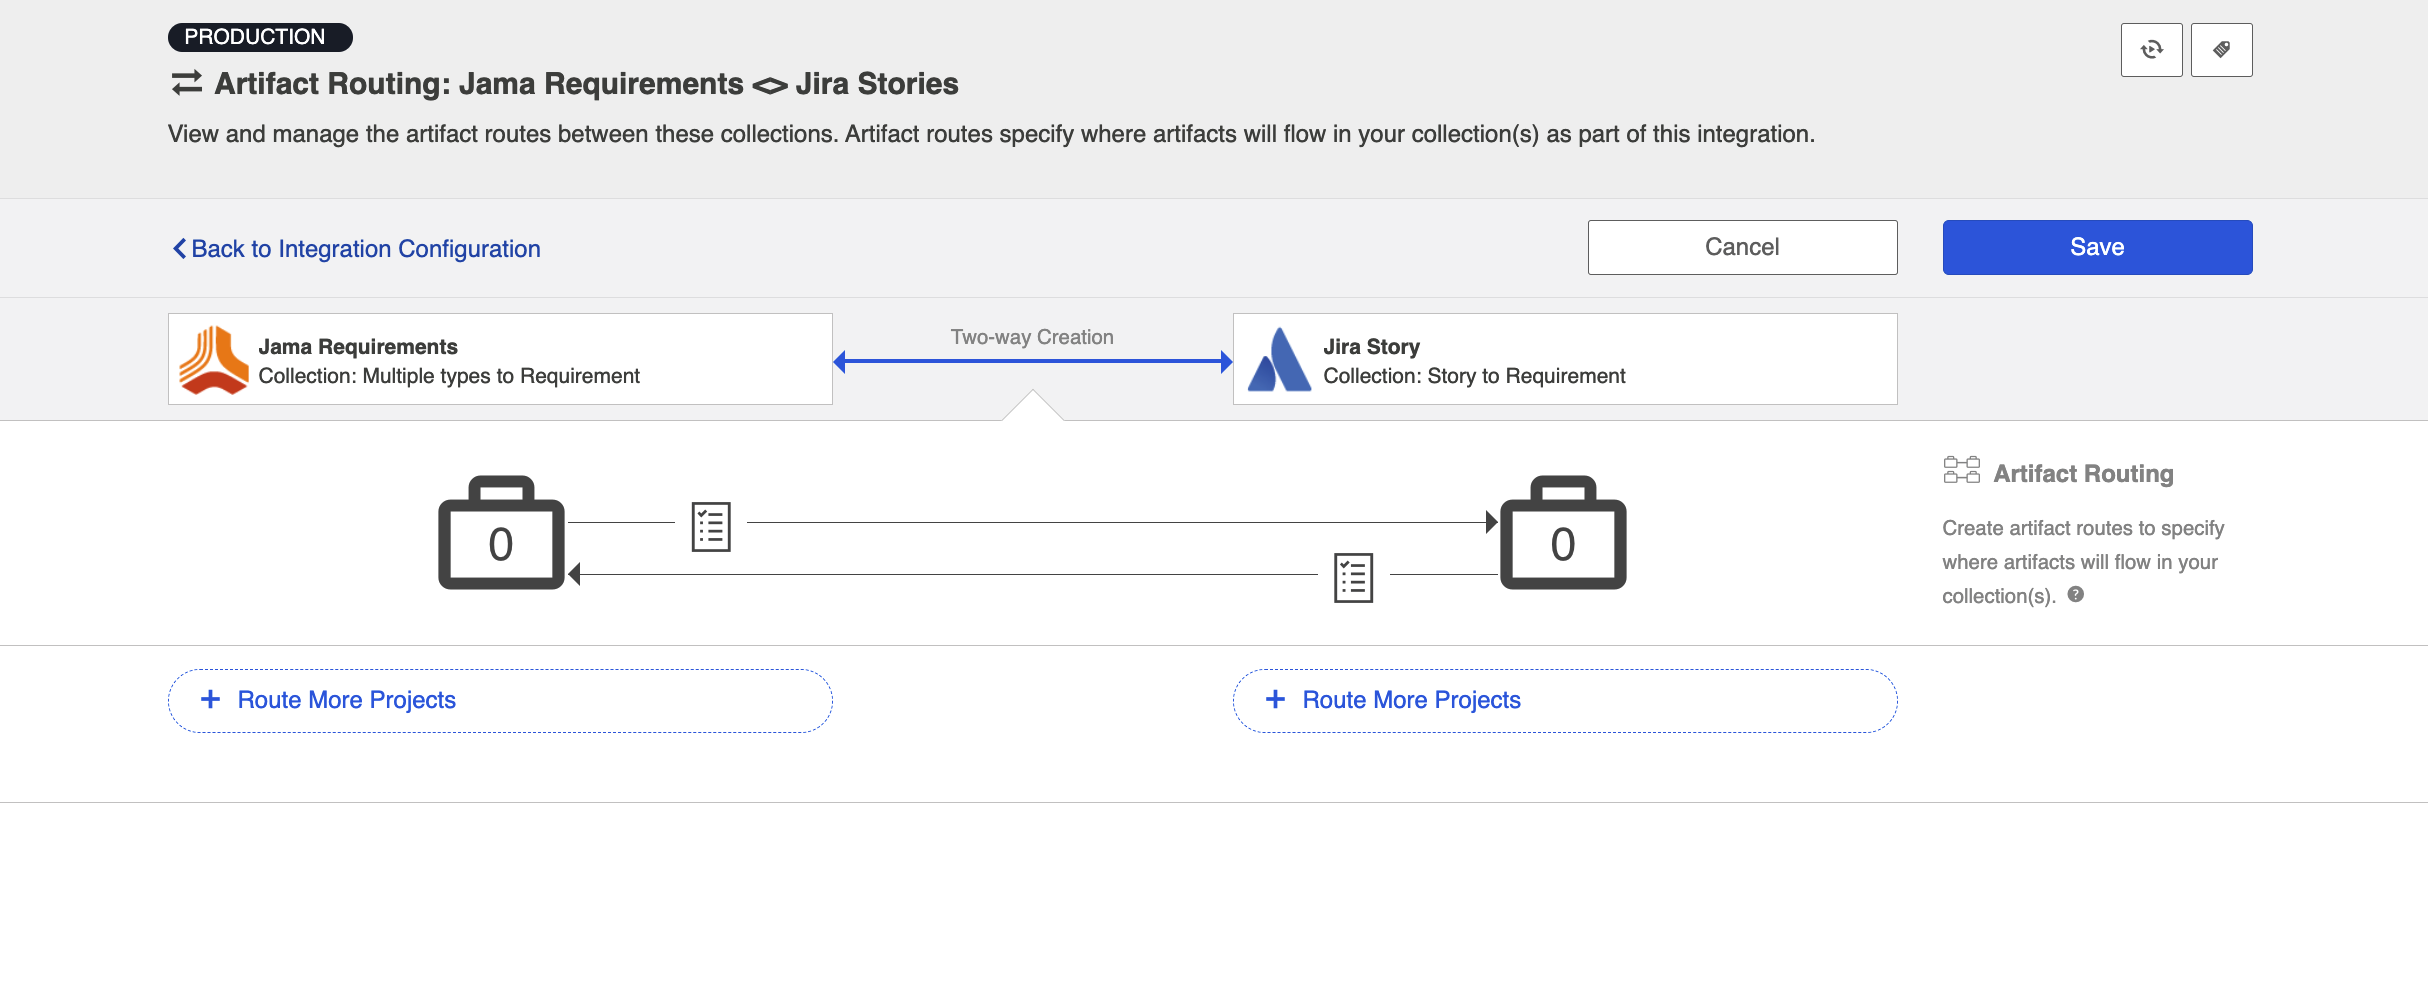
This will bring you to the Artifact Routing screen. On this screen, you can specify where (in which projects) artifacts will flow in your collections.
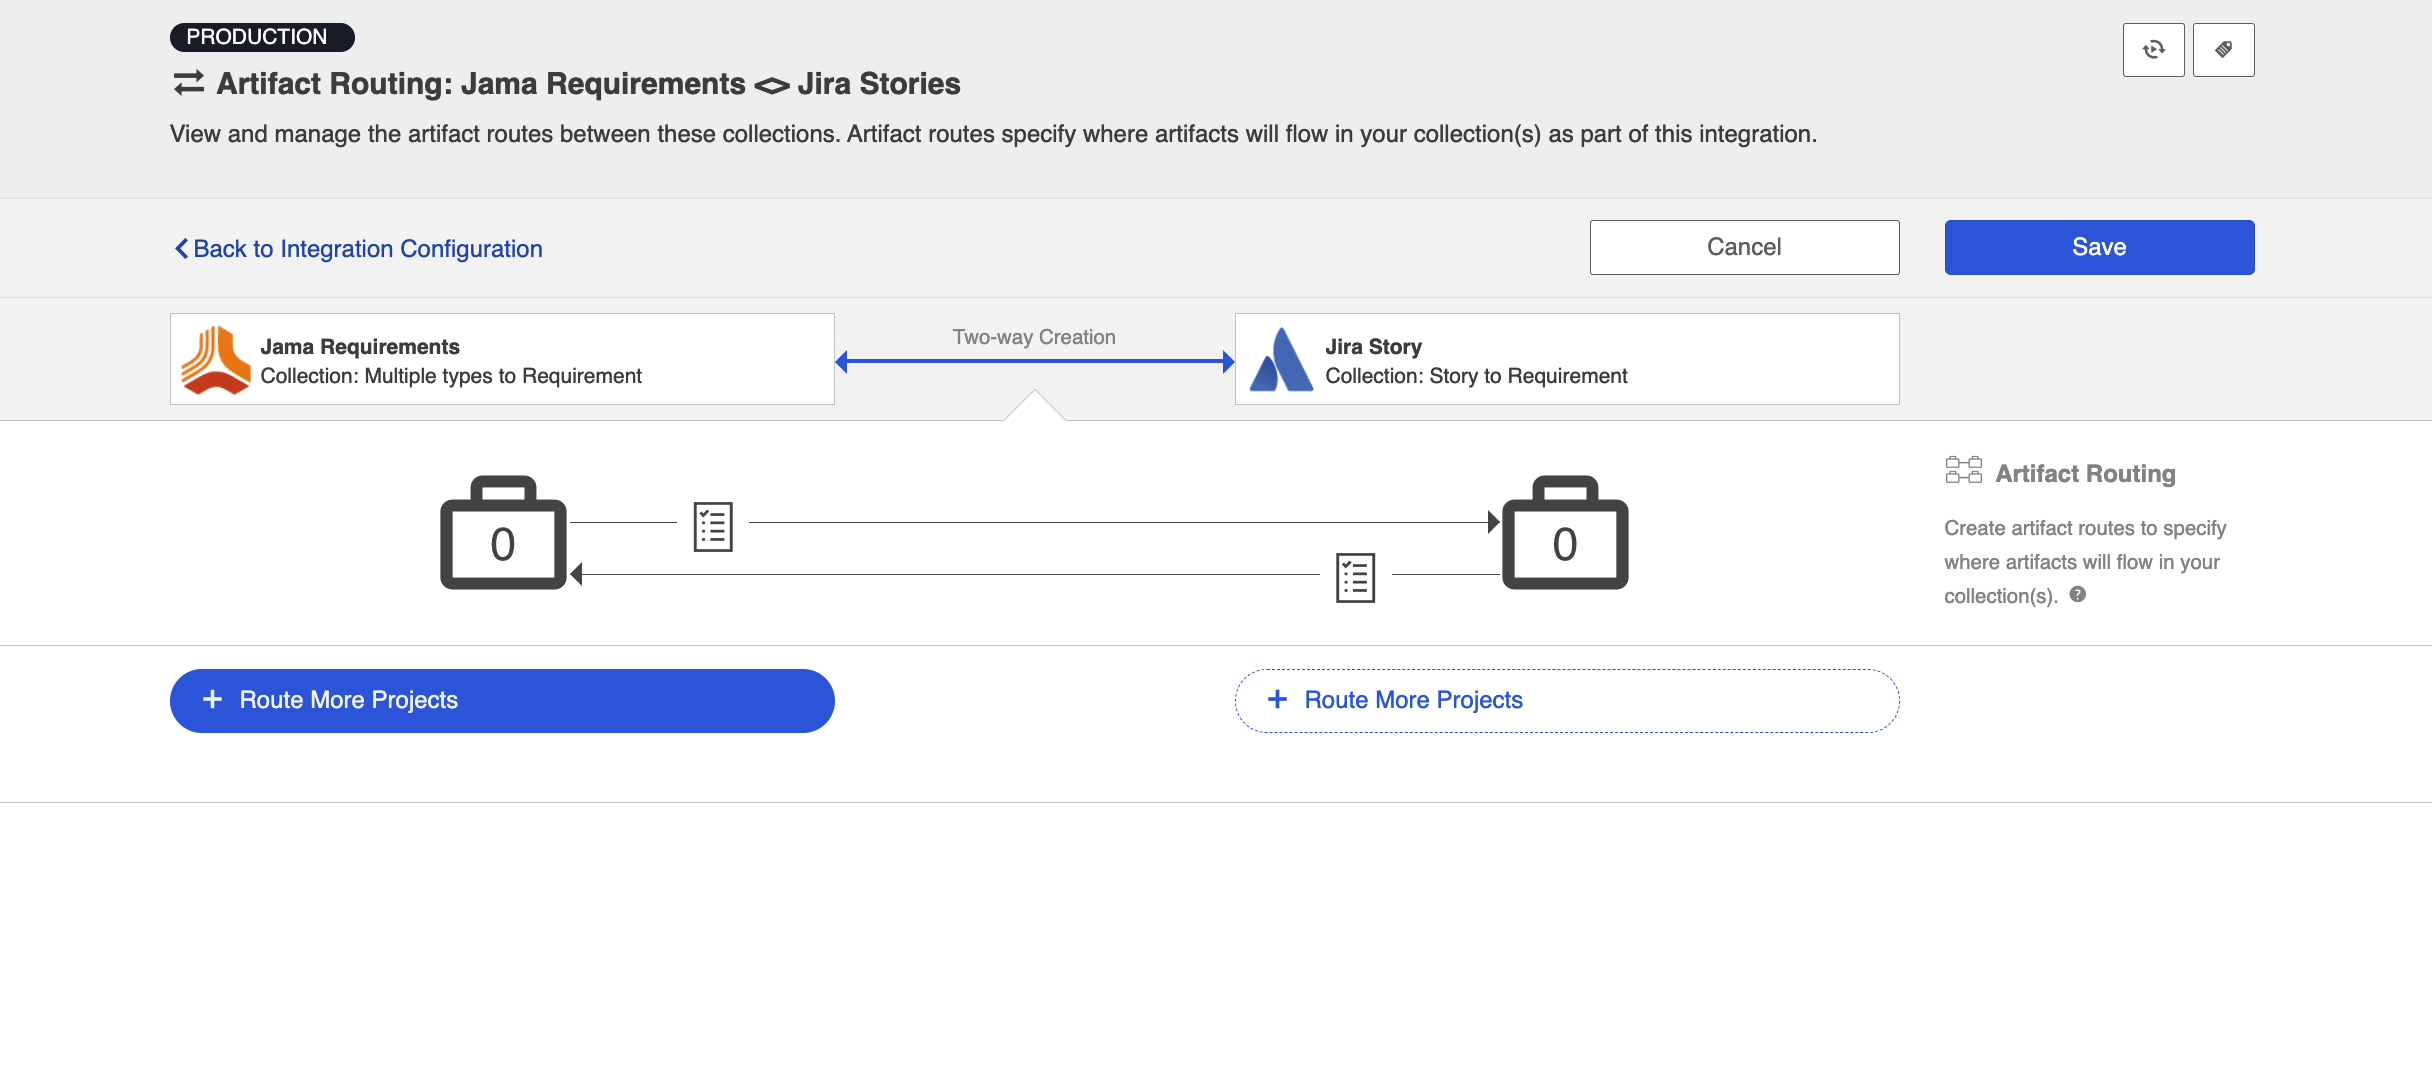
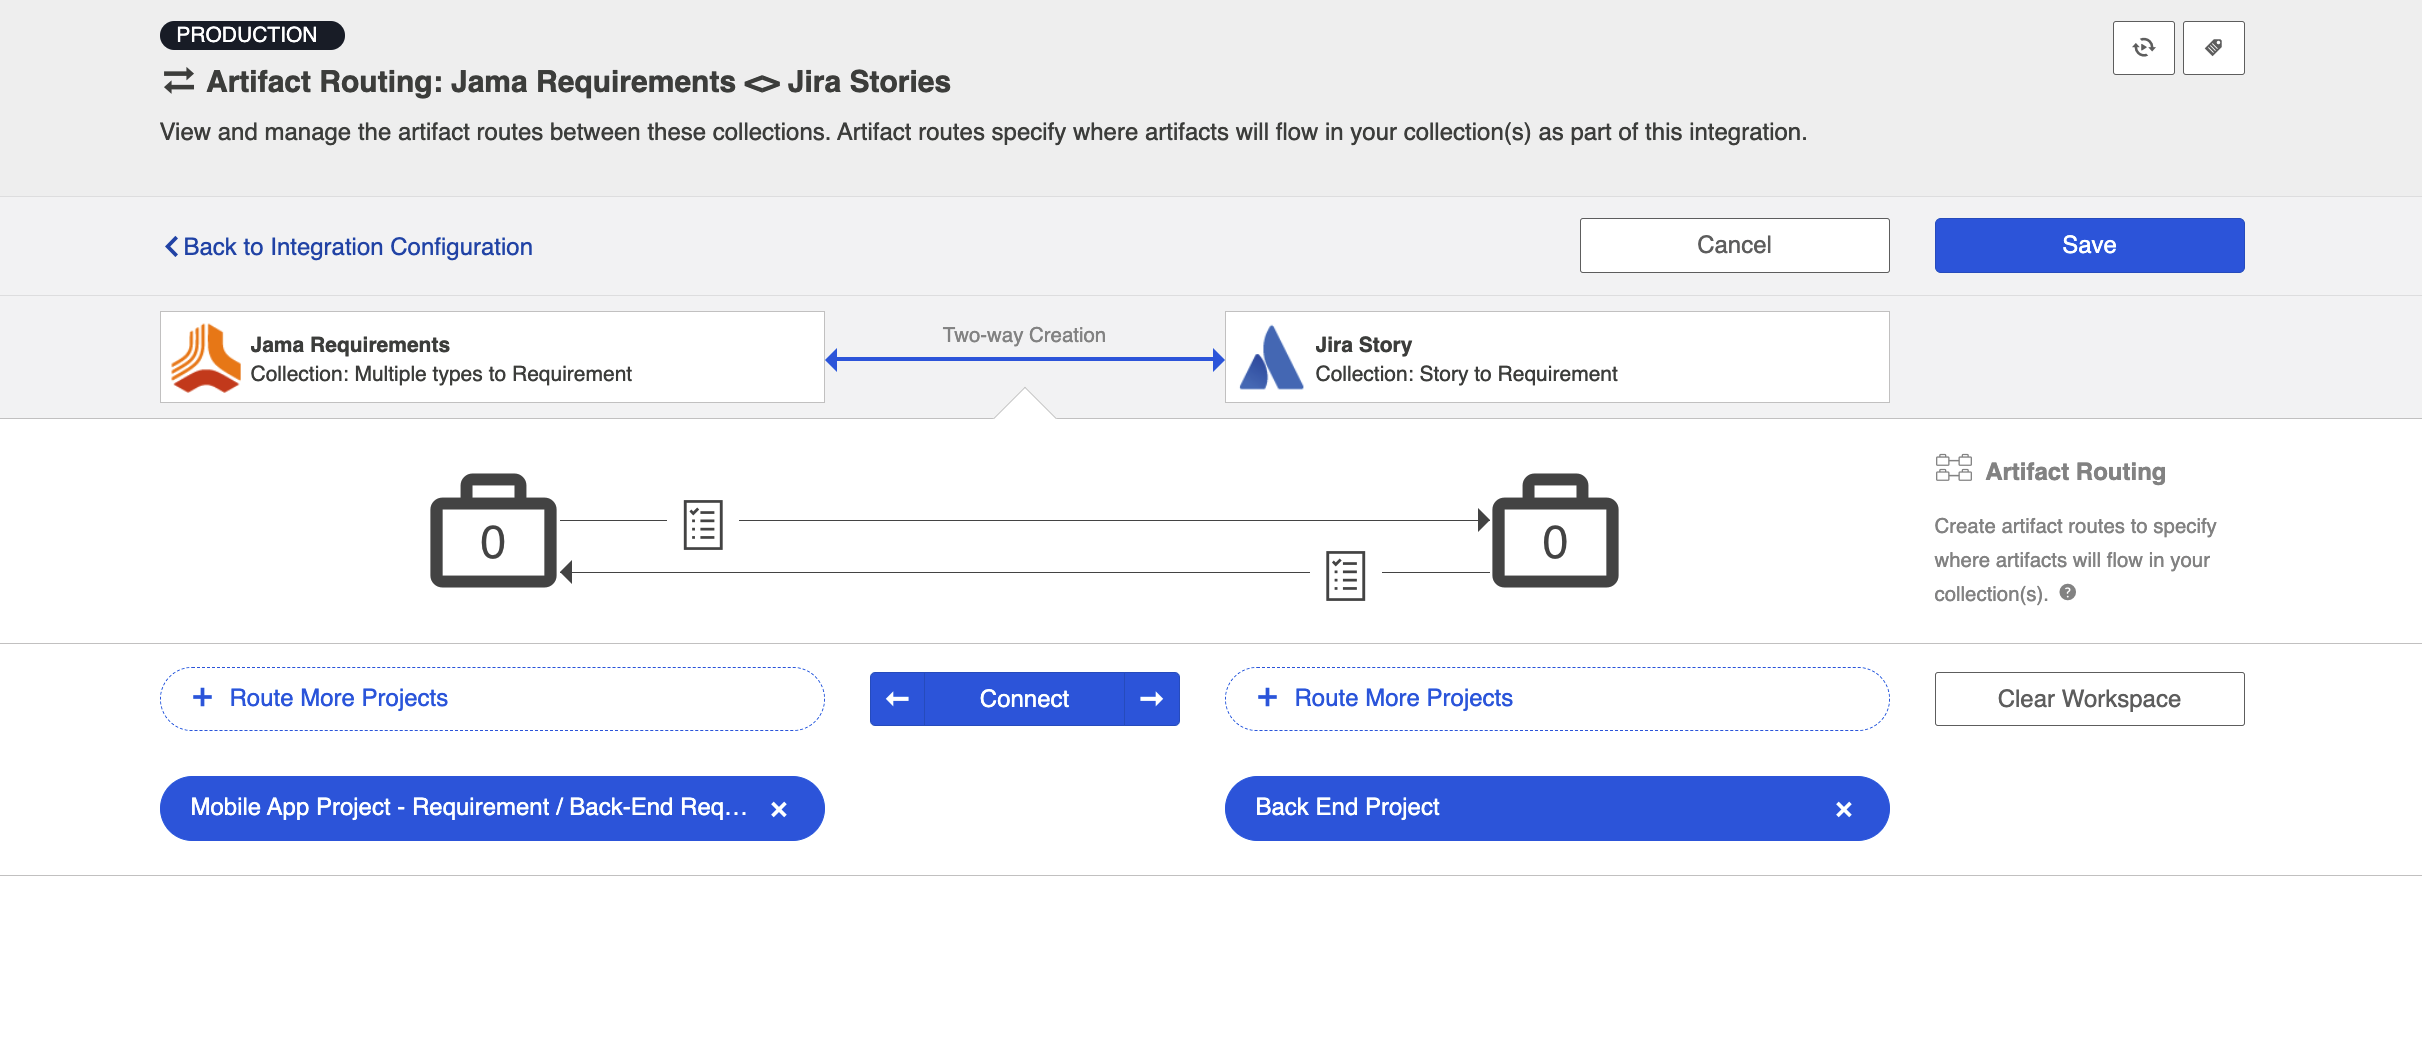
To configure an artifact route, click + Route More Projects.
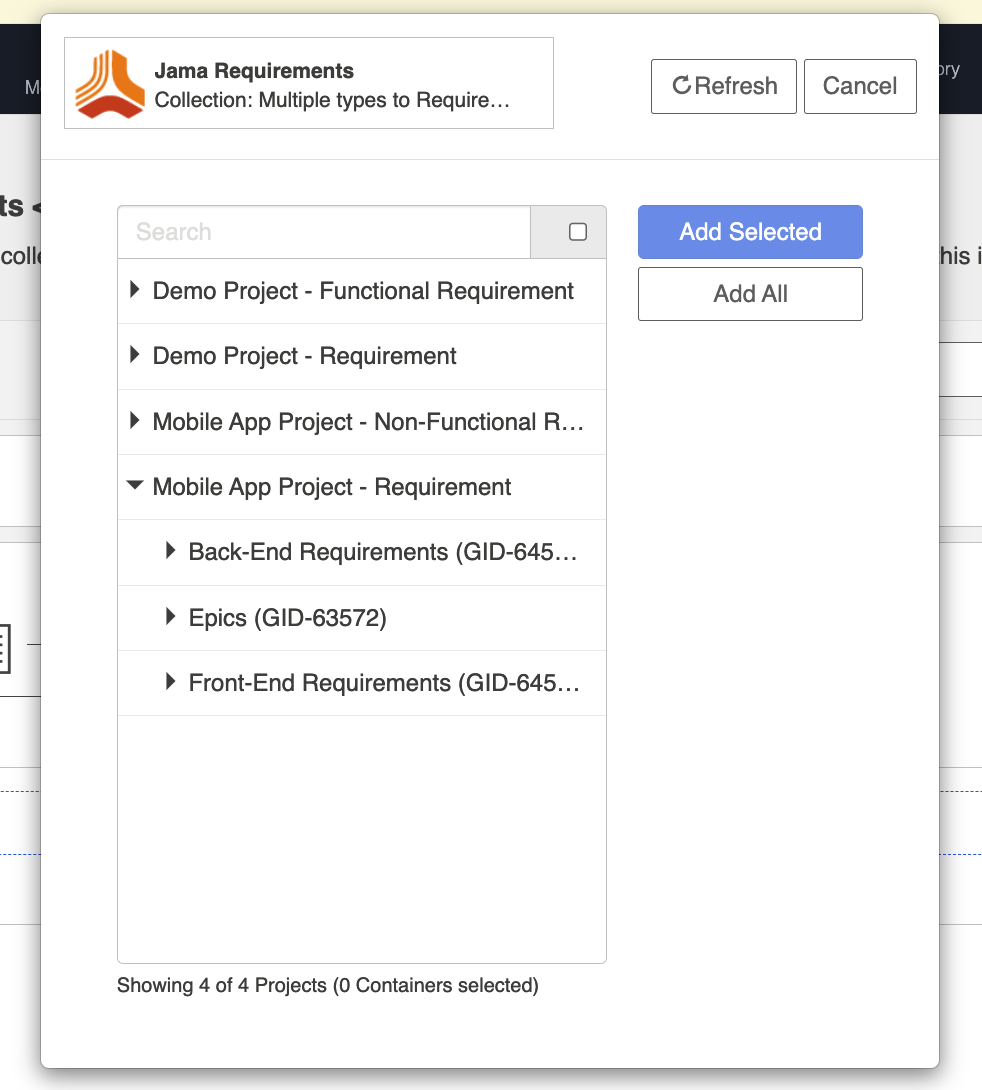
Select the project you'd like to include in your artifact route.
Note: If using the search function, it is important to note that searches are performed based on which projects are visible (i.e., iterative search). For example, in the screenshot below, the Mobile App Project top-level project is expanded and all of its child projects are visible. If the Mobile App Project was collapsed, its child projects would not be visible, thus not searchable.
After you've selected your projects, connect them using the Connect button. The directionality on the connect button refers to artifact creation.
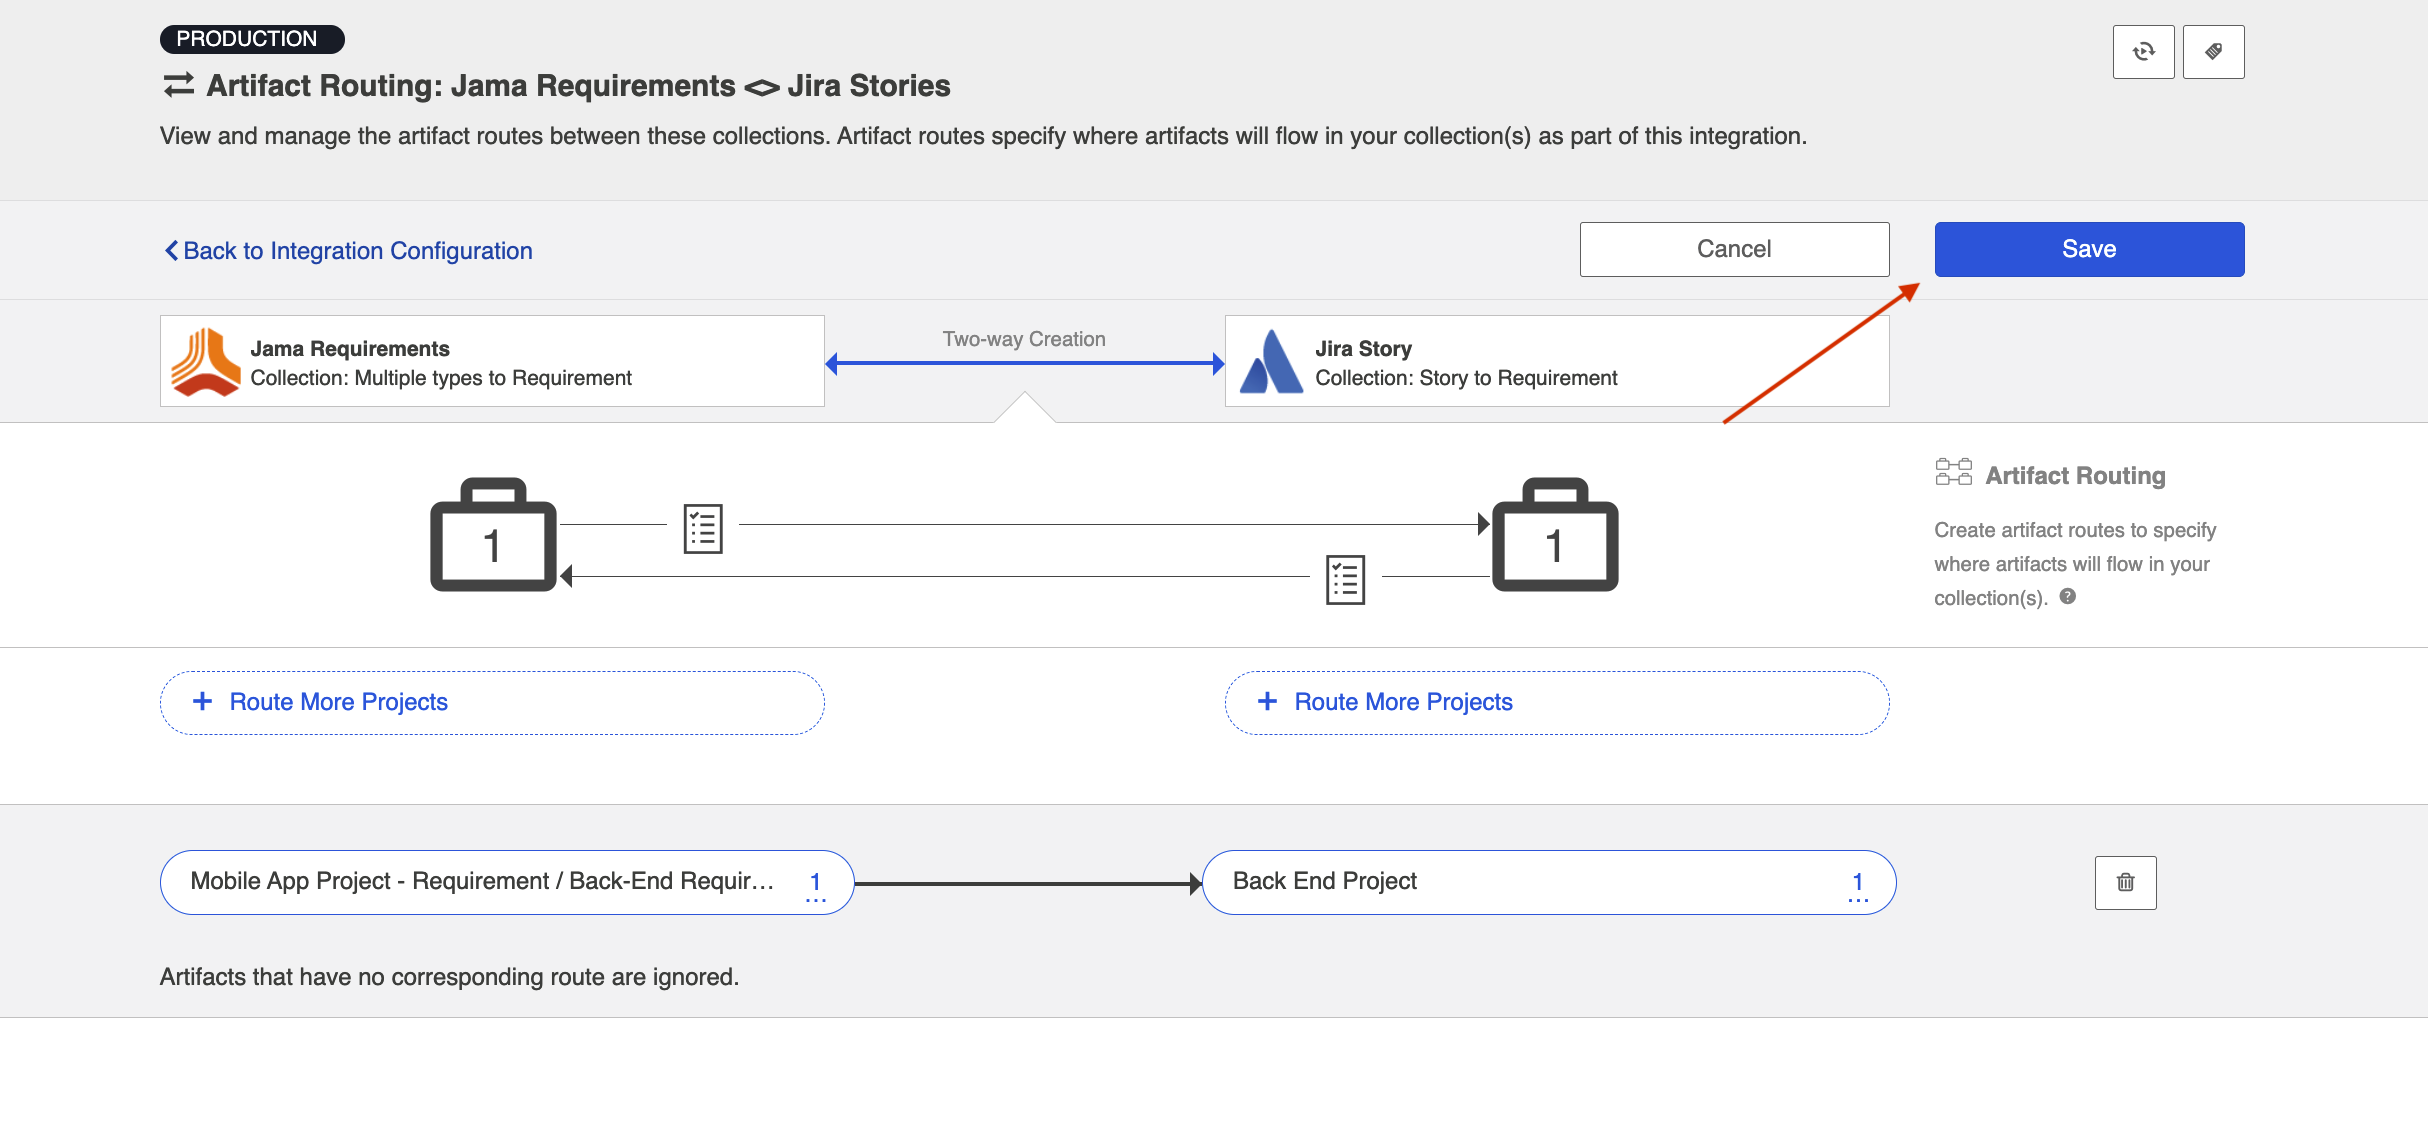
Once you're done updating your artifact routing, click Save and Done.
Static Artifact Routing
In some cases, the project an artifact resides in the source collection can sufficiently determine which project an artifact should be created in the target collection. In these instances, you can configure what is known as 'static artifact routing' (also known as 'explicit artifact routing').
Static artifact routes can have one or more source projects, but only a single target project.
To configure a static artifact route, use the Route More Projects buttons to add projects from your collections to your working space and connect them using the Connect button. The directionality on the connect button refers to artifact creation.
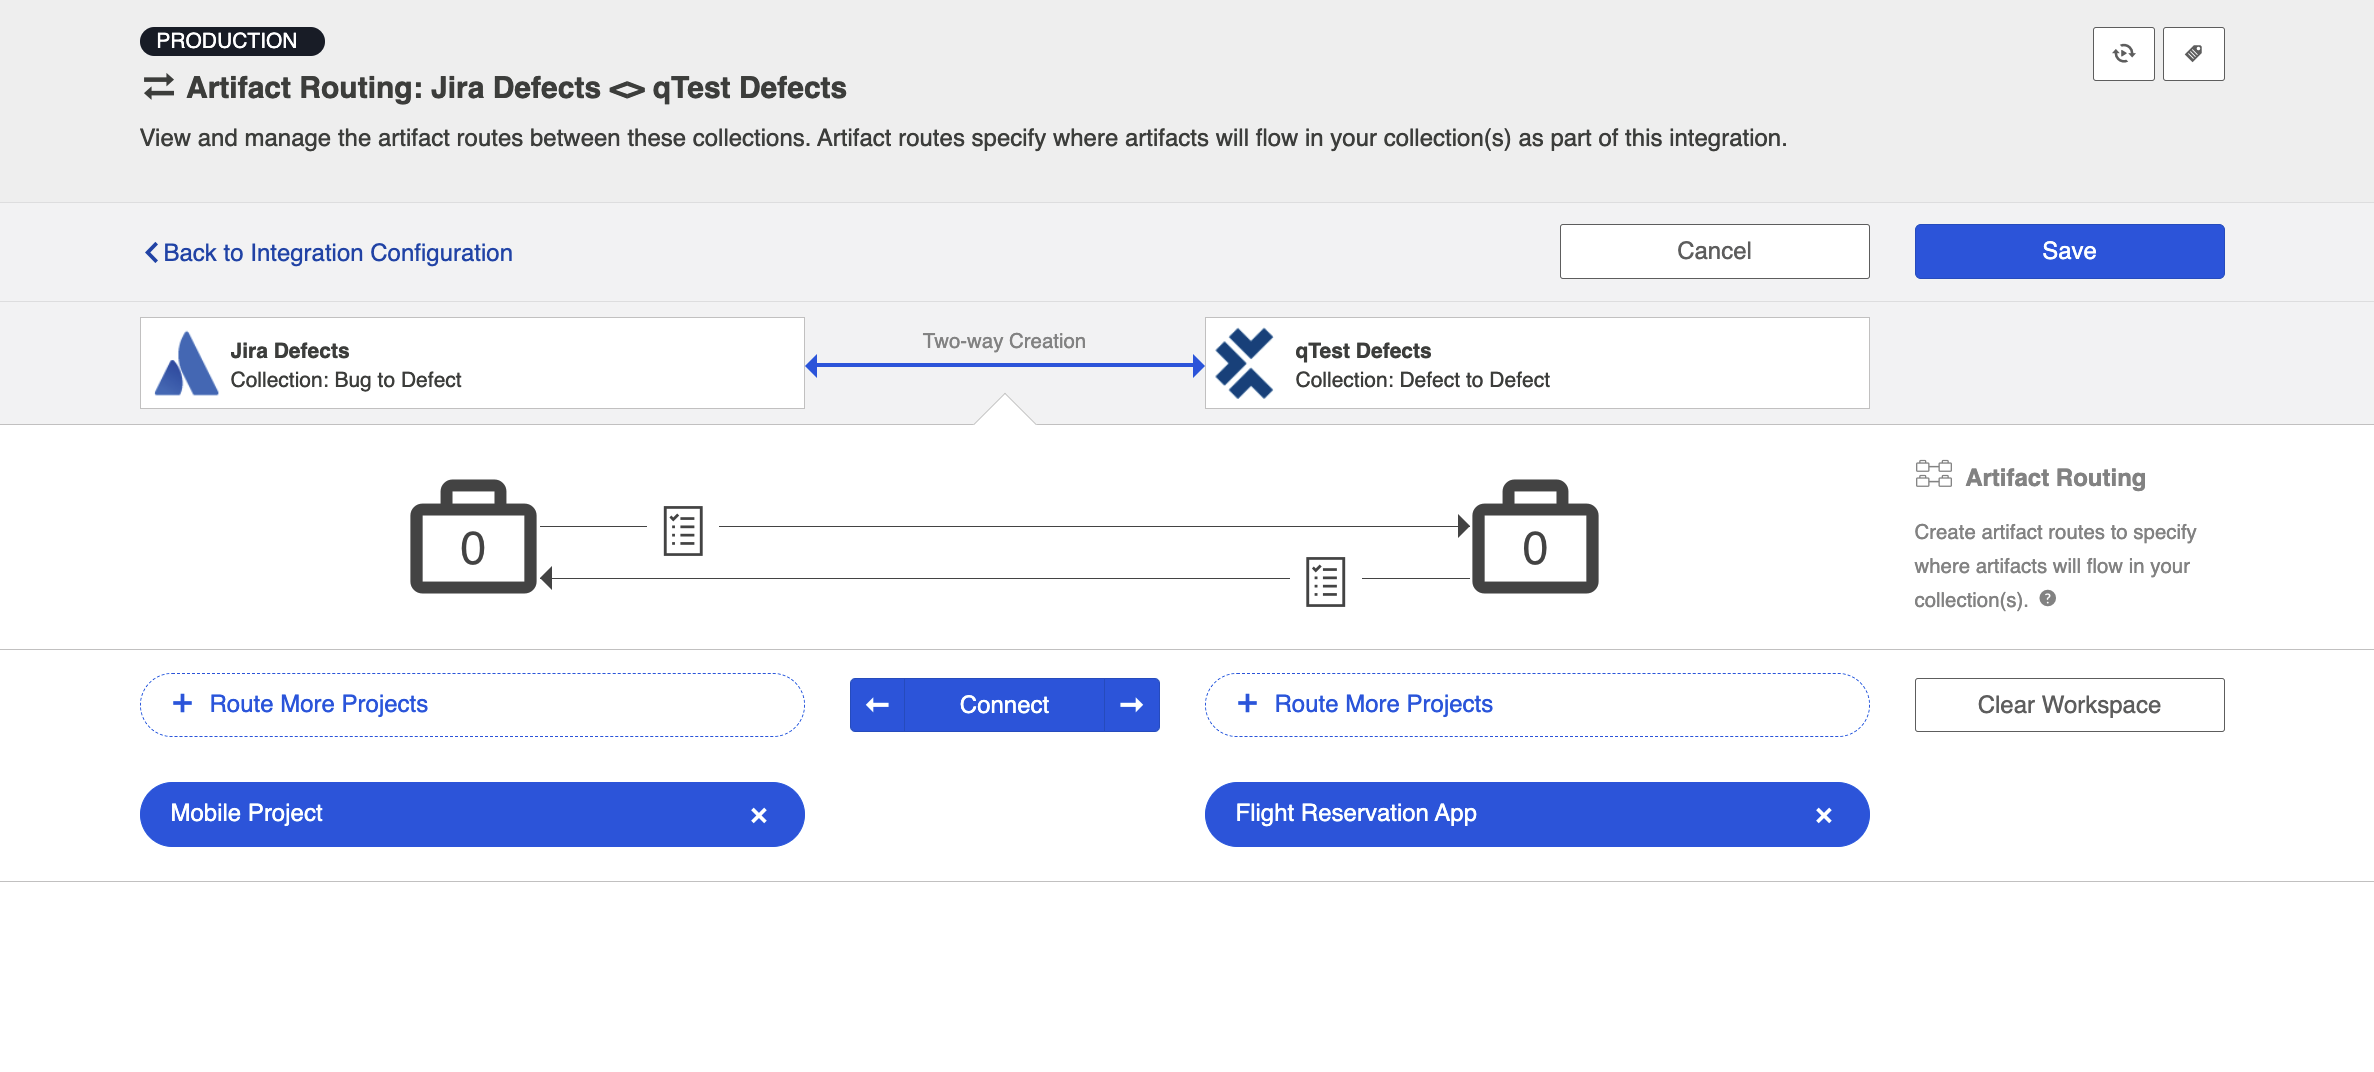
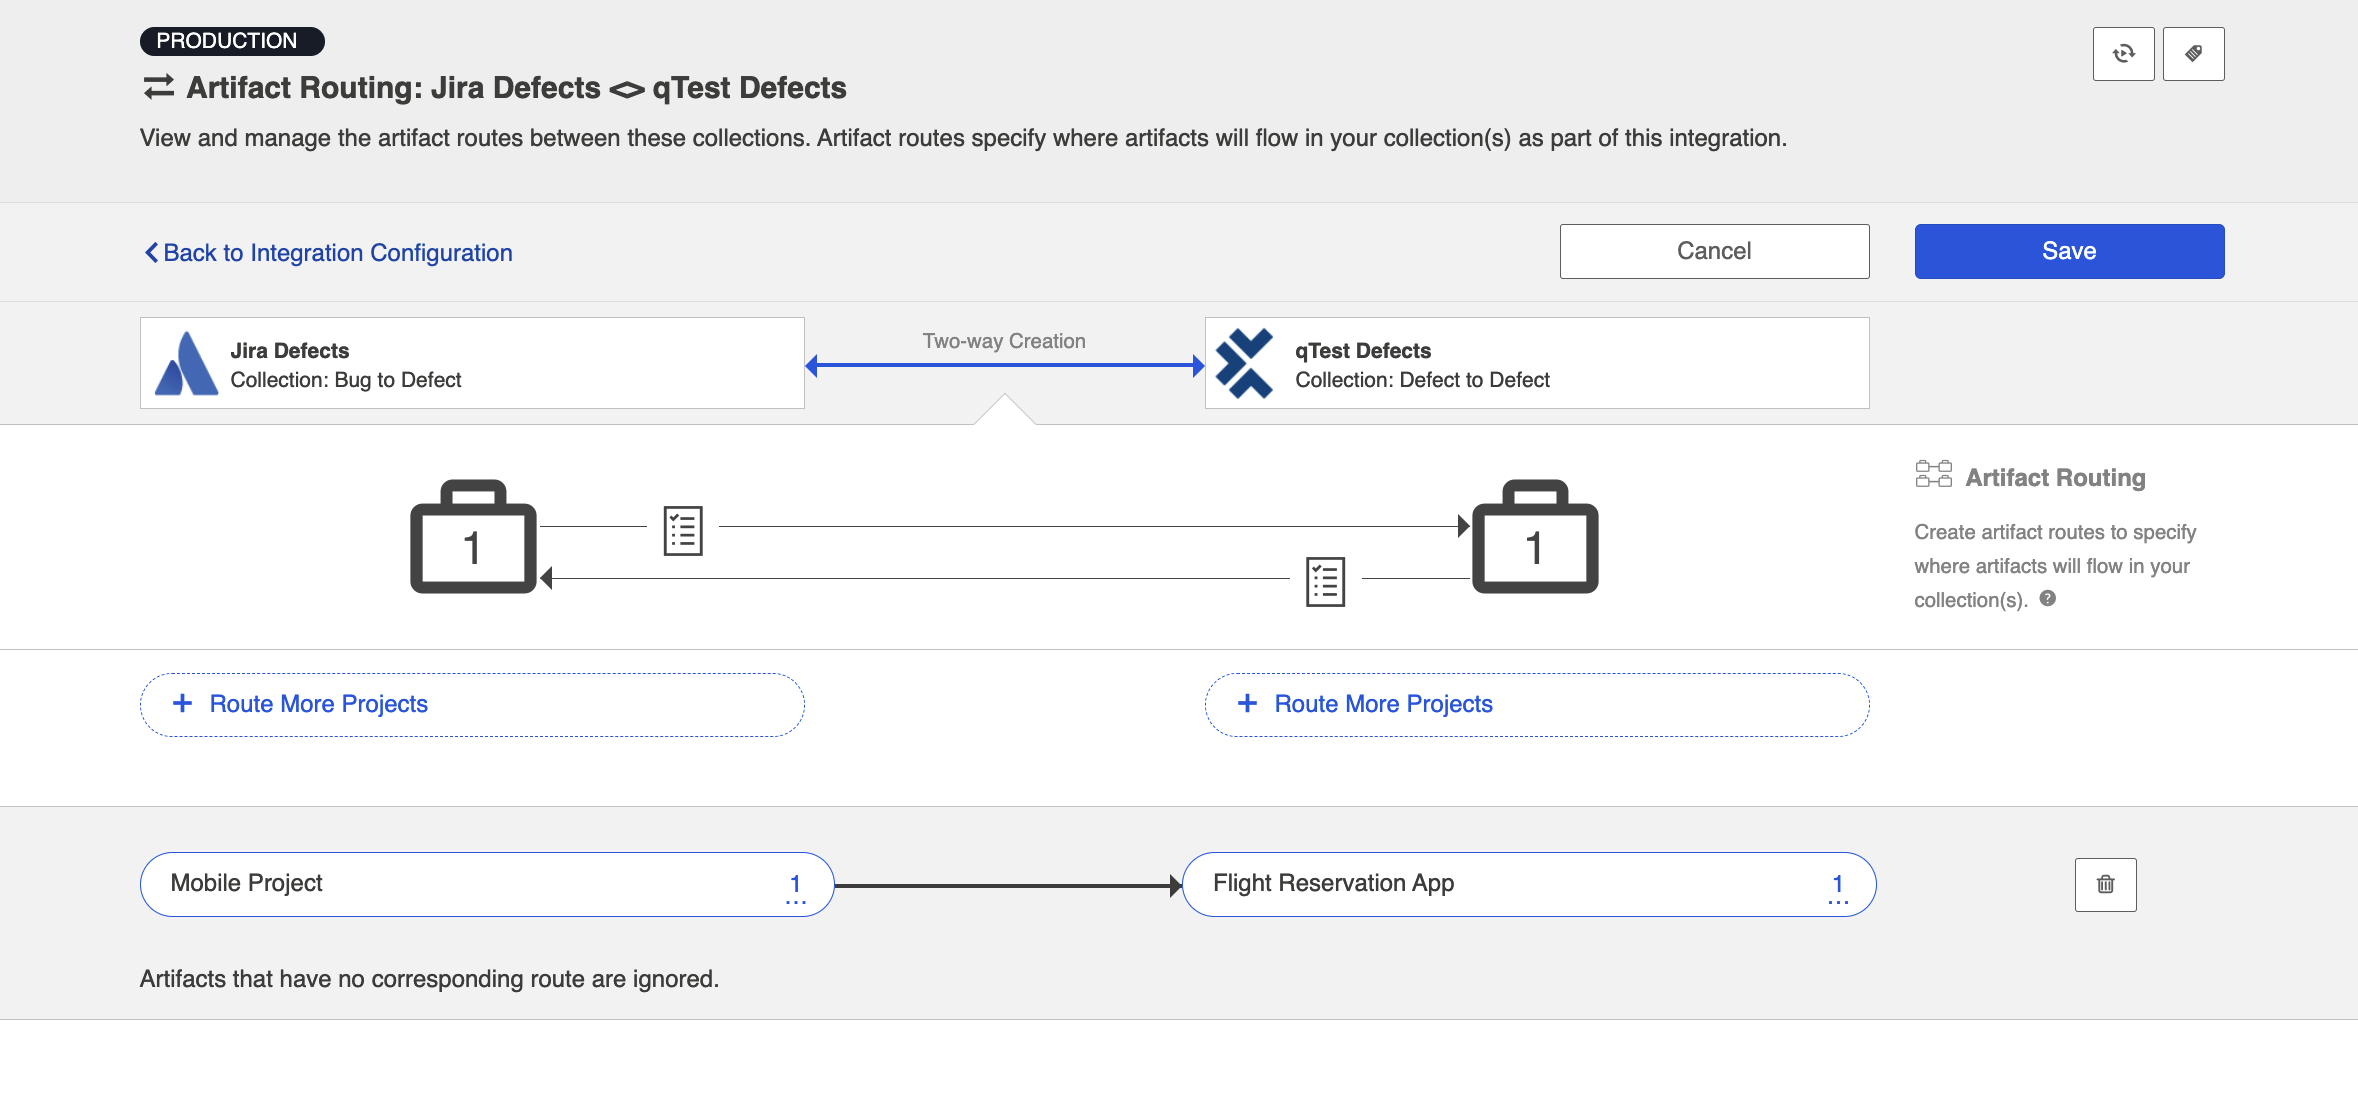
In the example shown below, artifacts from the Jira Mobile Project will be created in the Flight Reservation App project in qTest.
Conditional Artifact Routing
Check out the video below to learn more about Conditional Artifact Routing:
Note: The video above demonstrates Conditional Artifact Routing within the context of a Create via Gateway Integration. Create via Gateway Integrations are only available in editions that contain the Gateway add-on. See the Planview Hub Editions table to determine if your edition contains this functionality. Though the video is for a Gateway Integration, the core concepts outlined in the video can be applied to any integration template.
In some cases, the project an artifact is in within the source repository does not provide enough information to determine which project the artifact should be created in within its target repository. Oftentimes, in fact, some unique characteristic of an artifact, such as a specific field value, is the factor that should be used to determine which project an artifact should be created in within the target repository.
In these instances, you will configure what is known as conditional artifact routing to determine which project each artifact is created in within your target repository. Conditional artifact routing (also known as 'dynamic artifact routing') can be used to inspect a single-select field of an artifact and, depending on its value, to route that artifact to the appropriate project in the target collection.
Conditional artifact routes can have one or more source projects, and always have multiple target projects.

To create a conditional artifact route, use the Route More Projects buttons to add projects from your collections to your workspace and connect them using the Connect button.
Notice that after you've created your conditional artifact routing group, you'll be prompted to configure your route.
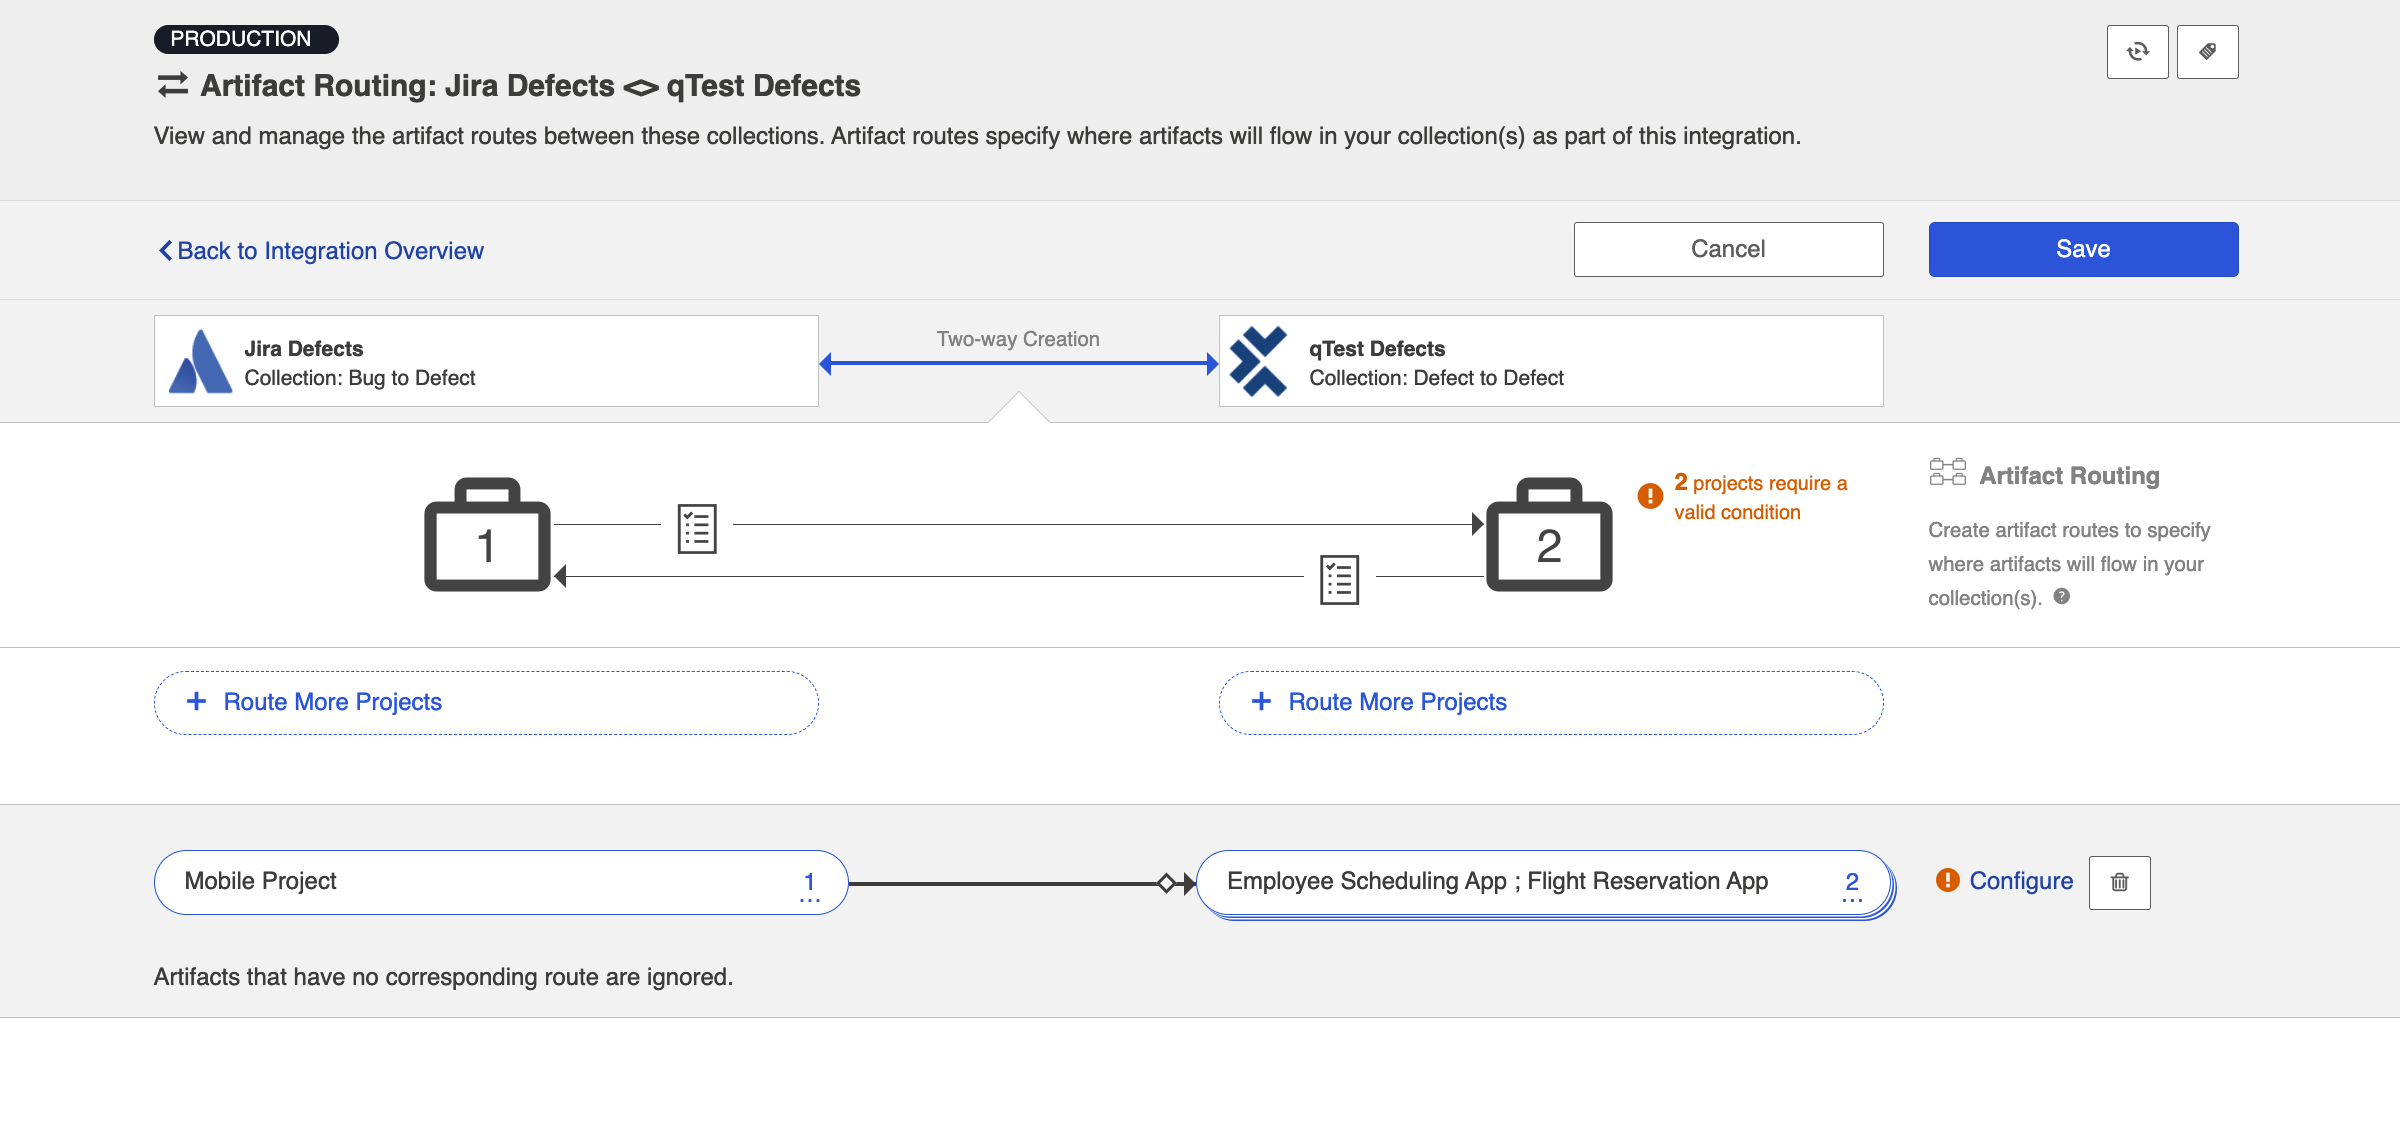
Click Save and then click Configure.
Tip: Clicking ctrl+s on Windows and cmd+s on macOS will save your configuration.
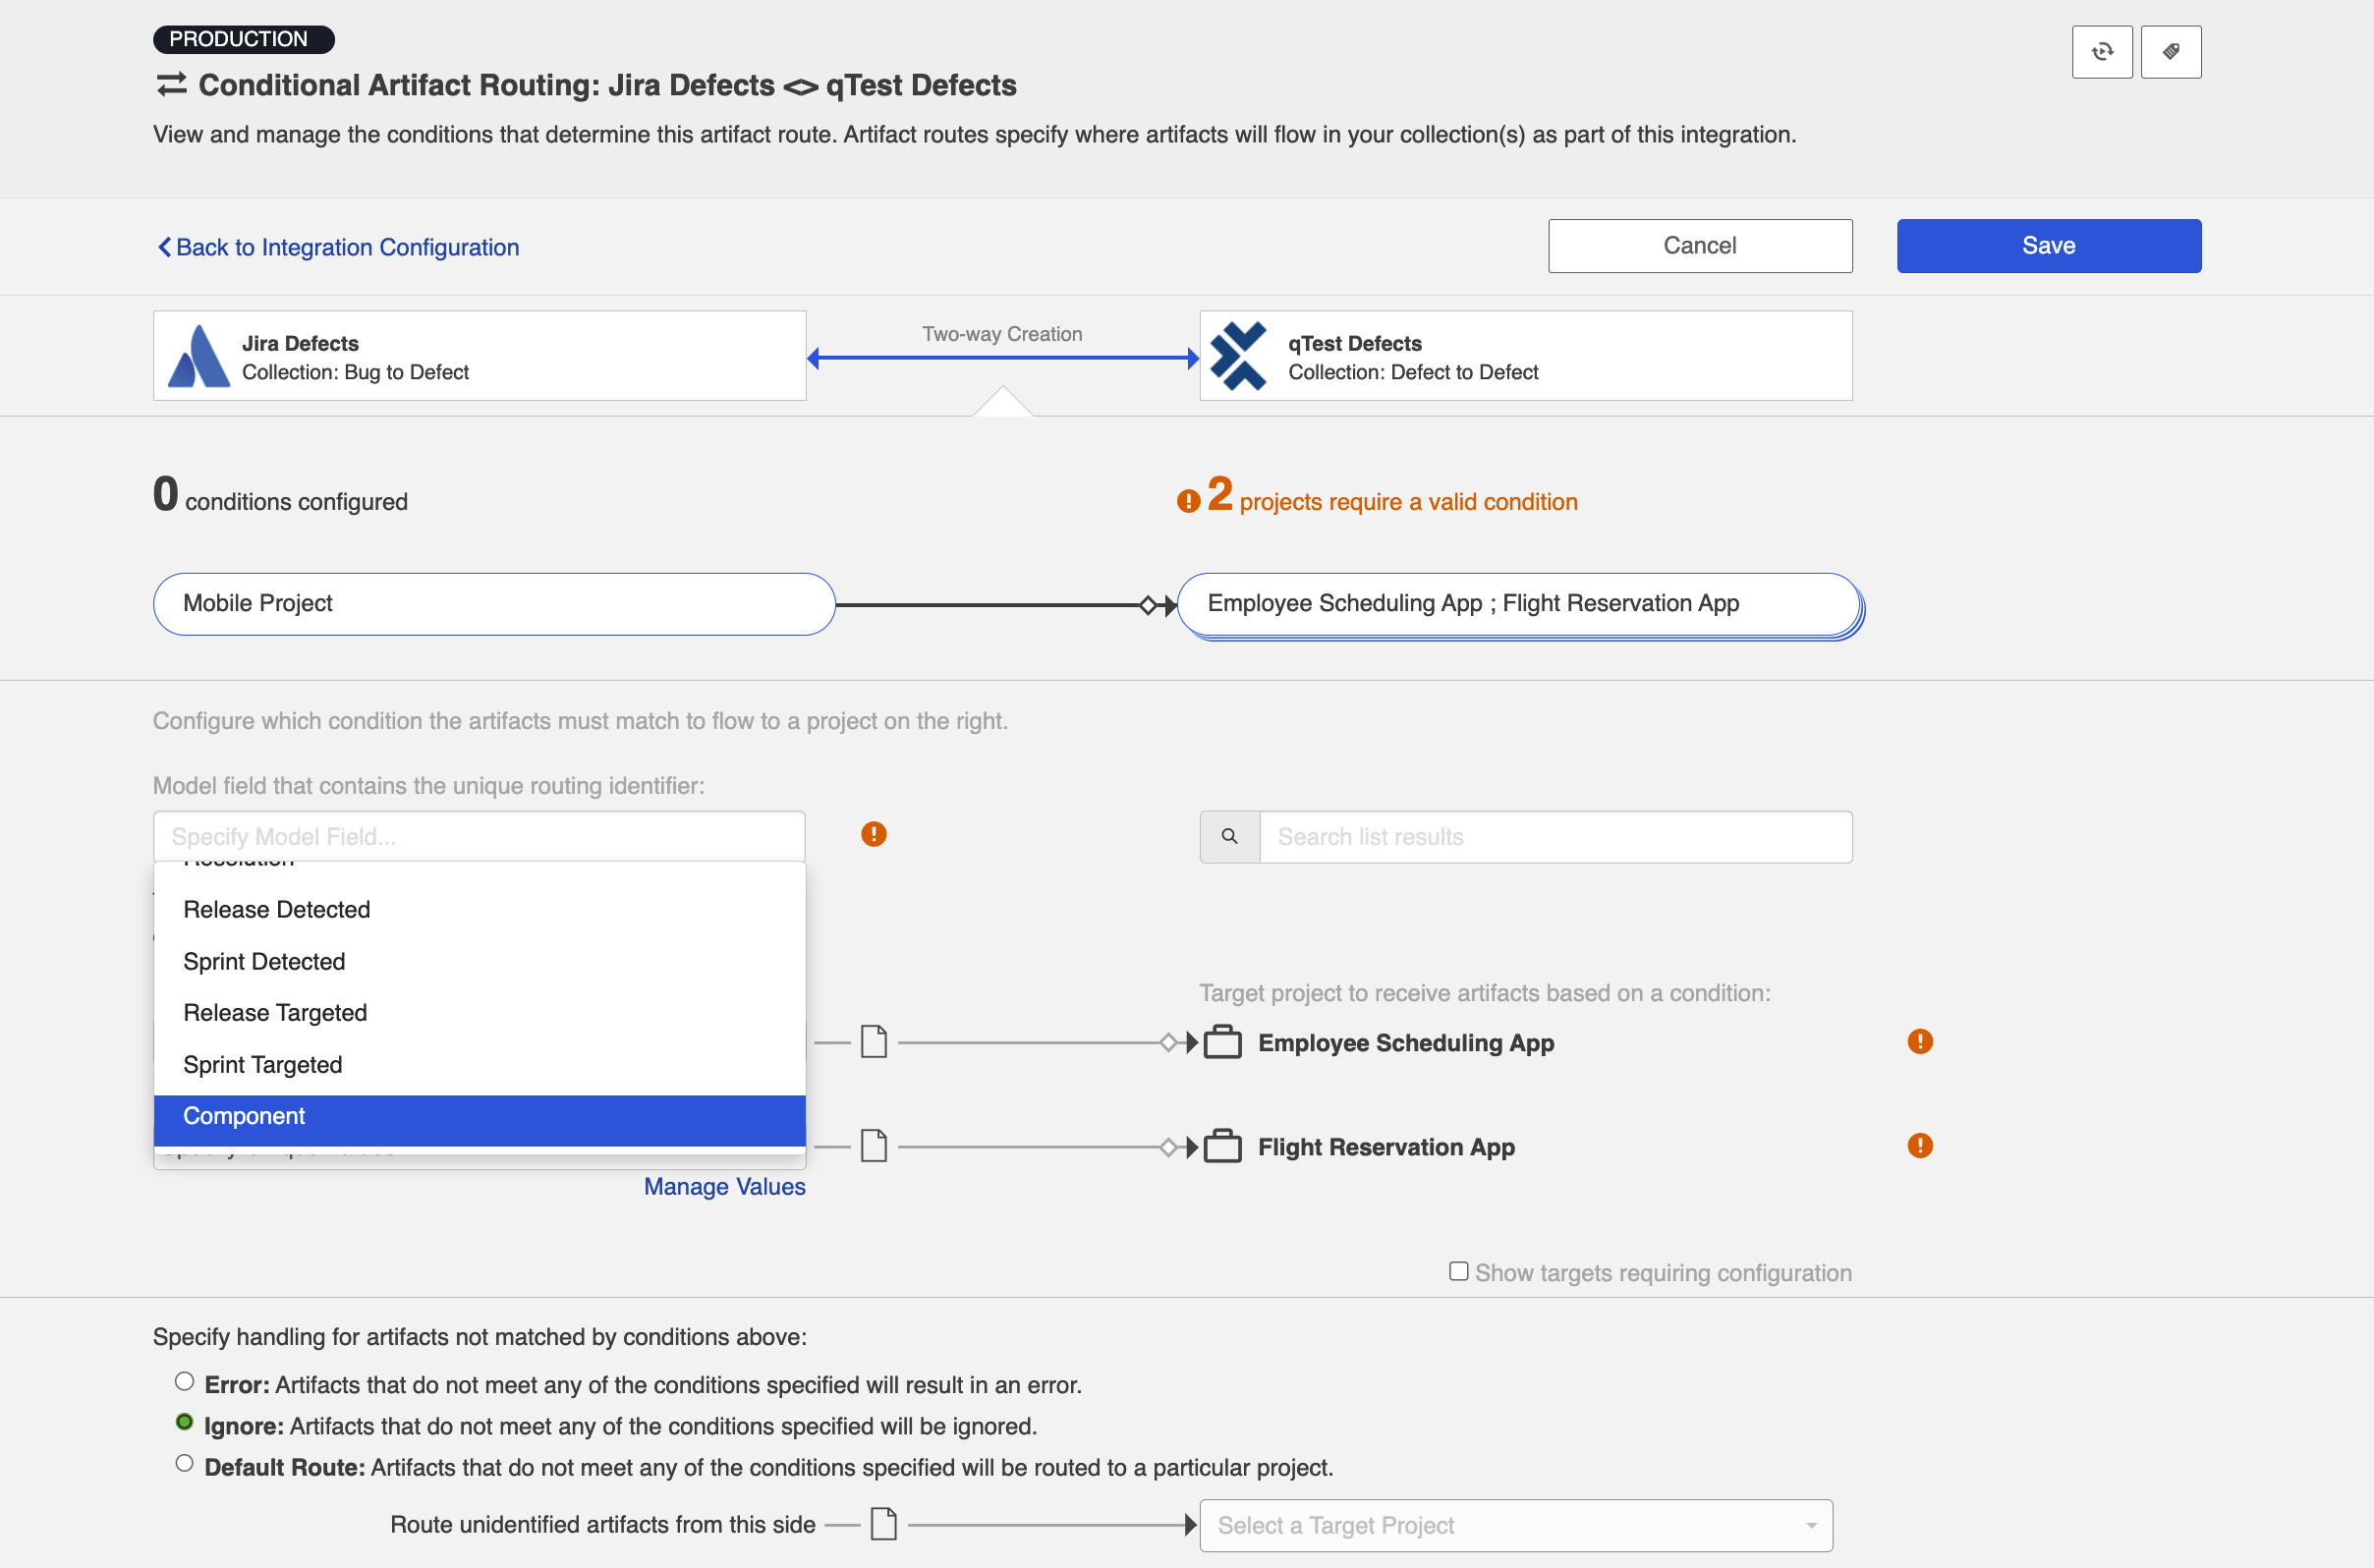
You'll be brought to the Conditional Artifact Routing screen. Here you'll start by selecting the model field that you would like to use to determine your artifact route.
Note: Conditional Artifact Routes can only be configured based on single-select fields in your model.
In the example below, the field "Component" contains the unique values that should determine the project an artifact will be created in qTest.
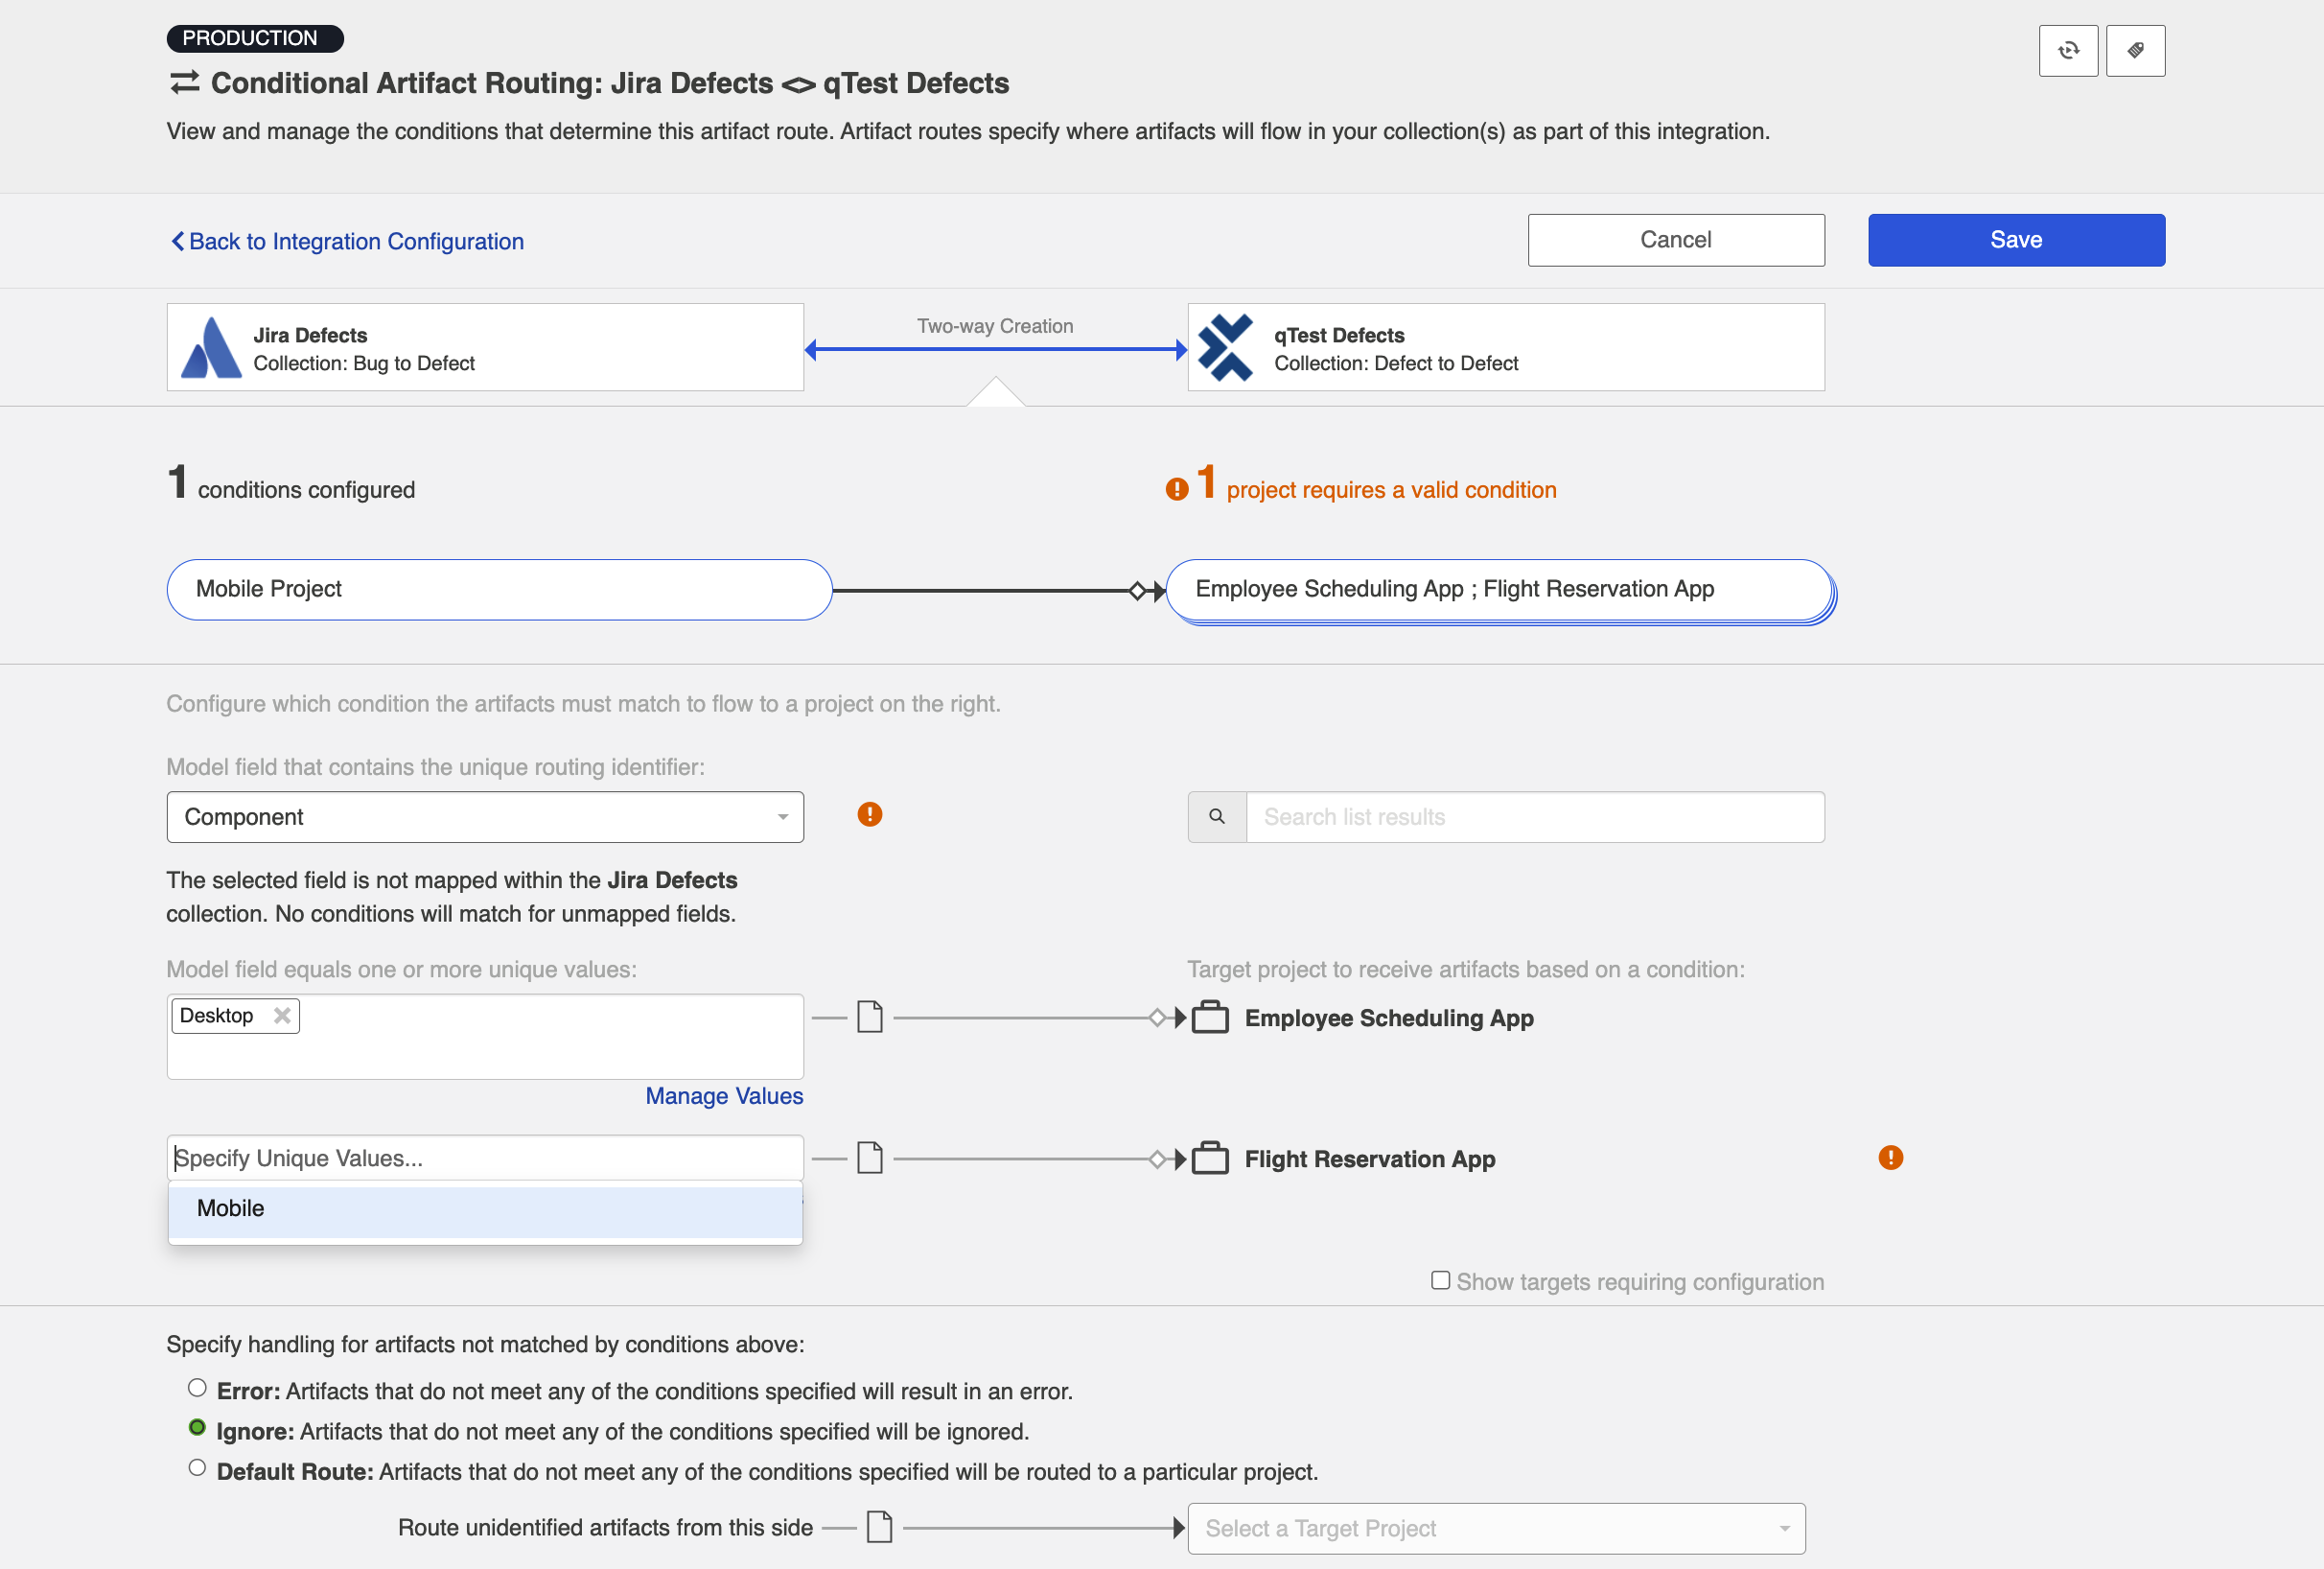
After you select the model field, you can identify one or more value to correspond to each target project. You can also use the Manage Values link to select from a list of values.
Once you've done this, you'll see your full conditional artifact routing group:
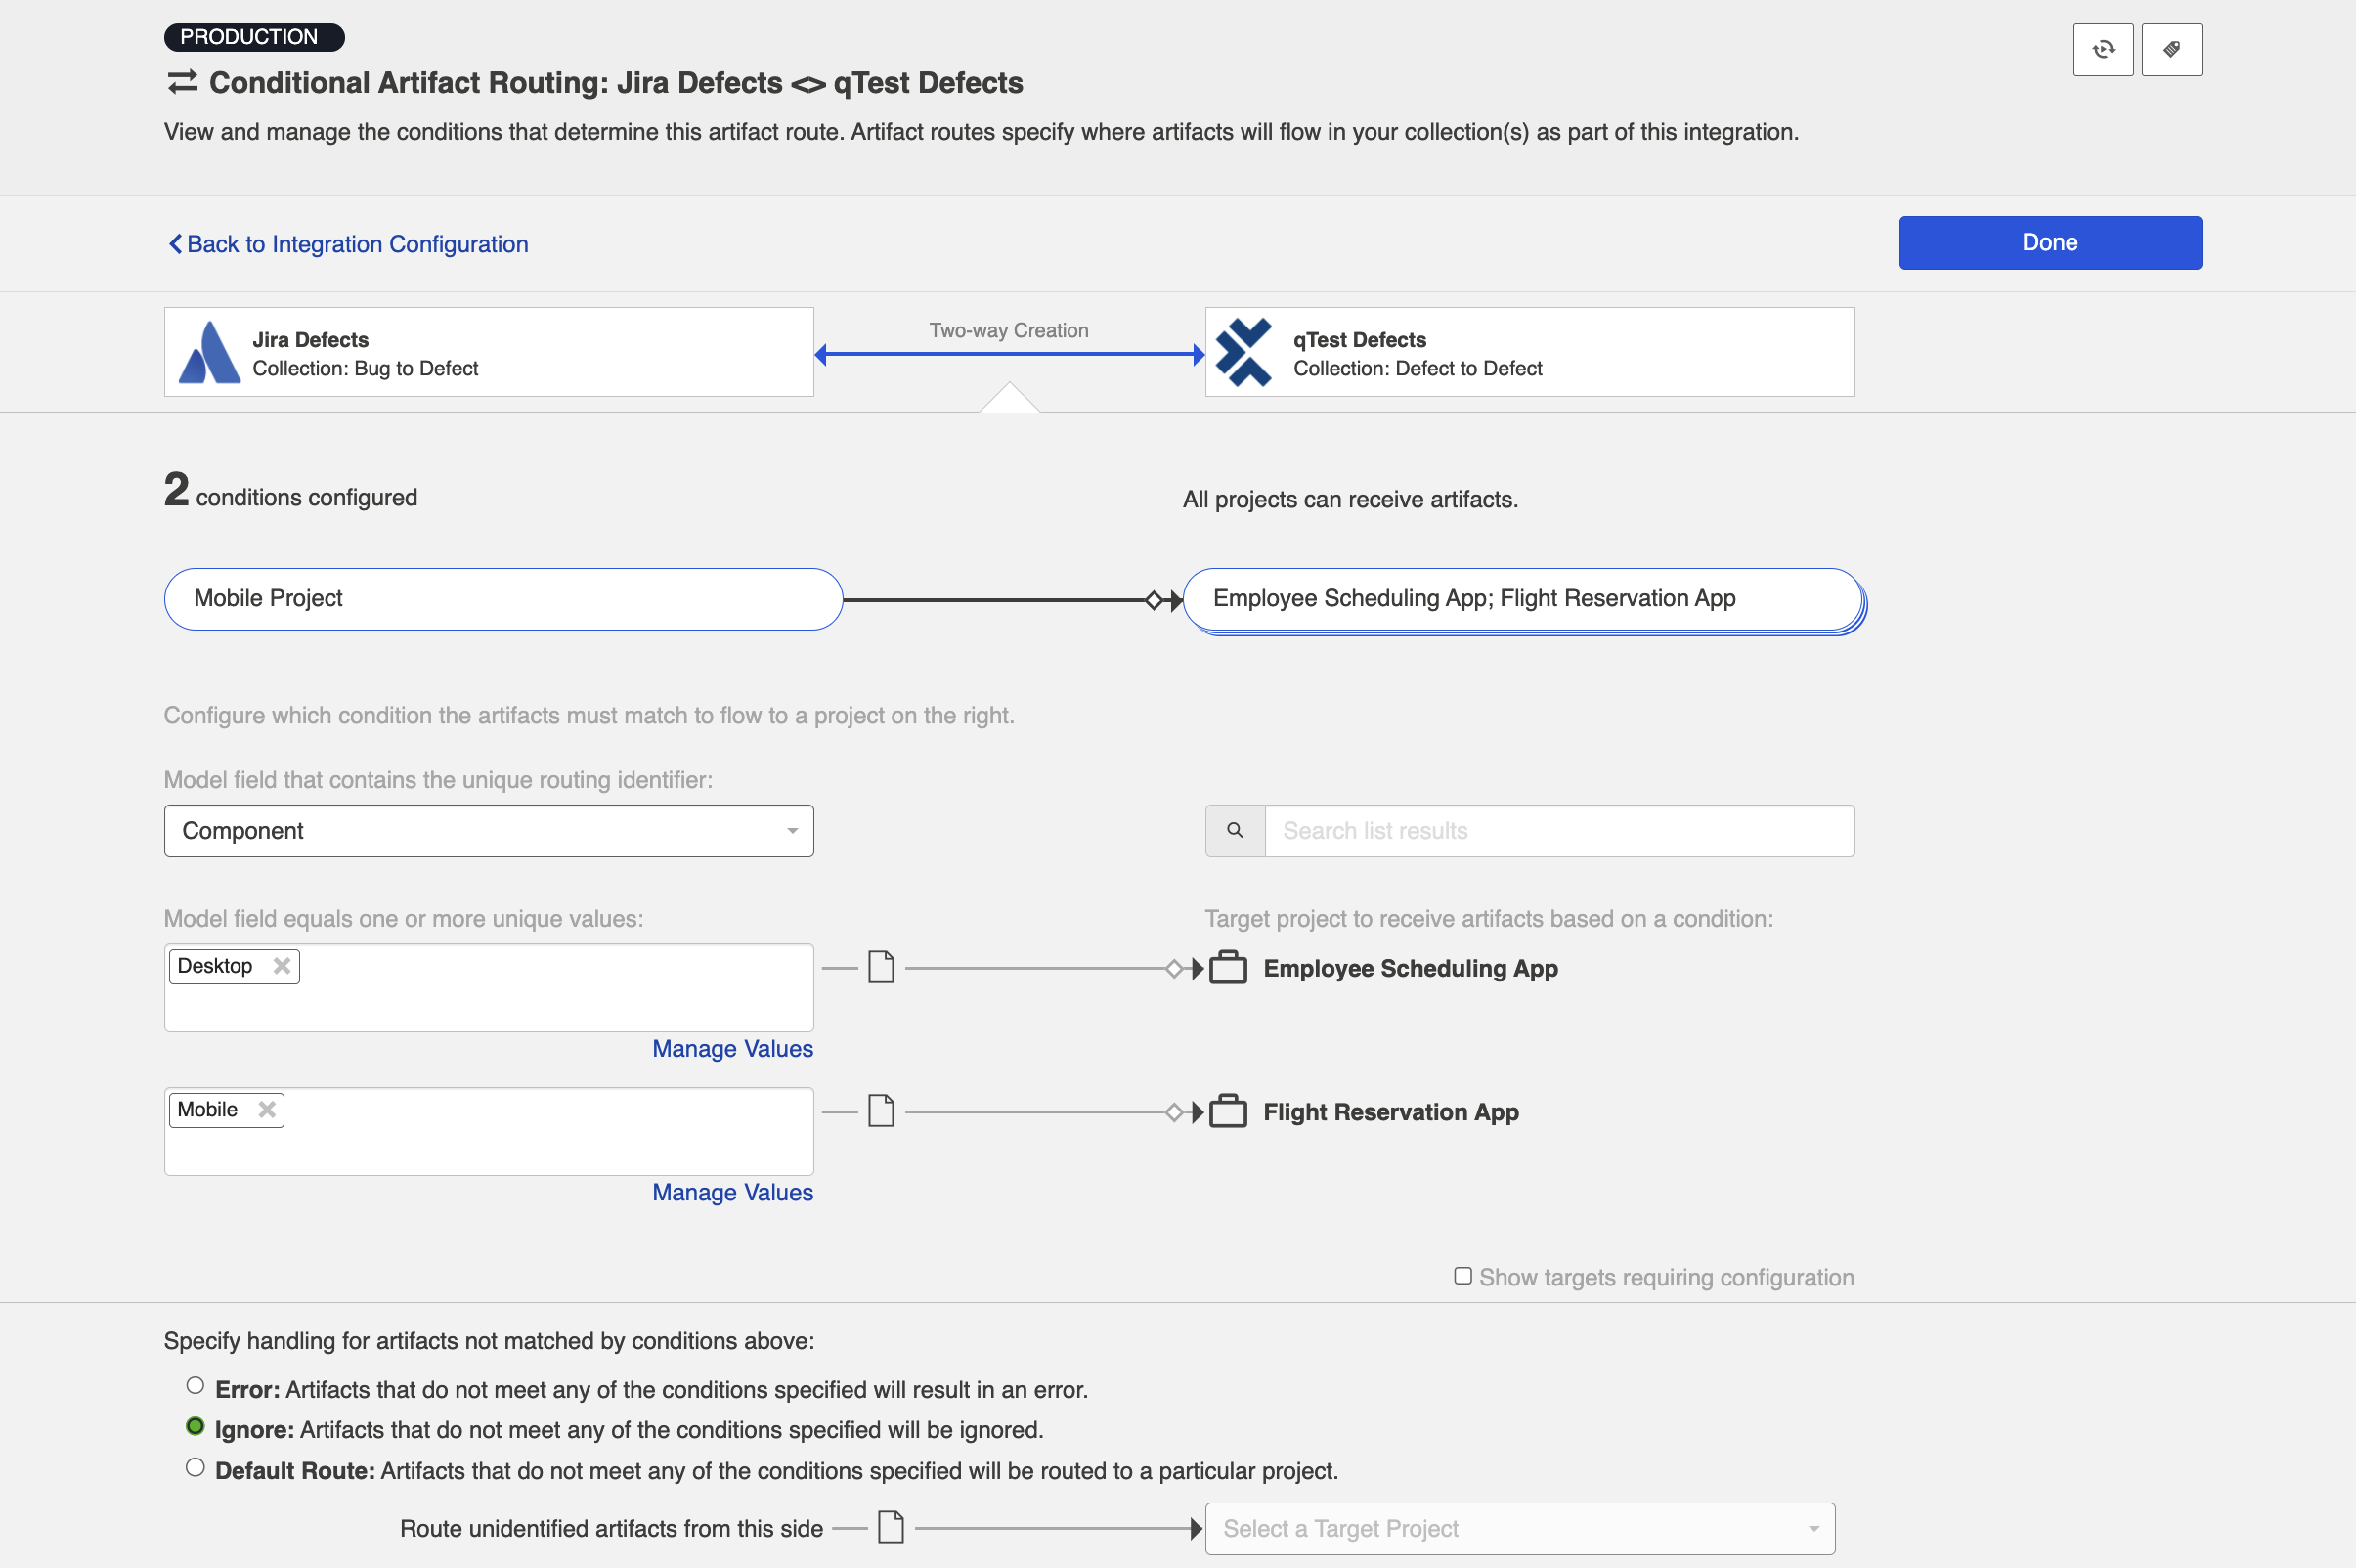
You can specify how you'd like to handle artifacts that do not meet any of the conditions specified by selecting one of the options provided at the bottom of the screen:

Next Steps
Once you've configured your Artifact Routing configuration, your next step will be to review your Artifact Filtering.