
Step 2: Create or Reuse a Model
What is a Model?

A model is a tool that makes the integration process scalable by defining the fields for each artifact type you would like to integrate. By mapping collections to the same model, you will be able to easily add new repositories and new projects within those repositories to your integration landscape. You can learn more about models in the Key Concepts.
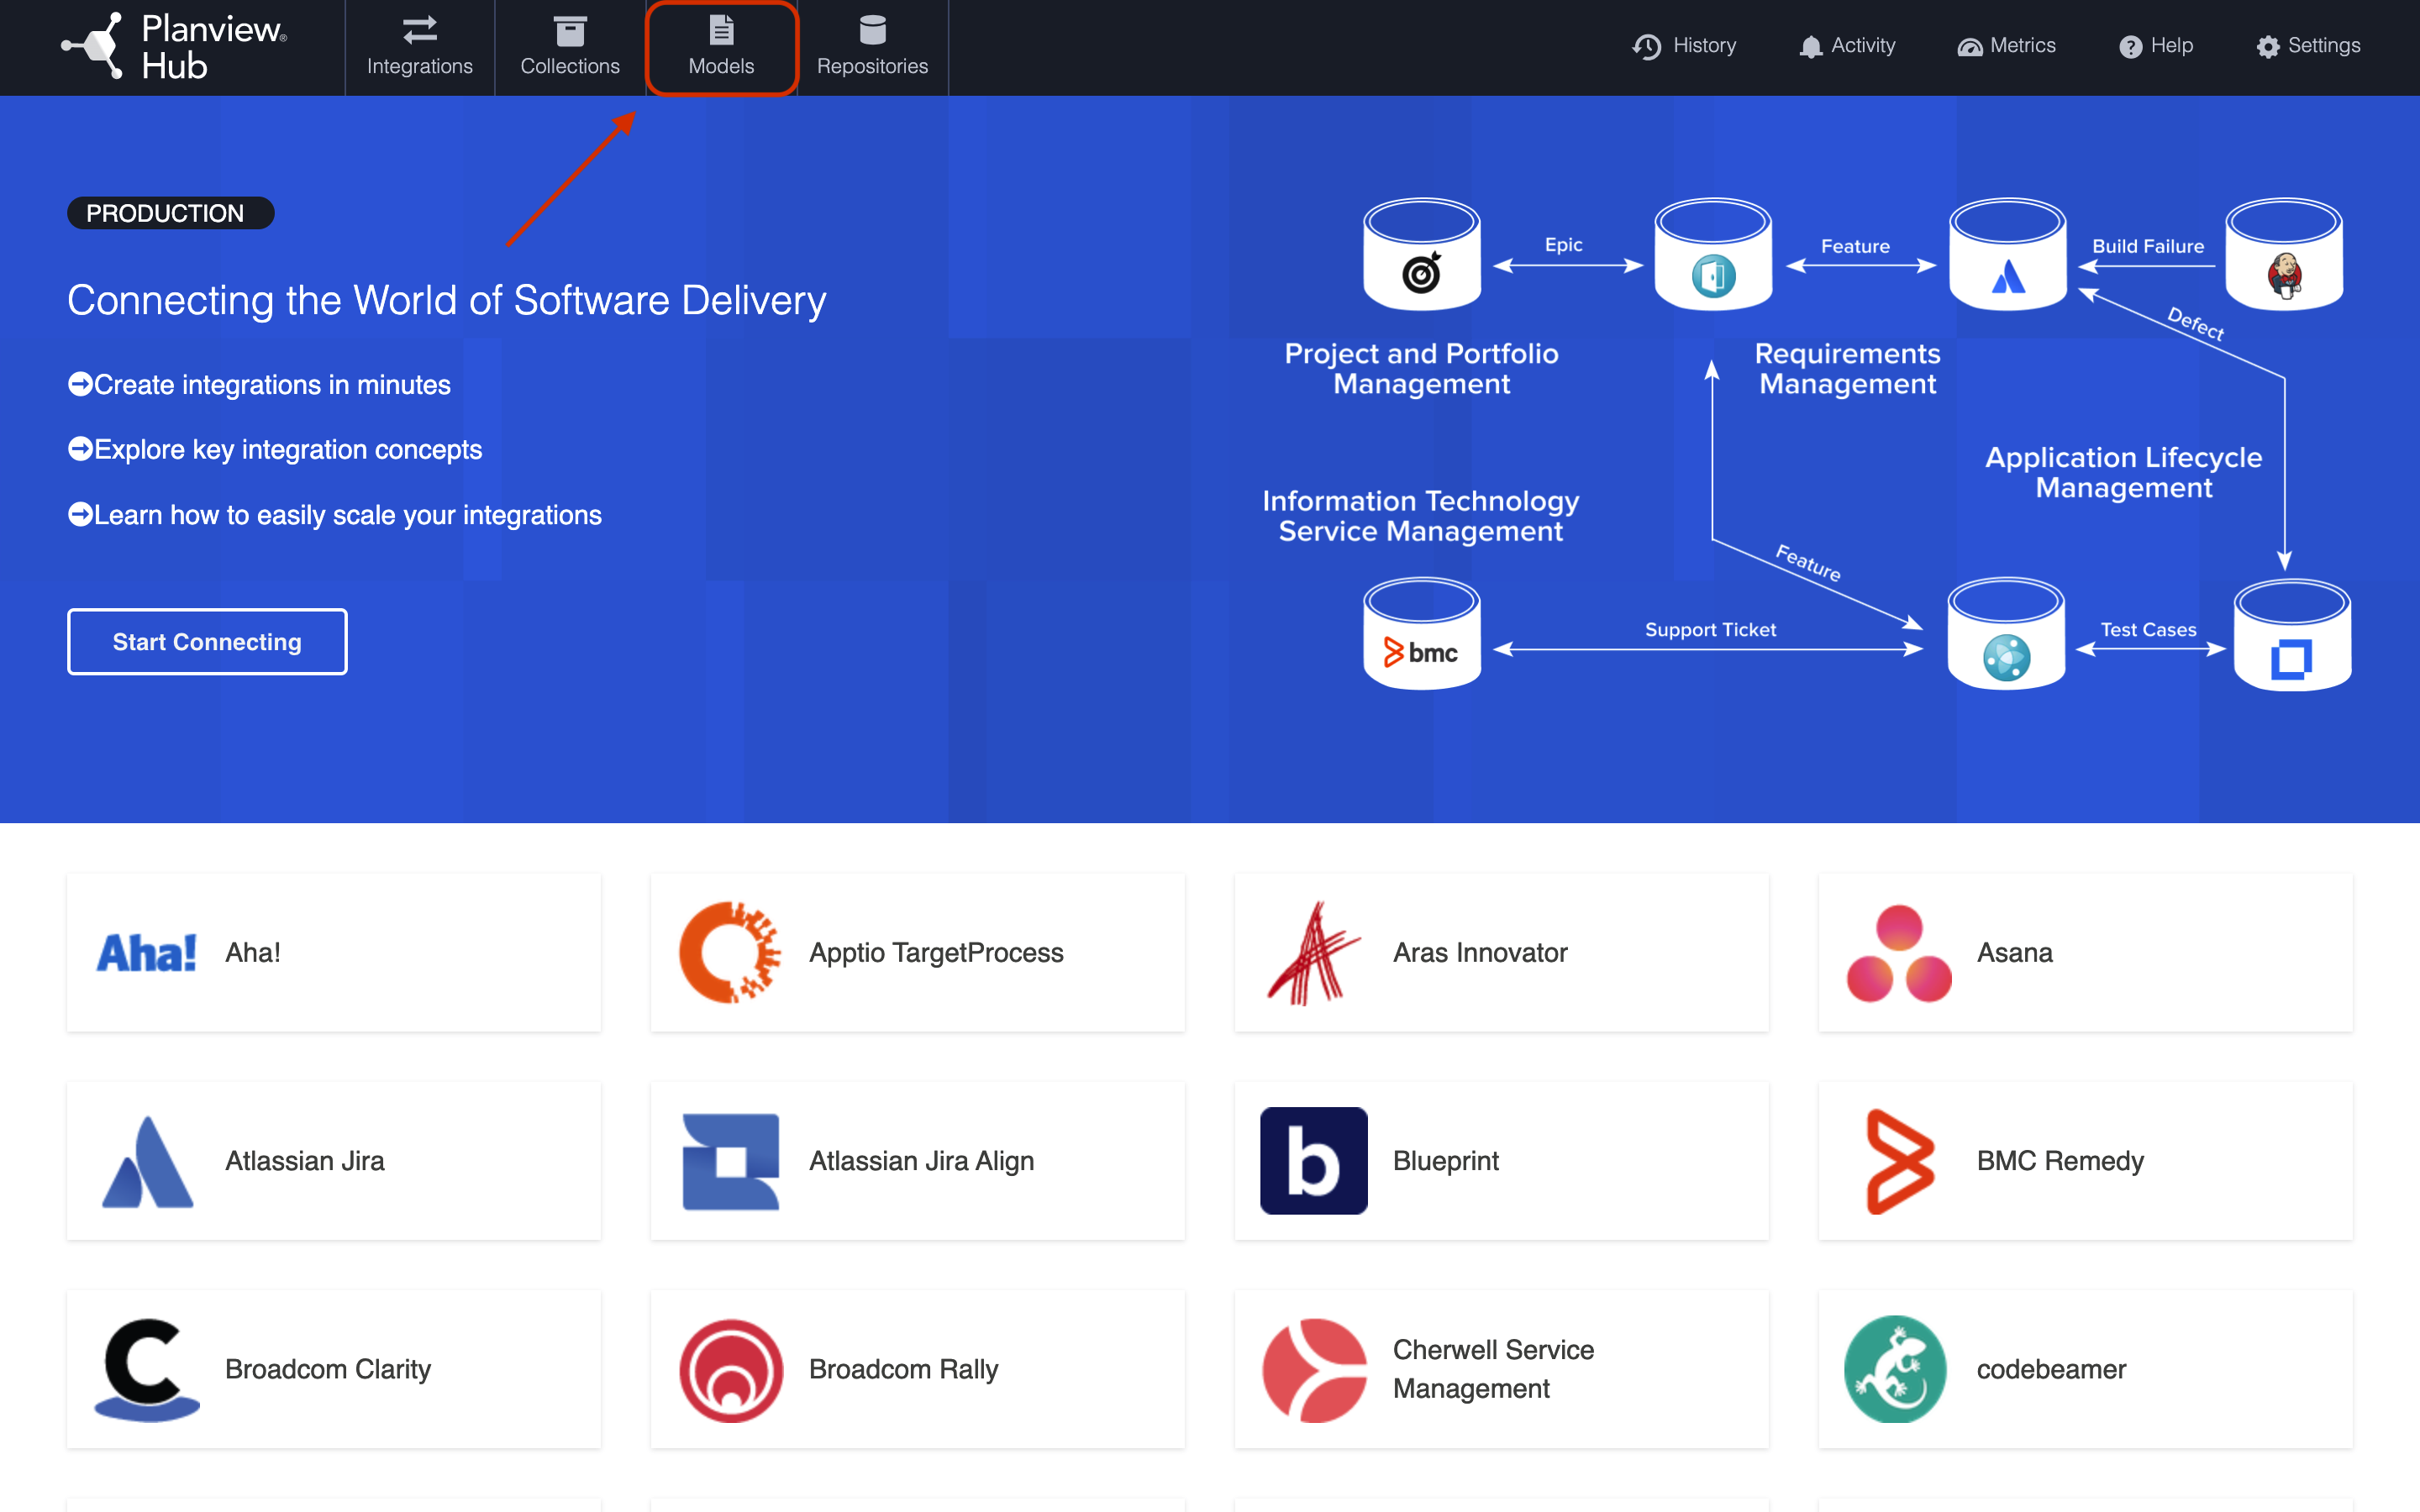
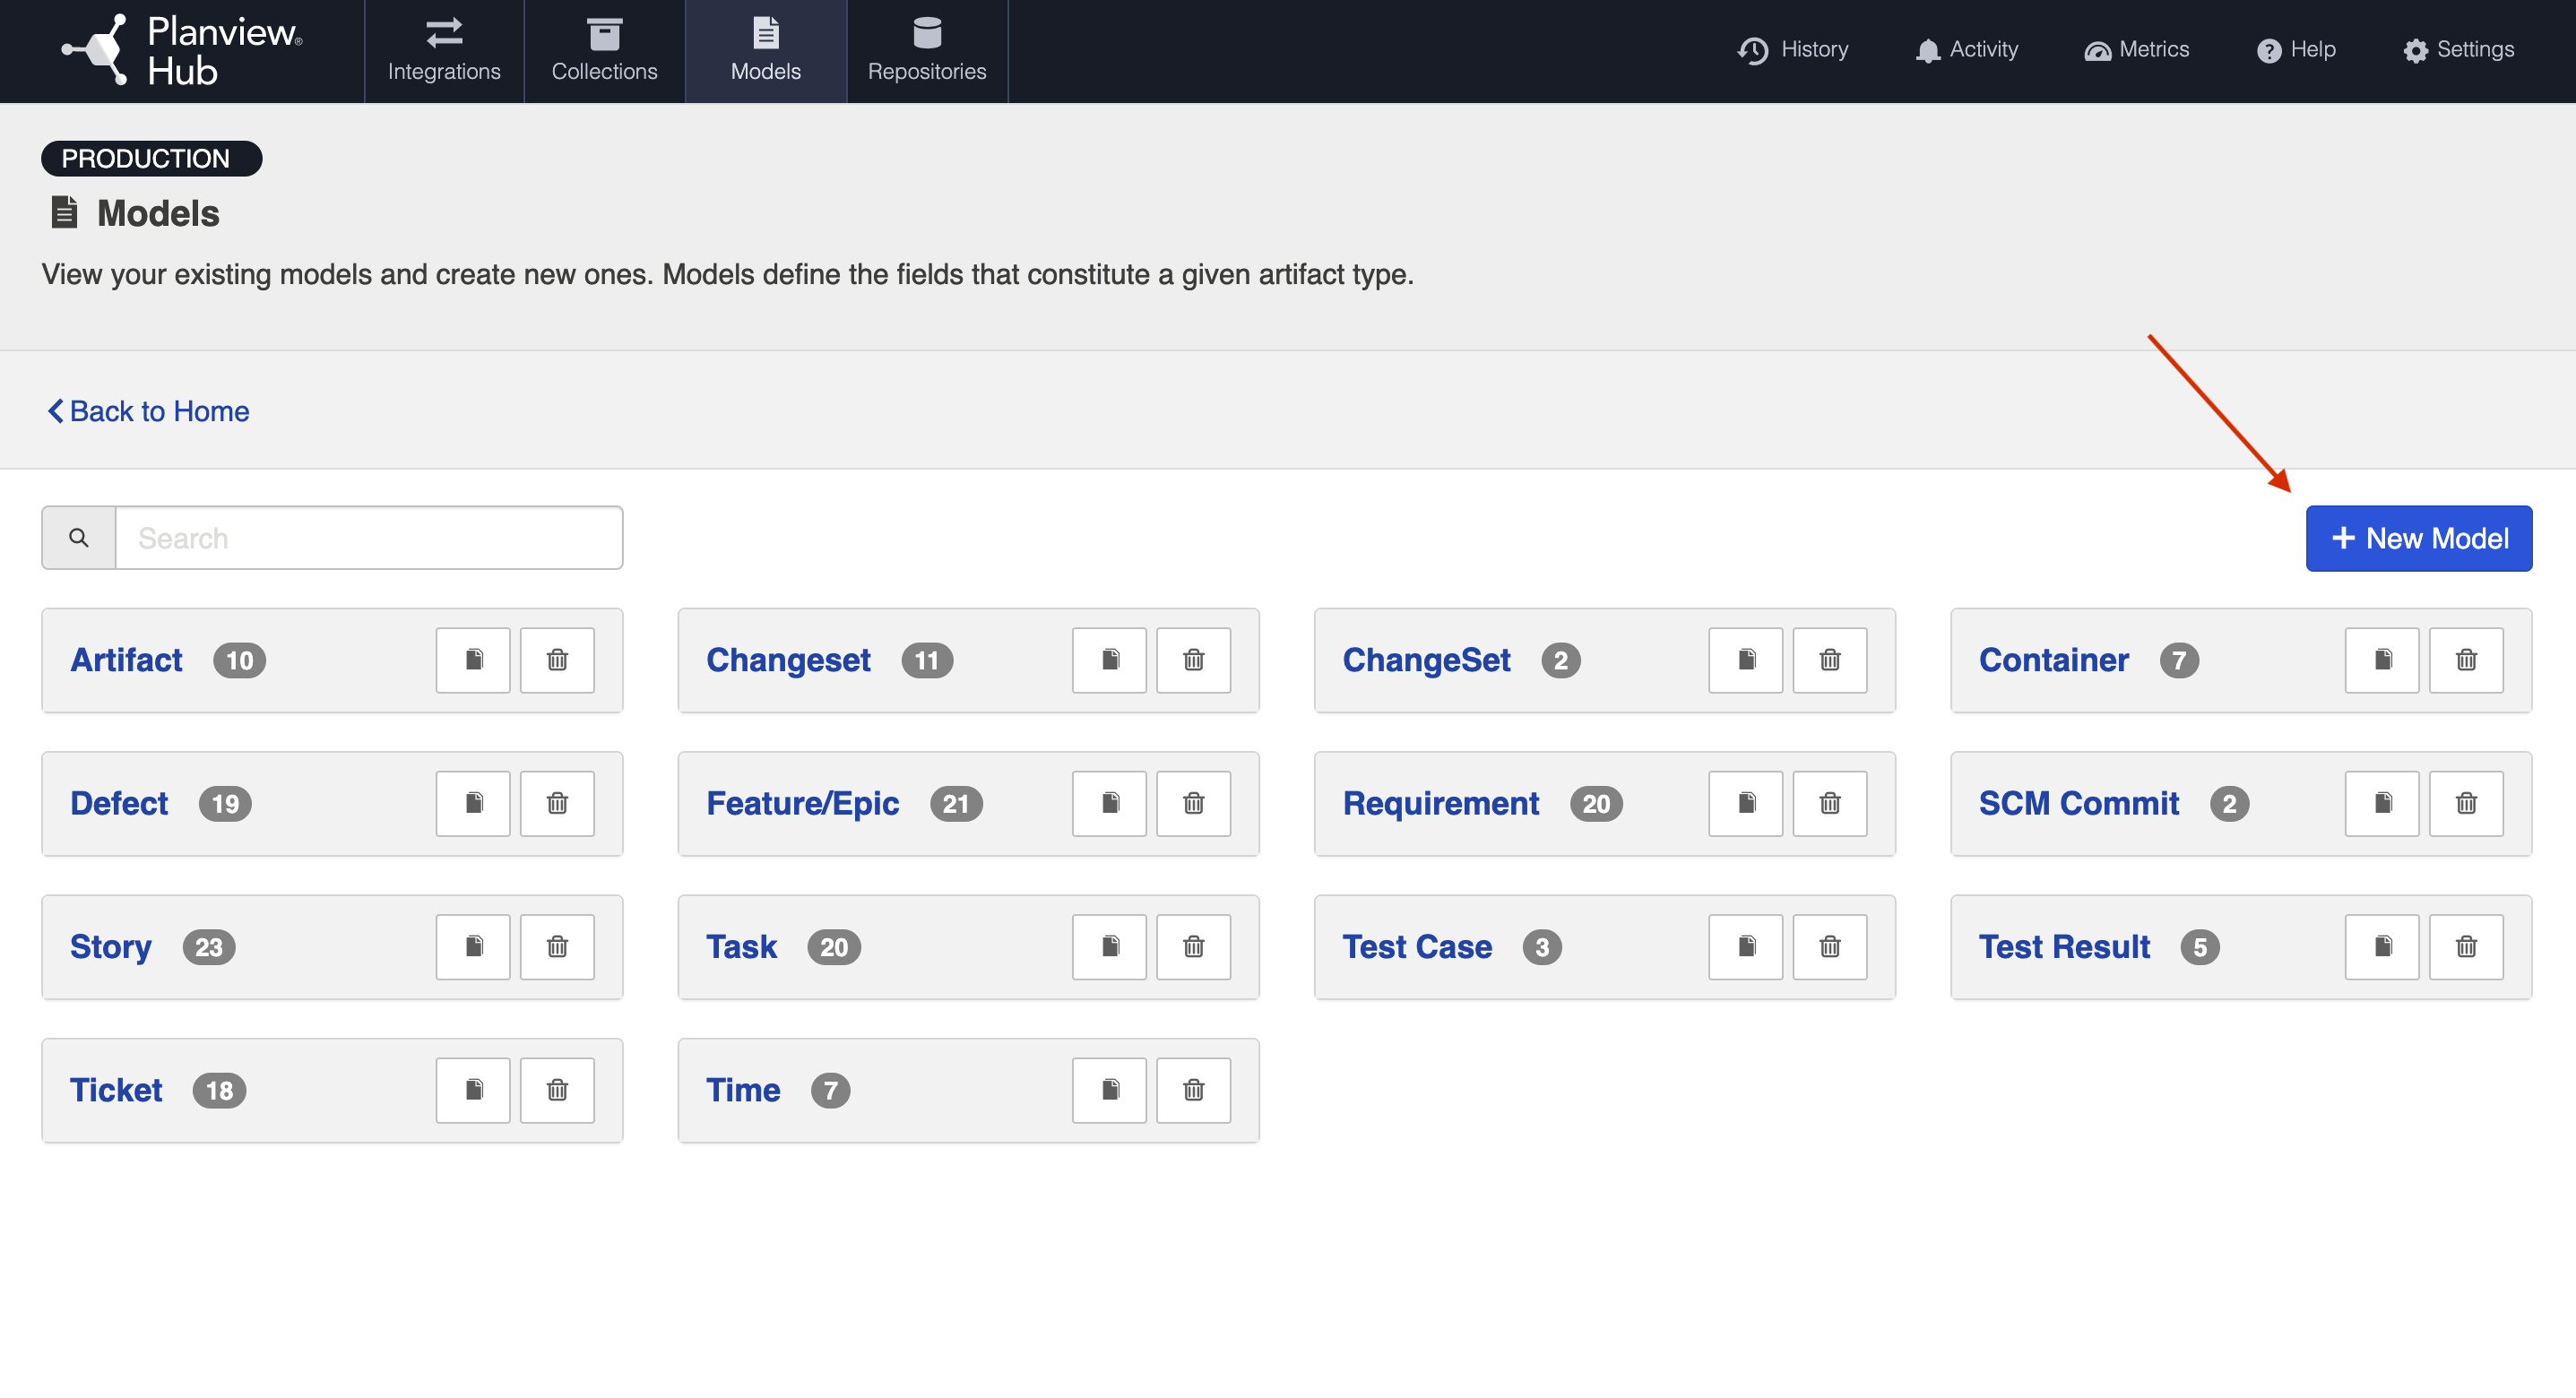
To access your models, click on the Models button at the top of the screen.
Out of the Box Models
Hub comes pre-packaged with several out-of-the-box models that are ready for you to use!
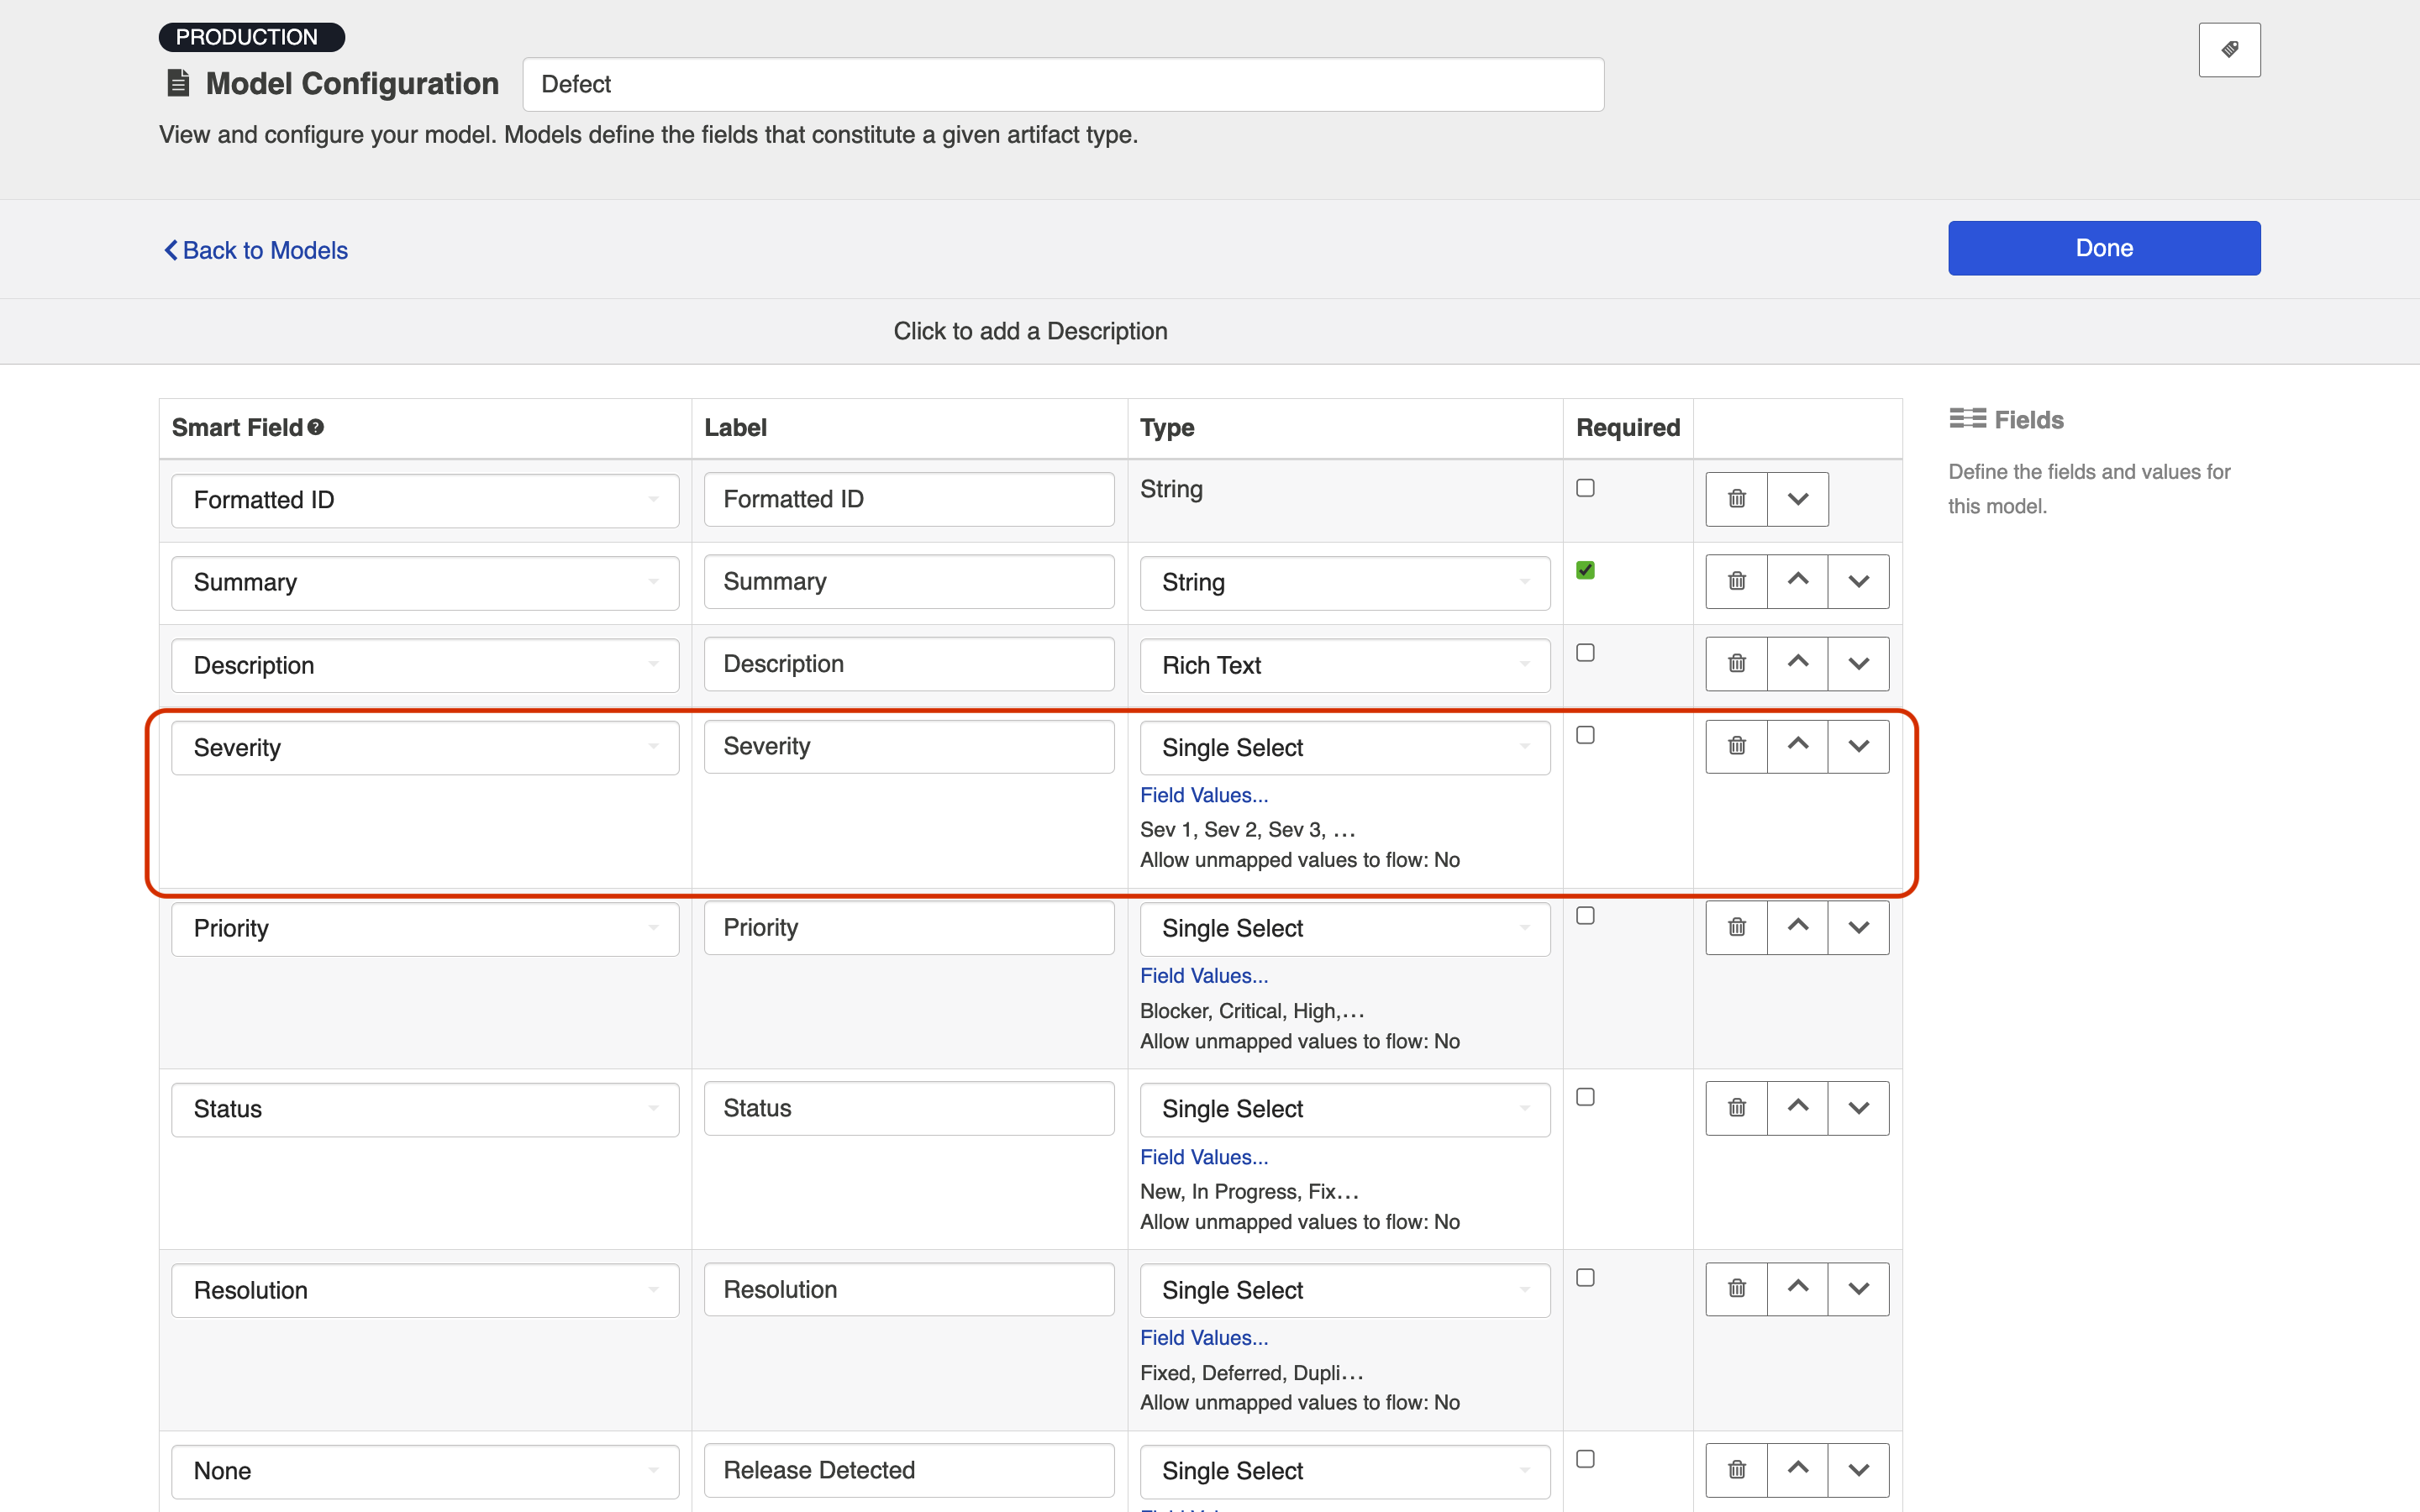
On the Models screen, you will see the name of each model, with a number identifying how many fields are included in that model.
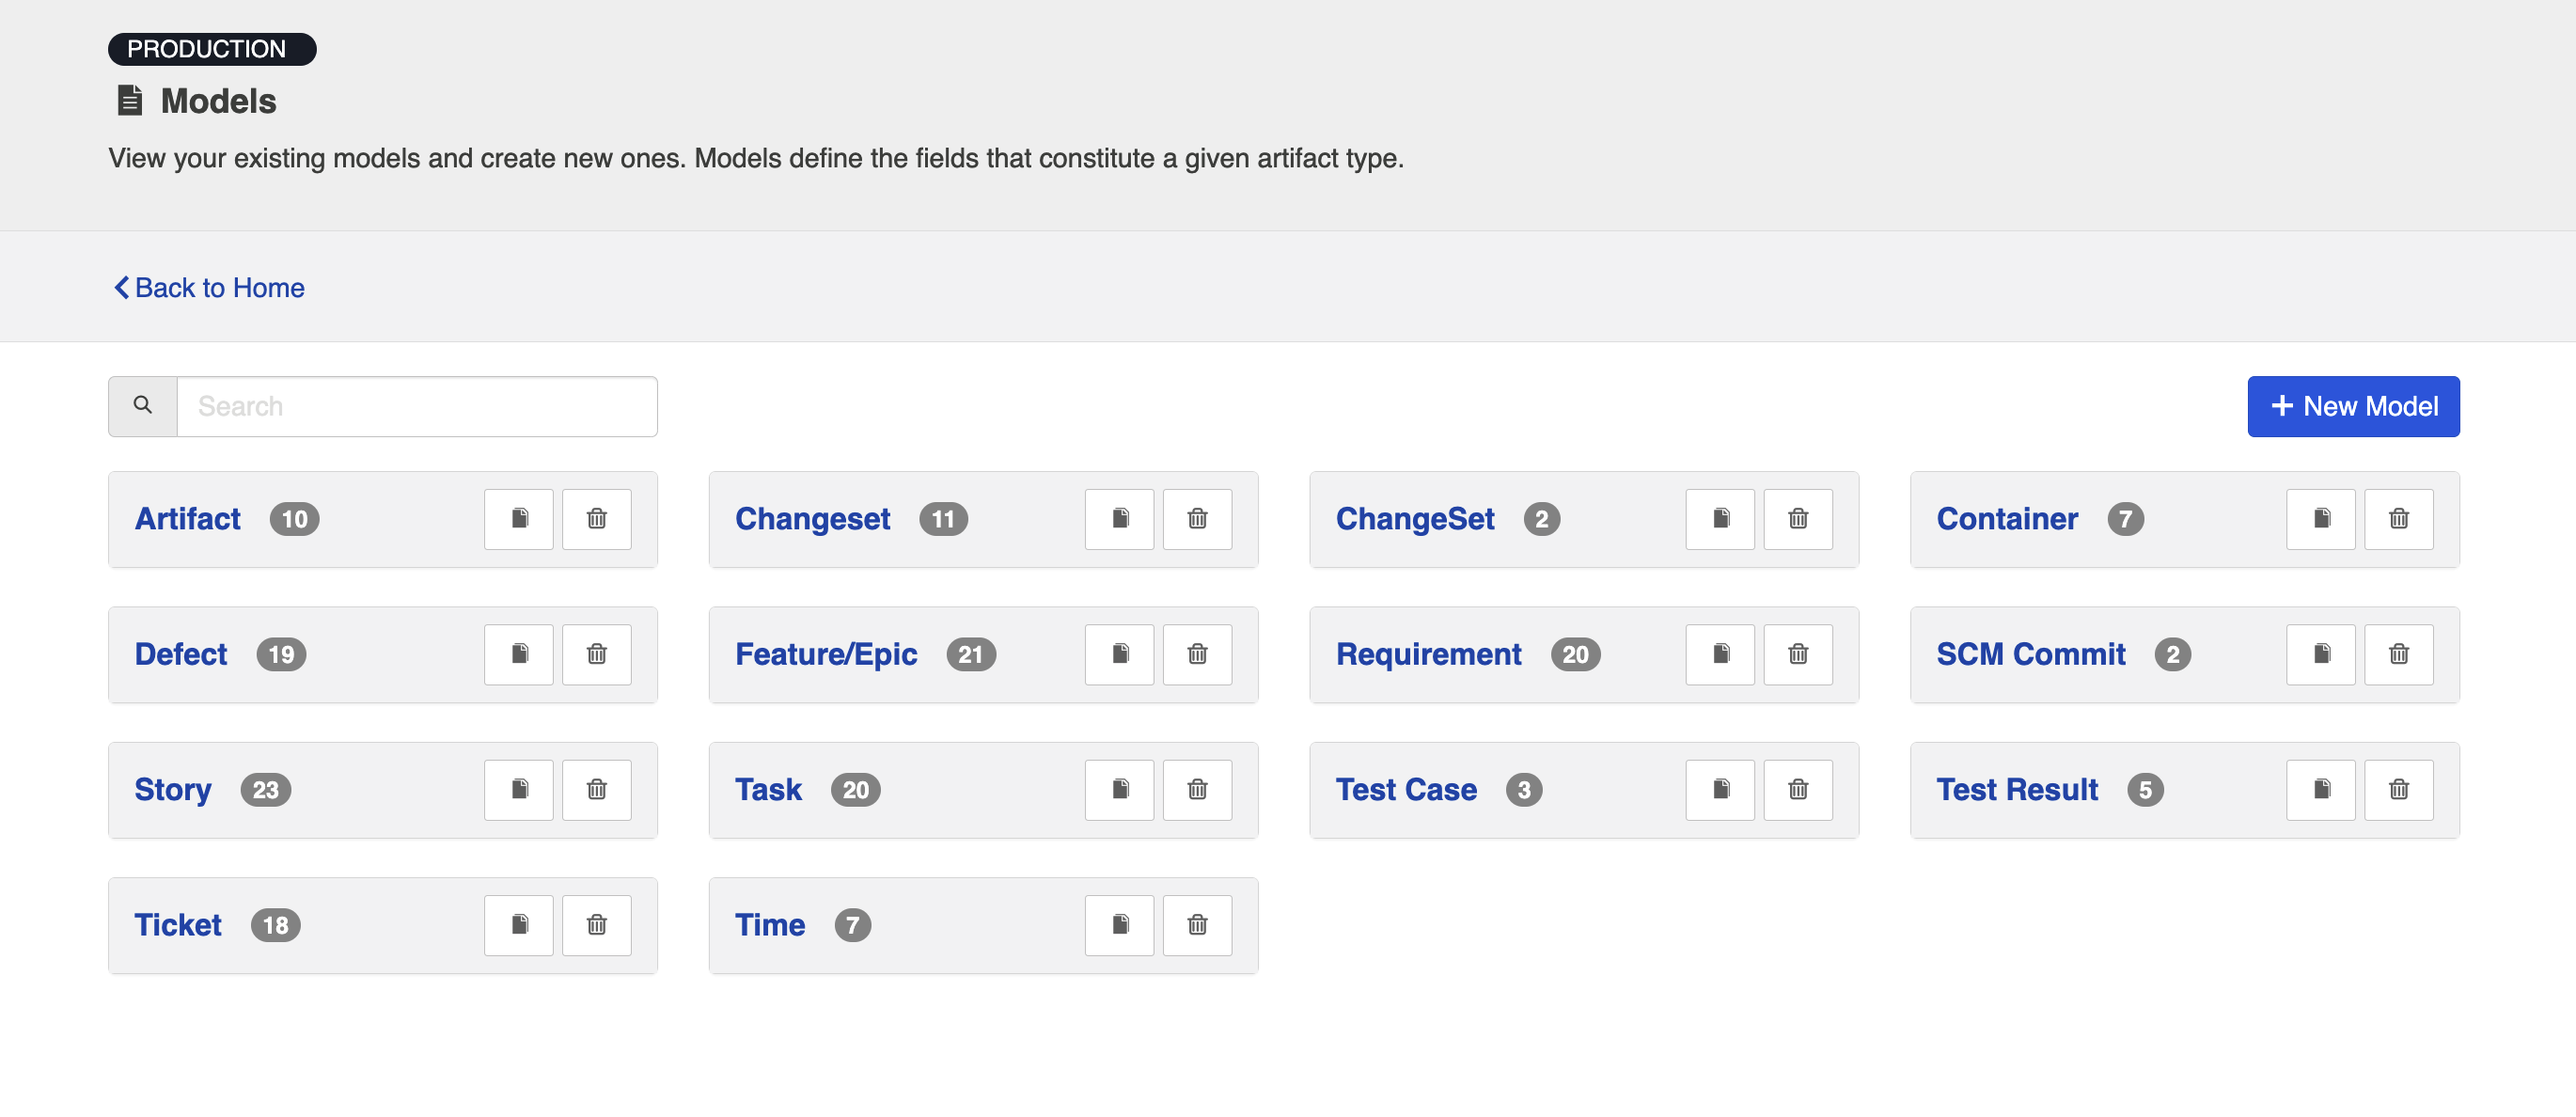
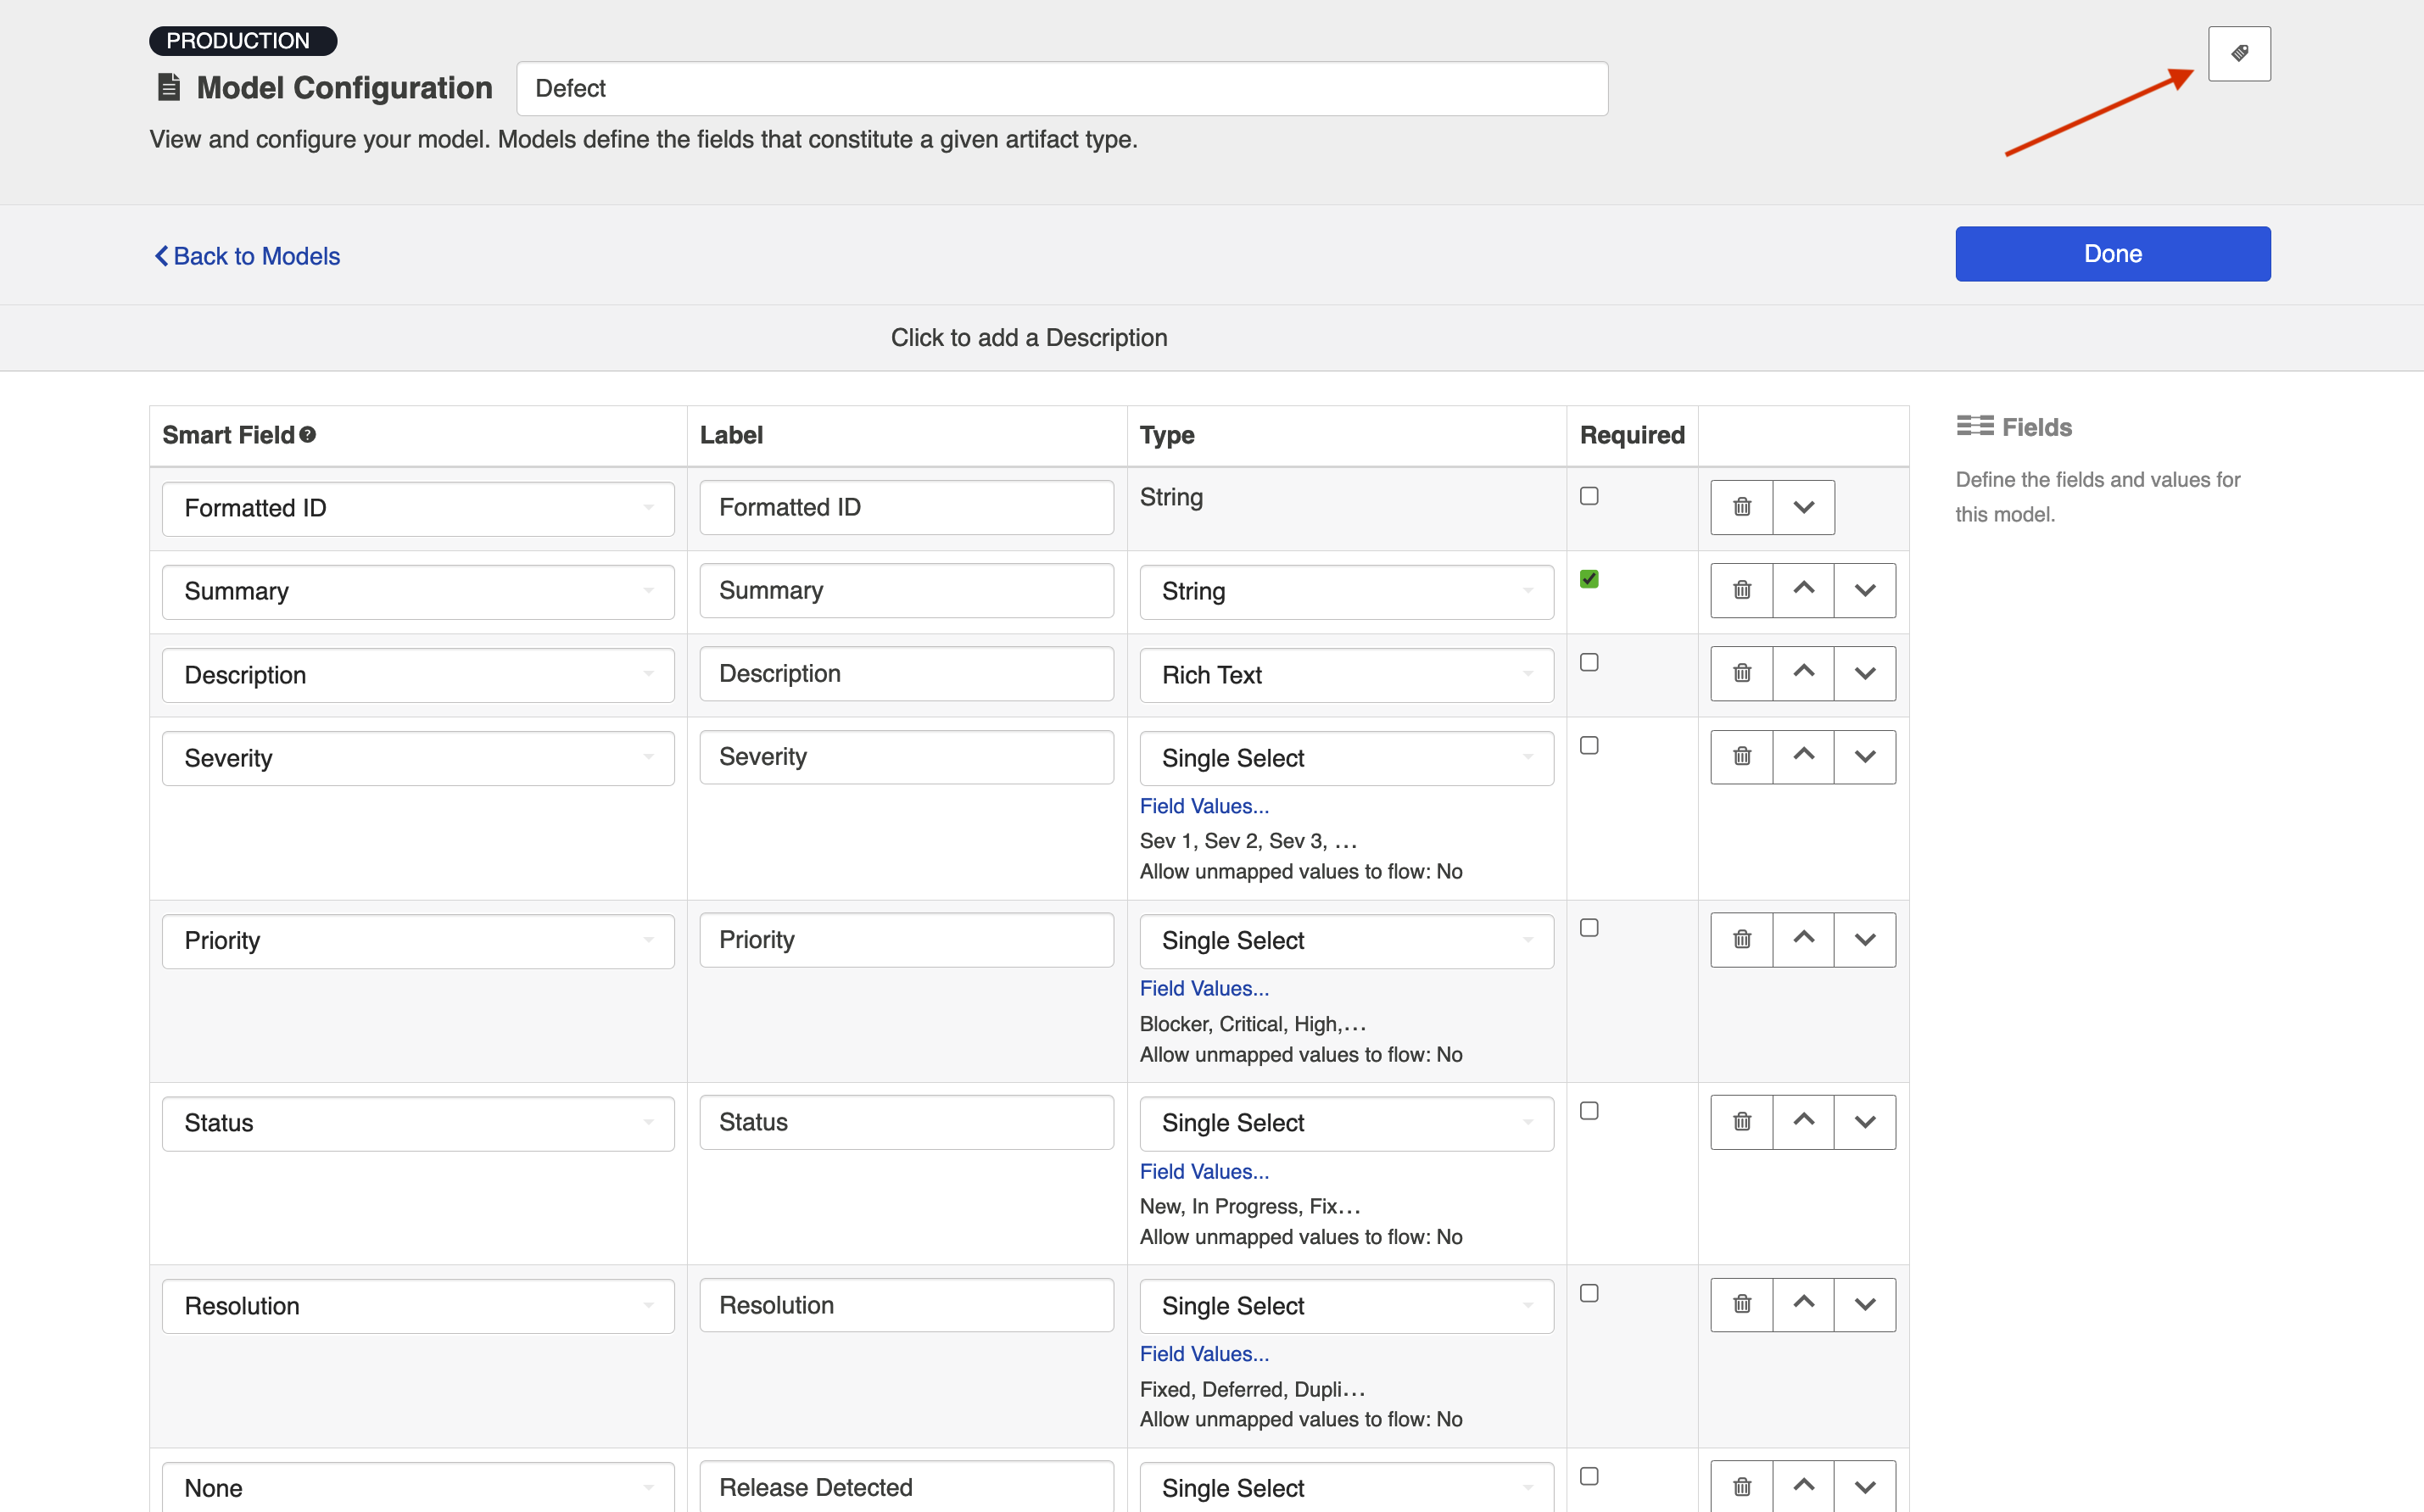
To view a model, simply click on its title. You will be brought to the Model Configuration screen, which will show the fields included in that model.
Copying a Model
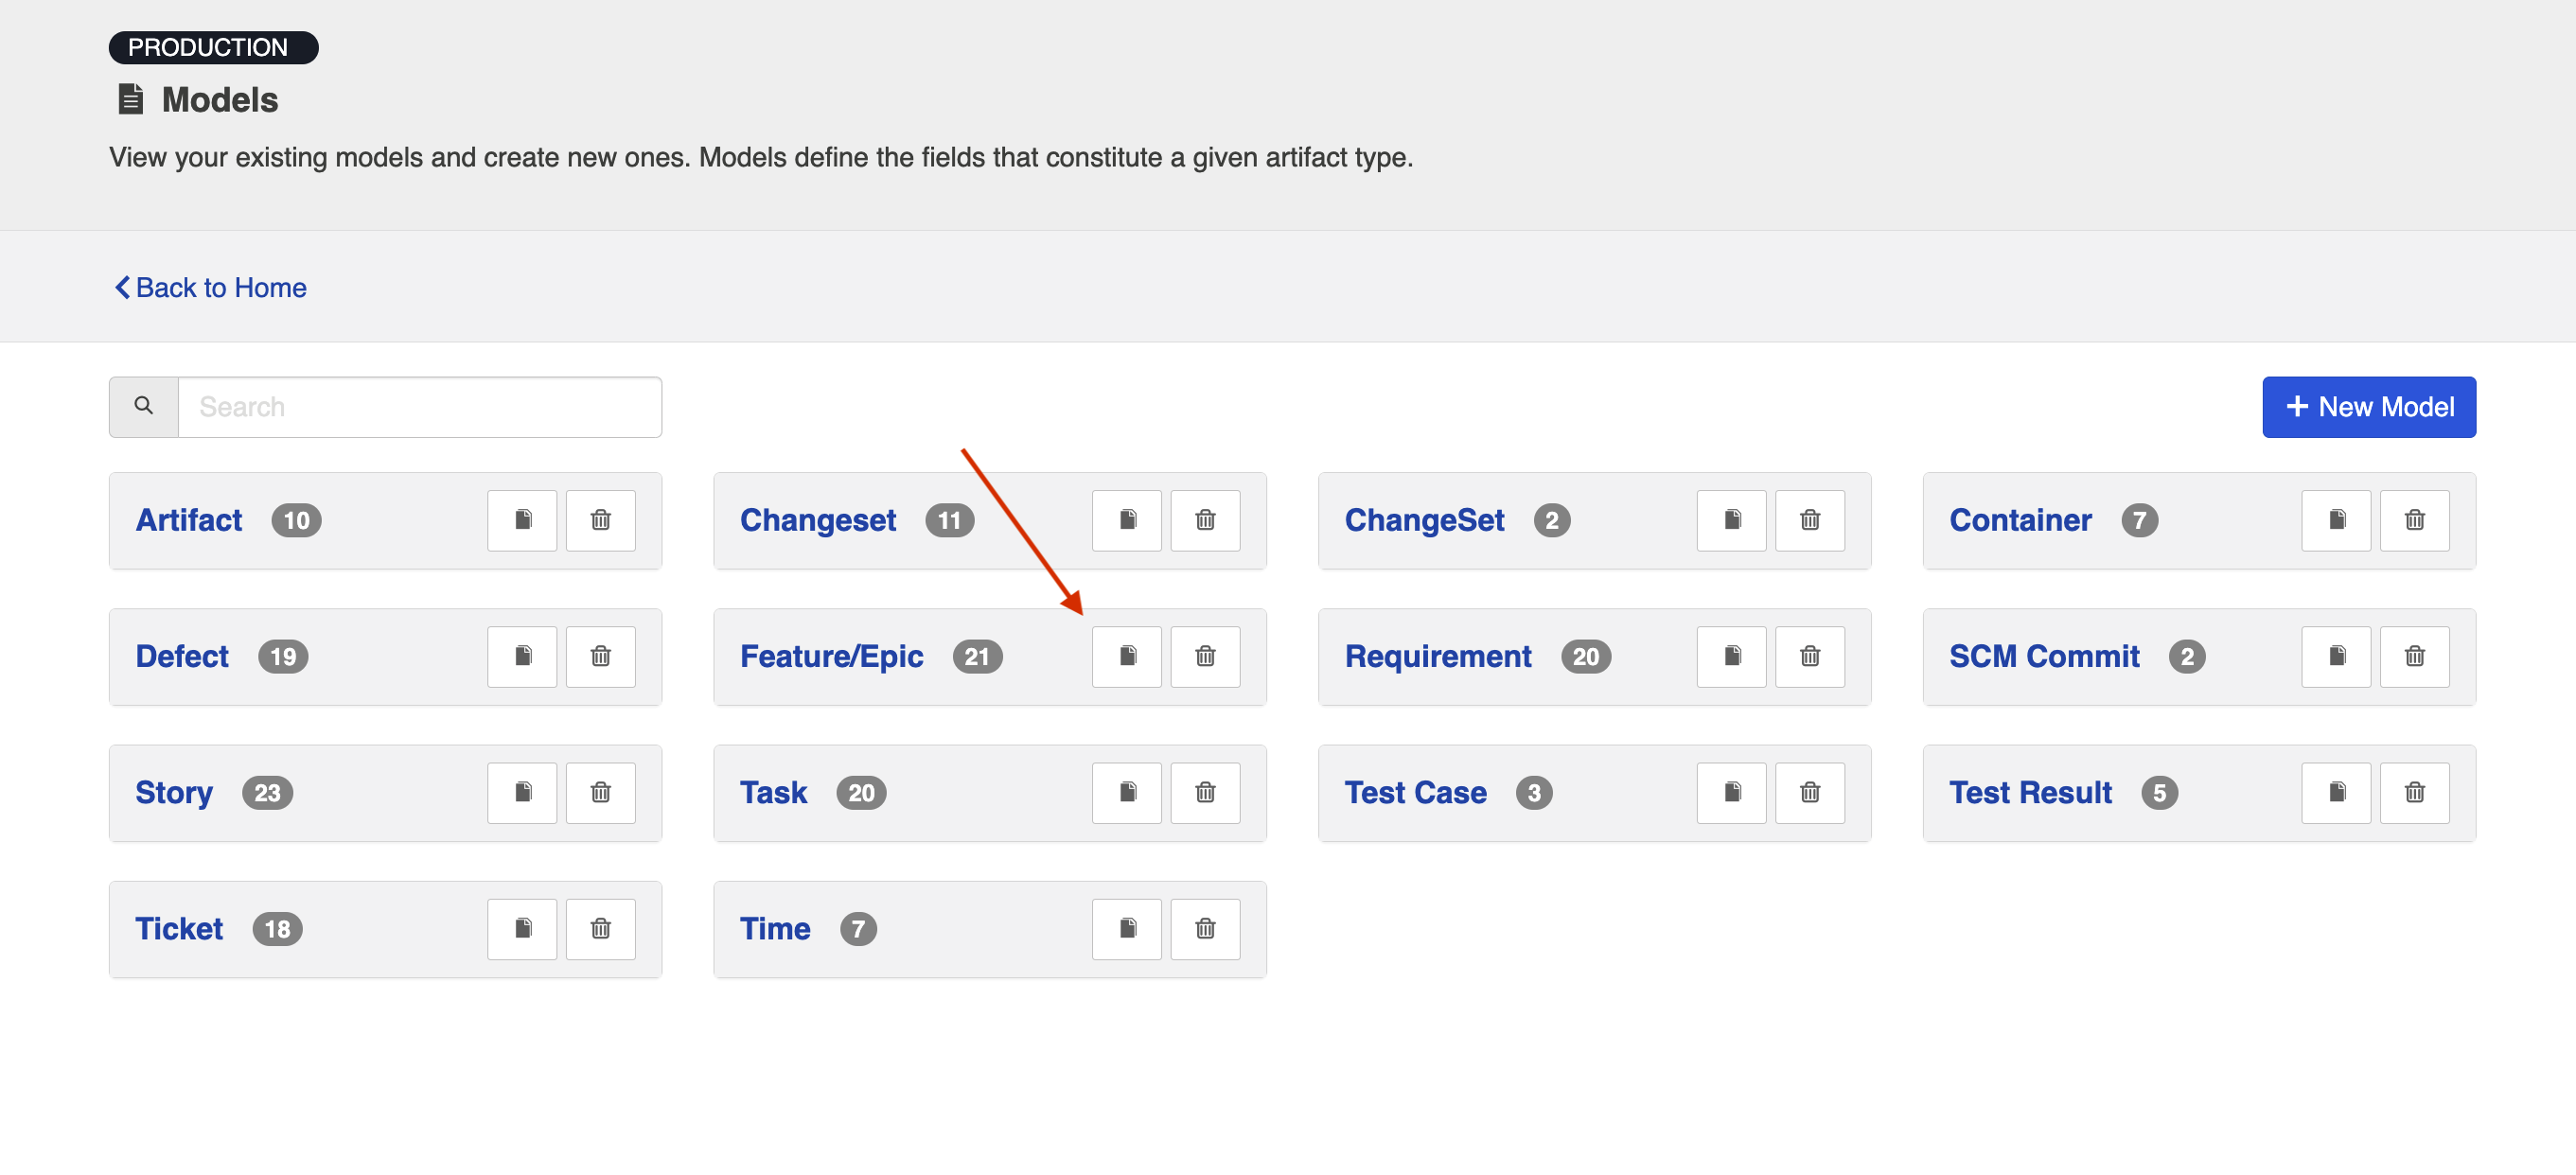
There may be times when you wish to copy a model and then modify certain fields on it for use in a different integration. To copy a model, click the copy button from the Models screen. The copied Model will be named "<Original Model name> (copy)".
Custom Models
Check out the video below to learn how to create a new custom model:
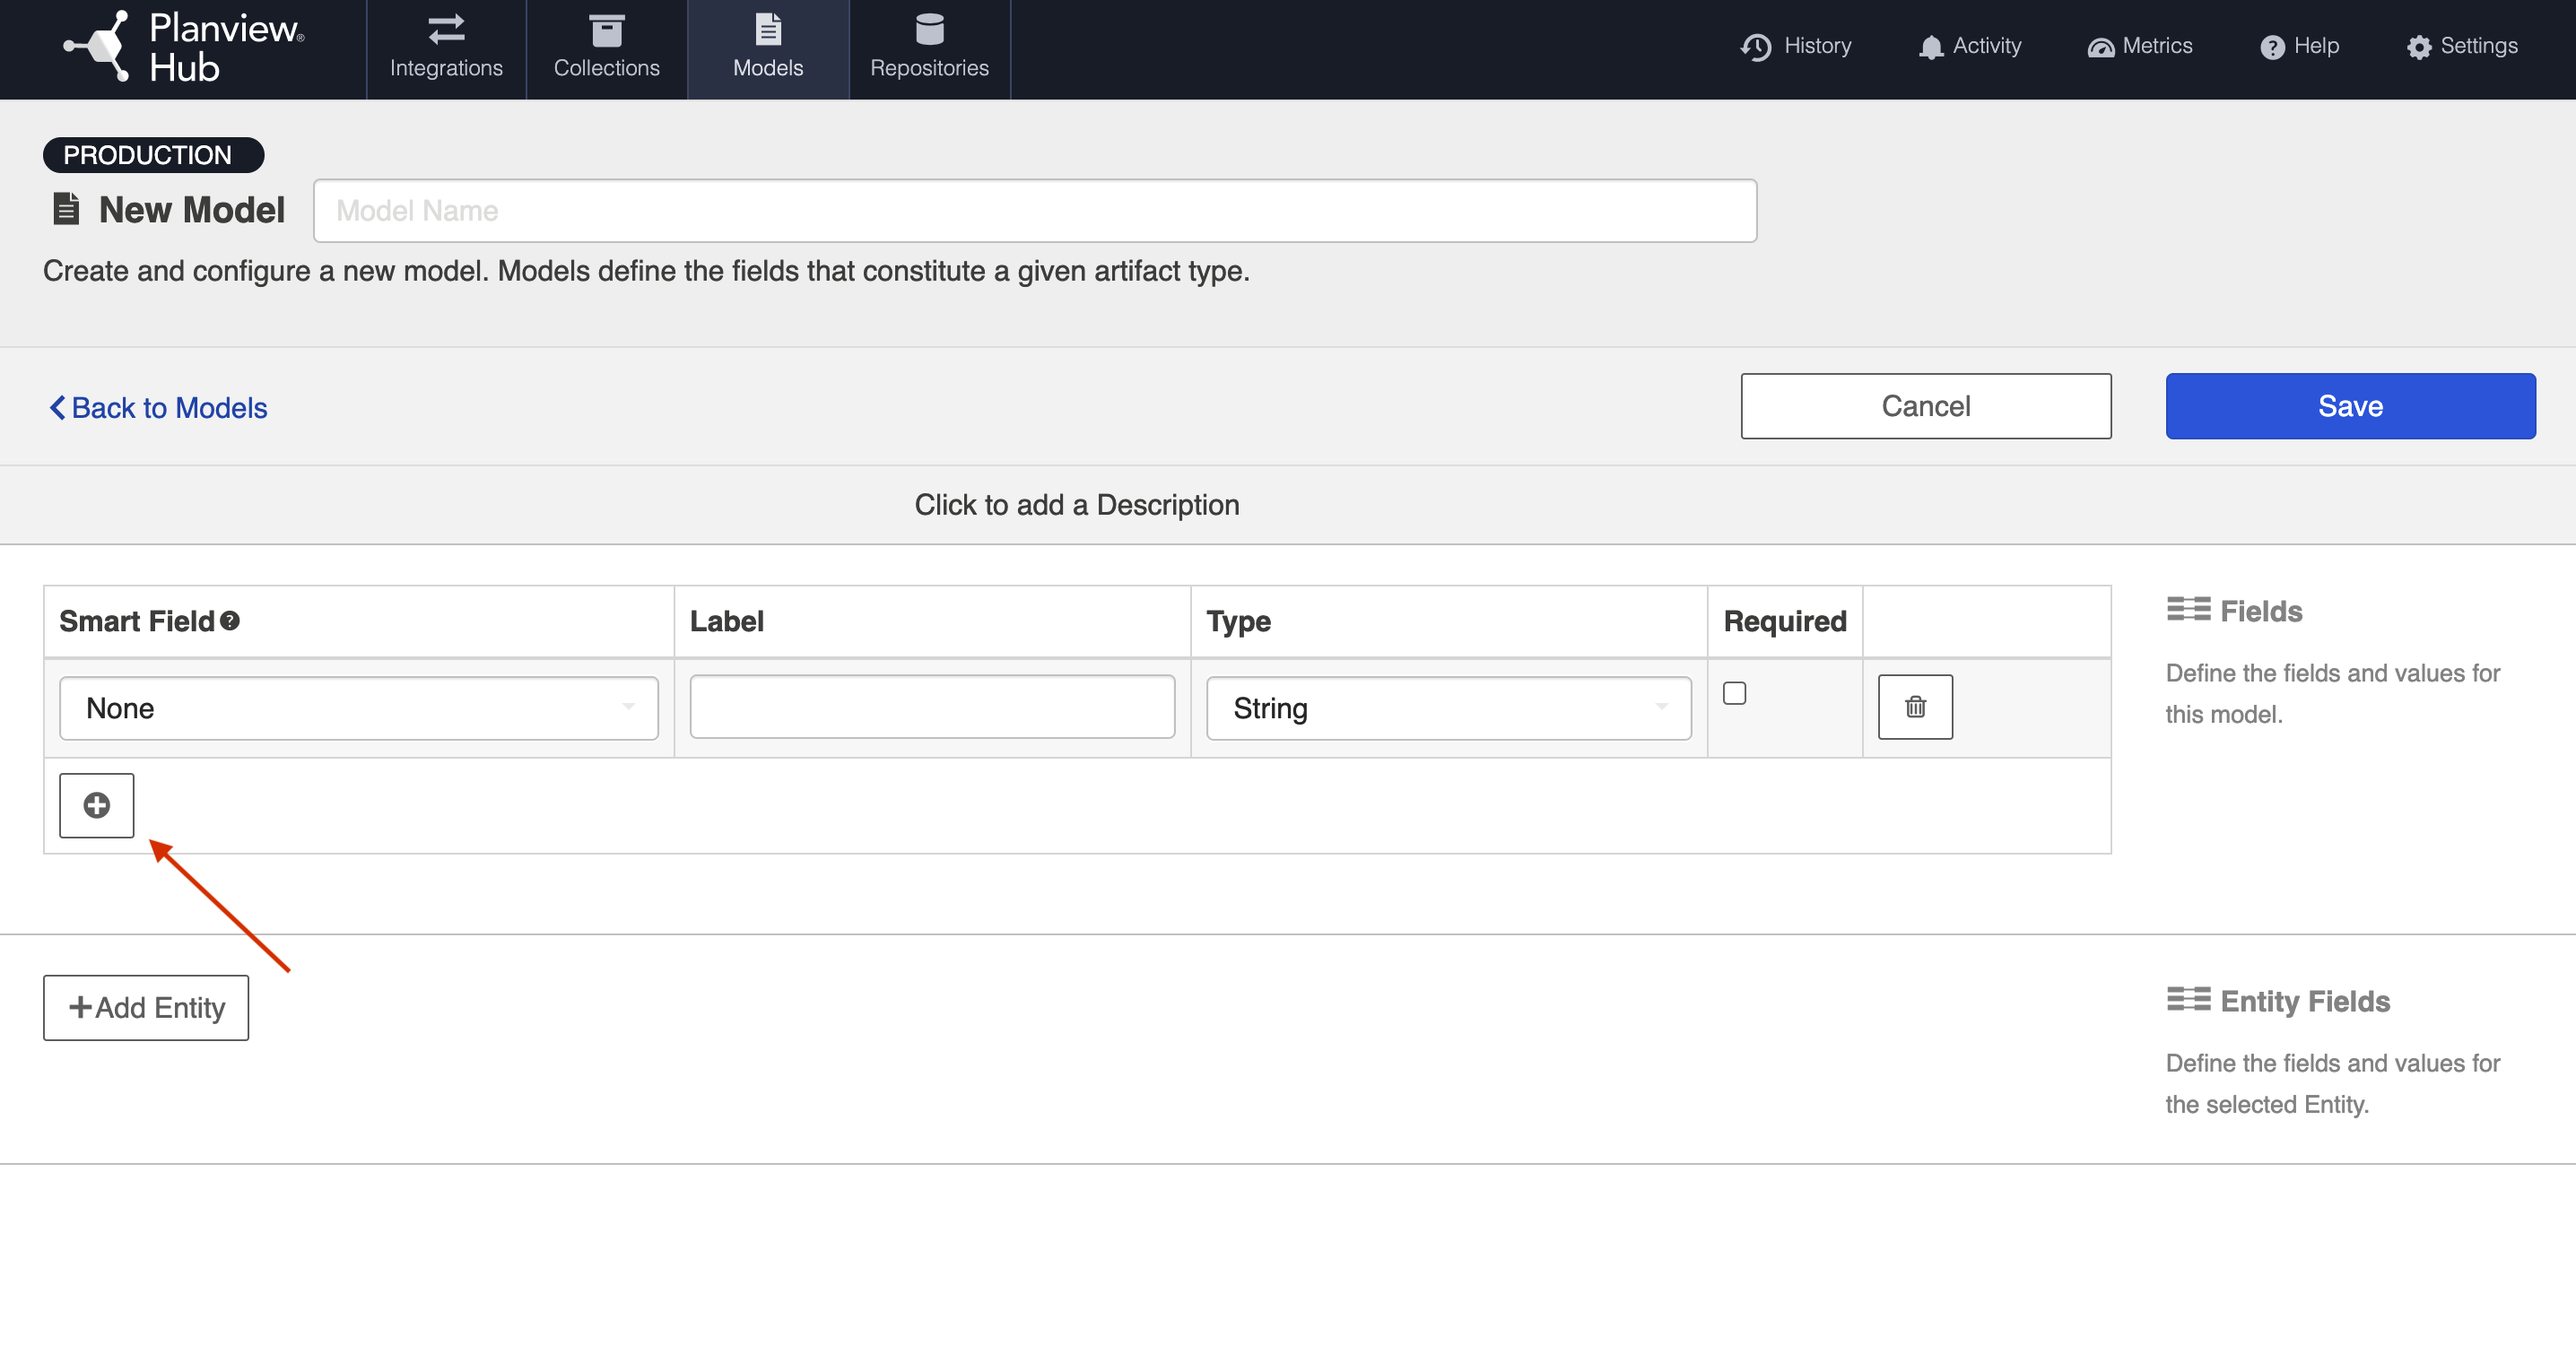
To create a new custom model, click the + New Model button at the top of the screen.
Model Type
Depending on your Hub edition, you may see a Model Type dropdown. You can learn more about this on the Test Synchronization page.
Add Fields to Your Model
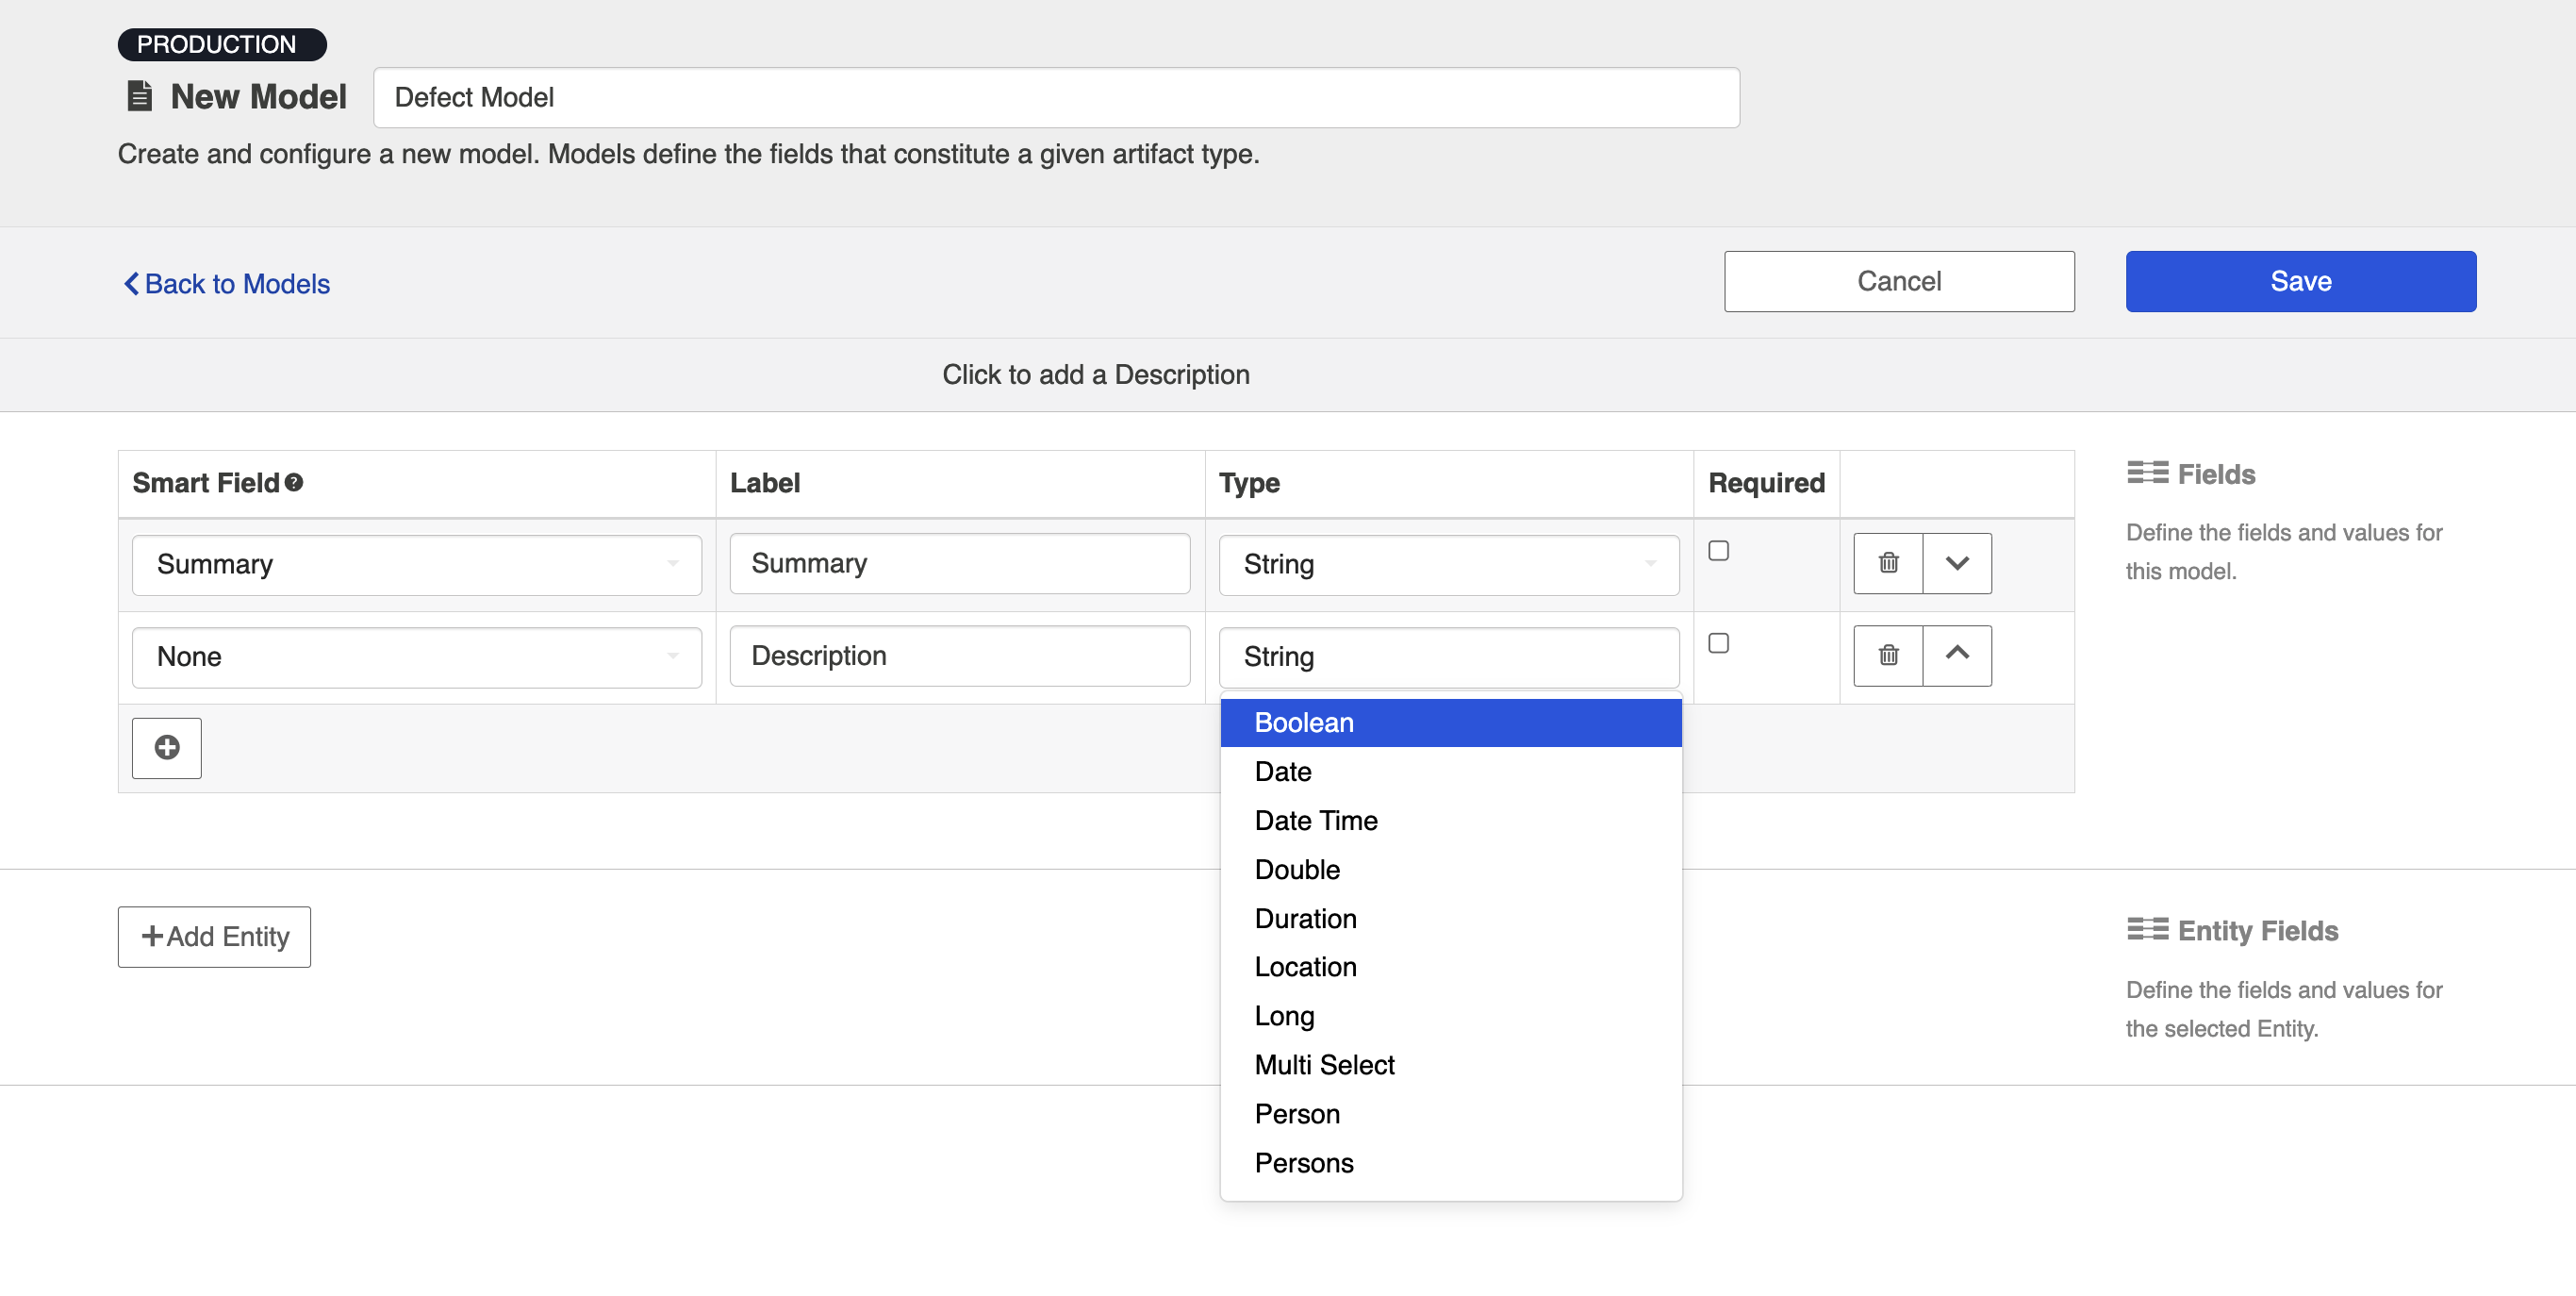
You can start configuring your first model immediately — just name it and start entering metadata into the first line. To add additional fields to your model, simply click on the plus sign at the bottom left of the model box.
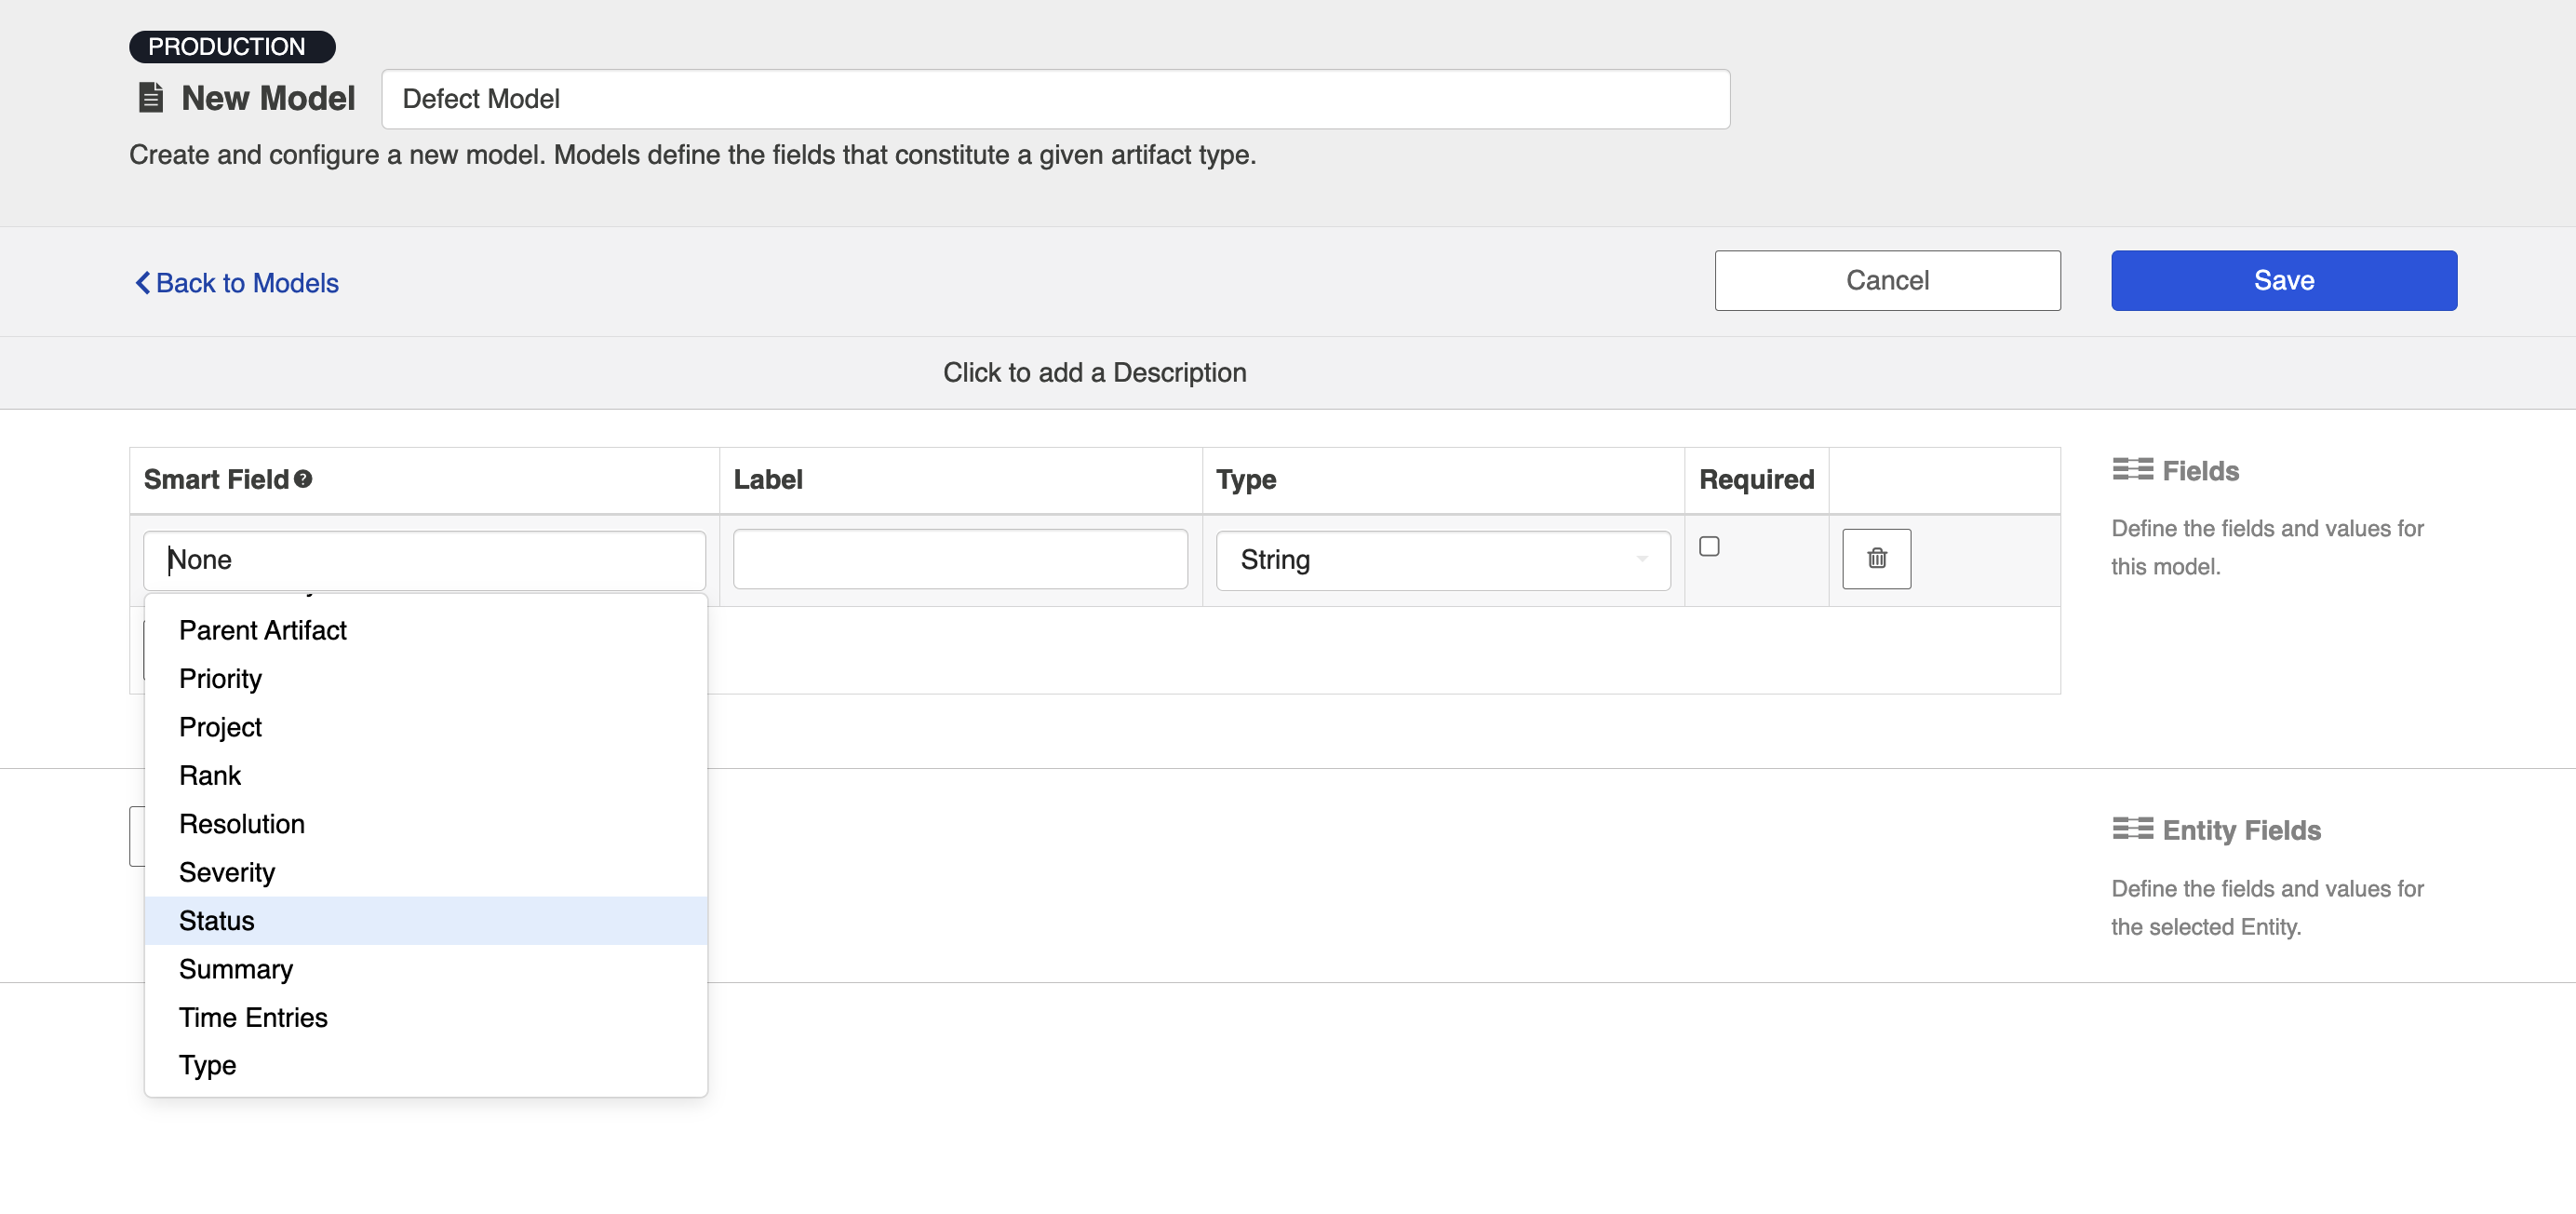
Smart Field Designation
For each field you add to your model, you have the option of identifying its corresponding smart field type. Smart fields are a set of fields commonly available in the connectors for all of the repositories Hub connects to. By designating a smart field to your model field, Hub will be able to more easily match fields from your repositories to your models when you are creating and editing collections.
Selecting a Smart Field will also give Hub the power to suggest the proper field type for your model field.
You do not have to select a smart field for all model fields. If you cannot find a smart field that corresponds to a model field, just leave the smart field drop down empty for that field.
Some examples of smart fields are:
- Formatted ID: the human-readable ID of an artifact
- Location: the field that holds the URL of an artifact
- Modified: a date-time field showing when changes were last made to an artifact
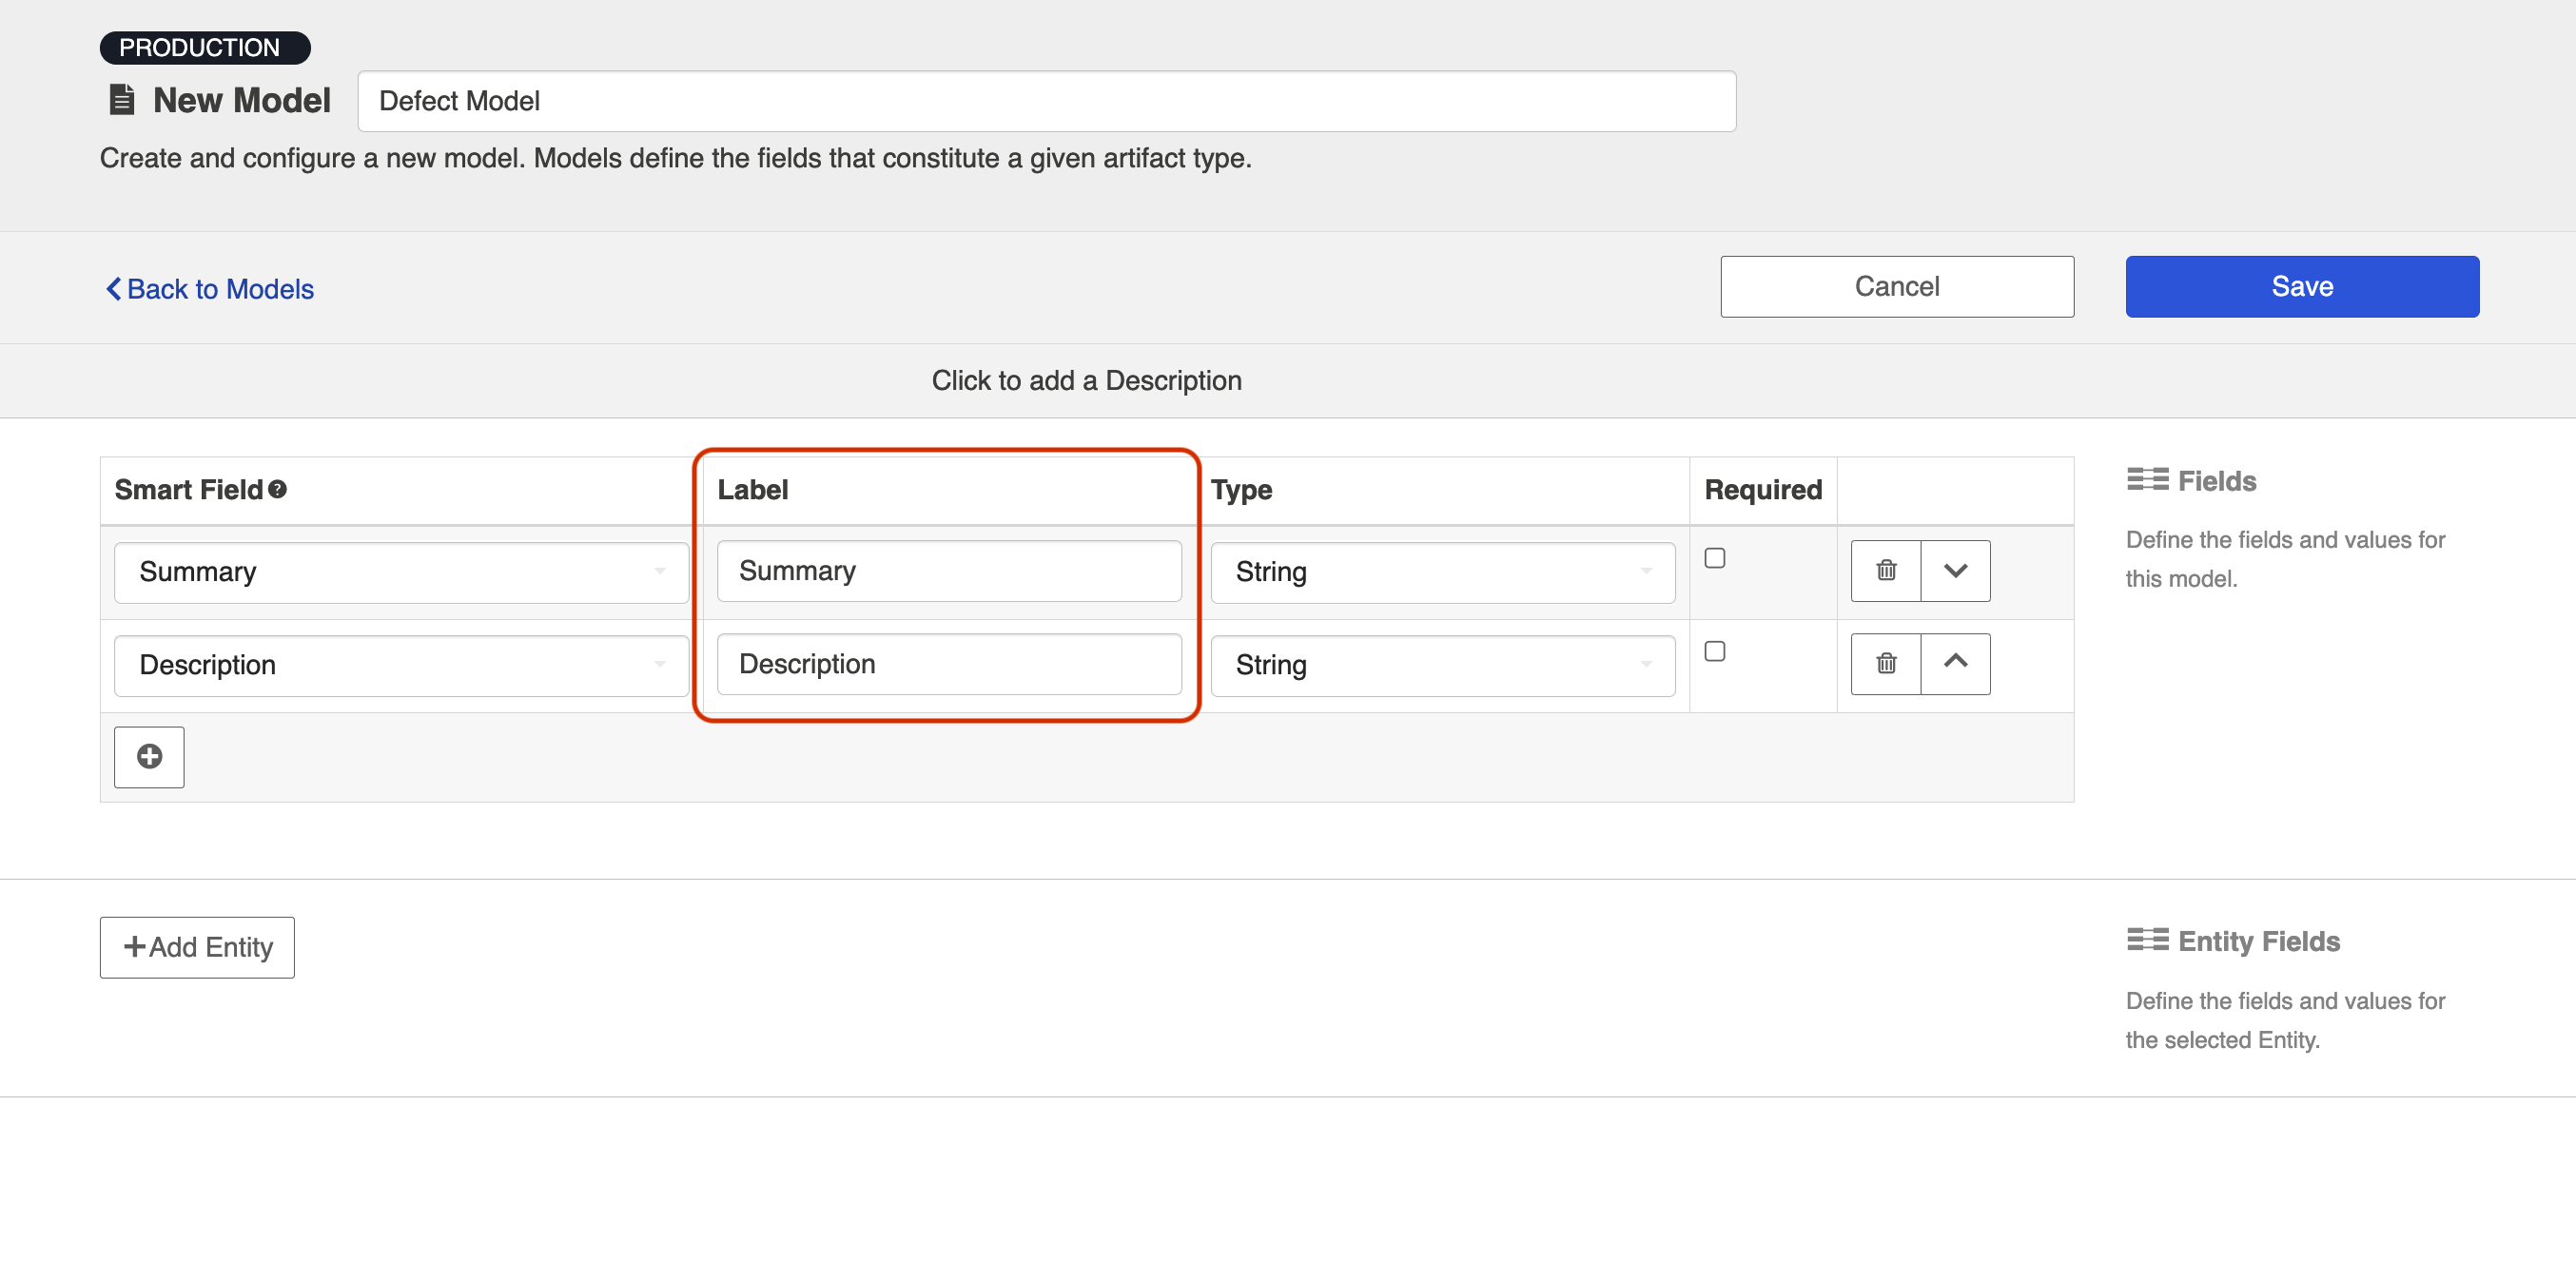
Field Label
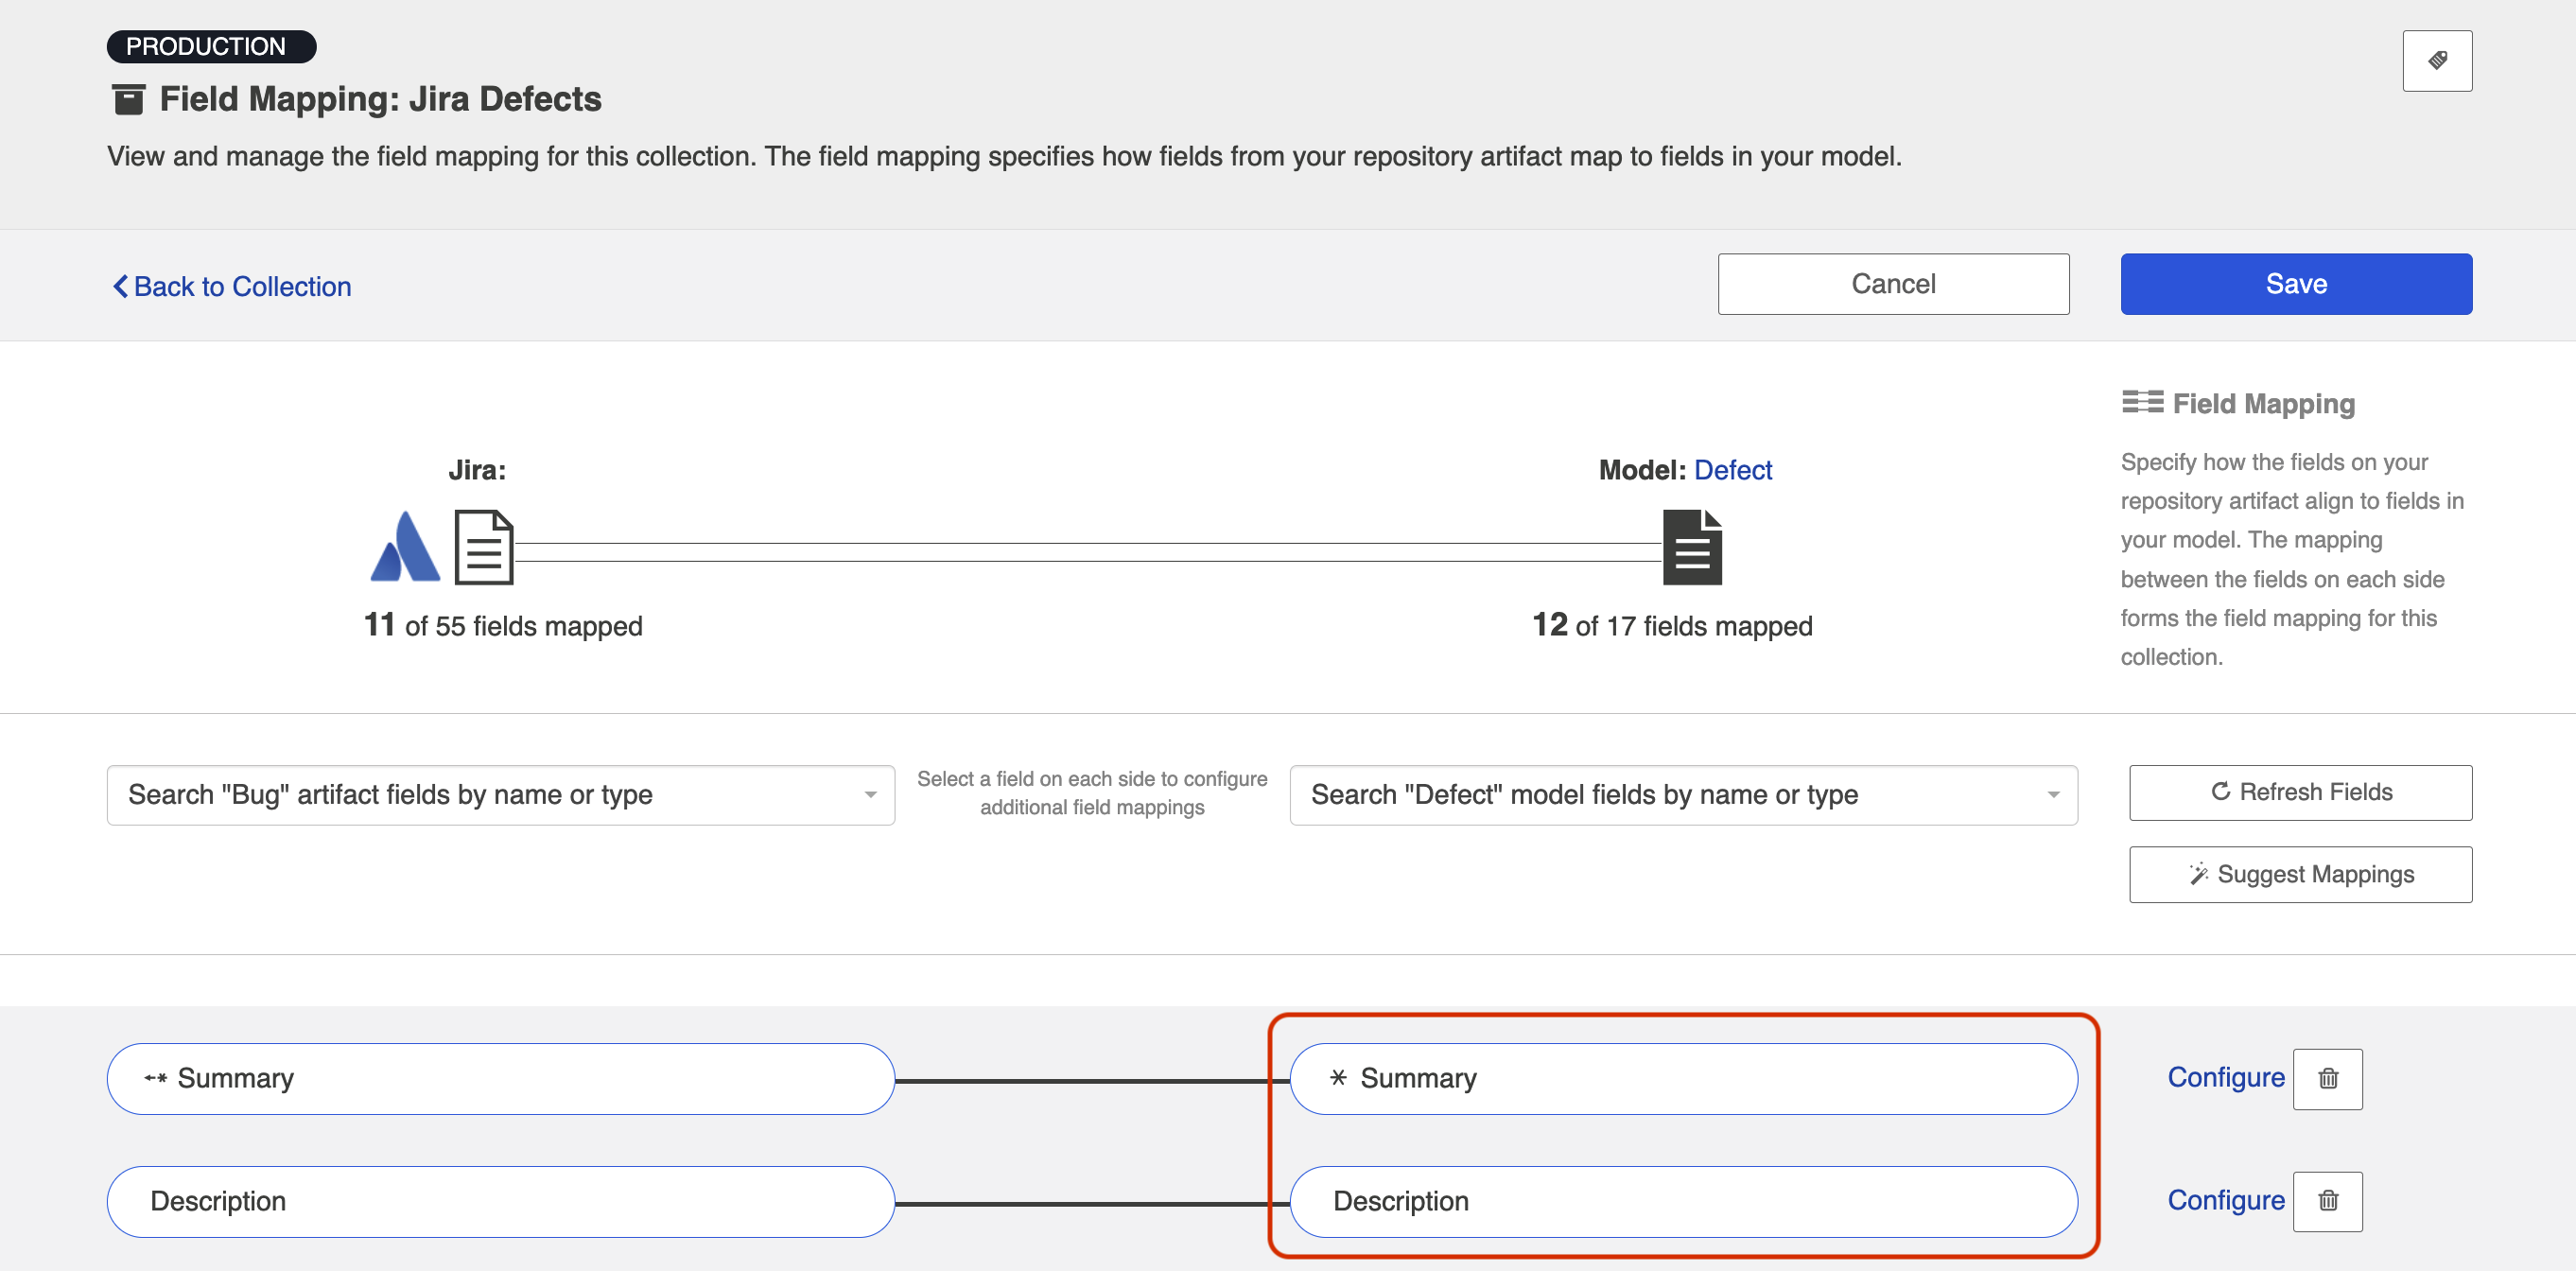
The label is the name of the field in your model that you will see throughout the Hub application, from the collection-to-model field mapping screen to the Field Flow screen in an integration.
Field Type
Hub supports a number of field types, such as string, multi-select, relationship, and more, for use in your model. Identify the field type that most closely aligns with the type of information you expect to flow through this model field.
Review the sections below for best practices and additional configuration steps for each field type.
Required Designation
For each field, you can configure whether or not that field requires a value.
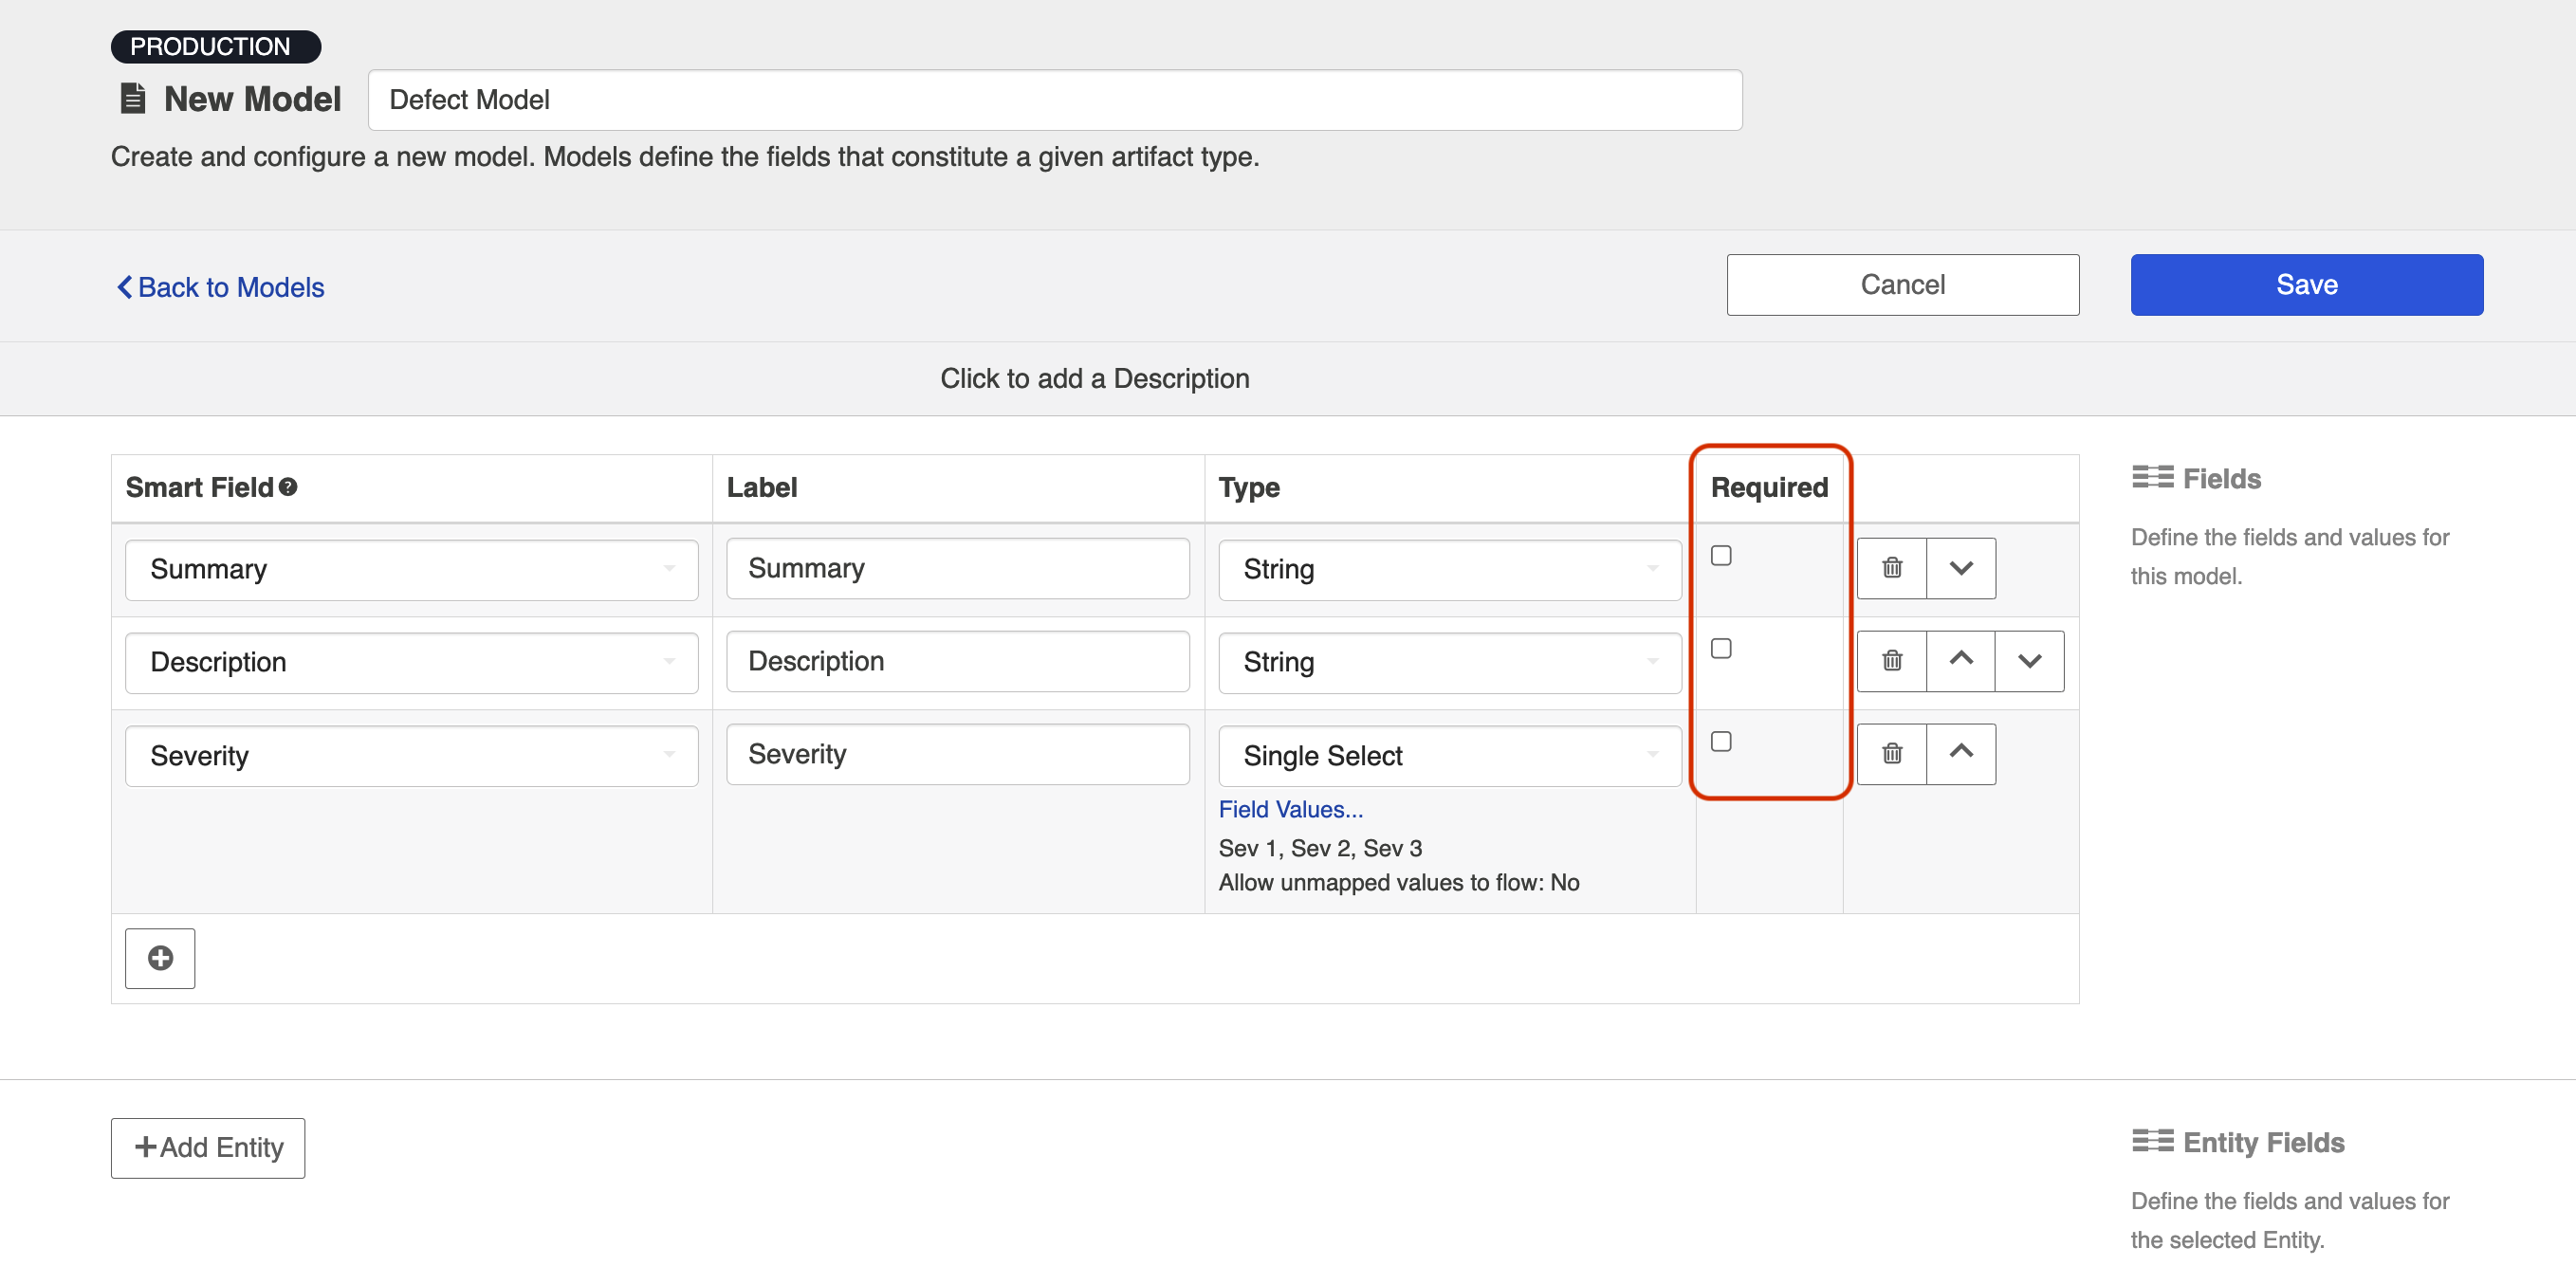
Marking a field as required has implications for all collection types:
- For repository collections, any required model field will be shown with a red asterisk in the collection to model mapping.
- For gateway collections, you will need to pass in a value in the payload for any required field in order for Hub to accept the payload.
- For database collections, the suggested DDL will mark the field as required ("not null"); this means that if you use that suggested DDL to create your database tables, the field will be required by your database table to create a new record about an artifact.

Viewing Associated Configuration Elements
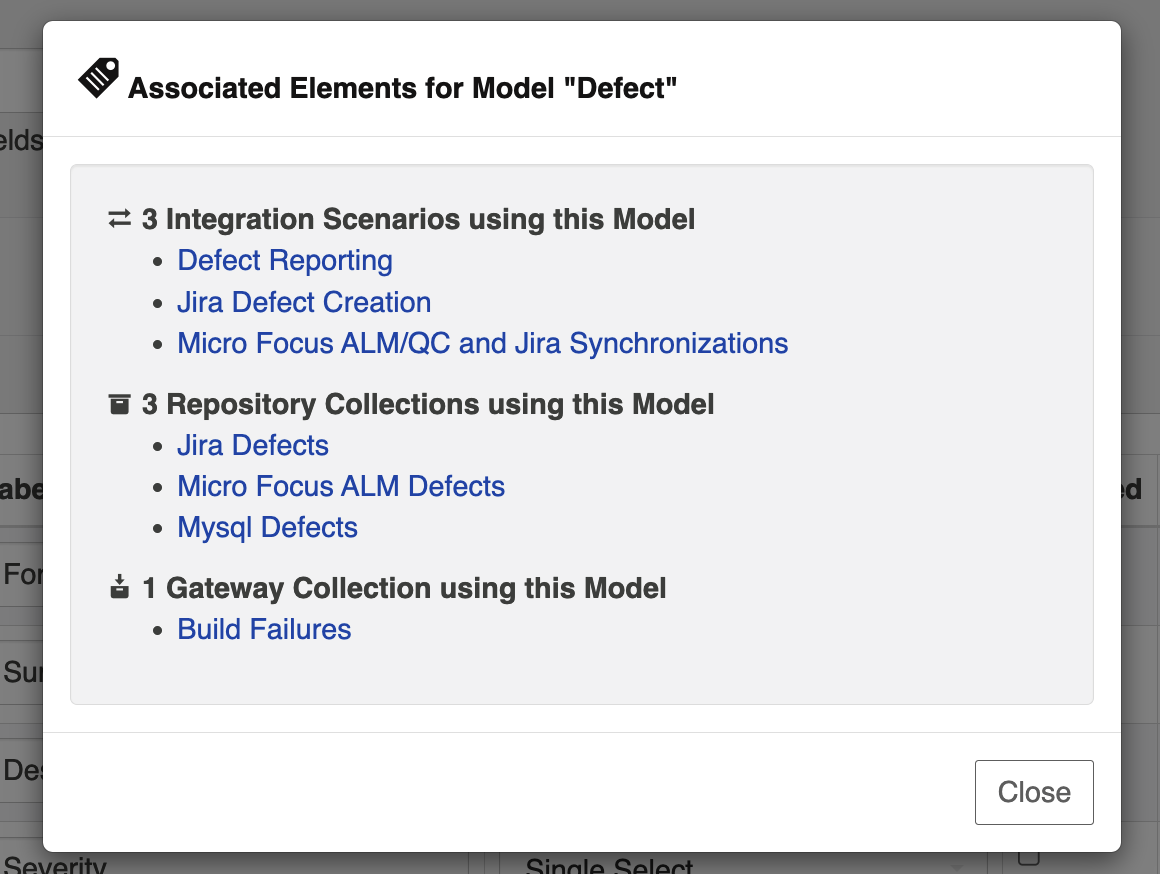
To view associated configuration elements (such as collections or integrations that utilize the model you are viewing), click the Associated Elements tag in the upper right corner of the screen.
Best Practices for Models
- Generally, the fewer models, the better. Create one model per primary artifact type. The model should have the greatest number of fields needed to accommodate all of your integrations for that artifact type. Then, at the collection- and integration-level, you can configure your field flow to only flow whichever fields are relevant for that integration. By utilizing fewer models, you'll see benefits in improved governance and standardization, and greater ease of scalability, data collection, self-service, and maintenance.
- The model field, by definition, sits in the middle of two fields: one from each repository you are integrating. Those two fields in your end systems may have different levels of detail, but by definition, they must map to the same model field. We recommend that your model field match the ‘richer’ of your two fields. This will ensure you preserve as much information as possible for as long as possible in your integrations. This allows your model to be more reusable and to support more scenarios.
For example, when mapping between text fields, it's often good practice to use a rich text field in your model. That way, you preserve the rich text from the source. If you map a rich text field to a text (string) field in the model, you'll lose the formatting information immediately.
- If you are mapping a single- or multi-select field in your repository that contains a large look-up list (i.e., which has hundreds or thousands of possible values):
- If the list of values match between your source and target repositories, make the model field a string field. This will allow the values to flow between the repositories without the need to maintain a field mapping.
- If you only need to map a small sub-set of the values, make the model field a single- or multi-select field, and check Allow unmapped values to flow.
- Whenever possible, utilize the smart fields available. For example, if you would like to add a 'status' field to your model, use the 'status' smart field, rather than entering 'status' as the field label, and selecting a field type manually. This will enable Hub to auto-map the model field to the appropriate fields within each repository.
- If you would like to use a field for artifact filtering, make sure to include that field in your model.
Glossary of Field Types
Fields that Require Additional Configuration
Single-Select and Multi-Select
Single-selects and multi-selects fields refer to fields in which the user selects one or many options from a list of values. These fields could refer to drop down menus, checkboxes, or radio buttons within the end repository, to name a few examples.
When utilizing single-select and multi-select fields in your model, there are a couple of additional configuration steps to be aware of.
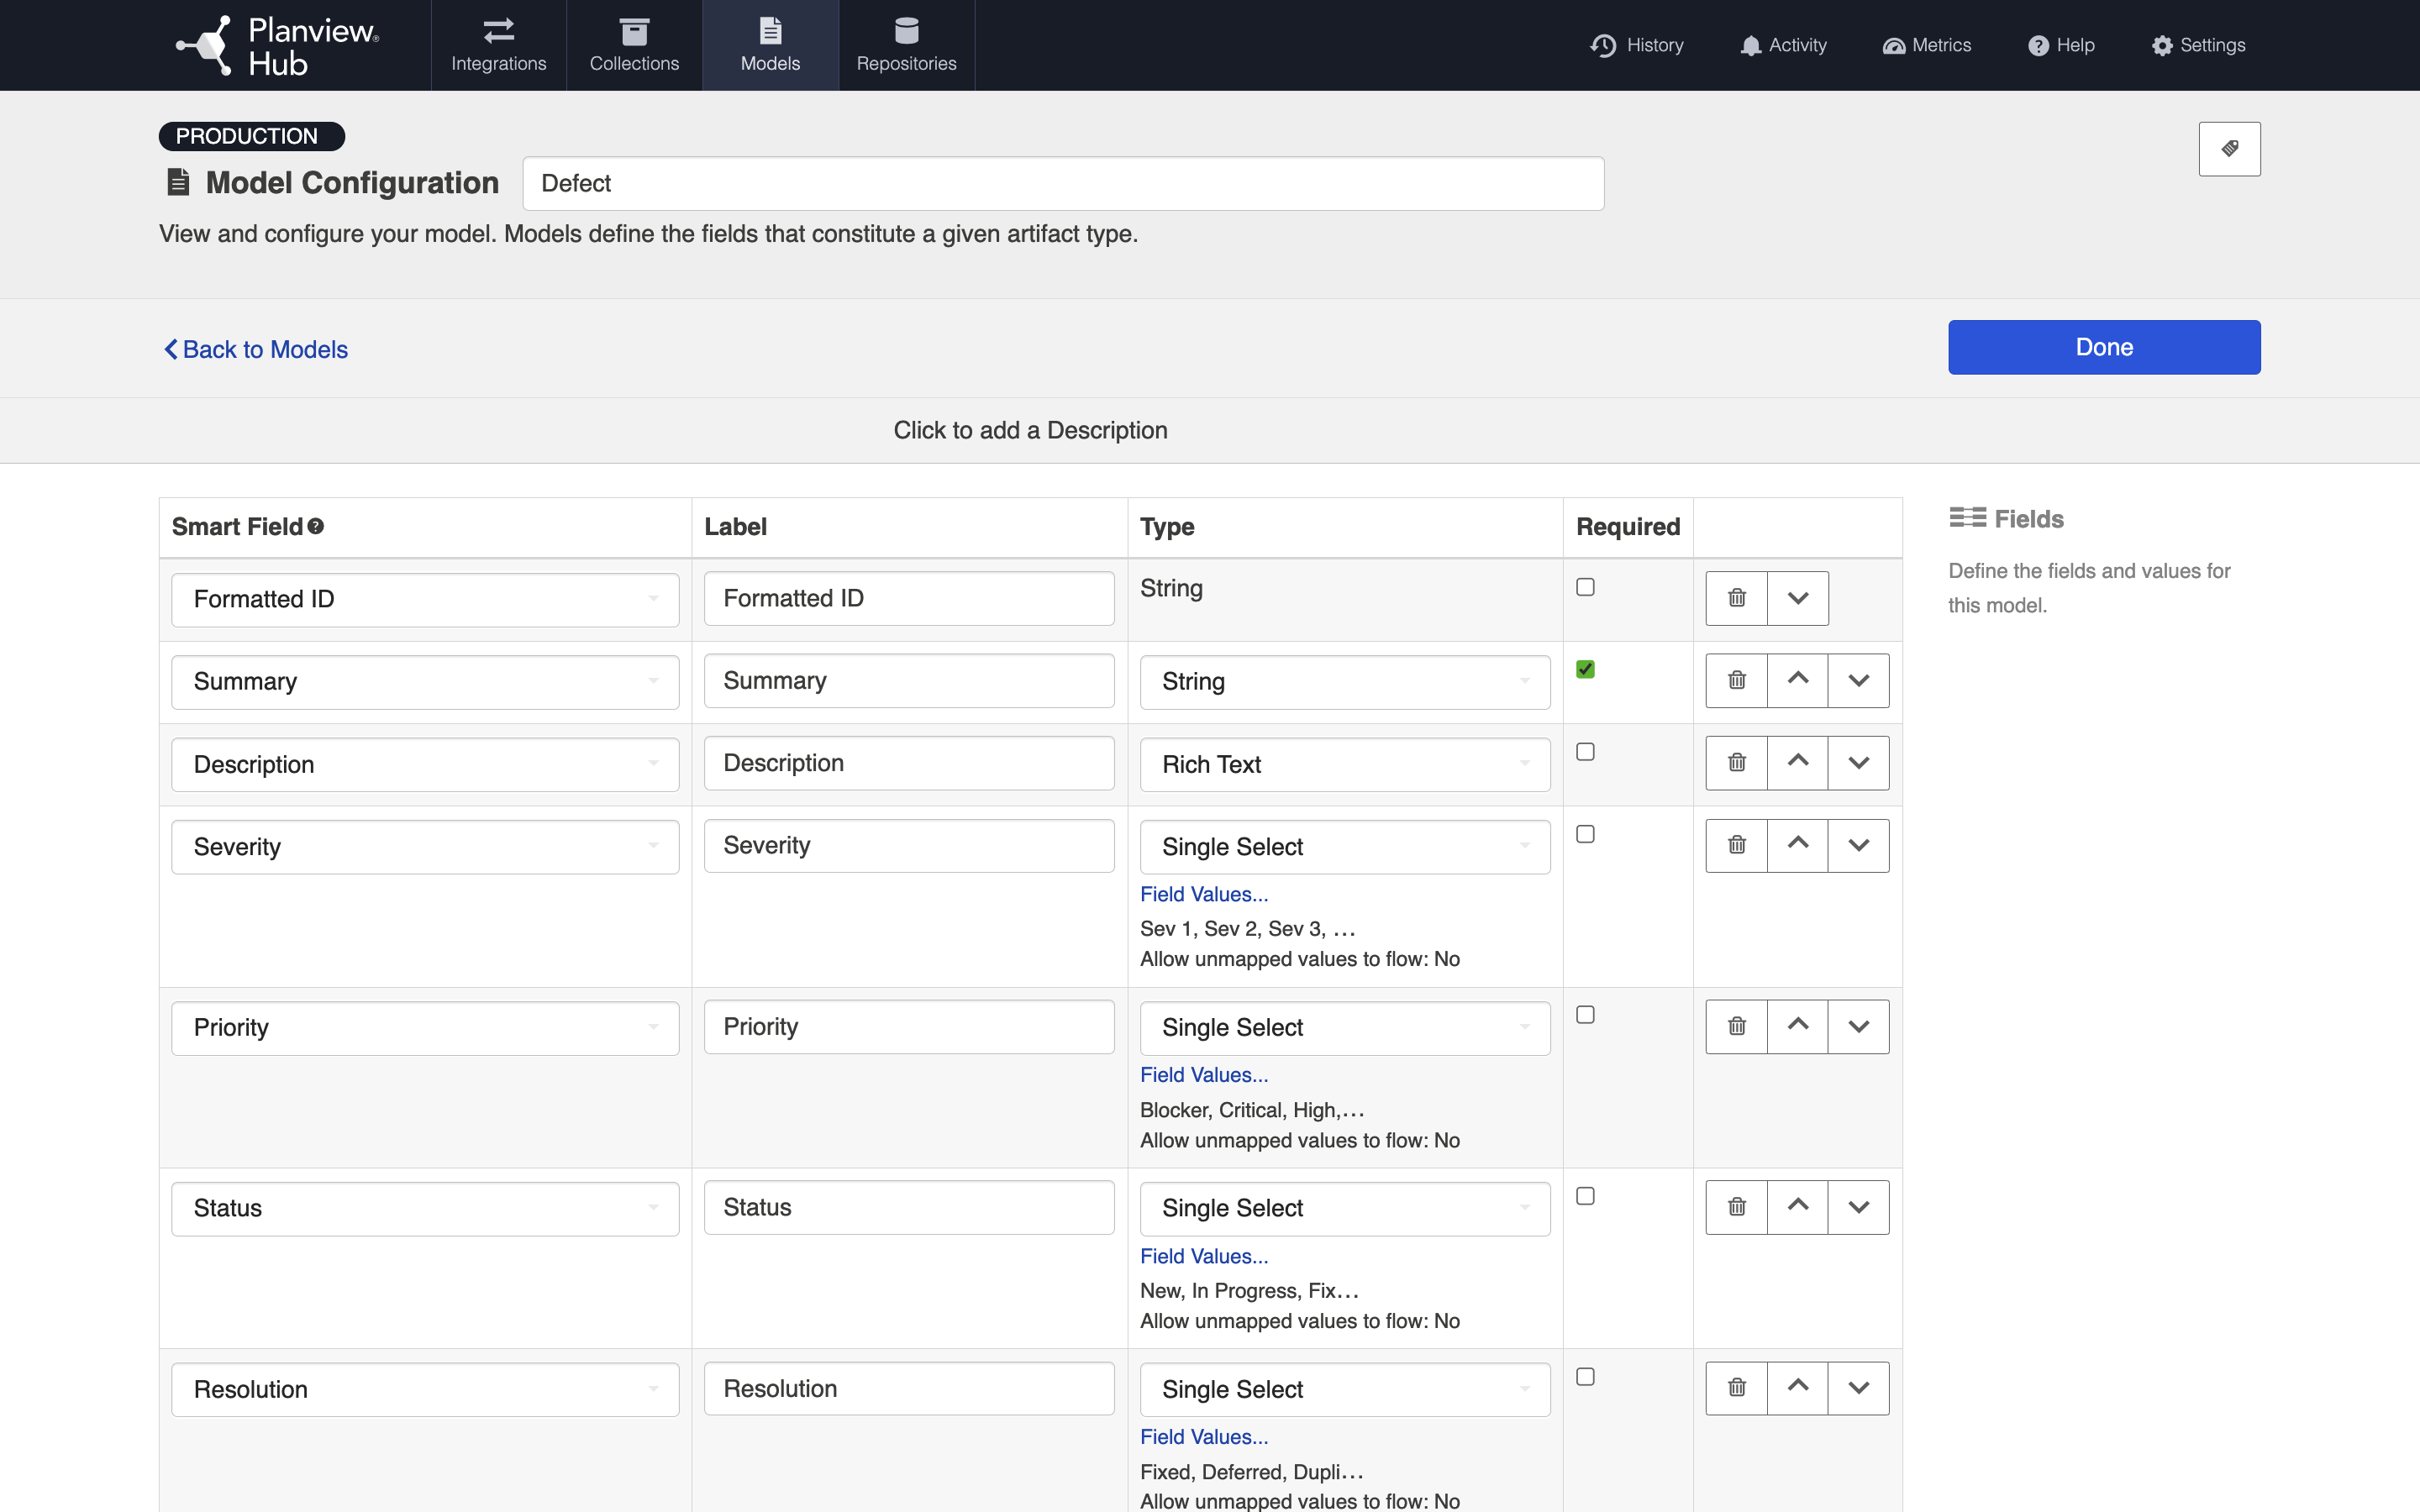
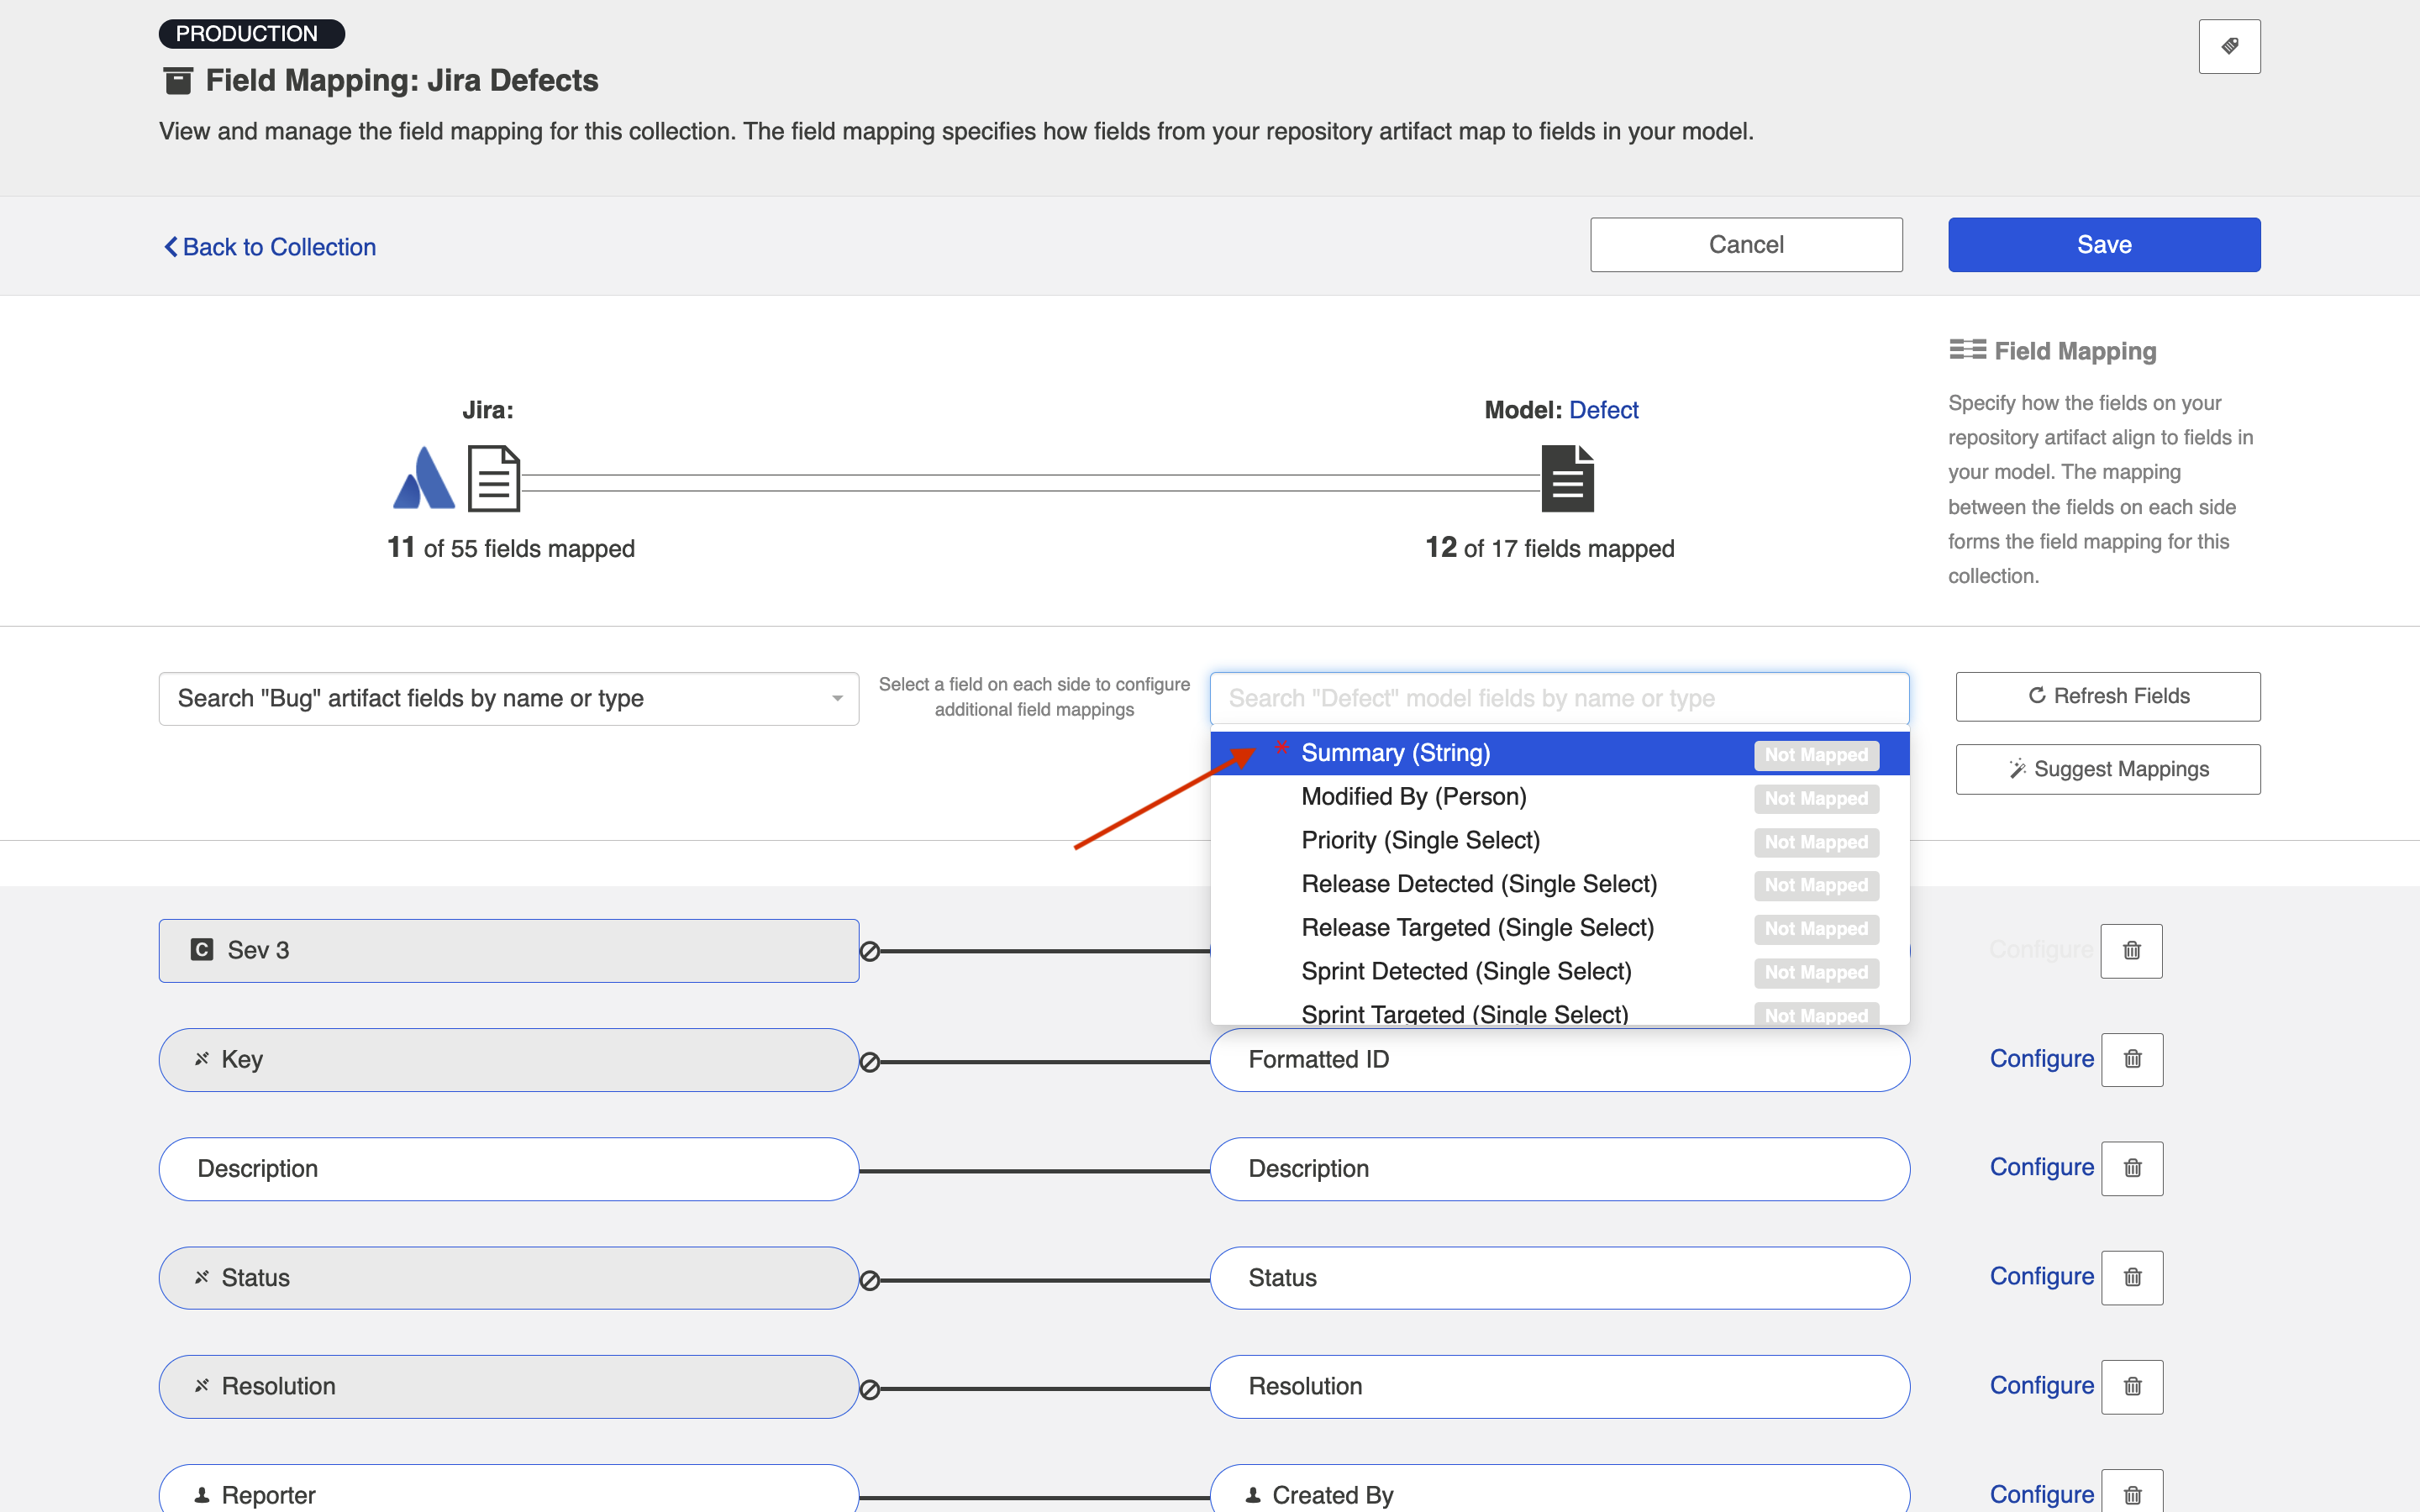
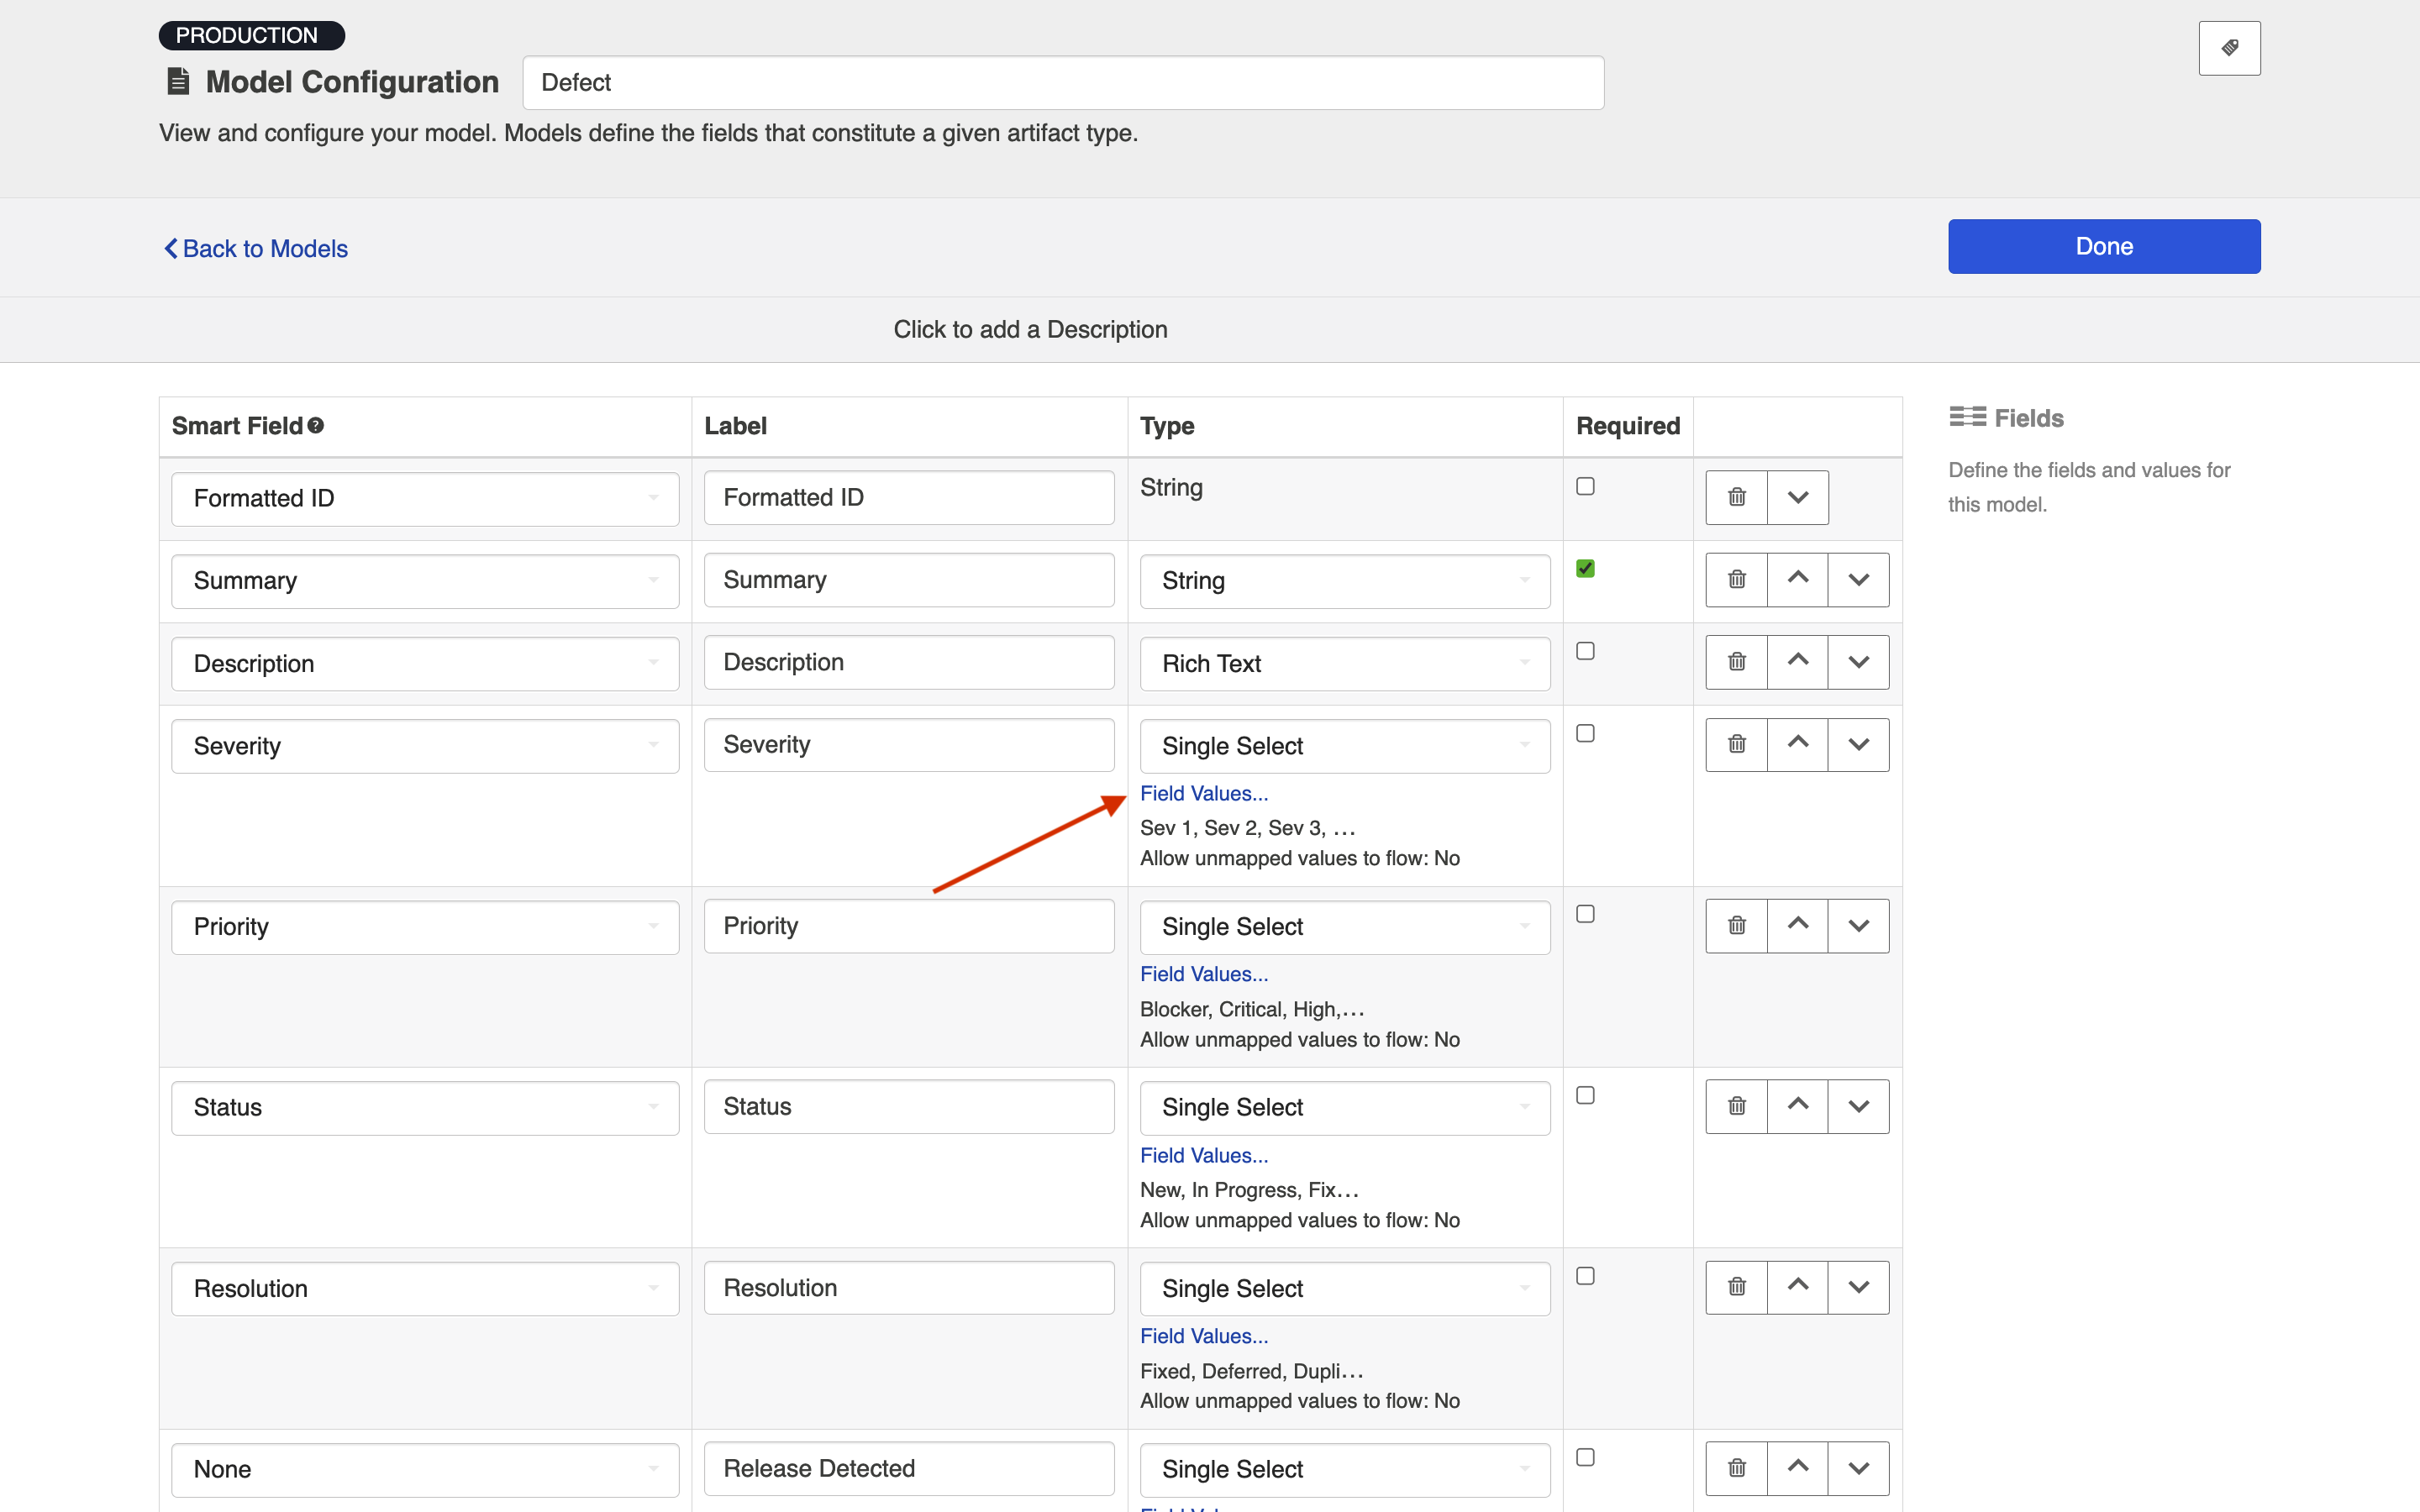
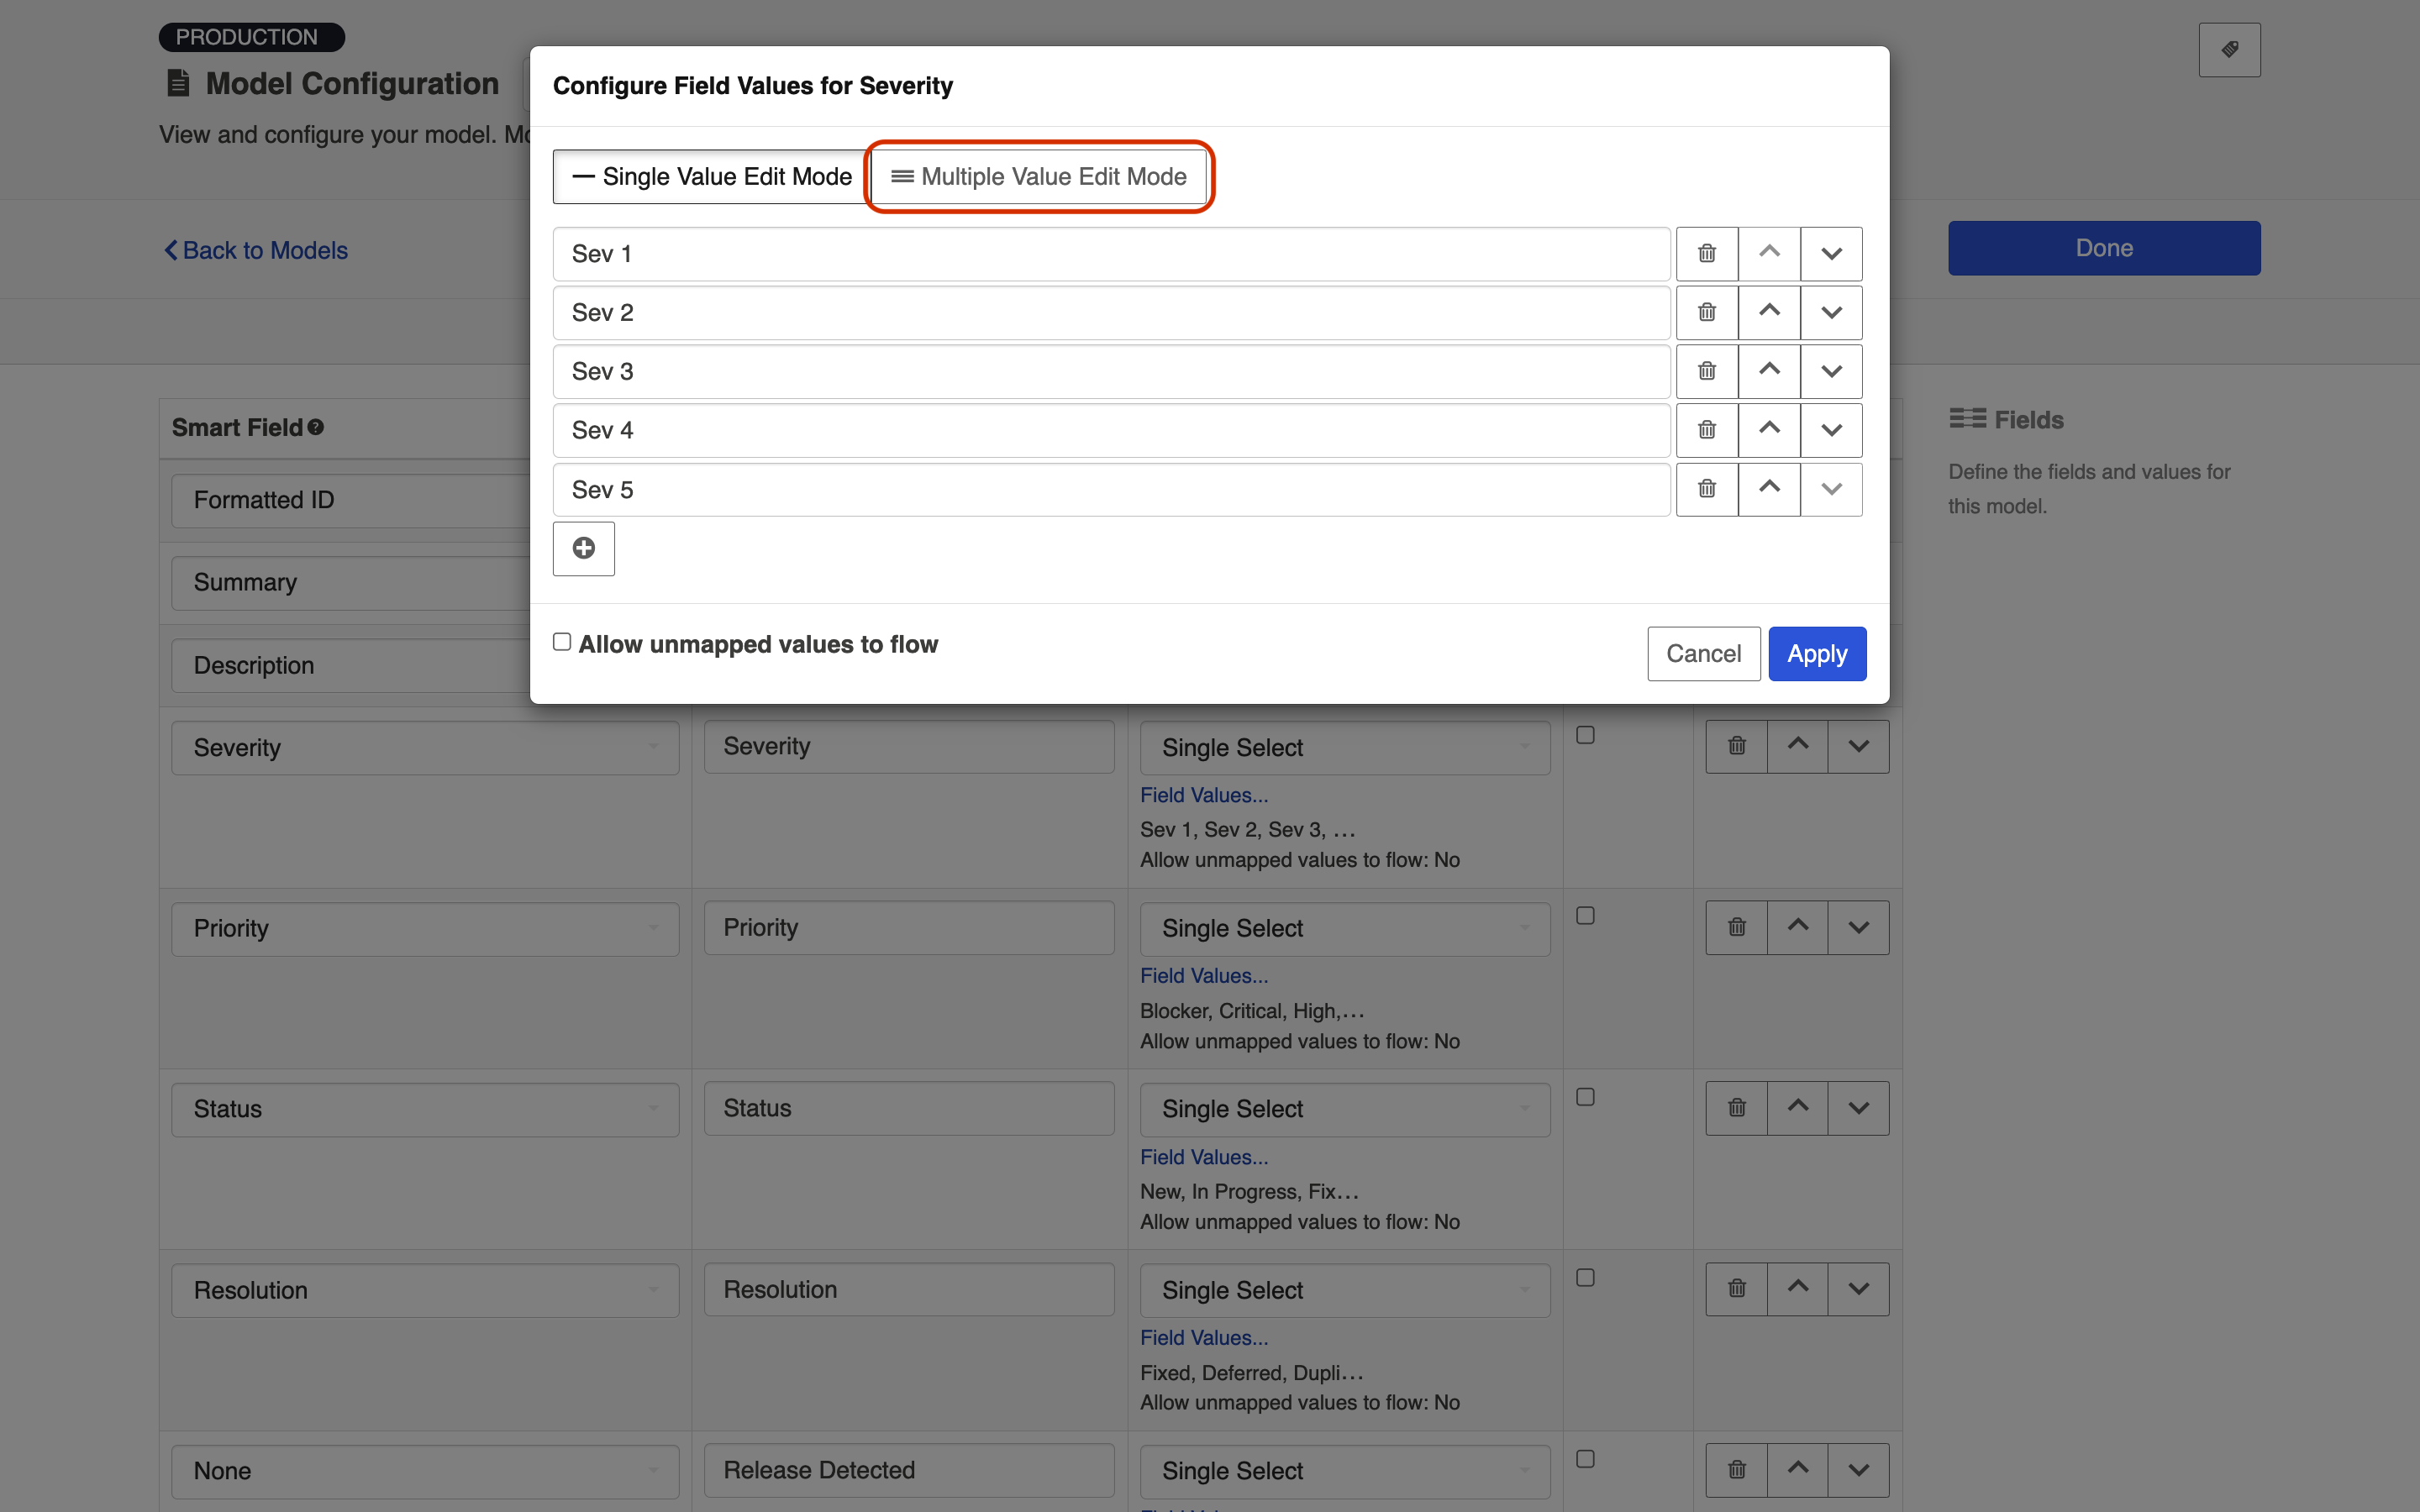
First, click the Field Values link to add values to your model. These will be the available field values that you will then map to fields within each end repository.
After clicking the link, a pop-up will appear prompting you to configure your field values. If you'd like to add a single field value to your model, you can use the + button to do so.
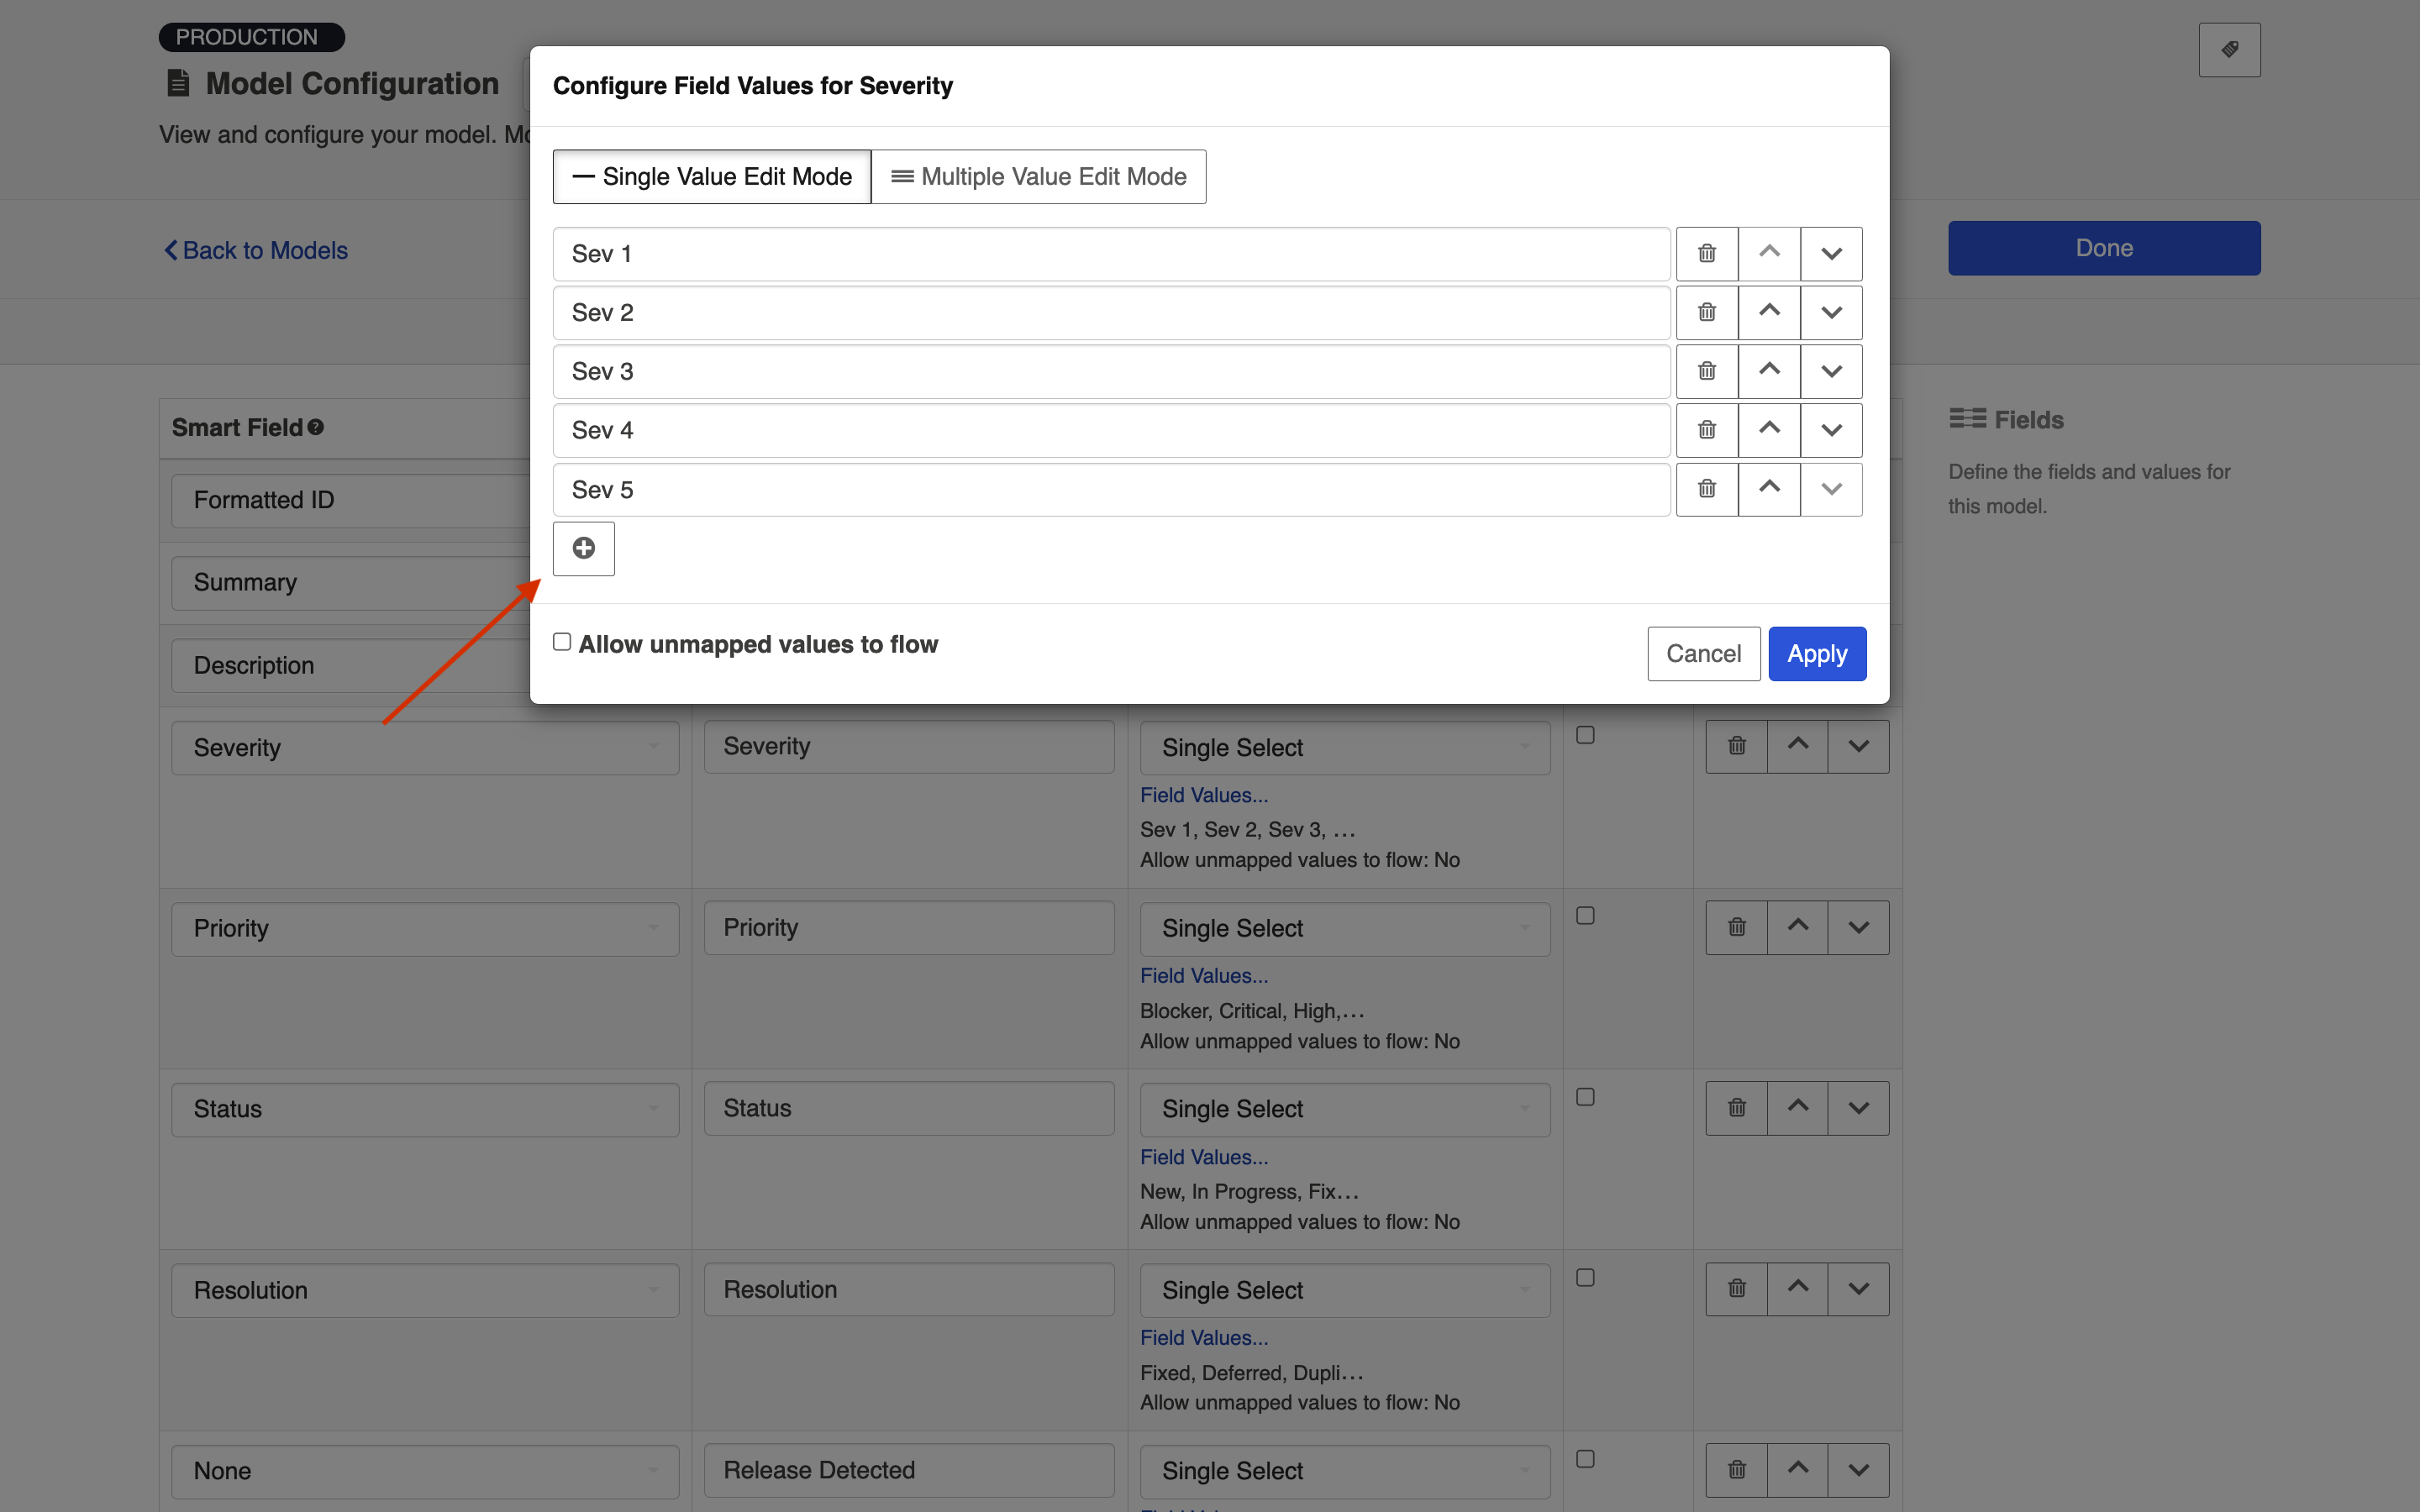
If you'd like to add multiple values at once, select Multiple Value Edit Mode.
Here, you can input multiple values by separating each value with a new line.
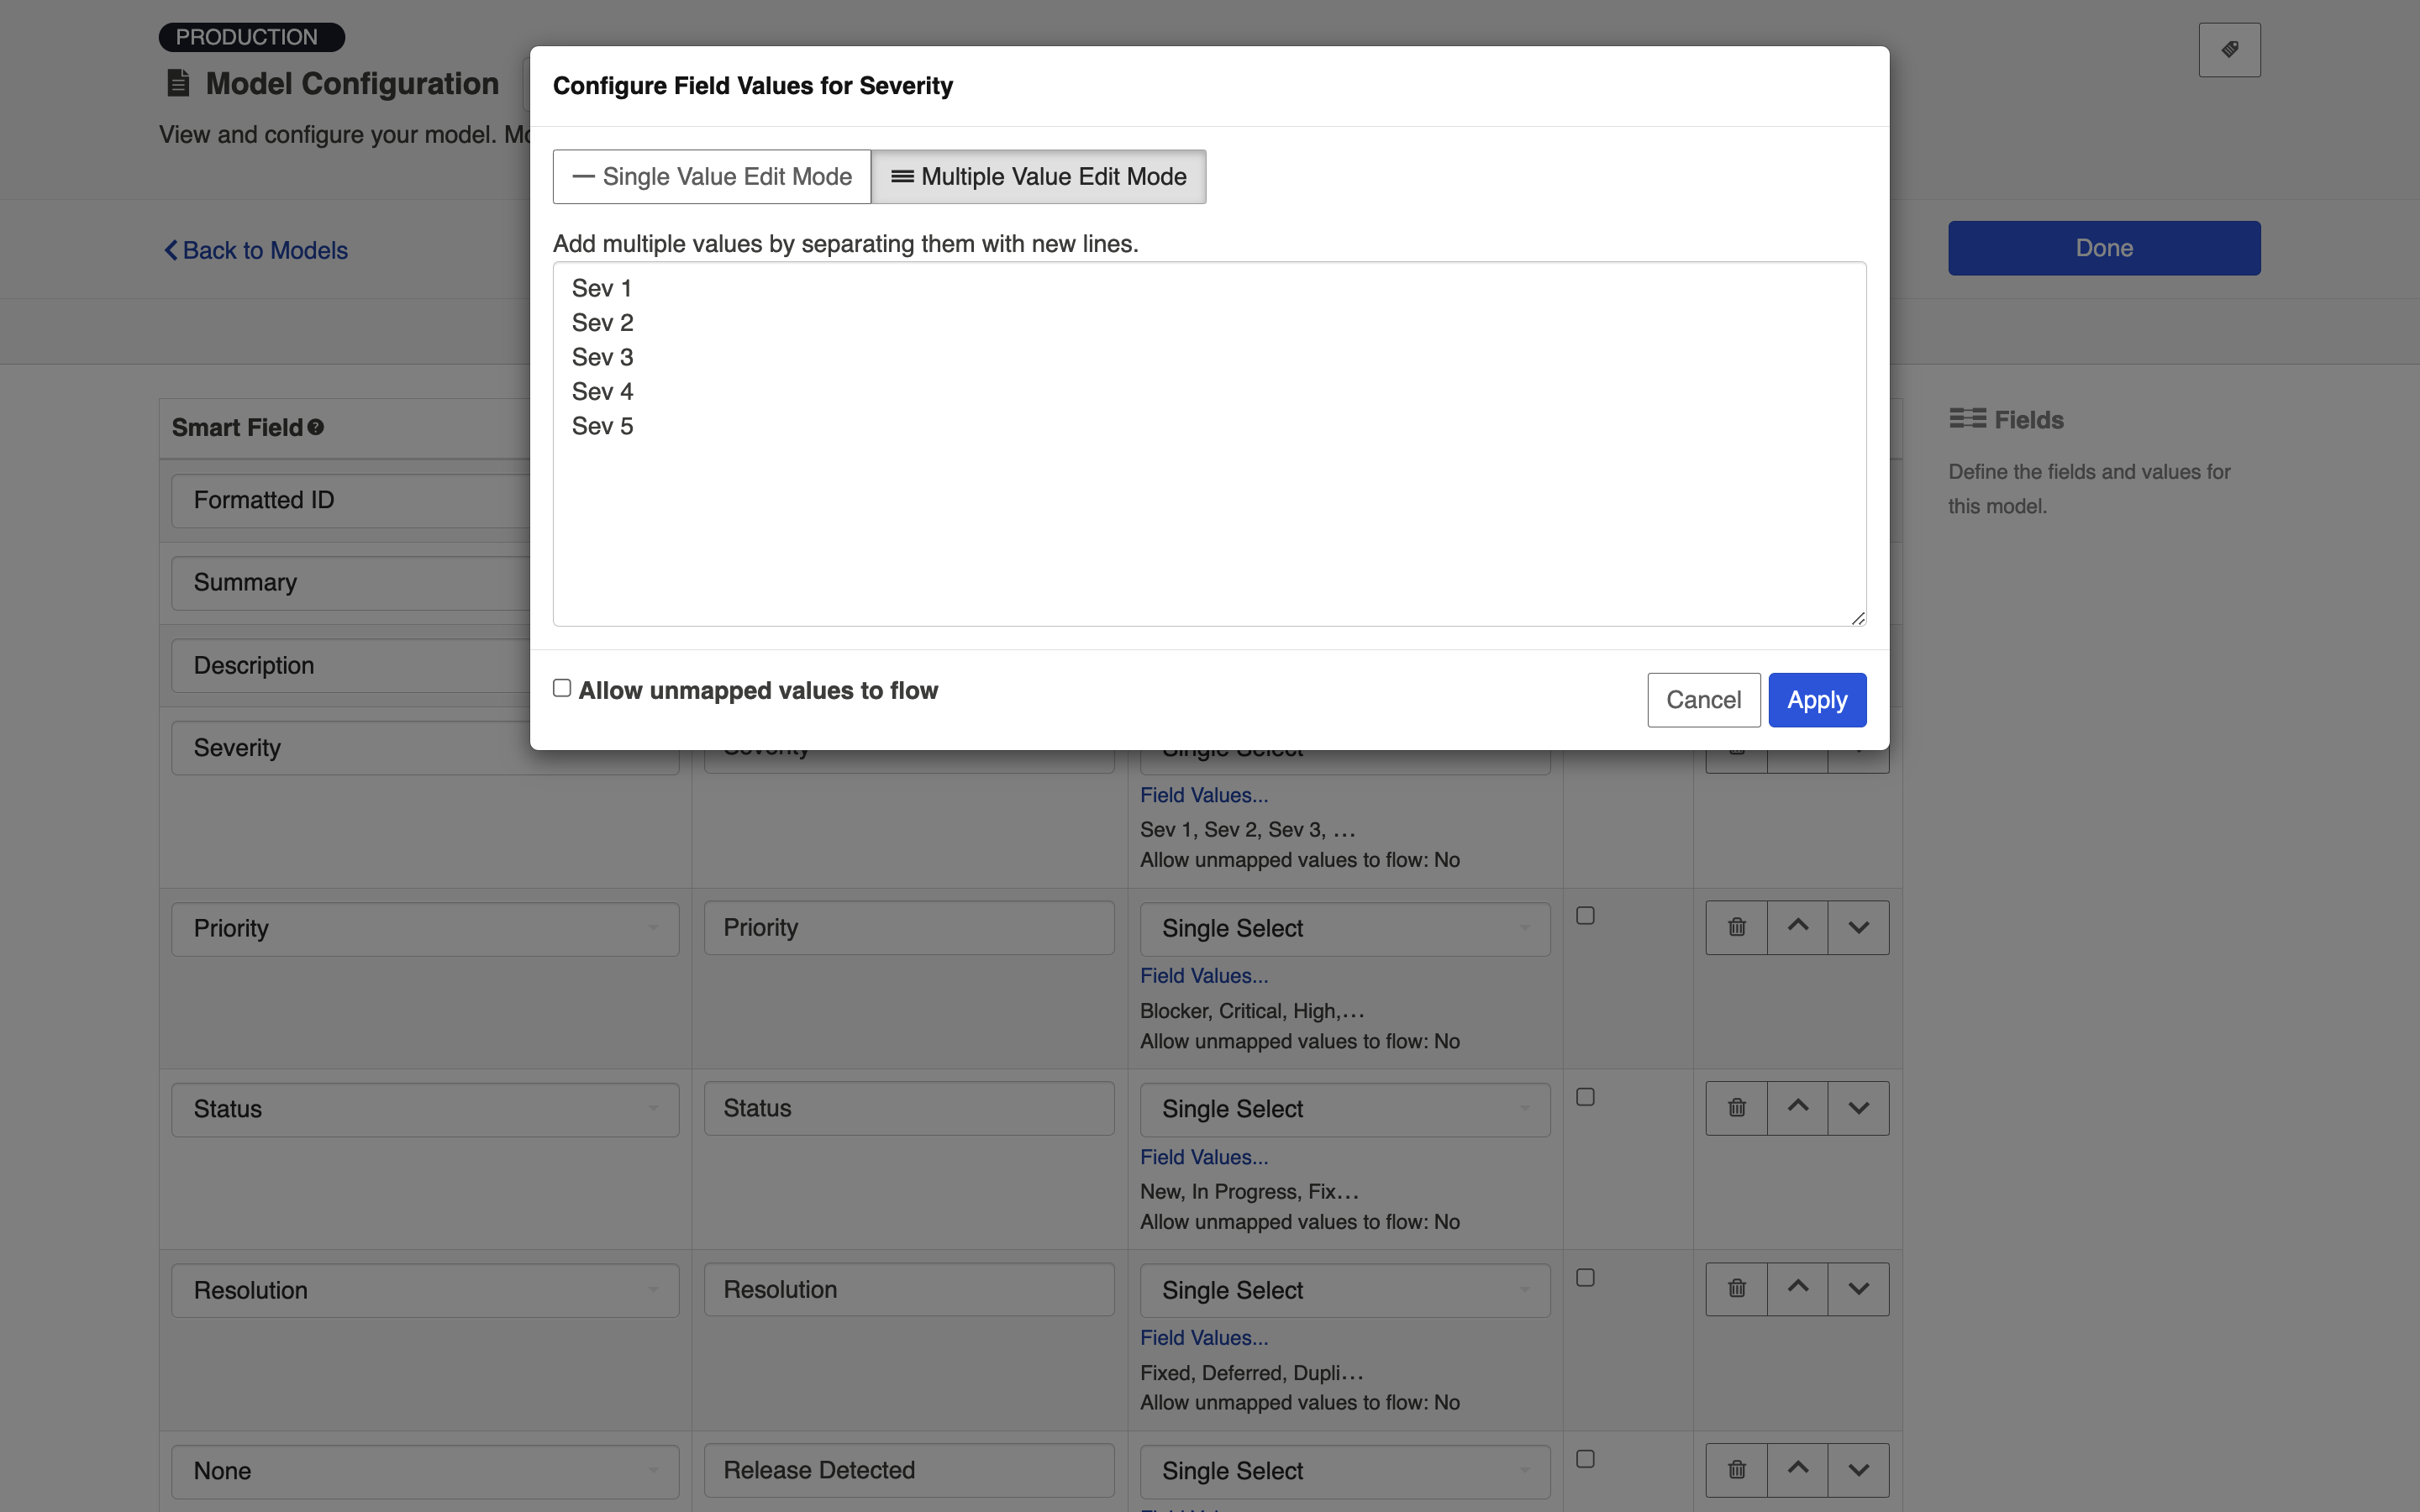
Next, decide whether or not you'd like to allow unmapped values to flow by checking this box.
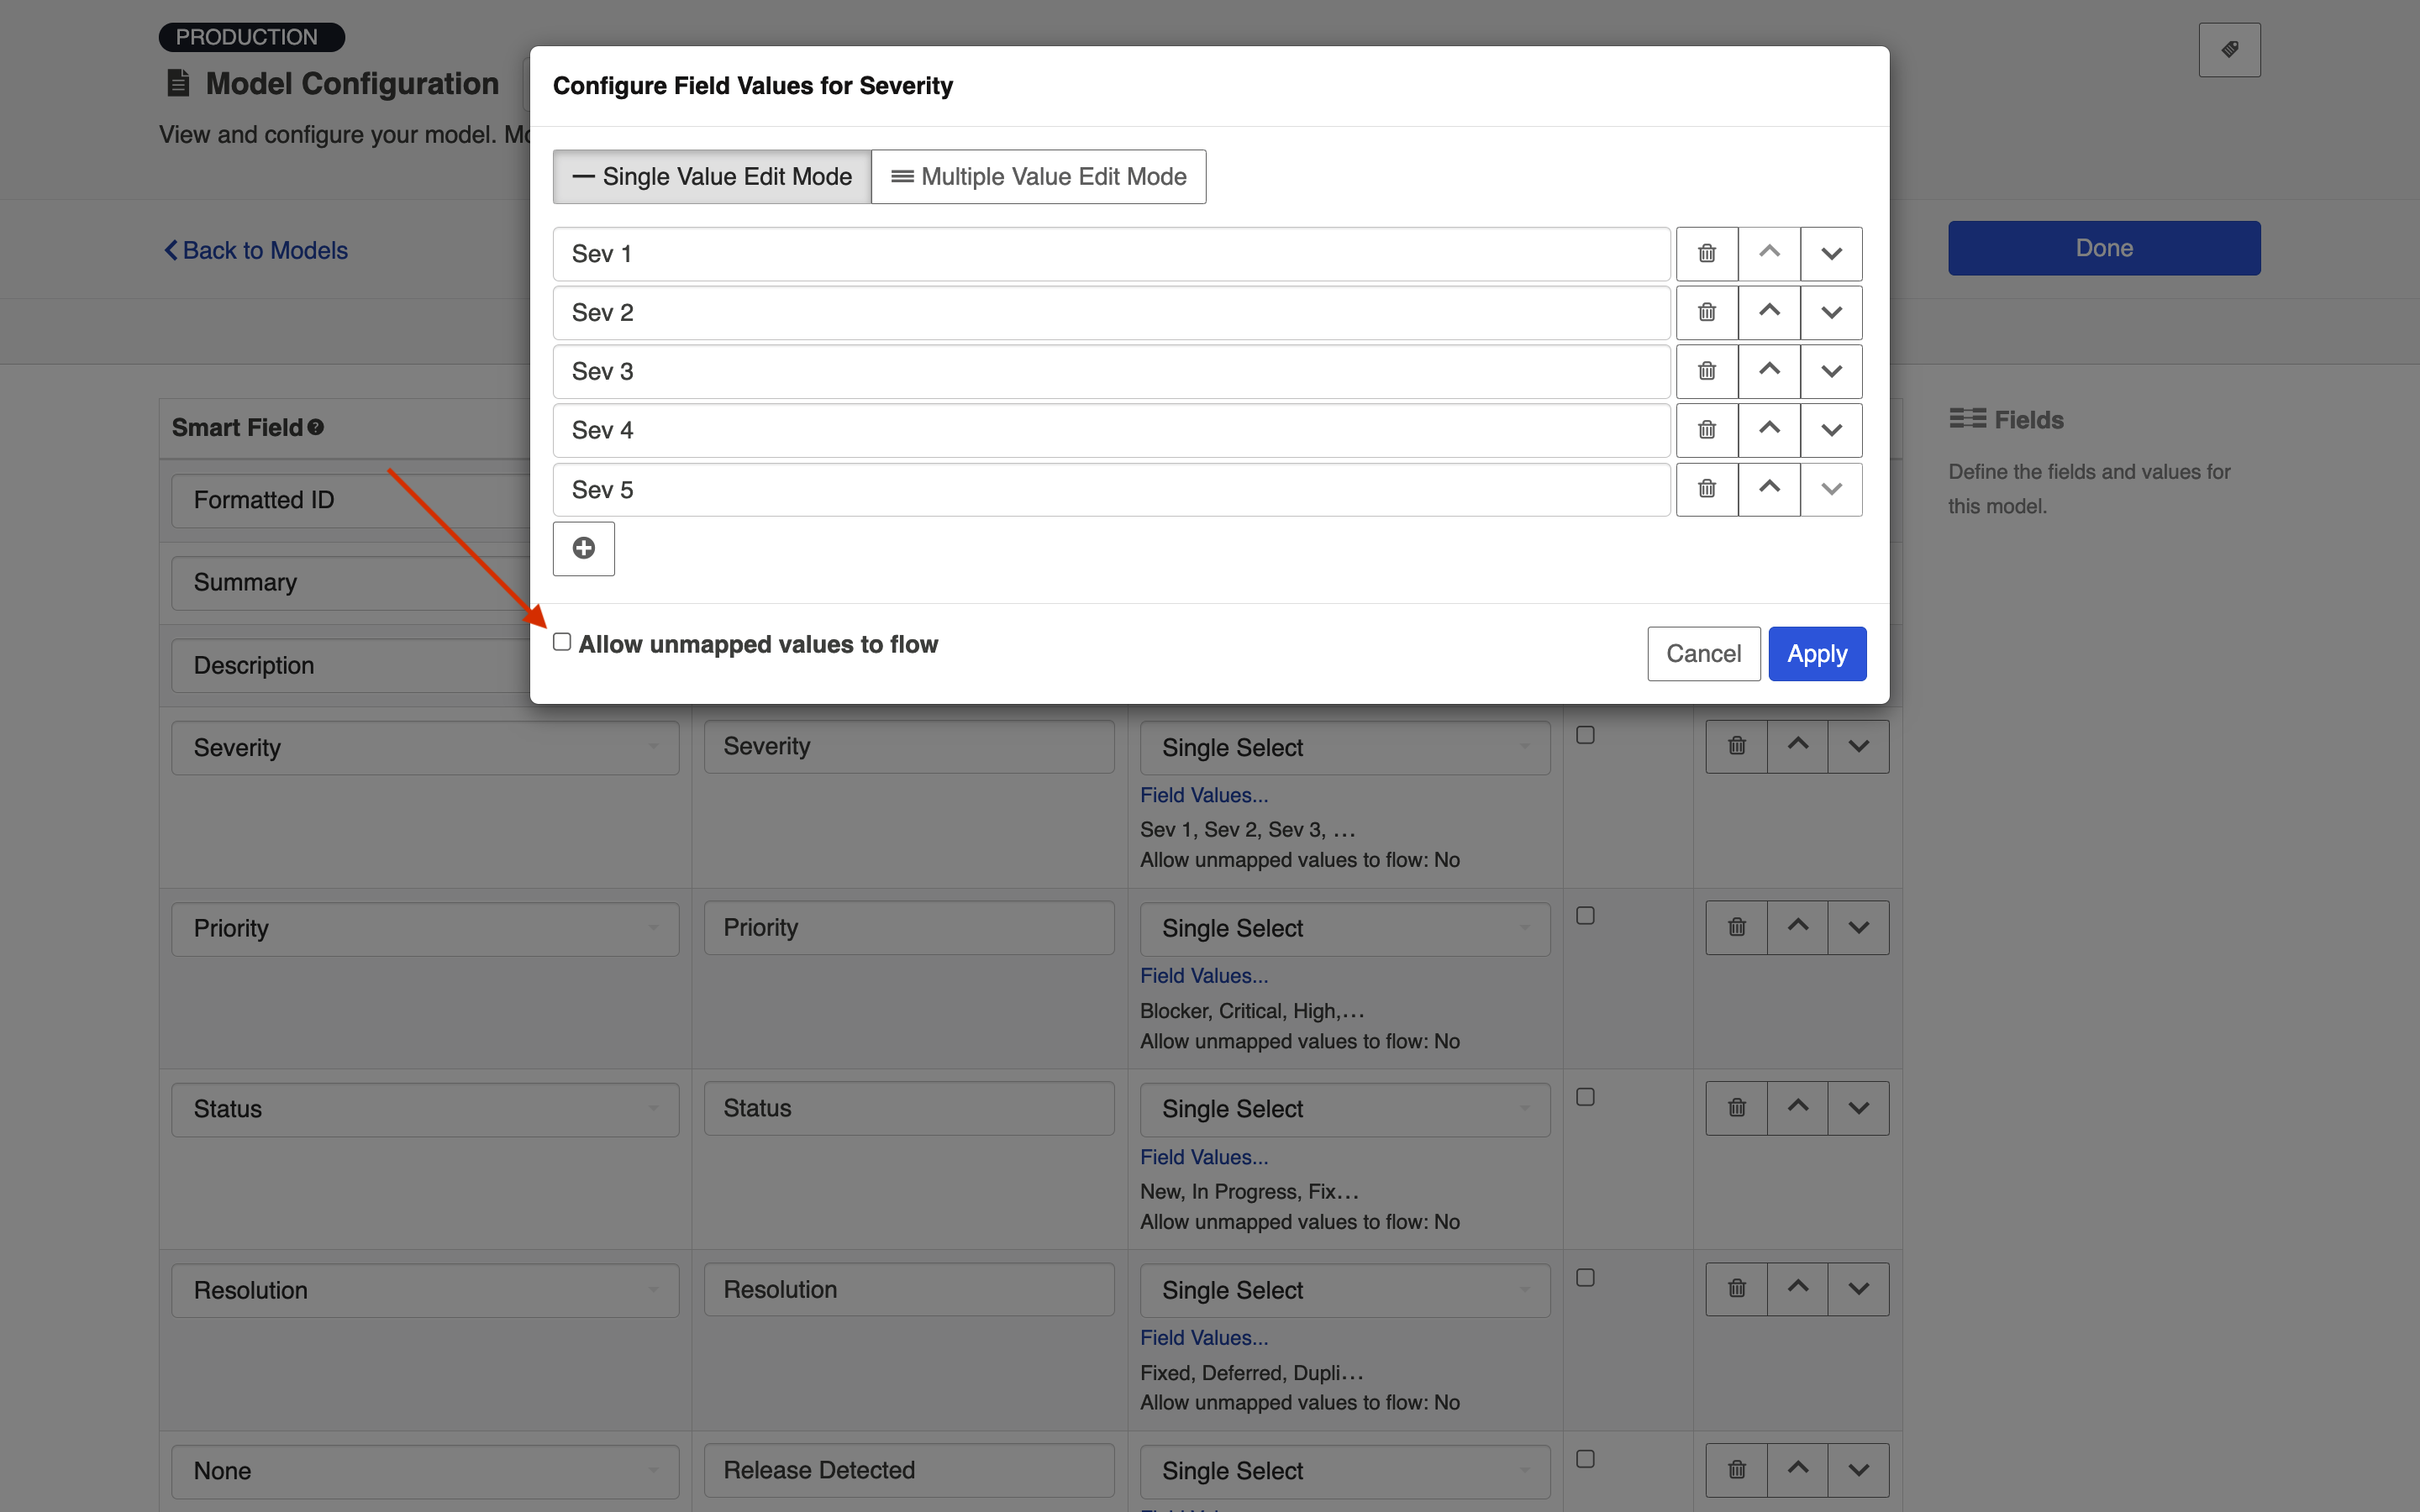
If you do not allow unmapped values to flow (the default setting), the server will reject any value that is not specified in the model. In general, this is the recommended approach. If you select this approach, you will need to map all possible values for the repository field to the specific values for the model field on the Field Configuration screen during Collection configuration.
If you do allow unmapped values to flow, field values not specified in the model will be able to flow while the integration is running. This can make sense in a few specific scenarios, such as an Enterprise Data Stream integration or in single select to string transforms, where there are many options available and you don't desire any normalization of the data flowing through. In most cases, however, you will not want to allow unmapped values to flow.
In the image above, you have added 5 specific values for the field "Priority" but have not allowed unmapped values to flow, meaning that any field values sent from the collection will need to be mapped to these 5 model values in order for your artifact to flow successfully.
Fields that Do Not Require Additional Configuration
Boolean
Boolean fields are typically represented by checkboxes in the end repository. These fields are often useful for filtering integrations. As an example, you could create a custom boolean field titled "Participate in Hub Integration". If you filter by that field (on the Artifact Filtering screen of your integration), only artifacts that your users have checked will participate in the integration.
Date
These identify a specific date.
Date Time
These are fields that identify something more specific than a date. For example, January 1, 2017 9:35am. A 'Created' field is often a Date Time field.
Double
Use this field for number fields - either integers or decimals. For example, a double could include both values "2" and "2.5." The Long field type can also be used for integers.
Duration
This field holds a length of time. This is typically used for worklogs and time estimations on tasks.
Location
This model field holds a URL.
There is also a Smart Field called Location which is specifically for the URL of a given artifact. The Location Smart Field is often used when you want to synchronize a URL reference field to your target artifact (sometimes referred to as 'backlinking'). This allows for bi-directional traceability. It can also be used to report the location of an artifact in an Enterprise Data Stream integration.
The 'Location' model field type, on the other hand, can be for any URL.
In addition to 'Location,' you will also see that there is a 'Web Links' field type available. The 'Web Links' field type includes the URL as well as additional information such as label, creator, and time of creation (depending on what the repository supports), while 'Location' includes only the URL.
Long
This field is for integer or whole numbers, only. An example of a Long field value is "2," but not "2.5." The Double field type can be used if you will also need to cover decimal values. Story points are a good example of a Long field.
Person and Person(s)
You'll notice that you are able to create both 'person' and 'persons' field types in your model. 'Person' refers to fields that contain one, and only one, Person object. Examples of this type of field are: Assignee, Owner, Reviewer, etc. Person objects contain more information than just the display name of the person. For example, they may also utilize the user's e-mail address or username in order to reconcile 'persons' between different repositories. You can learn more about person reconciliation strategies here.
The Person(s) field type refers to fields that contain more than one Person. A ‘Watchers’ field is a good example. There can be one or more Persons in a single Watchers field.
In general, we recommend using the 'persons' field type in your model, rather than 'person,' especially in cases where you may want to map a 'person' field in one repository to a 'persons' field in your other repository.
Relationship and Relationship(s)
You'll notice that you are able to create both 'relationship' and 'relationships' field types in your model. 'Relationship' refers to scenarios where your artifact can be related to one, and only, one artifact. An example of a 'relationship,' is 'parent,' as oftentimes an artifact can only have one parent artifact. 'Relationships' refers to scenarios where your artifact can be related to many artifacts. An example of 'relationships' is 'child,' as one parent-artifact can often have many child artifacts.
In general, we recommend using the 'relationships' field type in your model, rather than 'relationship,' especially in cases where you may want to map a 'relationship' field in one repository to a 'relationships' field in your other repository.
Rich Text
This is for fields that can contain rich text. These are fields that can contain HTML and/or wiki markup, such as bold, italics, or colored fonts. These are often Description fields.
String
String fields are used for text input. These model fields will not transmit rich text information.
Web Links
Web Links fields are intended to point to URLs outside of a given tool. They can contain information in addition to the URL, such as label, time of creation, and creator (depending on what the repository supports). They could also be considered a hyperlink field.
In addition to 'Web Links,' you will also see that there is a 'Location' field type available. The 'Web Links' field type includes the URL as well as additional information such as label, creator, and time of creation (depending on what the repository supports), while 'Location' includes only the URL.