What should I be aware of when upgrading to 21.1?
Last Updated: | Applicable Hub Versions: 21.1 and later
Answer
When upgrading to 21.1.0 or later from an earlier version, you must add a TasktopDeleteArtifactPairsUser role and TasktopViewArtifactPairDetailsUser to your user account in the Hub User Administration Console (Keycloak) to ensure you can view details and delete artifact pairs.
Note: All users installing Hub after 21.1 (and Hub cloud users) will have the new role by default and will not need to follow any additional steps.
To add the TasktopDeleteArtifactPairsUser role, please see the instructions below:
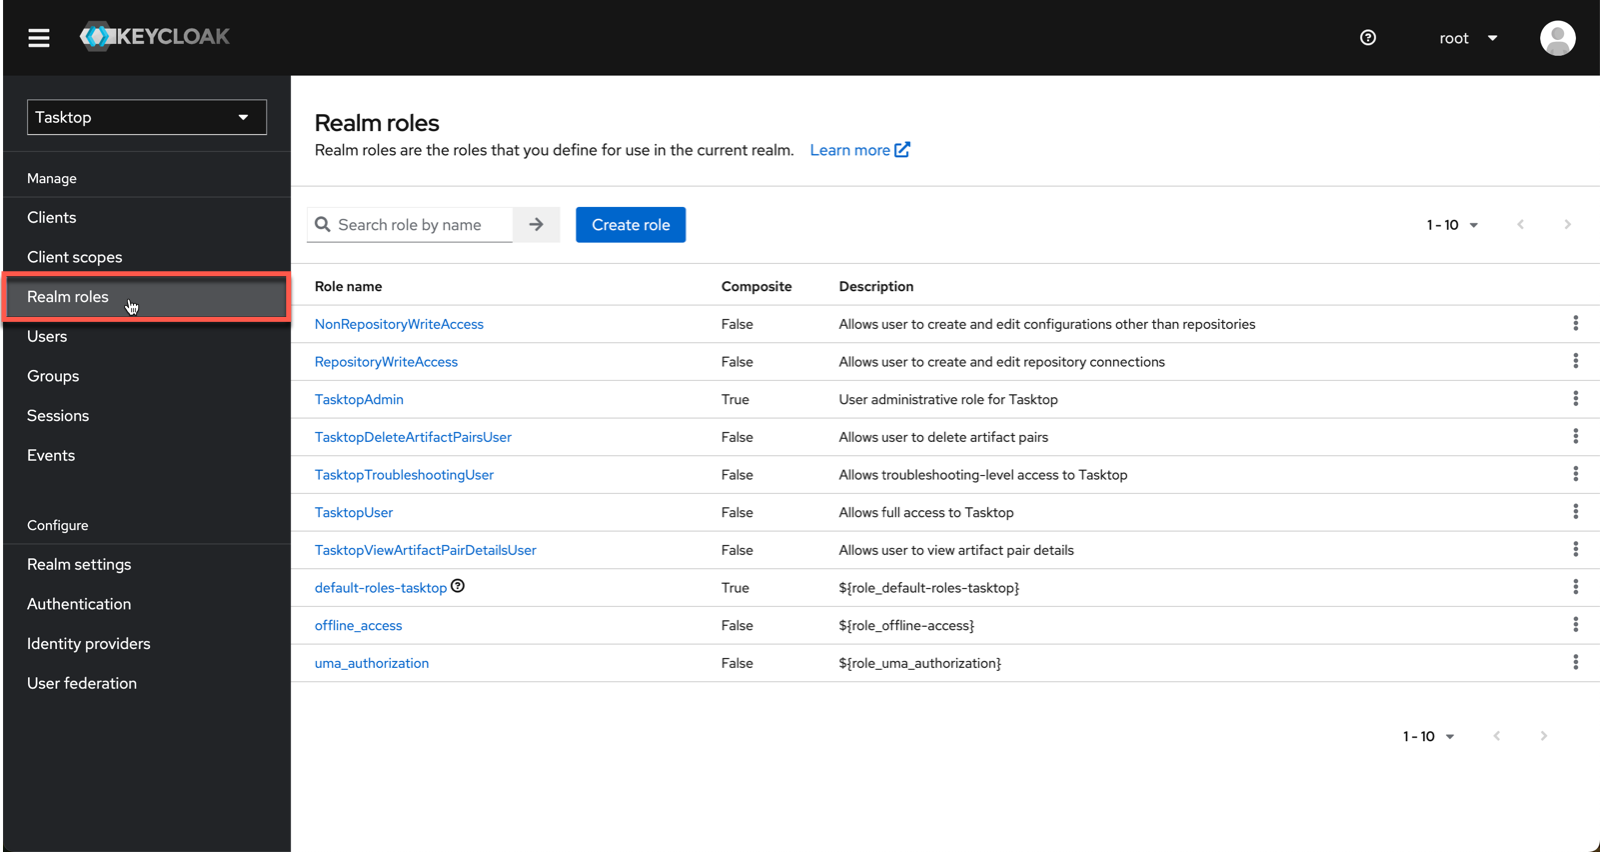
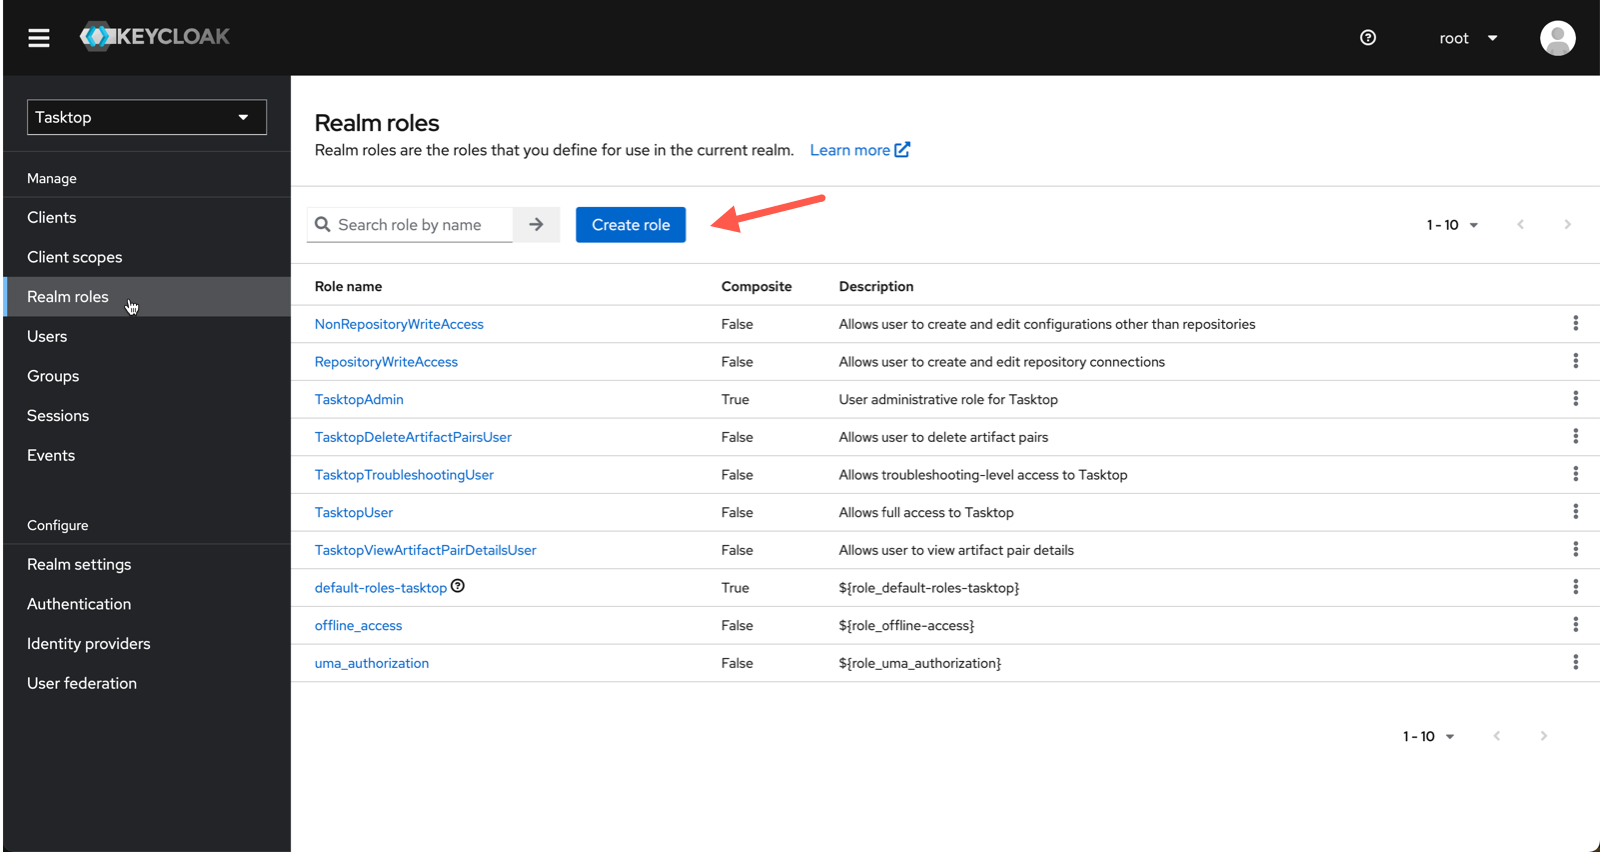
- Login to the Tasktop Admin Console and click Realm roles on the left sidebar.
- Next, click Create Role to add the new user role.
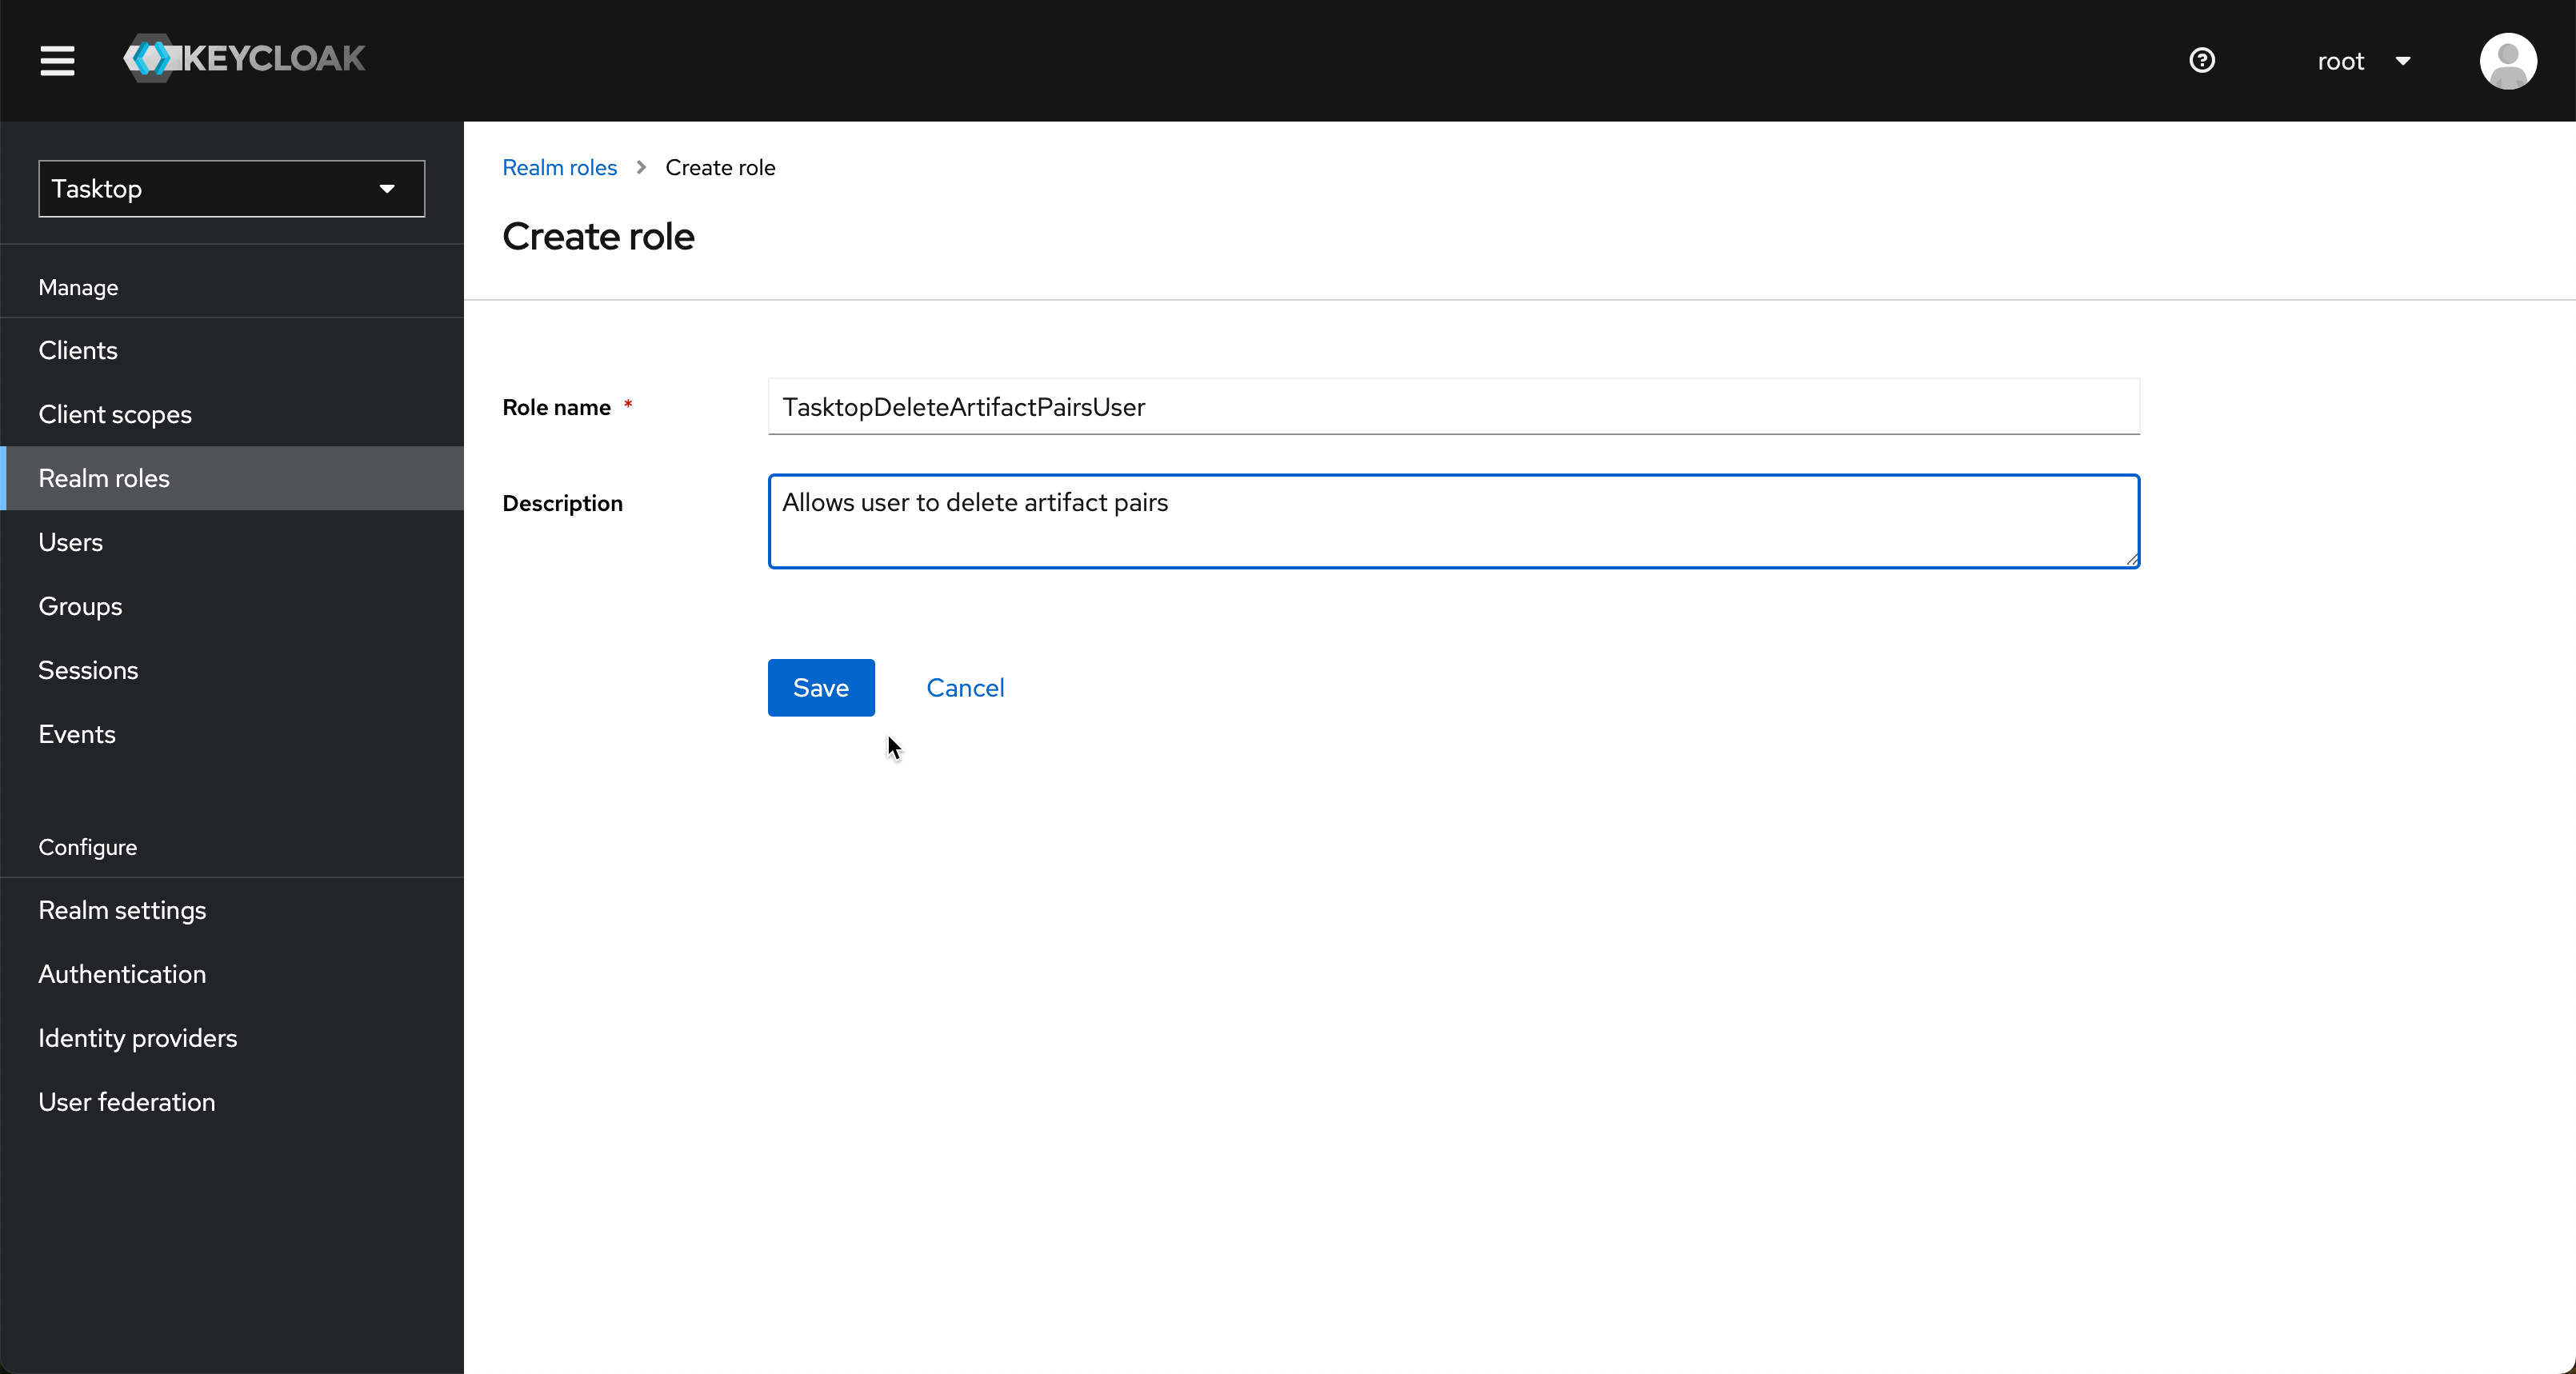
- Name the new role TasktopDeleteArtifactPairsUser and enter the following description, Allows user to delete artifact pairs.
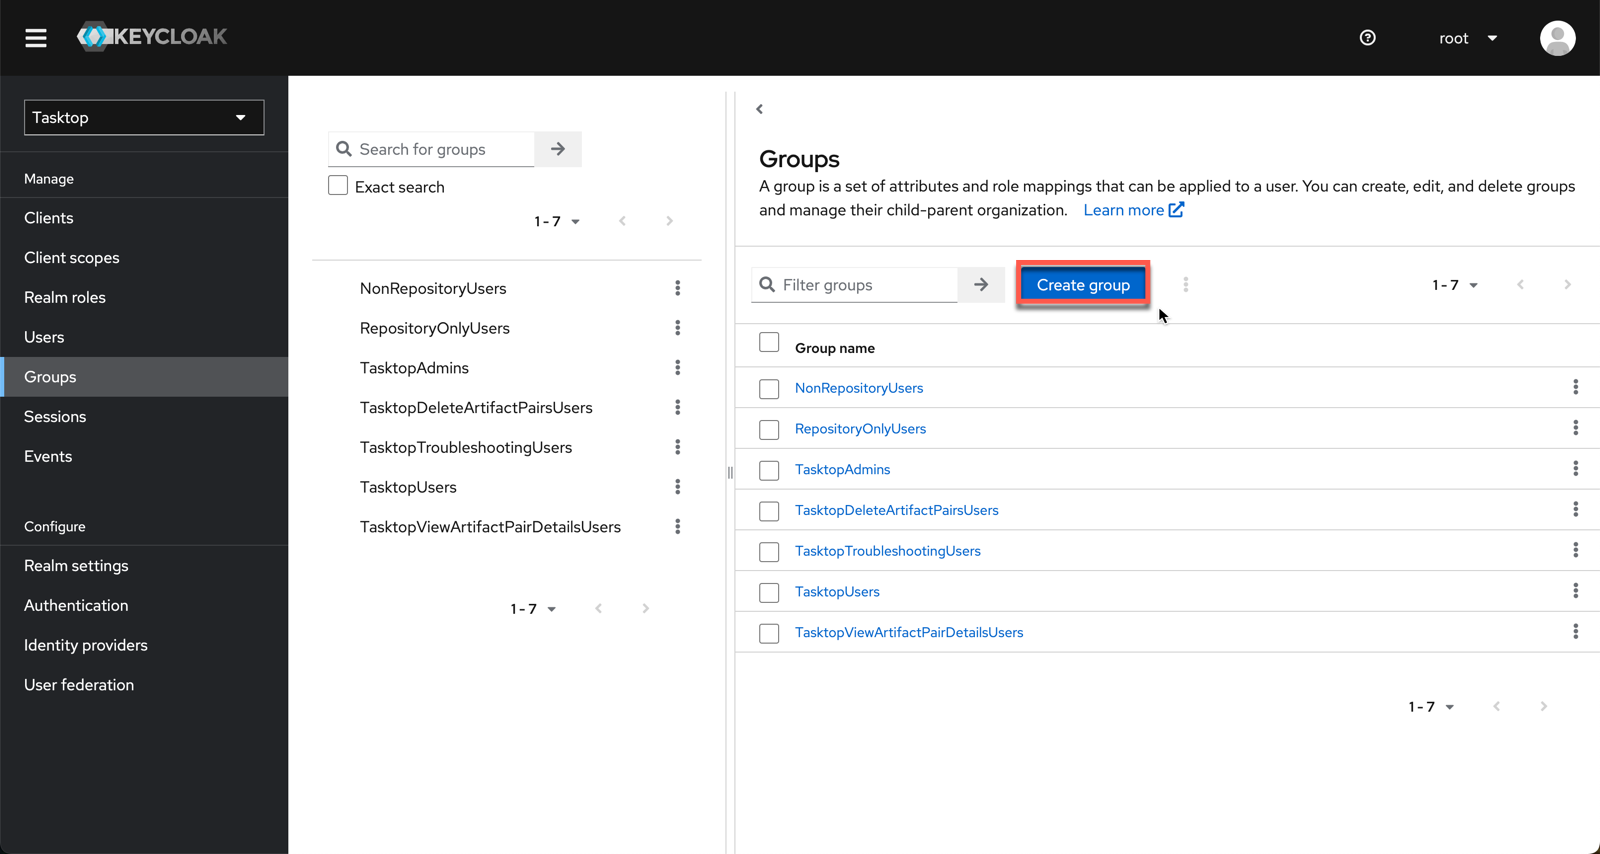
- After saving the new role, navigate to Groups and click Create group.
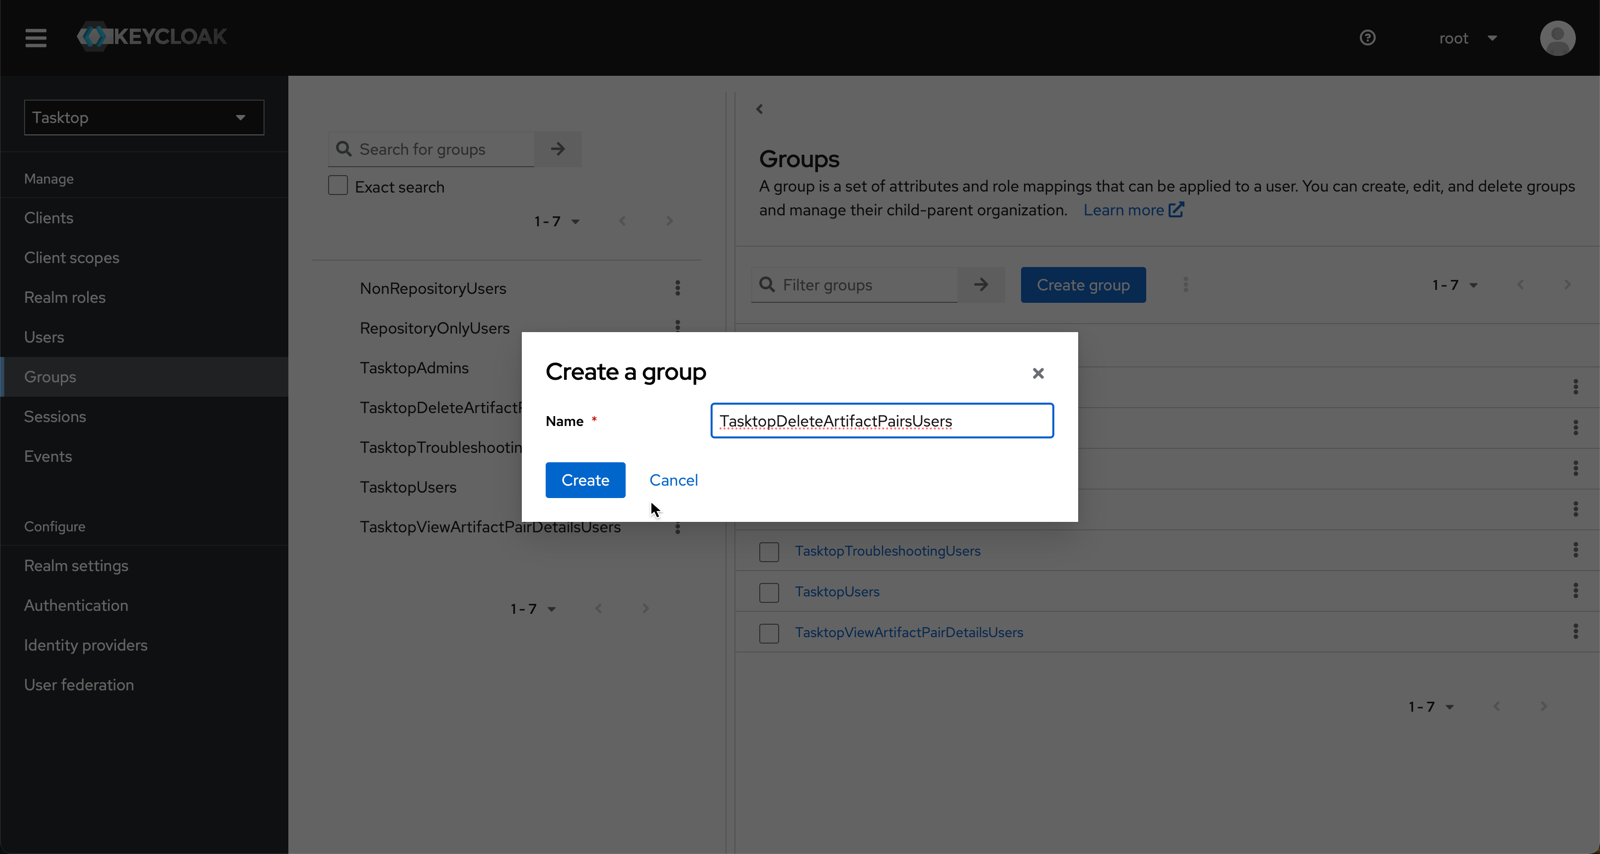
- Name the new group TasktopDeleteArtifactPairsUsers and click Create.
- Go back to the group list and click on the newly created group.
- Go to the role mappings tab, click on Assign role and add the TasktopDeleteArtifactPairsUser role to this group.
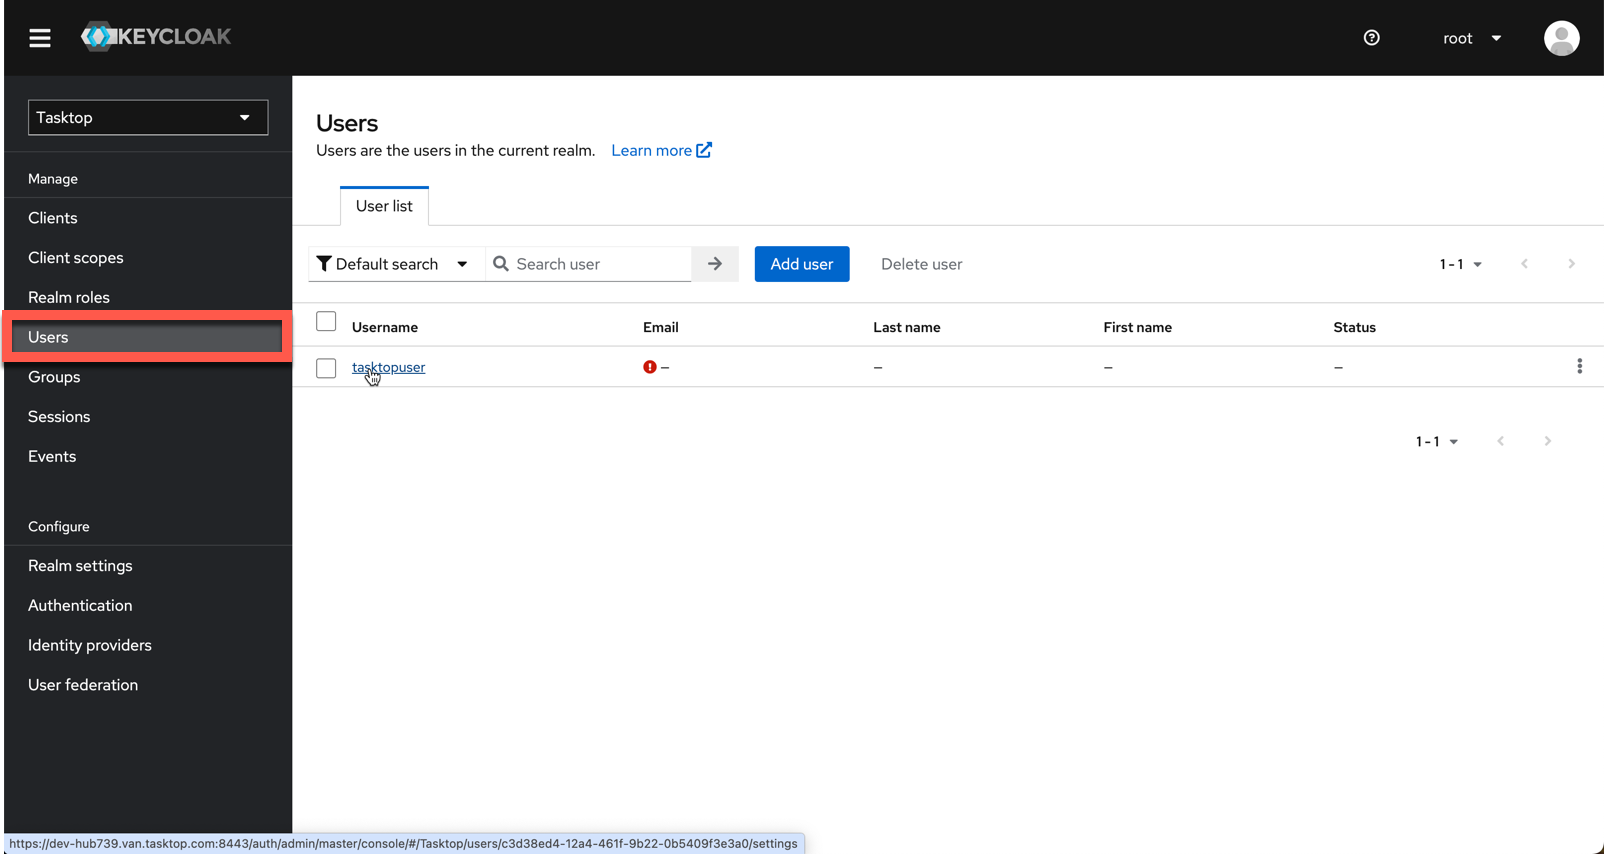
- Next, assign your desired users to the group. To do this, click Users on the left sidebar and select the user you'd like to add.
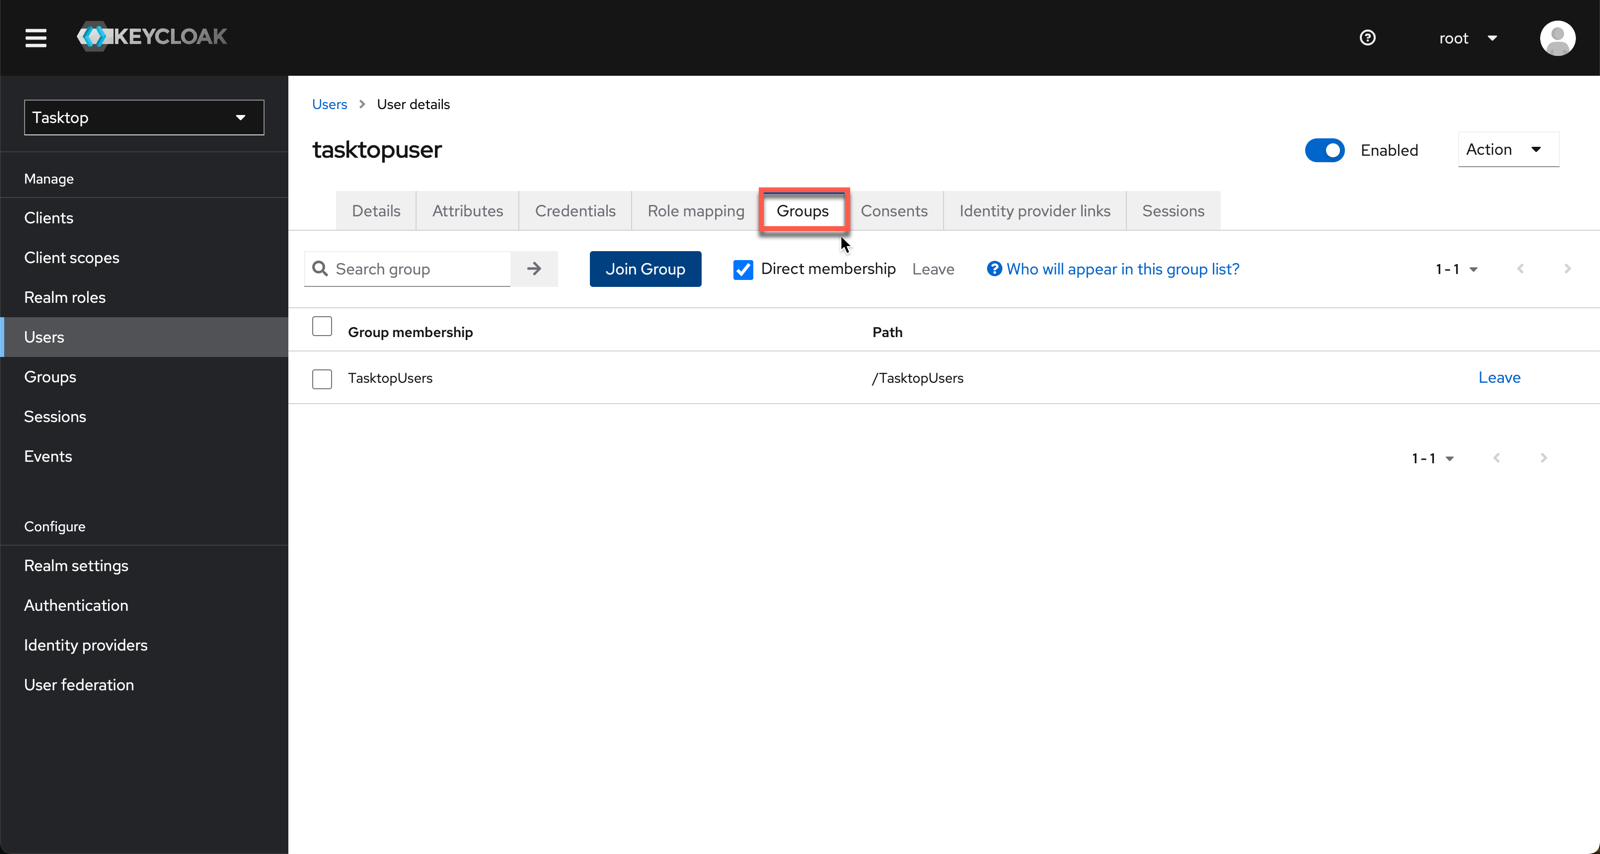
- Then, click the Groups tab, select the group you'd like to join, and click Join Group.


To add the TasktopViewArtifactPairDetailsUser role, please see the instructions below:
- Login to the Hub Admin Console and click Realm roles on the left sidebar.
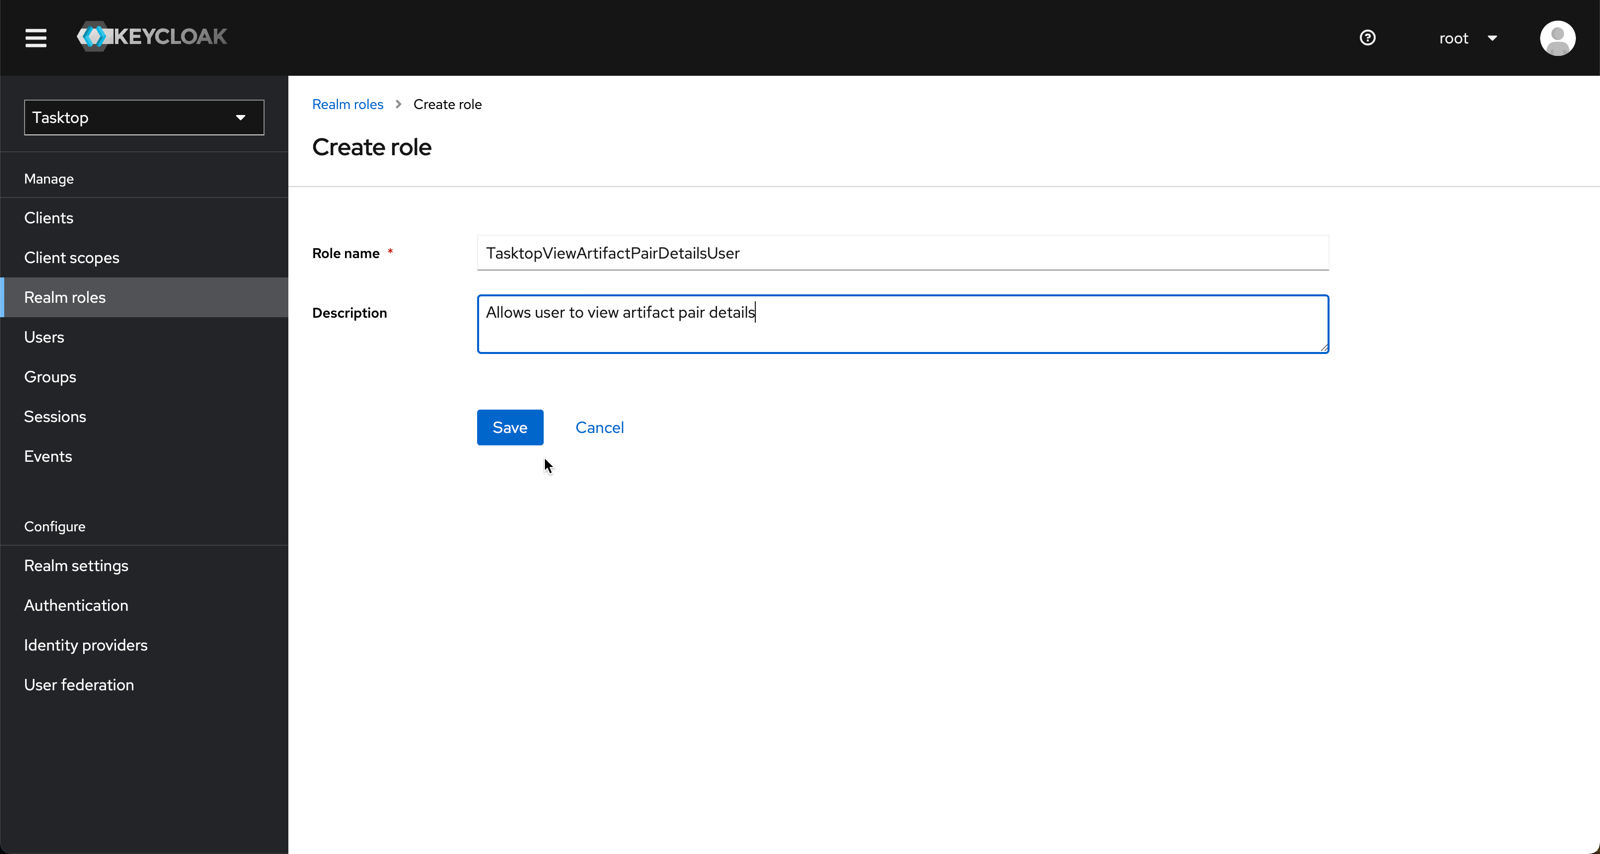
- Next, click Create role to add the new user role.
- Name the new role TasktopViewArtifactPairDetailsUser and enter the following description, Allows user to view artifact pair details.
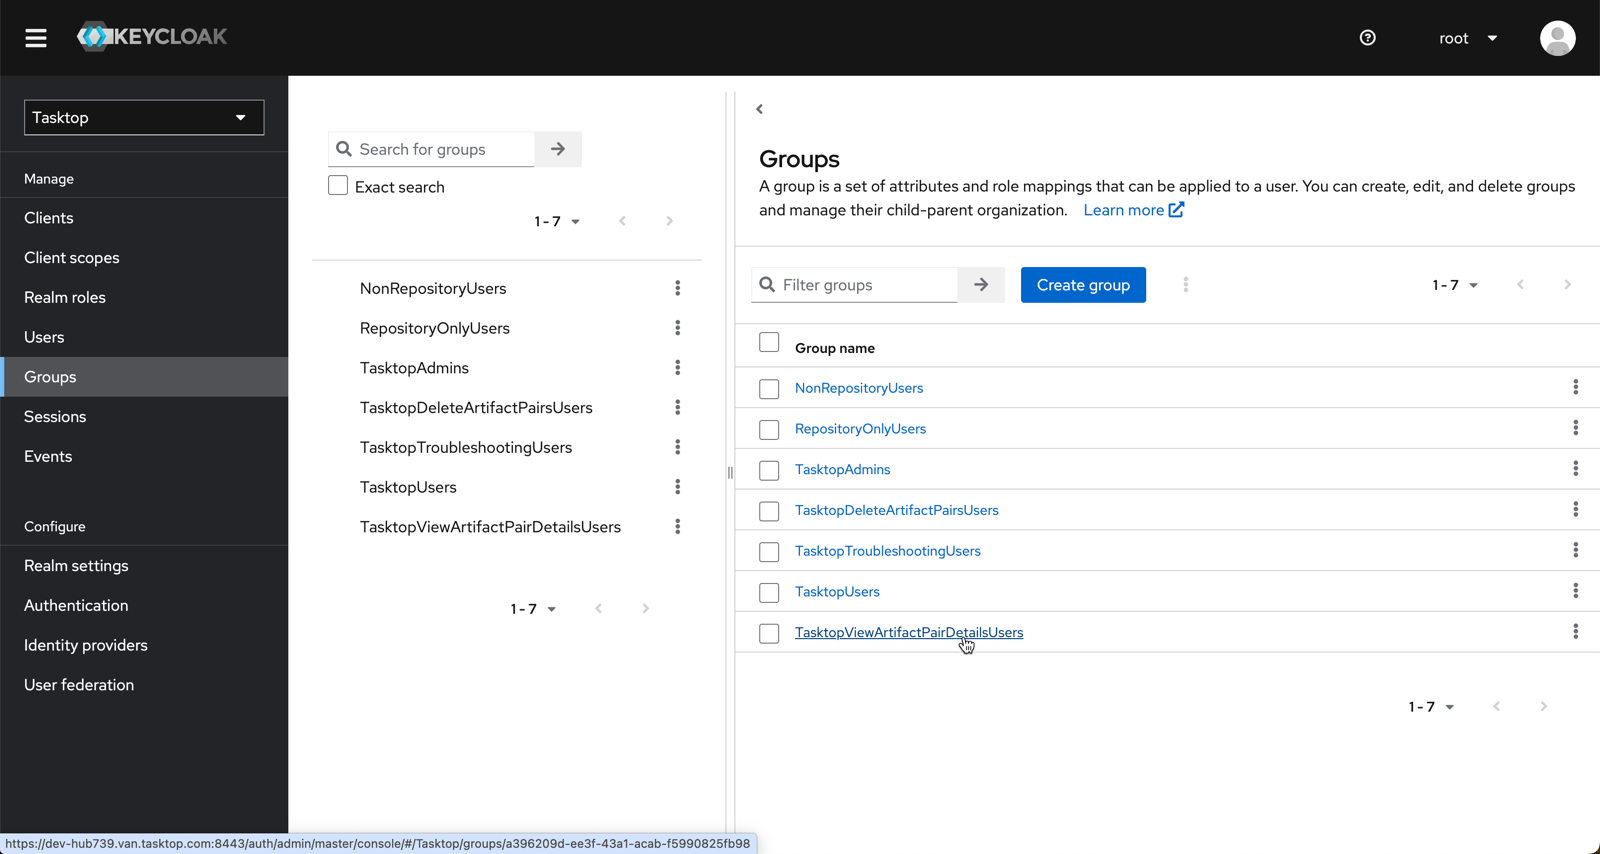
- After saving the new role, navigate to Groups and click New to create a new group.
- Name the new group TasktopViewArtifactPairDetailsUsers and click Create.
- Go back to the group list and click on the newly created group.
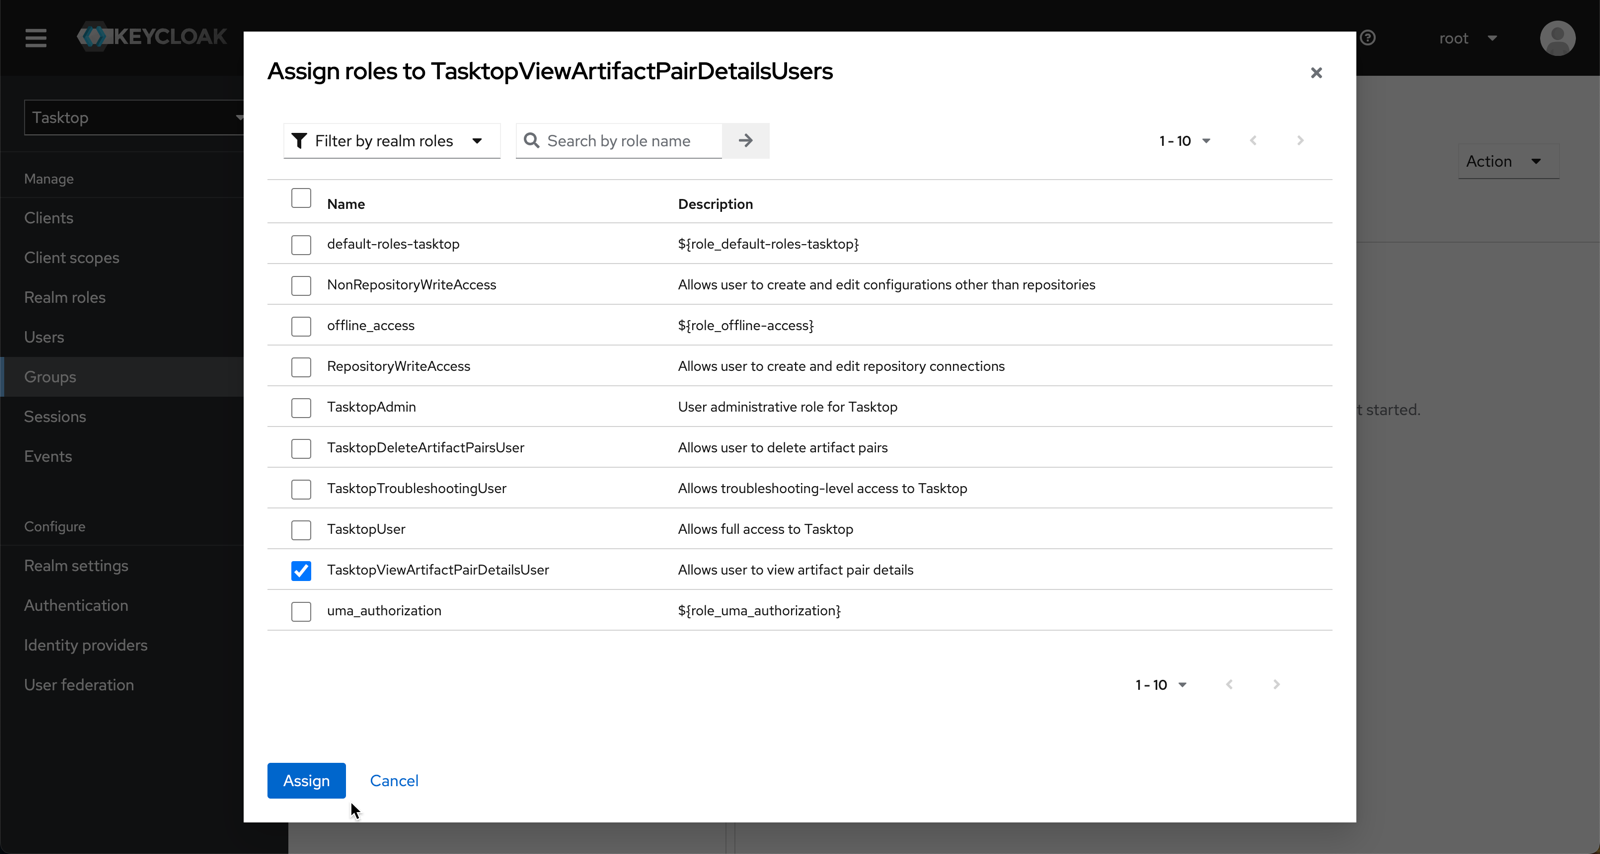
- Go to the role mappings tab, click on Assign role and add the TasktopViewArtifactPairDetailsUser role to this group.
- Next, assign your desired users to the group. To do this, click Users on the left sidebar and select the user you'd like to add.
- Then, click the Groups tab, select the group you'd like to join, and click Join.