
Work Item Synchronization
What is an Integration?

An integration is quite simply the flow of information between two or more collections.
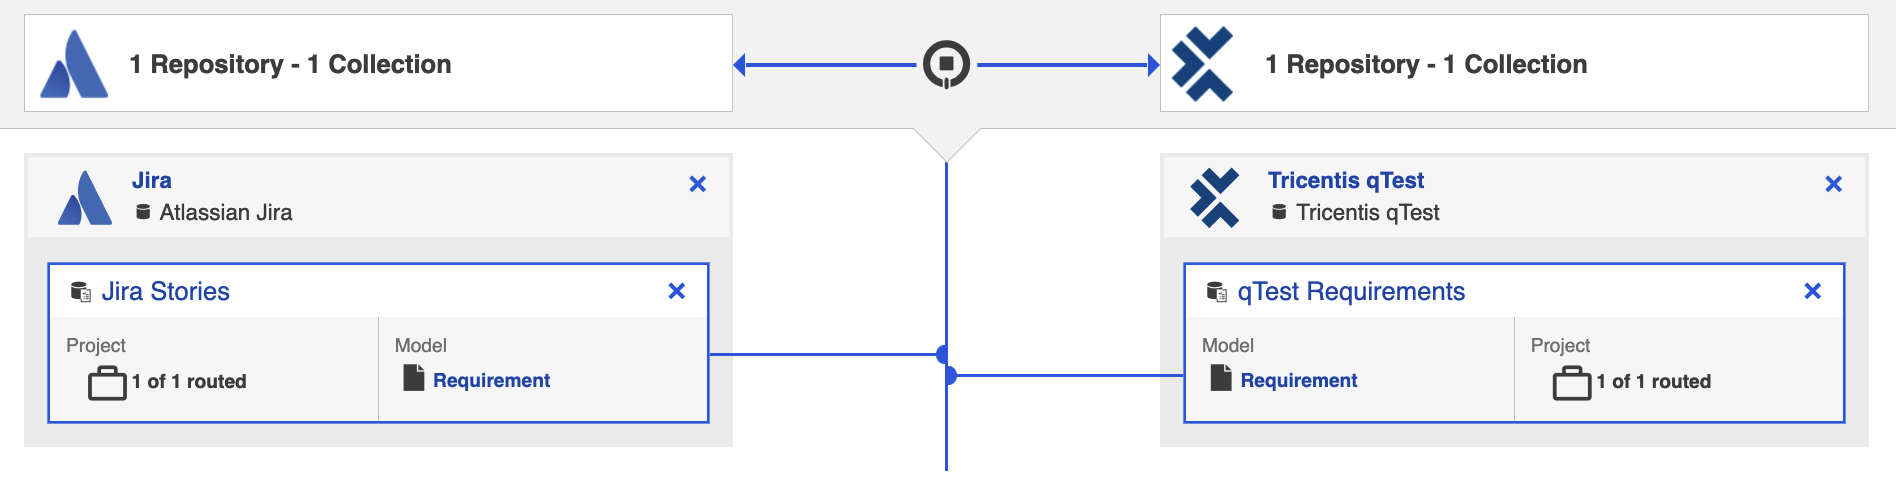
A work item synchronization is a specific type of integration that flows work items (such as defects, requirements, or stories) between two repositories.
When you configure your work item synchronization, you can customize the field flow, artifact routing, artifact filtering, as well as enable or disable comment flow or attachment flow.
Video Tutorial
Check out the video below to learn how to configure a Work Item Synchronization.
This video assumes that you have already configured your repositories, models, and collections as outlined in the Quick Start Guide.
Use Case and Business Value
The Work Item Synchronization Template connects teams working in different tools as they fulfill their roles in the software development lifecycle. It allows you to flow work items (such as defects or requirements) from one repository to the other.
As part of this integration,
- Work Items, such as defects or requirements, will flow between two work item (repository) collections.
- Artifact Creation Flow can be configured either one-way or two-way
- You'll also configure the direction and frequency in which each field on those artifacts, as well as comments and attachments, should be updated.
Template Affordances
The Work Item Synchronization template allows you to flow artifacts between two work item (repository) collections.

Configuring a Work Item Synchronization Integration
Now that you have all of your base components (i.e., repositories, models, and collections) set up, you can configure an integration to synchronize the artifacts in your collections.
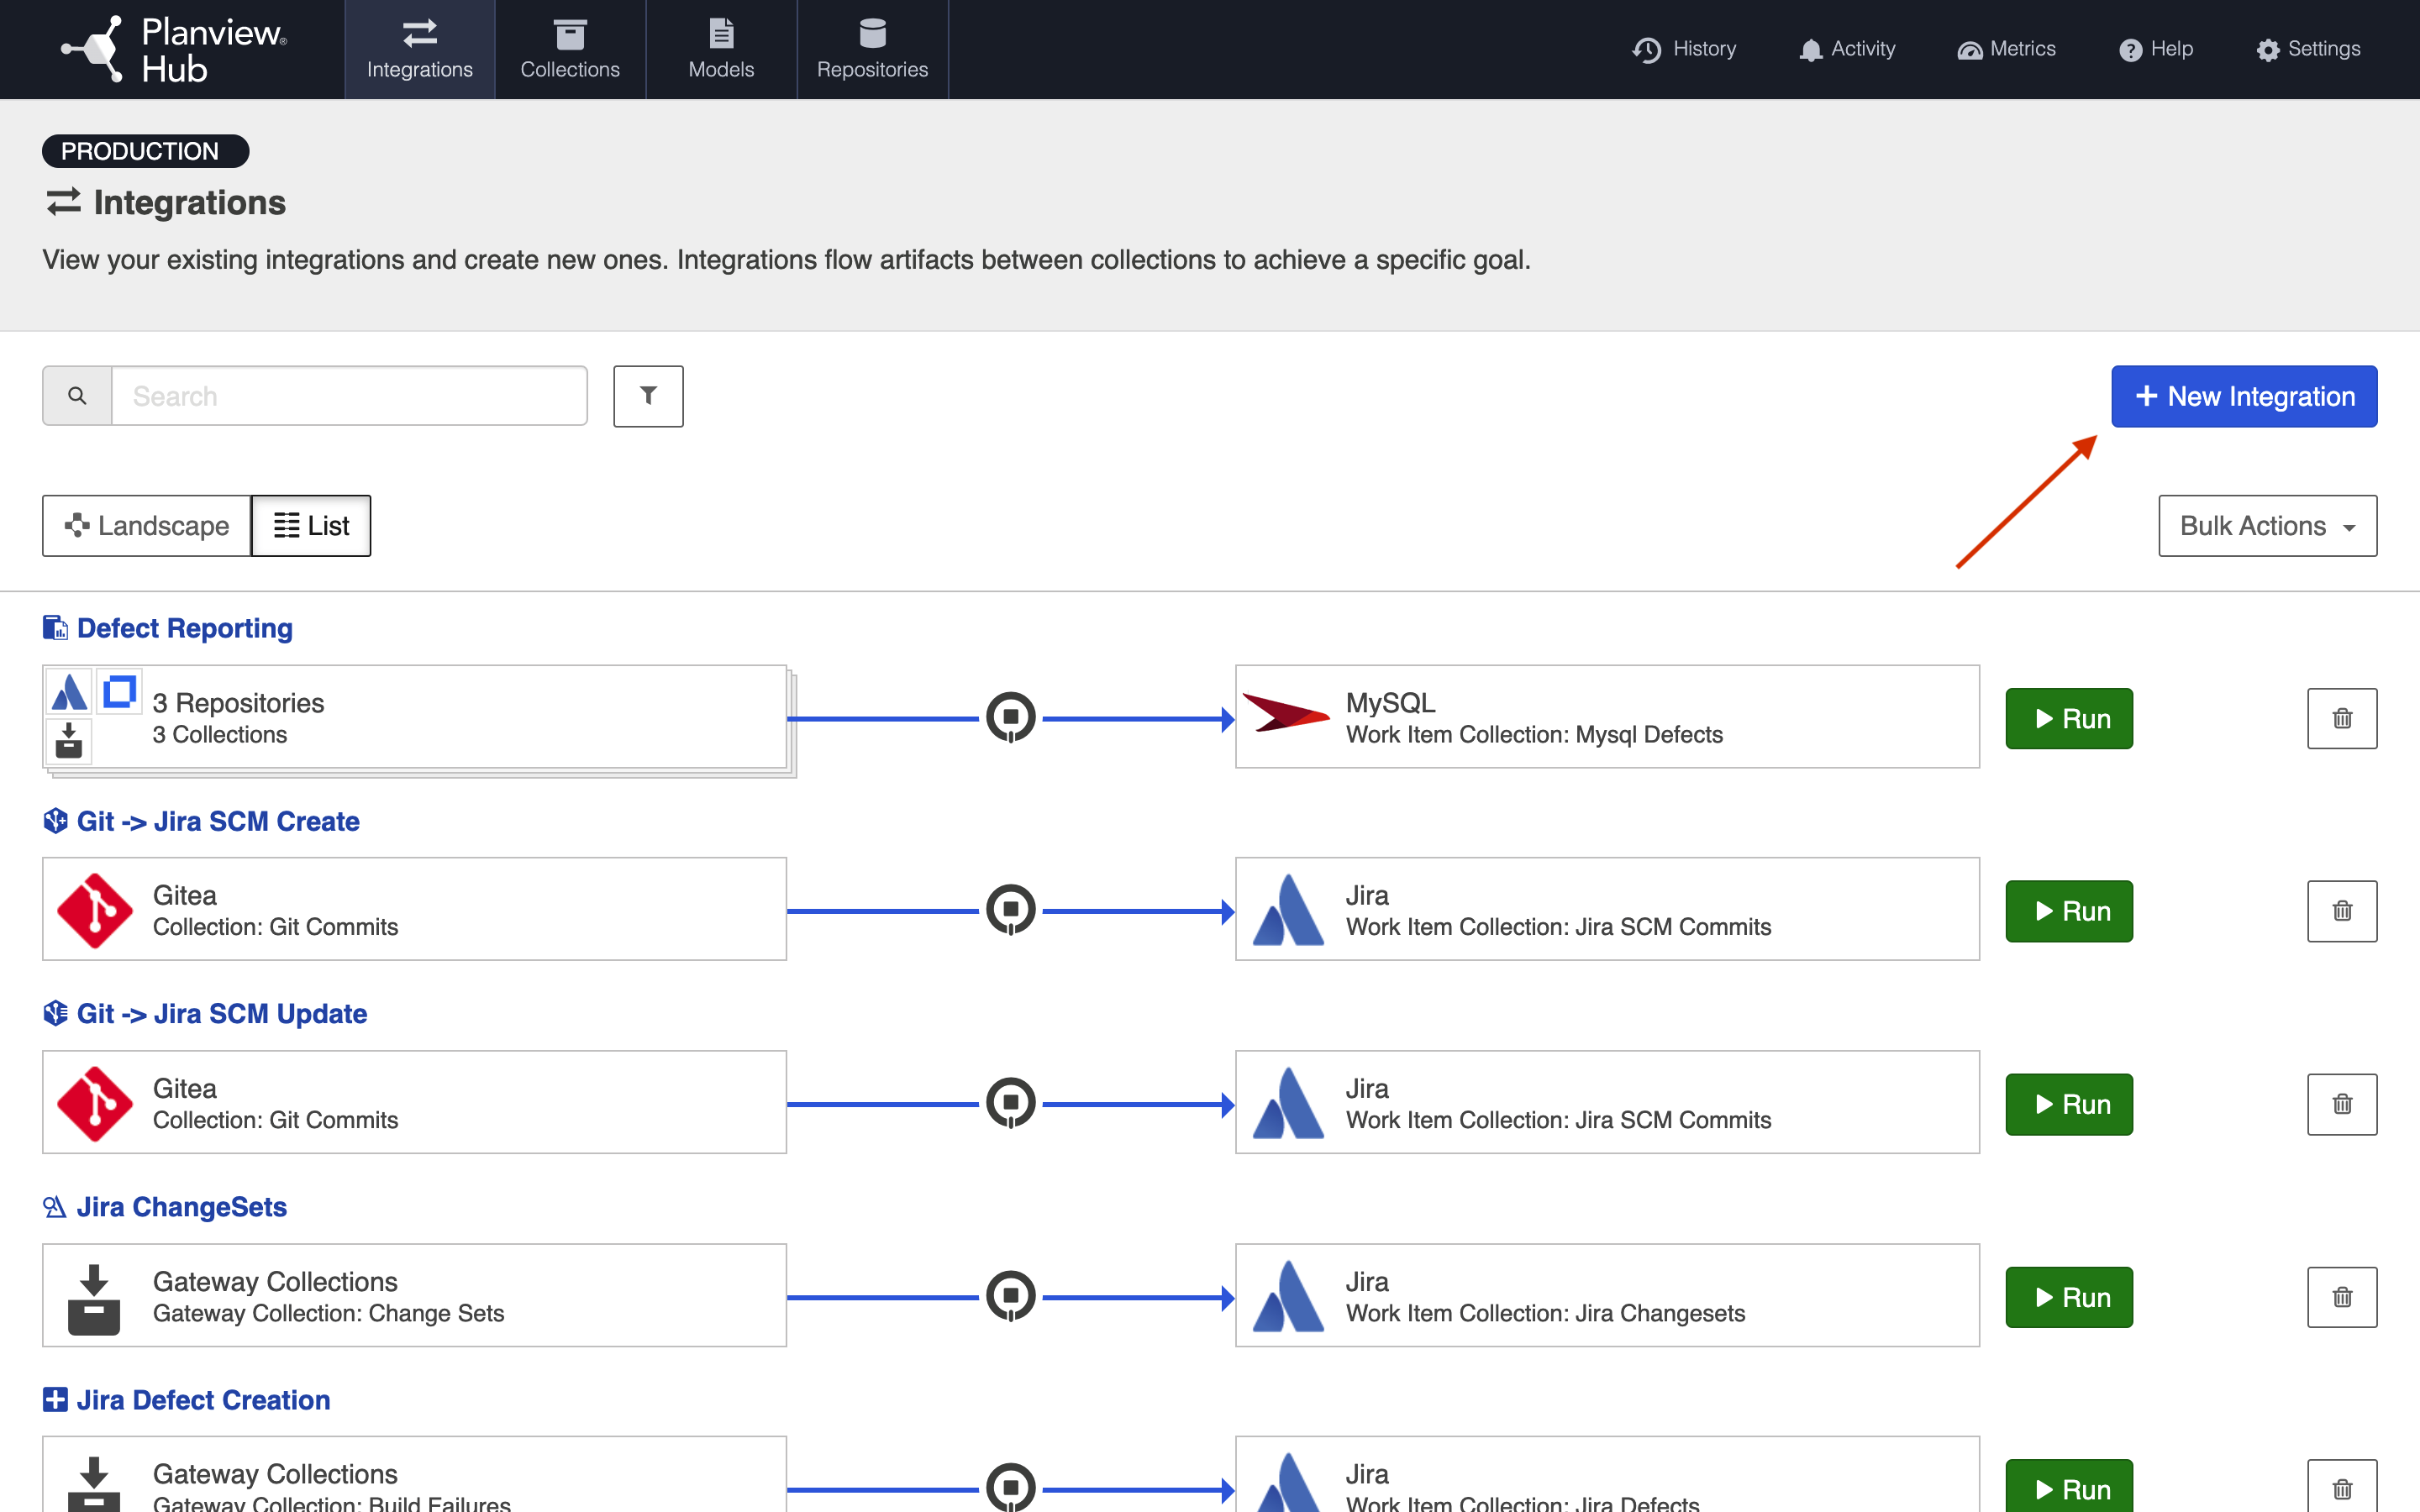
To configure your integration, select Integrations at the top of the screen, then click + New Integration.
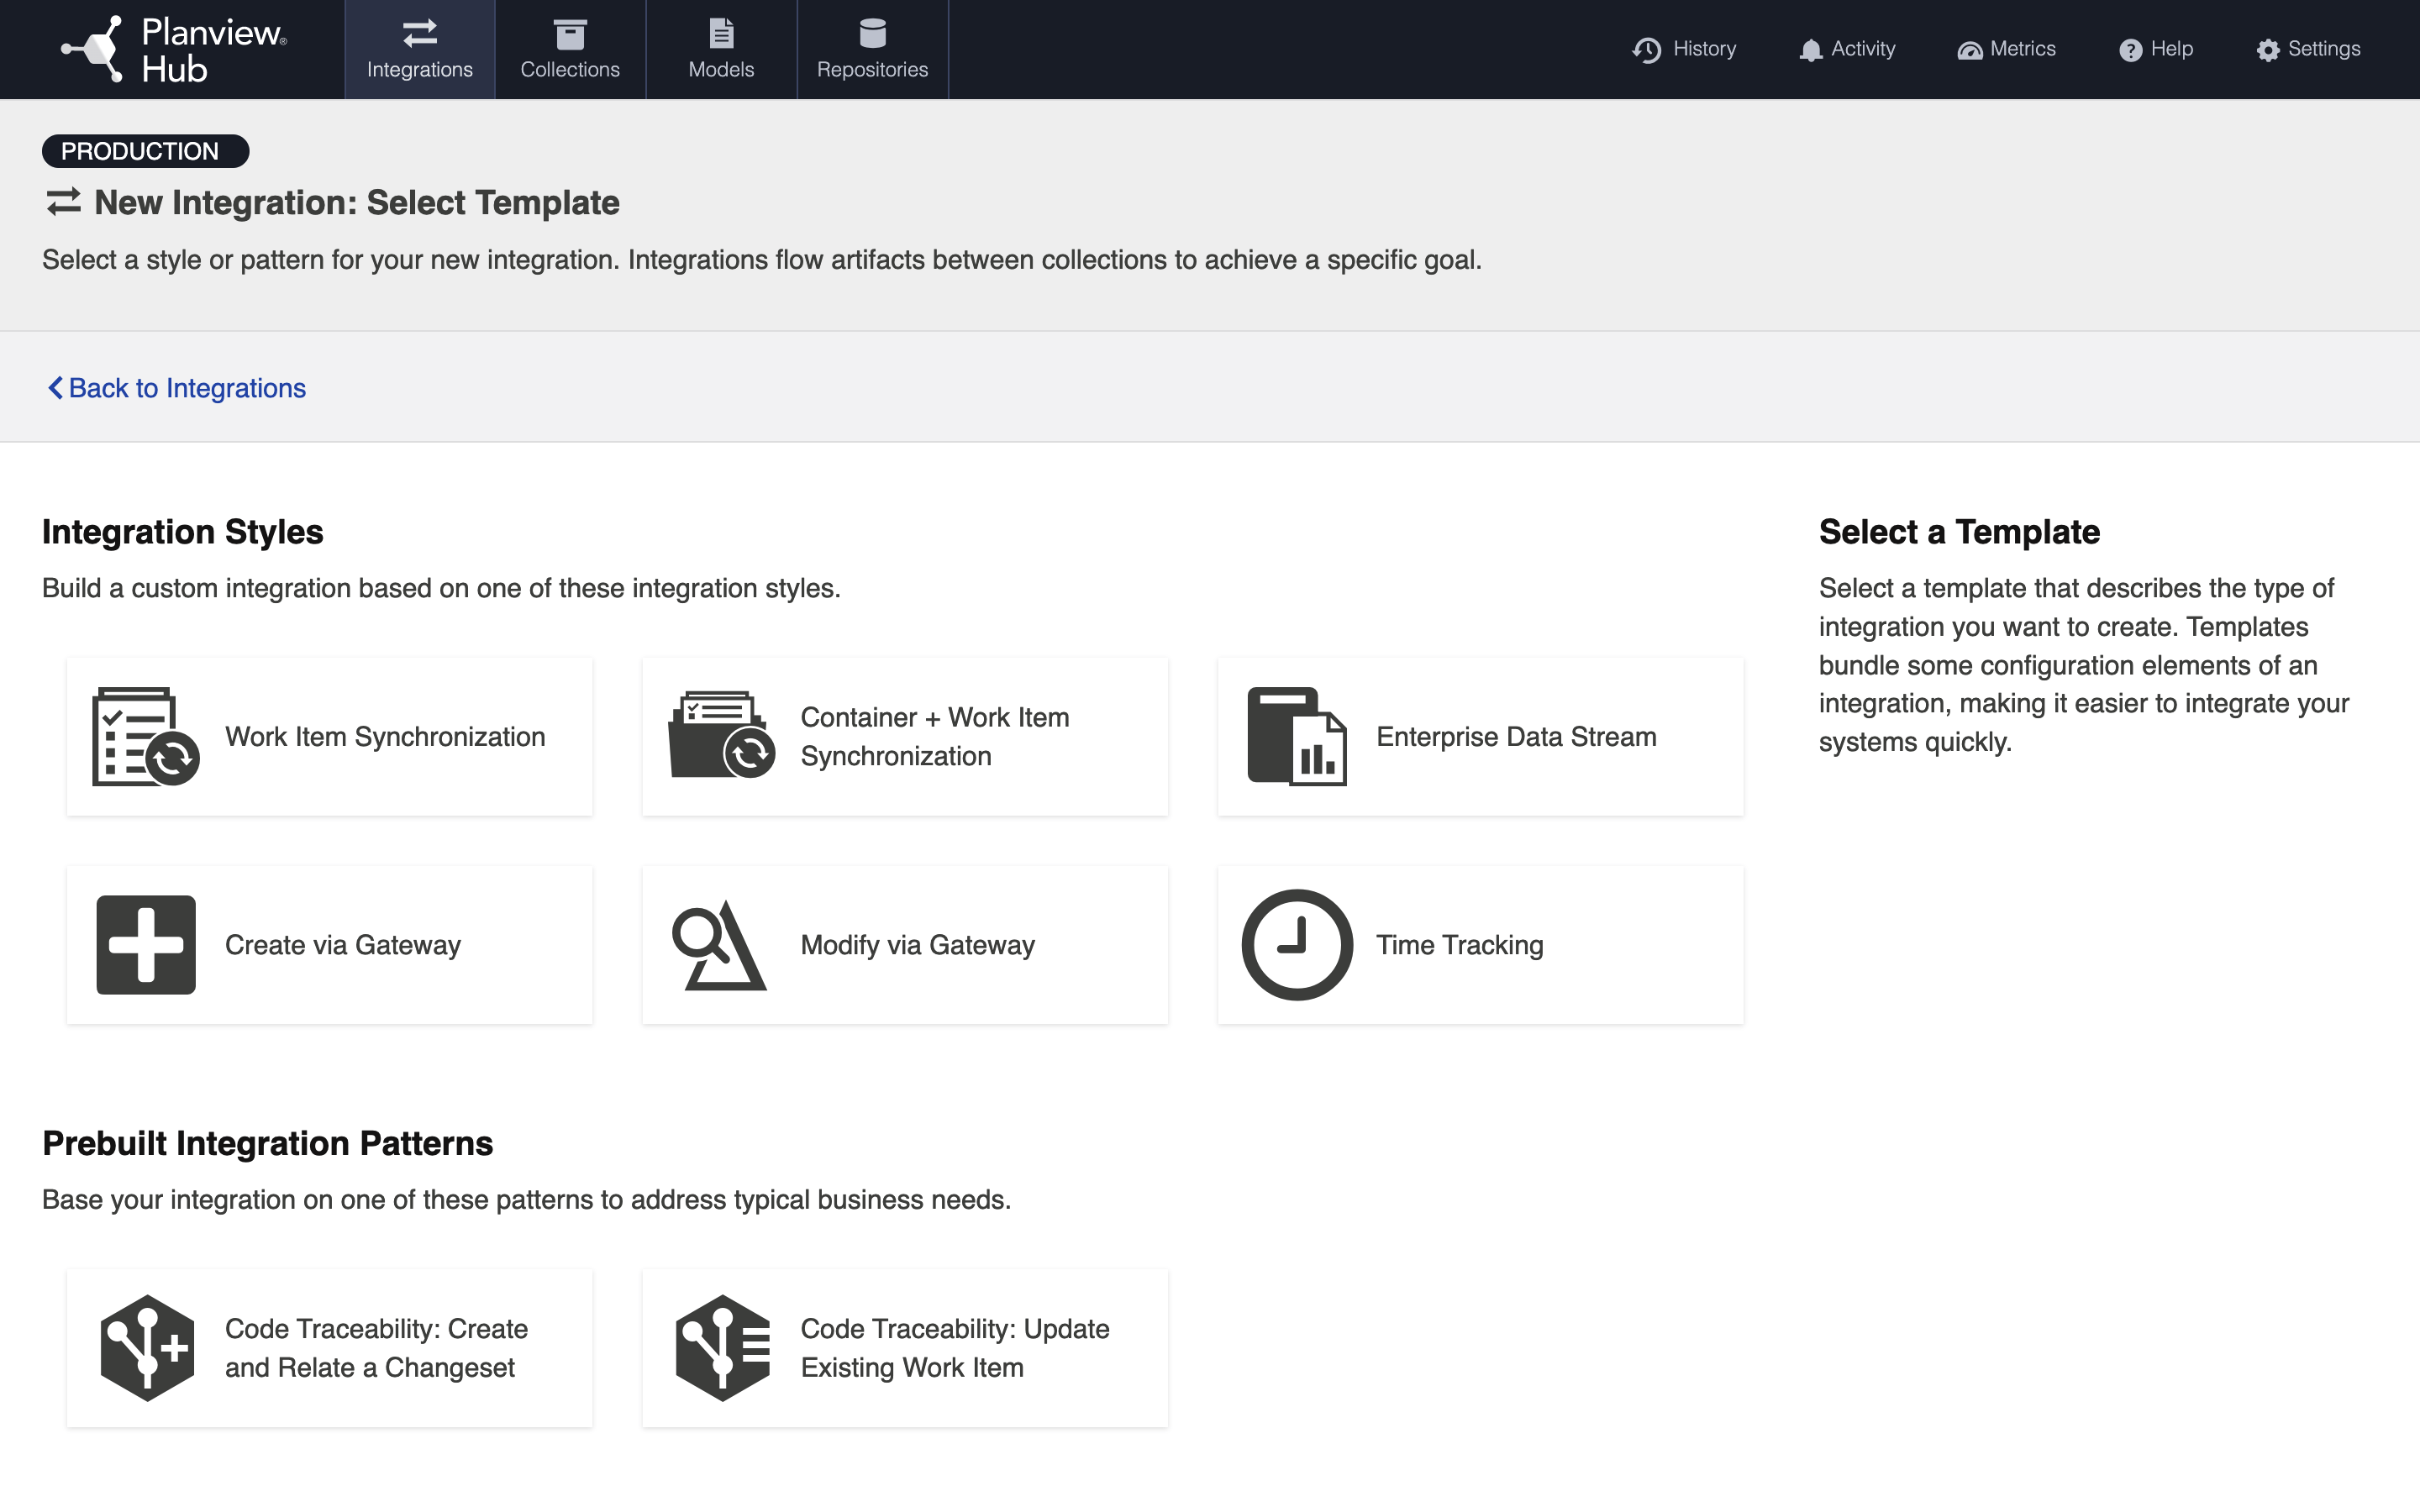
Select the Work Item Synchronization template.
Note: Depending on the edition of Hub you are using, you may not have all options available.
This will bring you to the New Integration screen.
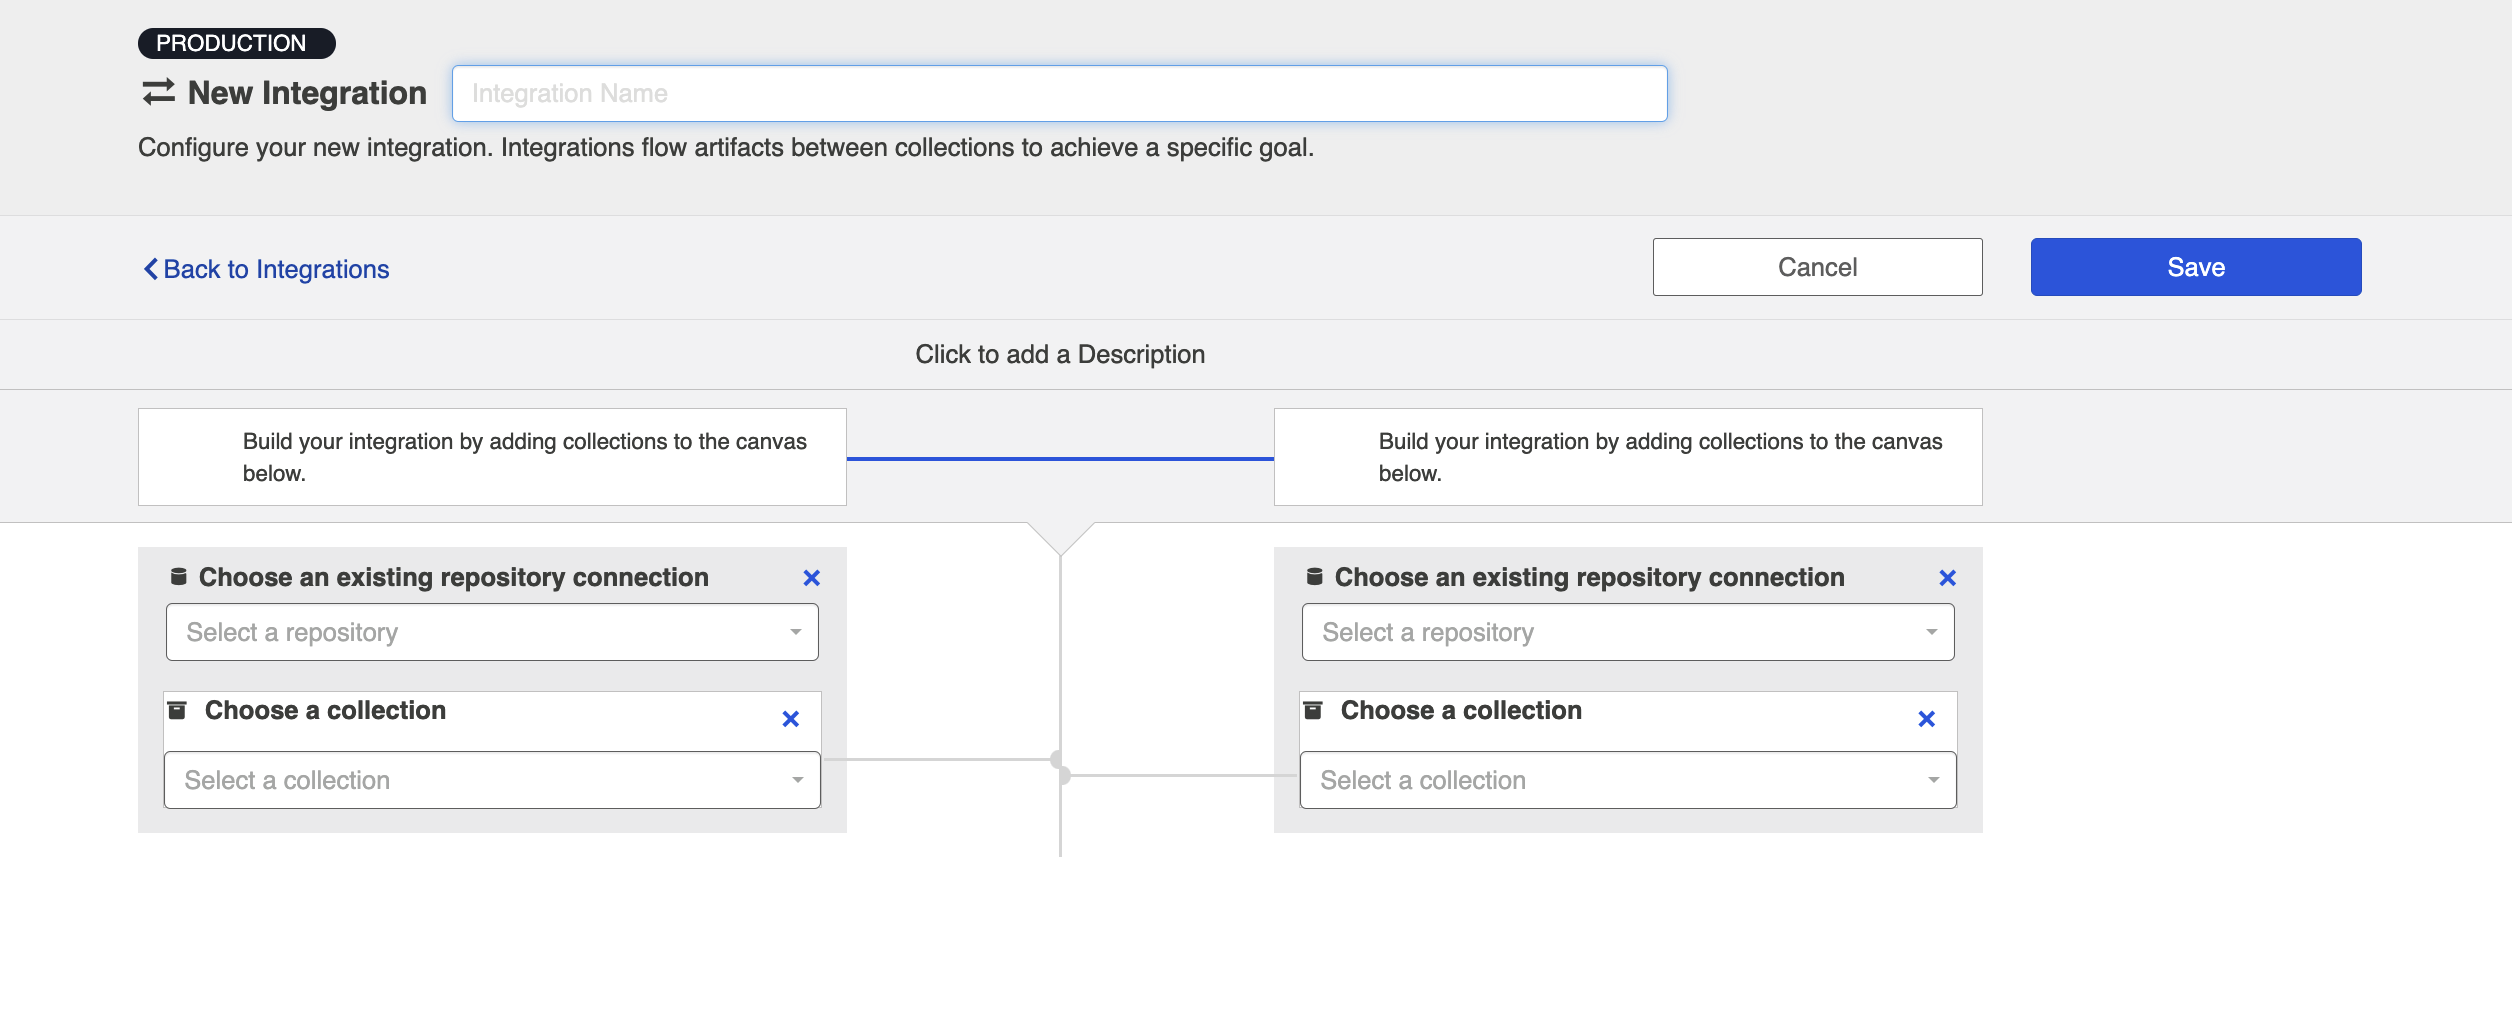
Name and describe your integration, and select your repositories and collections.
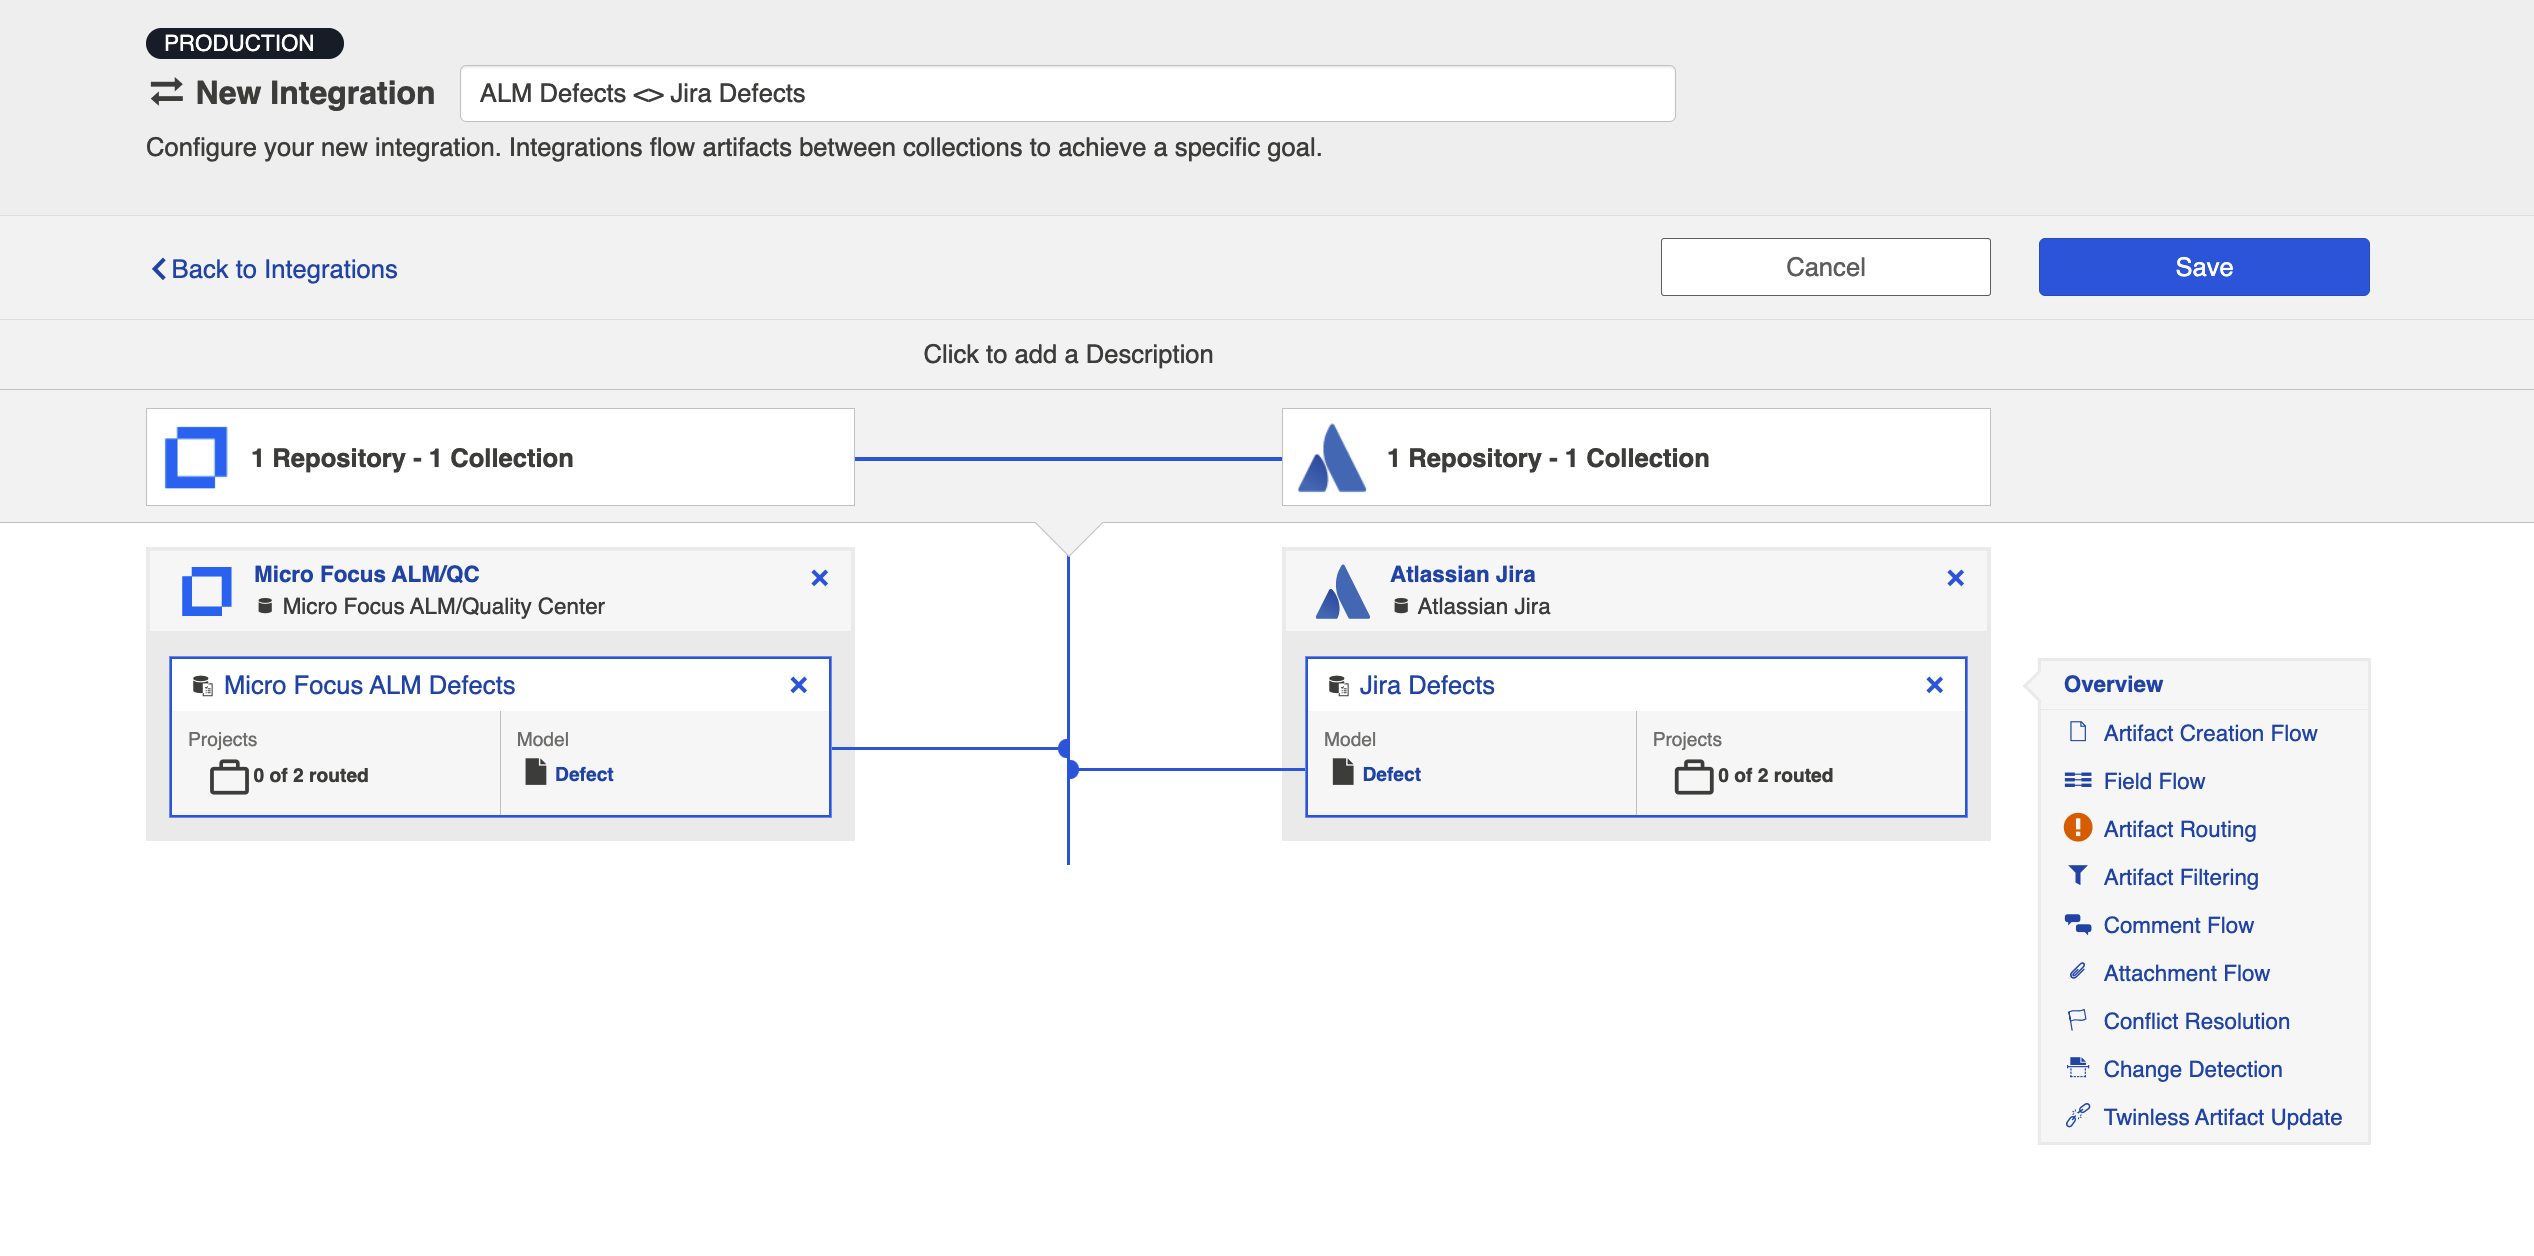
You can click the Overview link on the right side of the Integration Configuration screen to get to the main display page (shown in the second screen shot).
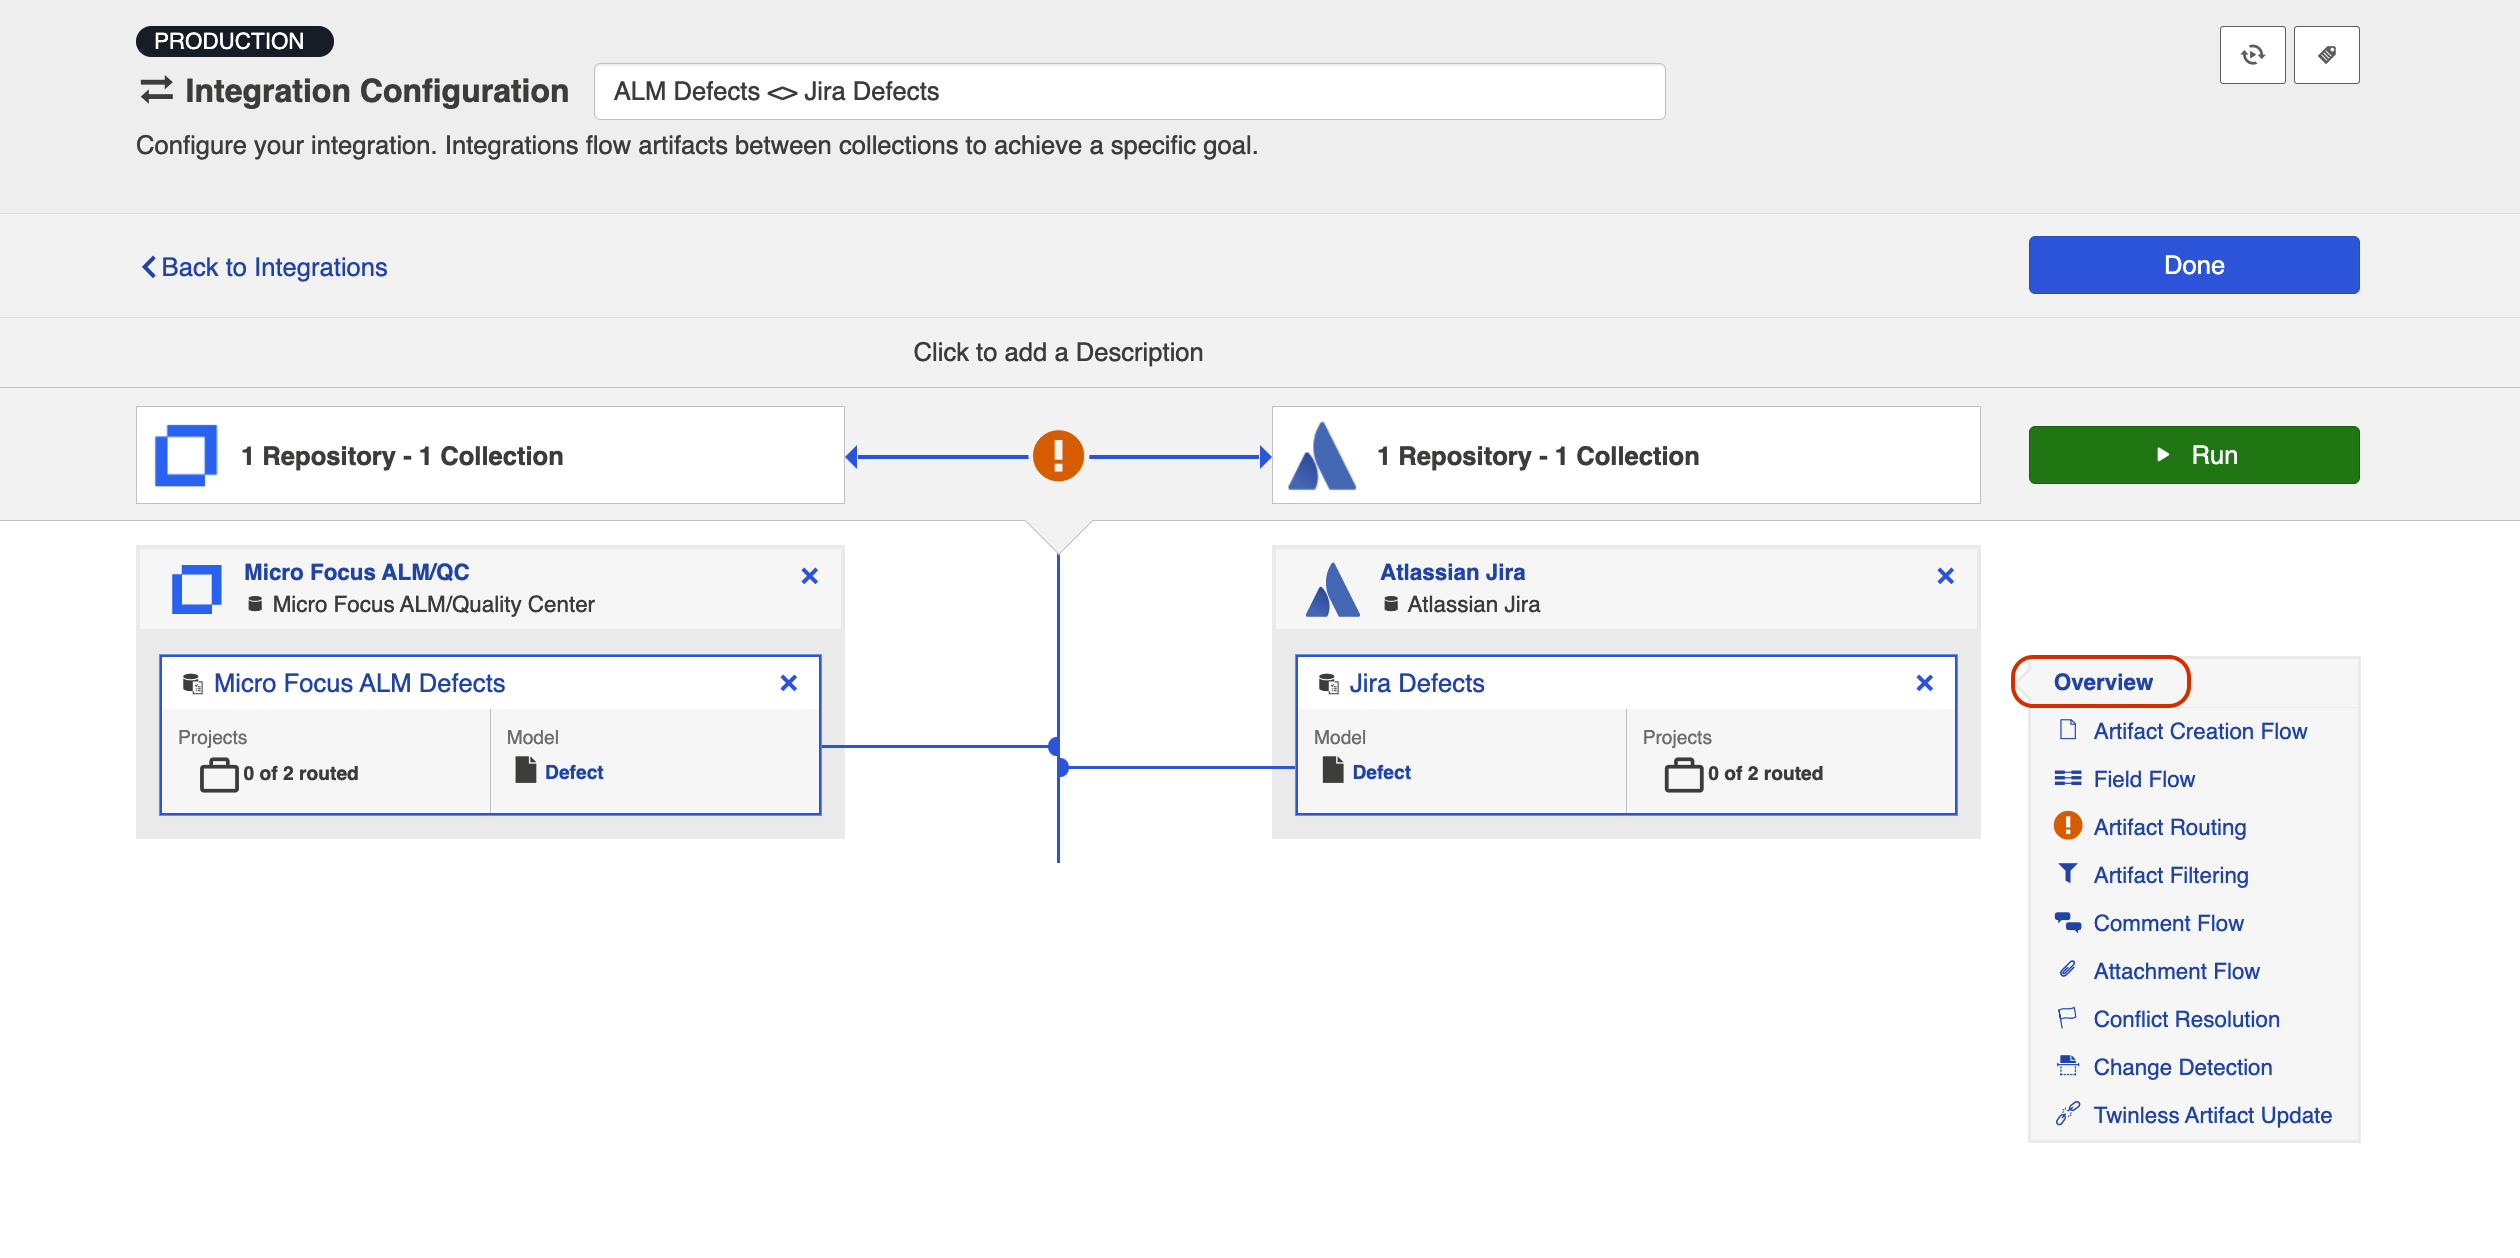
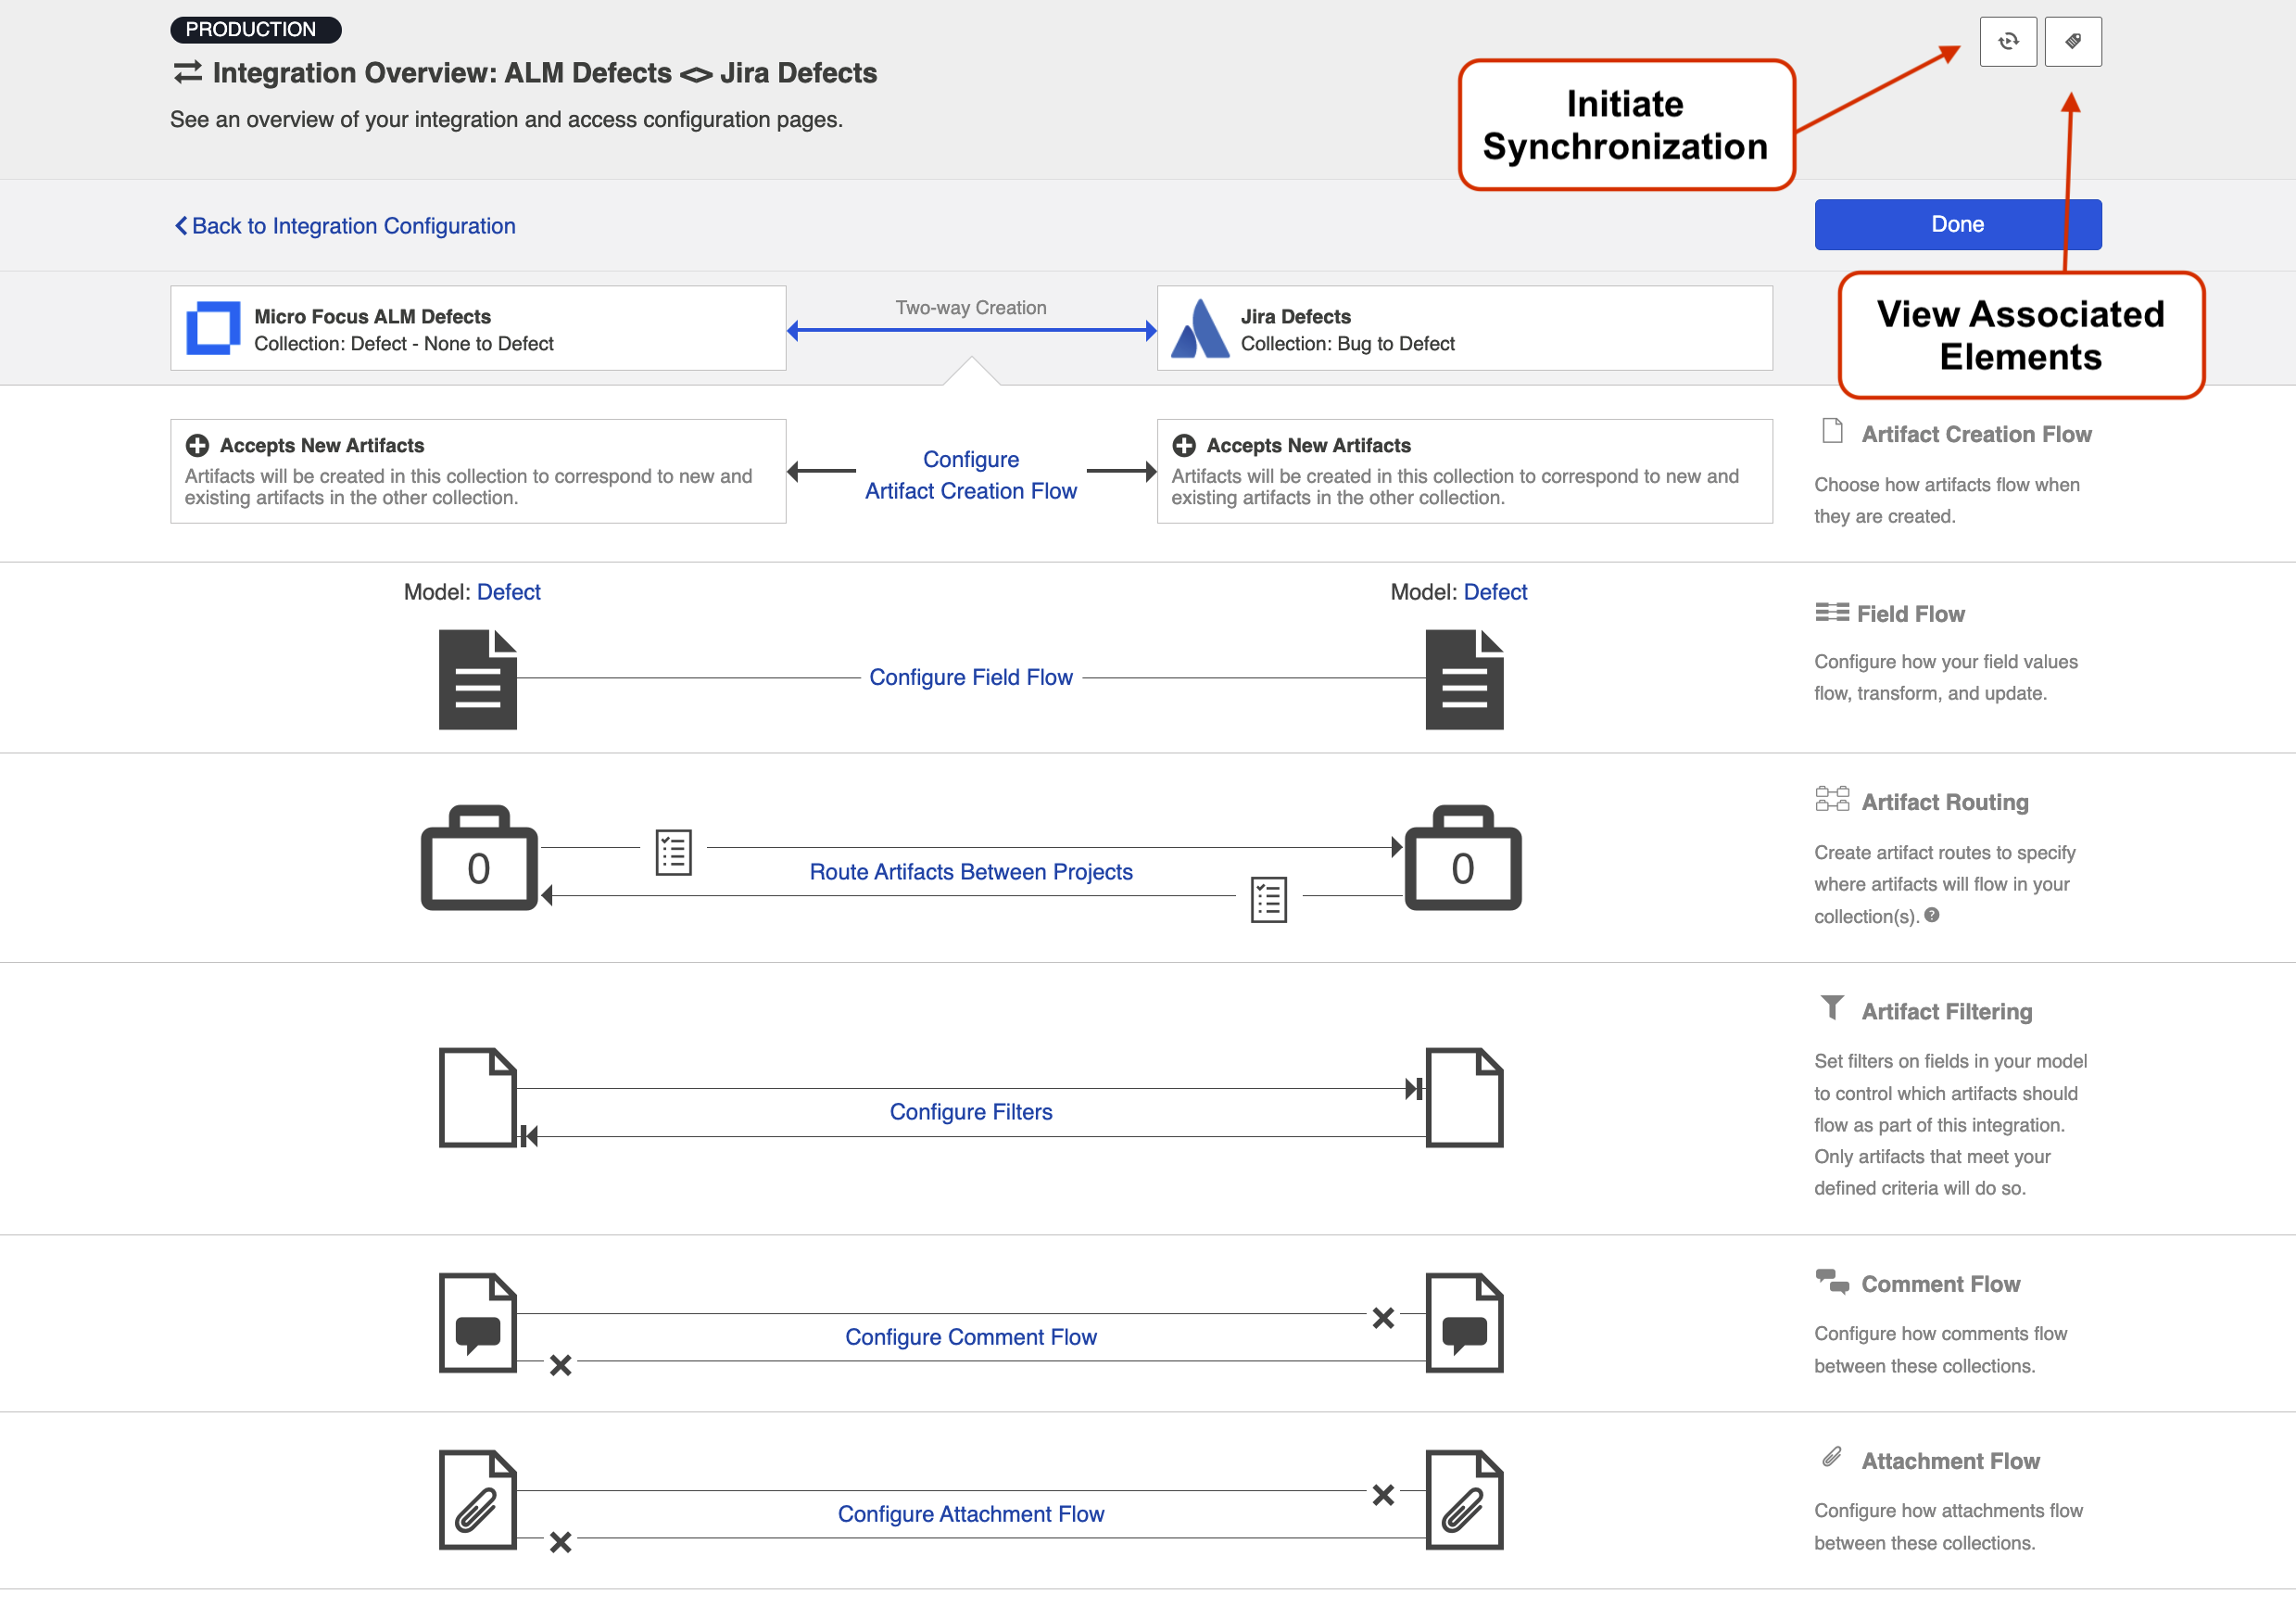
From this page, you can configure many different components of your work item synchronization.
Artifact Creation Flow
On the Artifact Creation Flow screen, you can specify whether new artifacts will be created in one collection or both. You can learn more on the Artifact Creation Flow page.
Field Flow
On the Field Flow screen, you can configure how your field values will flow, transform, and update between each collection. Each field can be configured individually. You can learn more on the Field Flow page.
Artifact Routing
On the Artifact Routing screen, you can specify where (in which projects) new artifacts will be created, based on the projects they originate from in the source collection. You can learn more on the Artifact Routing page.
Artifact Filtering
On the Artifact Filtering screen, you can set filters on fields in your model to control which artifacts will flow as part of the integration. Only artifacts that meet your defined filter criteria will be eligible to flow. You can learn more on the Artifact Filtering page.
Comment Flow
On the Comment Flow screen, you can enable or disable comment flow. You can learn more on the Comment Flow page.
Attachment Flow
On the Attachment Flow screen, you can enable or disable attachment flow. You can also set a maximum attachment size limit. You can learn more on the Attachment Flow page.
Test Step Flow
Depending on your Hub edition, you may see a Test Step Flow sash. You can learn more about this feature on the Test Synchronization page.
Conflict Resolution
On the Conflict Resolution screen, you can set a strategy to determine how to resolve conflicts when changes are made to both the source and target artifact. You can learn more on the Conflict Resolution page.
Change Detection
On the Change Detection screen, you can set custom change detection and full scan intervals for your integration. Change Detection and Full Scan intervals define how frequently Hub will search for updates made to artifacts in each repository. The settings configured here will override the default global change detection settings configured on the General (Settings) screen. You can learn more on the Change Detection page.
Twinless Artifact Update
On the Twinless Artifact Update screen, you can configure one final update (for example a comment or a status change) on an artifact when its “twin” in the other repository is no longer eligible to participate in the integration (for example when it’s been deleted or no longer meets the artifact filter). The final update informs the newly twinless artifact that the synchronization has been discontinued.
This feature demystifies the integration process and allows end users to understand why an artifact may no longer be receiving updates via the Hub integration. Once notified of the change via a comment or field update on the artifact, users can work with their Hub admin or with users in the other system to troubleshoot. You can learn more on the Twinless Artifact Update page.
Error Flow
On the Error Flow screen, you can configure automated failure message flows that send error messages back to the source artifact when synchronization issues occur. Managing a Hub instance at scale means supporting multiple teams across numerous integrations. The Error Flow feature reduces your administrative burden by automatically delivering failure notifications directly to client teams when artifact synchronization fails. Instead of teams discovering issues later and escalating to you for investigation, they receive immediate visibility into synchronization problems at the source, enabling faster self-service troubleshooting and resolution. You can learn more on the Error Flow page.
Initiate Synchronization
You will also notice an Initiate Synchronization button in the upper right corner of the screen. This button can be used to immediately initiate synchronization for selected projects participating in your integration. This is beneficial if artifact filters are expanded, making it such that new artifacts are eligible for integration. You can learn more here.
Viewing Associated Configuration Elements
To view associated configuration elements (such as collections or models that utilize the integration you are viewing), click the Associated Elements tag in the upper right corner of the screen next to the Initiate Synchronization button.