Work Item Collection (Repository)
What is a Collection?
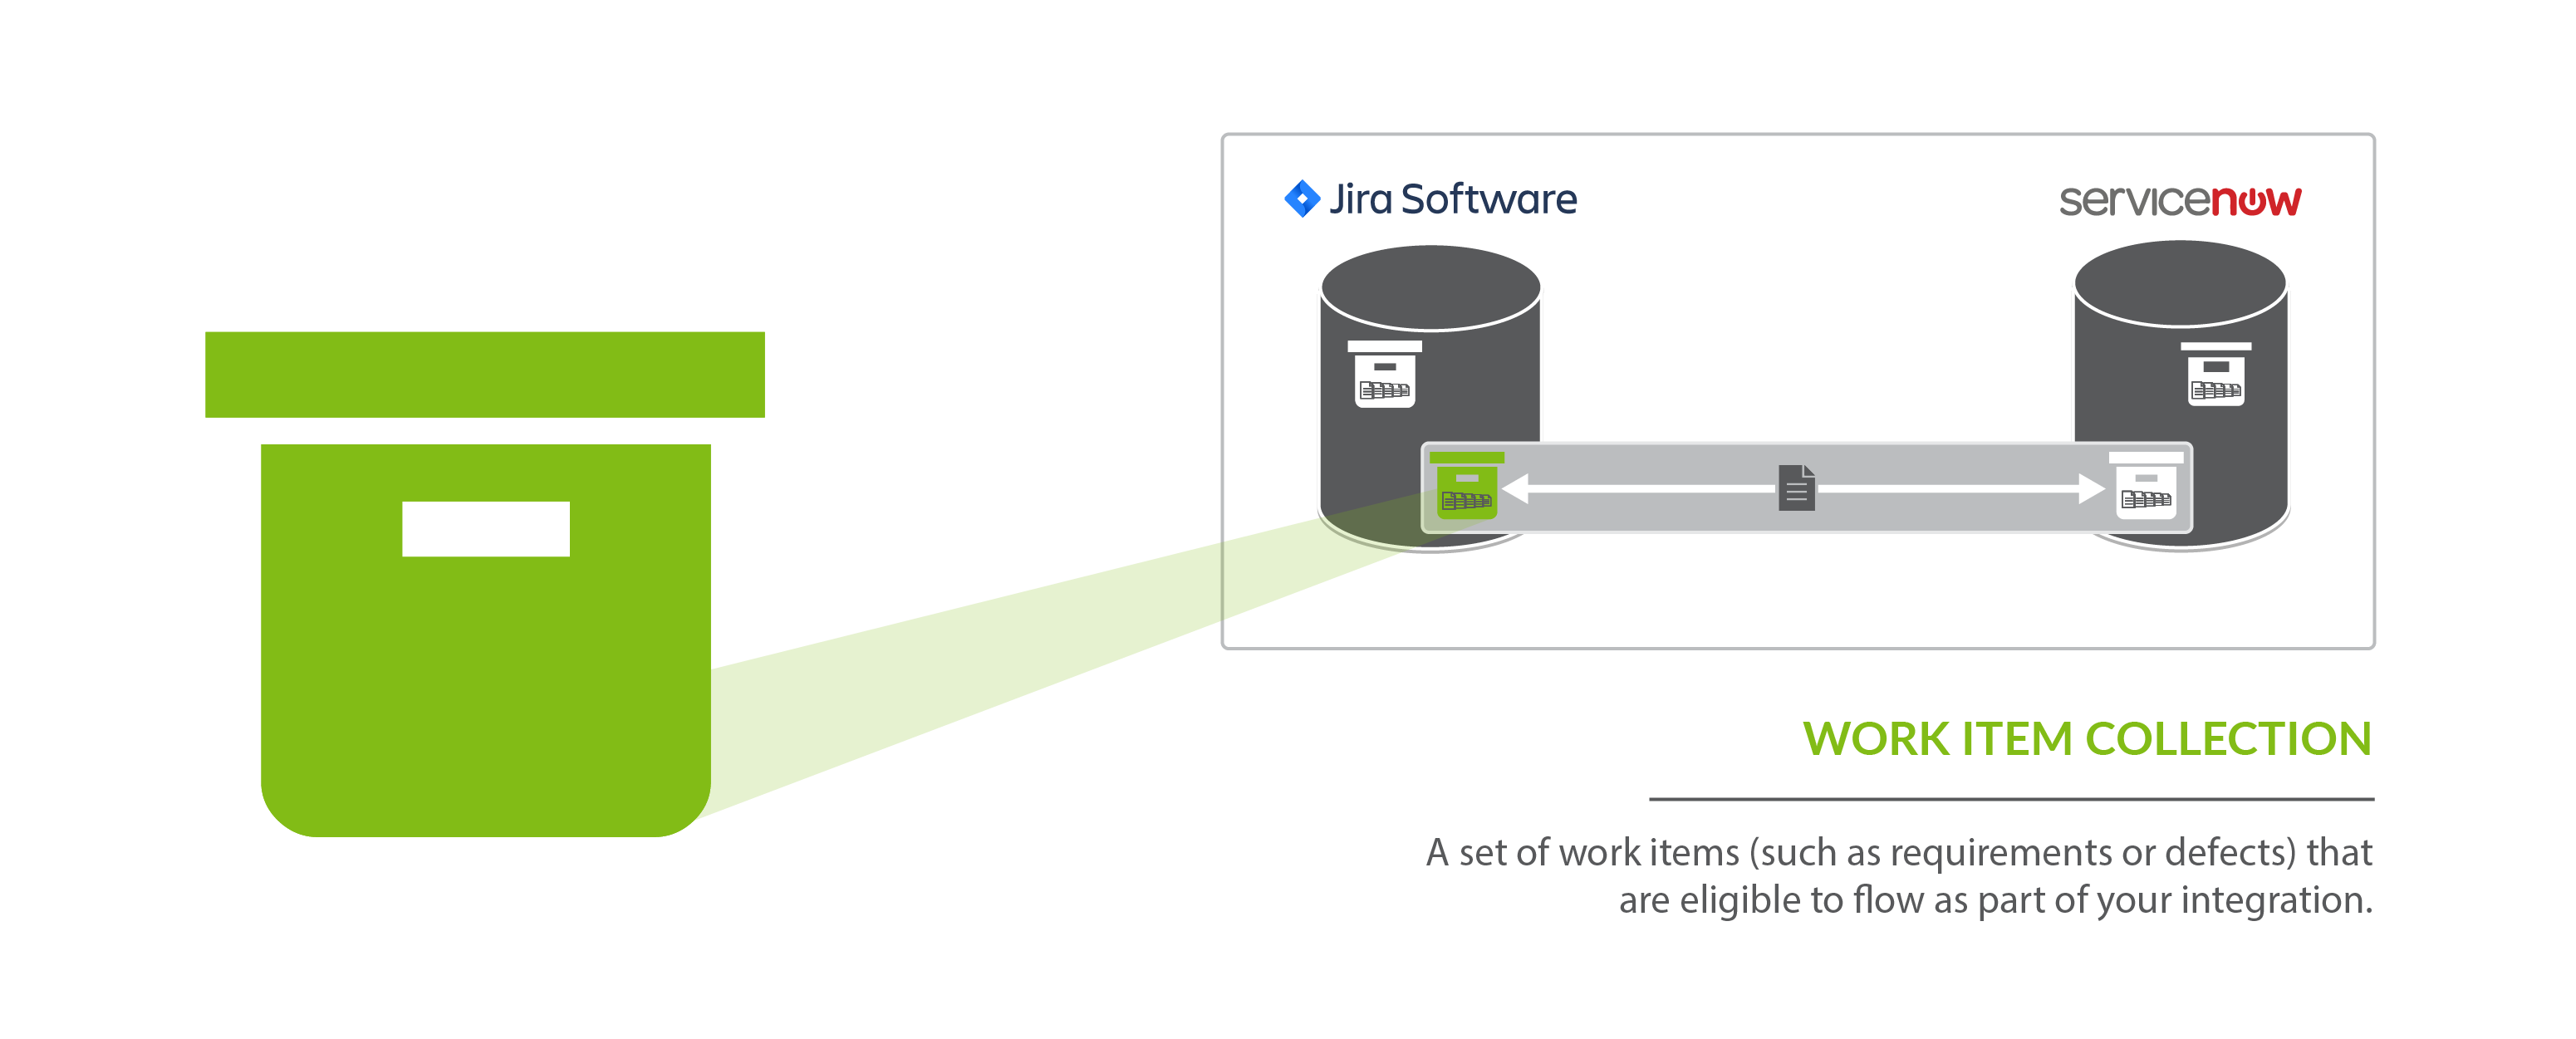
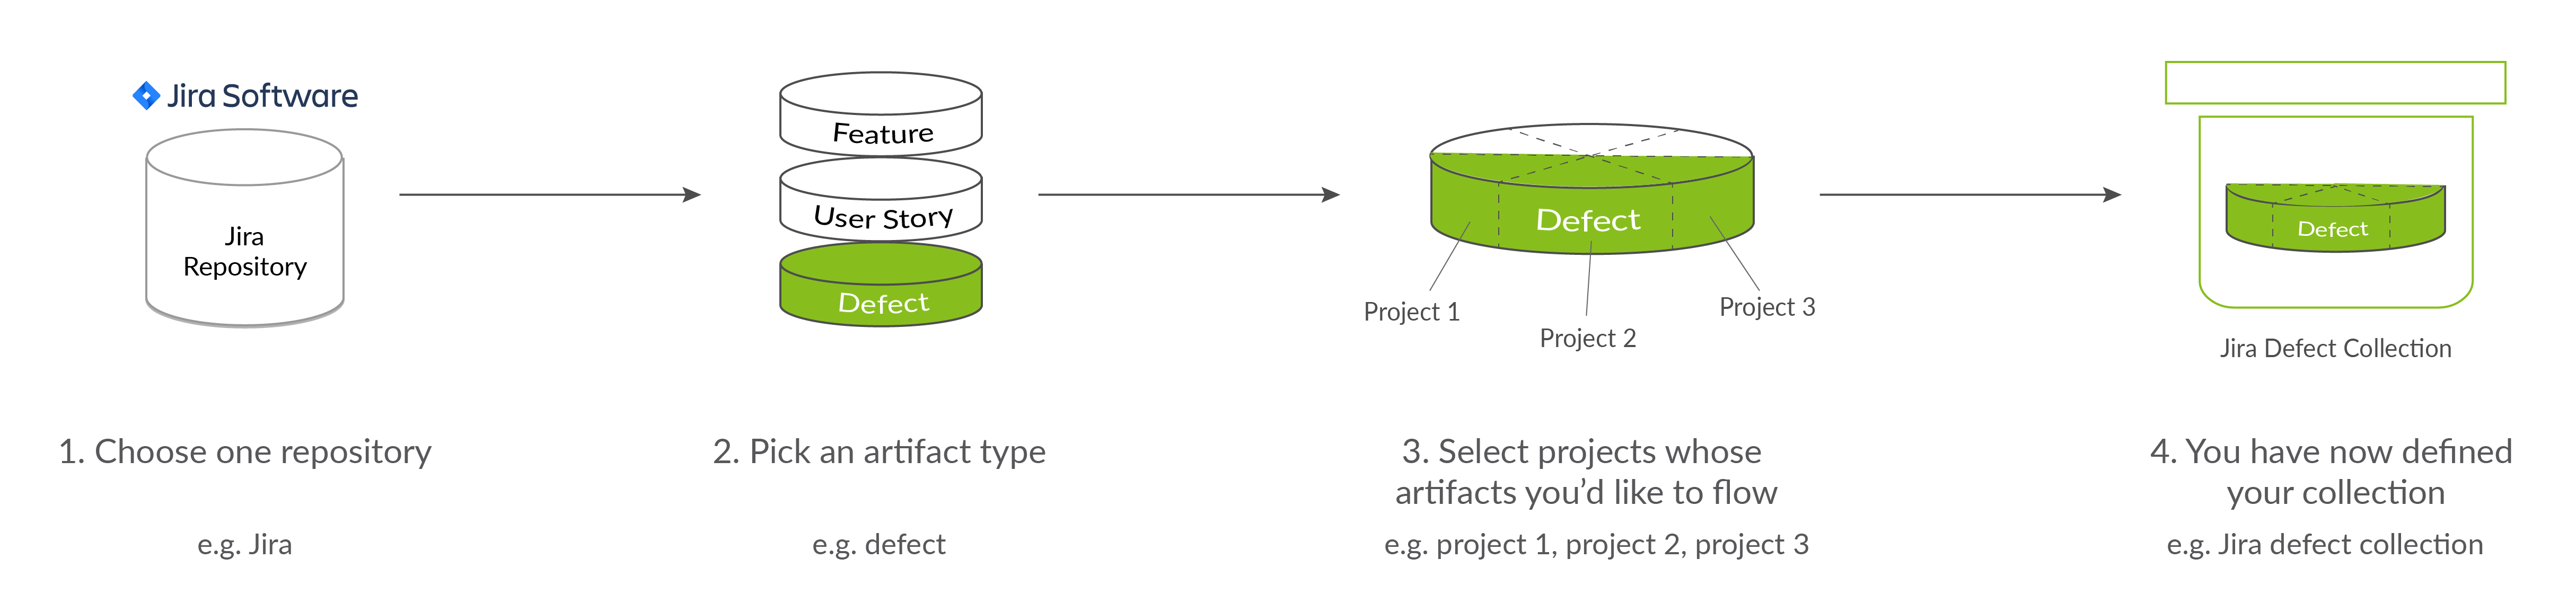
You can think of a collection as the set of artifacts that are eligible to flow as part of your integration. The process of creating a collection consists of a few steps which whittle down your repository into a smaller subset of artifacts. To create your collection, you will specify:
-
The repository the artifacts live in
-
Each collection can only come from one repository
-
-
The artifact type (i.e., defect, requirement, test case, etc)
-
Each collection can only contain one artifact type
-
-
The projects within the repository that those artifacts live in
-
Each collection can contain one or more projects
-
-
The model you would like your collection to be mapped to (not pictured)
-
Each collection can be mapped to one and only one model
-
You can learn more about collections in the Key Concepts.
Types of Work Item Collections
There are two types of Work Item Collections:
- Work Item (Repository) Collections, which connect to repositories like Jira, Jama, and ServiceNow
- Work Item (Database) Collections, which connect to databases, such as MySQL.
On this page, we will be teaching you how to configure a Work Item (Repository) Collection.
Note: SCM repositories, such as Git, are not available for Work Item collections. To configure an SCM collection, please see Outbound Only Collection instructions.
Video Tutorial
Check out the video below to learn how to create a new work item (repository) collection:
Creating a Work Item (Repository) Collection
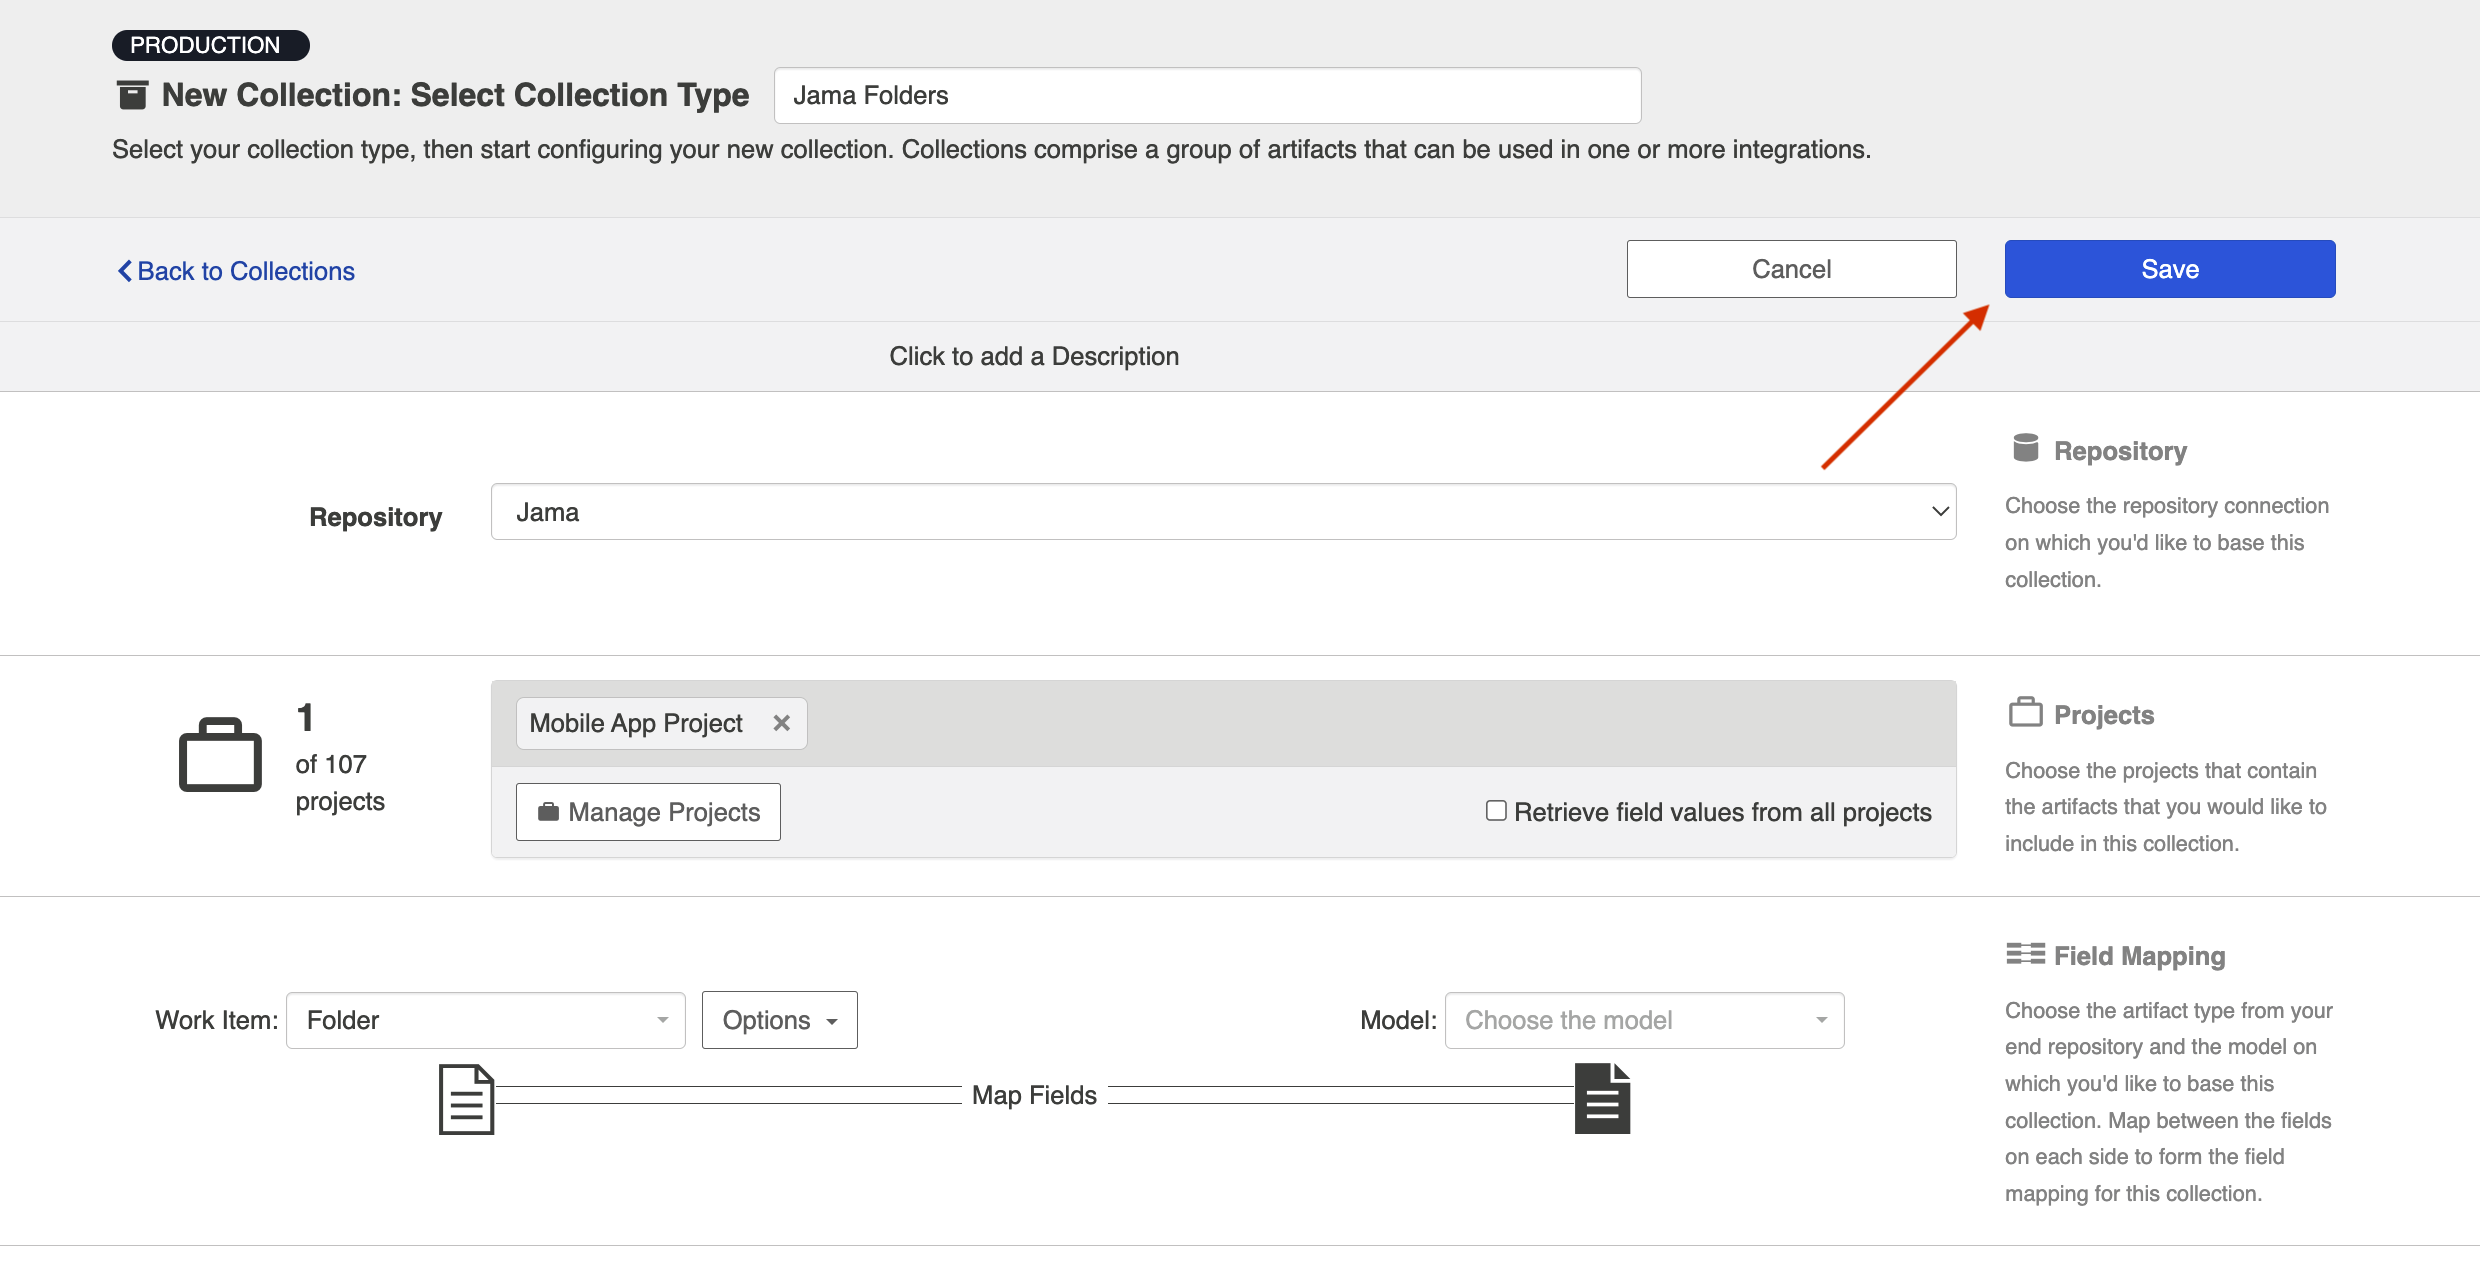
To create a work item (repository) collection, follow the steps below:
Select Collections at the top of the screen.
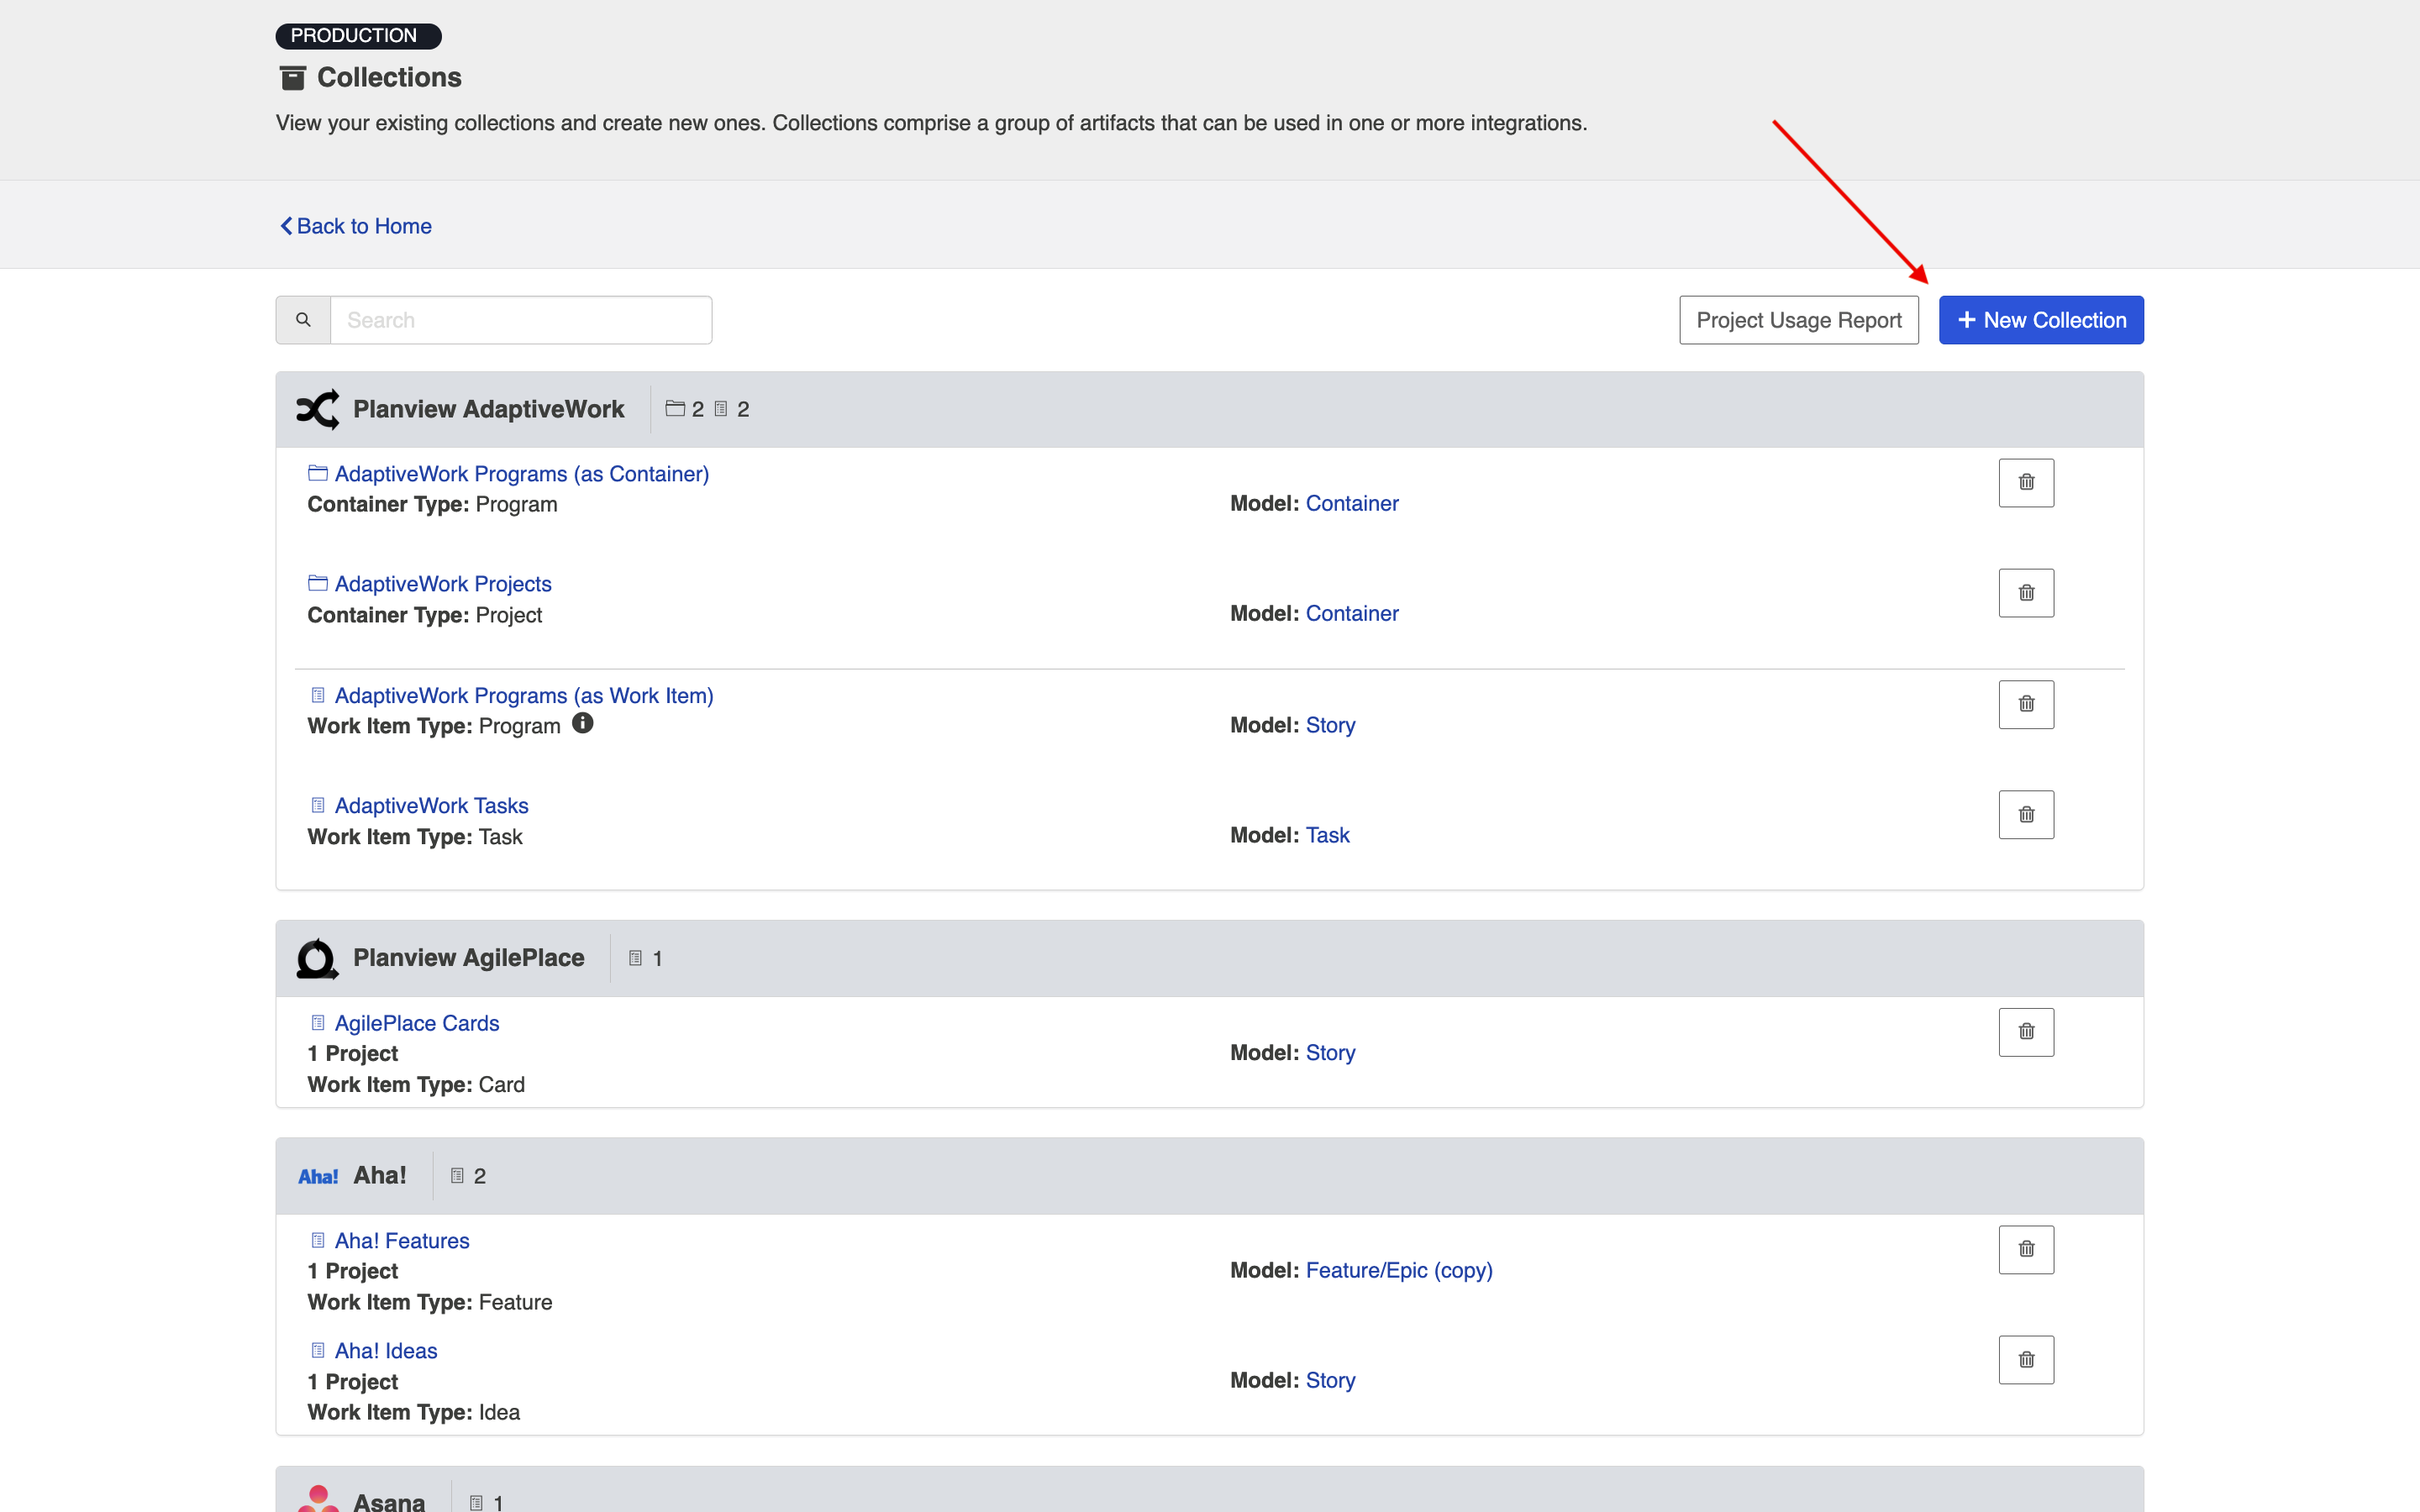
Click New Collection.
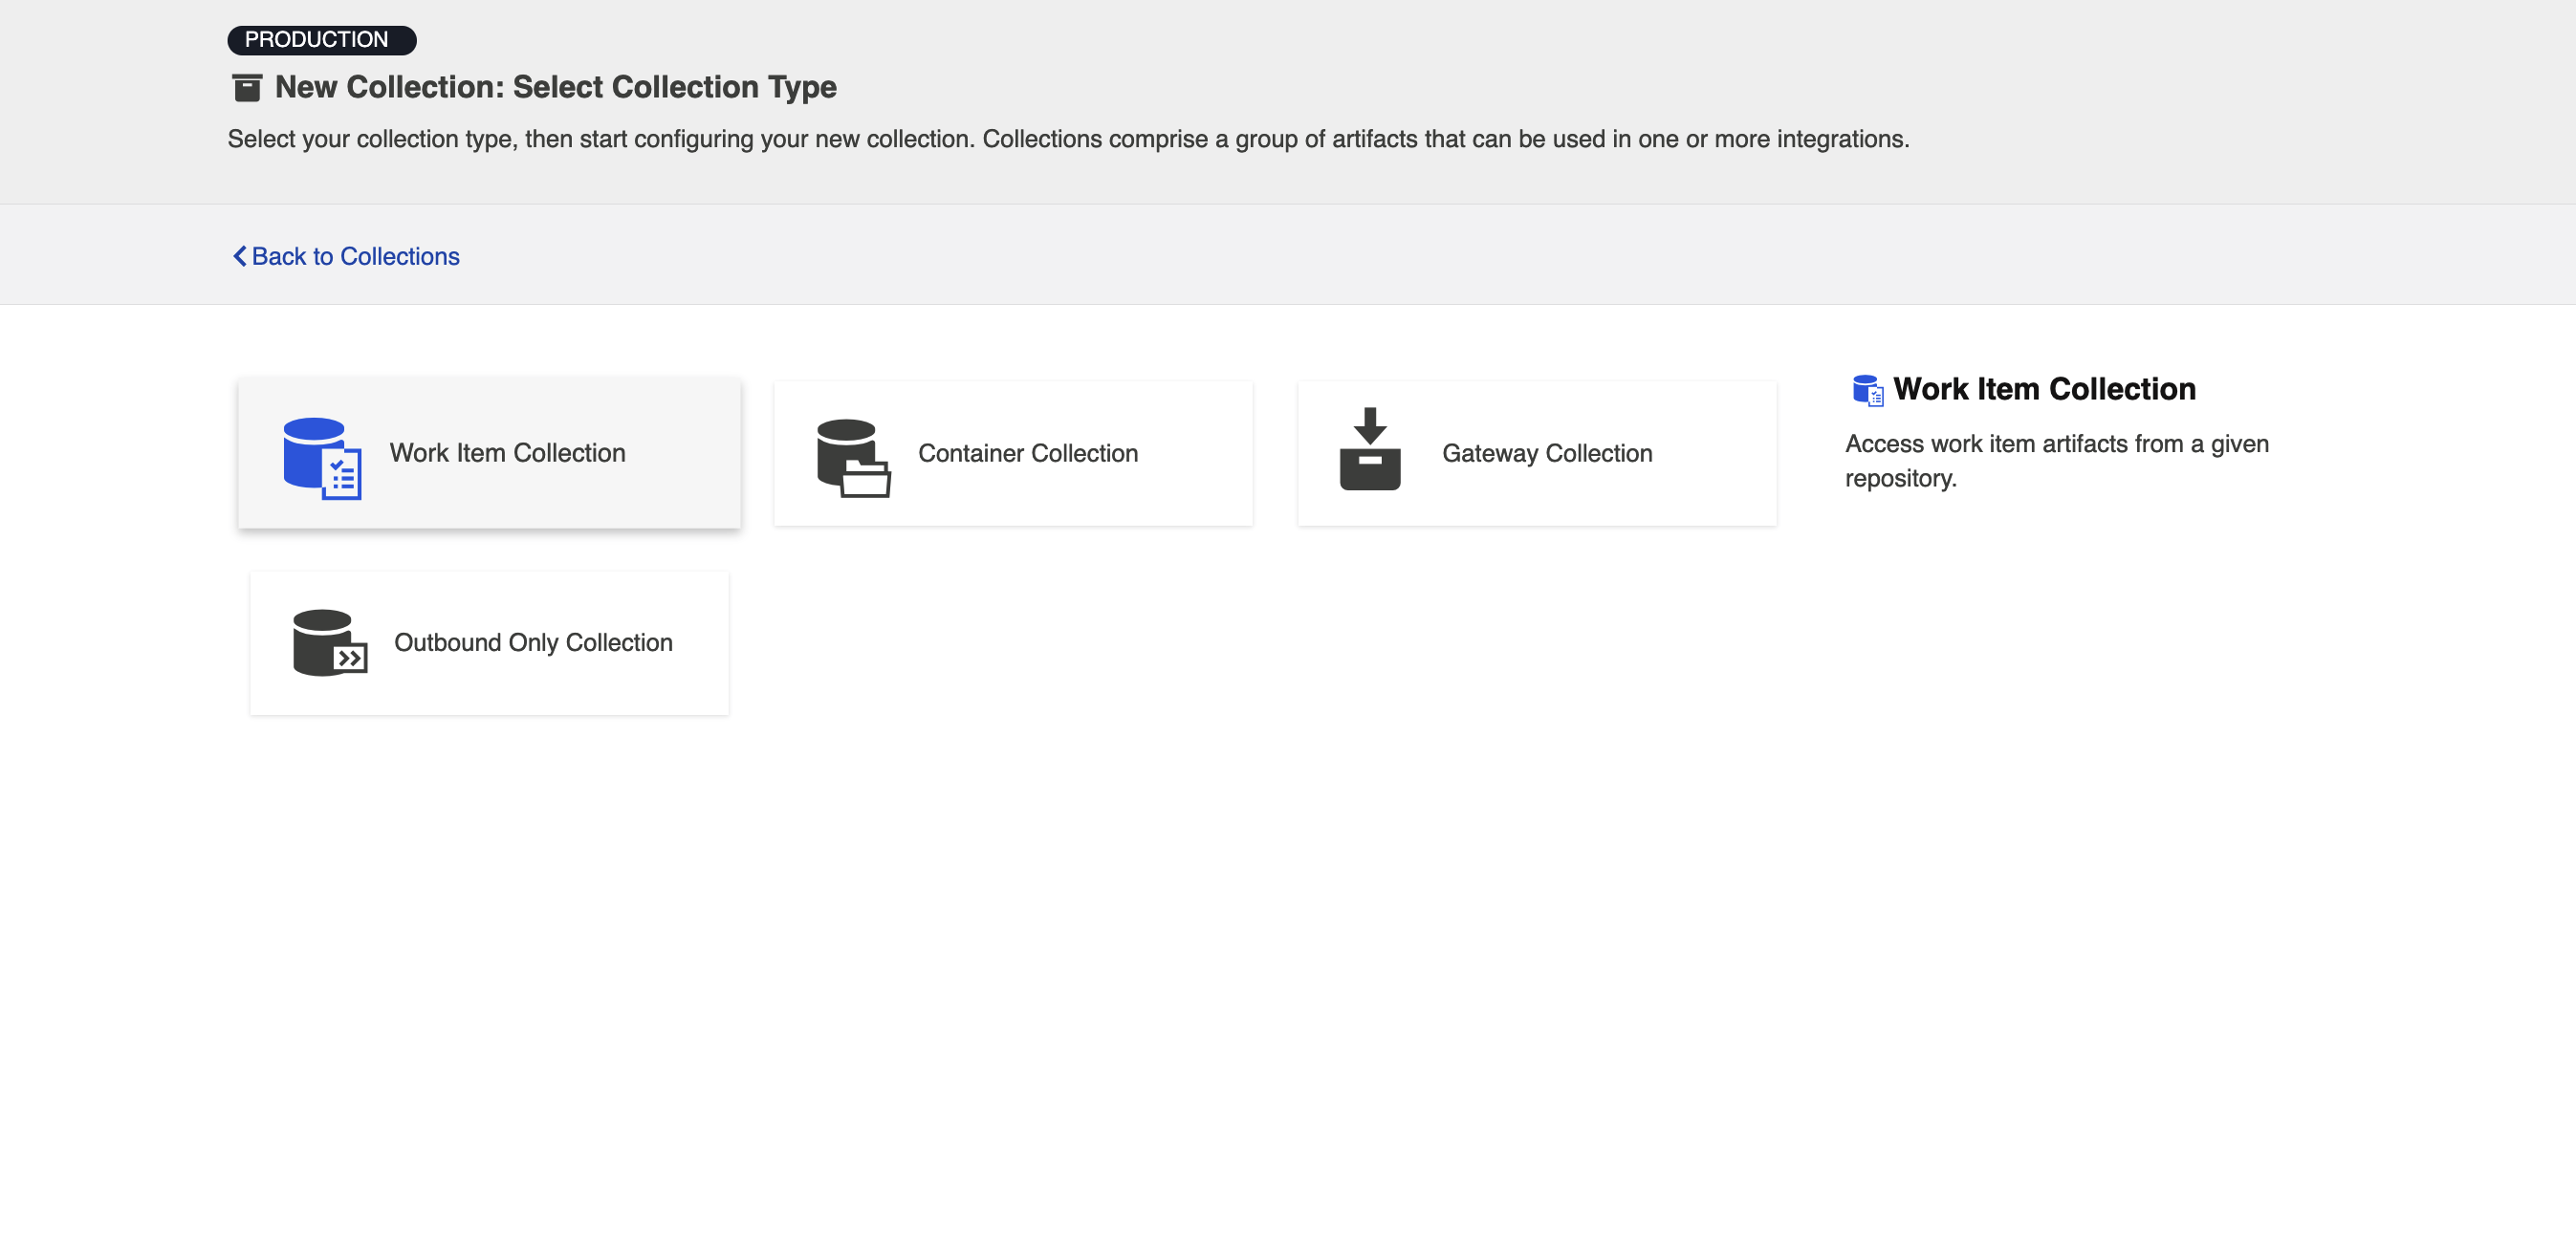
Select Work Item Collection as the collection type.
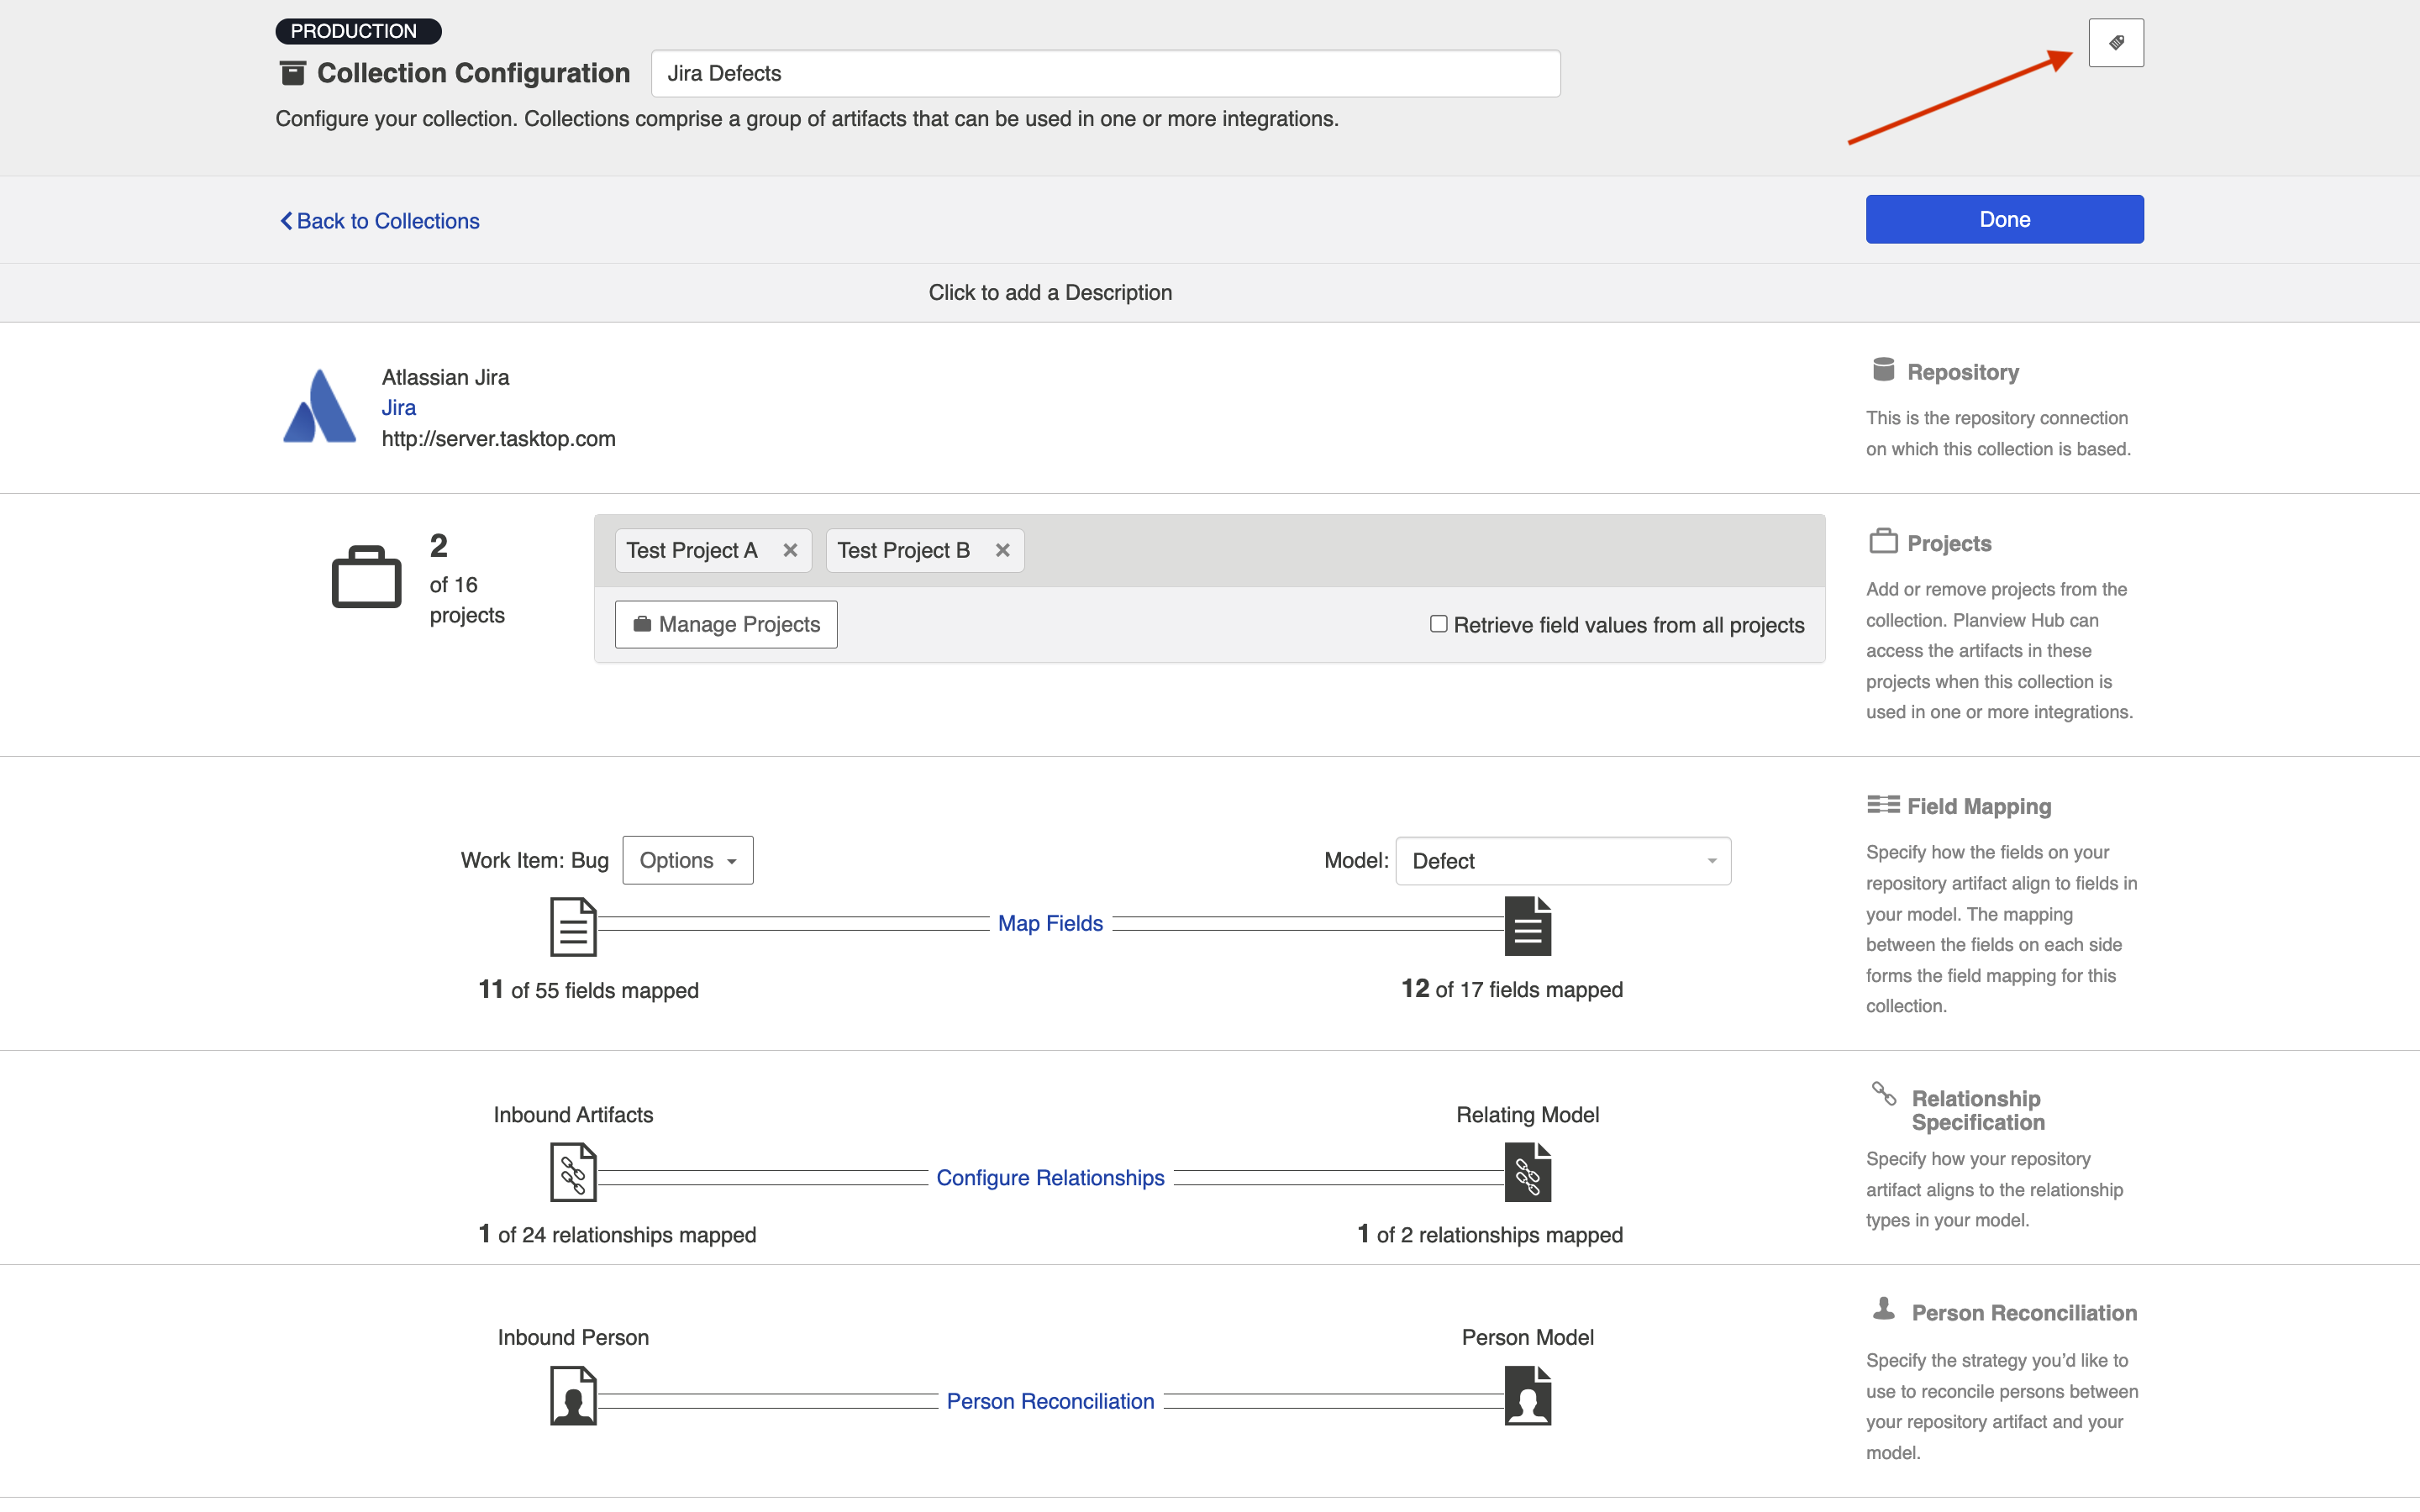
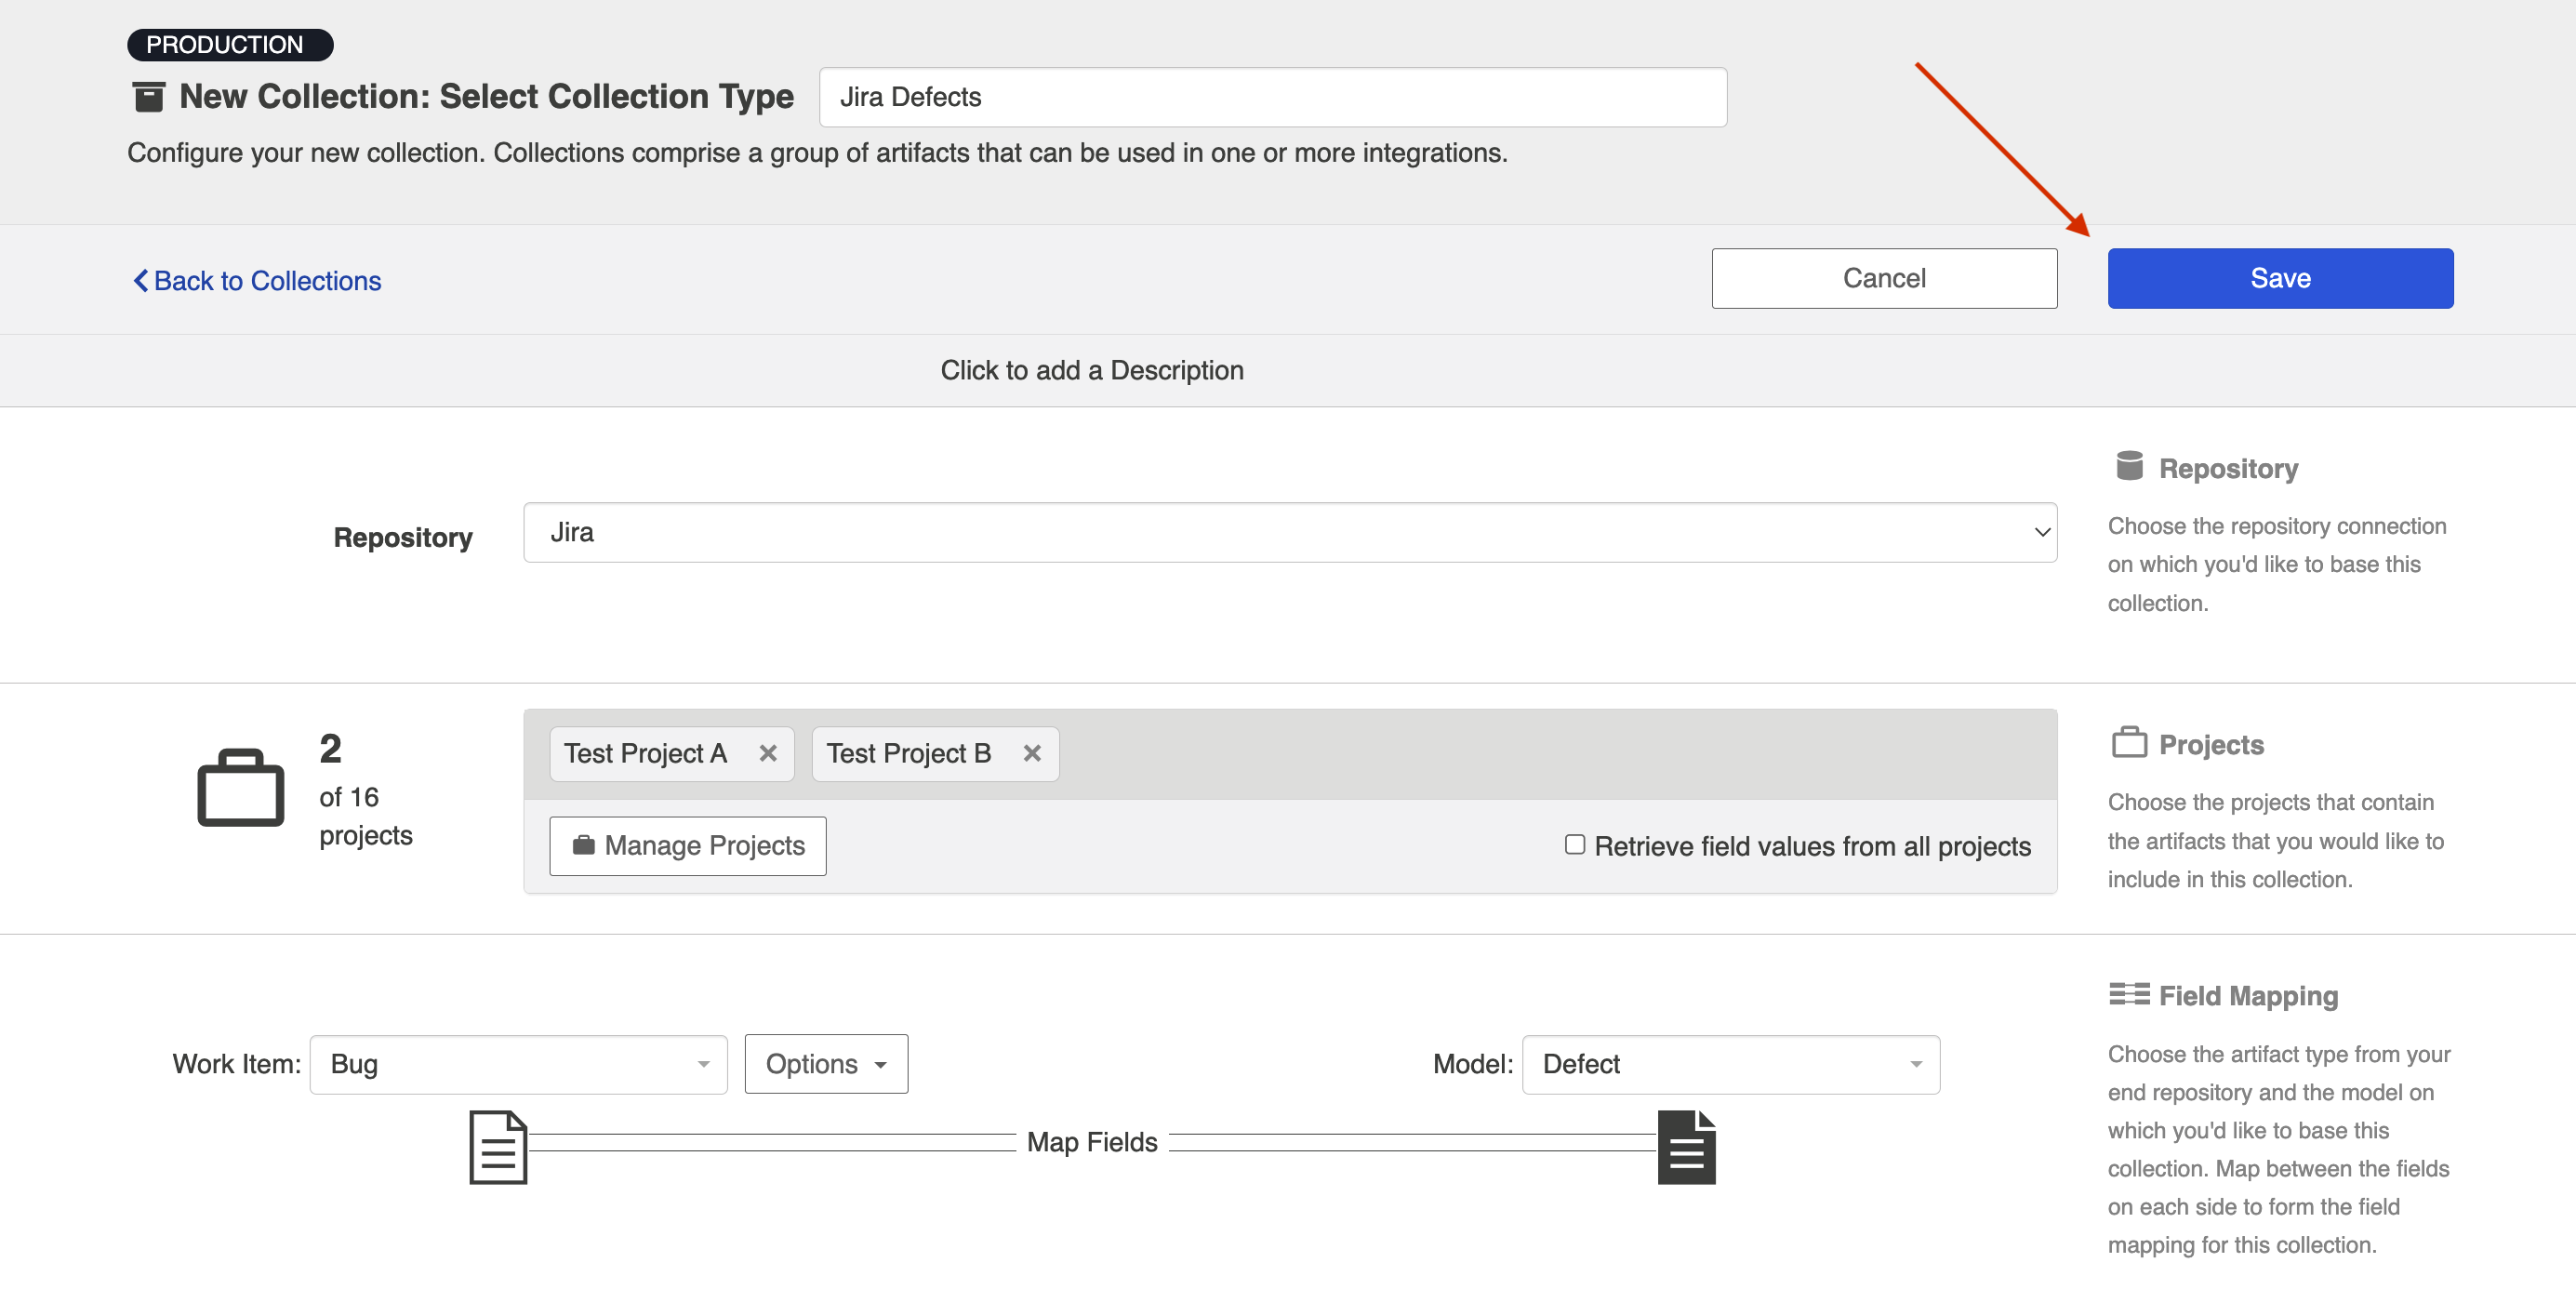
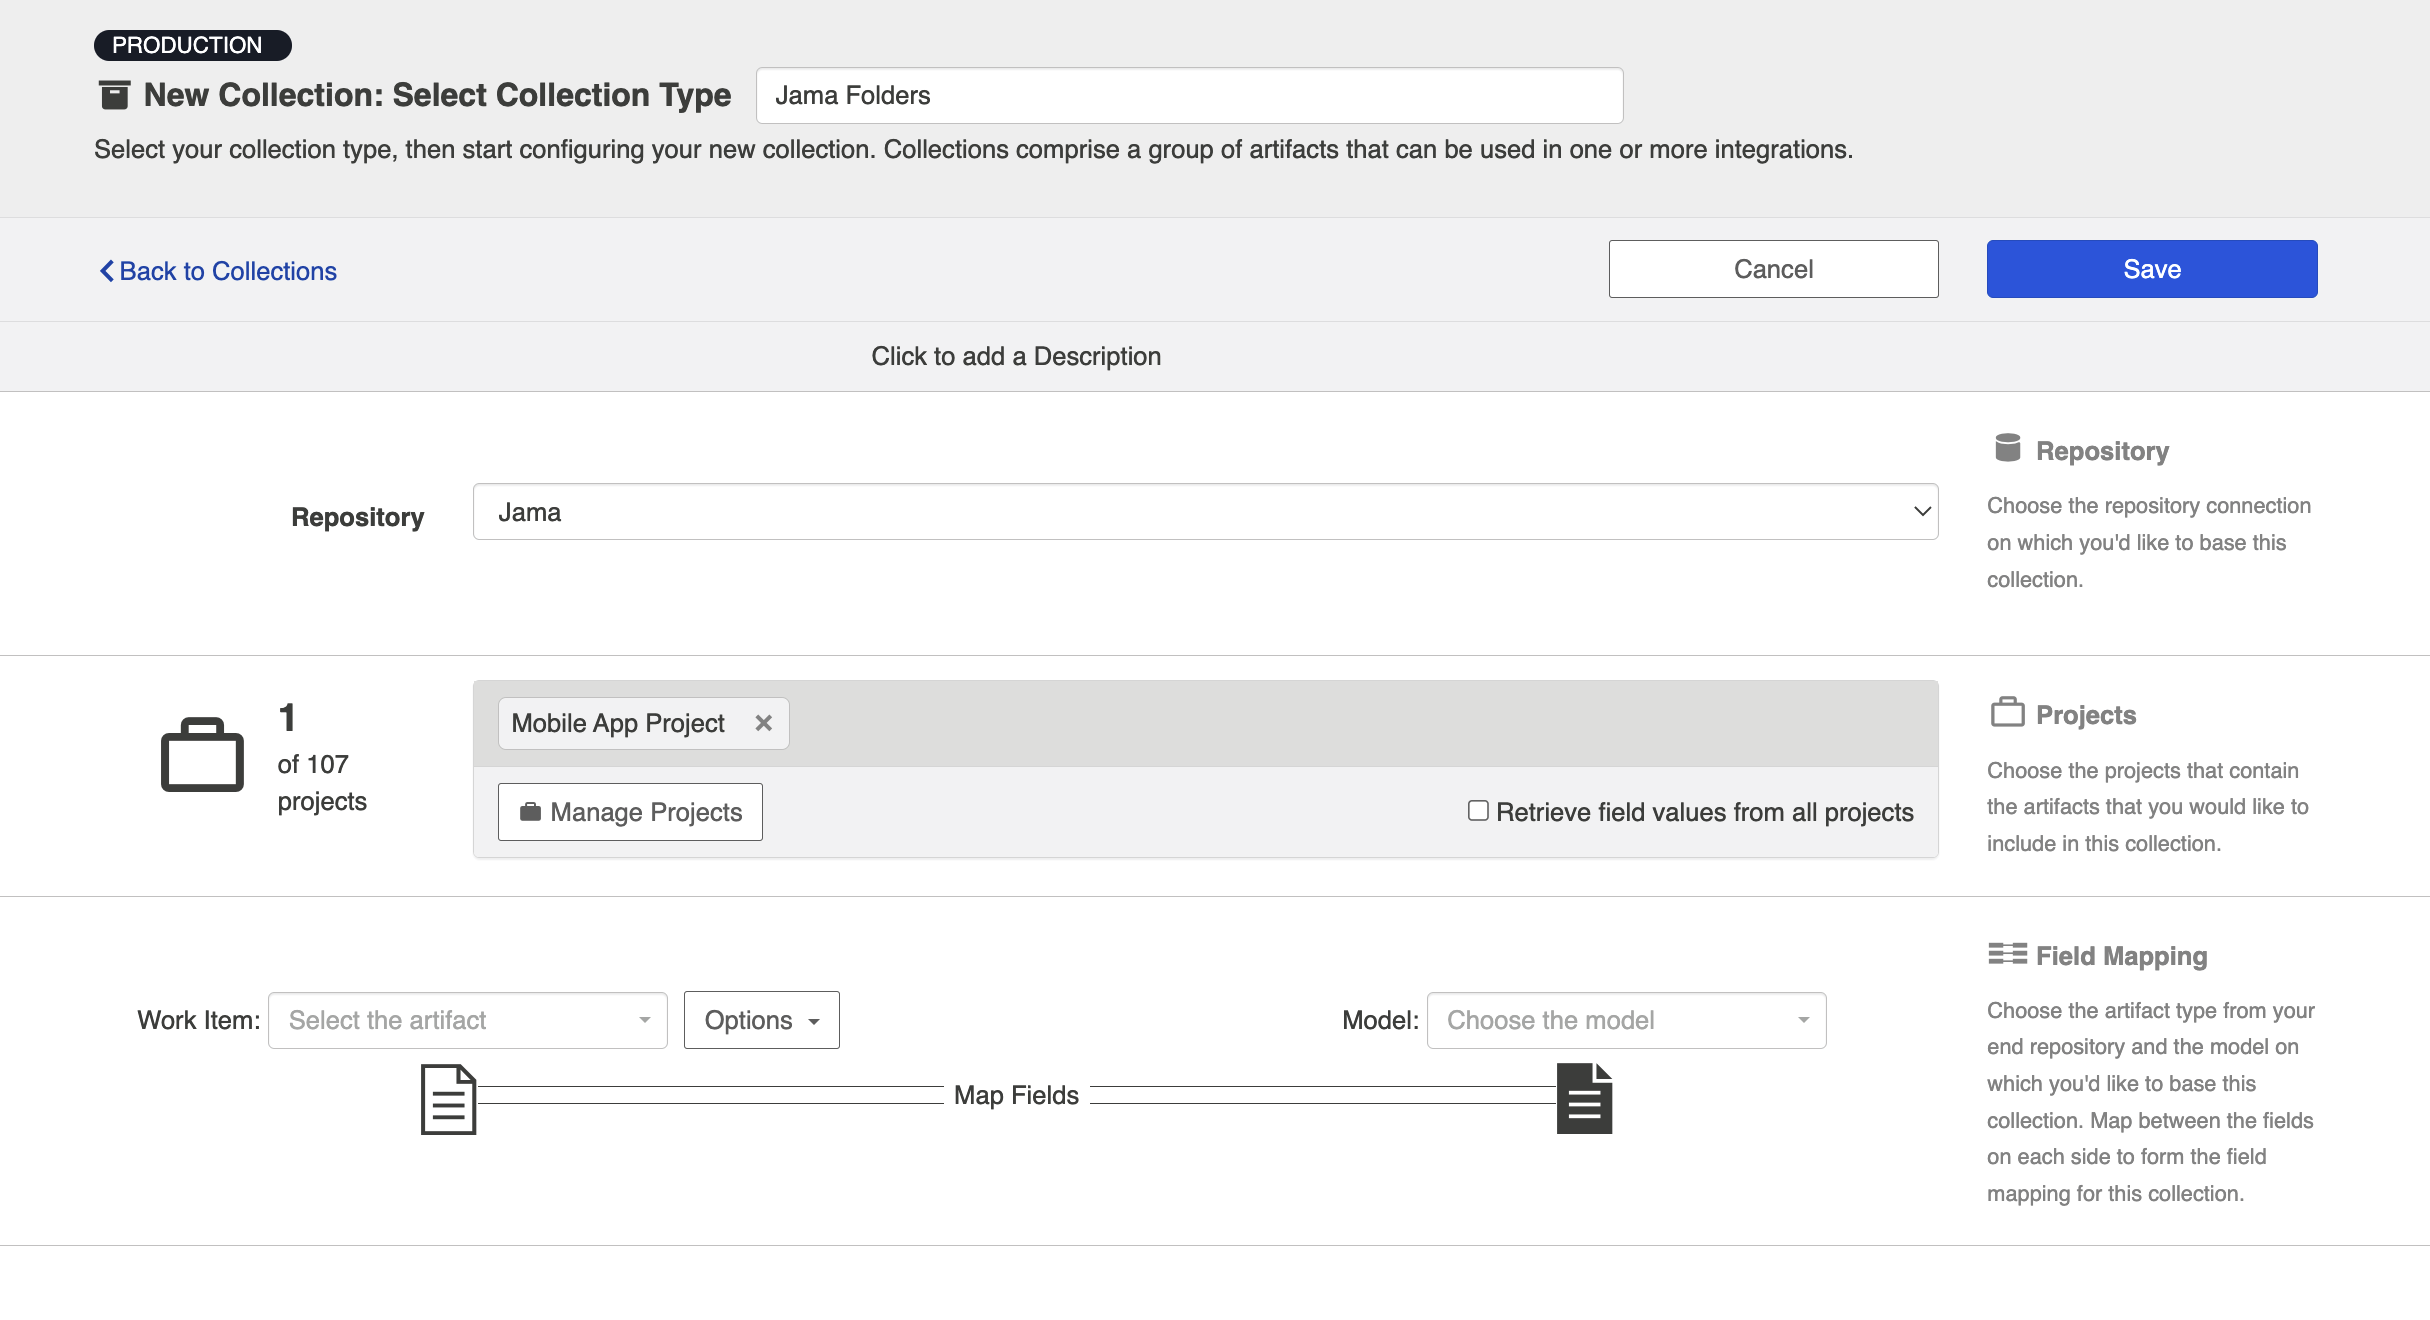
Name and describe your collection.
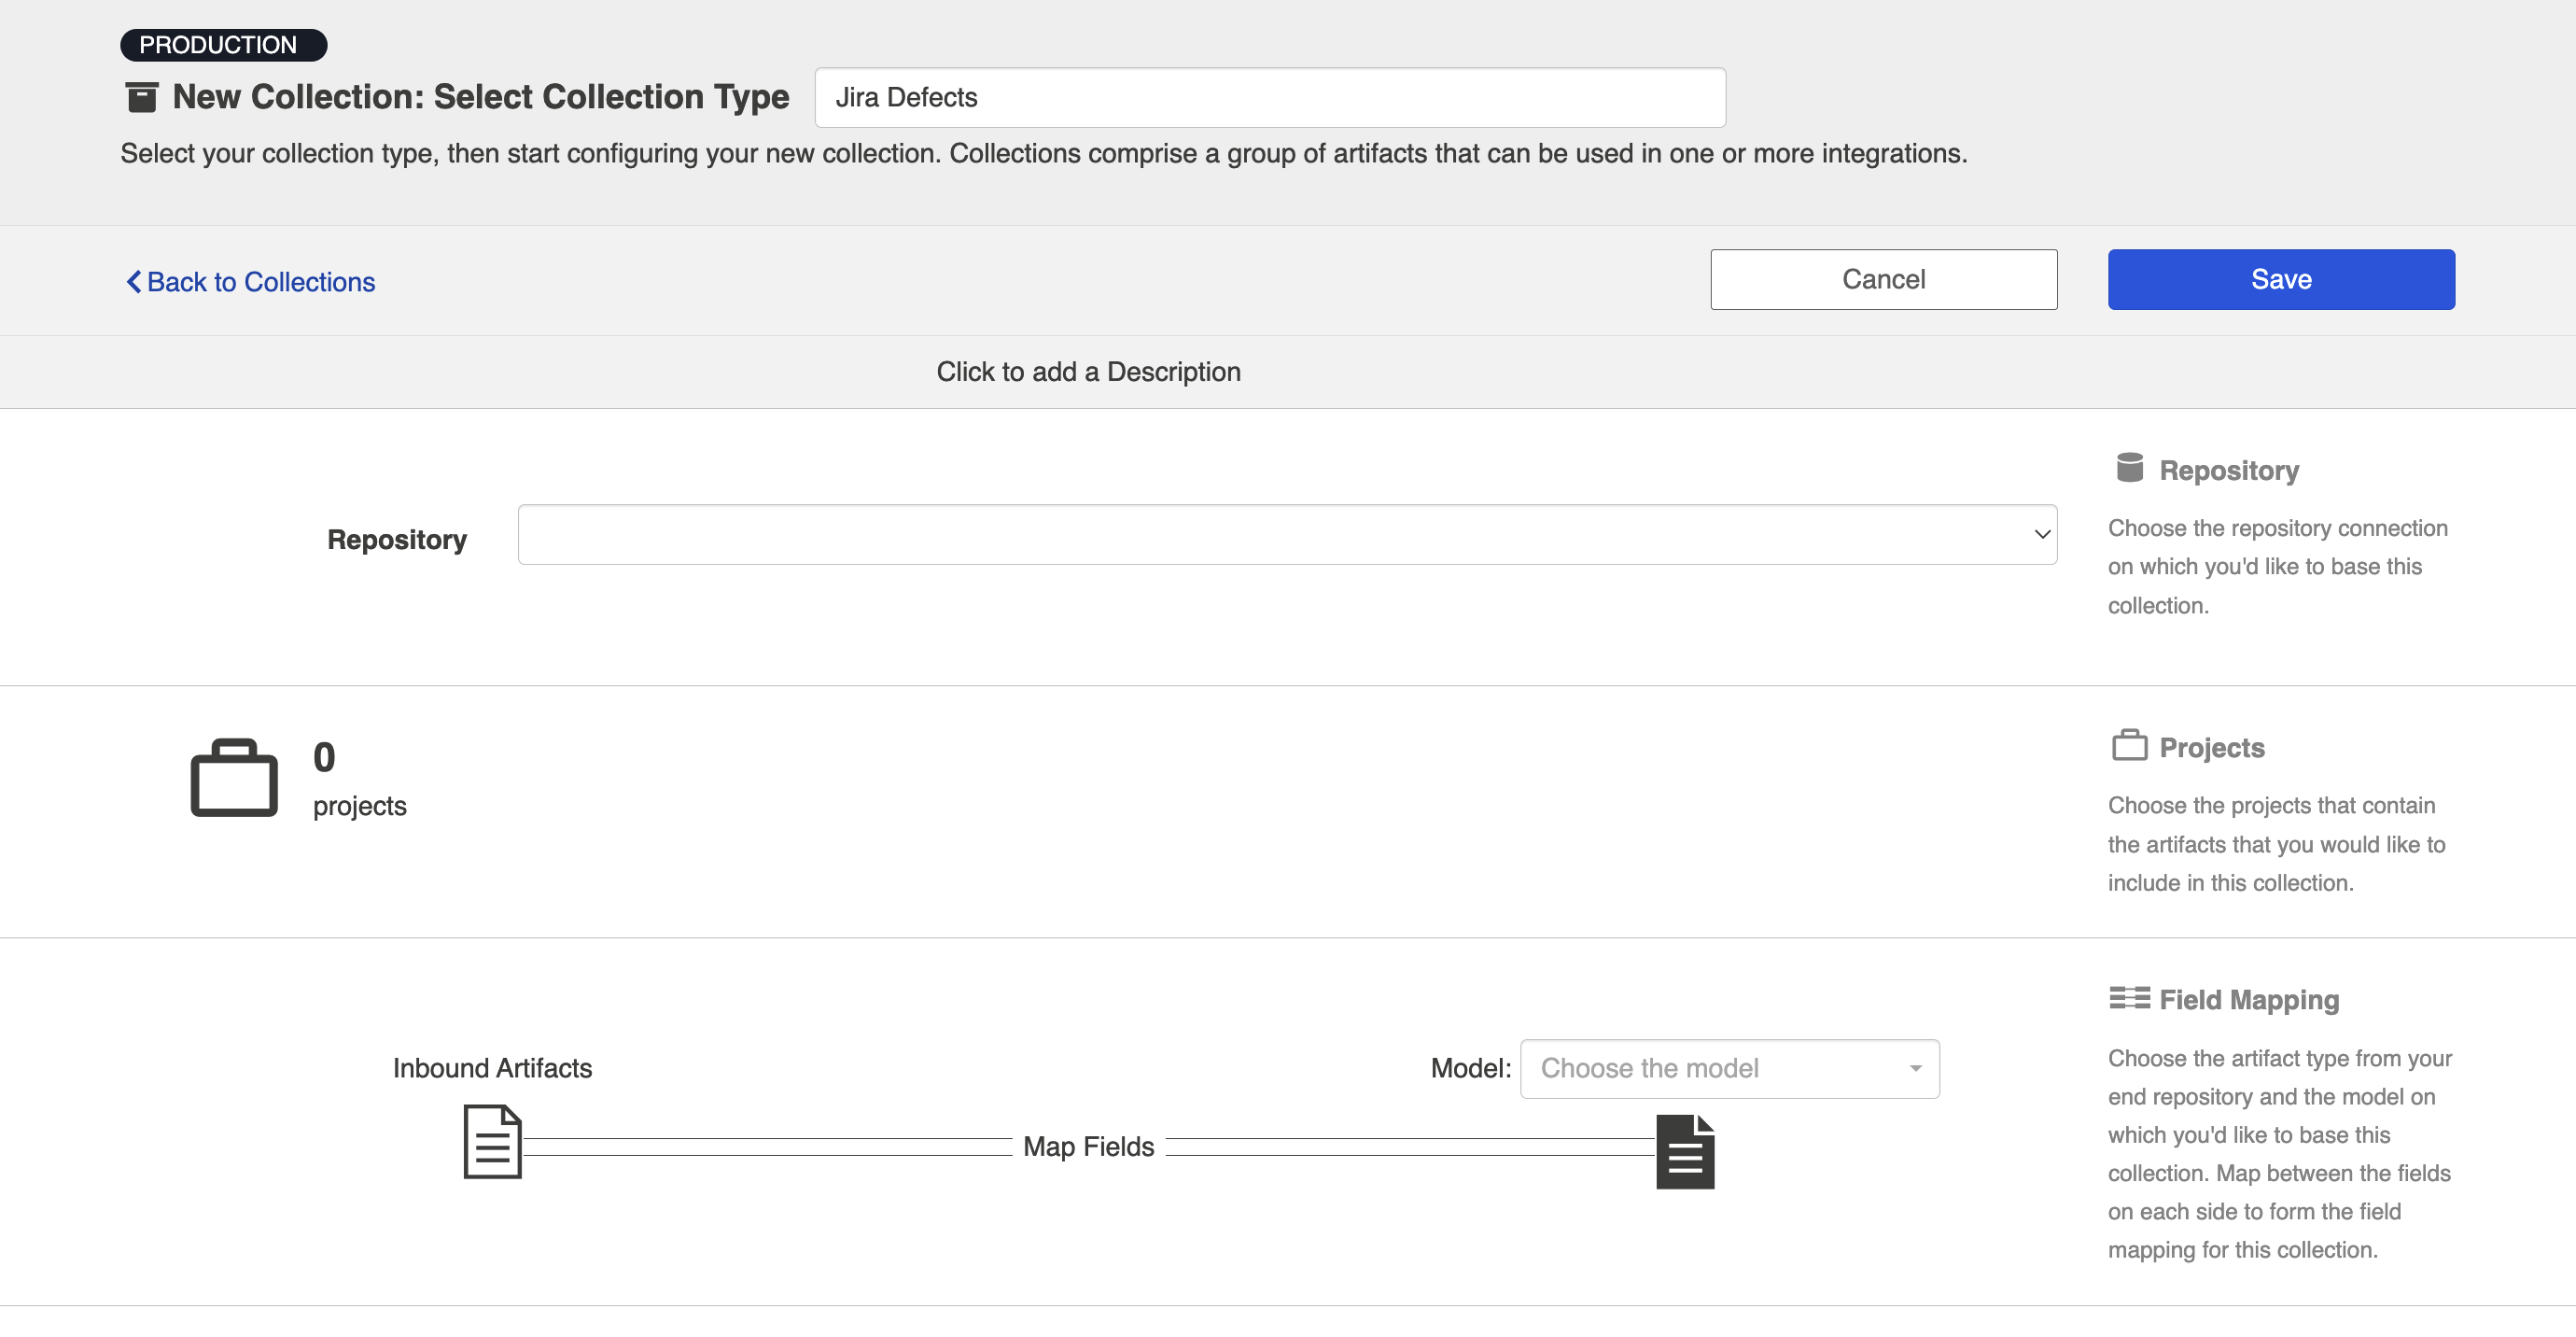
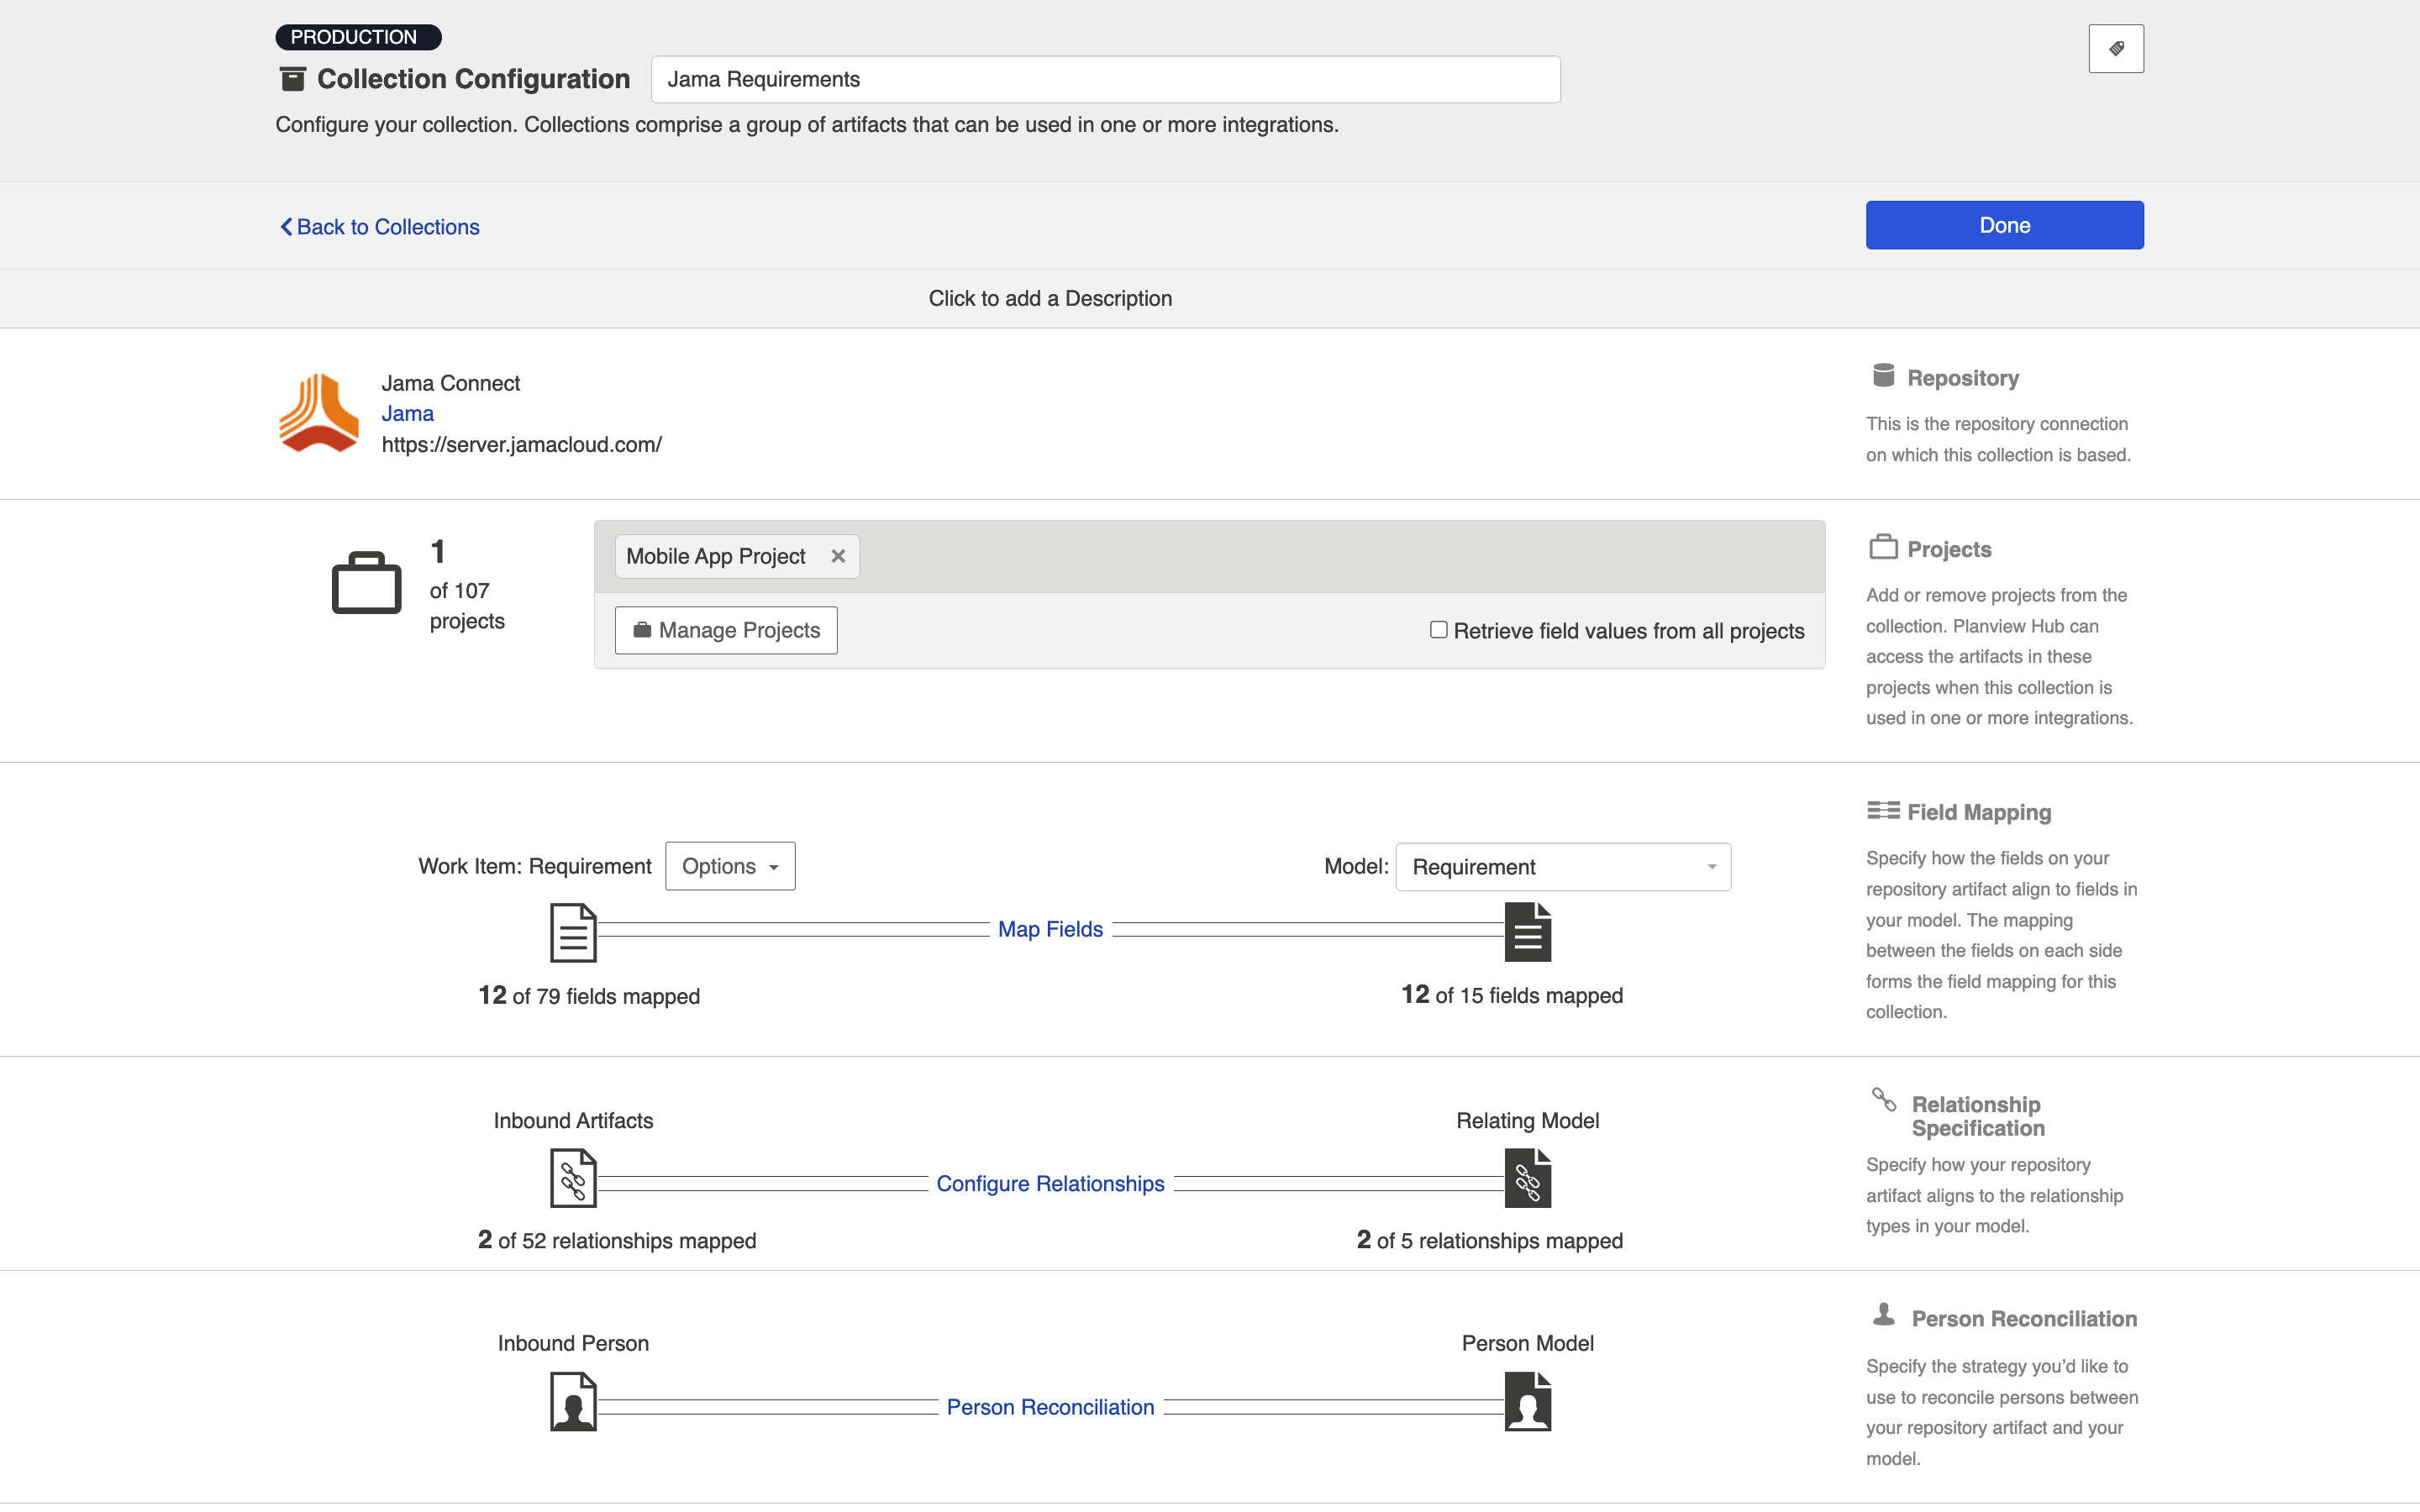
Select the repository that you would like to connect to. The collection will include artifacts from the repository you have selected.
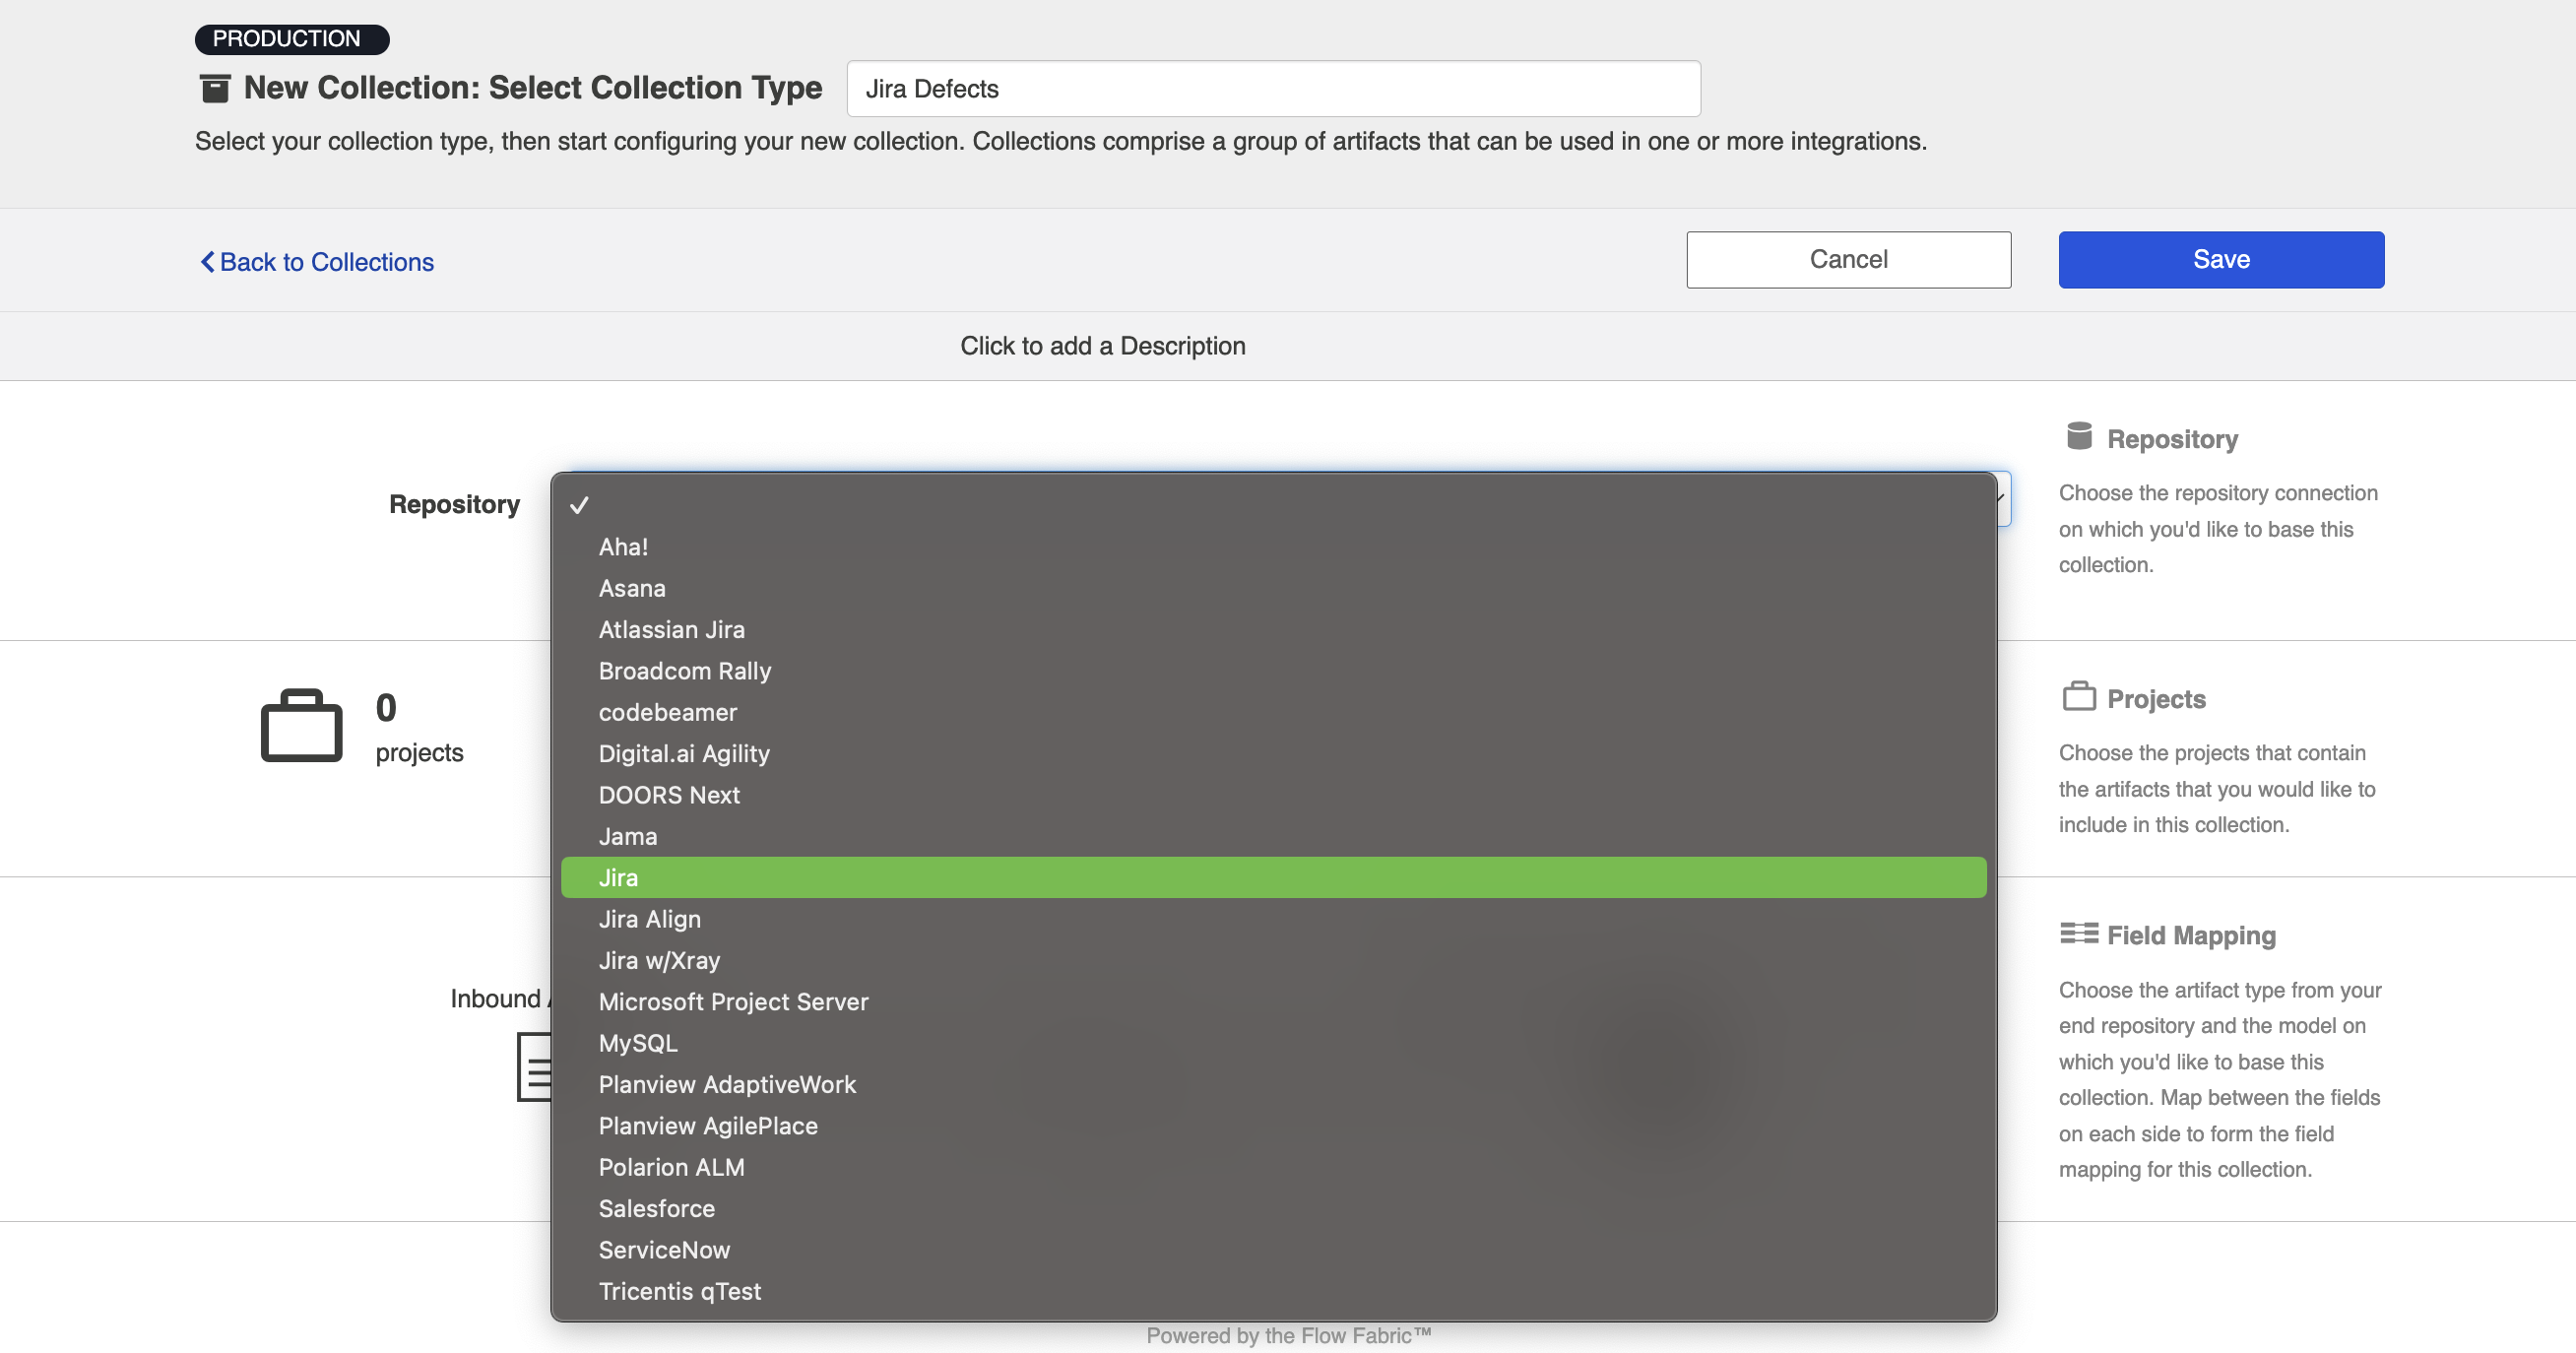
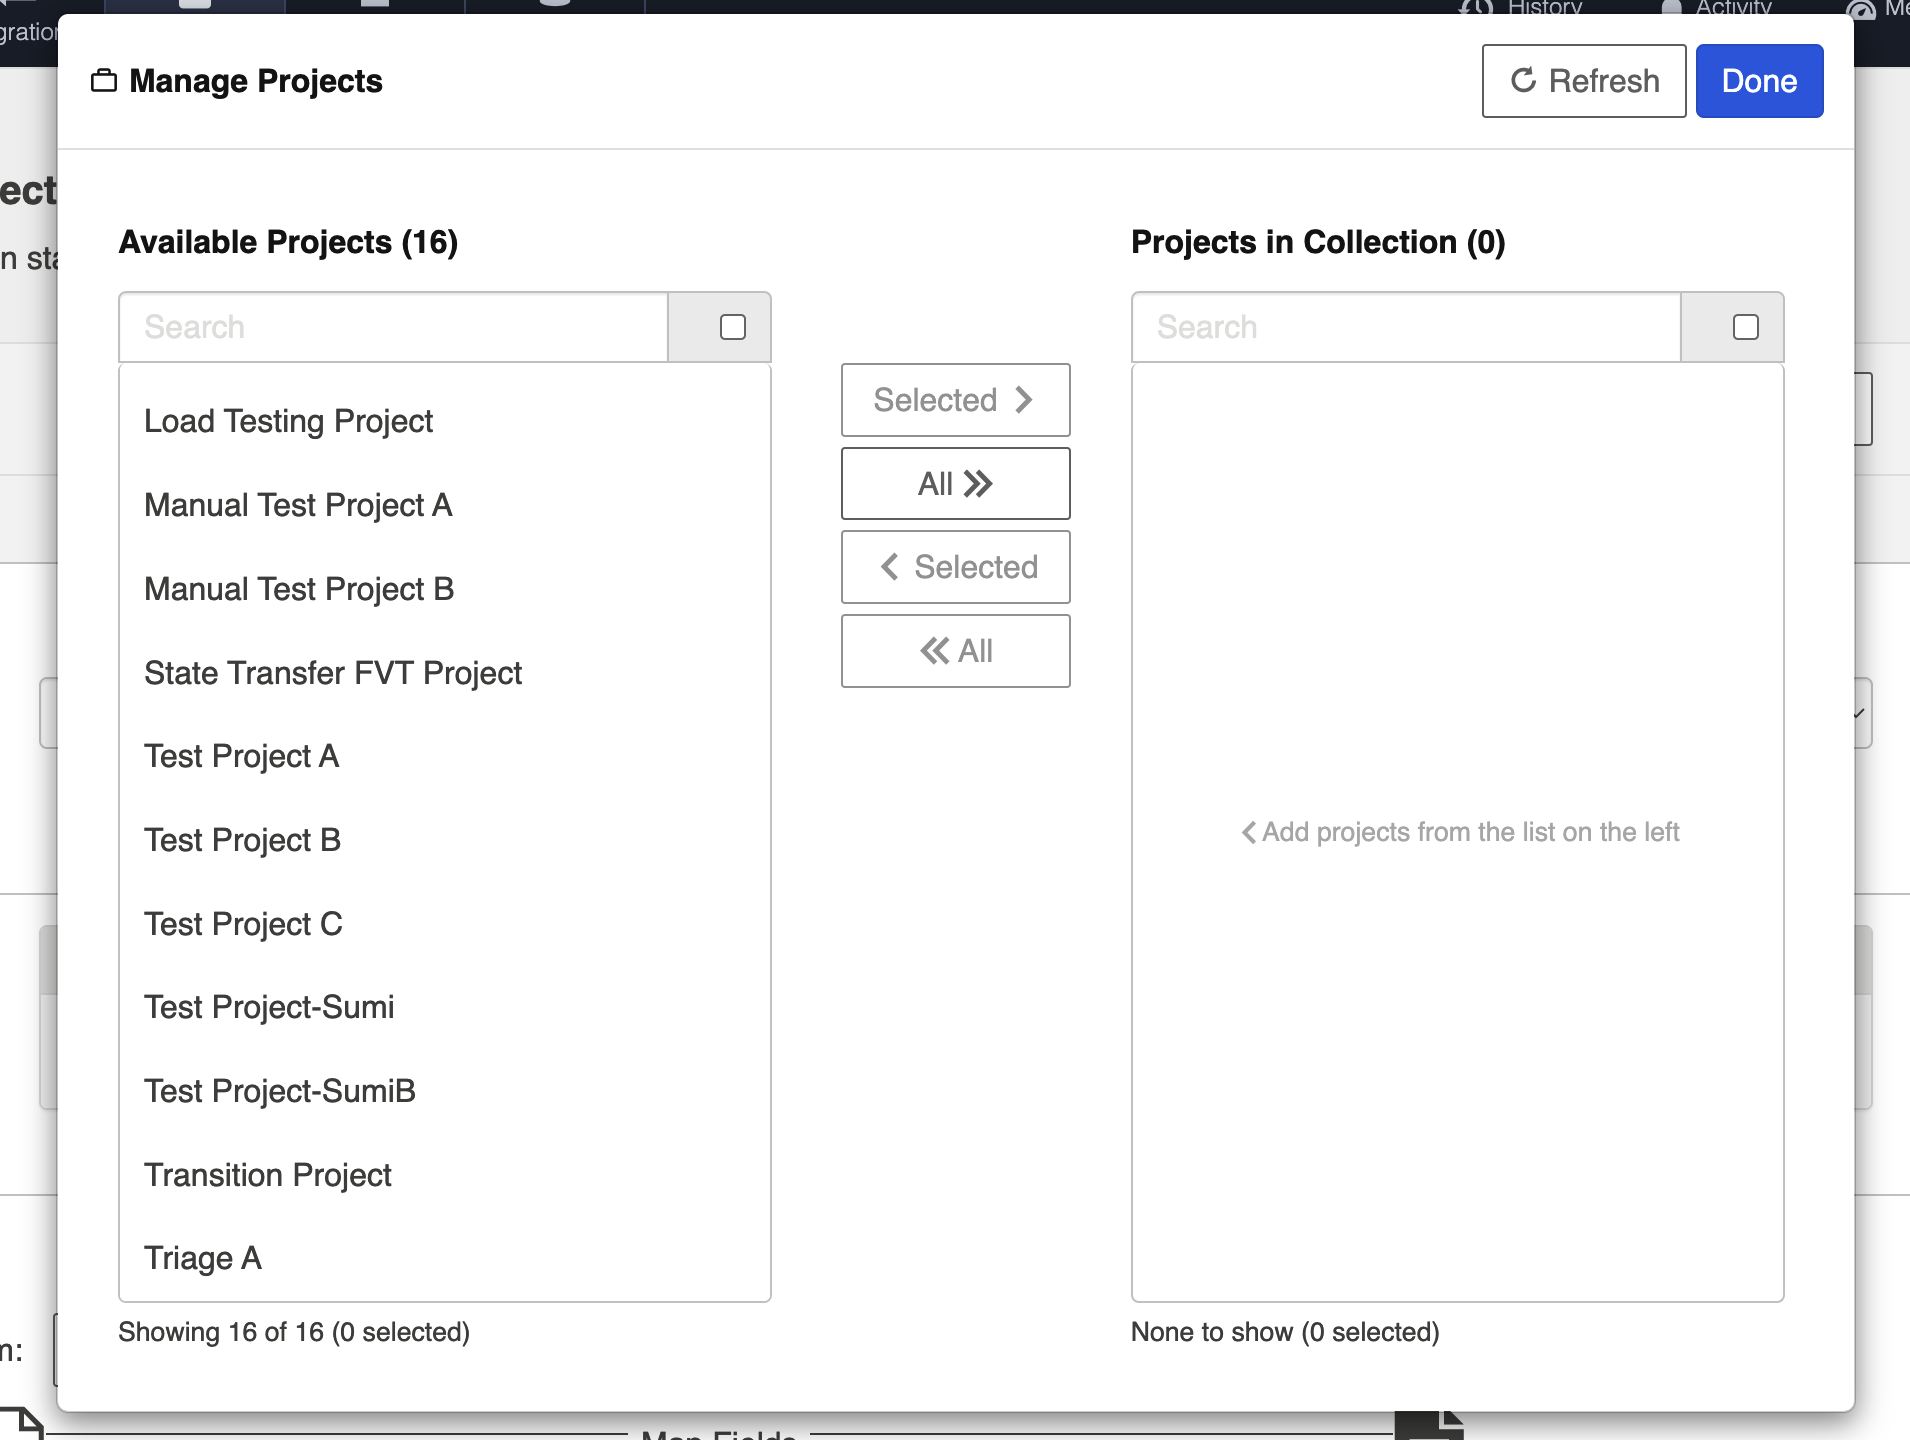
Add projects to your collection by selecting Manage Projects. These are the projects from which Hub will be able to create, retrieve, and update artifacts.
Note: In some cases, the word Project is used loosely. You may be selecting workspaces or some other organizational structure, depending on the repository you've connected to. You can review our Connector Docs to see which containers are supported for each repository.
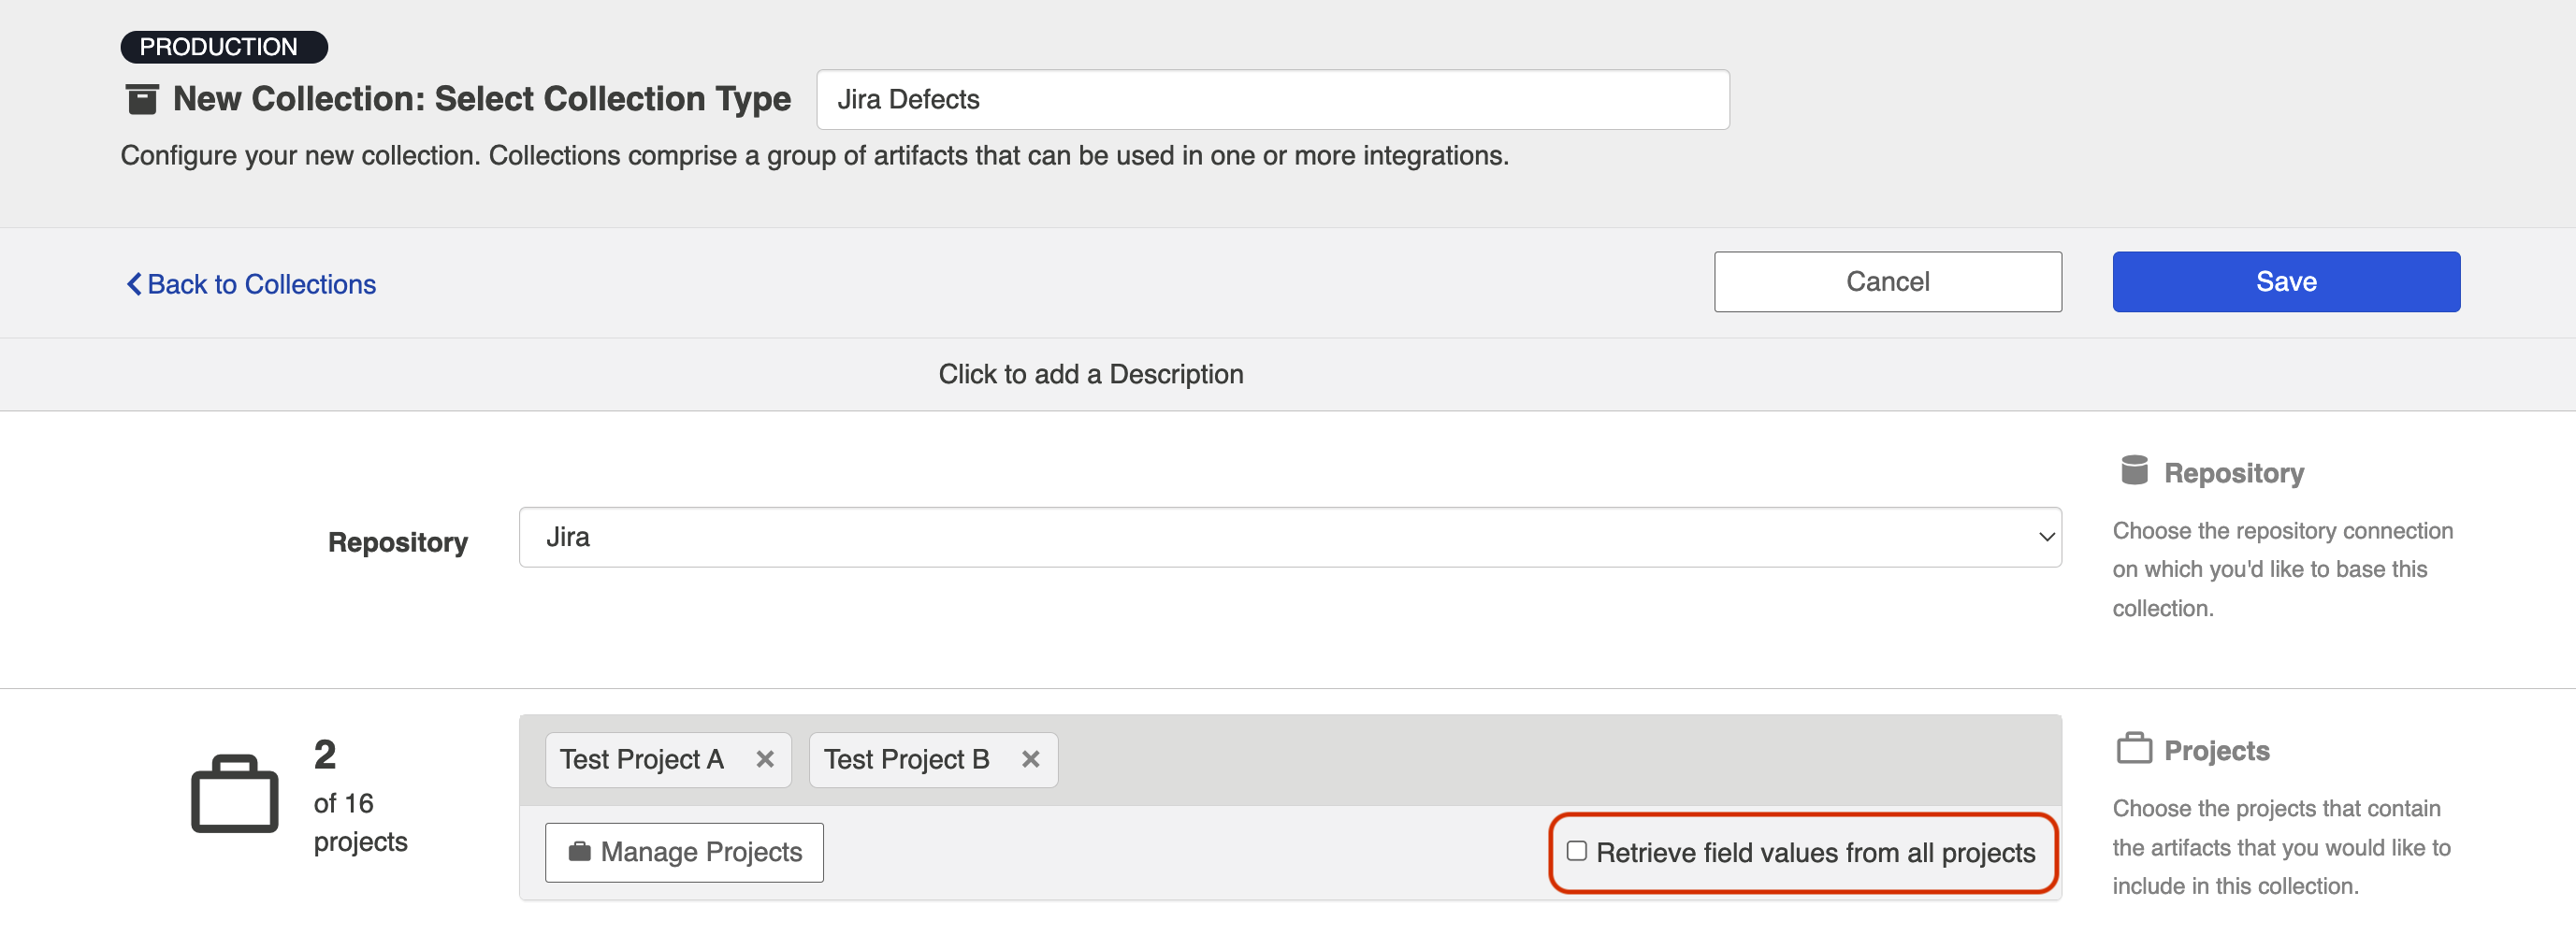
By default, Hub retrieves field values from one sample project for mapping. In rare cases where values vary between projects, check the Retrieve field values from all projects box on the Collection configuration screen to retrieve all possible values. Be aware that retrieving values from all projects can take some time.
Note: For instructions on how to include multiple artifact types in a single collection, see the Affinity Modeling section below.

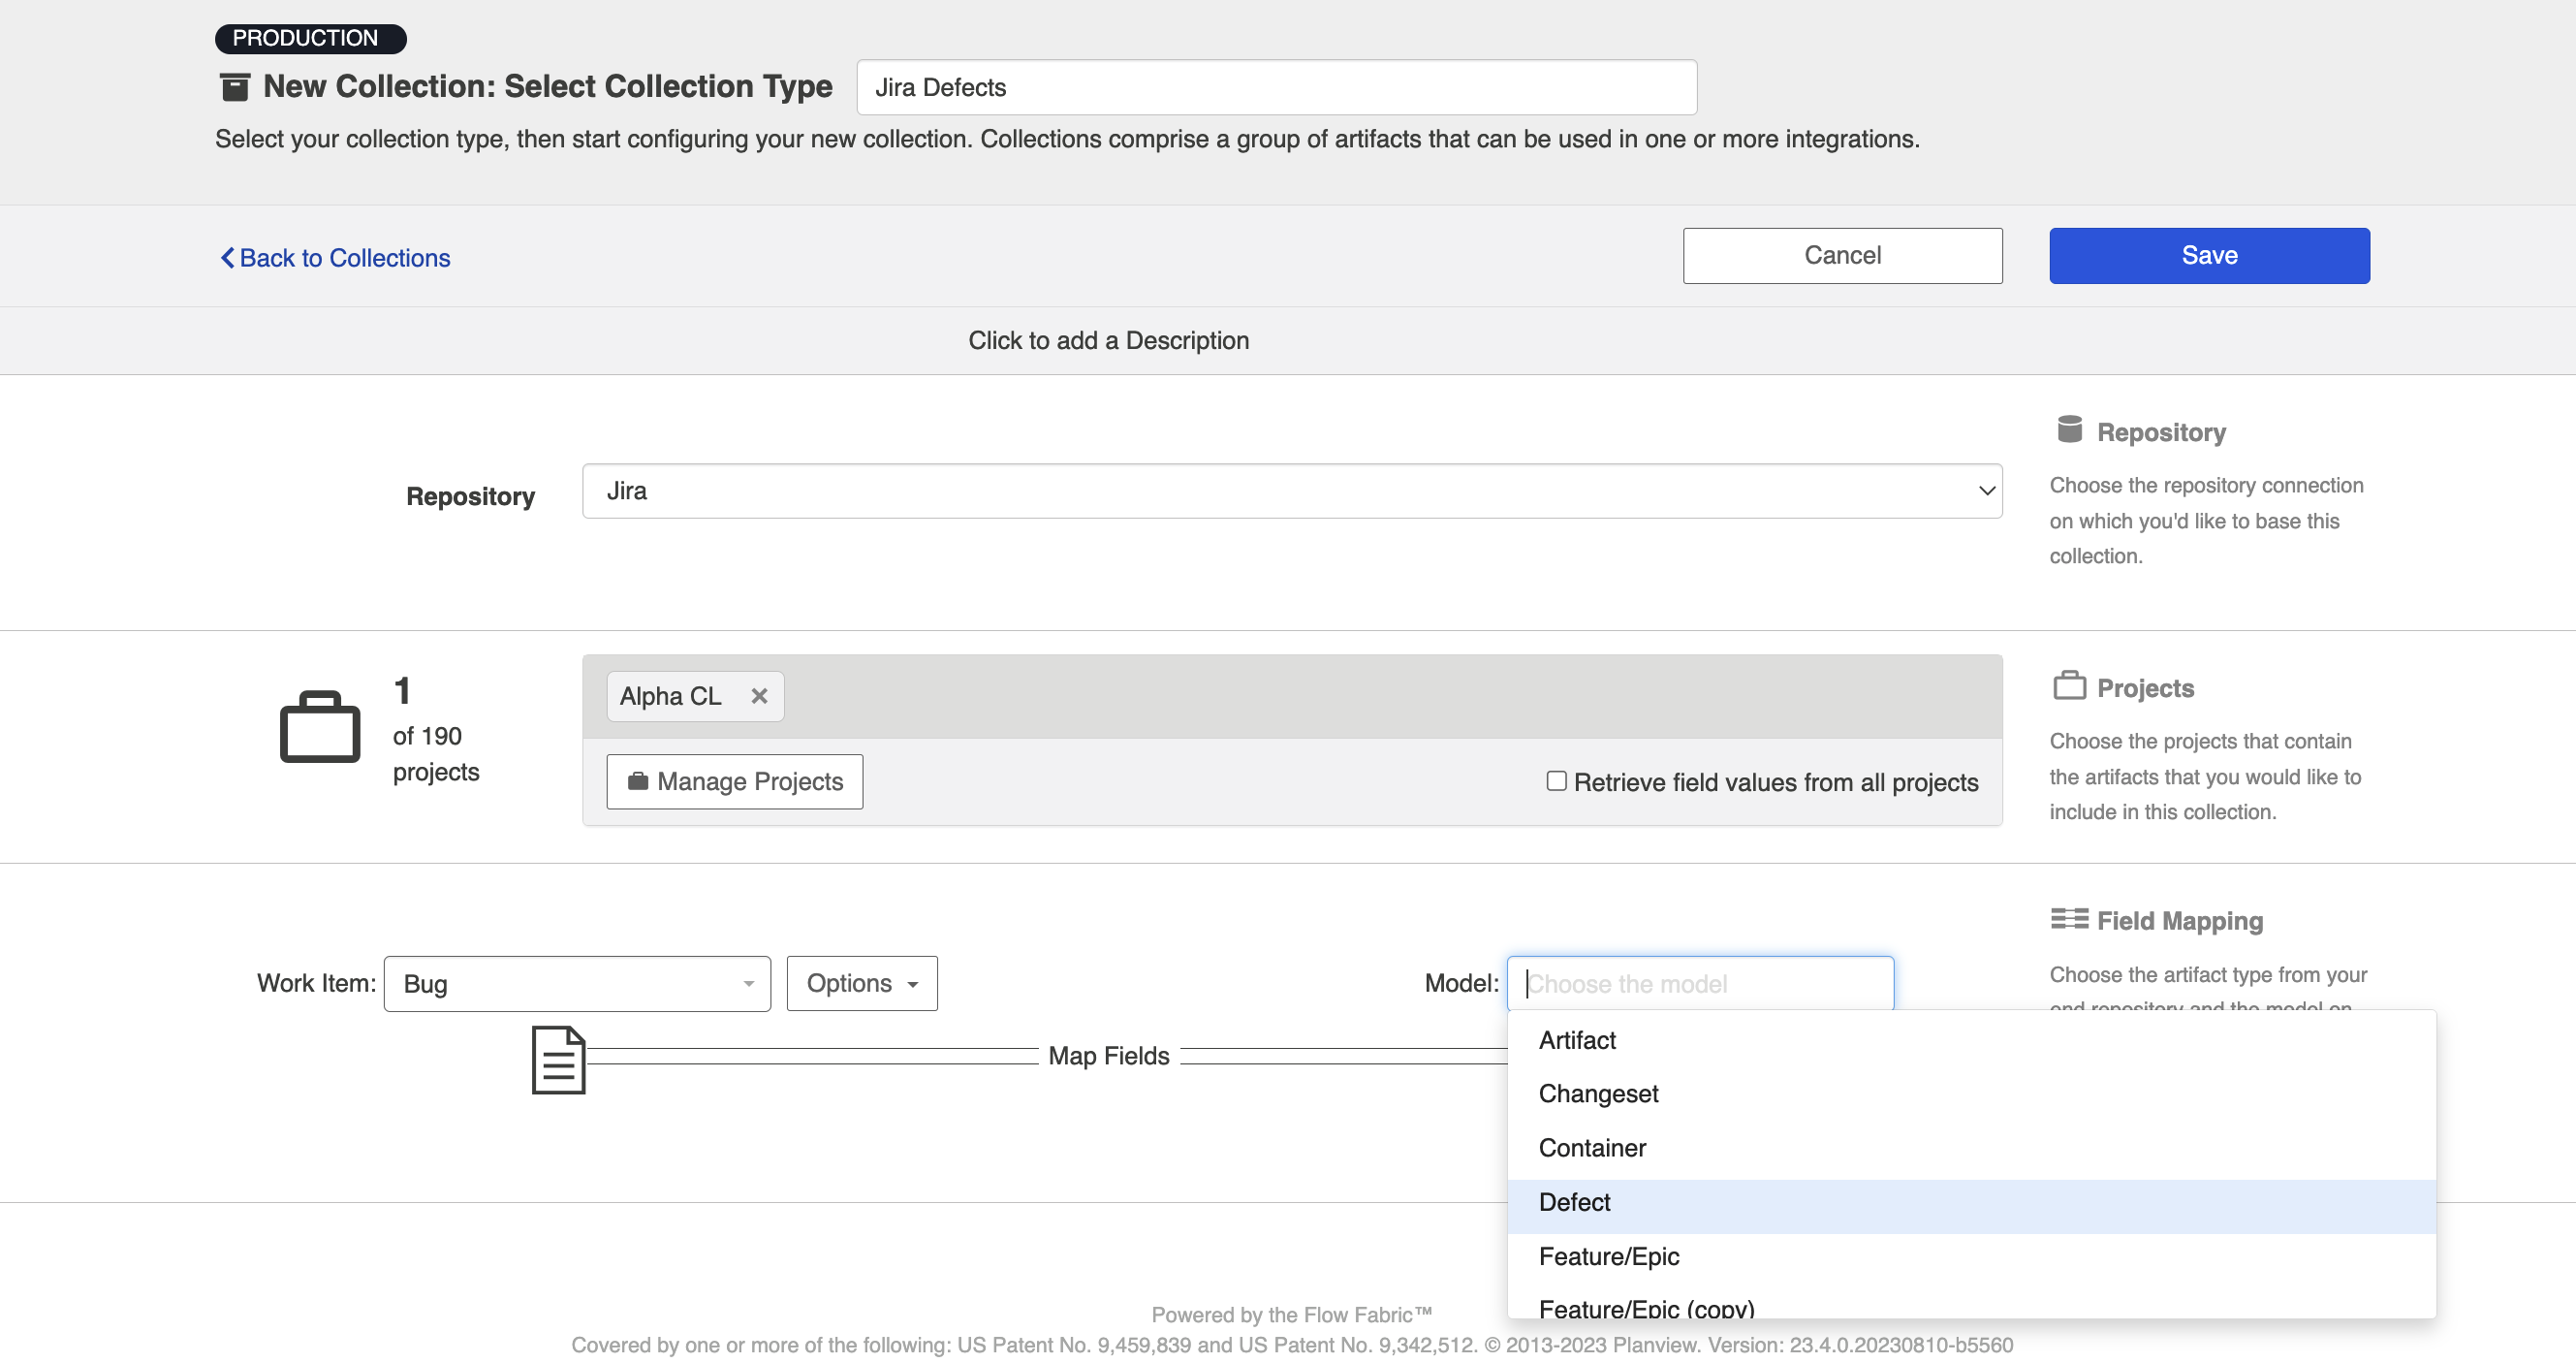
Select the model you'd like to use for this collection.
Note: The projects included in your collection must contain at least one artifact of the type selected. For example, in the image above, there must be at least one bug in Test Project A in Jira in order for your collection to save.
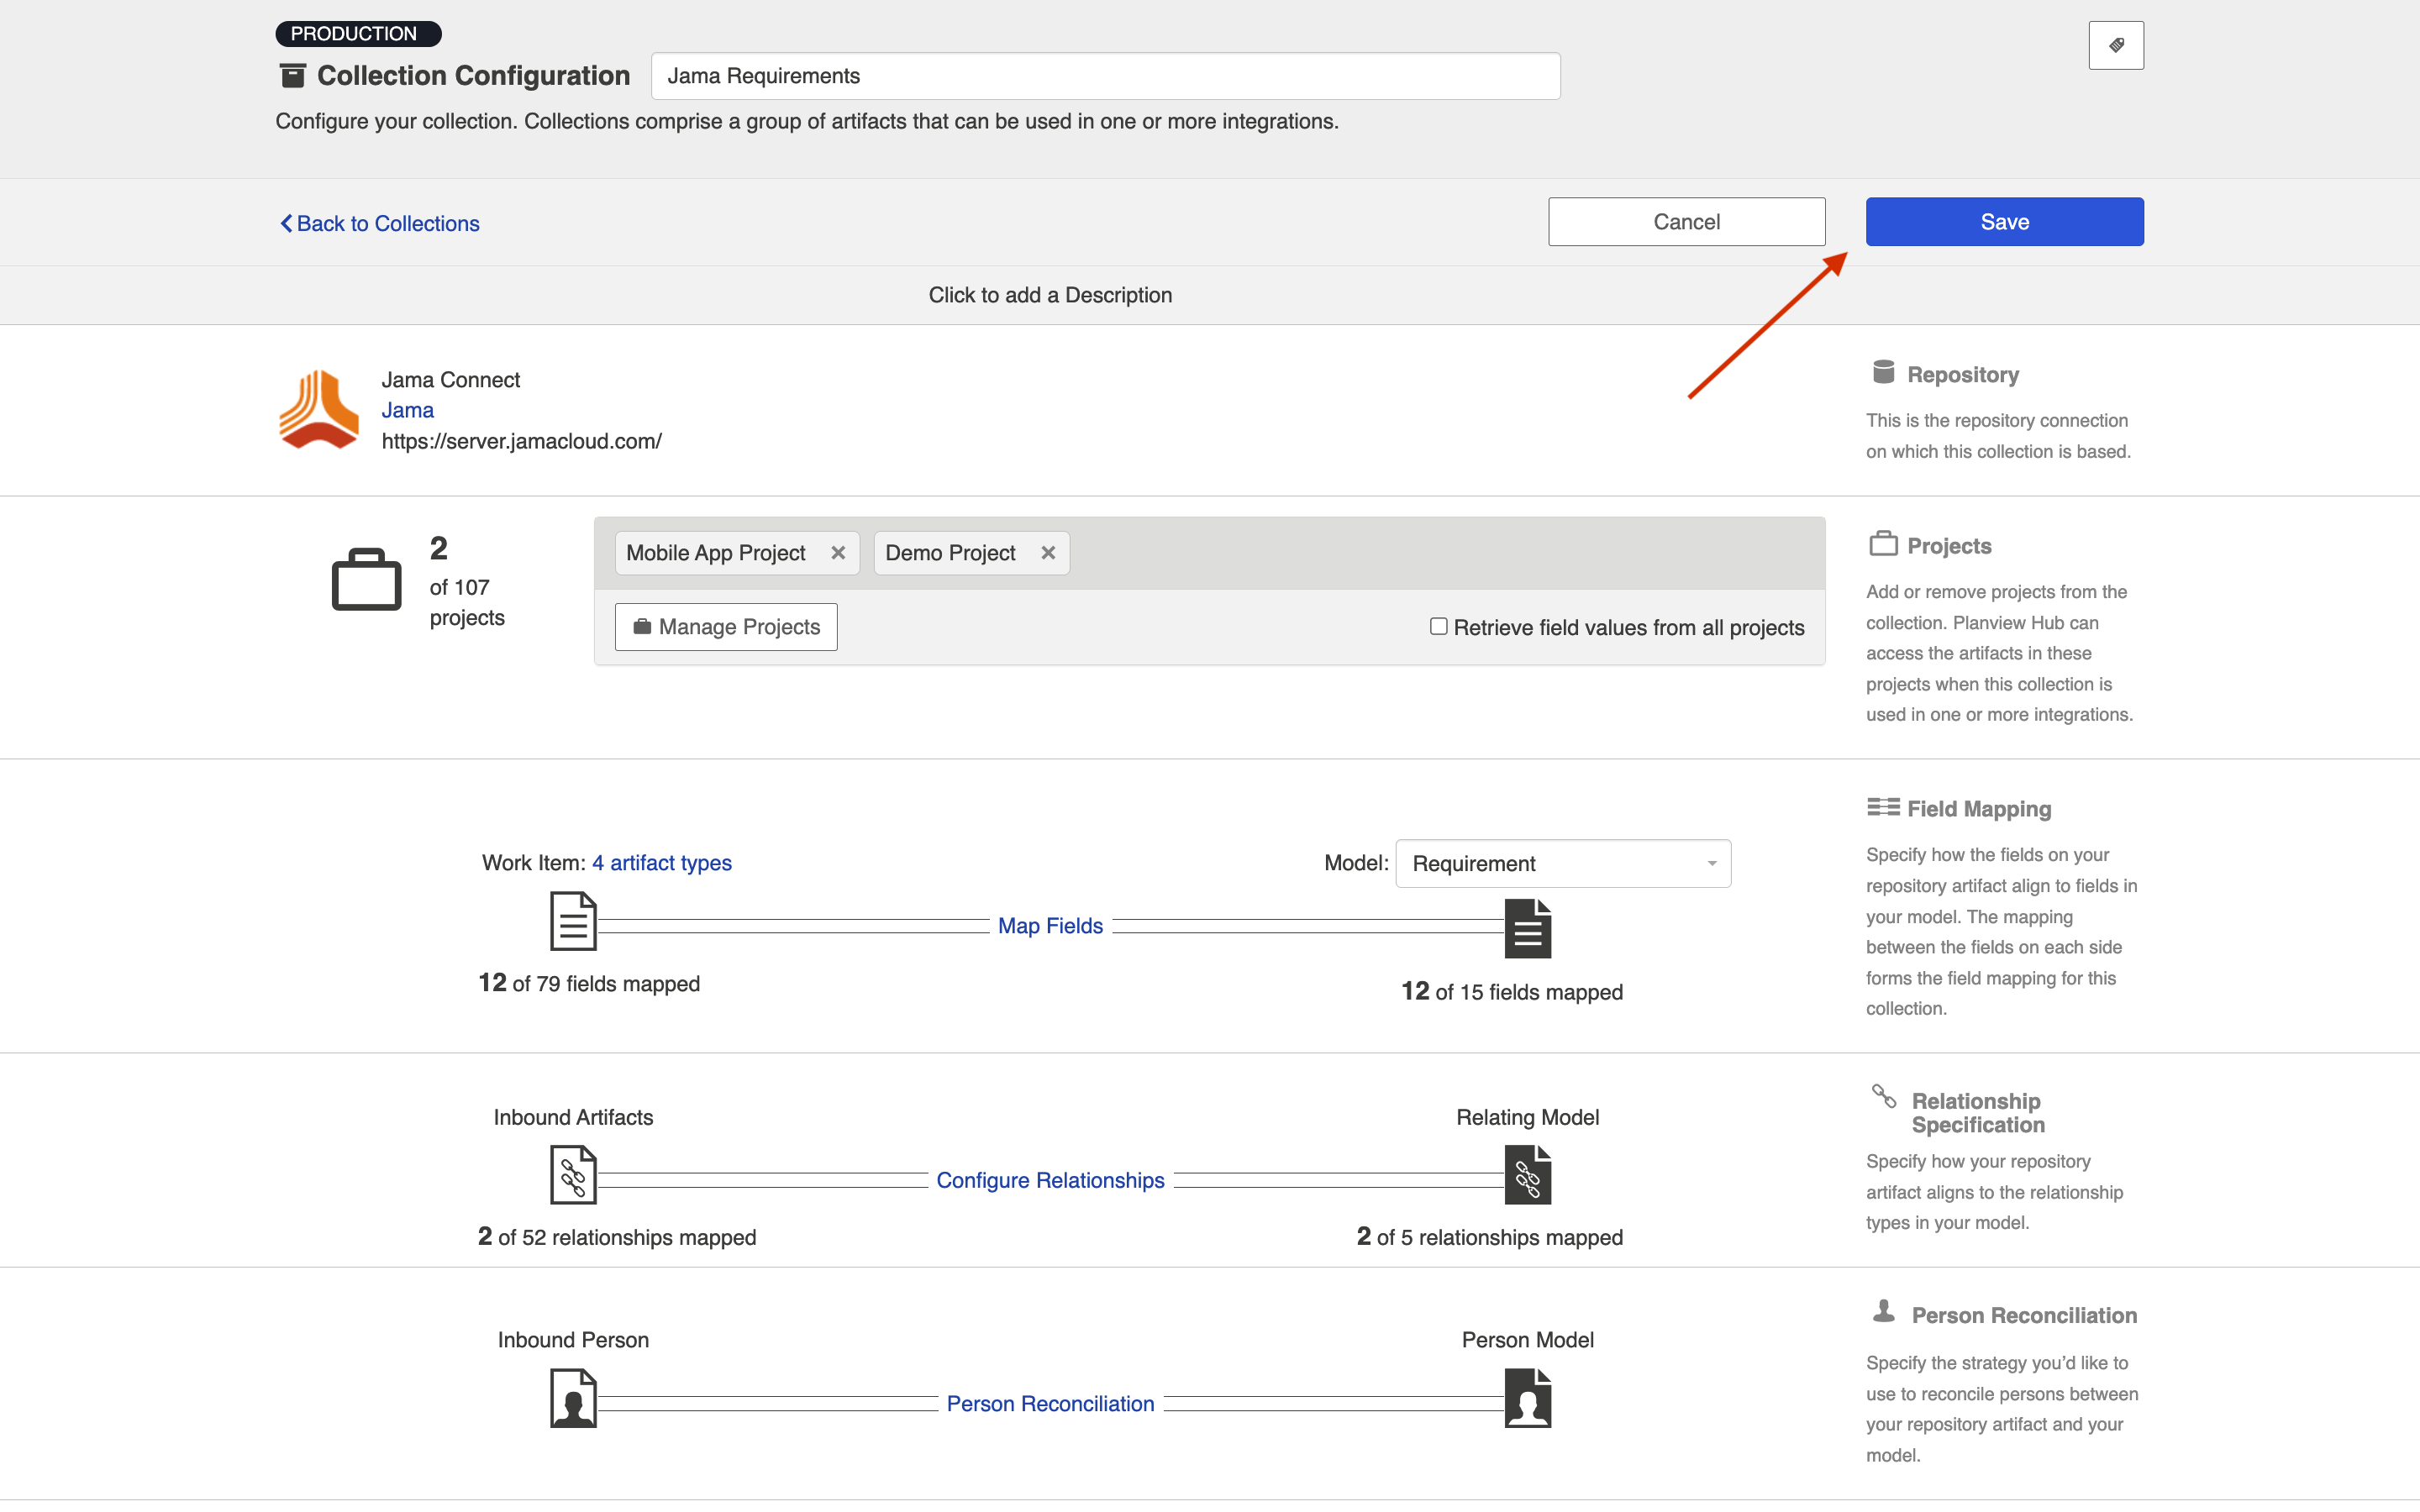
Click Save.
Tip: Clicking ctrl+s on Windows and cmd+s on macOS will save your collection.
Once you save, you'll see a number of configuration panels appear:
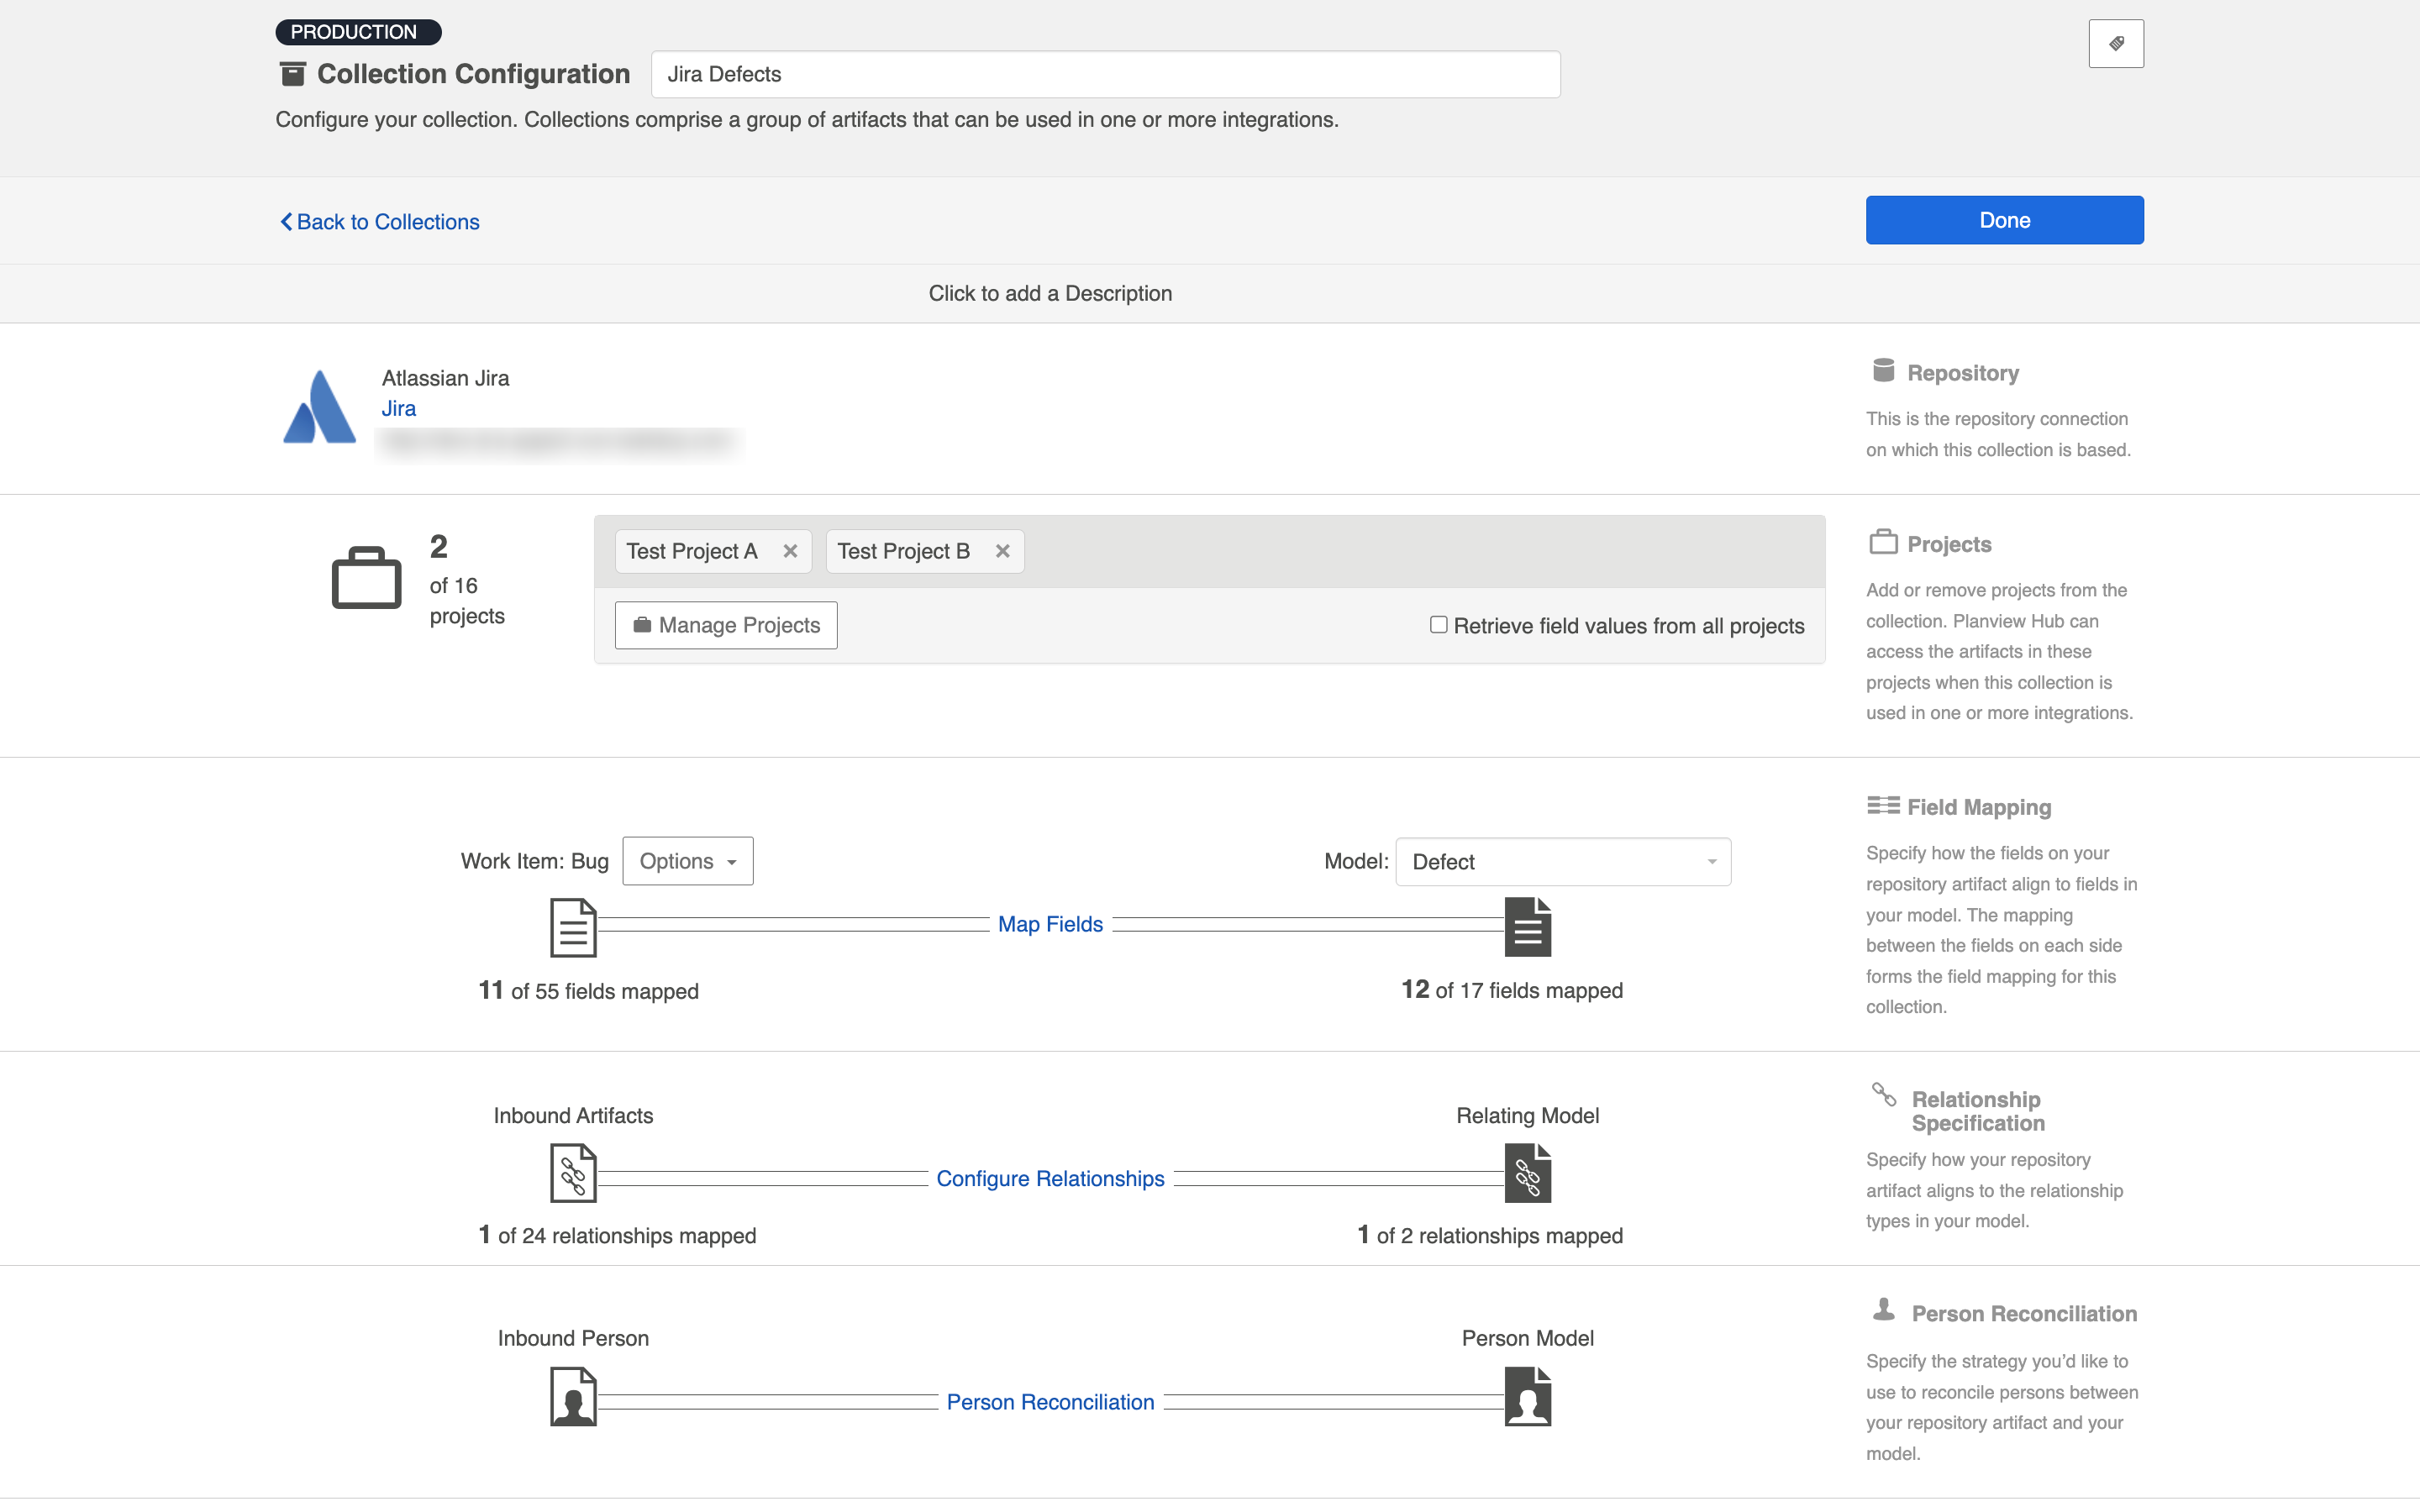
Tip: Each configuration panel is an important part of configuring your collection. Make sure you review the links below to ensure you've configured each section appropriately.
Map Fields
Clicking Map Fields will take you to the Field Mapping screen. On this screen, you will be able to specify how fields in your repository are mapped to fields in your model. This mapping will determine how information flows between fields in your source and target collection.
You can learn more about this process on the Field Mapping page.
Map Test Step Fields
Depending on your Hub edition, you may see an option to Map Test Step Fields.
You can learn more about this process on the Test Synchronization page.
Configure Relationships
Clicking Configure Relationships will take you to the Relationship Specification screen. On this screen, you will be able to specify how relationship fields in your repository are mapped to fields in your model. Relationship fields, such as blocked by, is related to, and parent, enable you to preserve the relationship structure between artifacts as you flow information from one collection to the other.
You can learn more about this process on the Relationship Specification page.
Person Reconciliation
Clicking Person Reconciliation will take you to the Person Reconciliation screen. On this screen, you will be able to specify the strategy you'd like to use to reconcile person fields between your repositories.
You can learn more about this process on the Person Reconciliation page.
Comment Configuration
Clicking Configure Comments will take you to the Comment Configuration screen. On this screen, you will be able to apply a comment extension.
You can learn more about this process on the Comment Configuration page.
State Transitions
Clicking Configure State Transitions will take you to the State Transition screen. On this screen, you will be able to configure state transitions to successfully flow field updates for fields that require defined workflows within your repository.
You can learn more about this process on the State Transitions page.
Artifact Unions
Clicking Configure Artifact Unions will take you to the Artifact Unions screen. On this screen, you can configure artifact unions to specify related artifacts whose fields you'd like to flow along with the artifacts in your collection.
You can learn more about this process on the Artifact Unions page.
Optional: Set a Repository Query
If you have enabled repository queries for the repository that you have connected to, you will also see a Repository Query sash at the bottom of the screen.

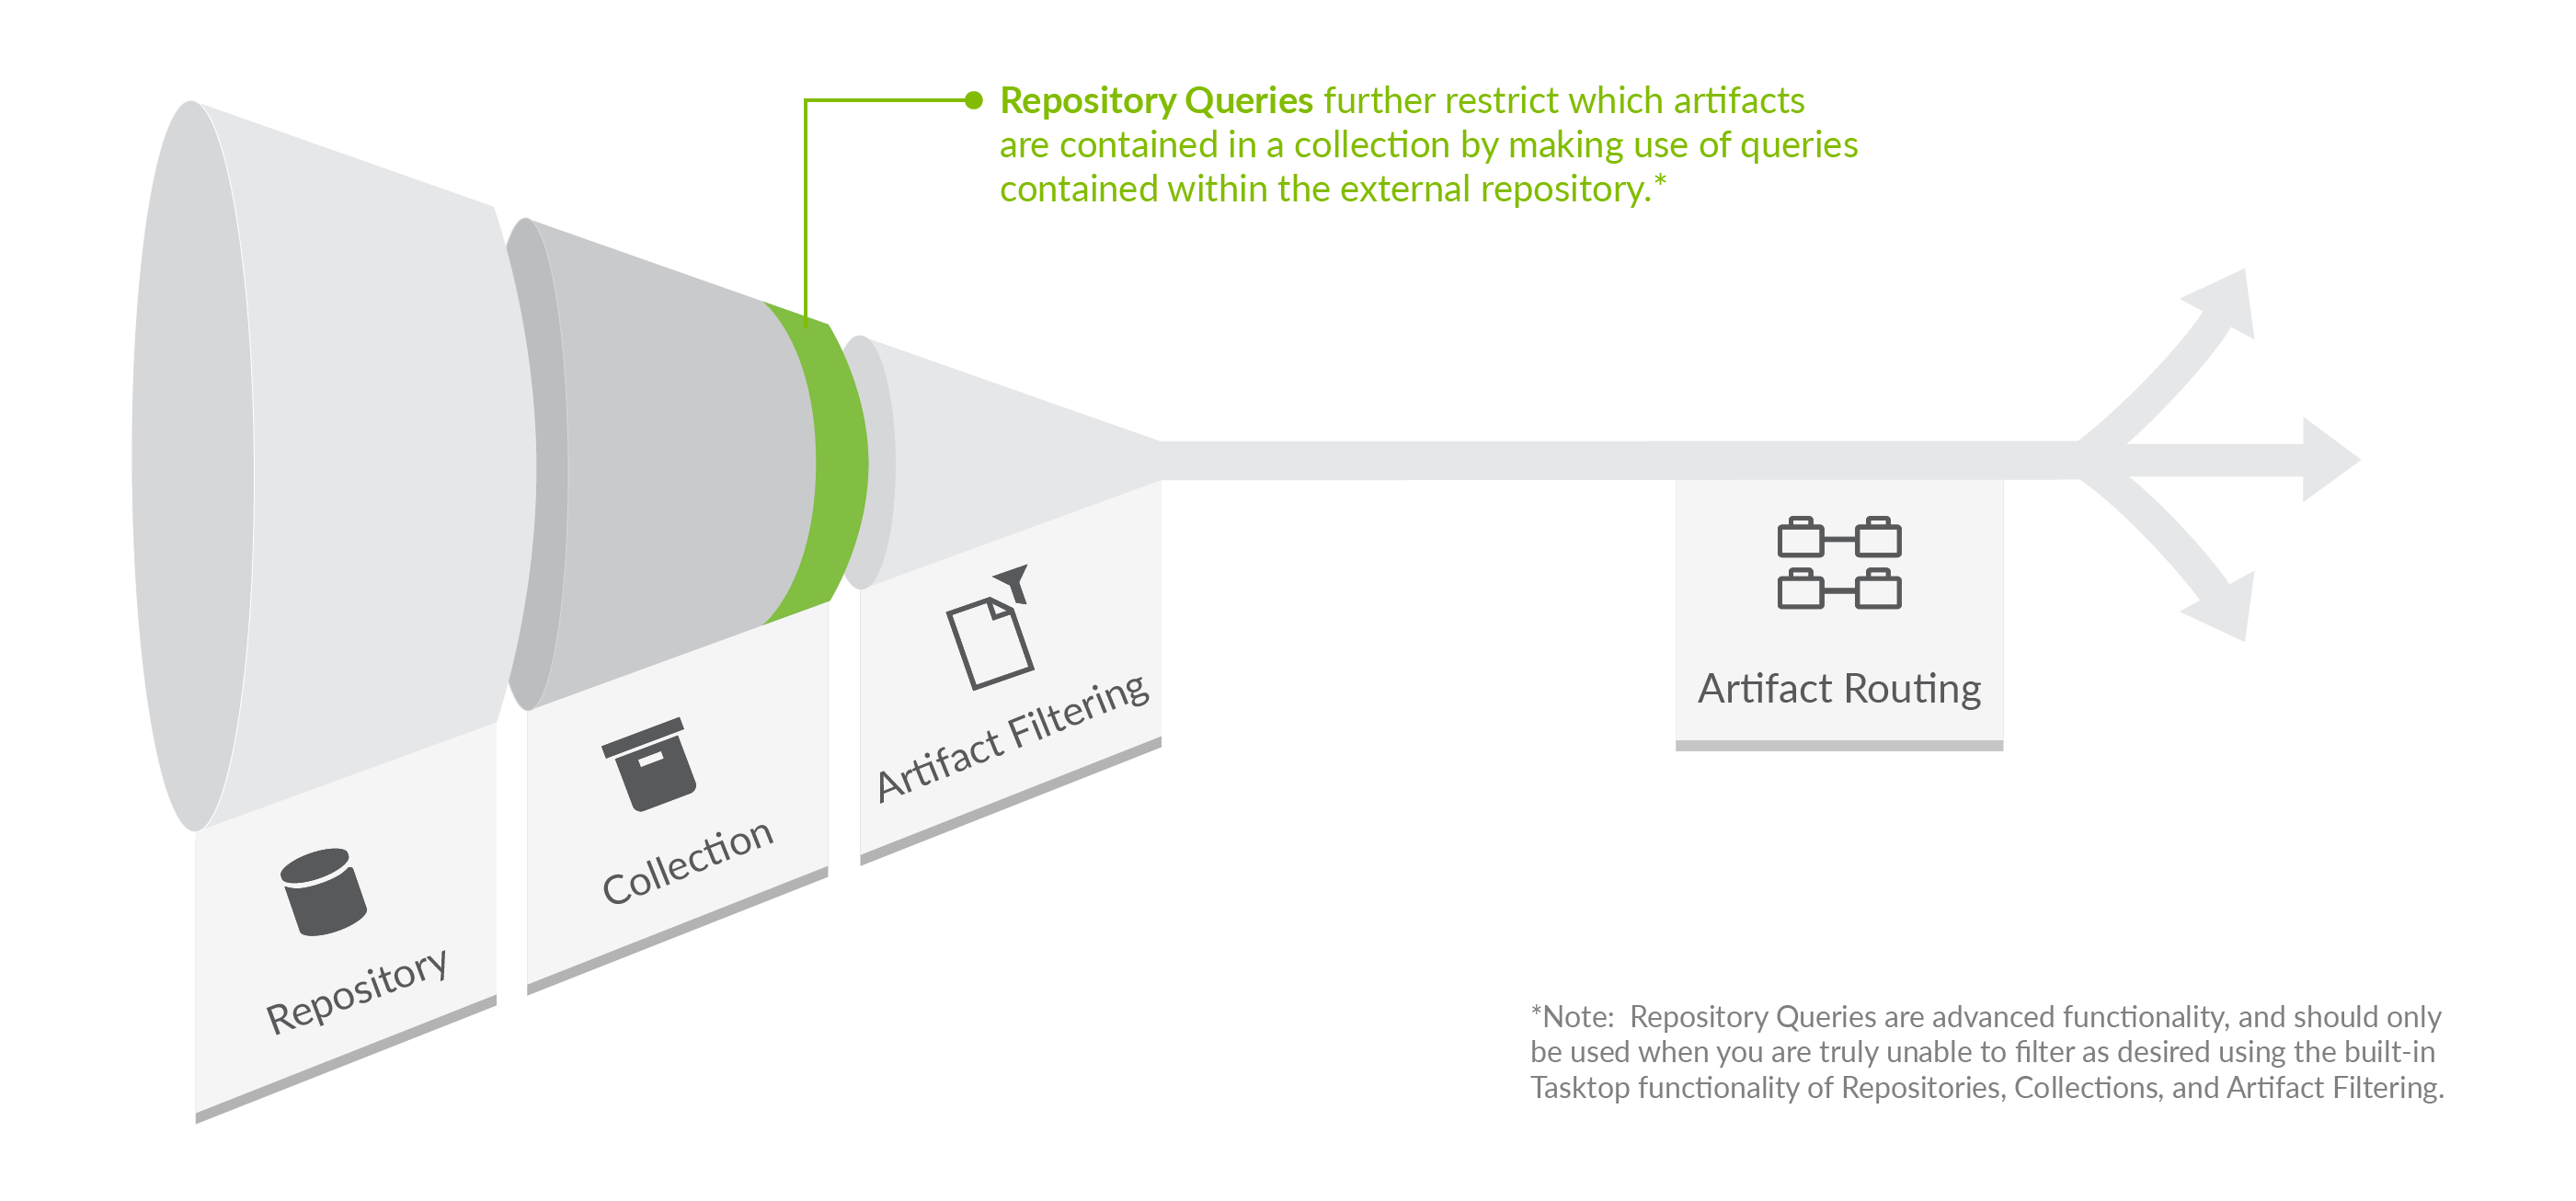
Note: Repository Queries are advanced functionality, and should only be used when you are truly unable to filter as desired using the built-in Hub functionality of Repositories, Collections, and Artifact Filtering.
When configuring your integration, you have several options available to refine which artifacts are eligible to flow.
- First, by defining your repository (for example, Jira)
- Next, when creating your collection, you further refine which artifacts are eligible to flow by selecting only one artifact type (for example, defects), and one or more projects within your repository.
- Next, by configuring artifact filtering at the integration level, you further refine which artifacts can flow, based on fields on those artifacts,
- And finally, by configuring artifact routing, you determine which projects from your collection will participate in the integration, as well as where new artifacts will be created and updated, based on the projects they originated in.
Note: When setting a repository query, we recommend only including artifacts of the same type and in the same project(s) as the collection. If a repository query contains many artifacts not included in the collection, performance may be impacted.
In general, the options outlined above should allow you the flexibility to create collections that are broad enough to be reusable in a range of integrations, while still having fine-grained control at the integration-level to ensure that only desired artifacts are flowing within the context of that integration.
In rare cases, however, you may find that the best option to restrict the artifacts eligible to flow is by setting a query within the repository itself.
If you plan to utilize repository queries, check the box next to Enable collections to be refined by setting a repository query, on the Repository Connection screen.
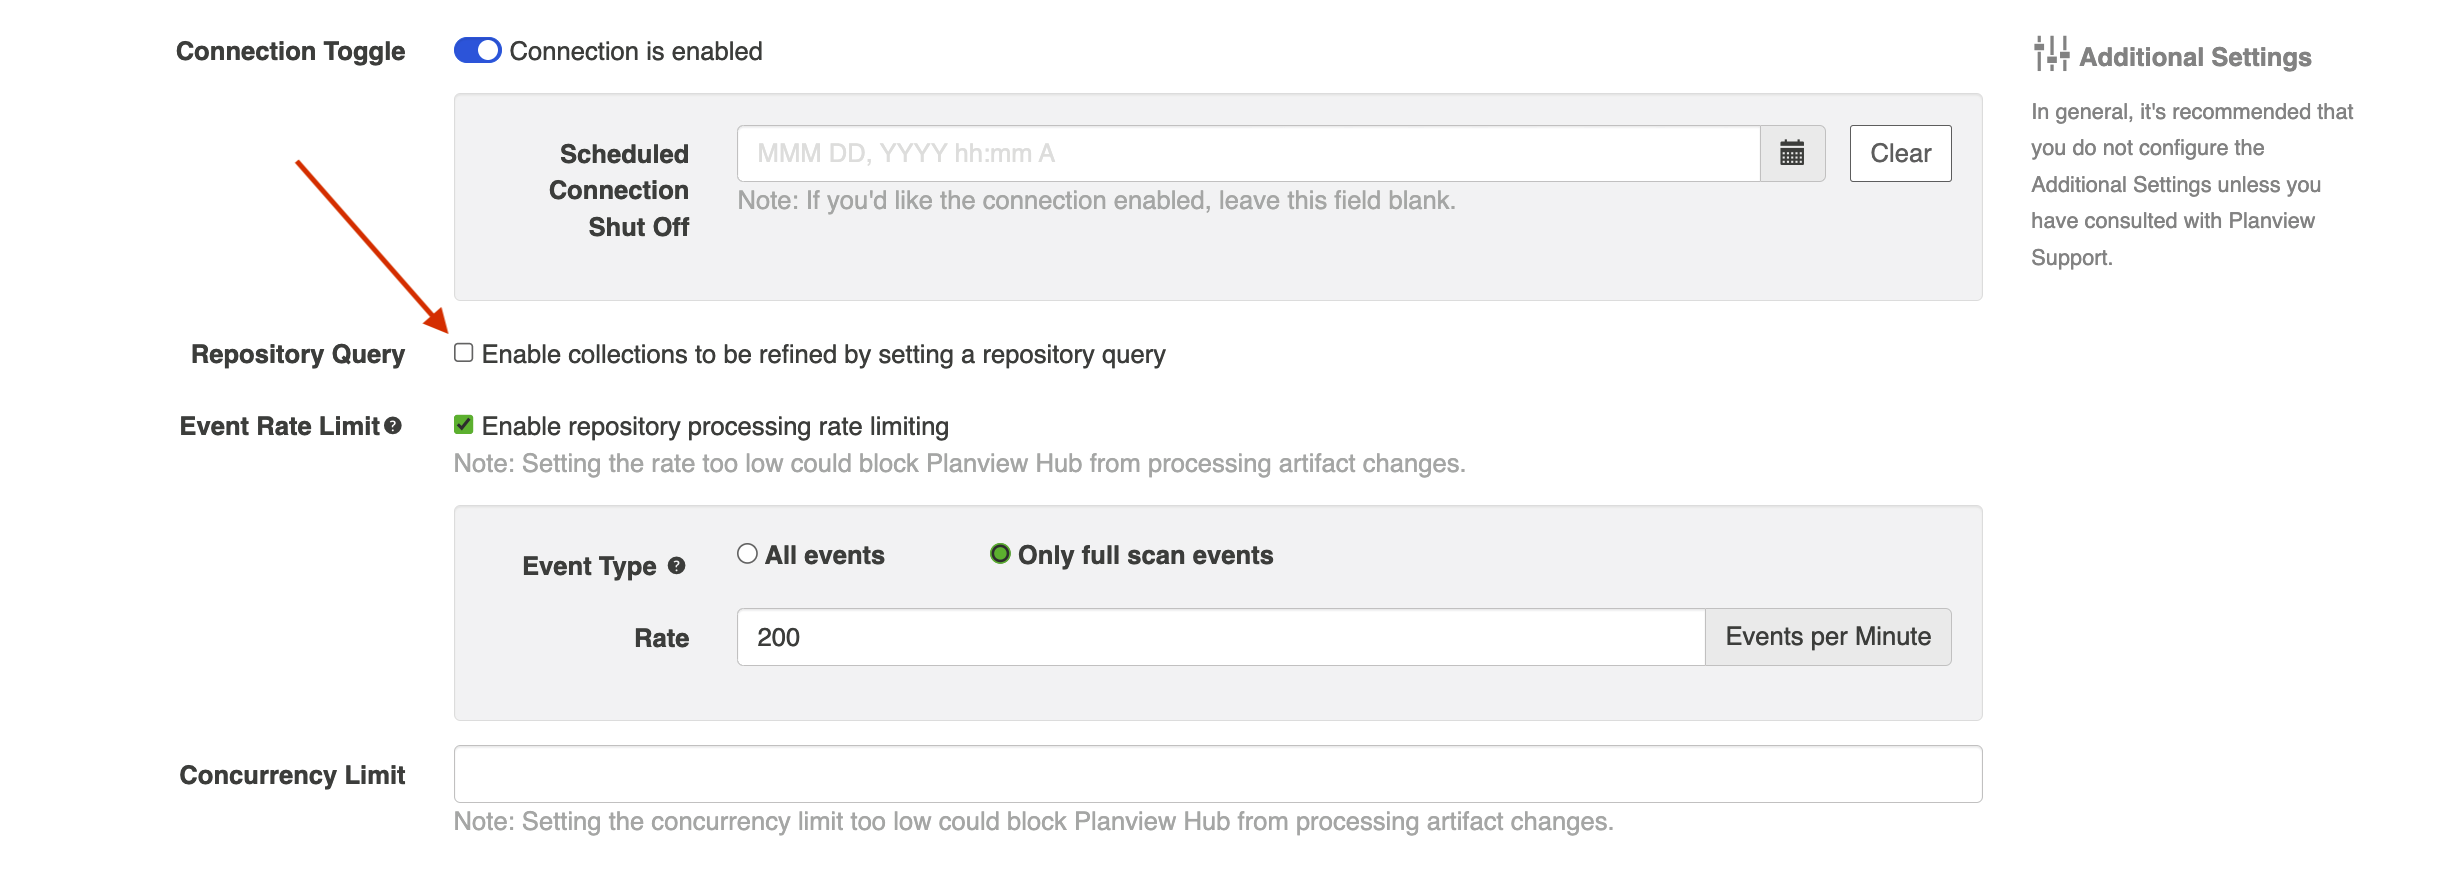
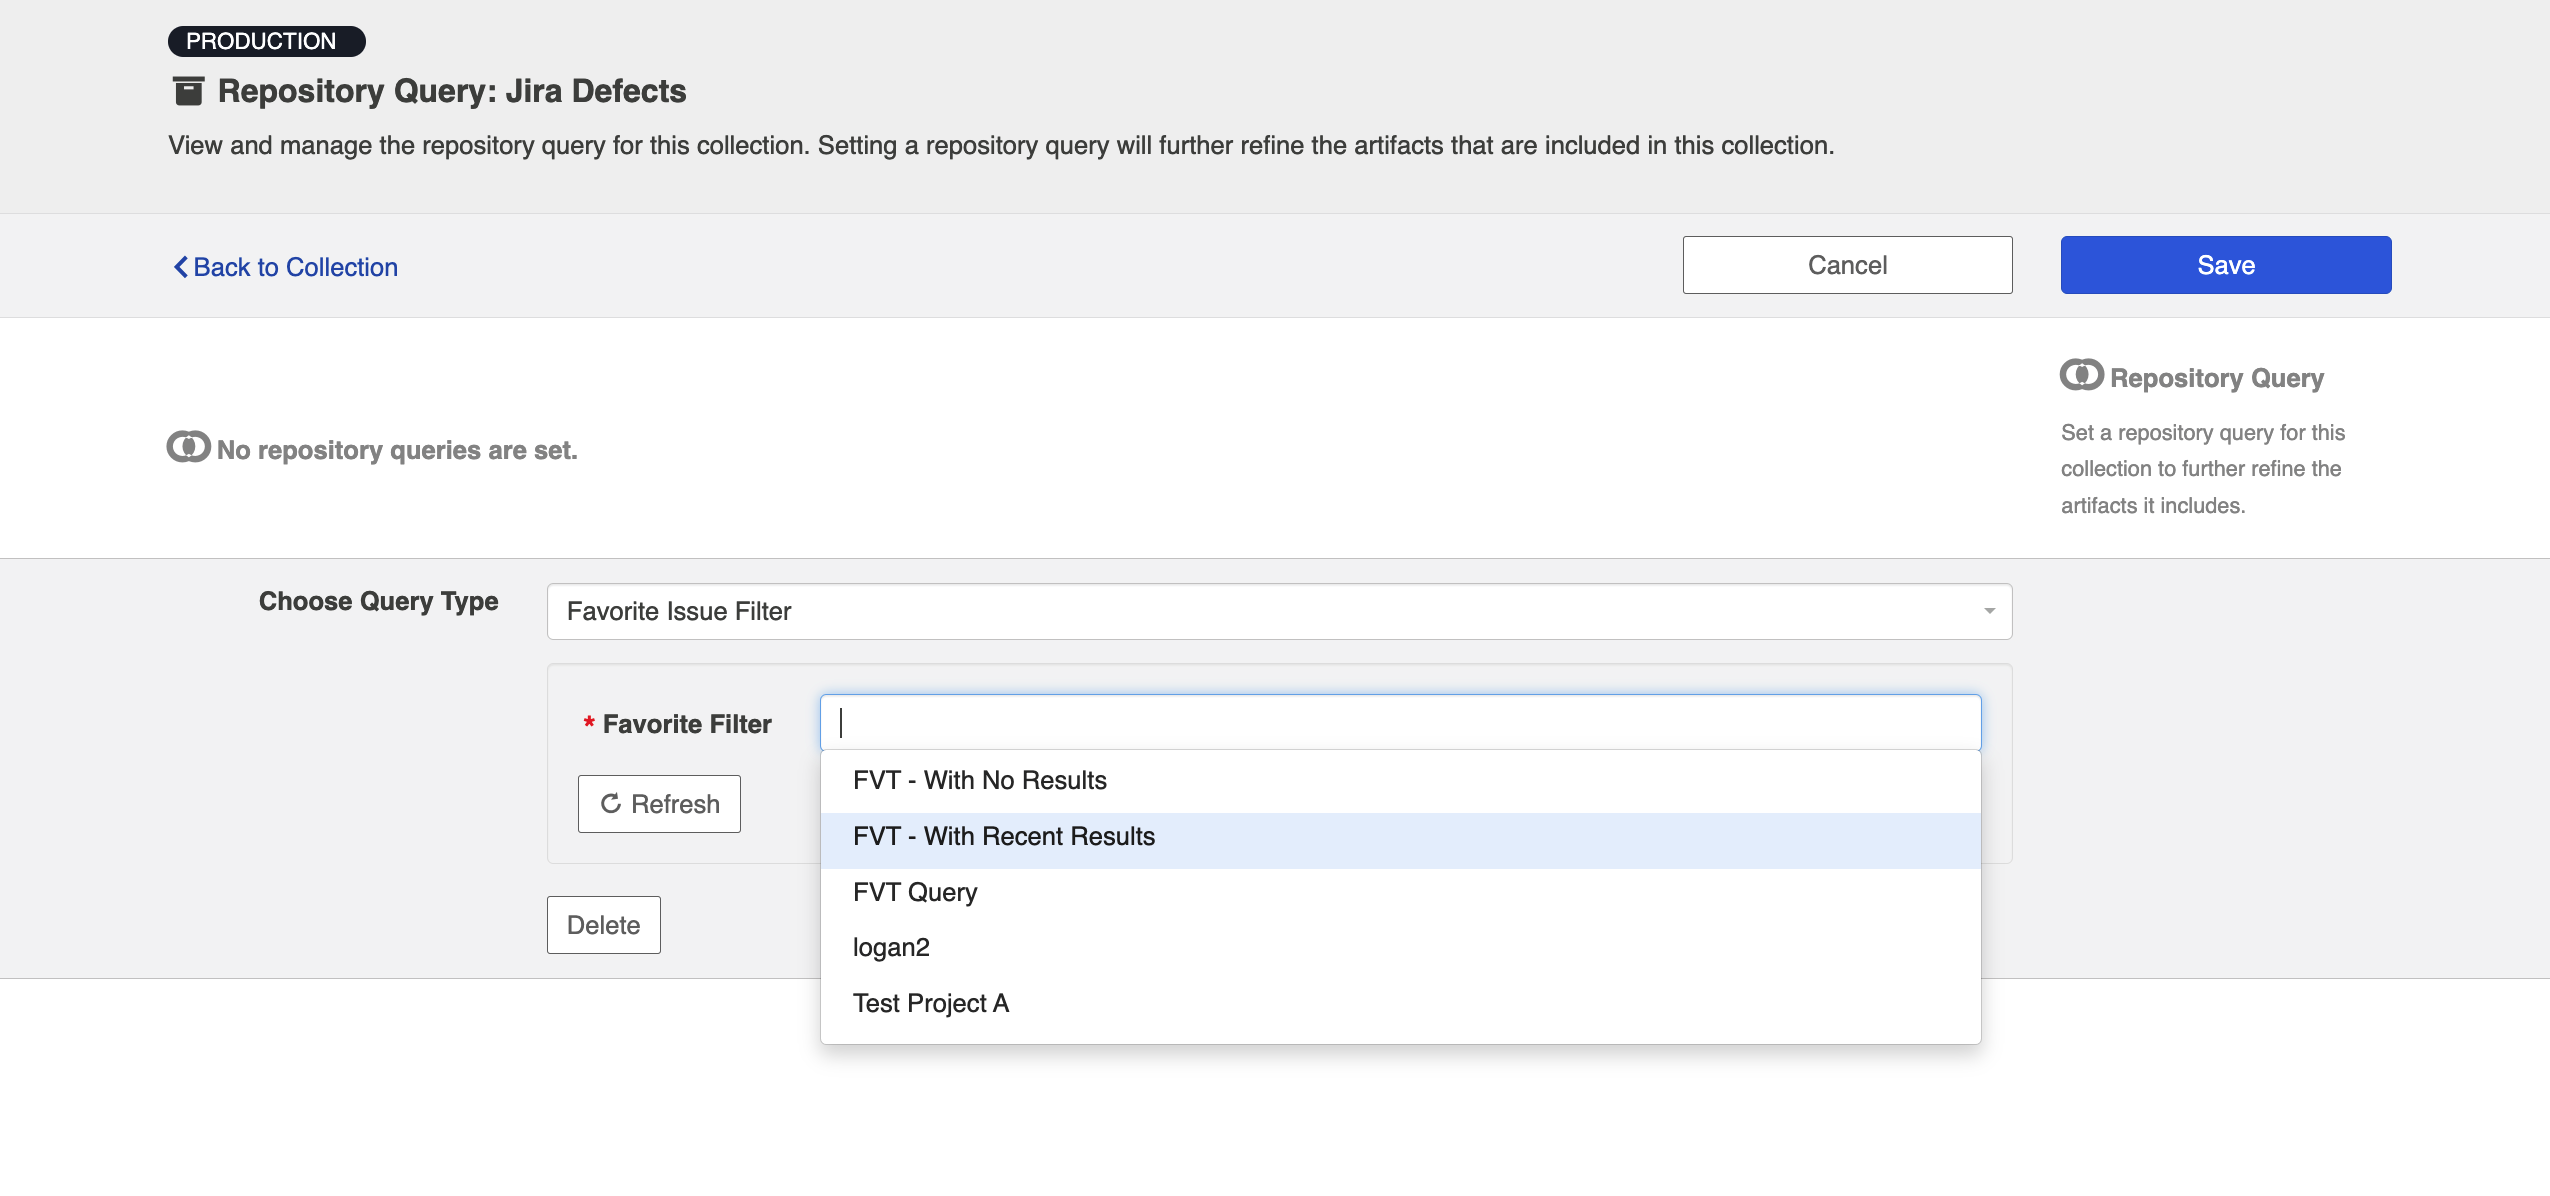
Once this is selected, you will be able to select a repository query at the Collection level for any collections utilizing this repository.
On the Repository Query screen, you can search for your desired repository query. Select the query you'd like to use, and click Save and then Done.
Tip: Clicking ctrl+s on Windows and cmd+s on macOS will save your repository query.
You will then see the selected repository query on the Collection Configuration screen:
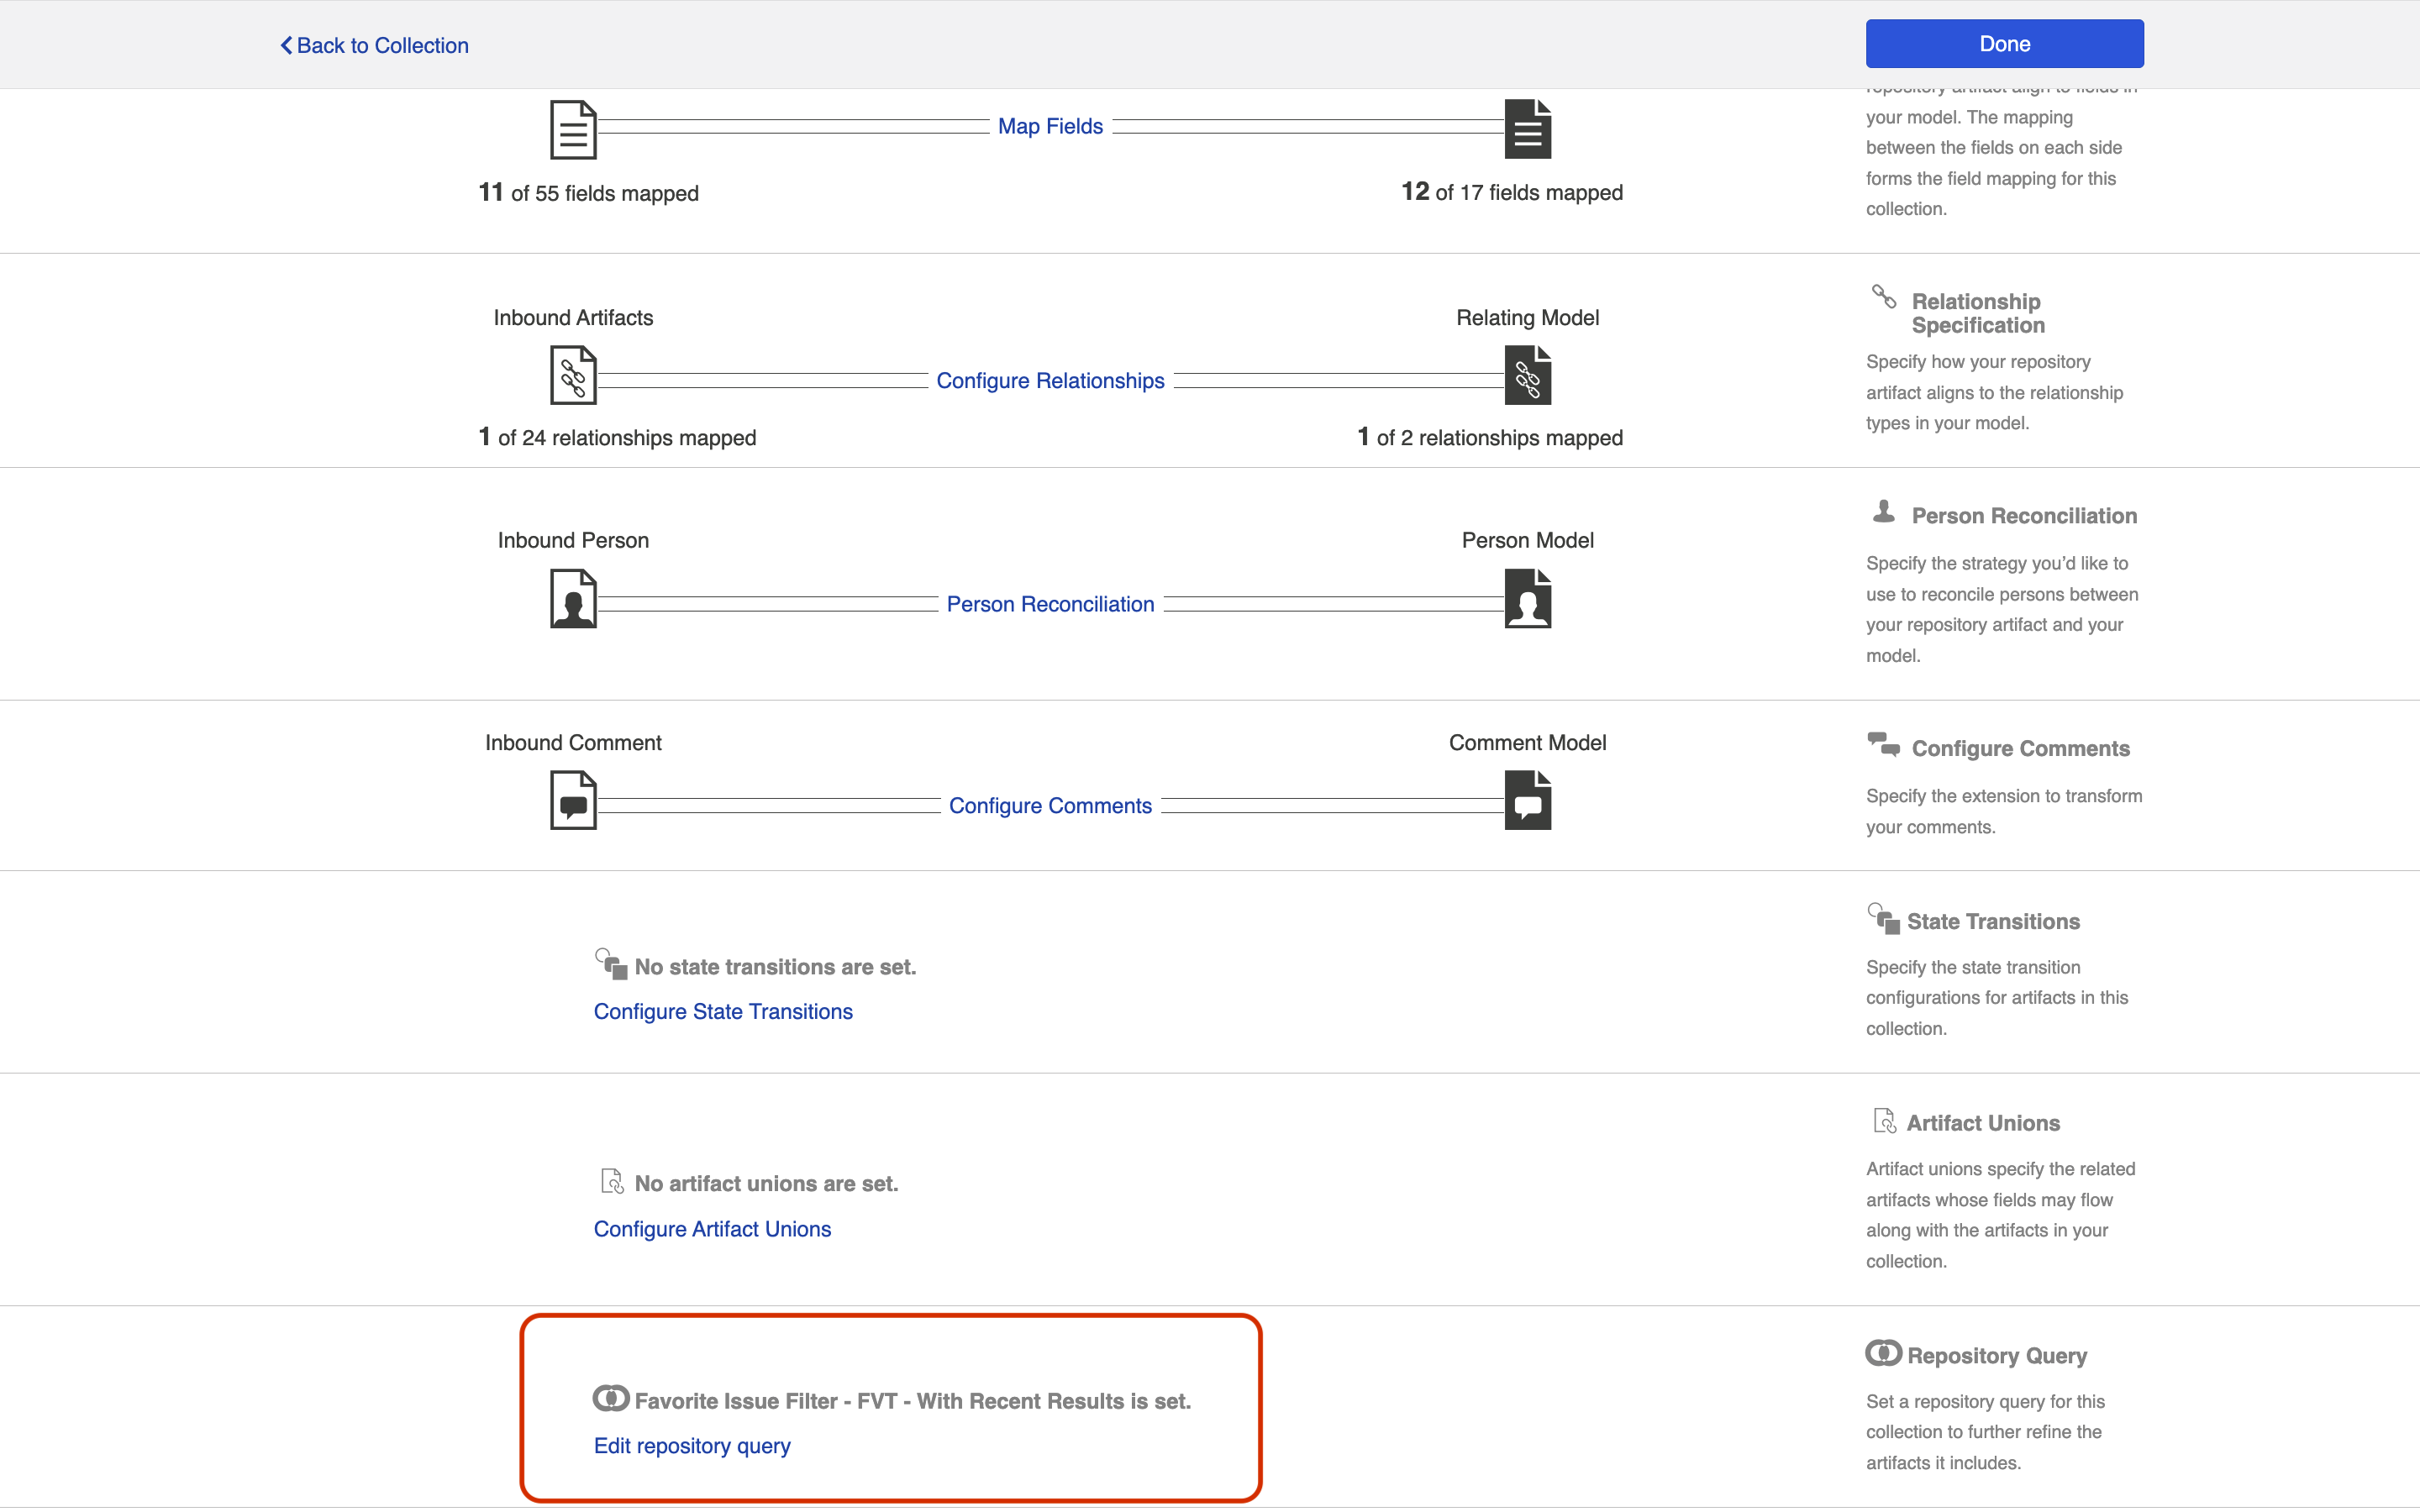
Note: Remember, applying a repository query to a collection will only further refine the artifacts included in that collection. If you select a query that encompasses artifacts in projects not in your collection, these artifacts will not be added to the collection unless you also add those projects to your collection as you normally would.
Affinity Modeling
Affinity Modeling enables you to model multiple work item types of similar type in a single collection. This means modeling multiple projects and artifact types simultaneously, with fewer collections and field mappings to configure.
Please be aware of the following limitations before enabling affinity modeling:
- Repositories whose projects depend on type (e.g., Micro Focus PPM) are not eligible
- Repositories that do not allow project selection (e.g., ServiceNow, BMC Remedy) are not eligible
- Collections configured with a container type are not eligible
- Collections with affinity modeling enabled cannot be used in Container + Work Item Synchronizations
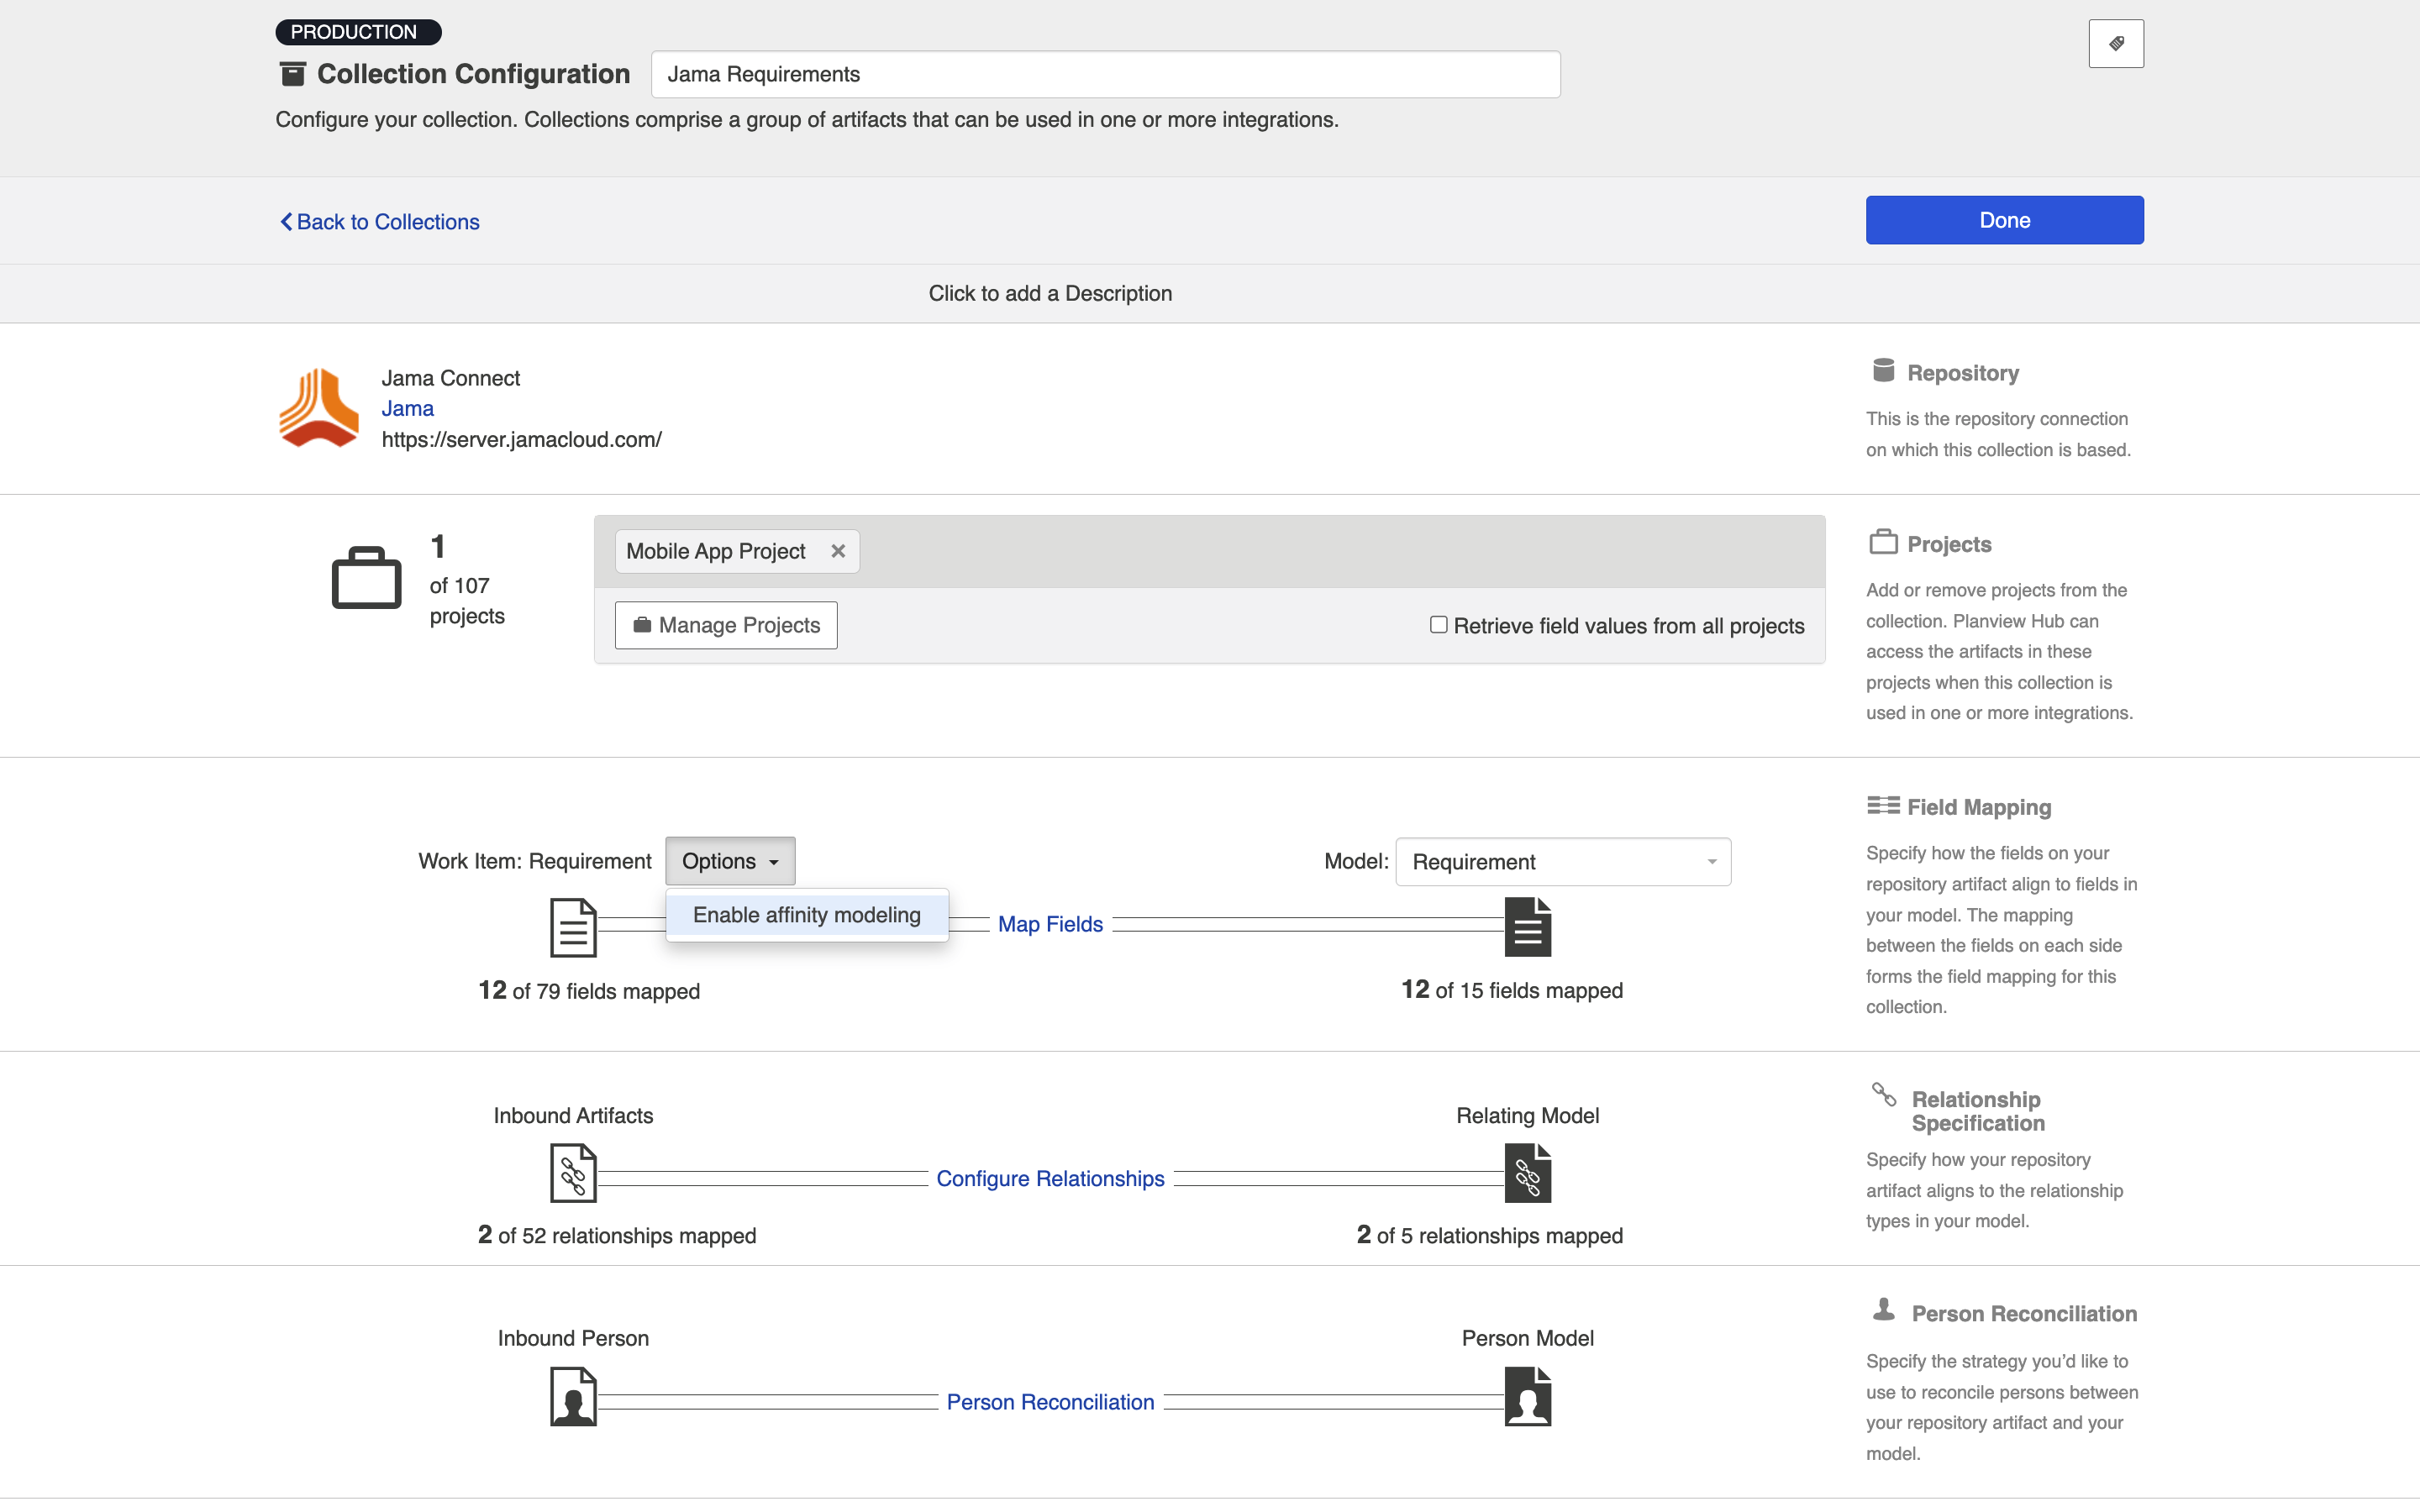
To configure affinity modeling, navigate to the Collection Configuration screen.
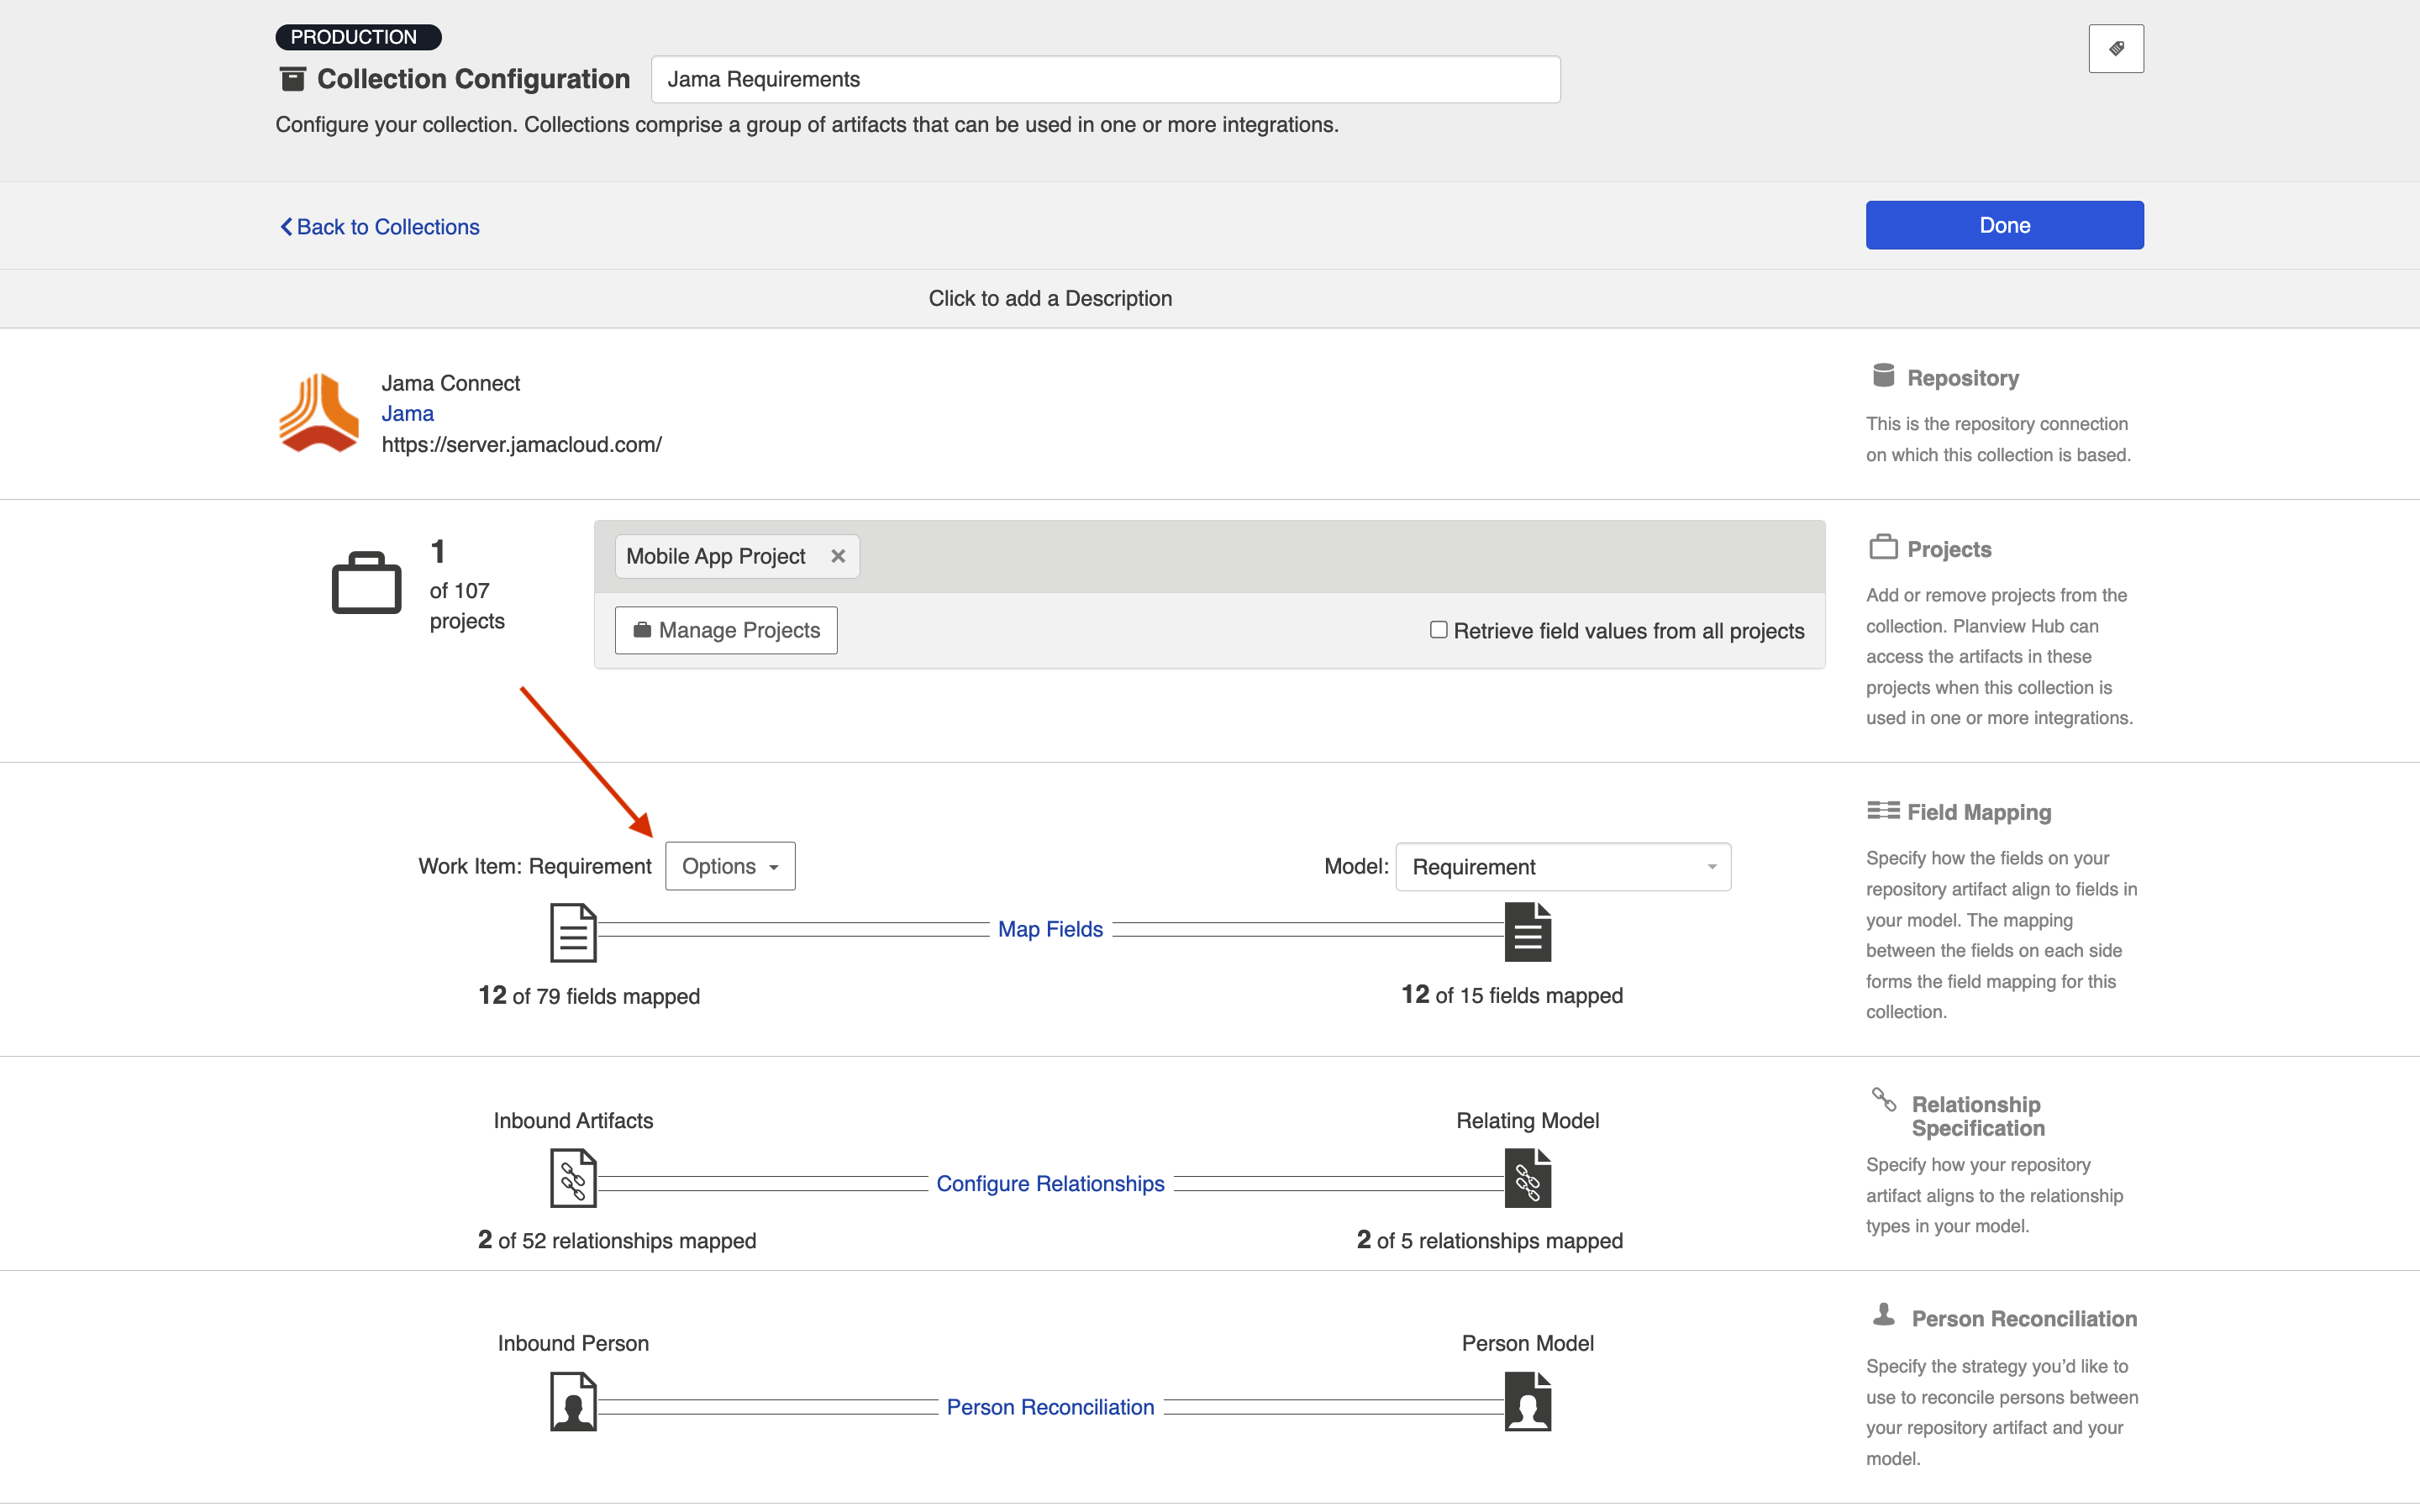
On this screen, you’ll see an Options dropdown next to the work item type.
Select Enable affinity modeling.
A warning message will appear informing you that the artifact types in the collection should use the same artifact schema to prevent synchronization errors.
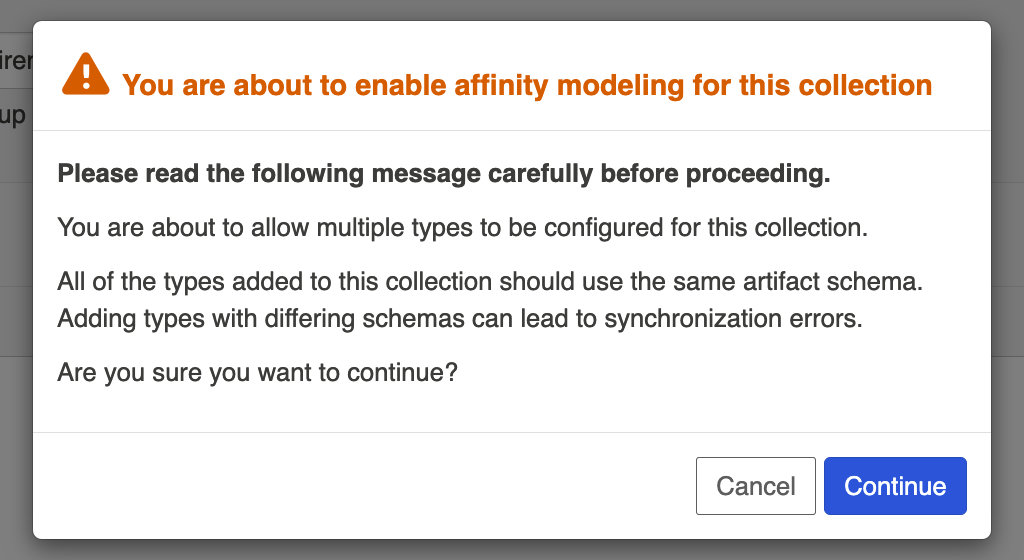
After clicking Continue on the warning message, the affinity modeling pop-up will appear.

Here, you can add multiple artifact types to the project(s) in your collection.
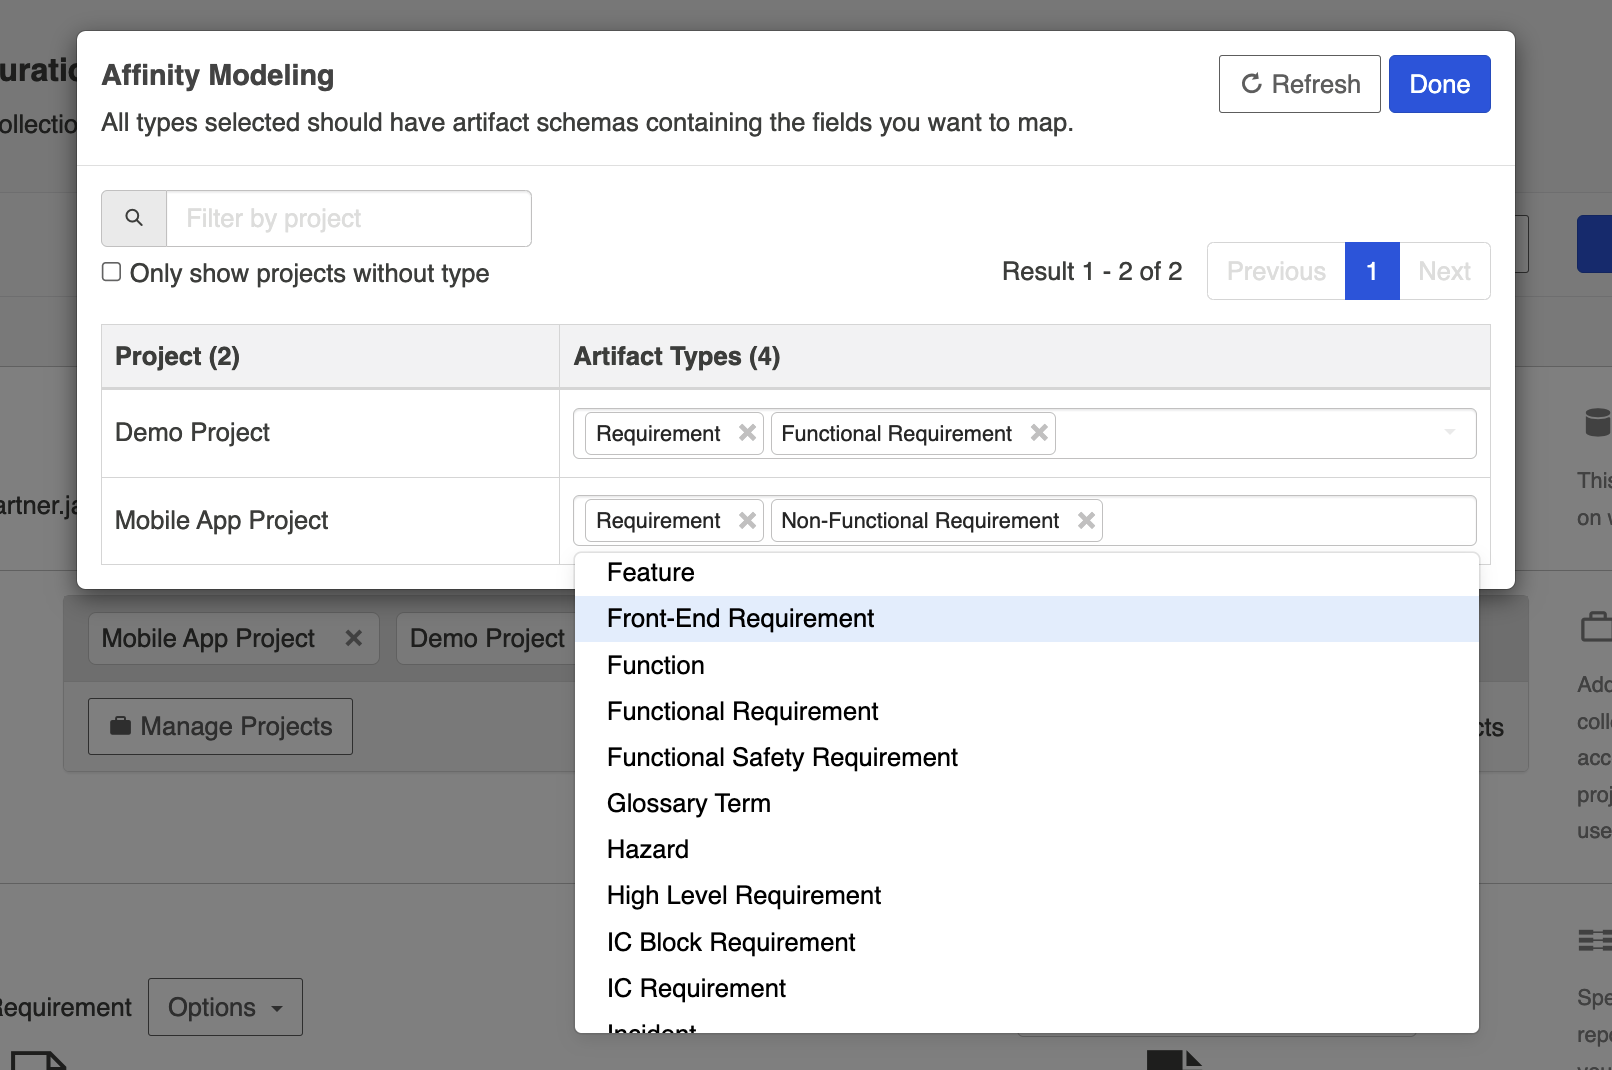
Note: All included artifact types should share the same artifact schema to prevent synchronization errors.
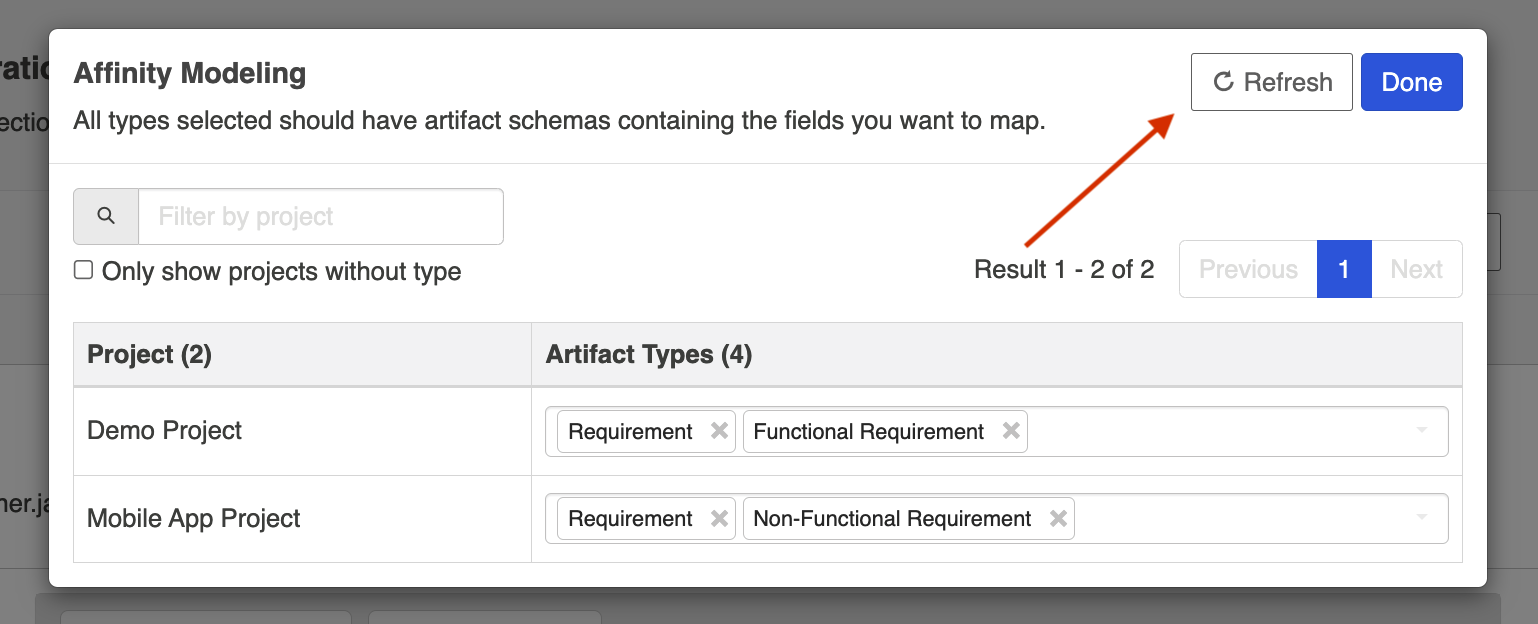
If you need to refresh the fields available for the collection, use the Refresh Fields button in the Hub UI, rather than your browser's refresh button.
If you encounter an error when saving the collection due to a project missing an artifact type, enable Only show projects without type to identify which projects need to be updated.
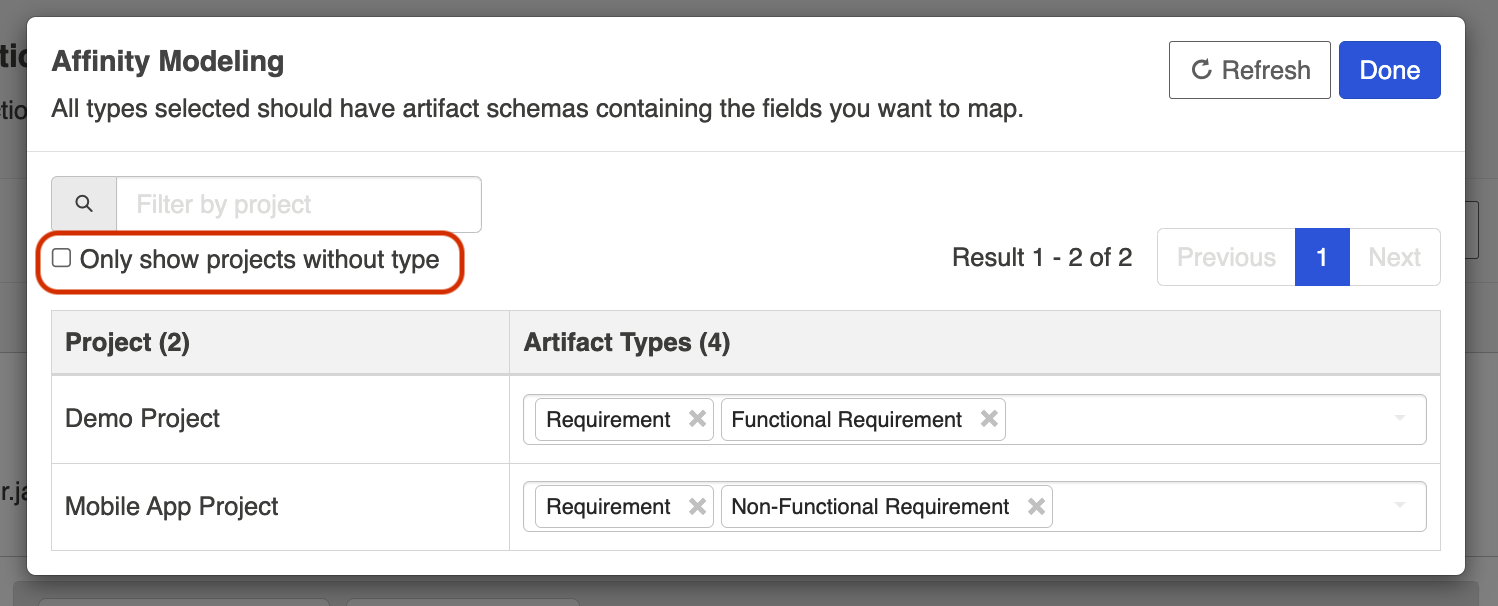
To save your changes, click Save.
Once configured, you will see all of the types available to be routed on the Artifact Routing screen when configuring your integration.
Note: Any existing field mappings will be reused for newly added types.
Work Item Treatment for Containers
Enabling Work Item Treatment for Containers gives you the flexibility to synchronize complex integration scenarios with ease and precision. With this feature, you can effortlessly synchronize work item artifacts with container artifacts by treating eligible container artifacts as work items.
Note: As a general rule, any container that can be synchronized between repositories can be treated as a work item.
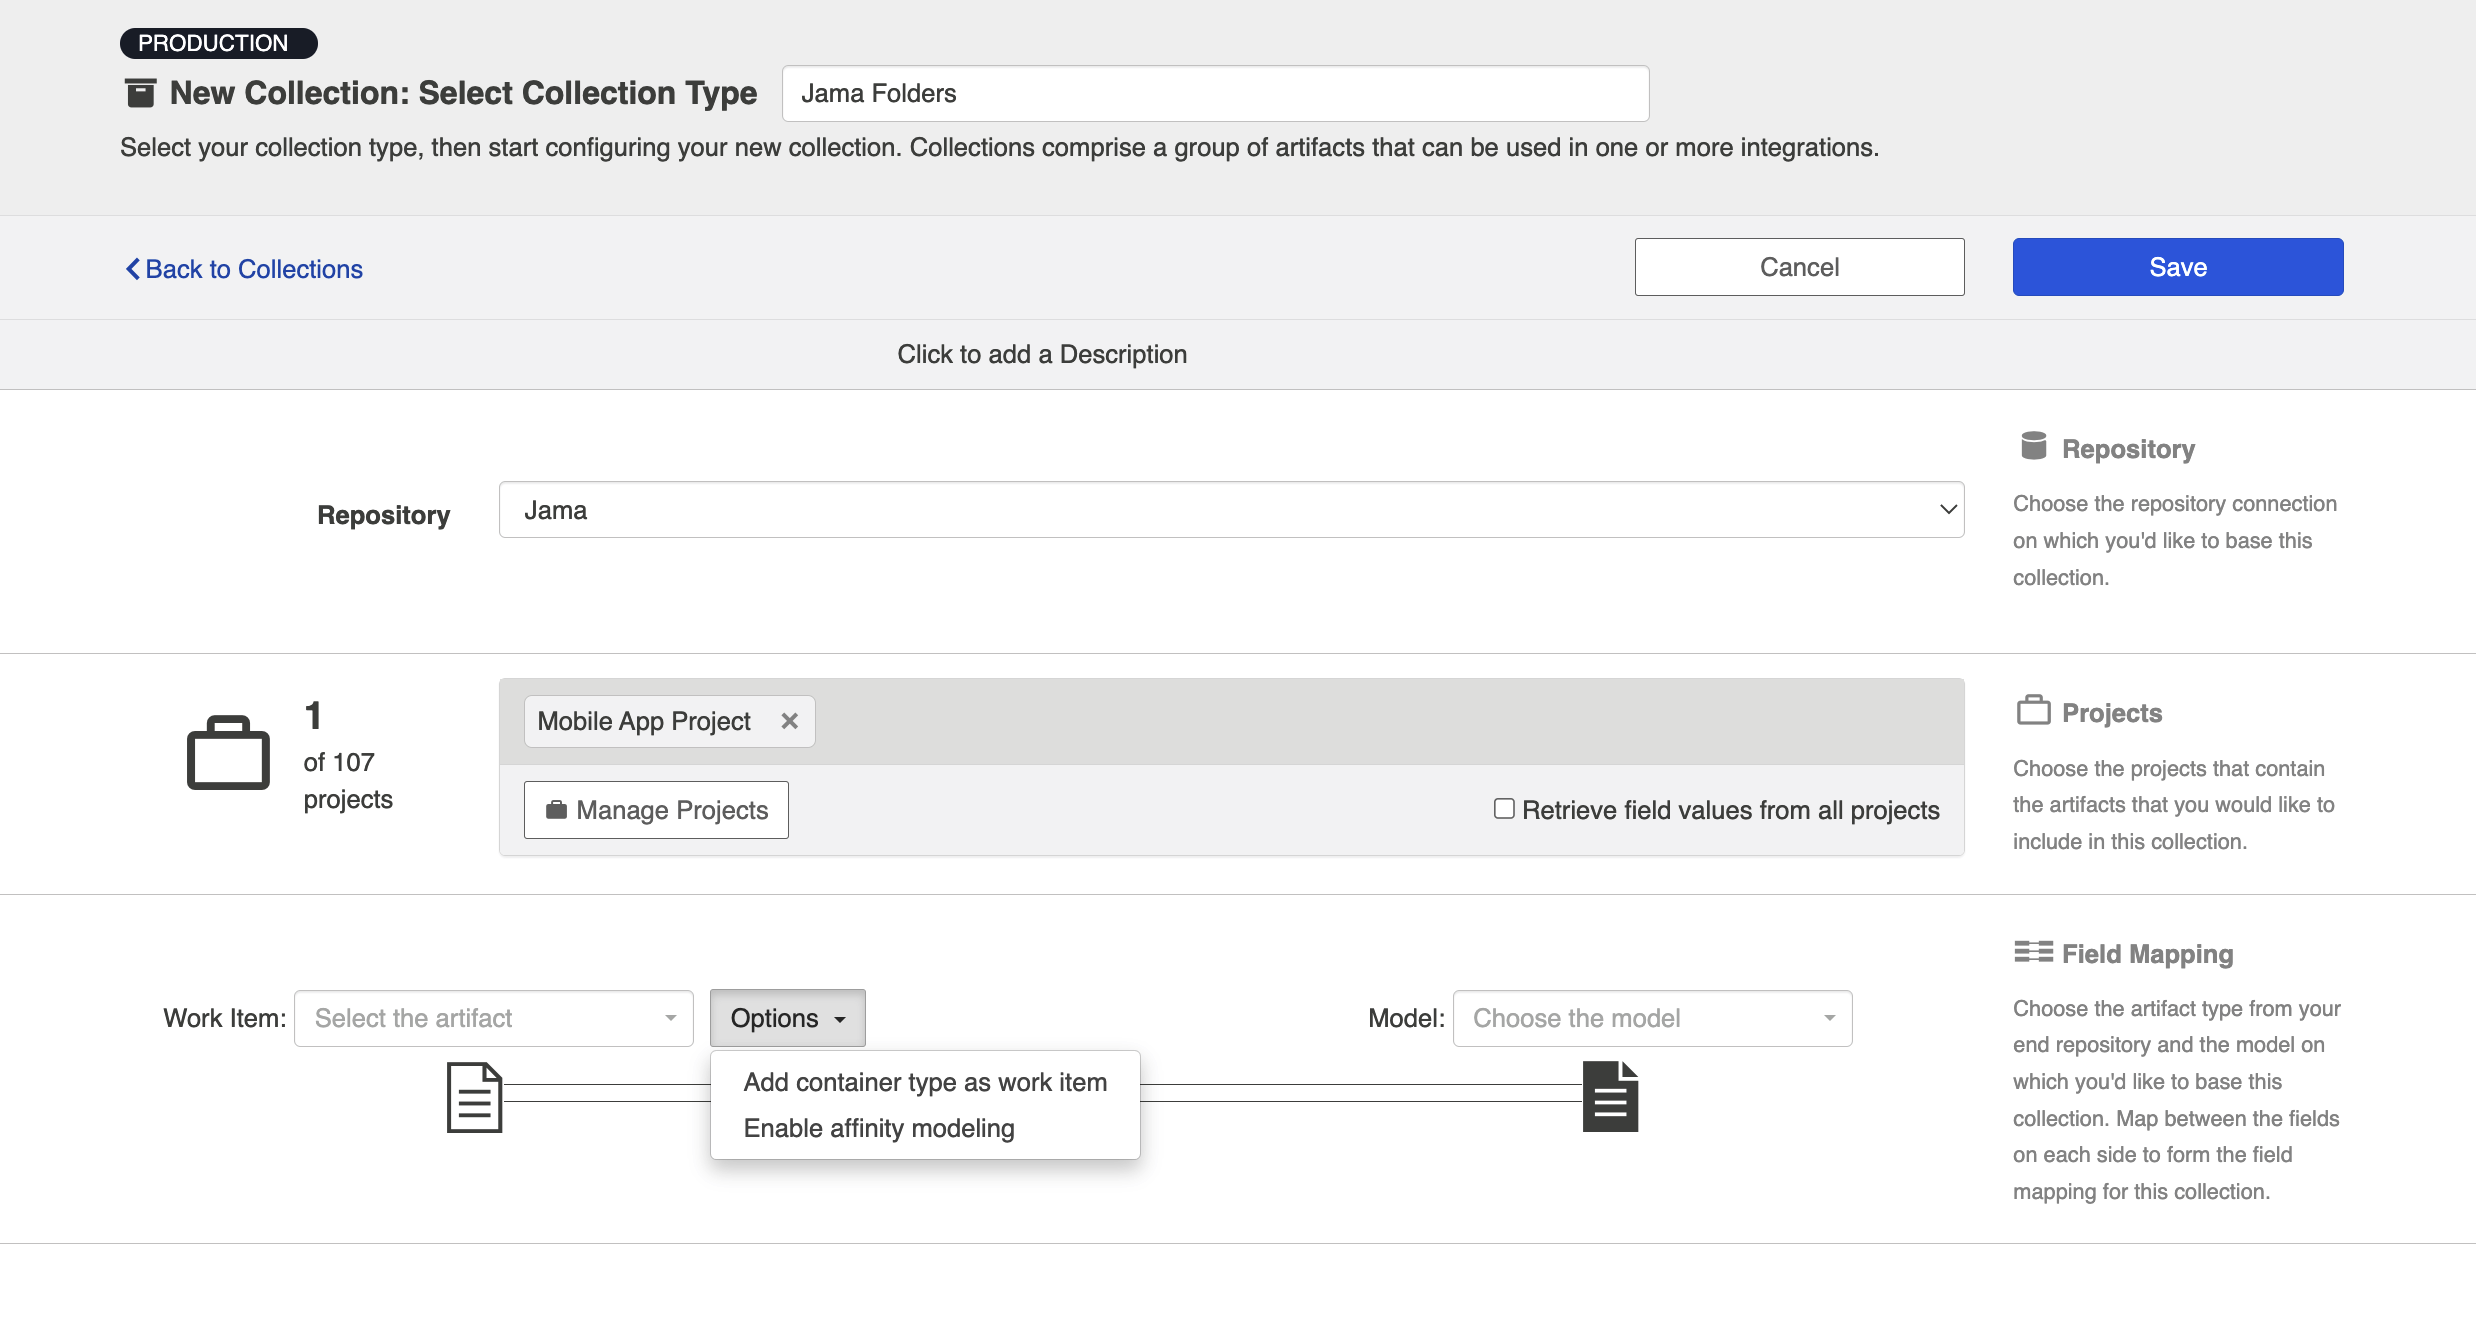
To enable this feature, navigate to the Collections screen and click New Collection.
Select Work Item Collection as the collection type.
Note: An existing container collection cannot be converted into a work item collection. A new collection must be created.
On the New Collection screen, select the repository and add the projects from which you’d like to retrieve artifacts.
After you’ve selected the projects, click Options next to the work item dropdown and select Add container type as work item.
A pop-up will appear with a warning message informing you that containers cannot be used for artifact routing once they are treated as work items.
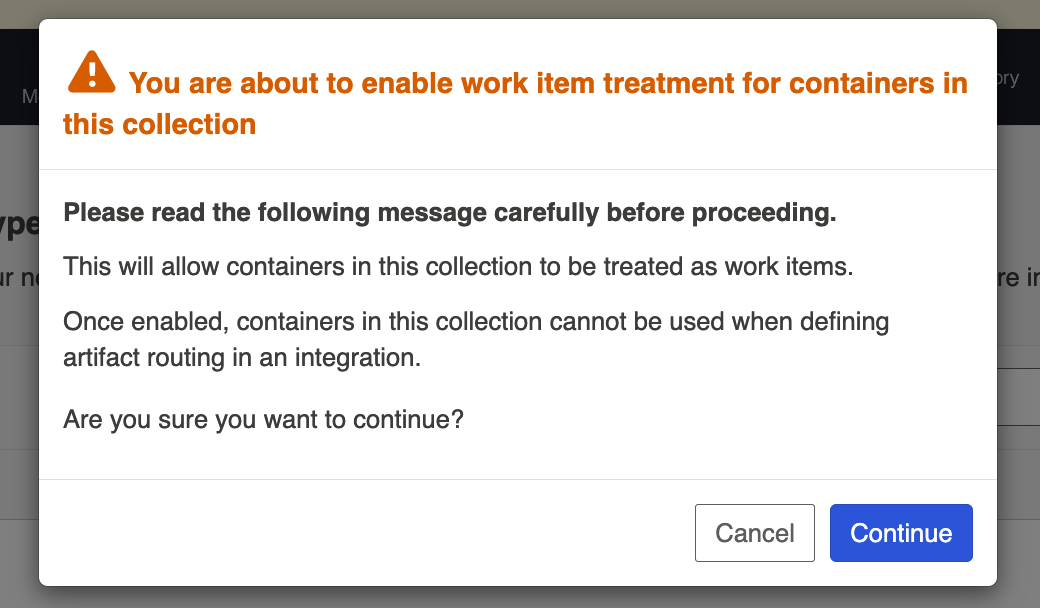
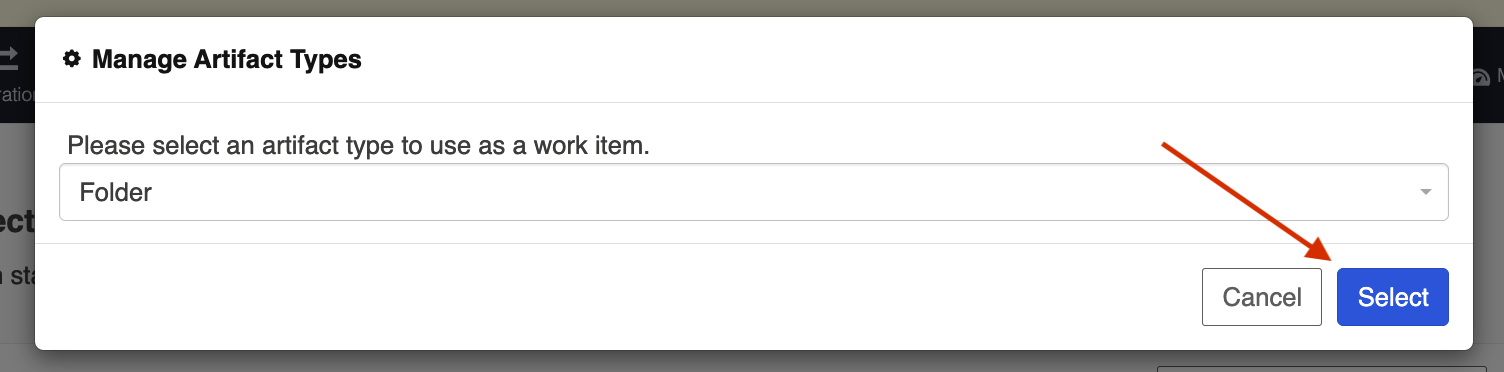
After clicking Continue on the warning message, the Manage Artifact Types pop-up will appear where you can select the container you’d like to use as a work item.
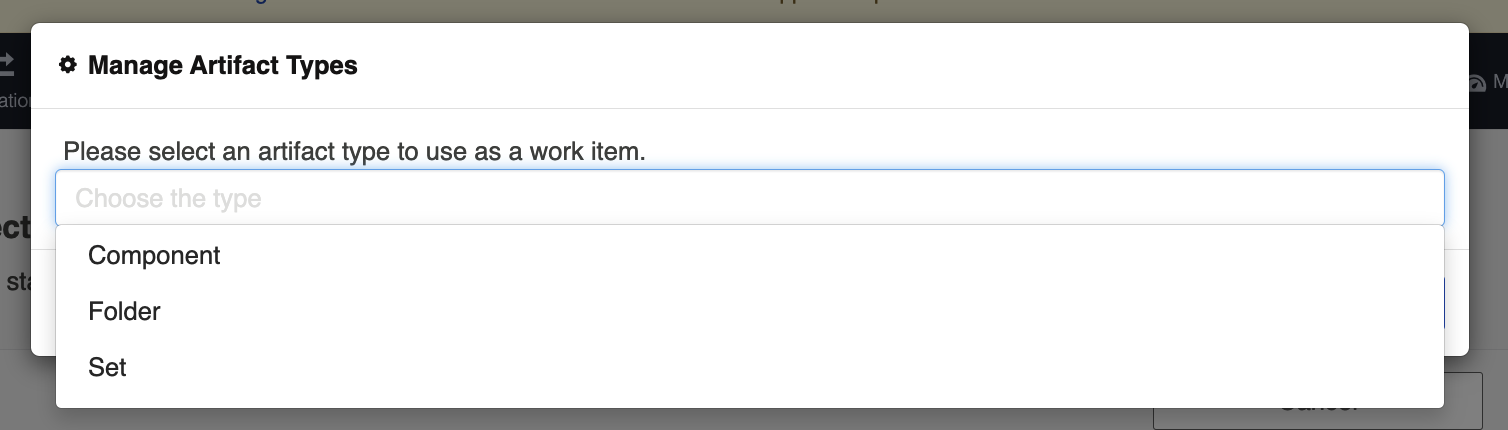
Once you’ve chosen the container, click Select.
Select the model you'd like to use for the collection. To save your changes, click Save.
Project Usage Report
The Project Usage Report lets you quickly identify where projects are used across your Hub configurations.
Each report includes the following details for selected projects:
- Used in Collections: This includes all the collections where the project is used
- Used in Artifact Unions (if applicable): This includes all the artifact unions where the project is used
- Artifact Types: This includes all the artifact types from the project that are being used
- Used in Integrations: This includes all the integrations where the project is used
- Associated Models: This includes all the models associated with the project
- Originating Repository: This is the source repository where the project exists
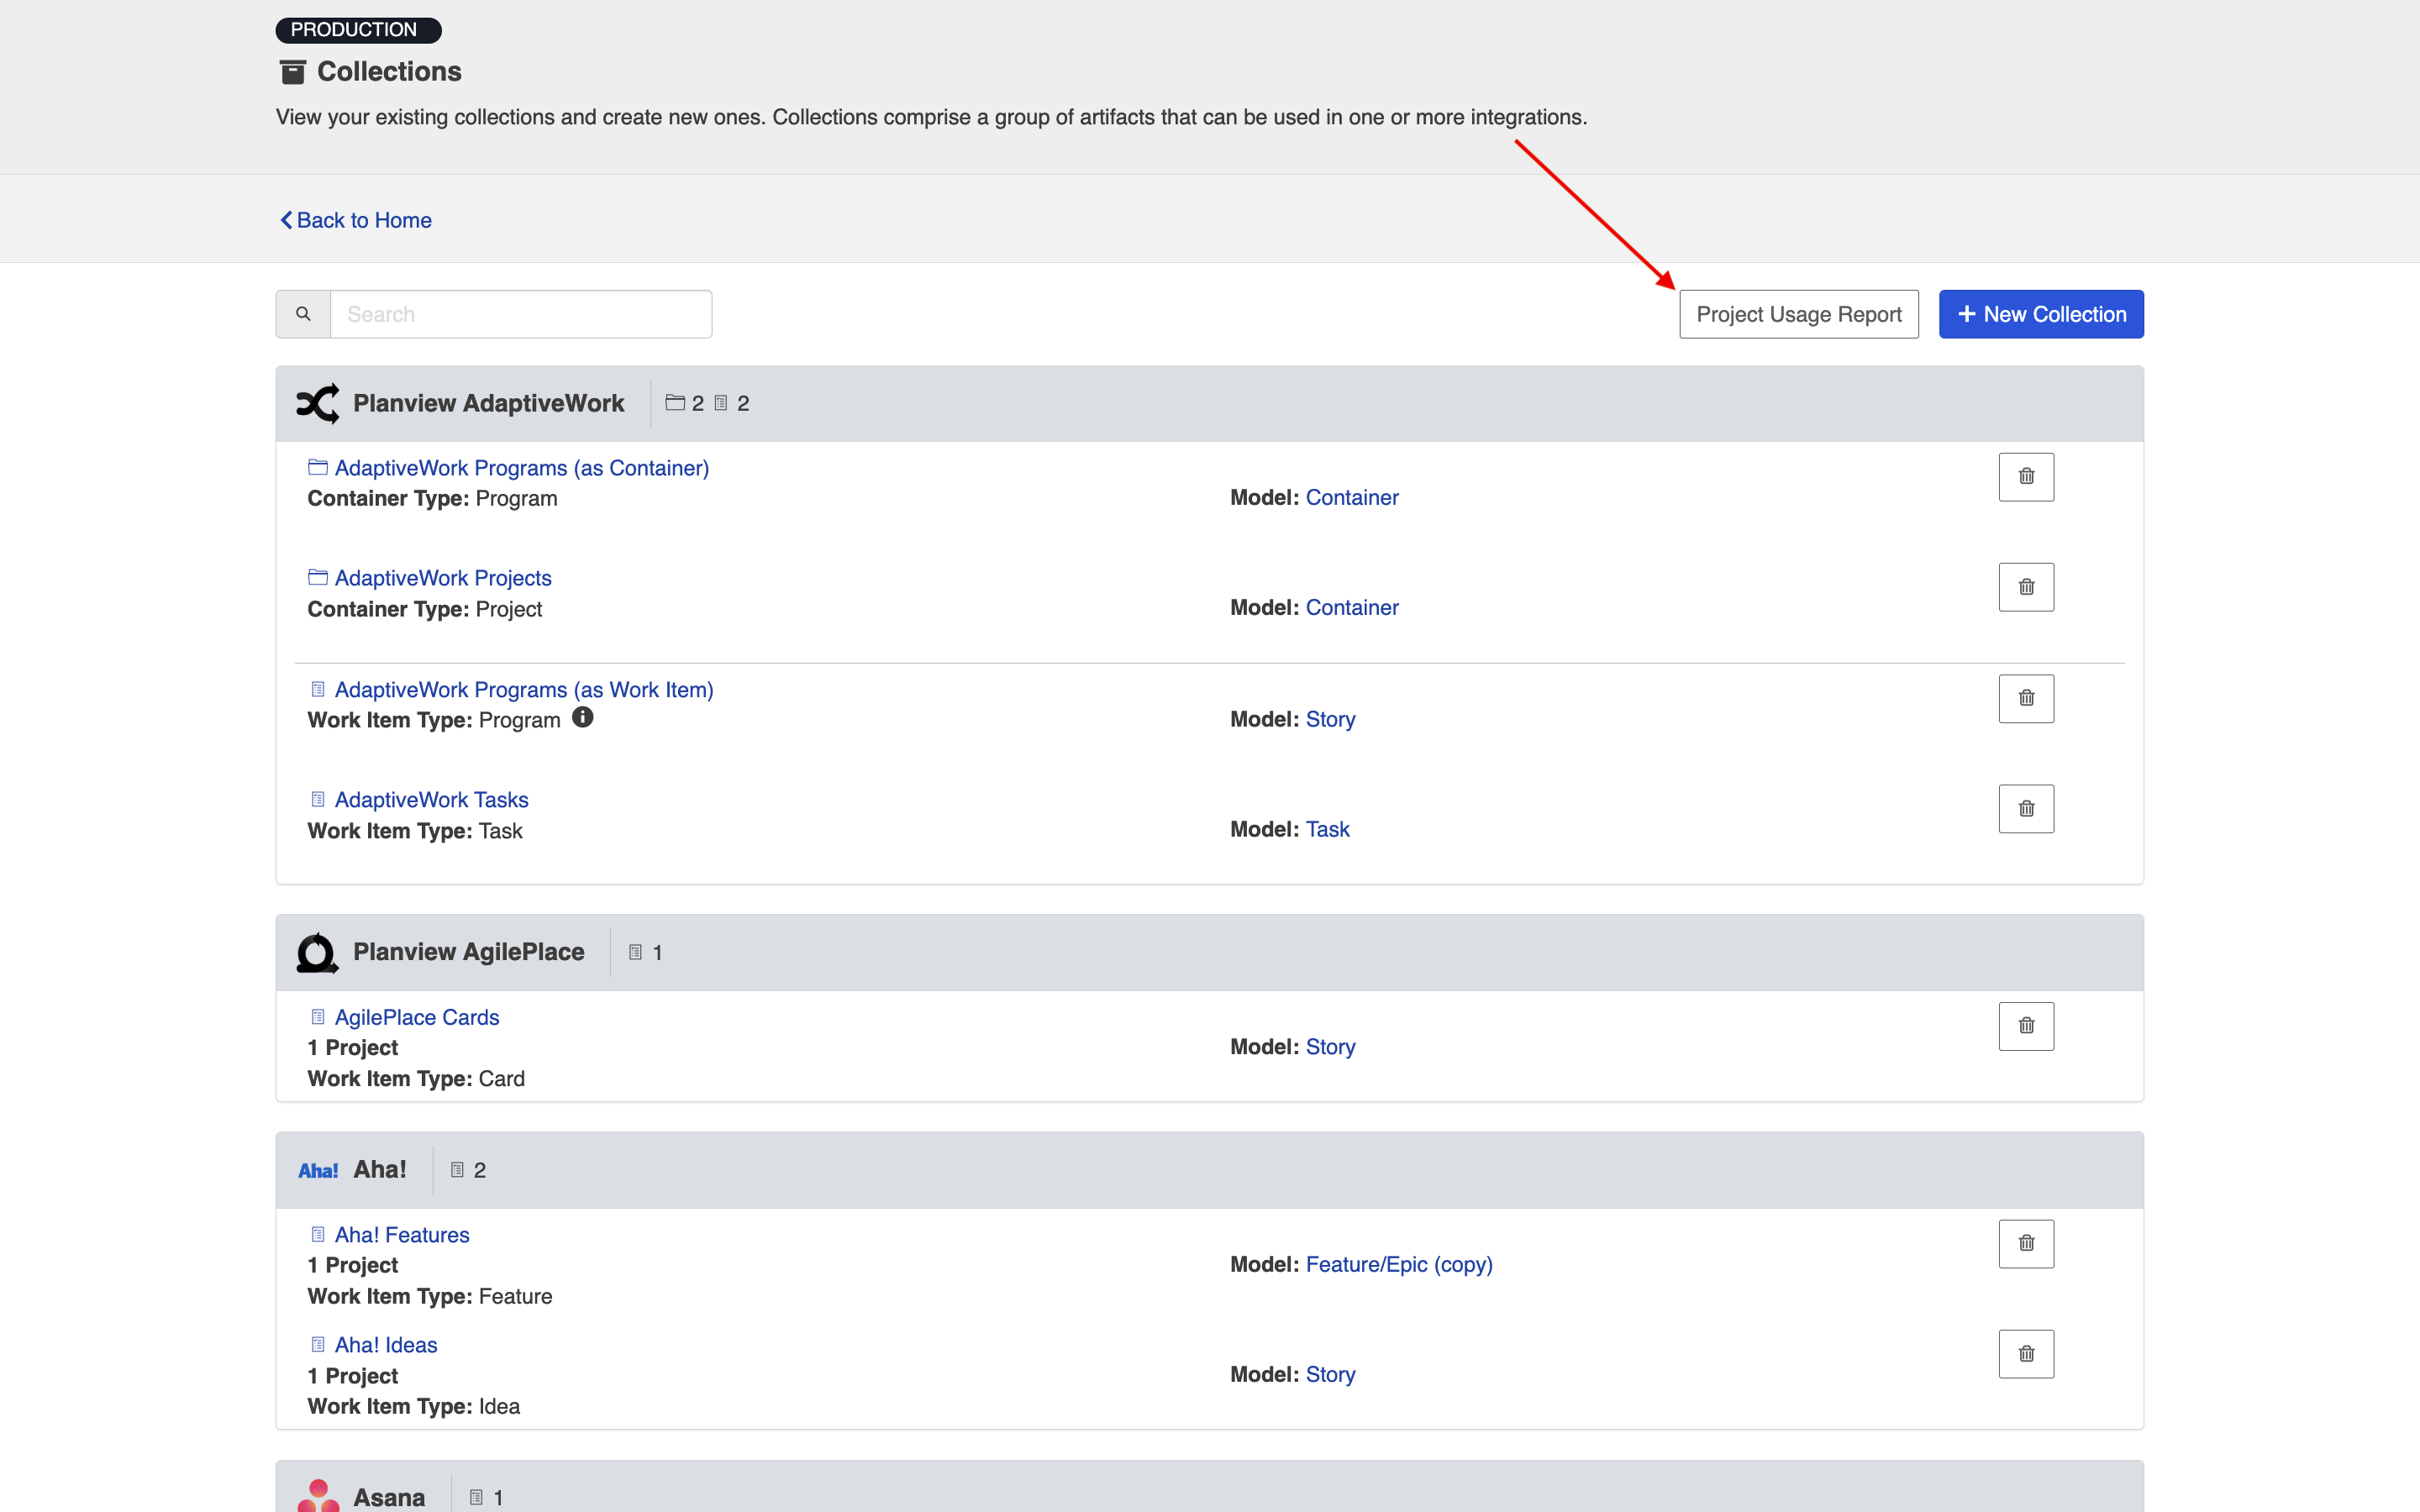
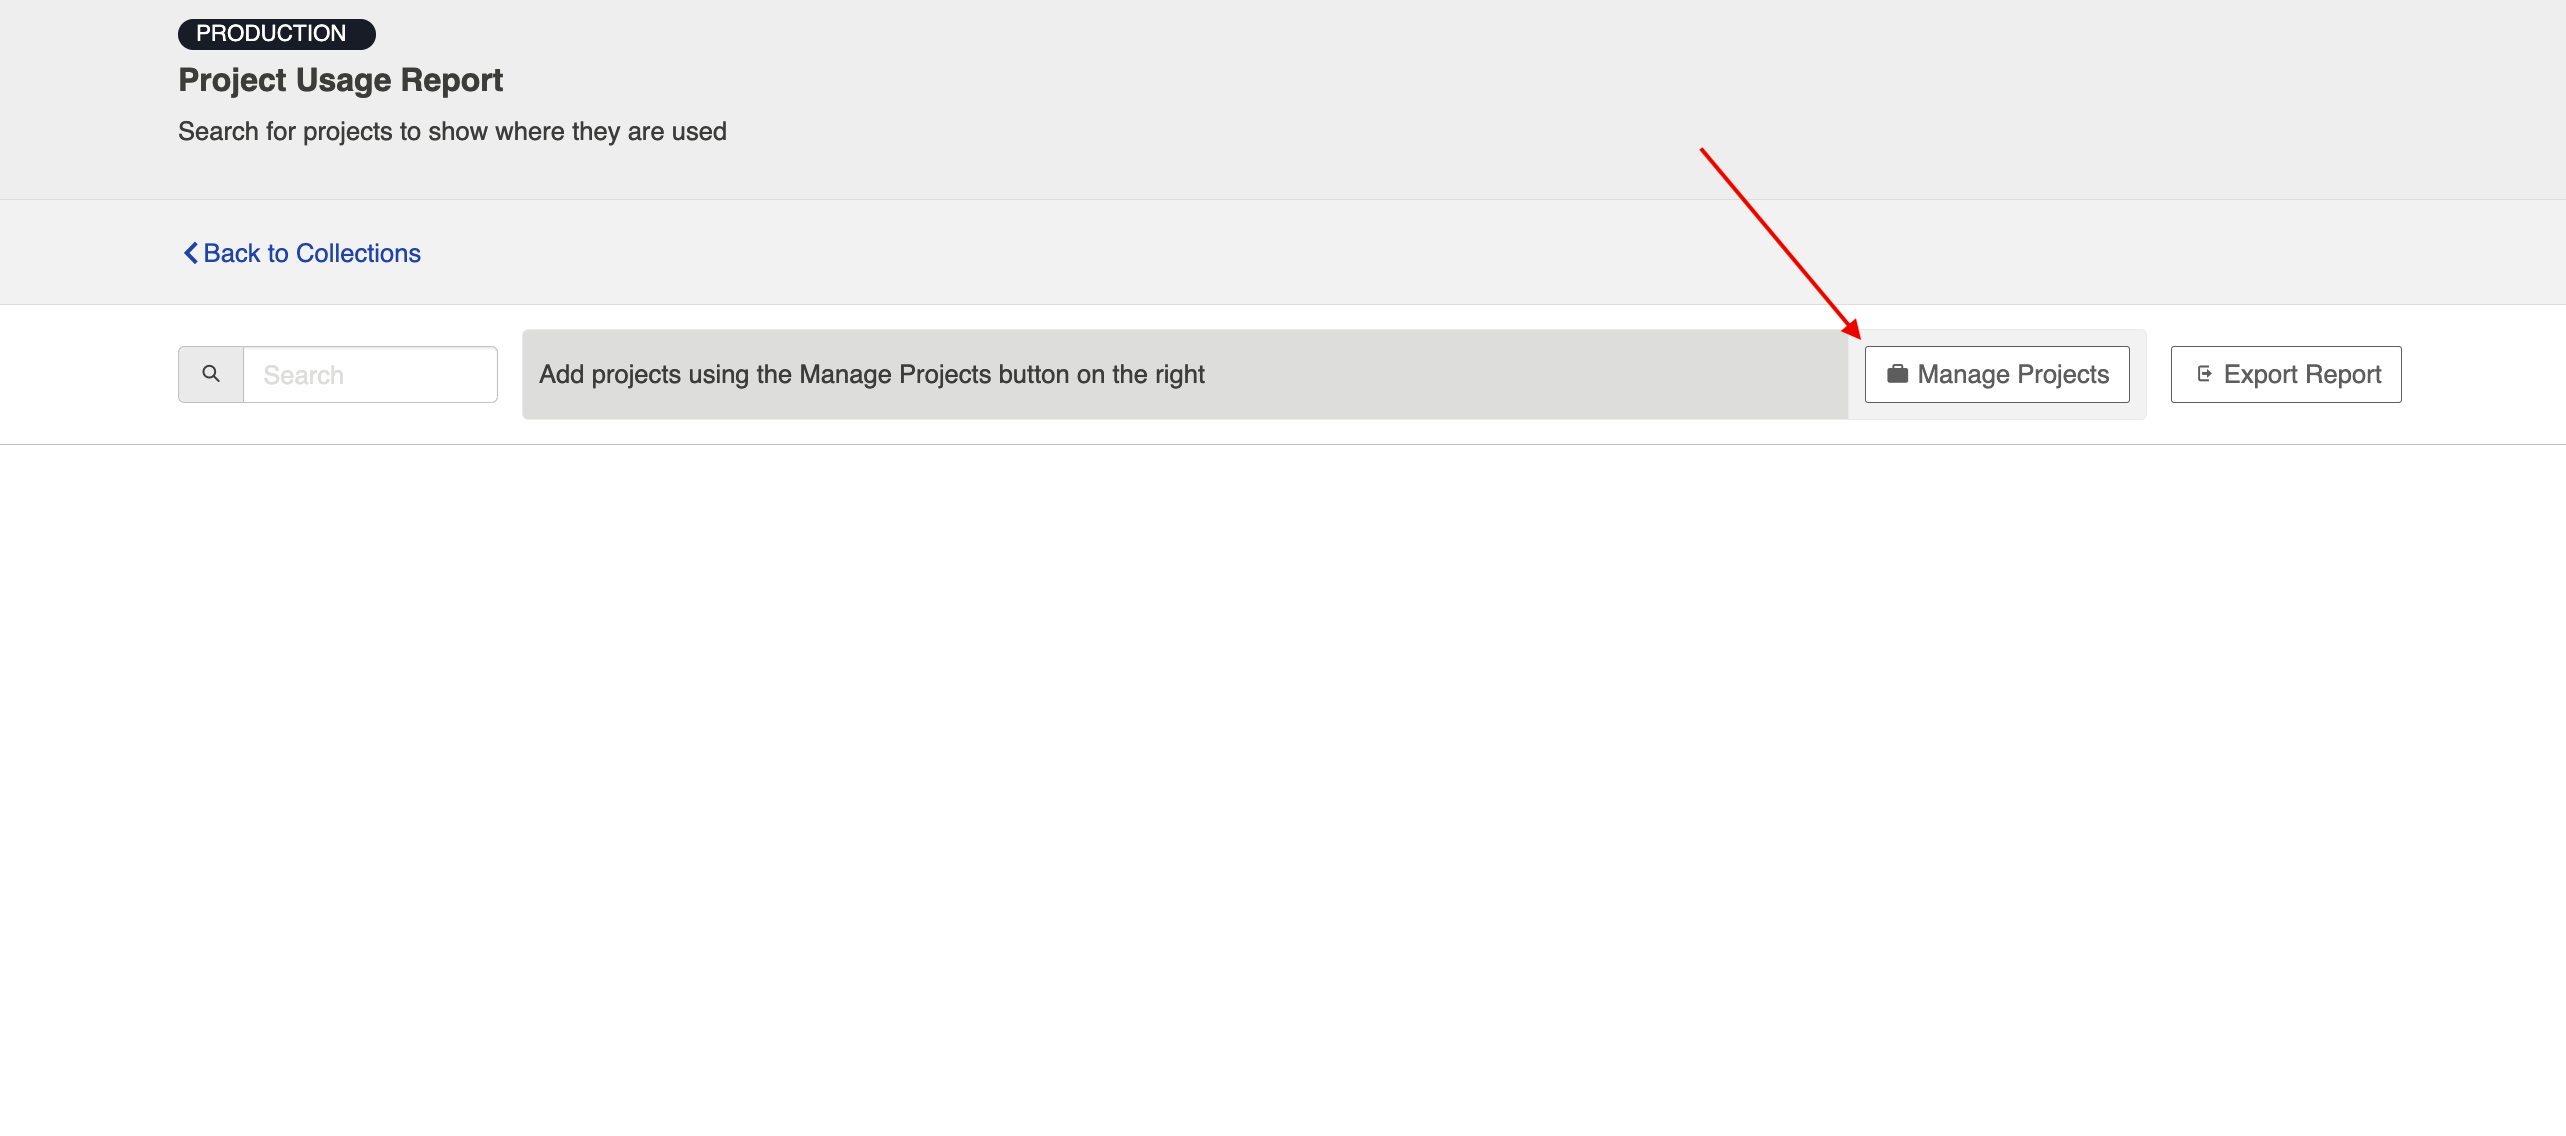
To access the project usage report, navigate to the Collections screen and click Project Usage Report.
On the Project Usage Report screen, you can select the projects you'd like to include in the report.
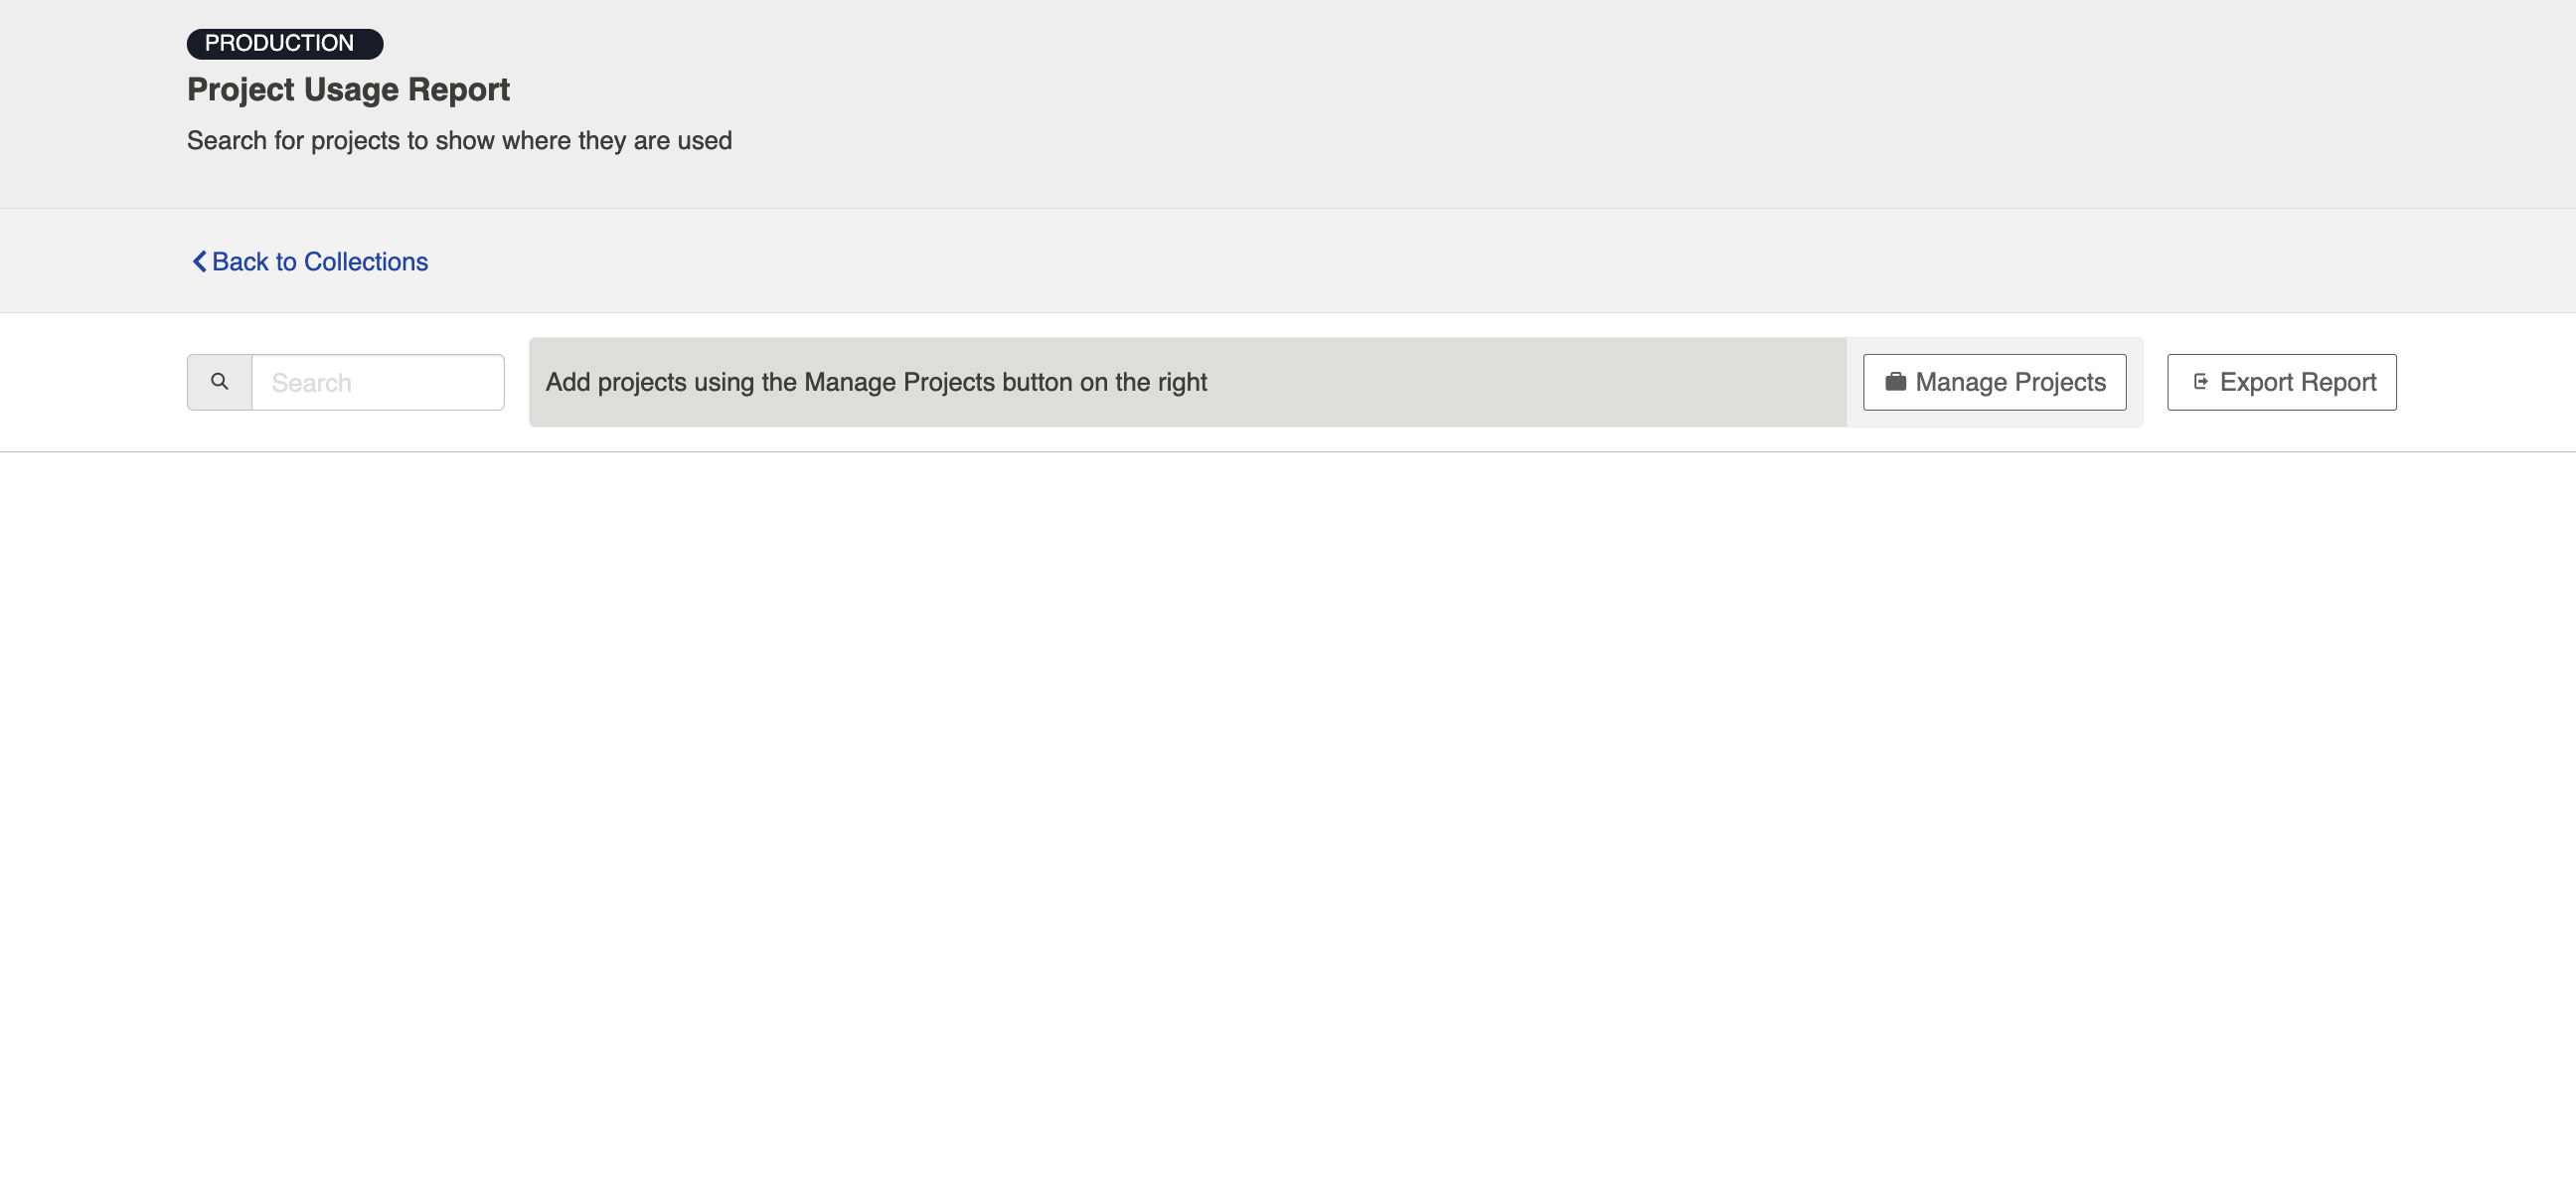
Add projects by clicking Manage Projects. These are the projects that will be included in your report.
A pop-up will appear showing you all of the projects being used in your Hub instance.
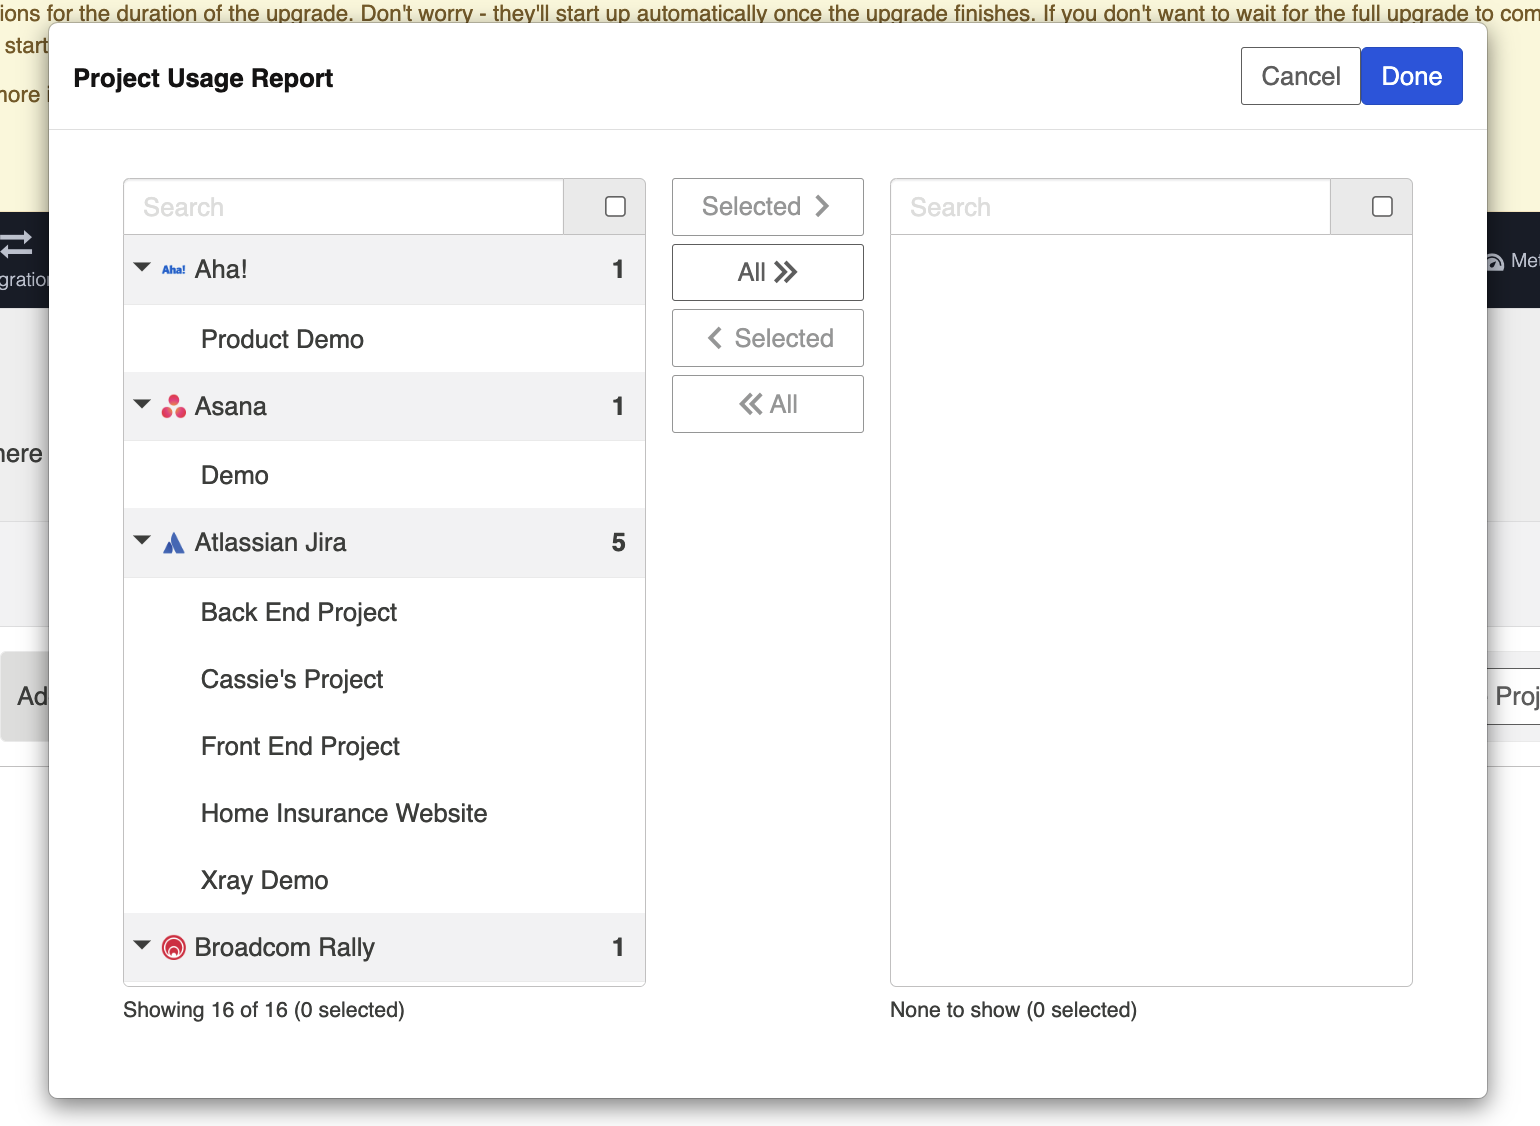
Once you've selected the projects you'd like to include in the usage report, click Done.

The selected projects will be listed in your project usage report, with the following details:
- Collections, integrations, and artifact unions containing the project
- Artifact types from the project that are being used
- Models associated with the project
- Repository where the project originates
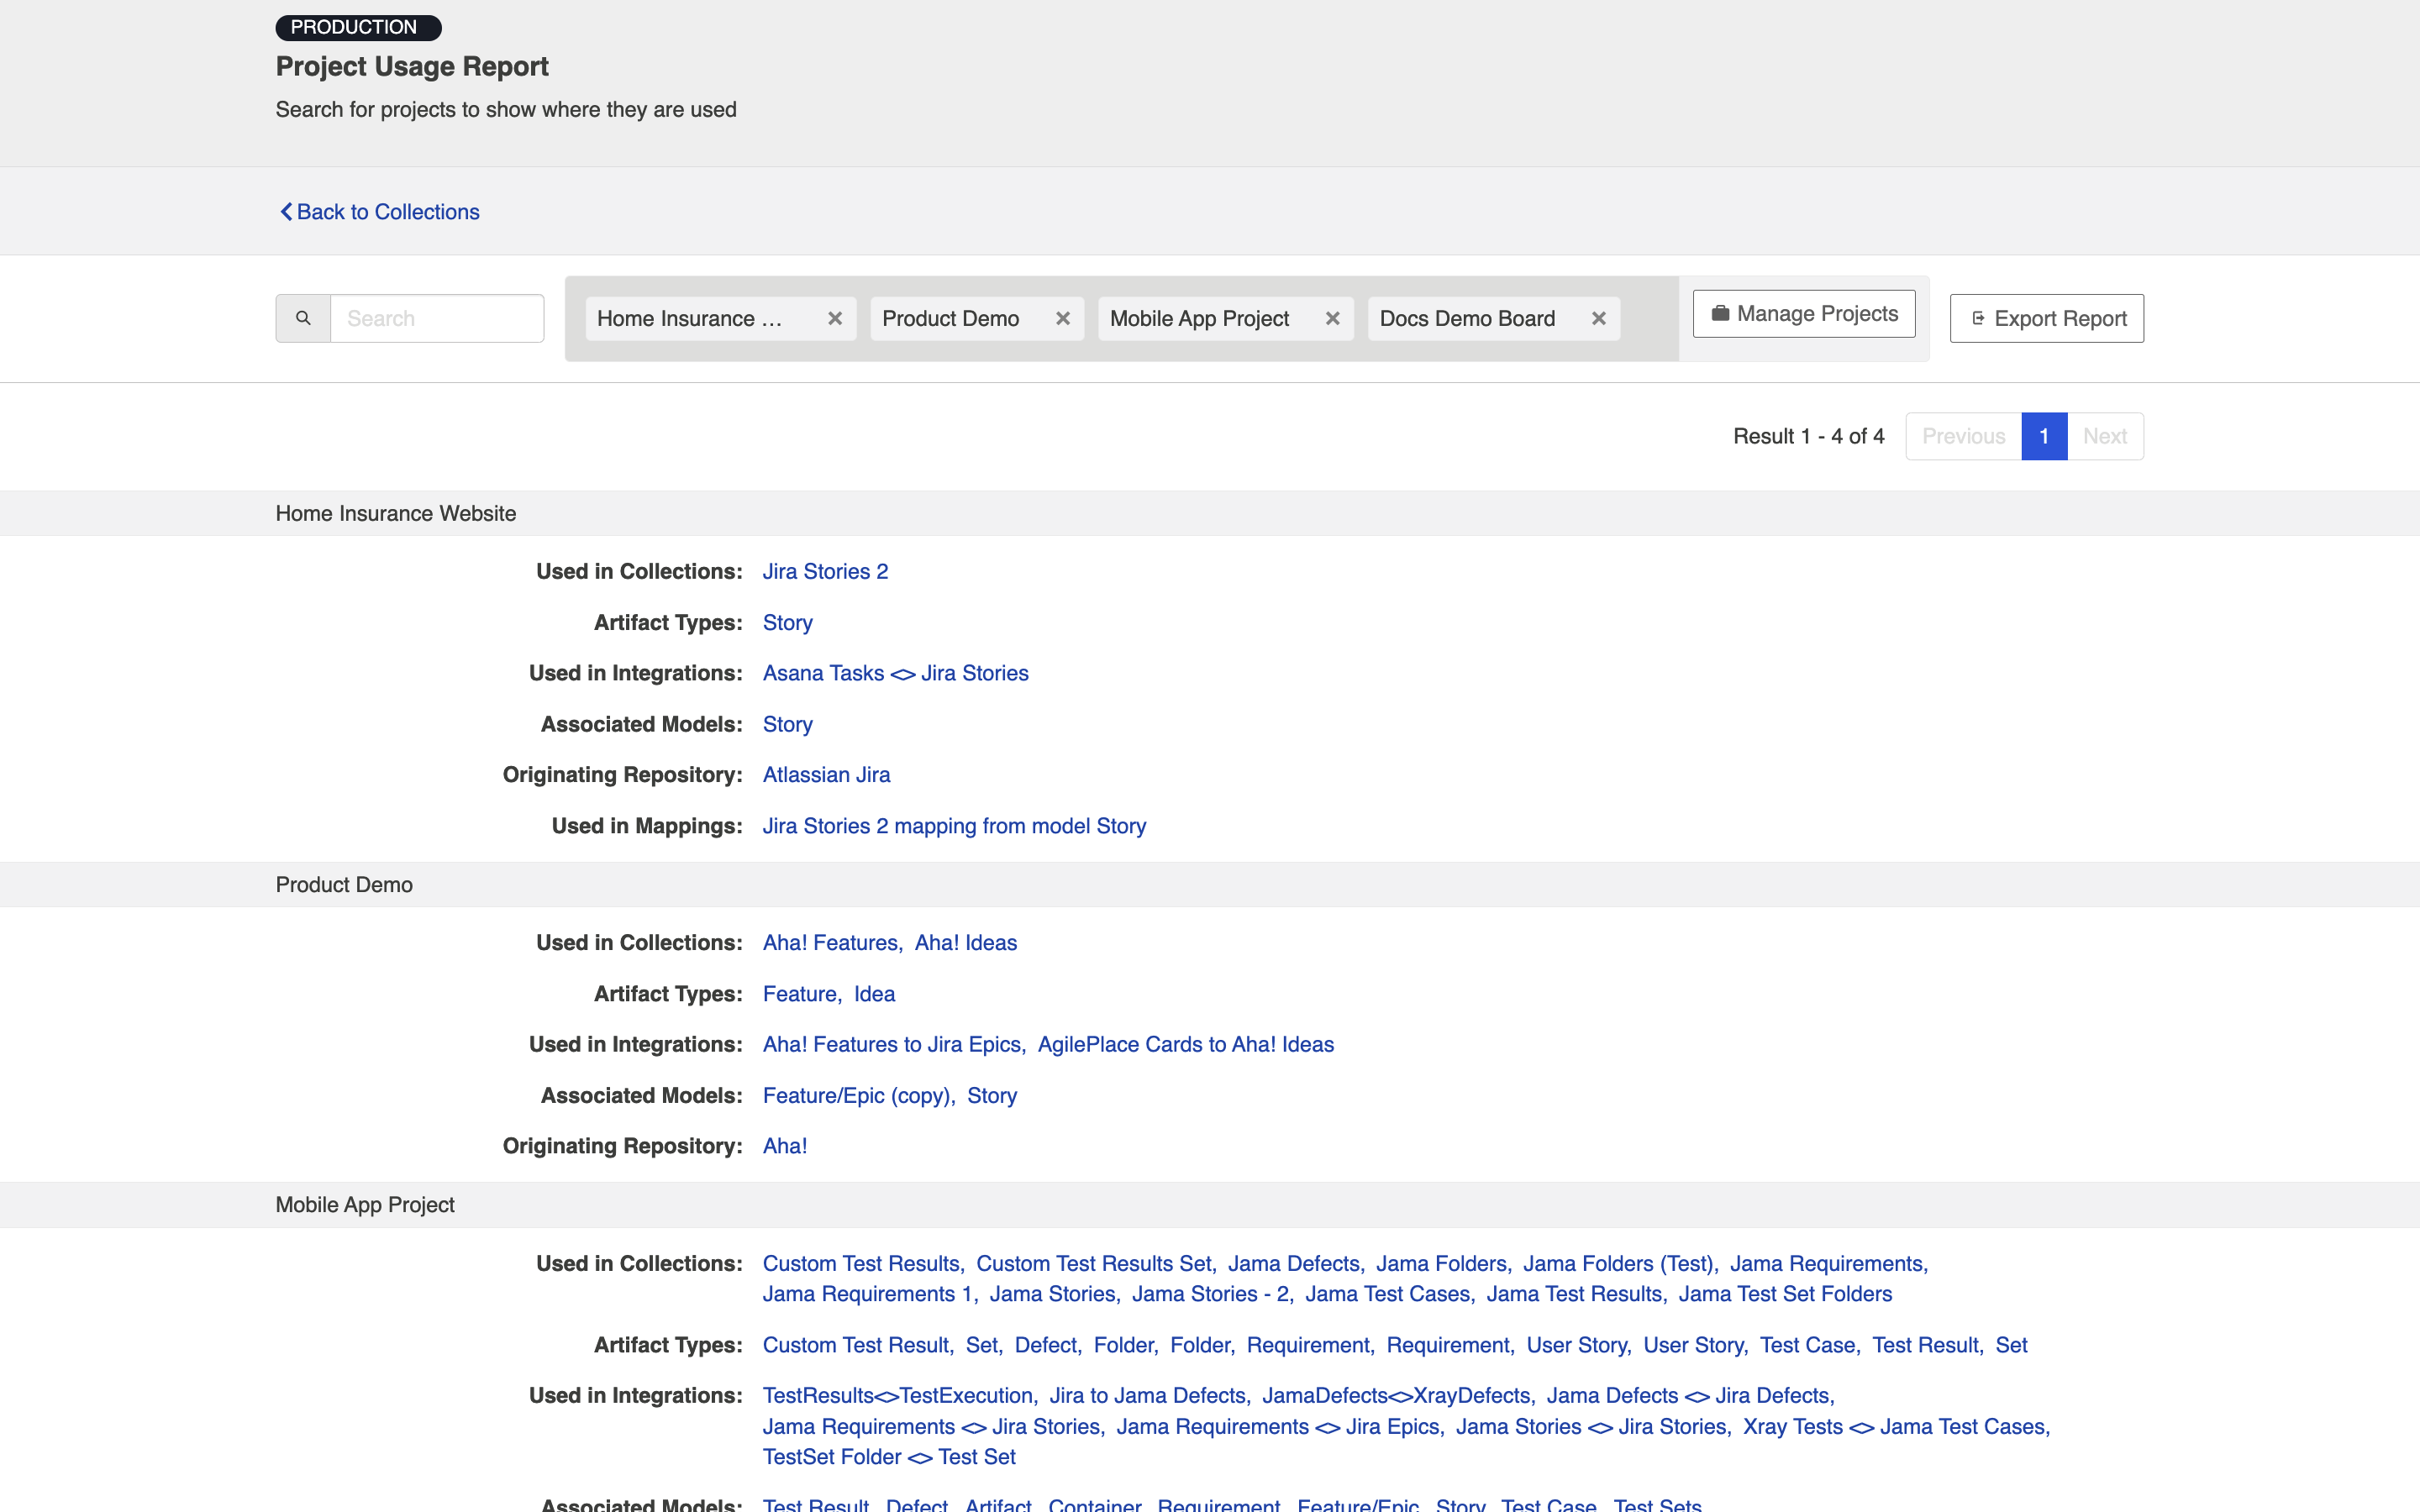
If you'd like to filter your results, you can use the search function.
To export a CSV file with the project usage report, click Export Report.
Viewing Associated Configuration Elements
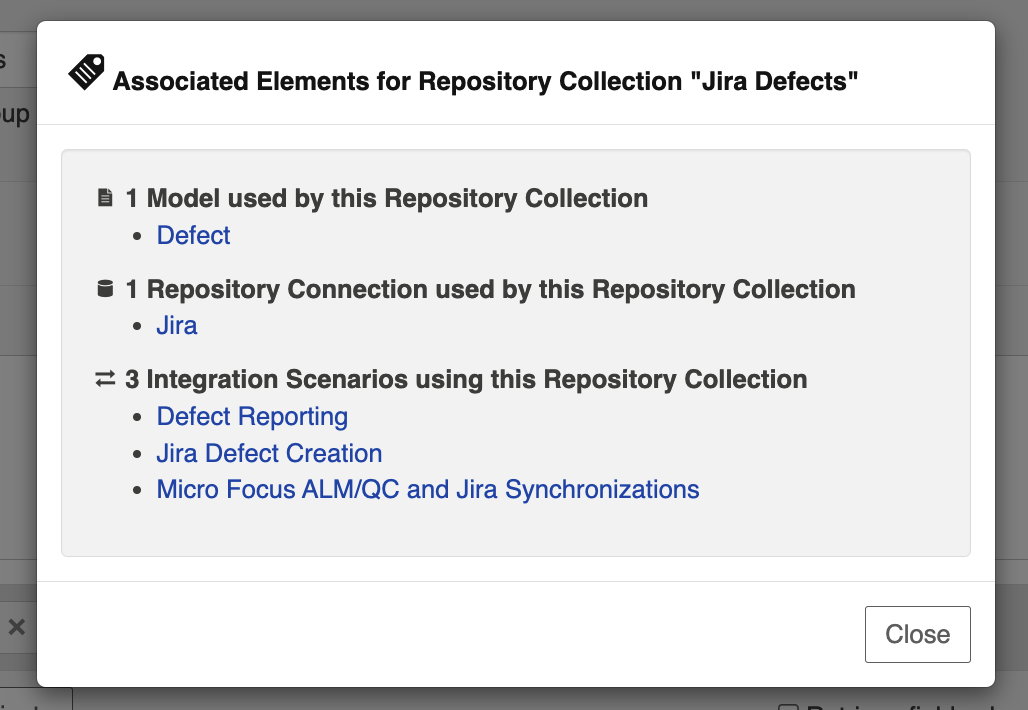
To view associated configuration elements (such as models or integrations that utilize the collection you are viewing), click the Associated Elements tag in the upper right corner of the screen.