
Artifact Unions
Introduction
Once you have completed your State Transitions configuration, your next step will be to configure and review your Artifact Unions. On this screen, you can specify the related artifact whose fields may flow along with the artifacts in your collection.
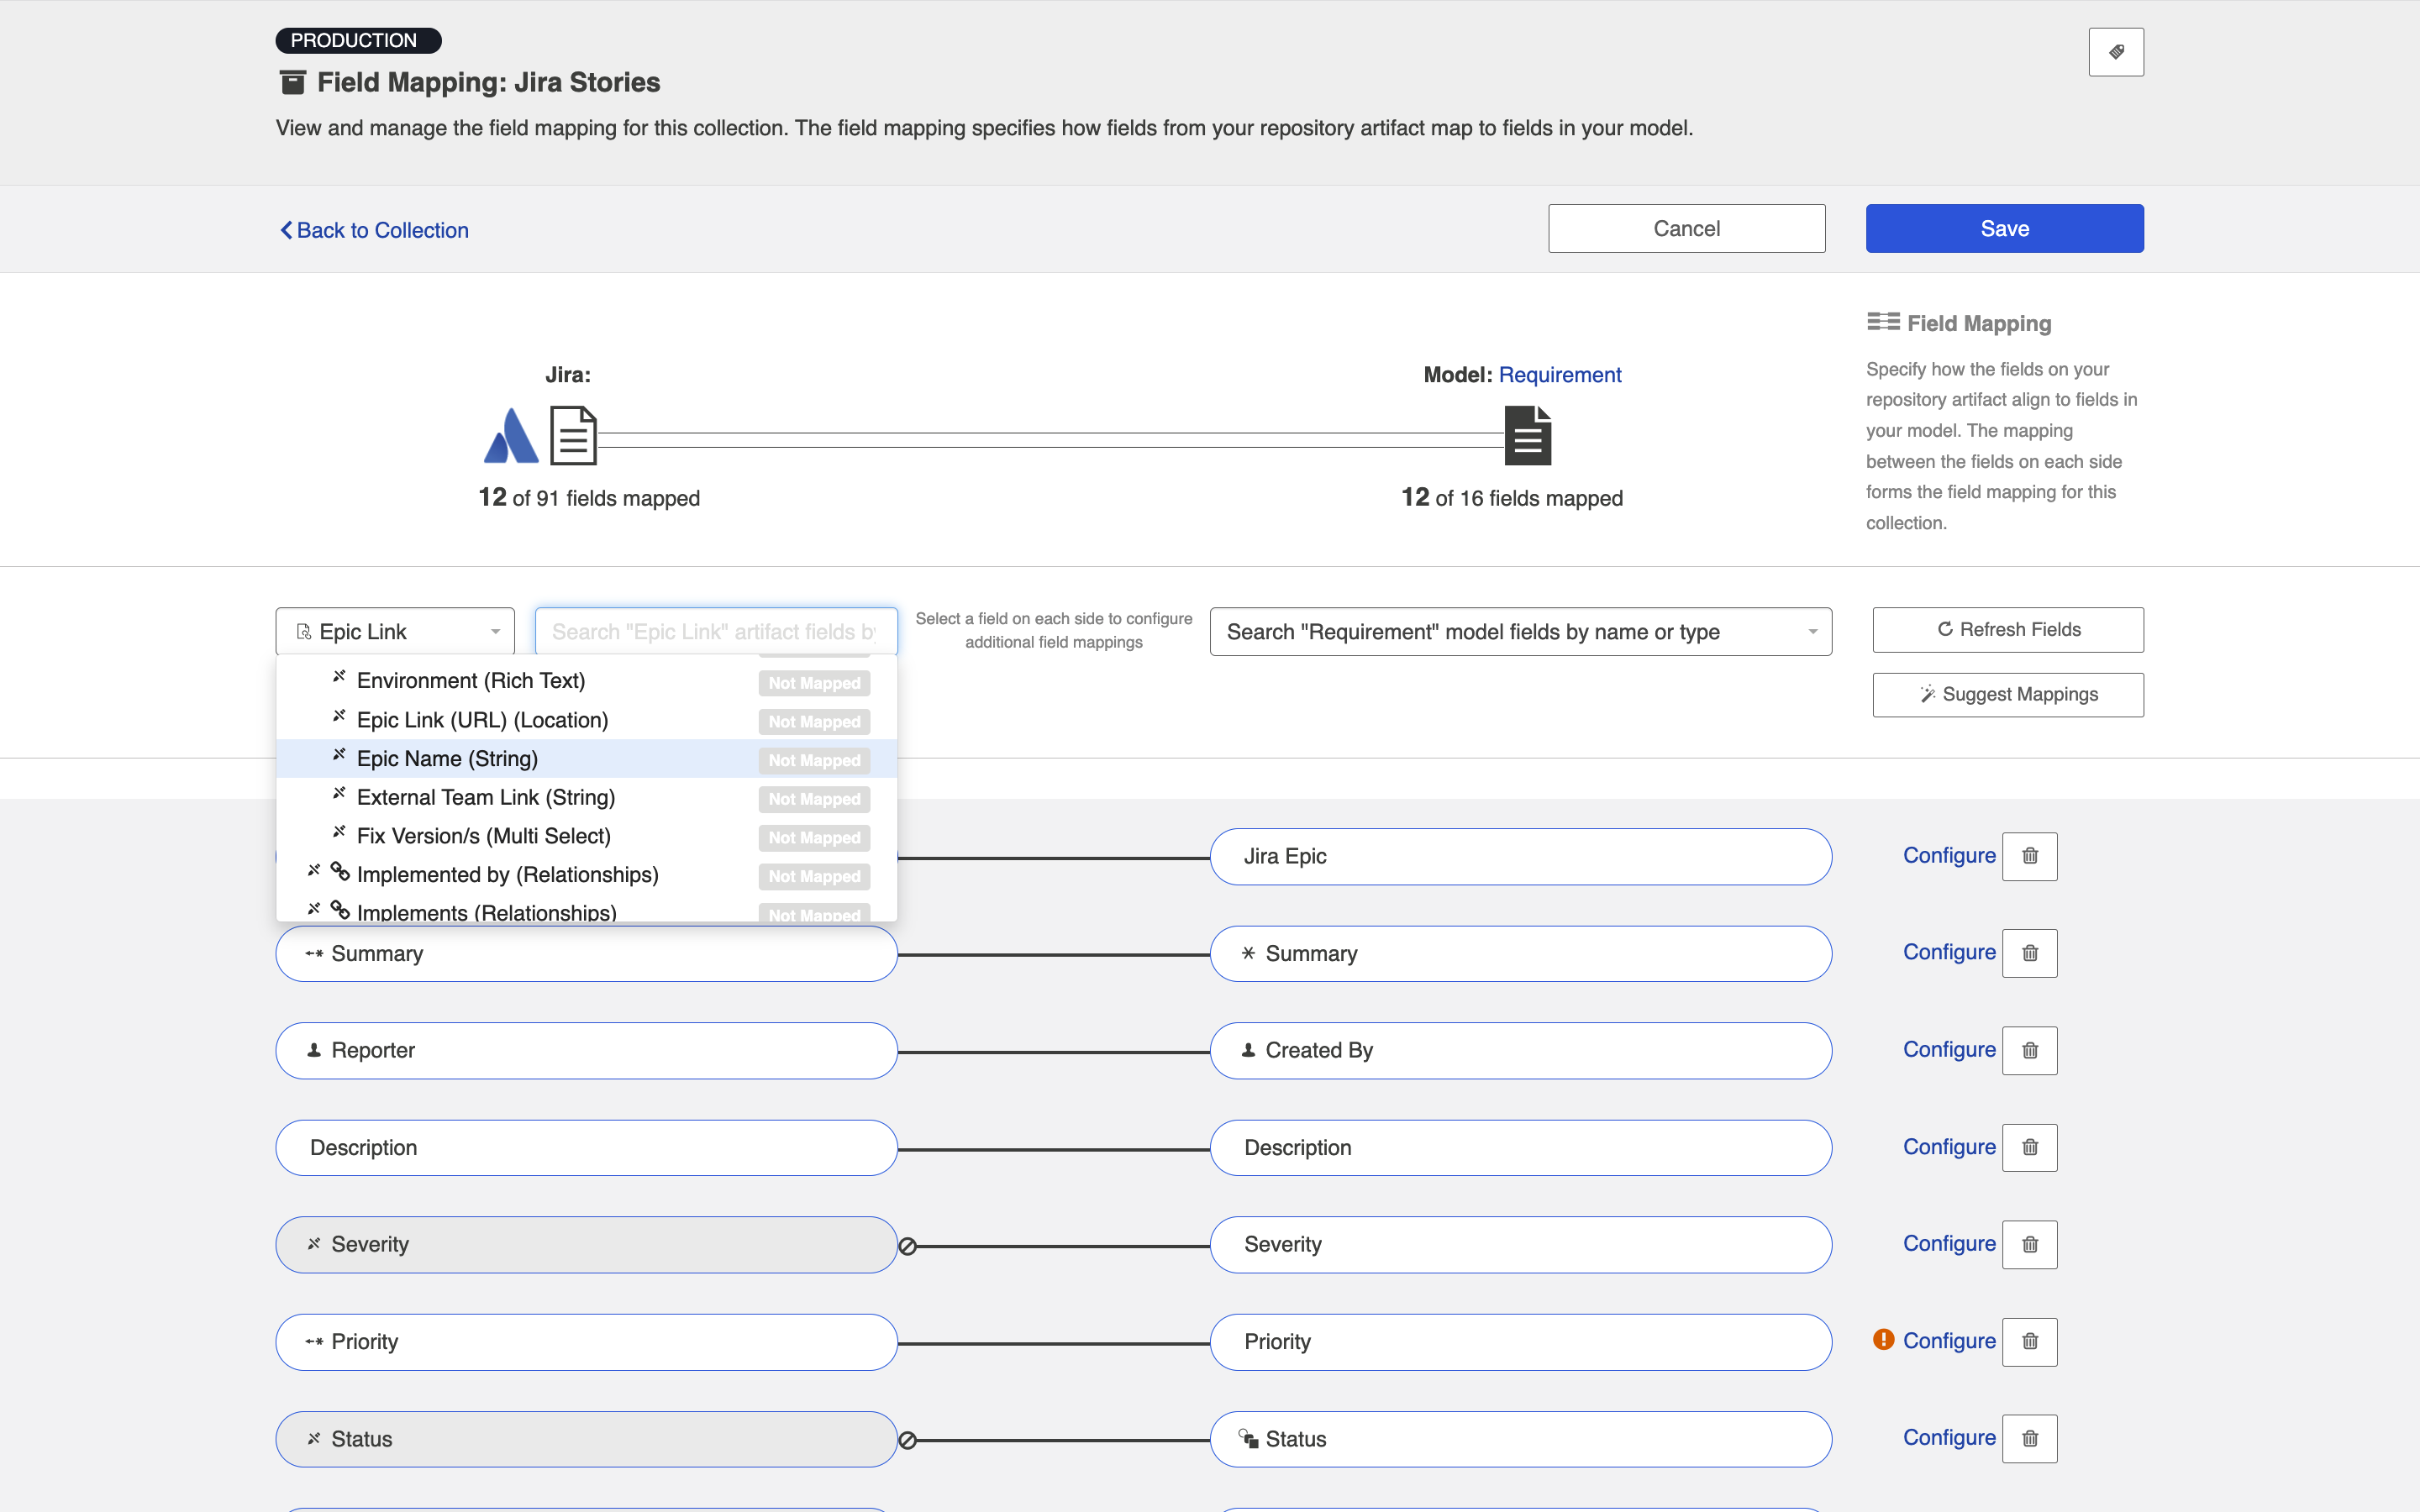
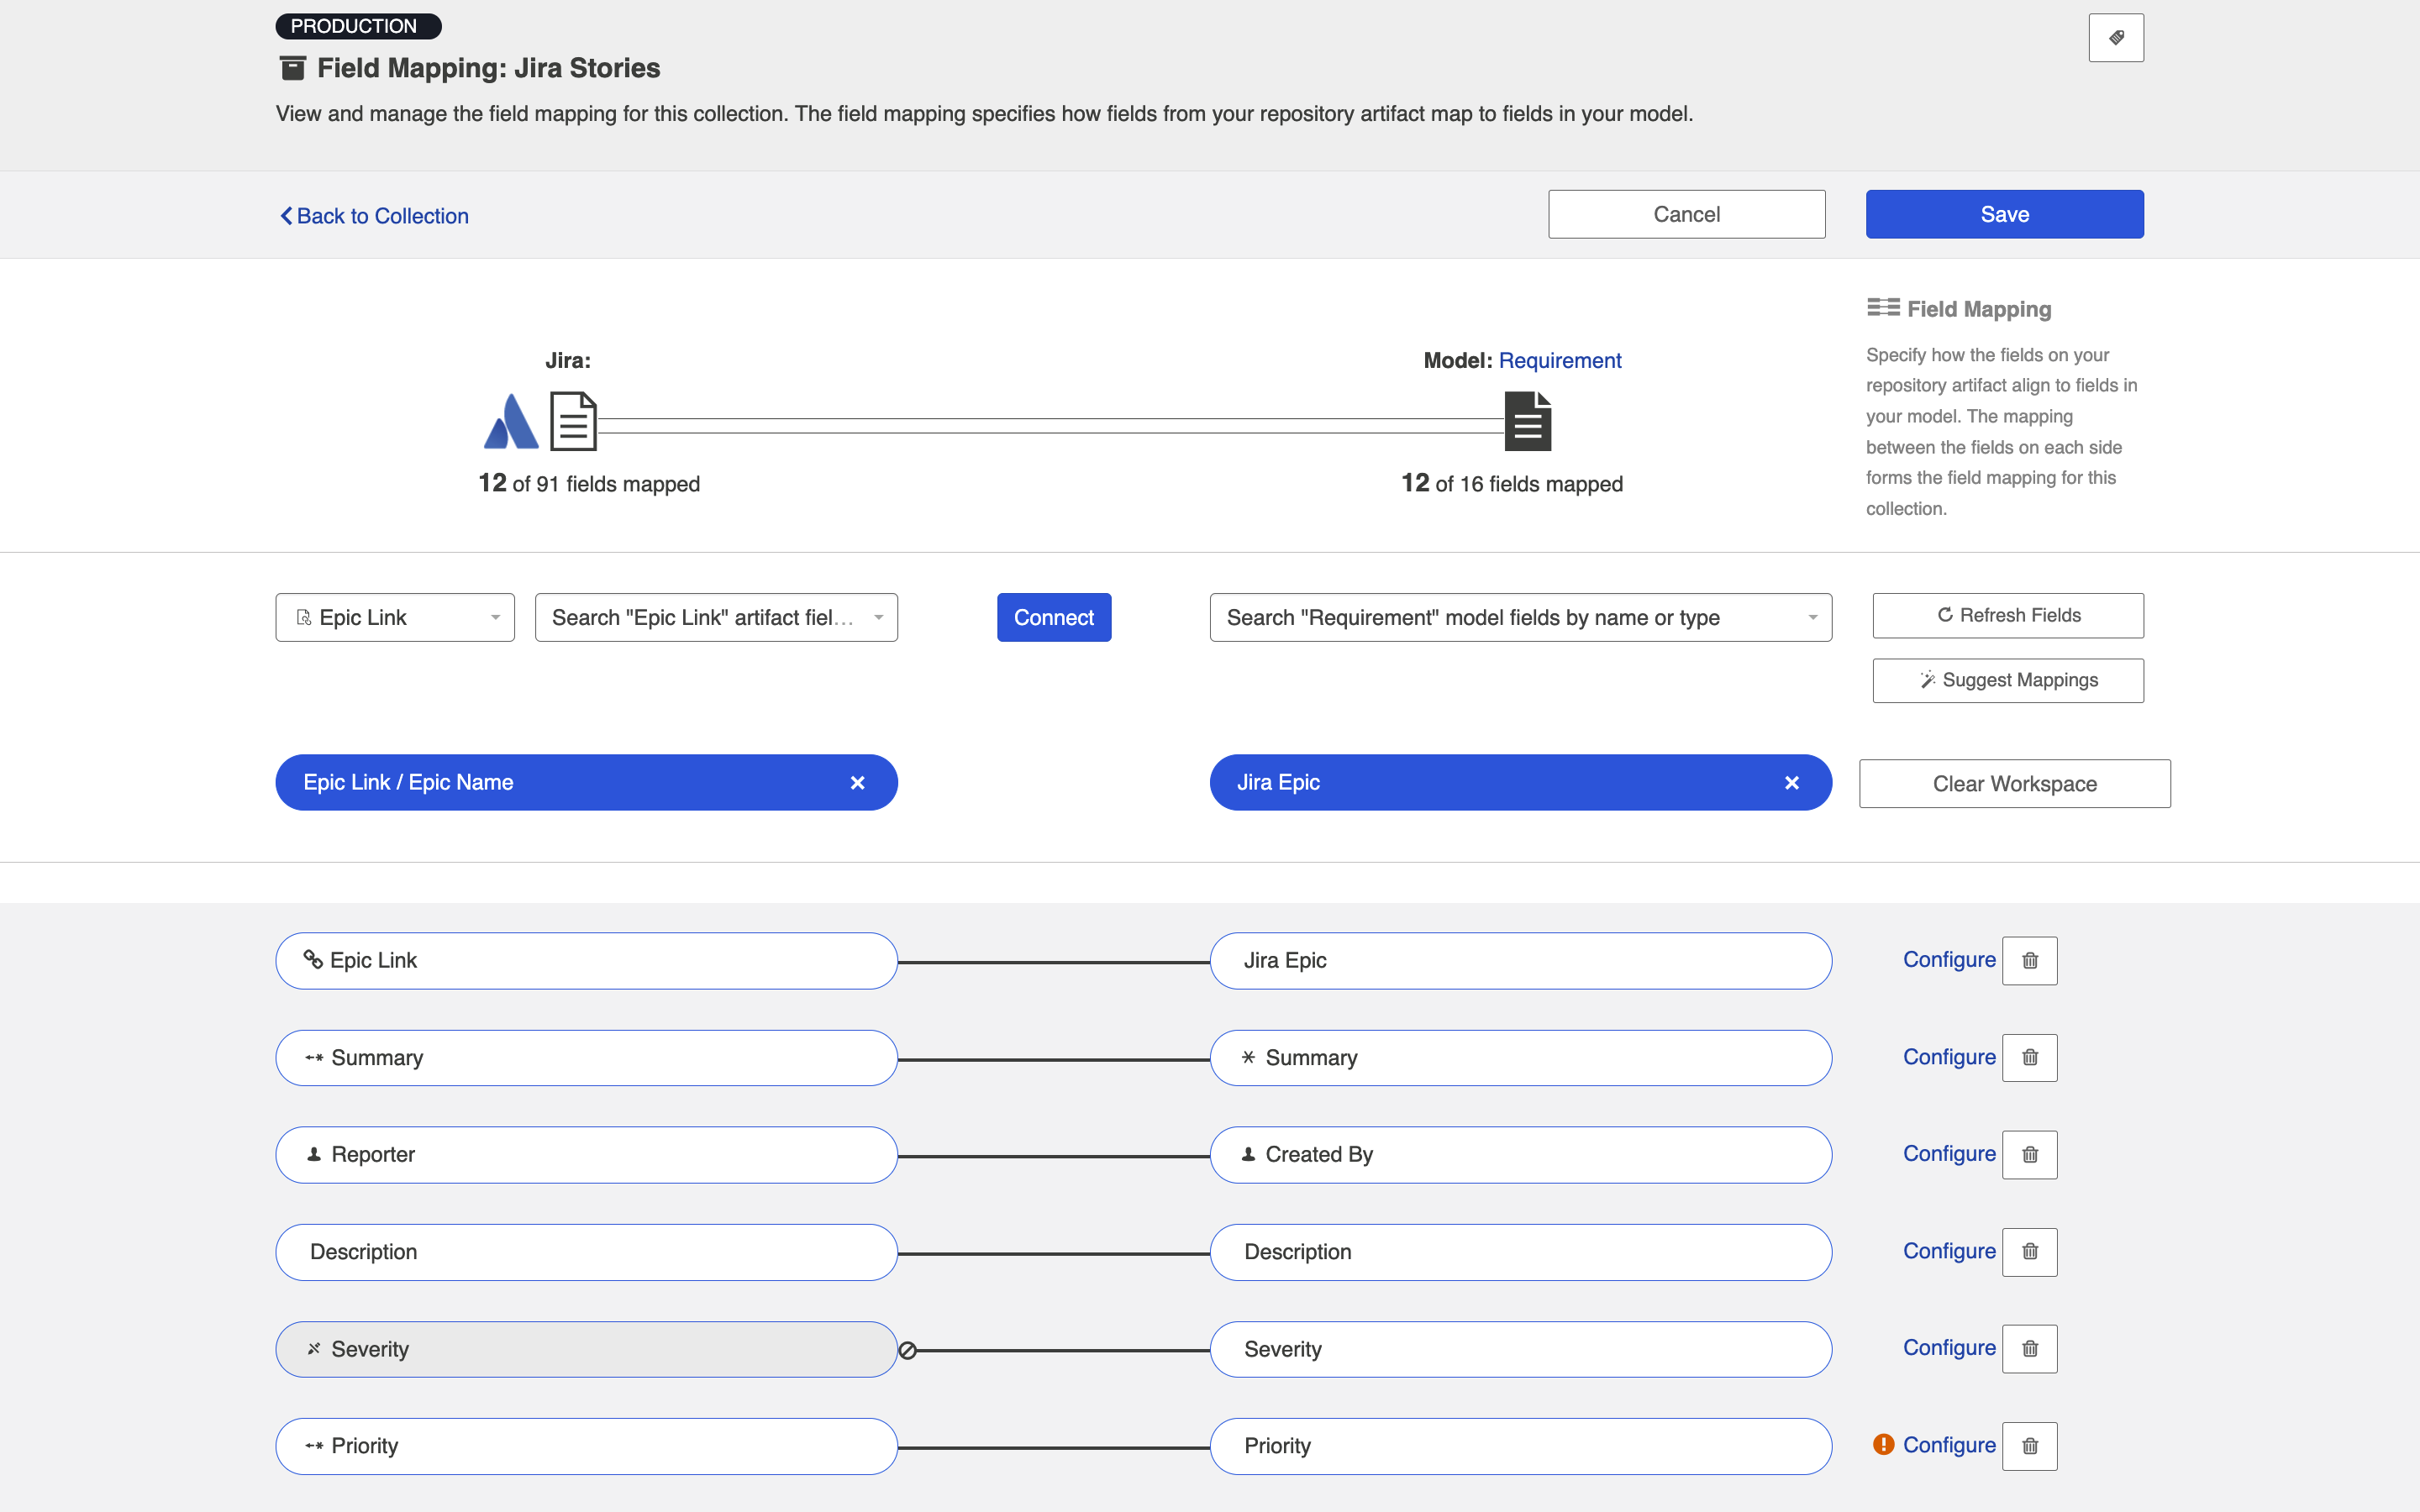
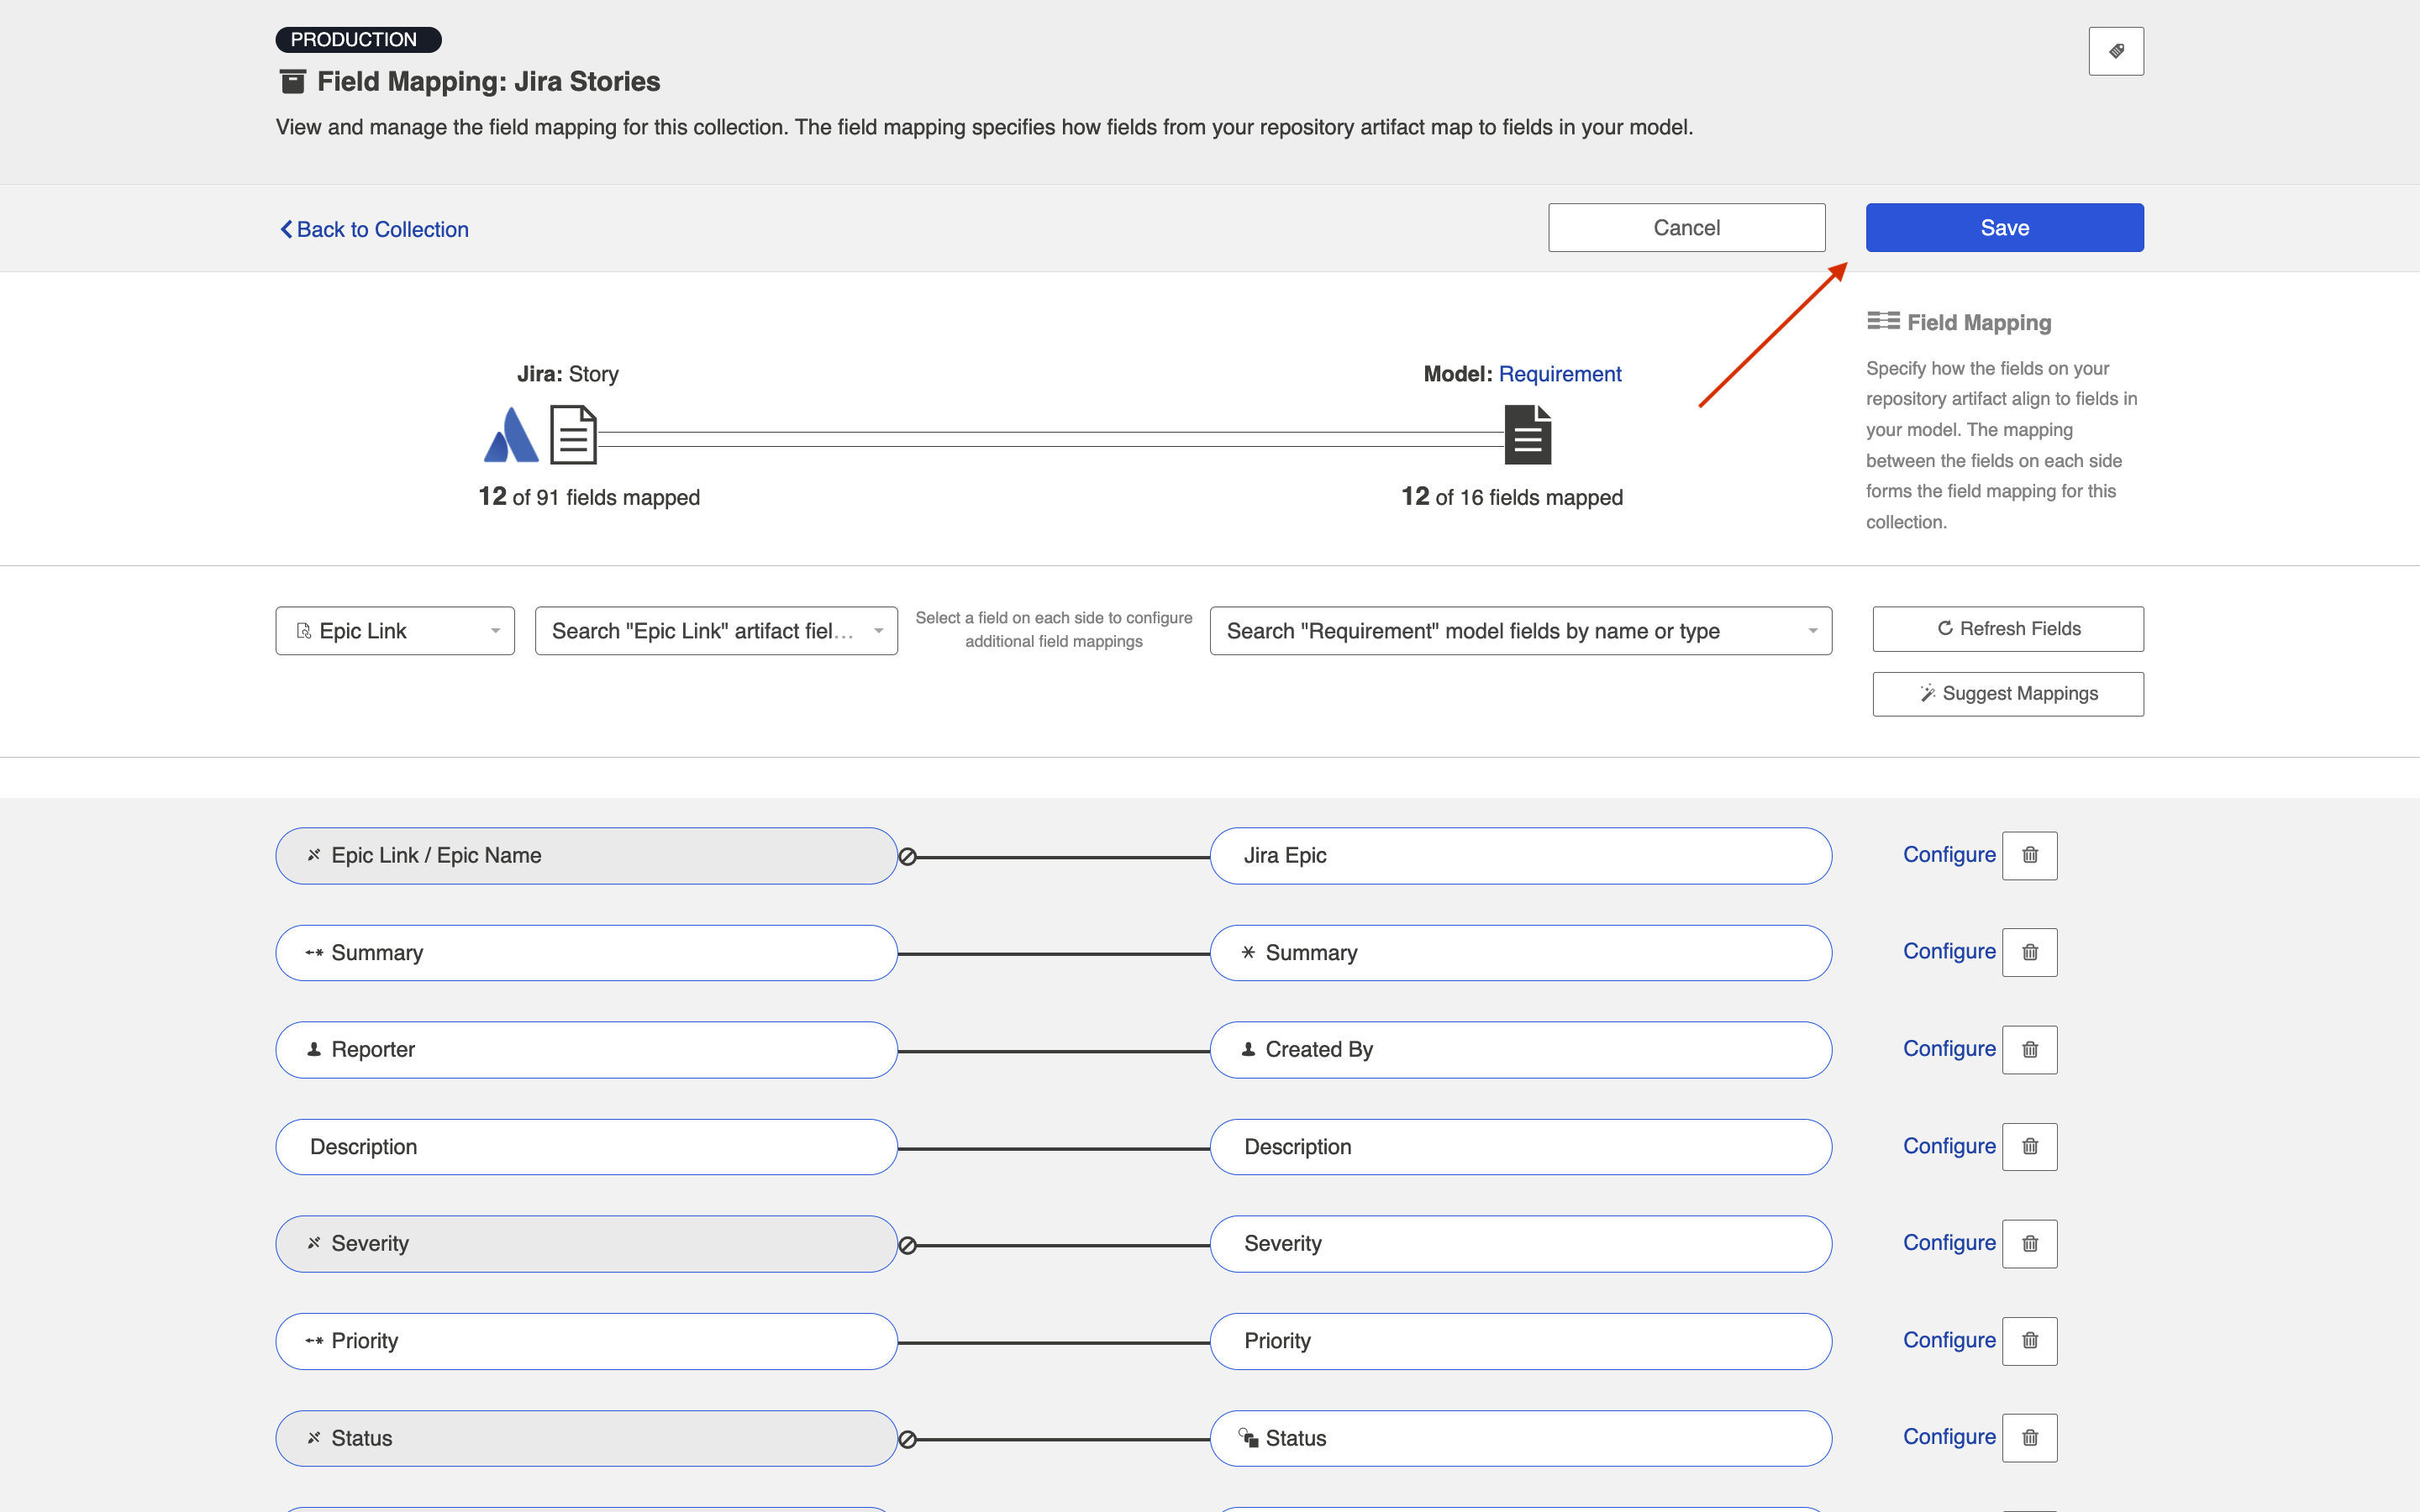
In the scenario shown below, the user has a 'Jira Stories to Jama Stories' integration and they'd like the Jira field 'Epic Name' to flow along with the artifacts in their 'Jira Stories' collection, however, the Jira field 'Epic Name' only exists on the 'Epic' artifact.
By creating an artifact union, they are able to extract this field from the 'Epic' artifact so that it will flow alongside their Jira Stories collection. After they create the artifact union, it can be mapped to the model where it will flow into their Jama stories collection.
Learn more on how to create and use artifact unions in the sections below.
Creating Artifact Unions
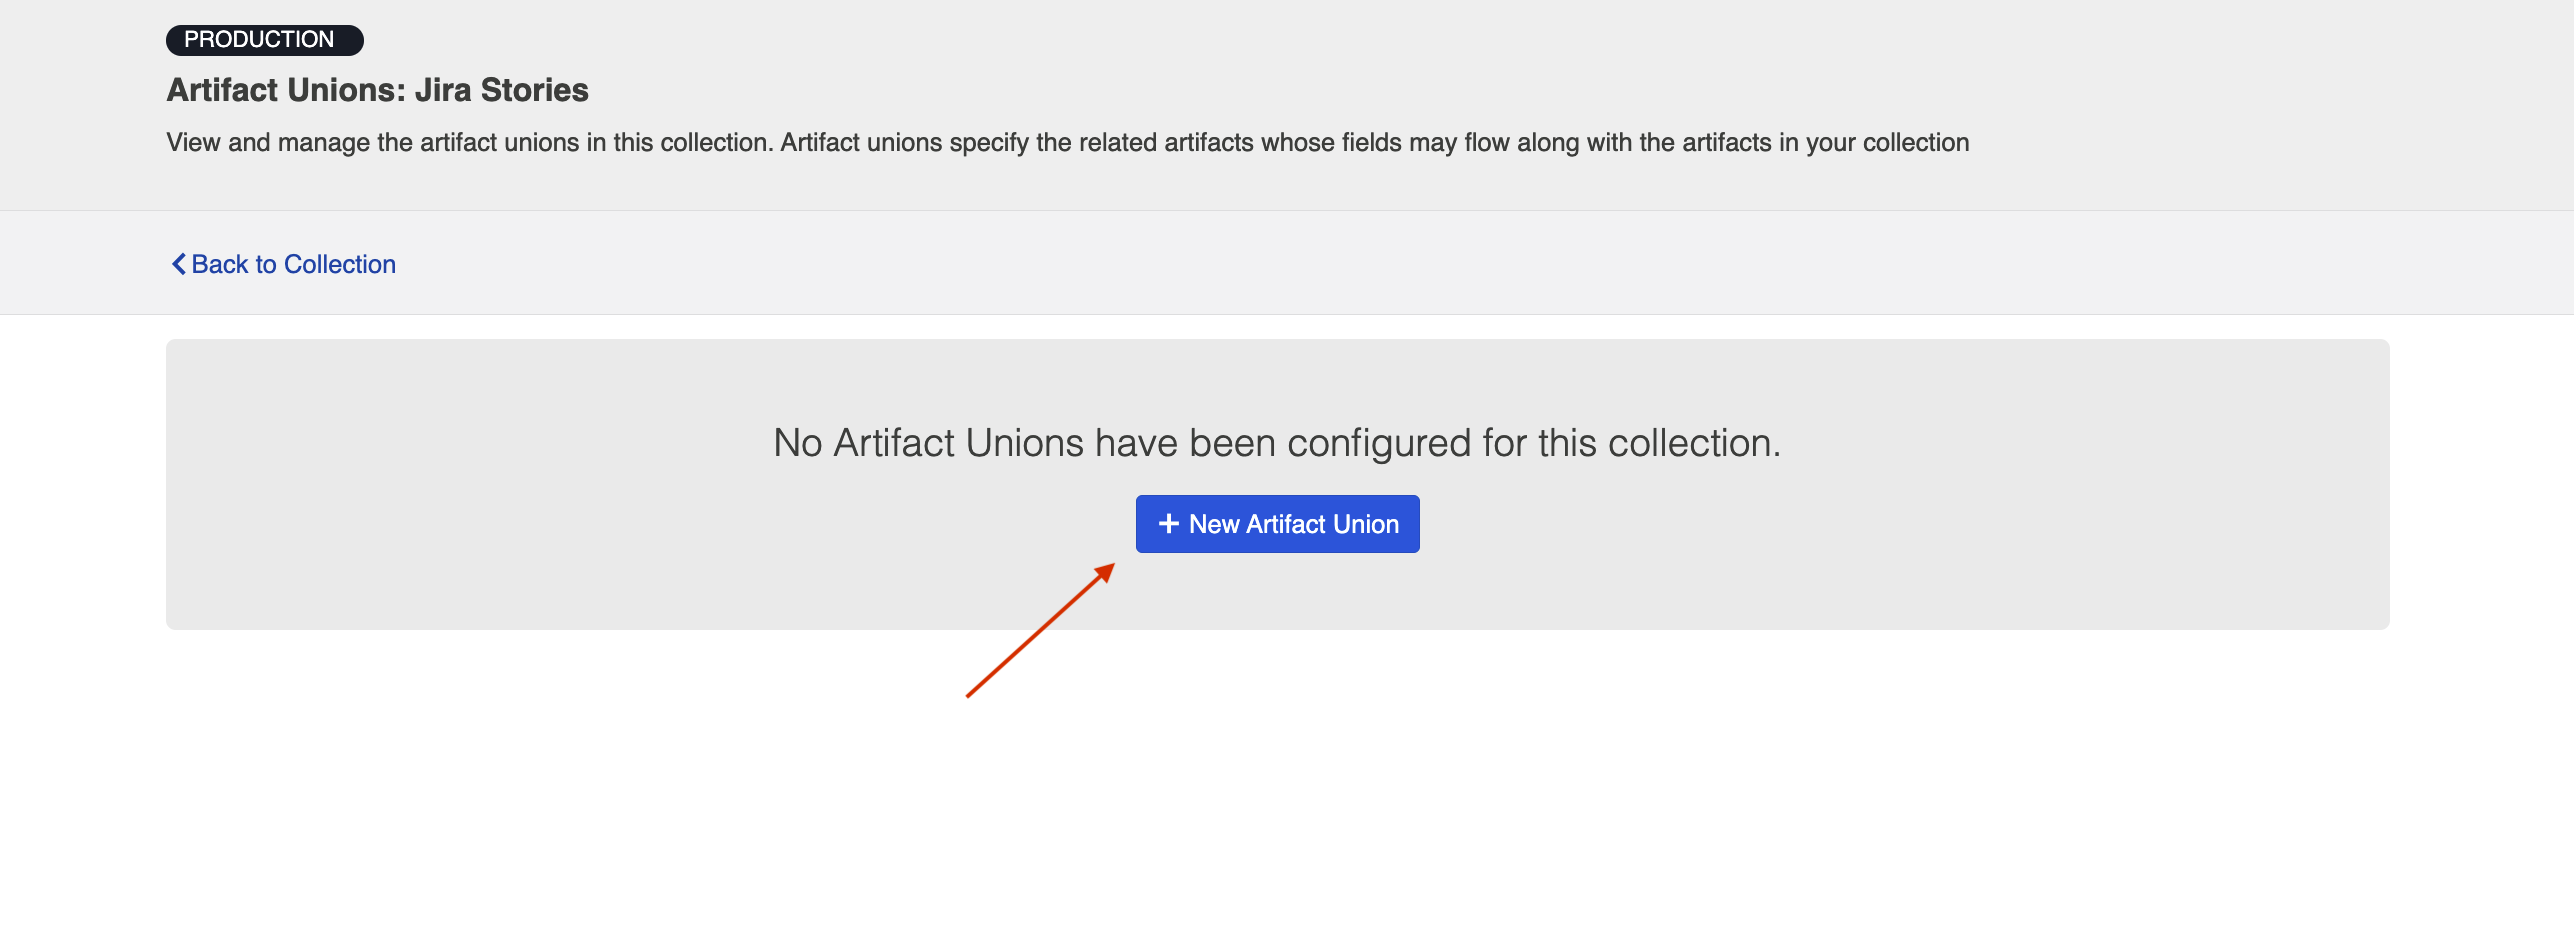
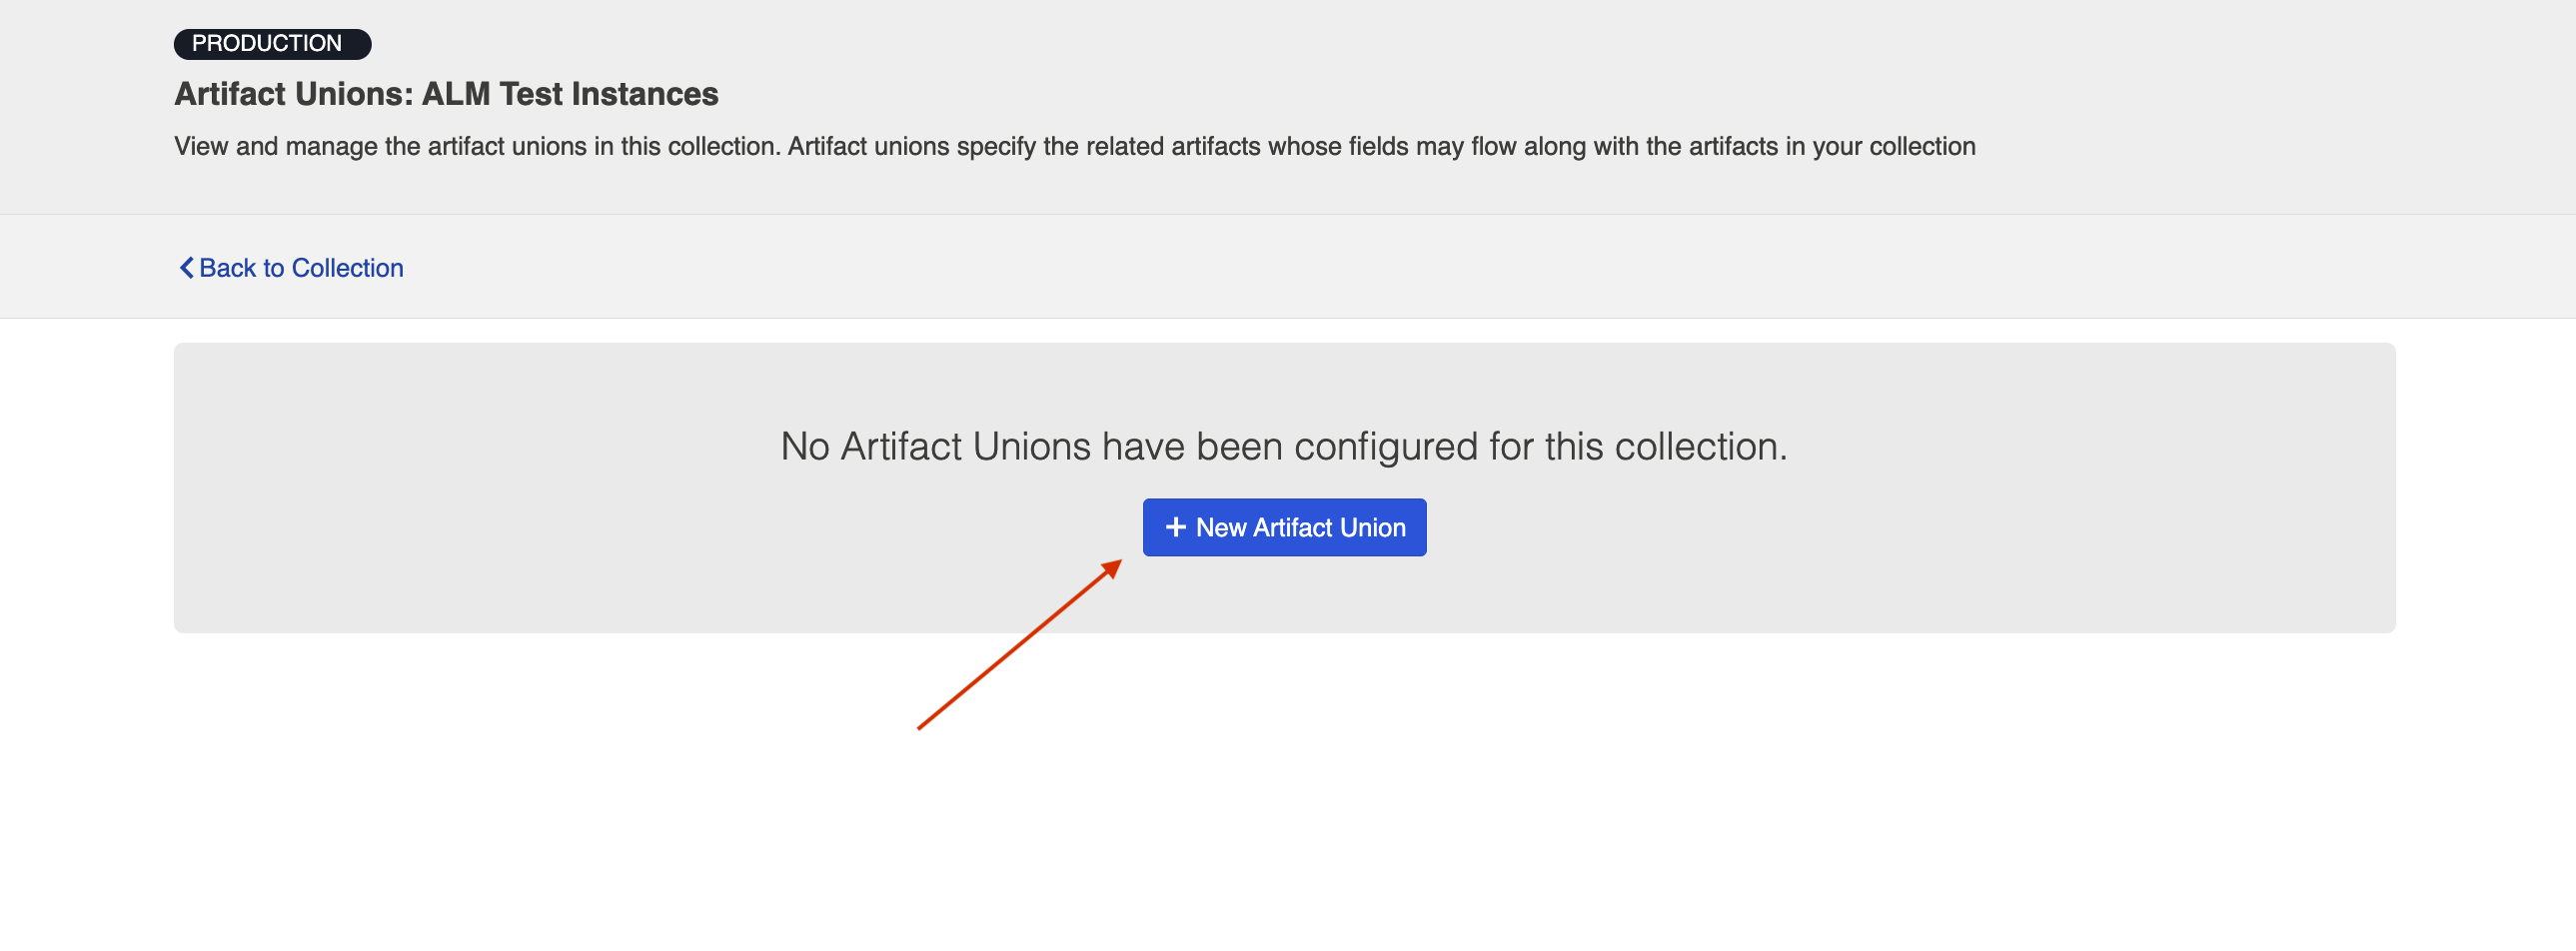
To access your artifact unions, navigate to the Collection Configuration screen and click Configure Artifact Unions.
Note: The Artifact Unions sash will only be visible when there is a single relationship/container field available for the collection.
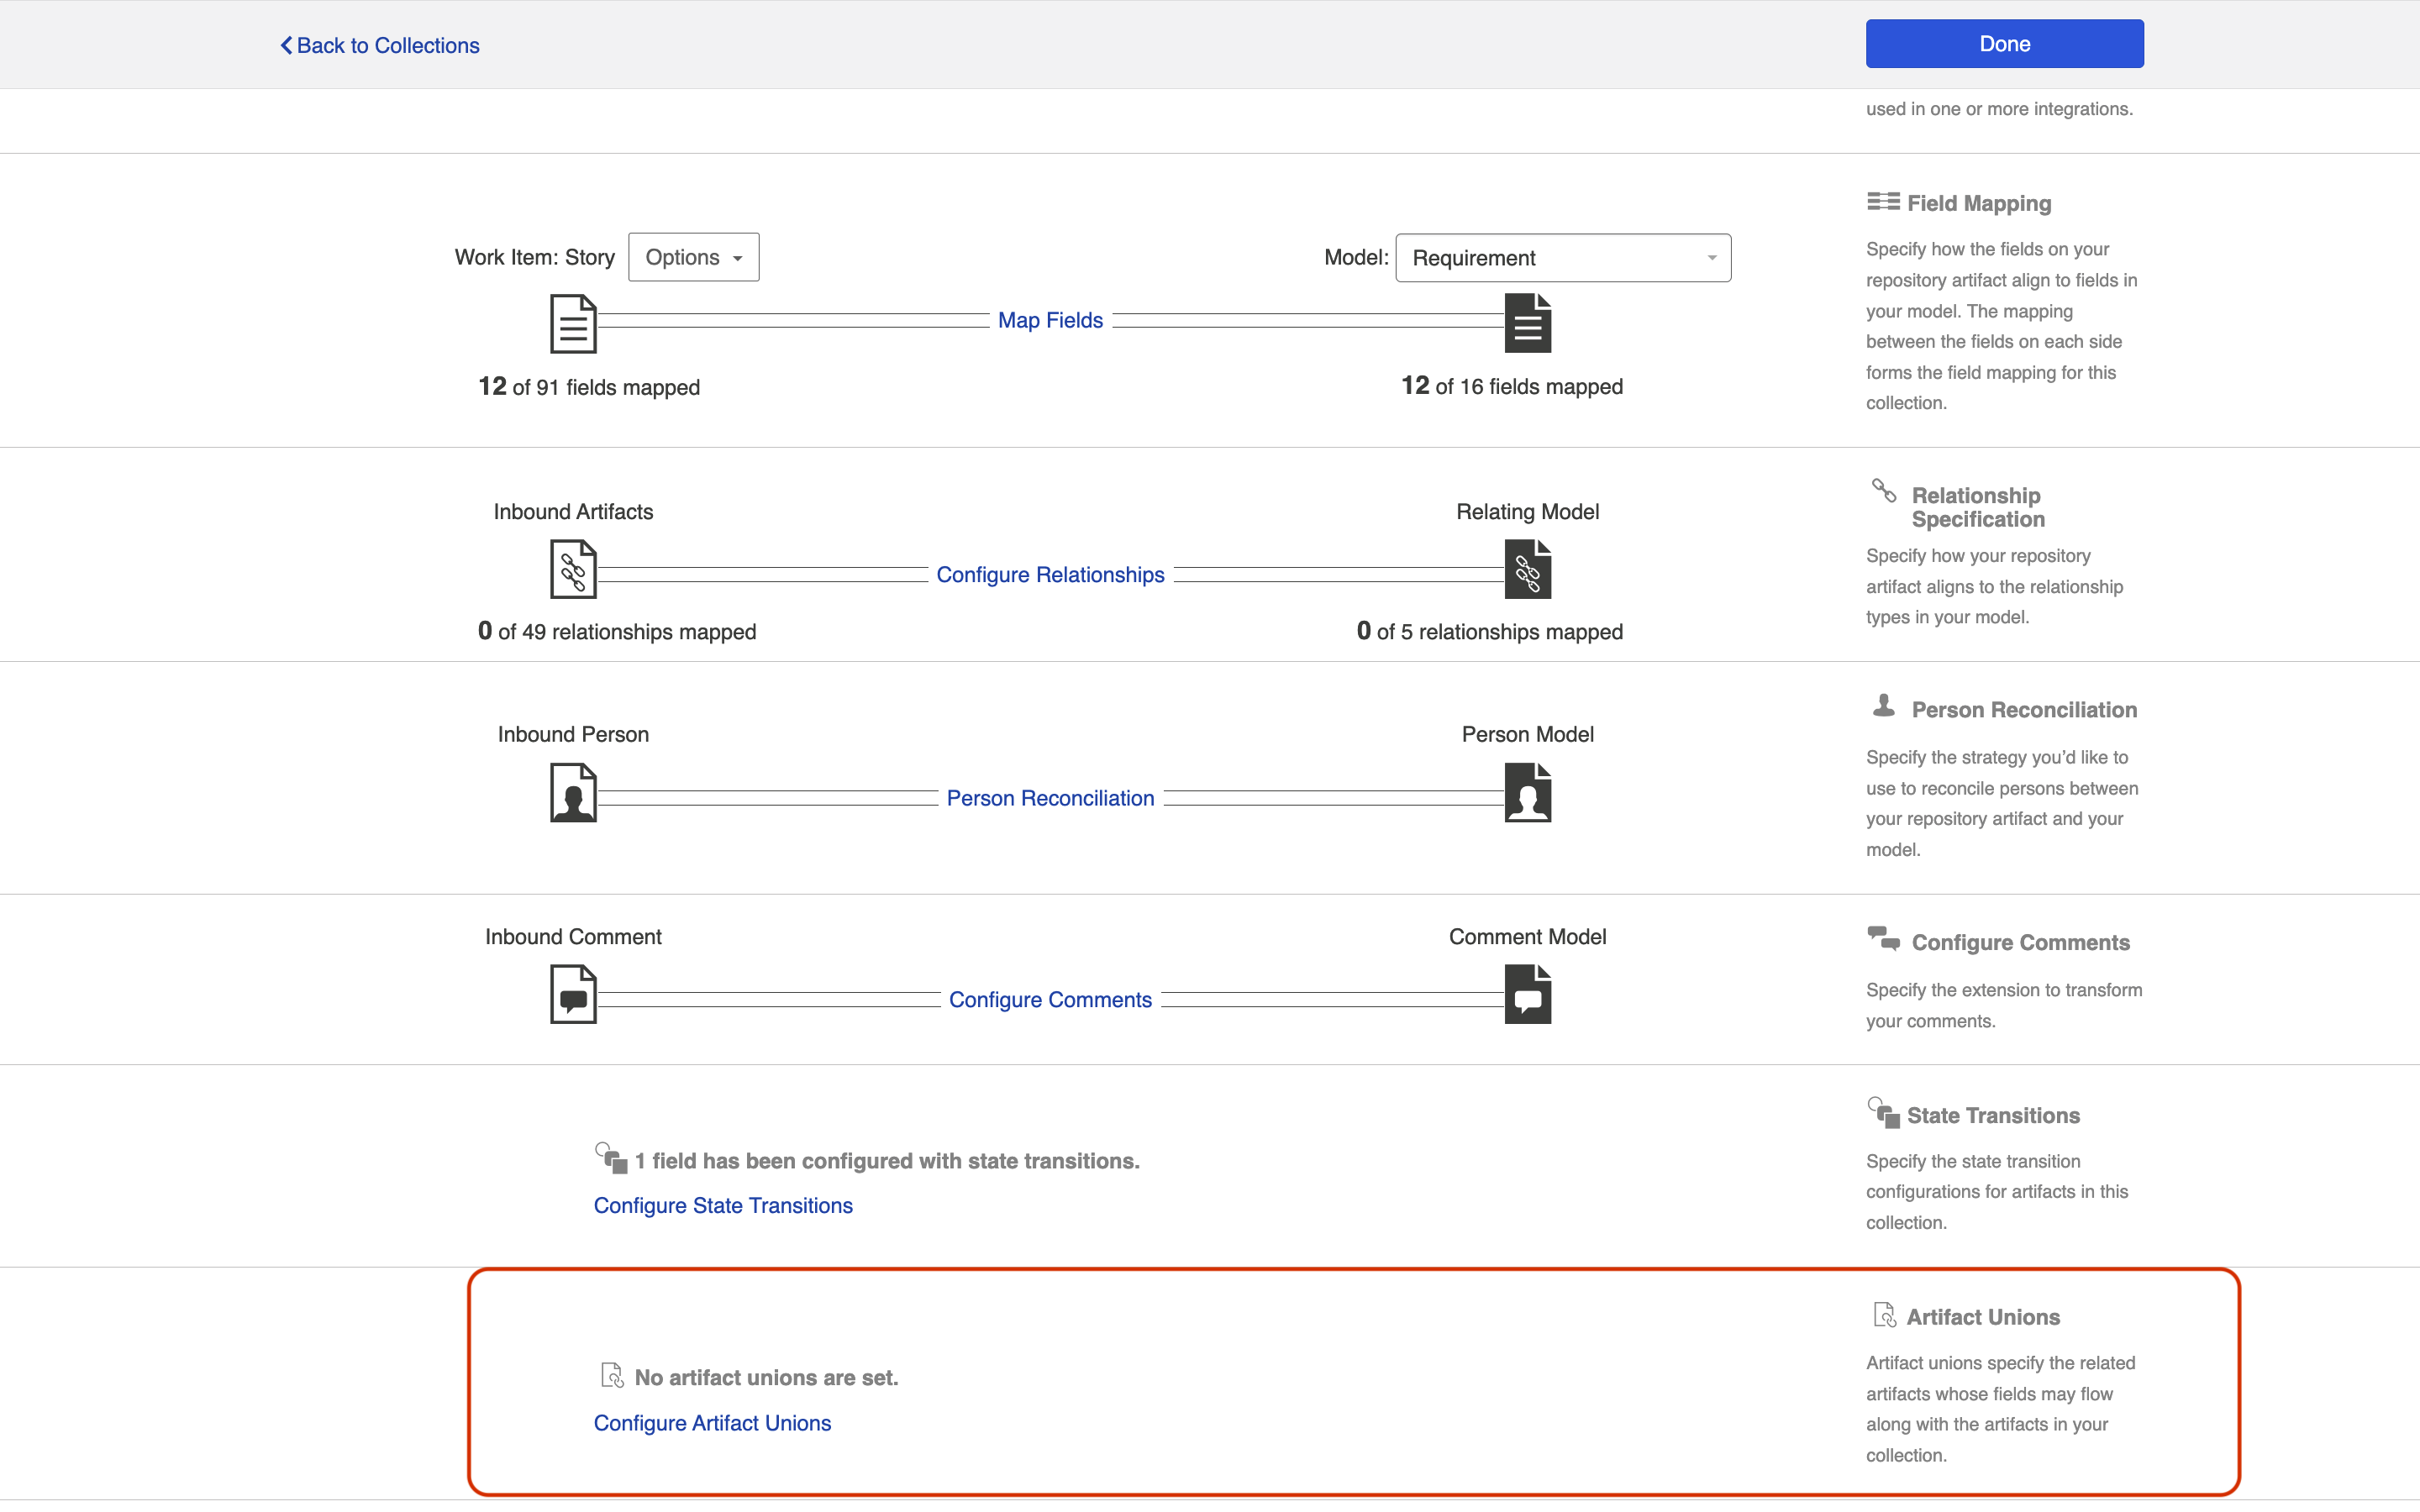
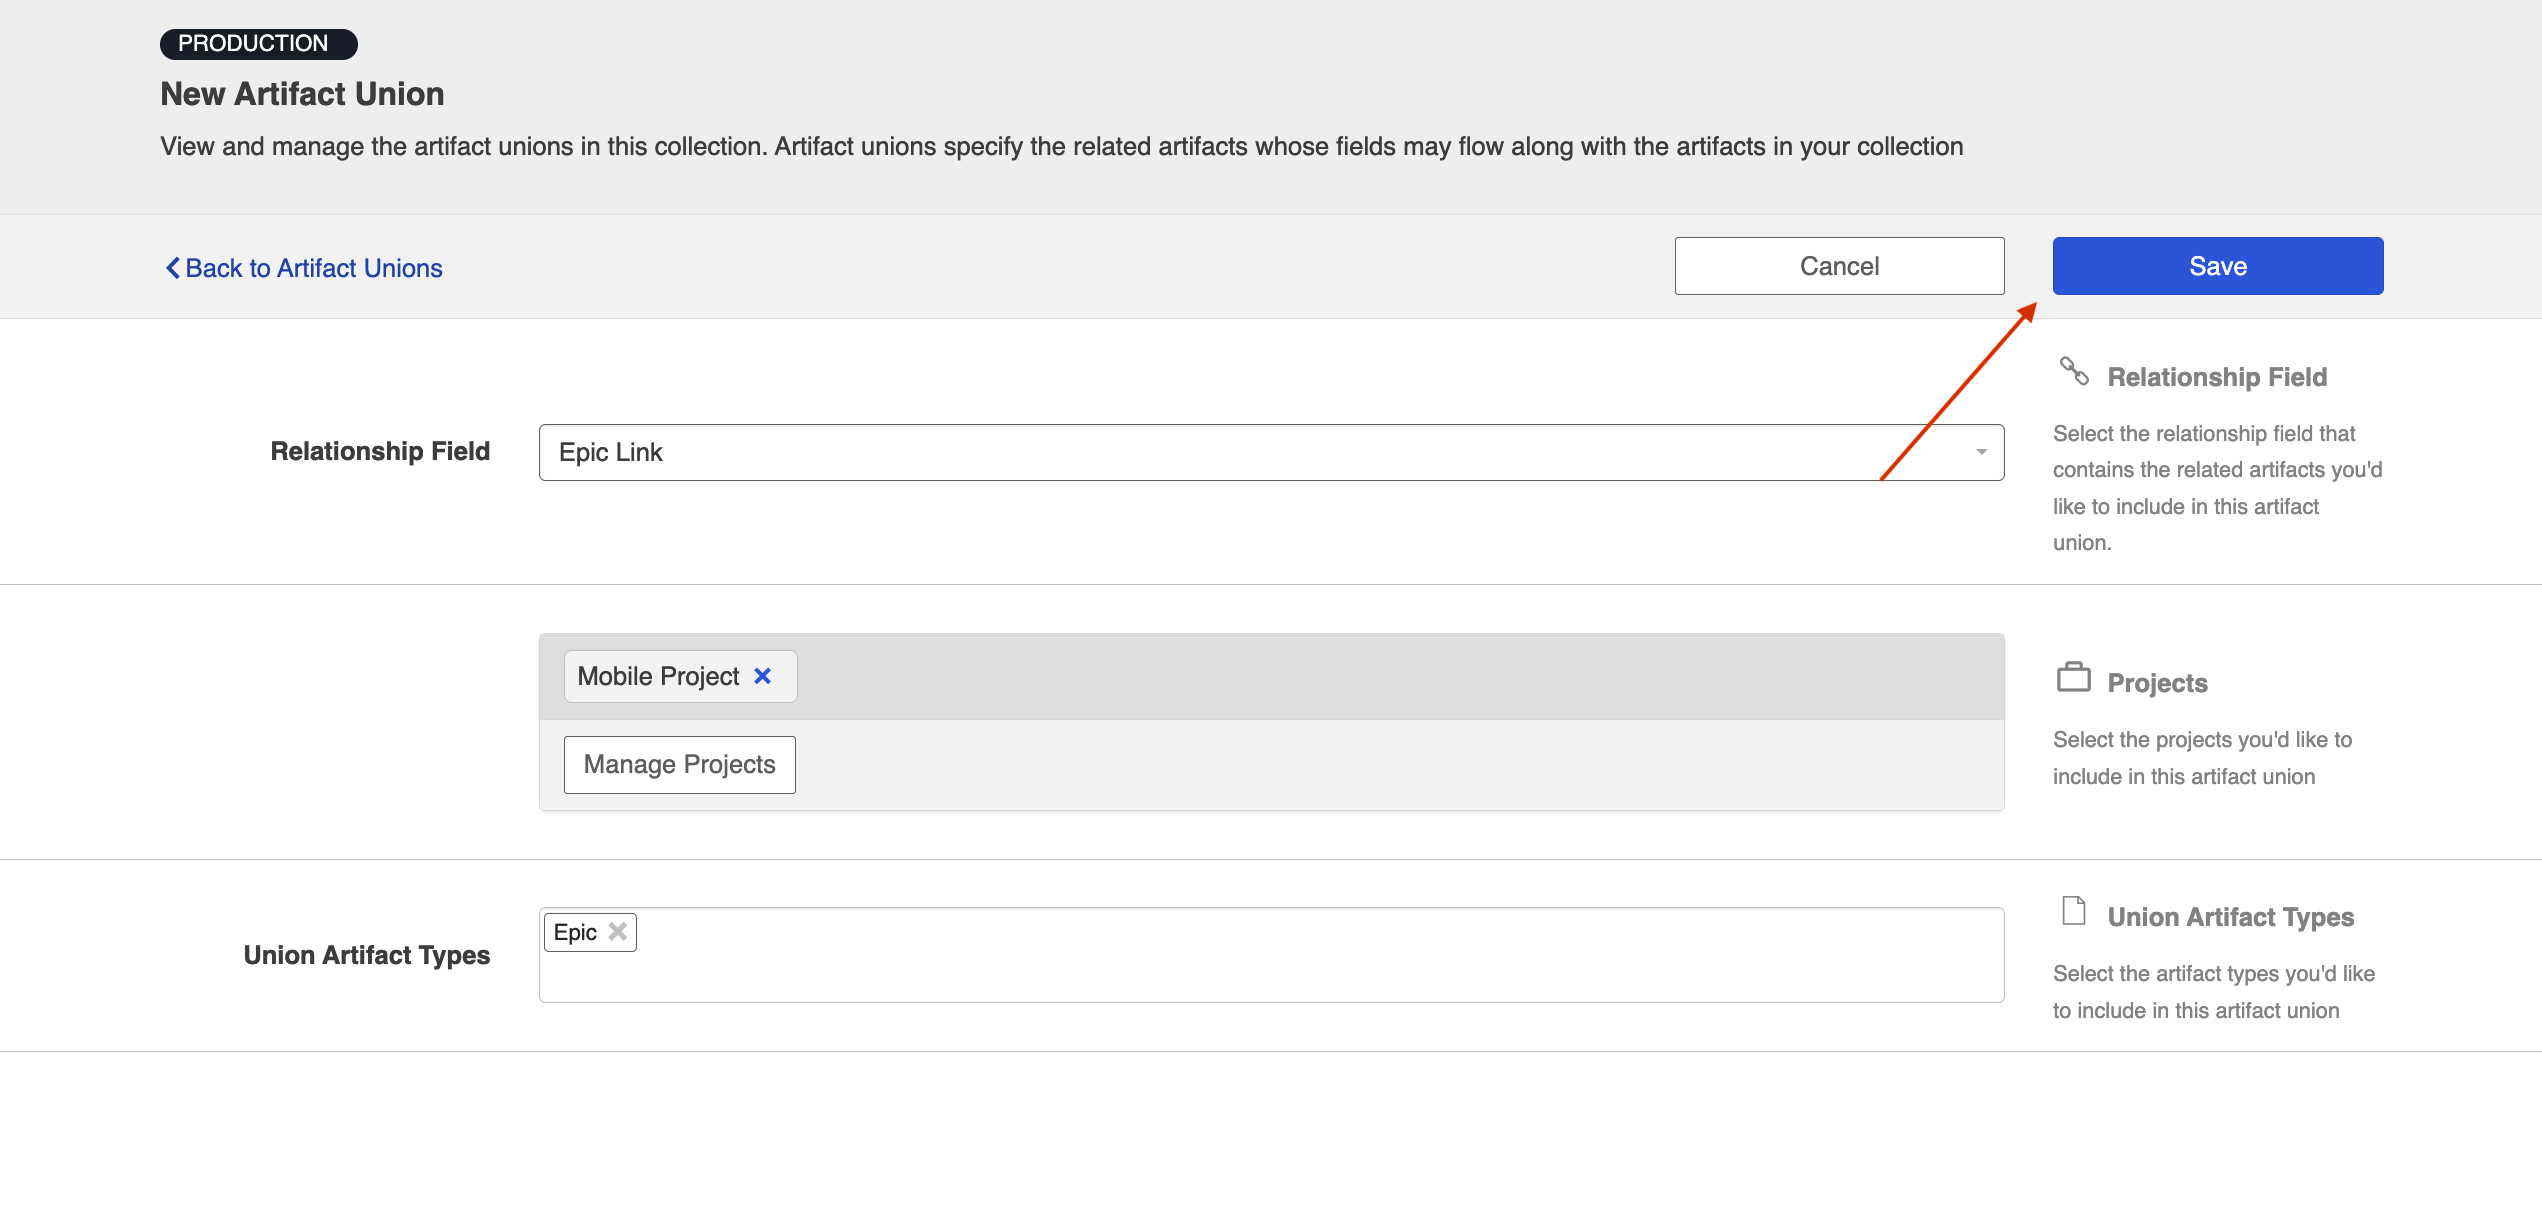
To add a new artifact union, click + New Artifact Union
Note: While there are no limits on artifact union configurations in a repository collection, please be aware that performance may be impacted if many configurations exist.
Select the relationship field that links the collection to the target artifact type you'd like to include in your artifact union.
Note: This dropdown will only contain relationship fields associated with the configured artifact.
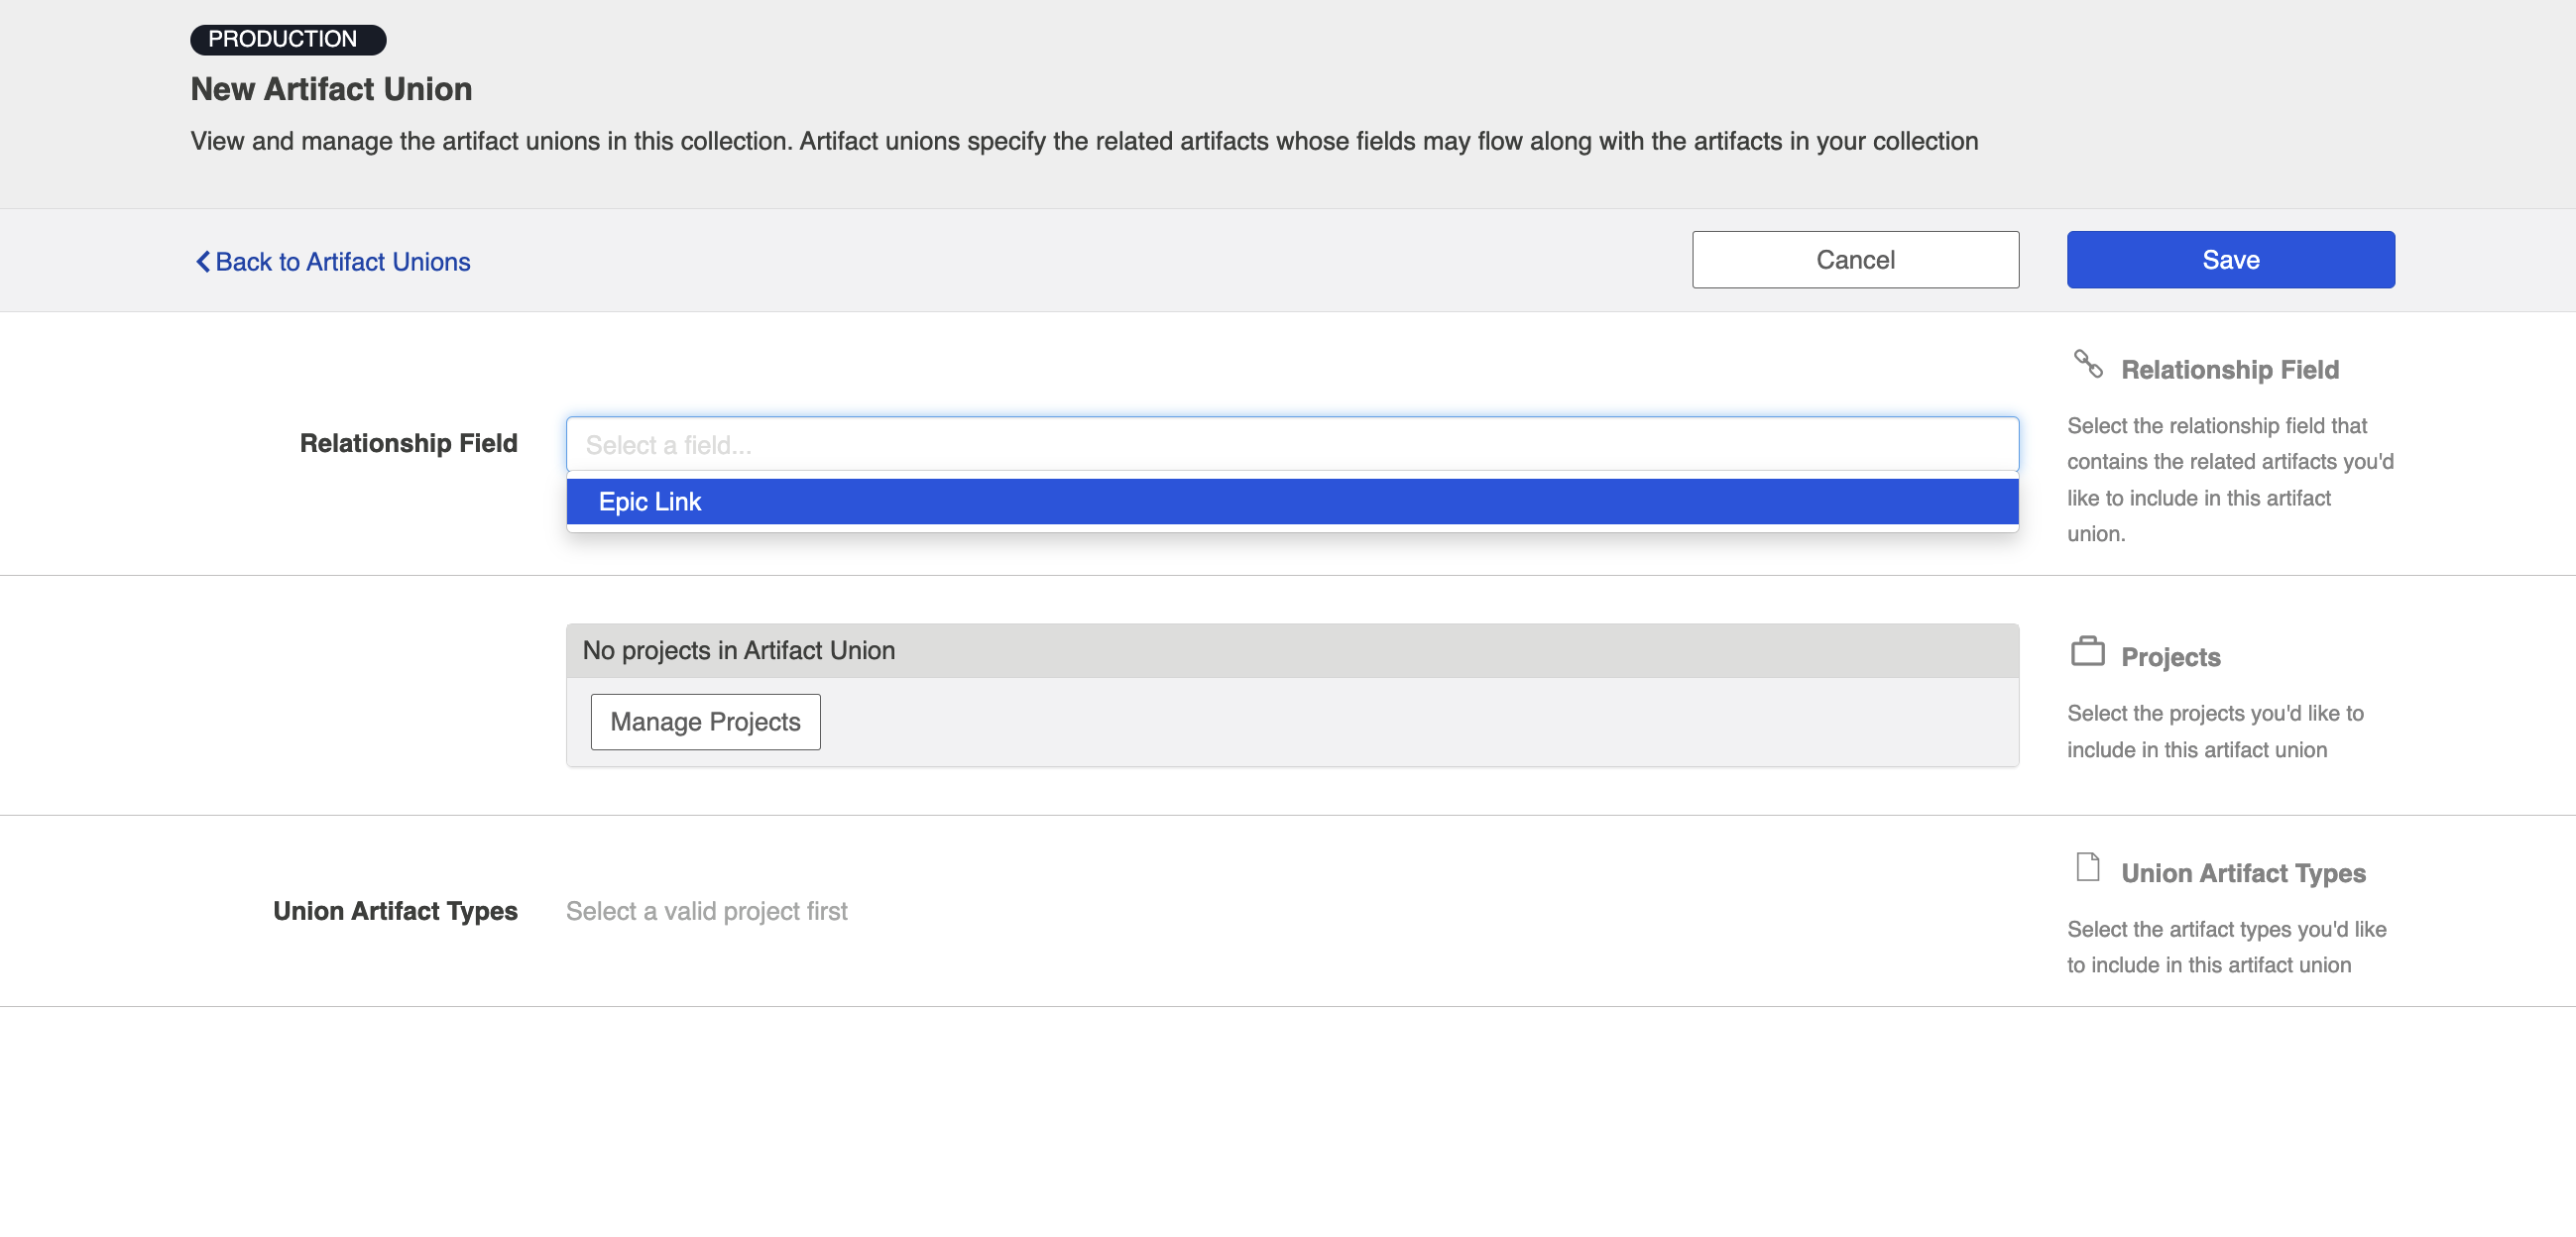
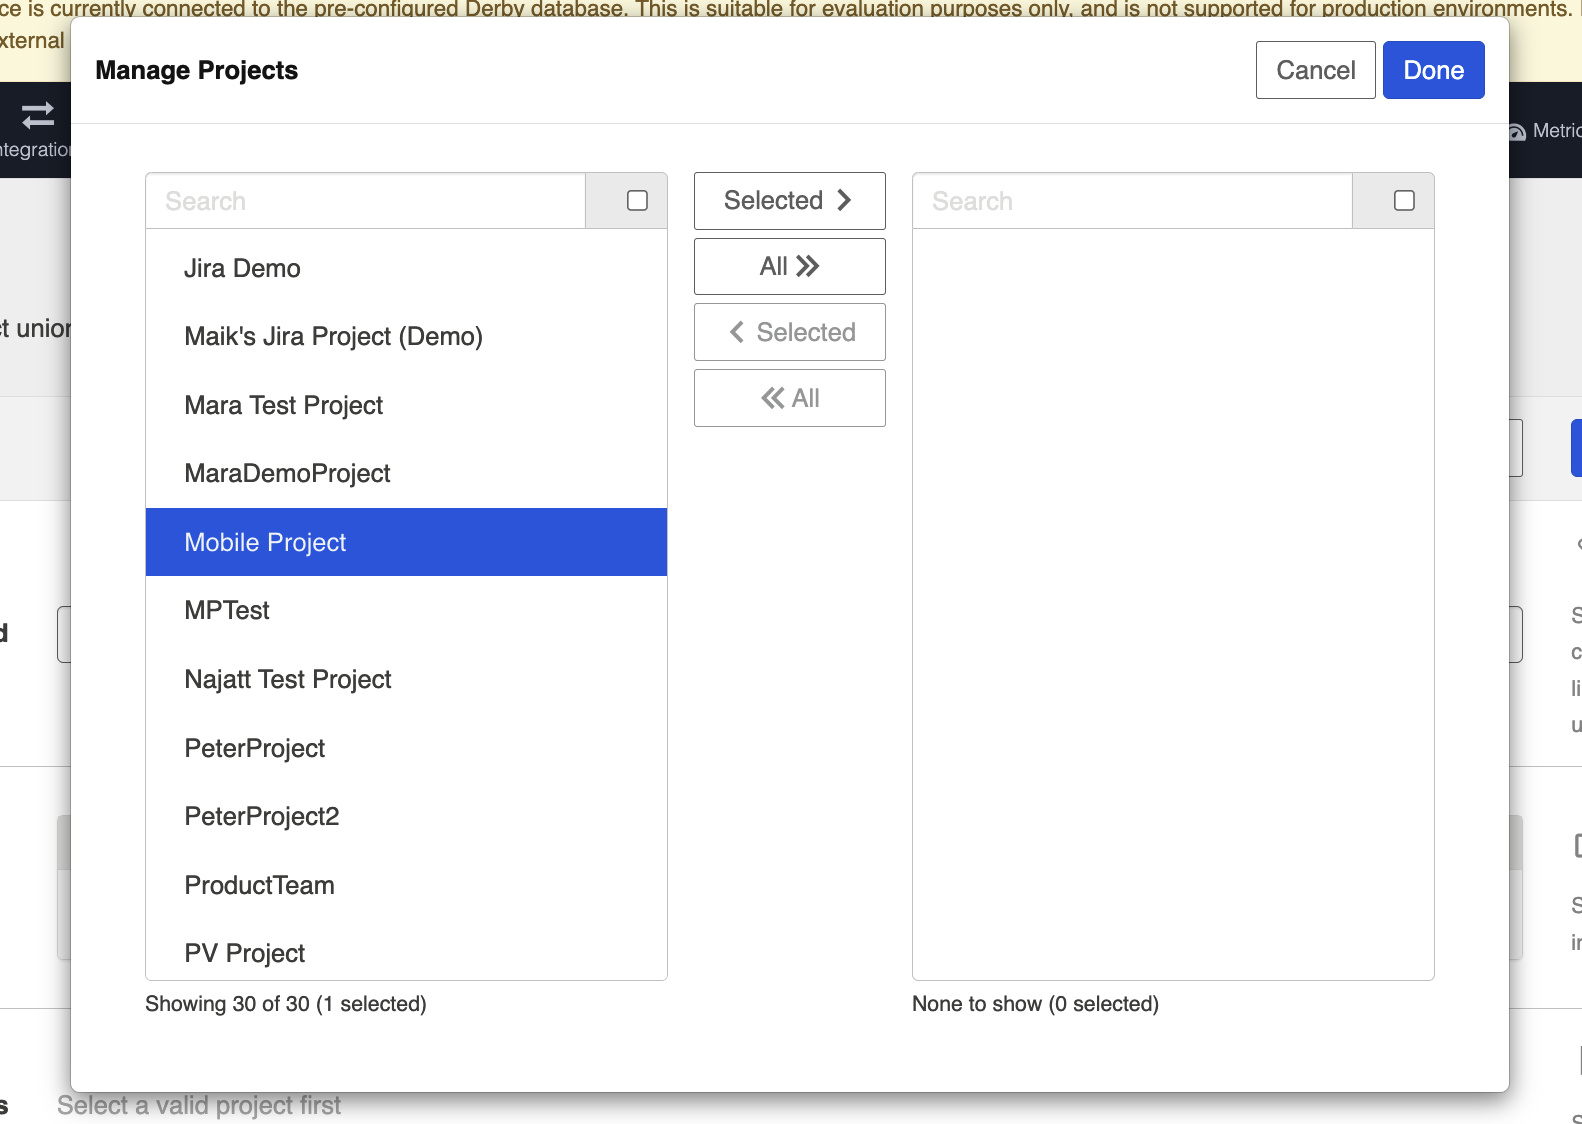
Select the project(s) you'd like to include.
Once you have selected the relationship field and project(s), you can choose the artifact type(s) you’d like to include in your artifact union.
Note: Only supported artifact types will be displayed.
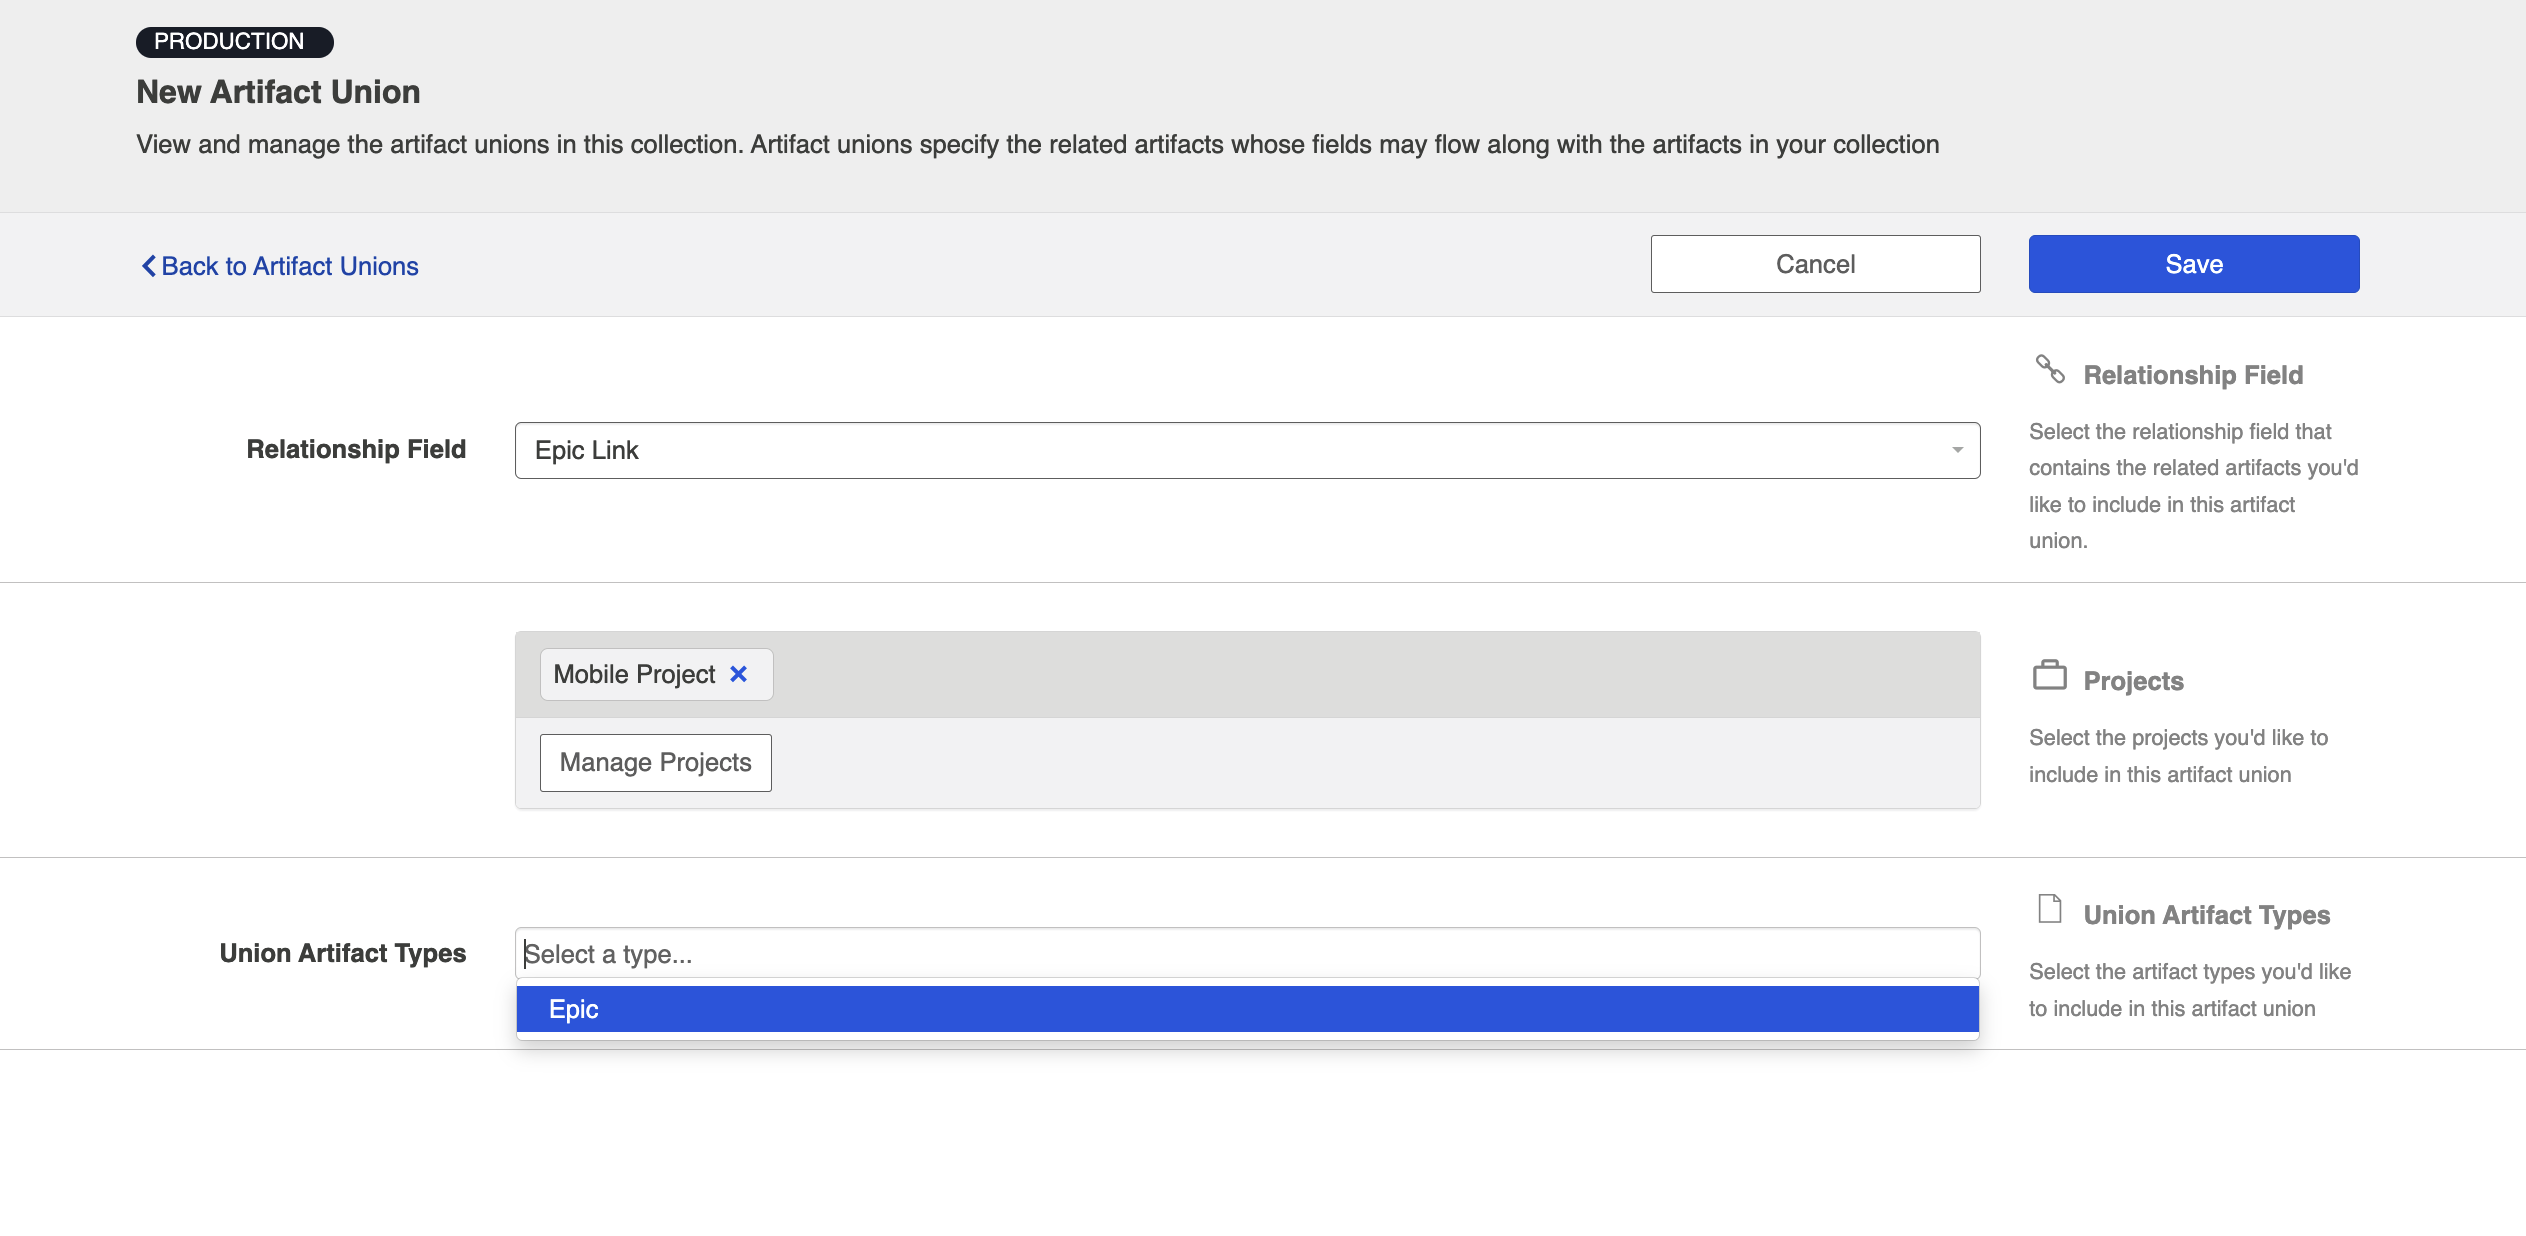
Click Save and Done to save your artifact union.
Tip: Clicking ctrl+s on Windows and cmd+s on macOS will save your artifact union.
Utilizing your Artifact Unions
Now that you've created your artifact union, you can now use your artifact union to flow the desired field to the other side of the integration.
Note: Fields flowing from artifact unions are read-only.
To do this, navigate to the Collection Configuration screen and click Map Fields.
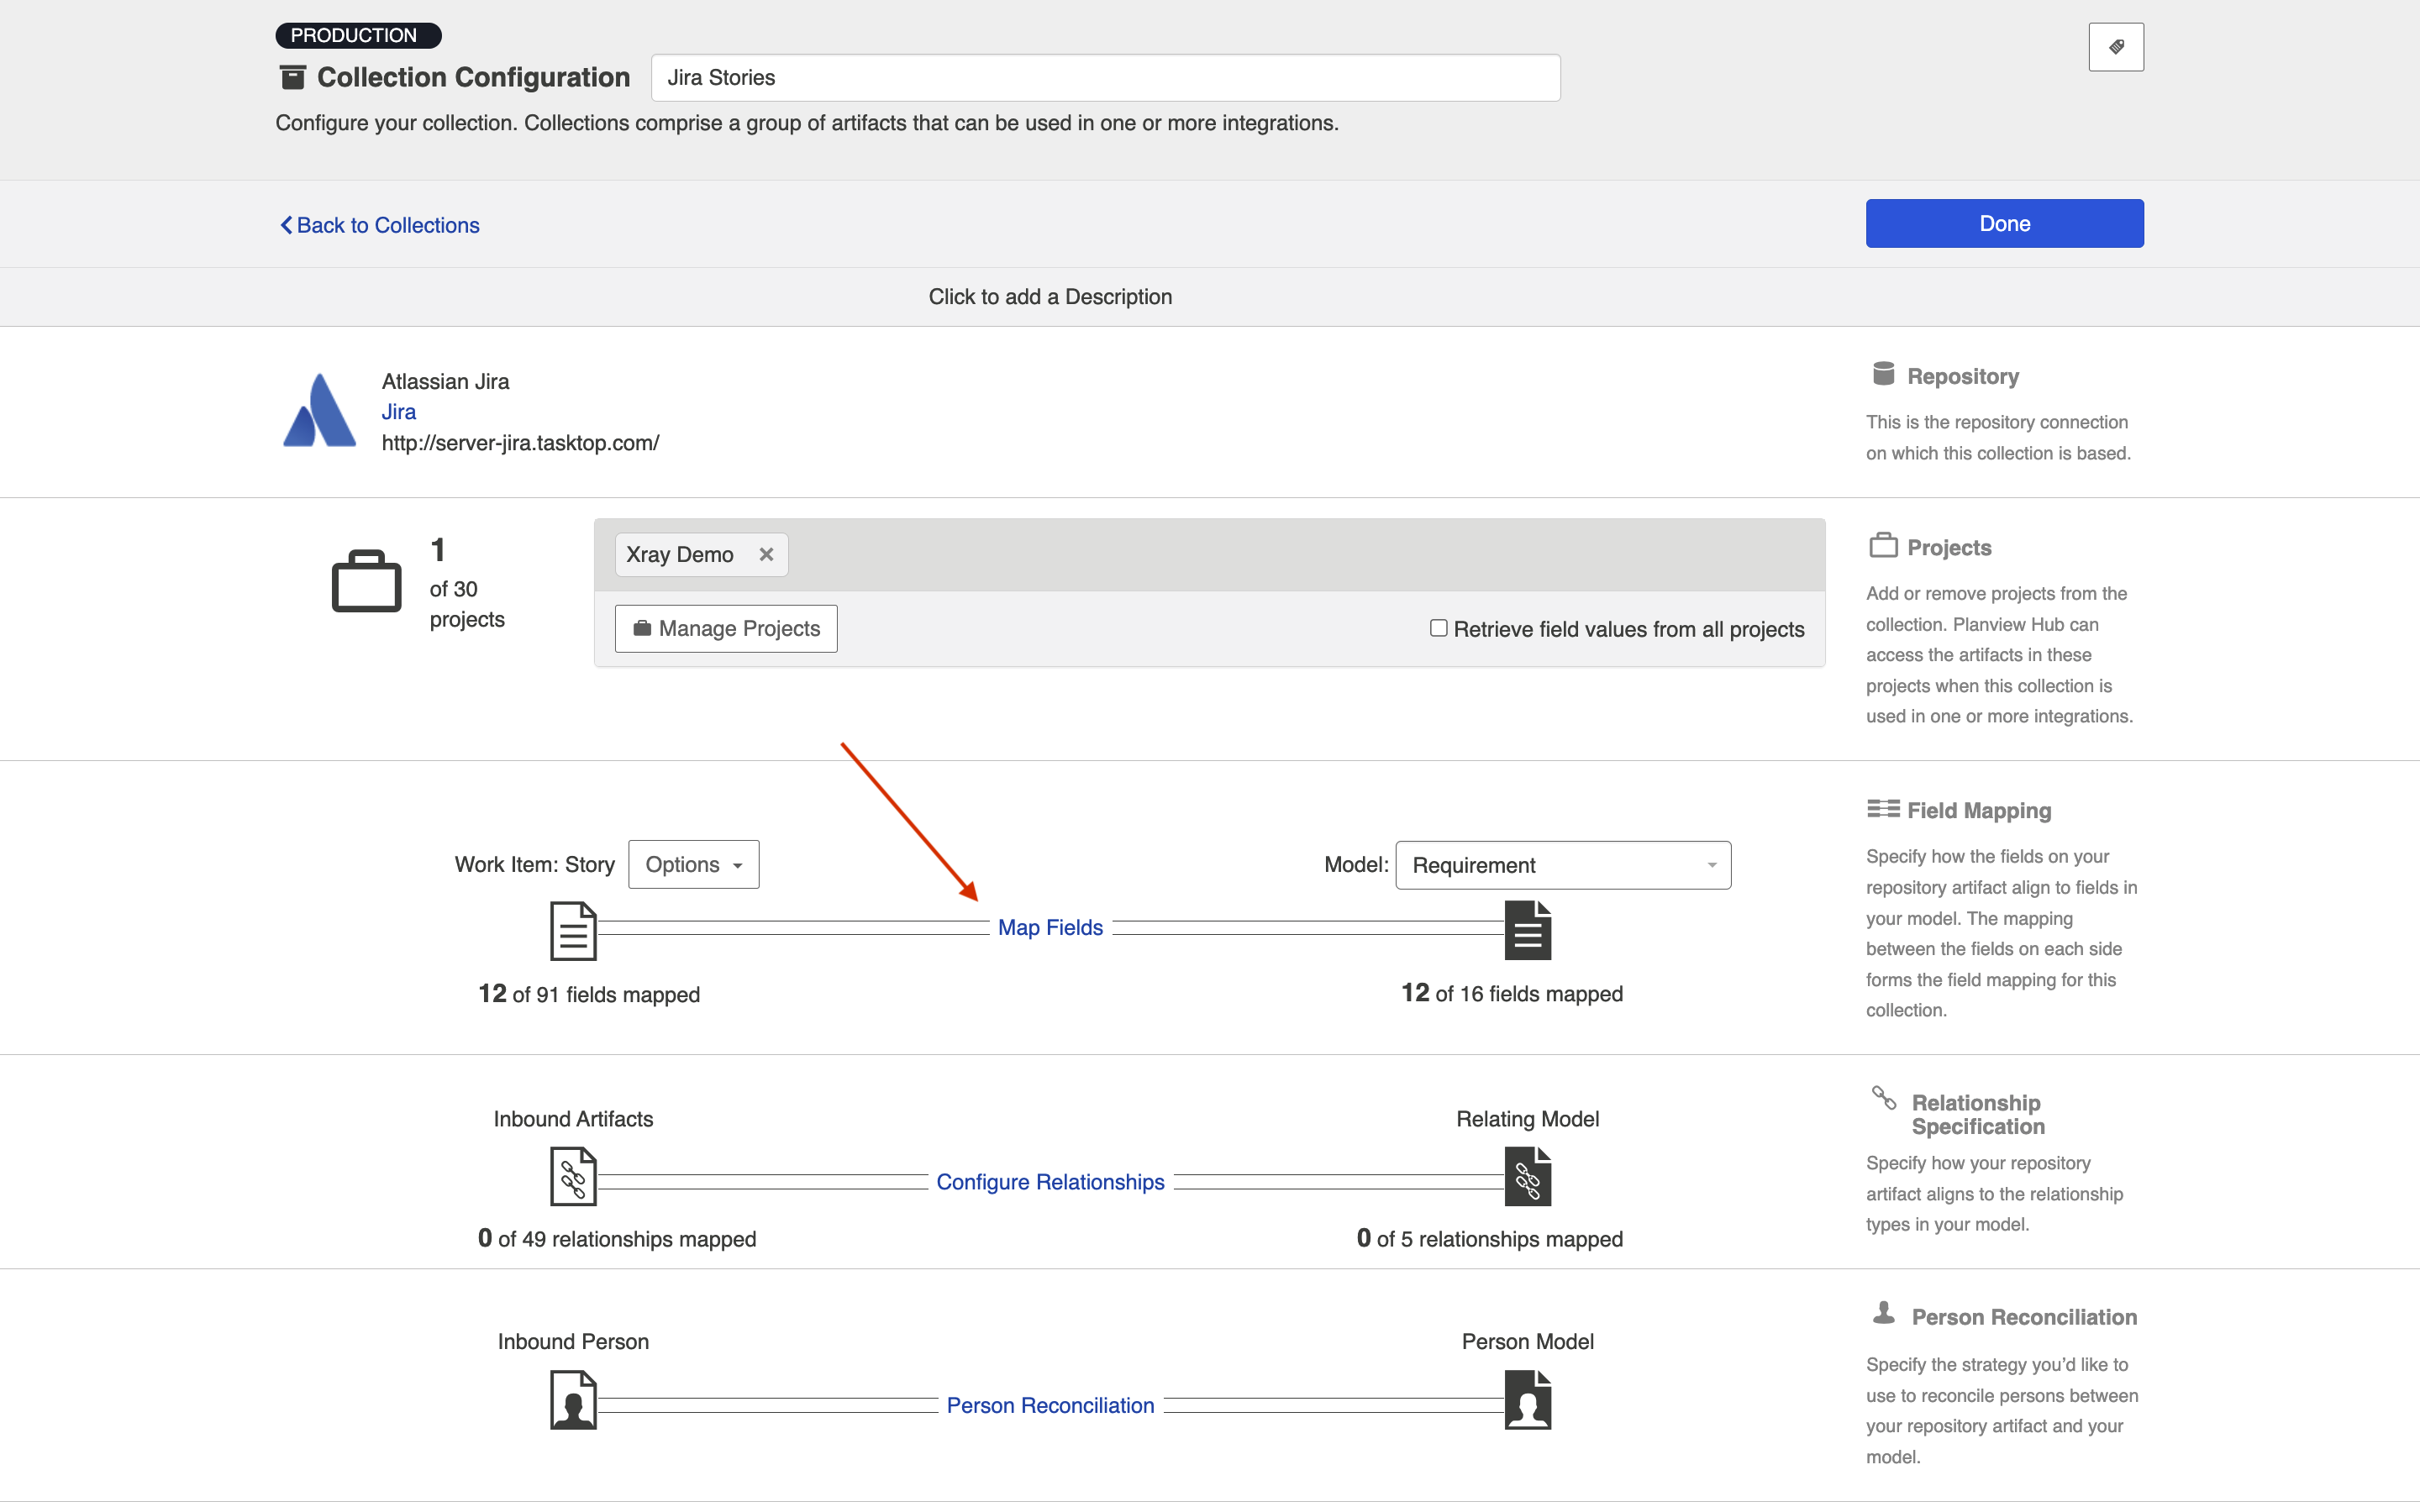
Next, select the configured artifact union from the dropdown menu.
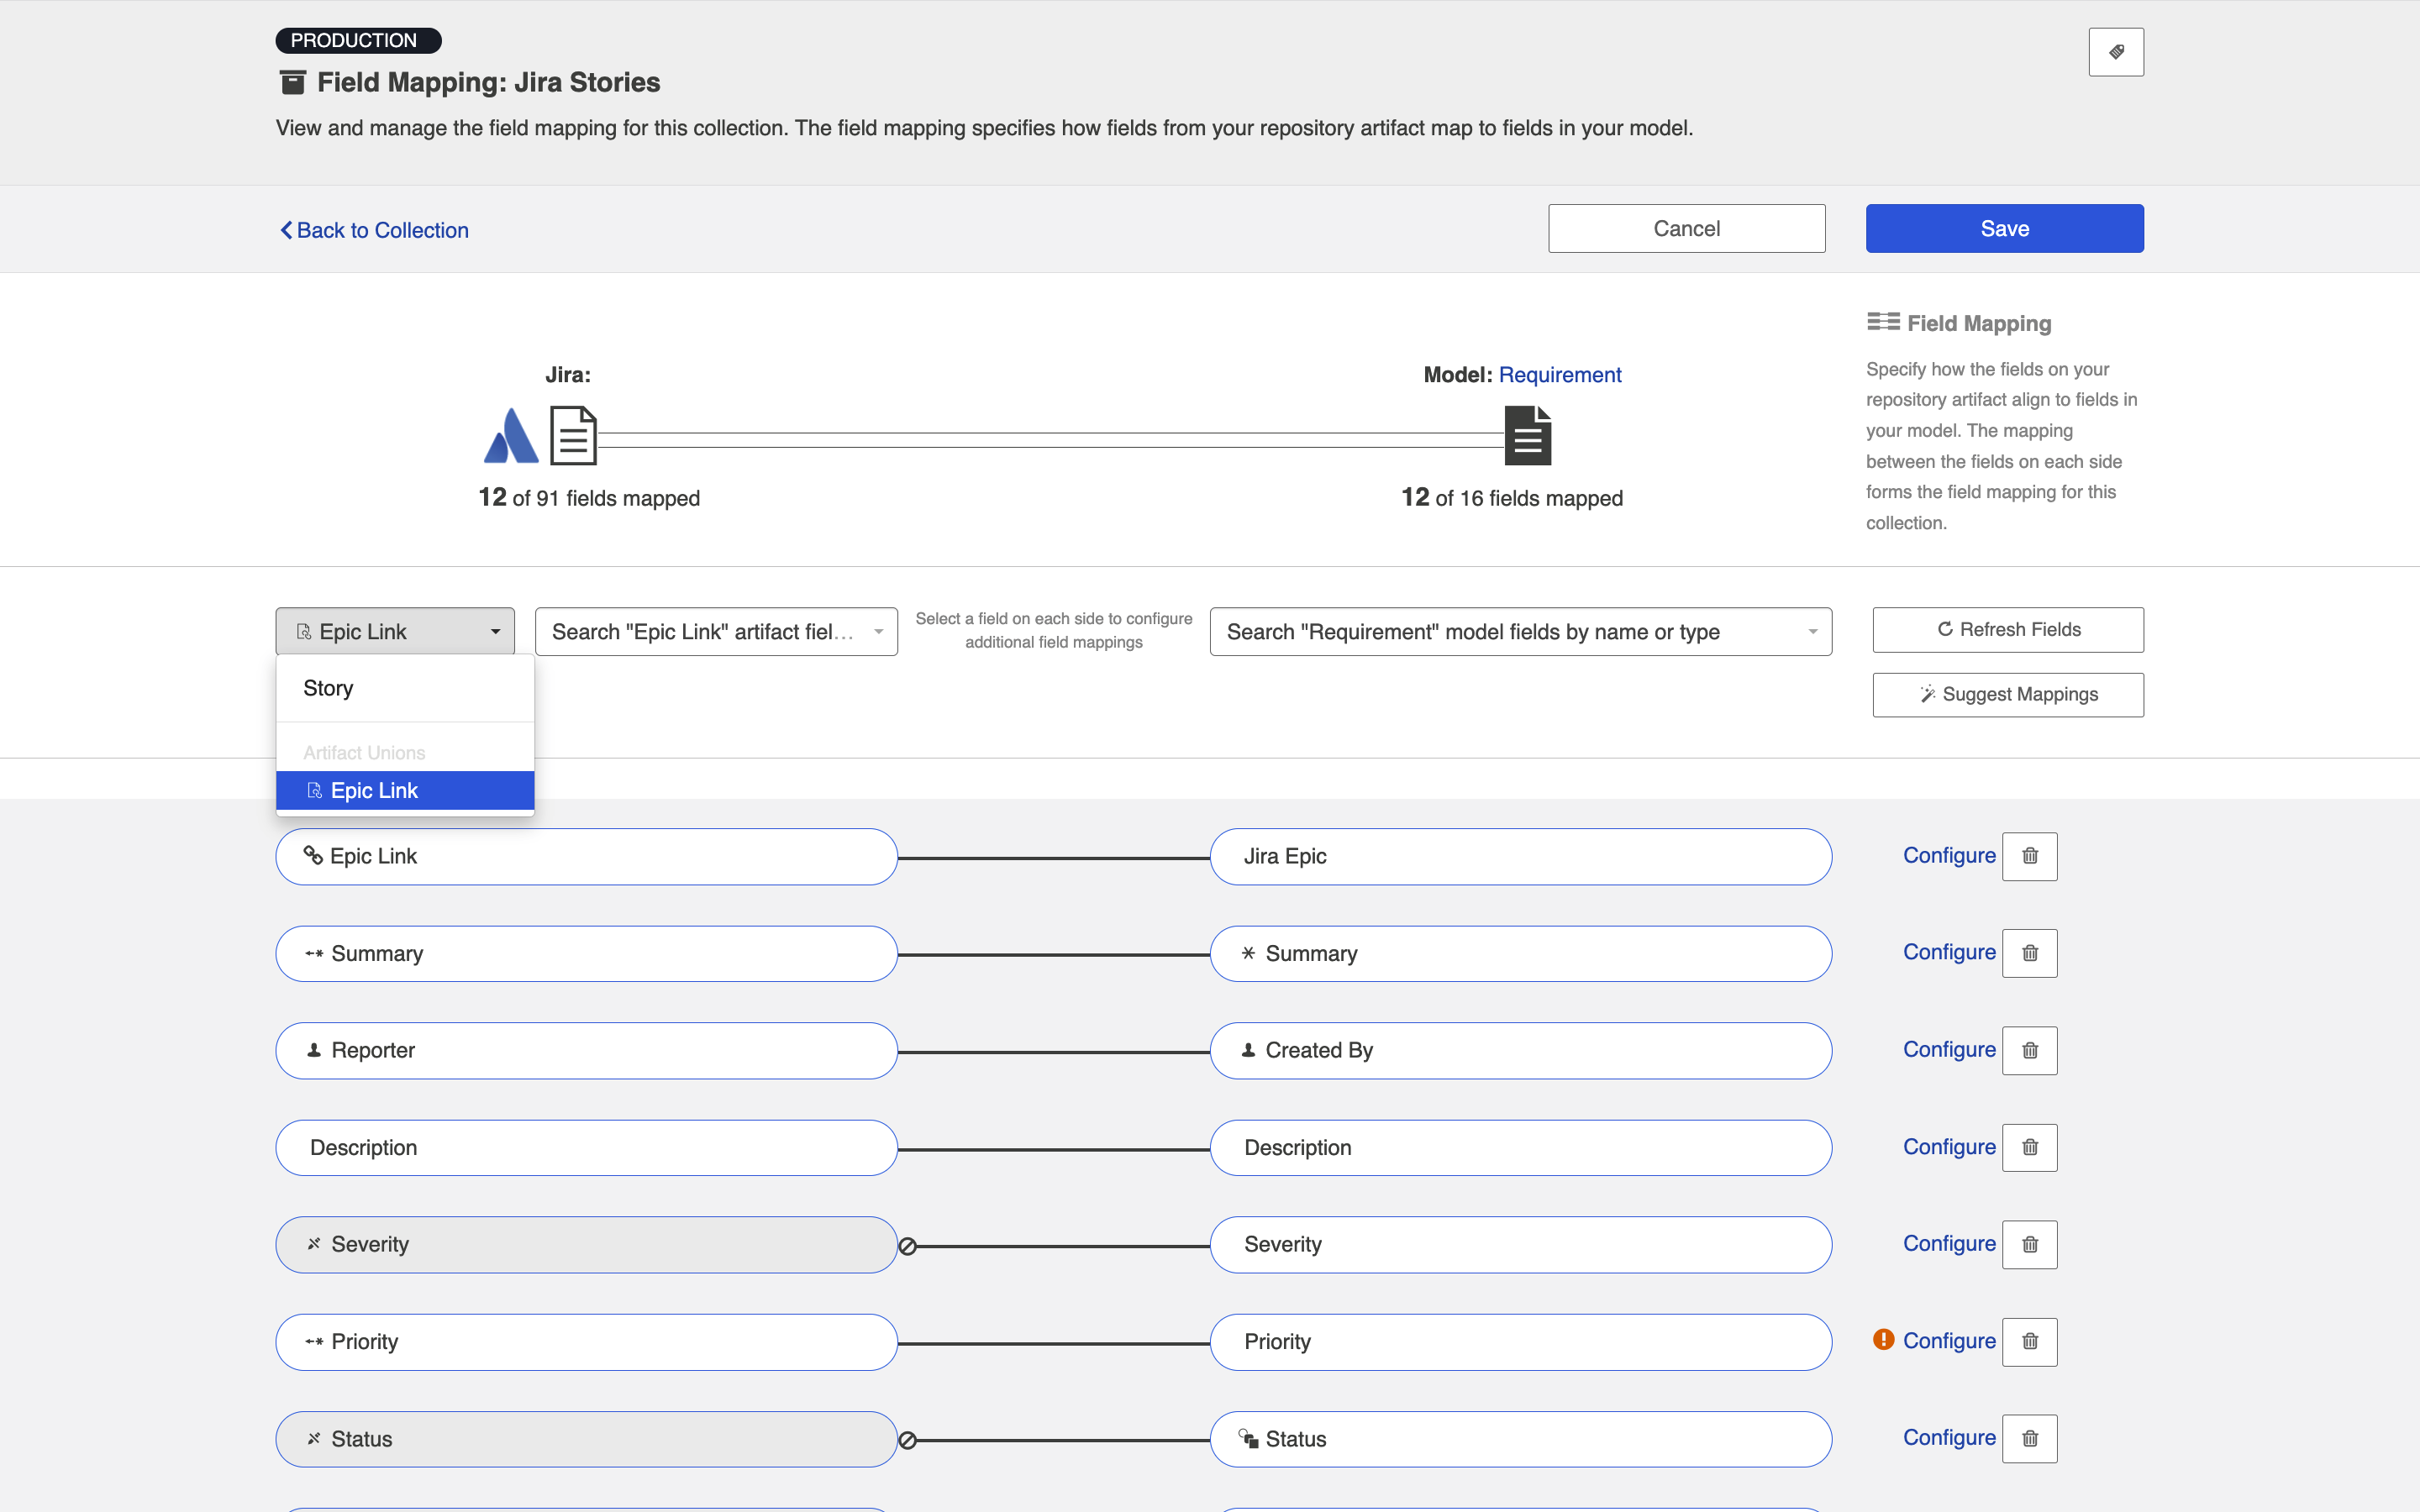
After you've chosen your artifact union, select the field you'd like to extract from the related artifact.
Next, select the model field you'd like to map your field to, and then click Connect.
After you've finished mapping your fields, click Save and Done.
Tip: Clicking ctrl+s on Windows and cmd+s on macOS will save your configuration.
That's it! Now, the field will seamlessly flow to the other side of the integration.
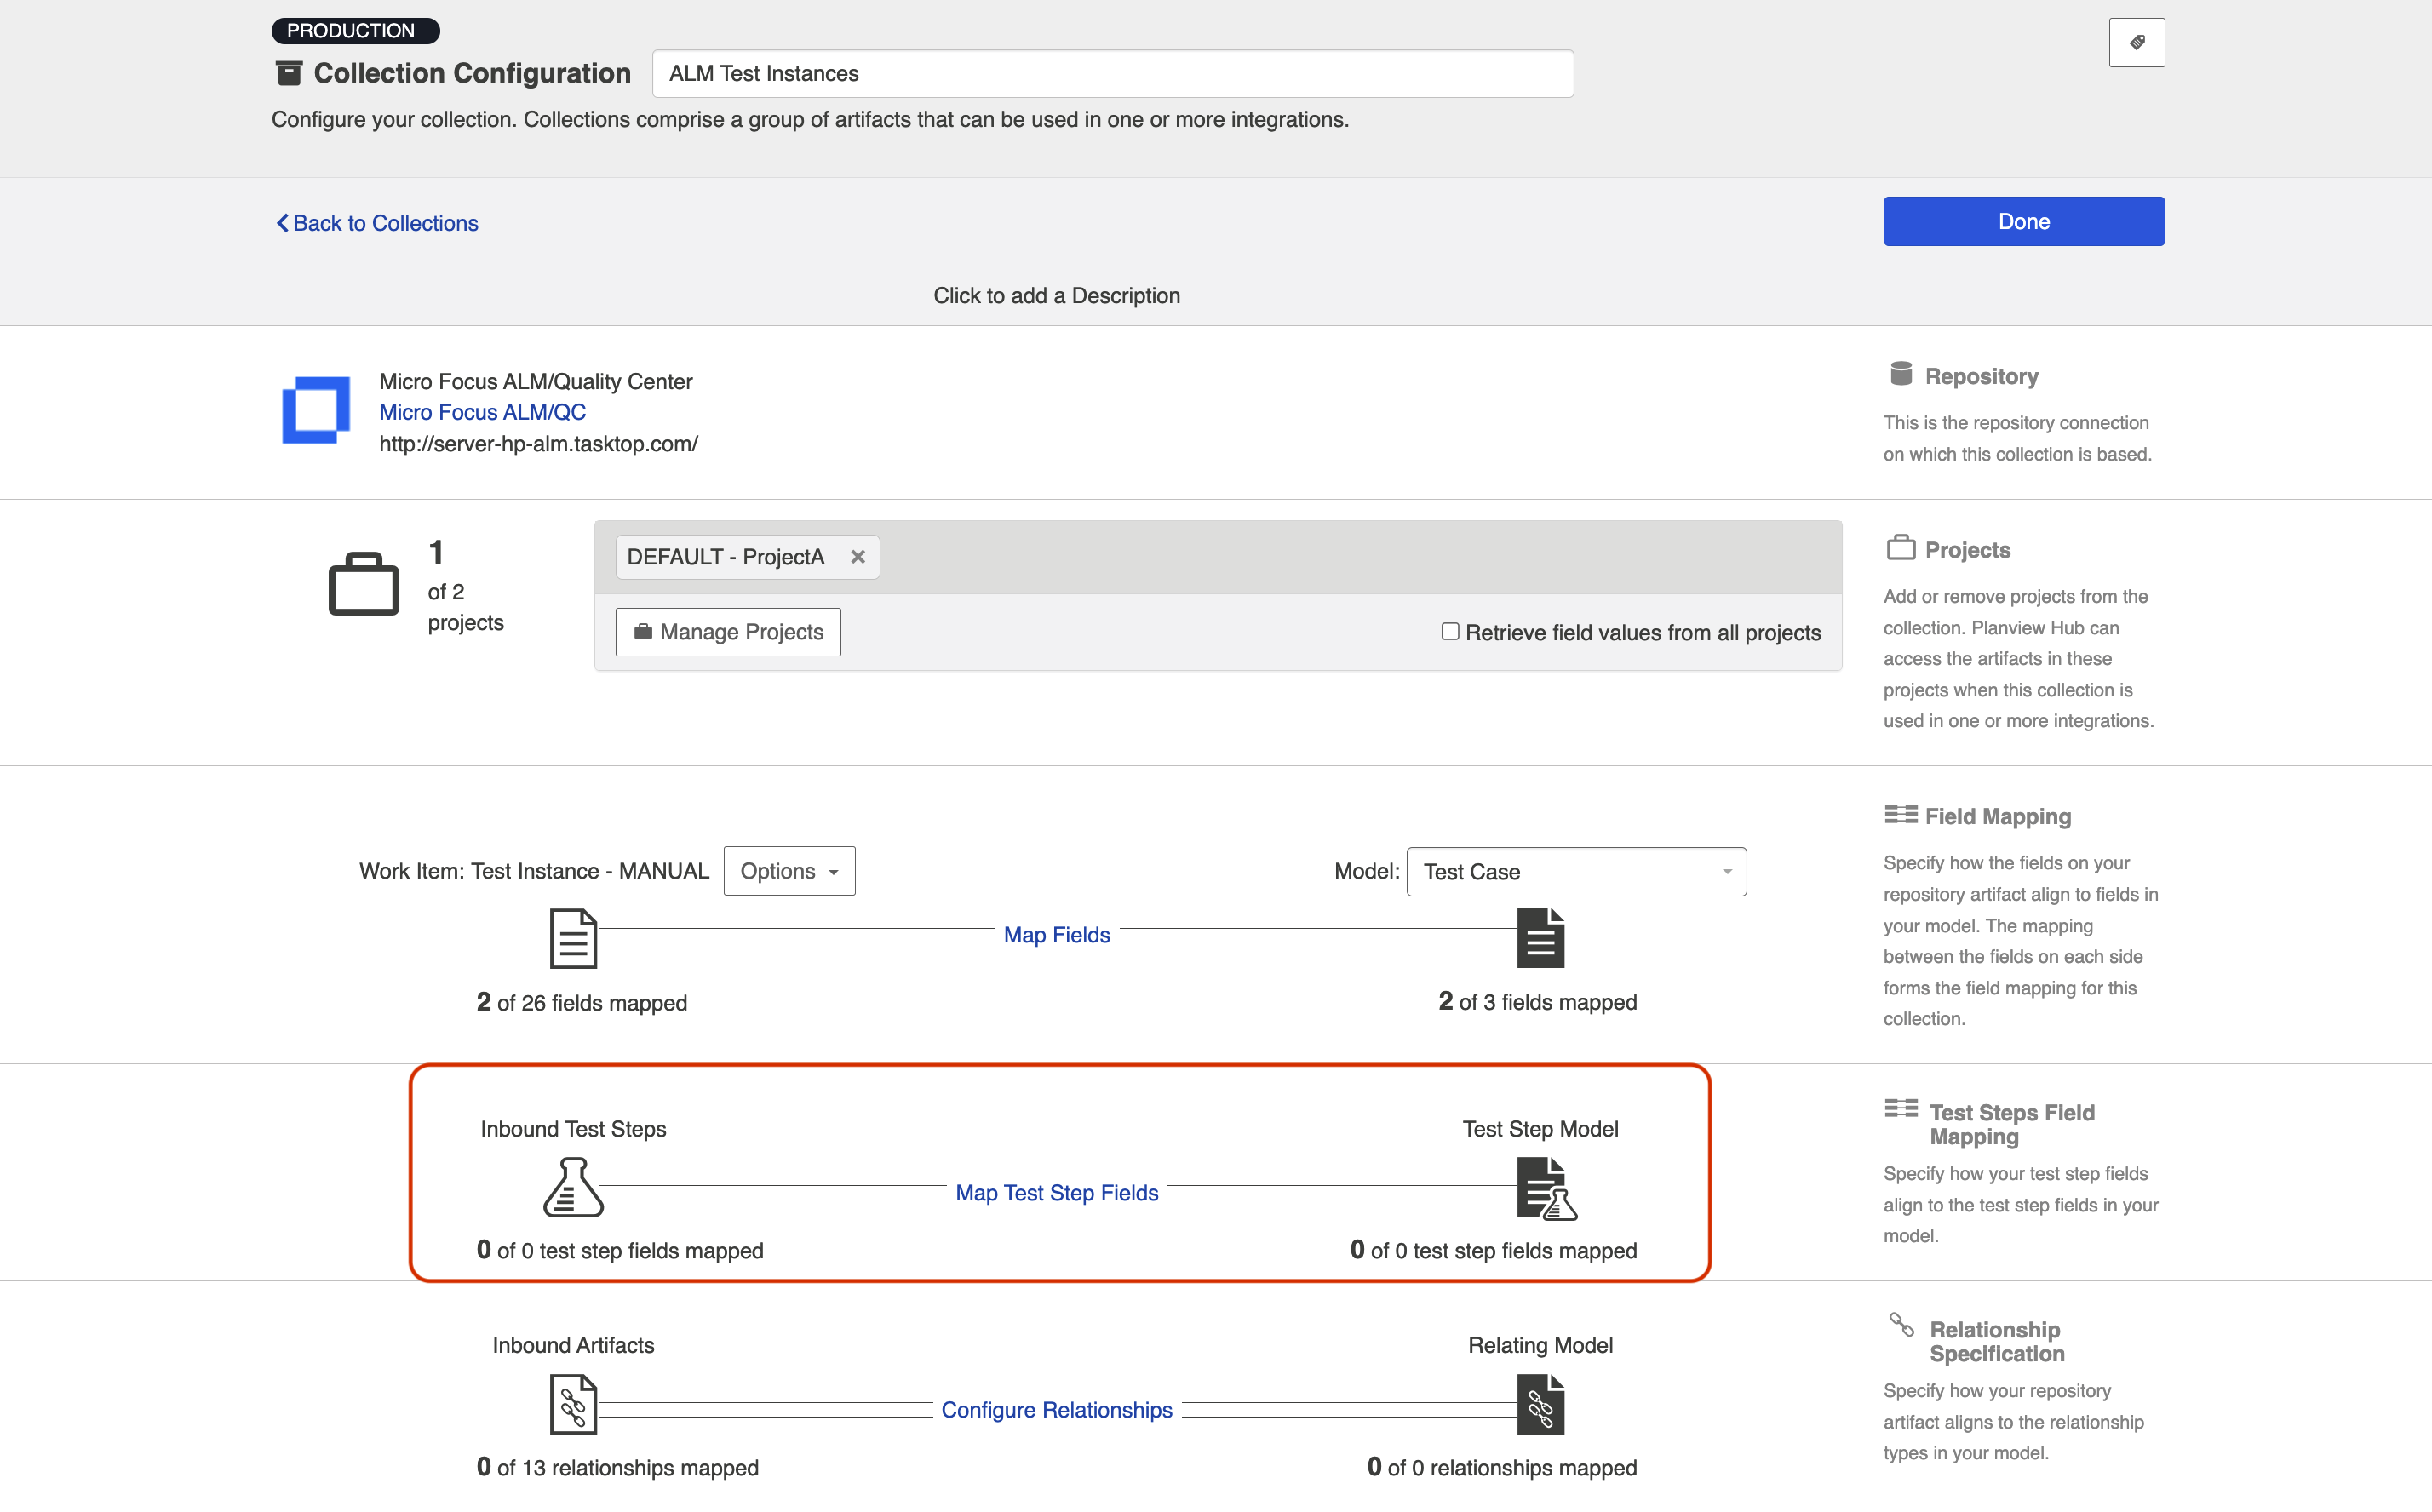
ALM/Octane Test Management
Planview Hub offers integration solutions to flow test artifacts such as test results, test steps, and their associated tests, test runs, test instances, and folder structures in Micro Focus ALM/Quality Center and Micro Focus ALM Octane. However, due to complex containment structures and multiple hierarchy levels, sometimes fields and data don't fully align.
Using artifact unions, you can easily flow test artifacts and their related fields and sub-entities from ALM to Octane.
In the example below, the user has an 'ALM Test Instances to Octane Tests' integration and they'd like to flow 'Test Steps' from ALM into their Octane Tests collection. However, ALM Test Steps only exist on the ALM 'Test' artifact. Because the ALM Test Instances has a shared relationship field with ALM Tests, they are able to configure an artifact union between ALM Test Instances and ALM Tests so that the Test Steps will flow into their Octane Tests collection.
See the section below for details on configuring this use case.
Configuration
Navigate to the ALM Test Instances collection and create a new artifact union.
Select the Test relationship field, desired project(s), and artifact type(s).
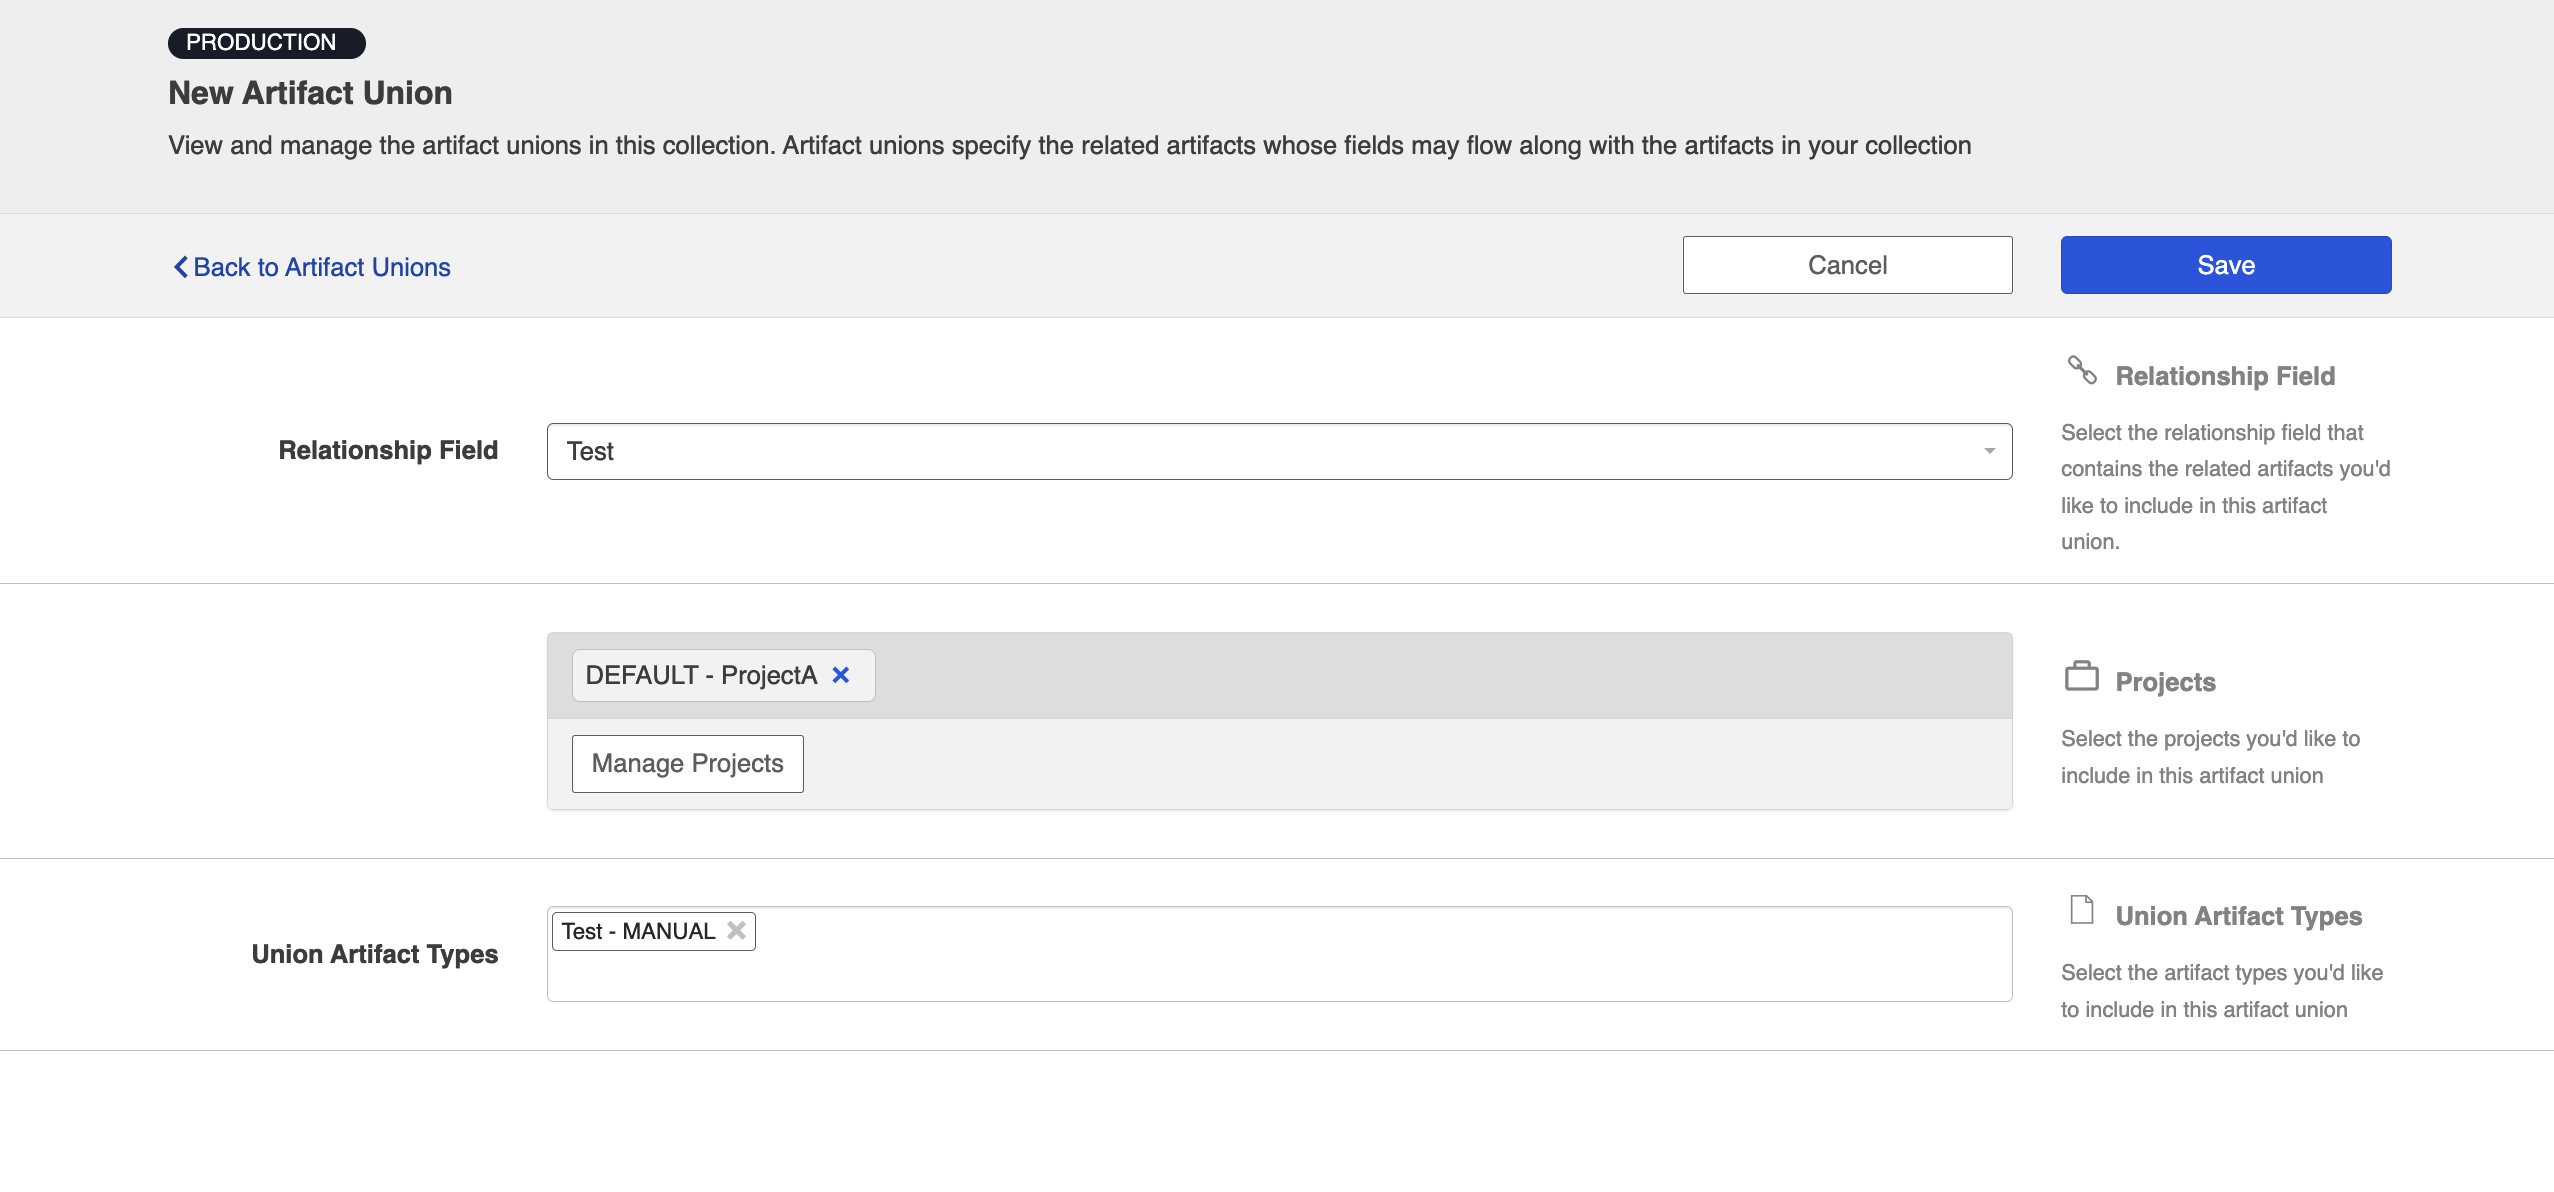
After saving the artifact union, click Map Test Step Fields on the Collection Configuration screen.
On this screen, select the Test artifact union from the Flow Test Steps From dropdown menu.
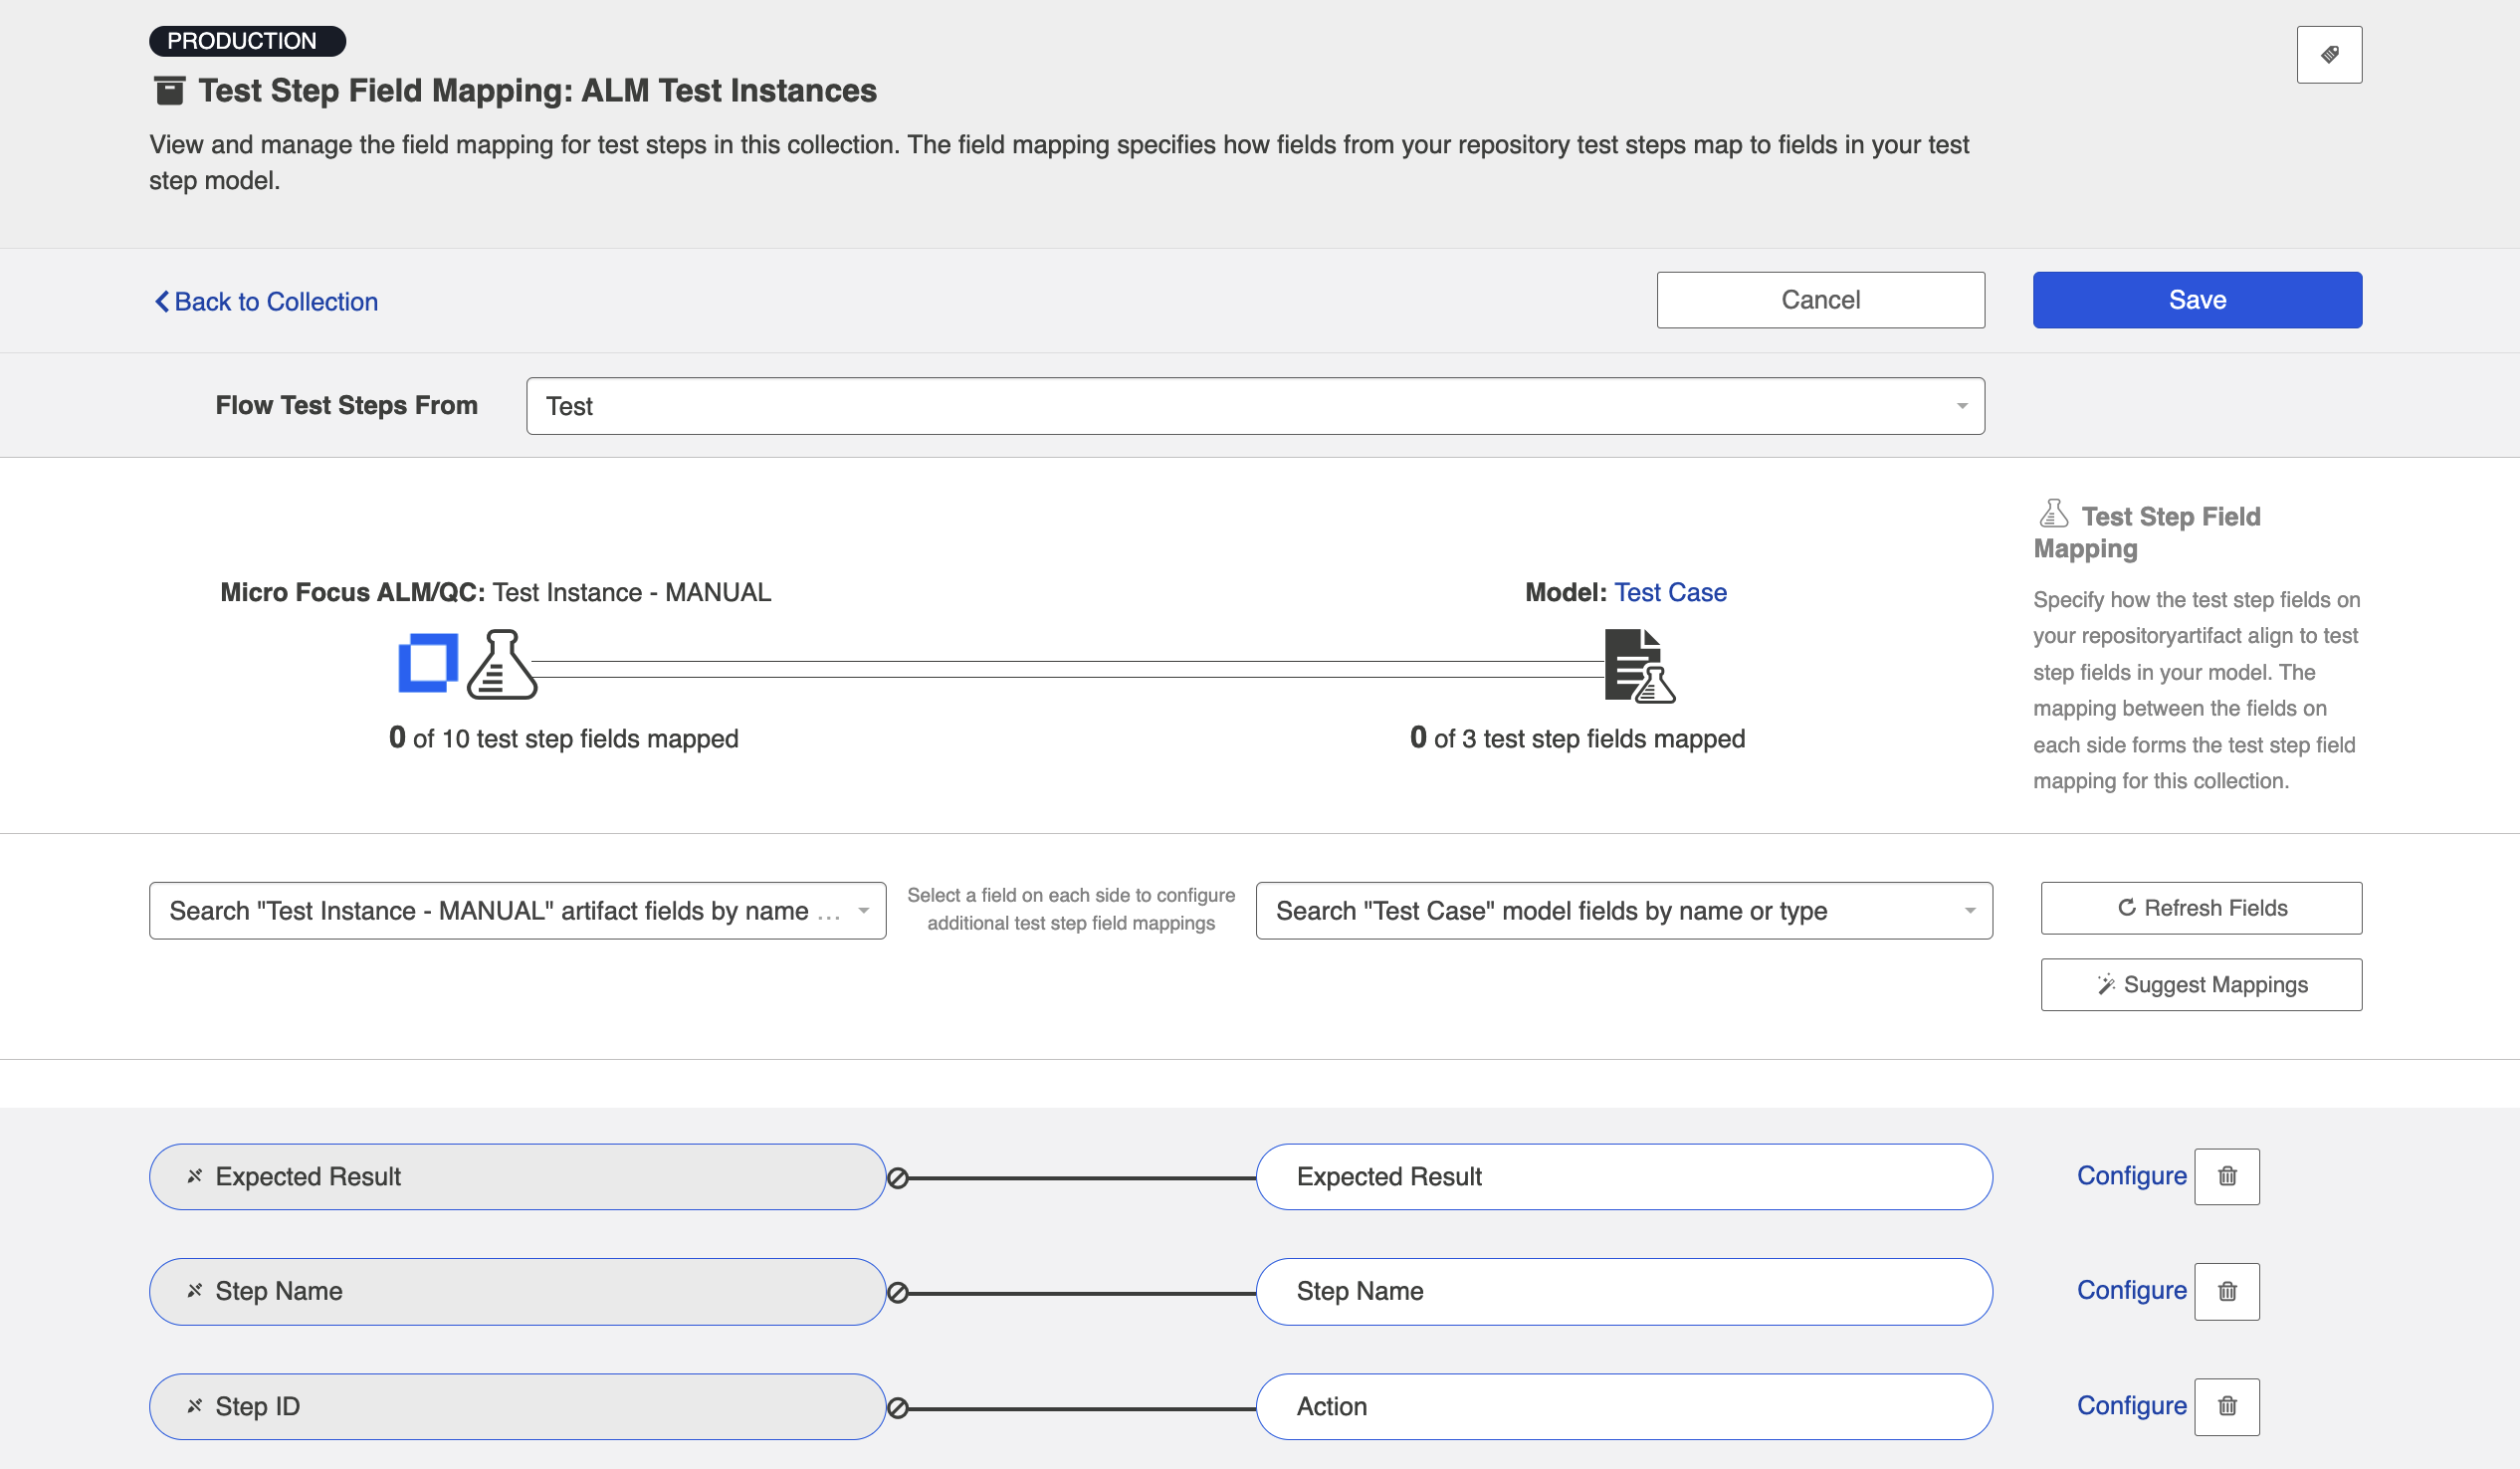
After saving, you can flow the ALM test steps into their Octane tests collection. And that's it!
Next Steps
Now that your Artifact Unions are configured, your collection configuration is complete. Once all the collections you'd like to utilize in your integration are set up, it's time to move on to Step 4: Configure your Integration.