
Artifact Filtering
Introduction
Once you have completed your Artifact Routing configuration, your next step will be to review and configure Artifact Filtering.
When configuring your integration, you have several options available to refine which artifacts are eligible to flow. The final mechanism available is artifact filtering, which is configured at the Integration level.

Artifact Filtering enables you to set filters on an integration in order to limit which artifacts are eligible to flow in your integration.
To use a field for artifact filtering, it must:
- Be a part of your model, and be mapped to the collection you are filtering from
- Be one of the following field types:
- Single Select
- Note that in cases where 'allow unmapped values to flow' is enabled in the model, only field values that are already a part of the model will be considered for artifact filtering
- Multi-Select
- Note that in cases where 'allow unmapped values to flow' is enabled in the model, only field values that are already a part of the model will be considered for artifact filtering
- Boolean
- Date
- Date/Time
- Duration
- String
- Long
- Double
- Single Select
Note: You can utilize our transforms to filter based on an 'unsupported' collection field type, if that field is mapped to a supported field type in your model. For example, you could filter based on a rich text field in your repository, if that rich text field is mapped to a string field in your model.
Configuring Artifact Filtering
To configure Artifact Filtering, click the Artifact Filtering link on the Integration Configuration screen.
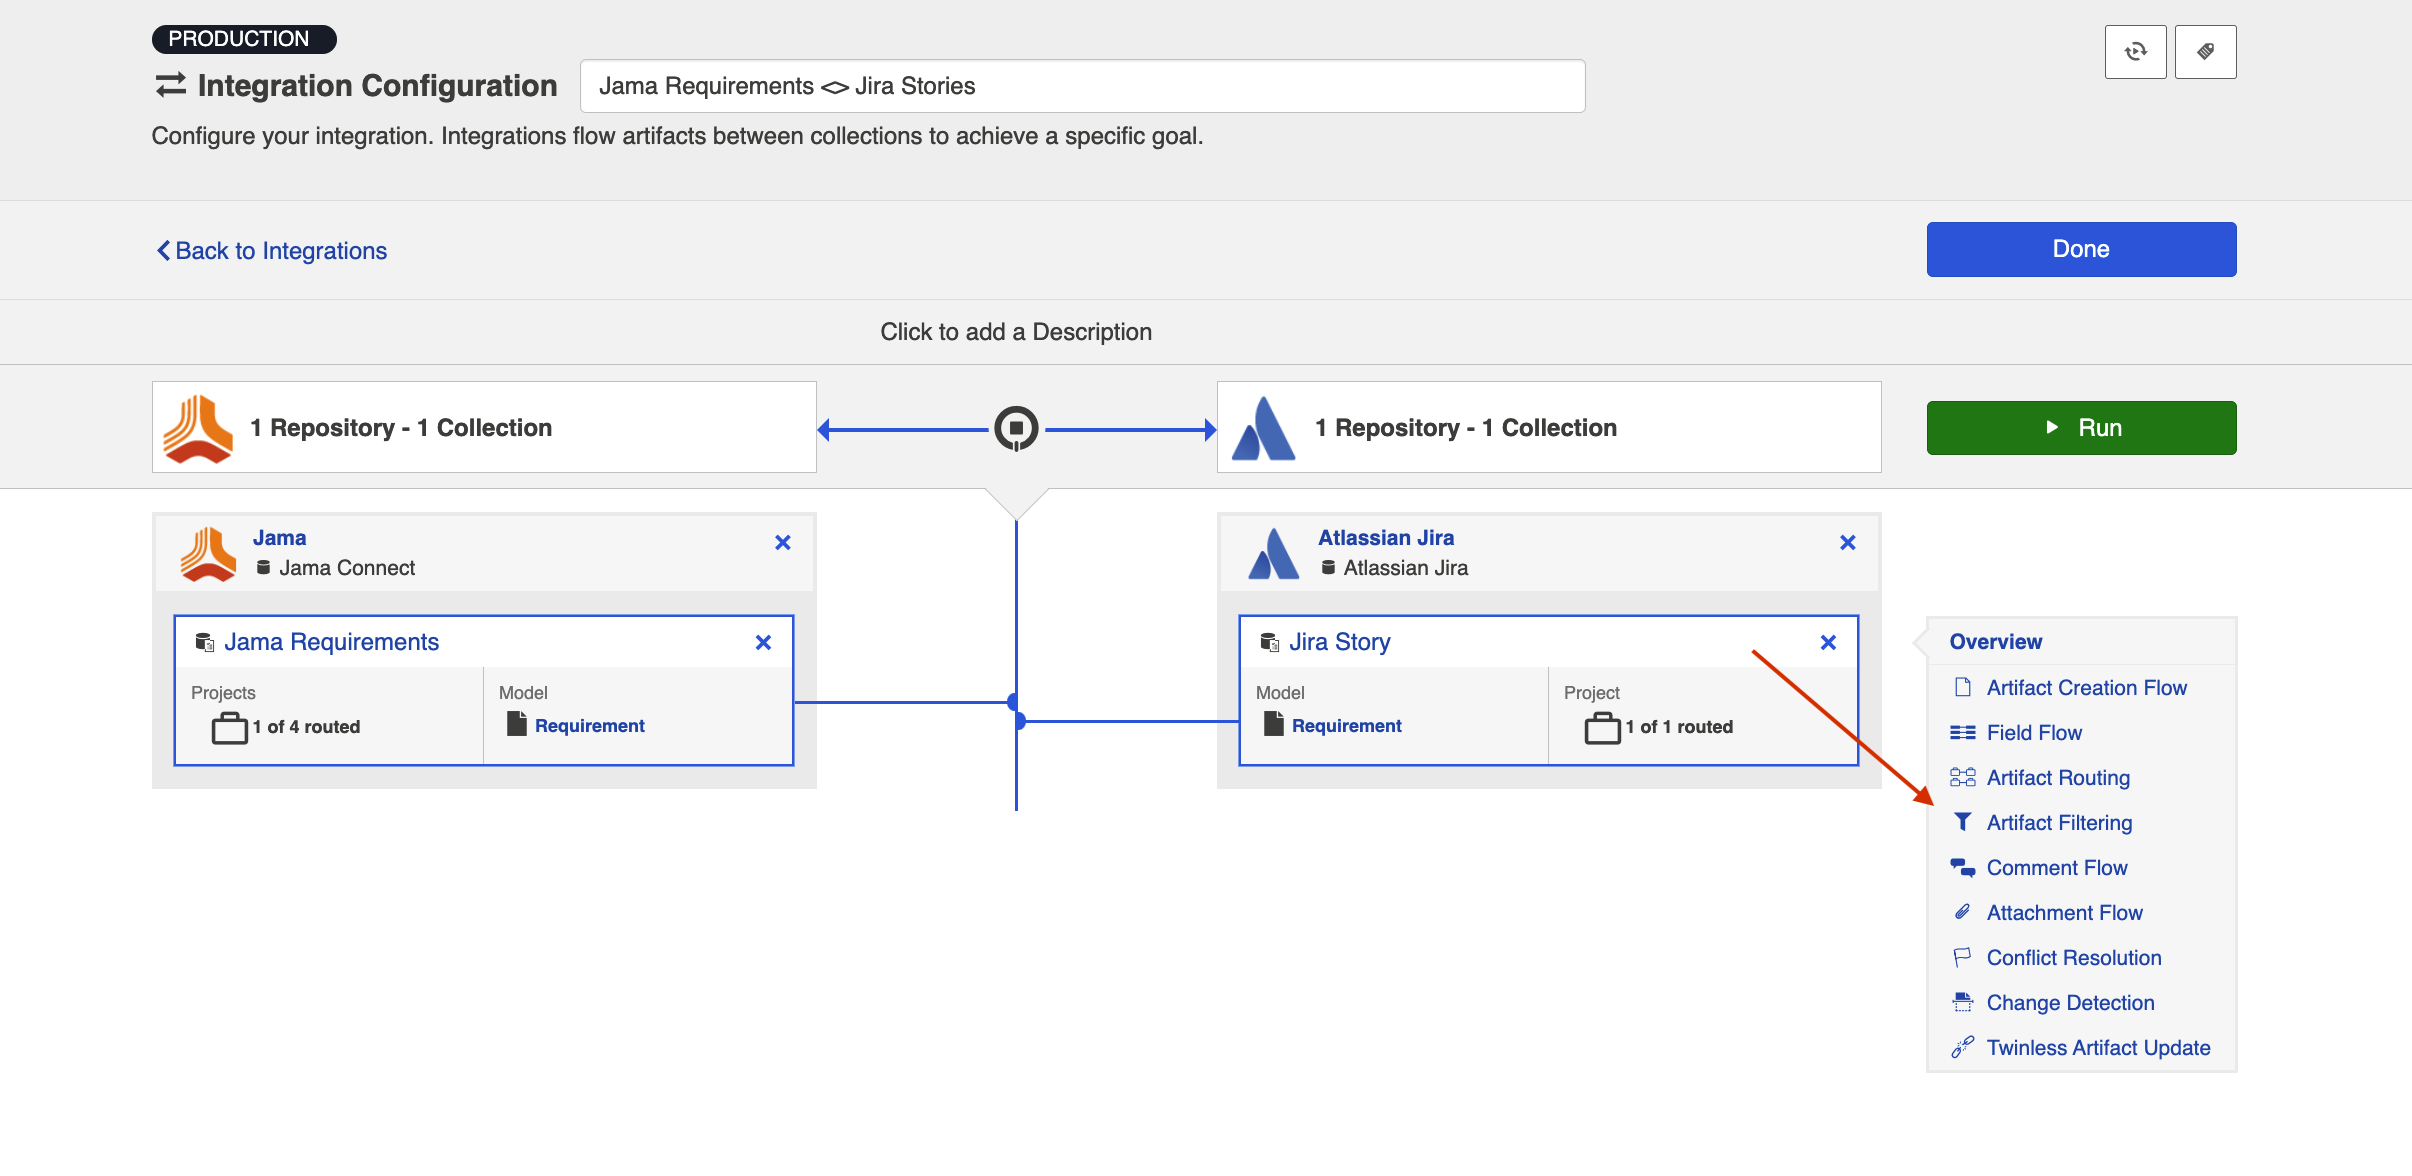
This will lead you to the Artifact Filtering screen, where you can configure your artifact filters.
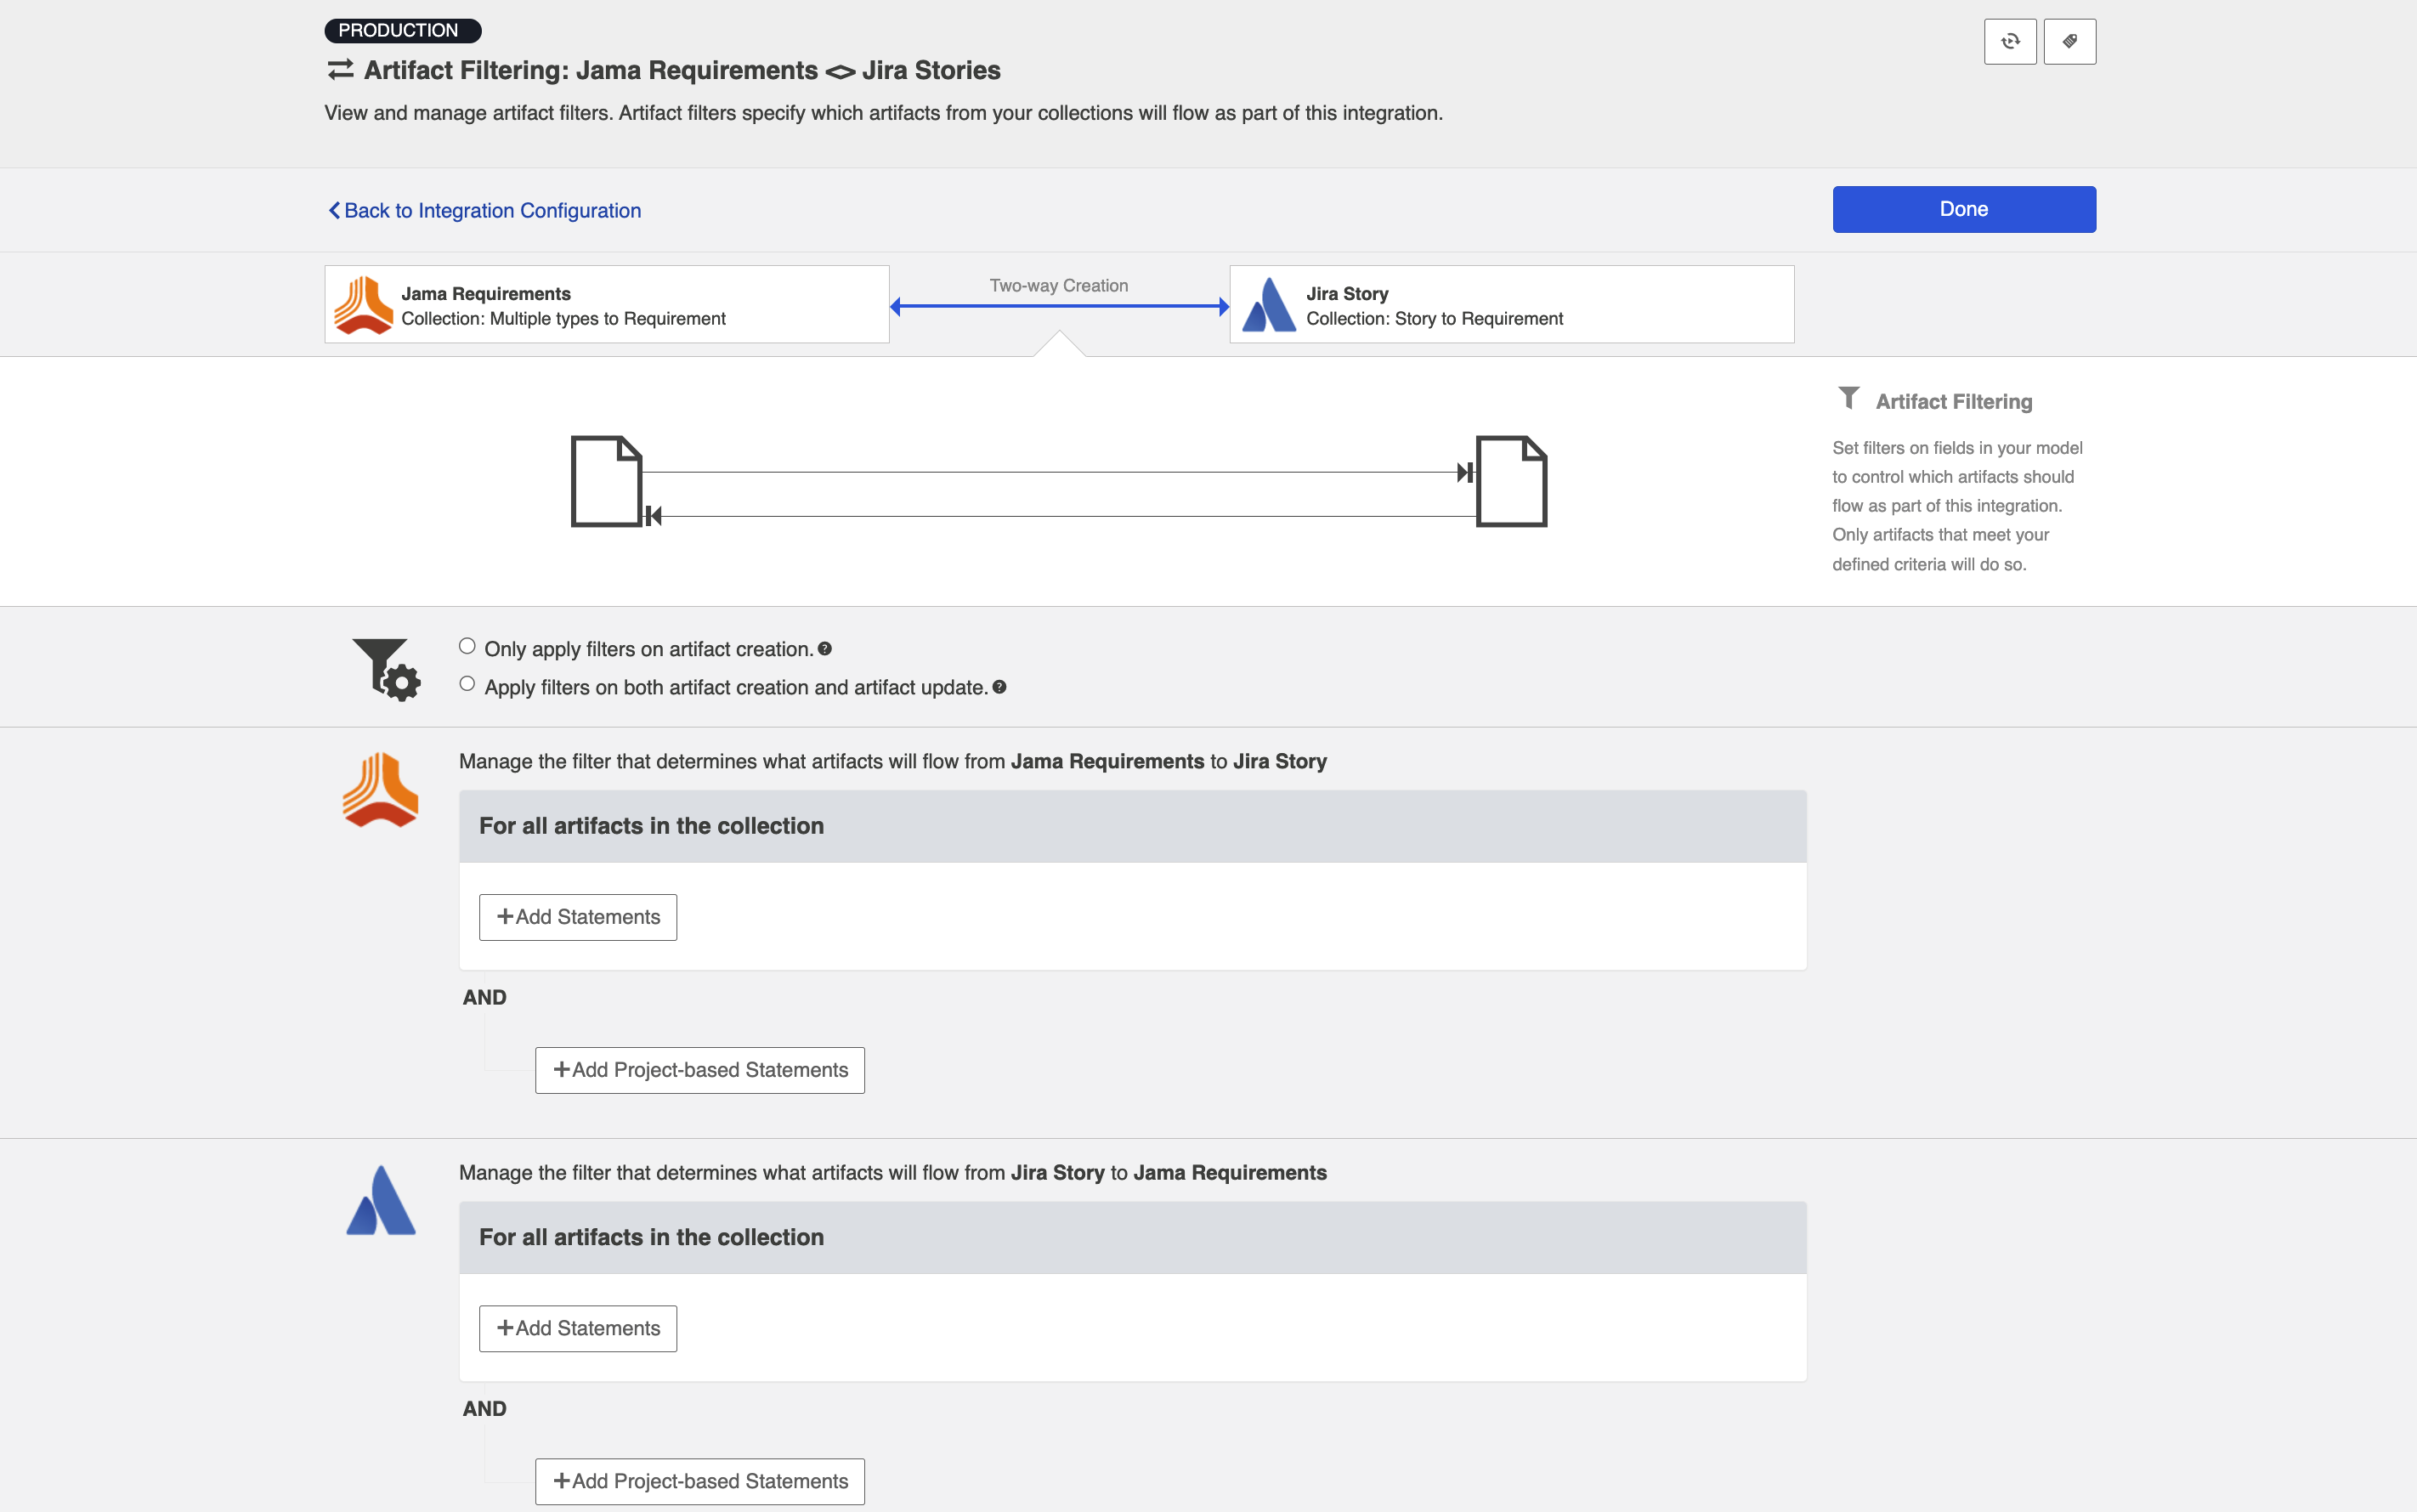
Artifact Creation vs. Artifact Update
First, determine whether you'd like your filter to apply to artifact creation and artifact update, or only to artifact creation.
Artifact creation and artifact update will provide improved performance, and should be used if you don't expect the value for the field you are filtering by to change in the external repositories.
Artifact creation means that once artifacts are synchronized, updates will continue to flow between them, even if values are changed that make it such that they no longer meet your filtering criteria. This ensures that your source and target artifacts will stay in sync with one another, even if the value for the field you are filtering by changes.

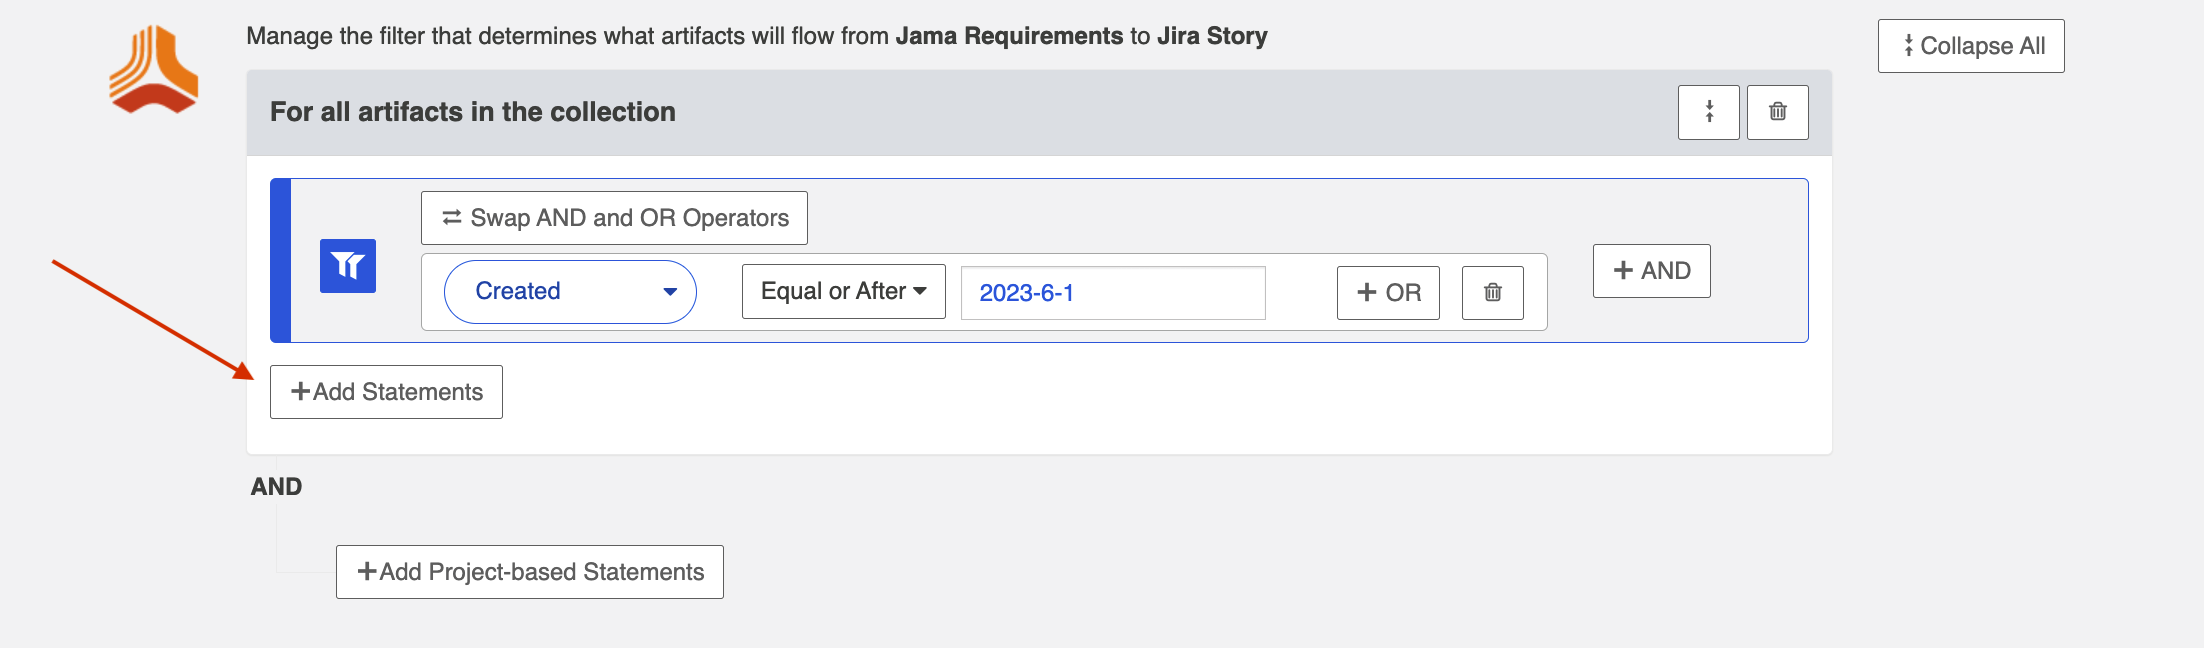
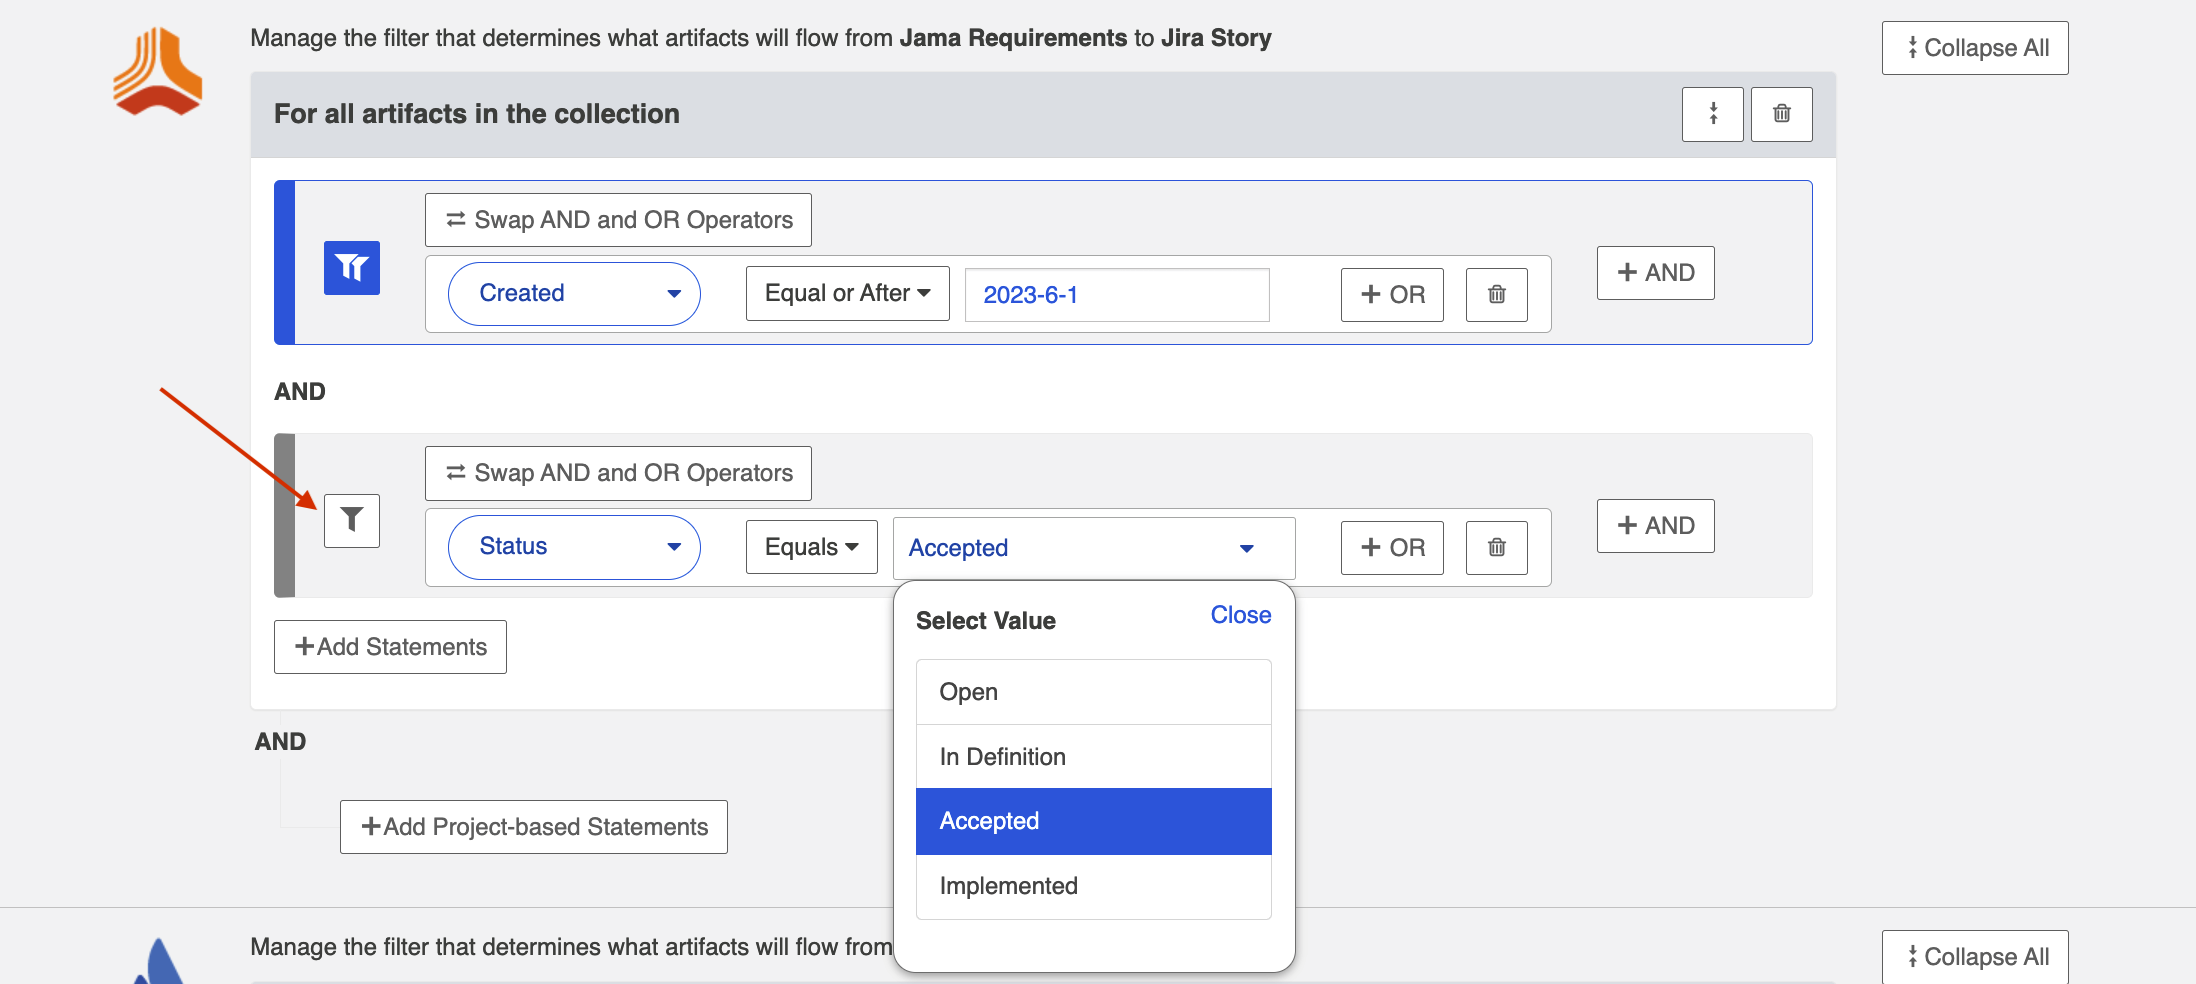
Configure Artifact Filter Statements
Next, you can begin configuring your artifact filtering statements. You can add statements for all artifacts in both collections, all artifacts in one collection, or to artifacts in specific projects within your collection.
Note: If you update your previously saved artifact filter criteria to broaden the scope of your running integration, click the 'process all artifacts' button on the Field Flow screen to ensure that all relevant updates are processed.
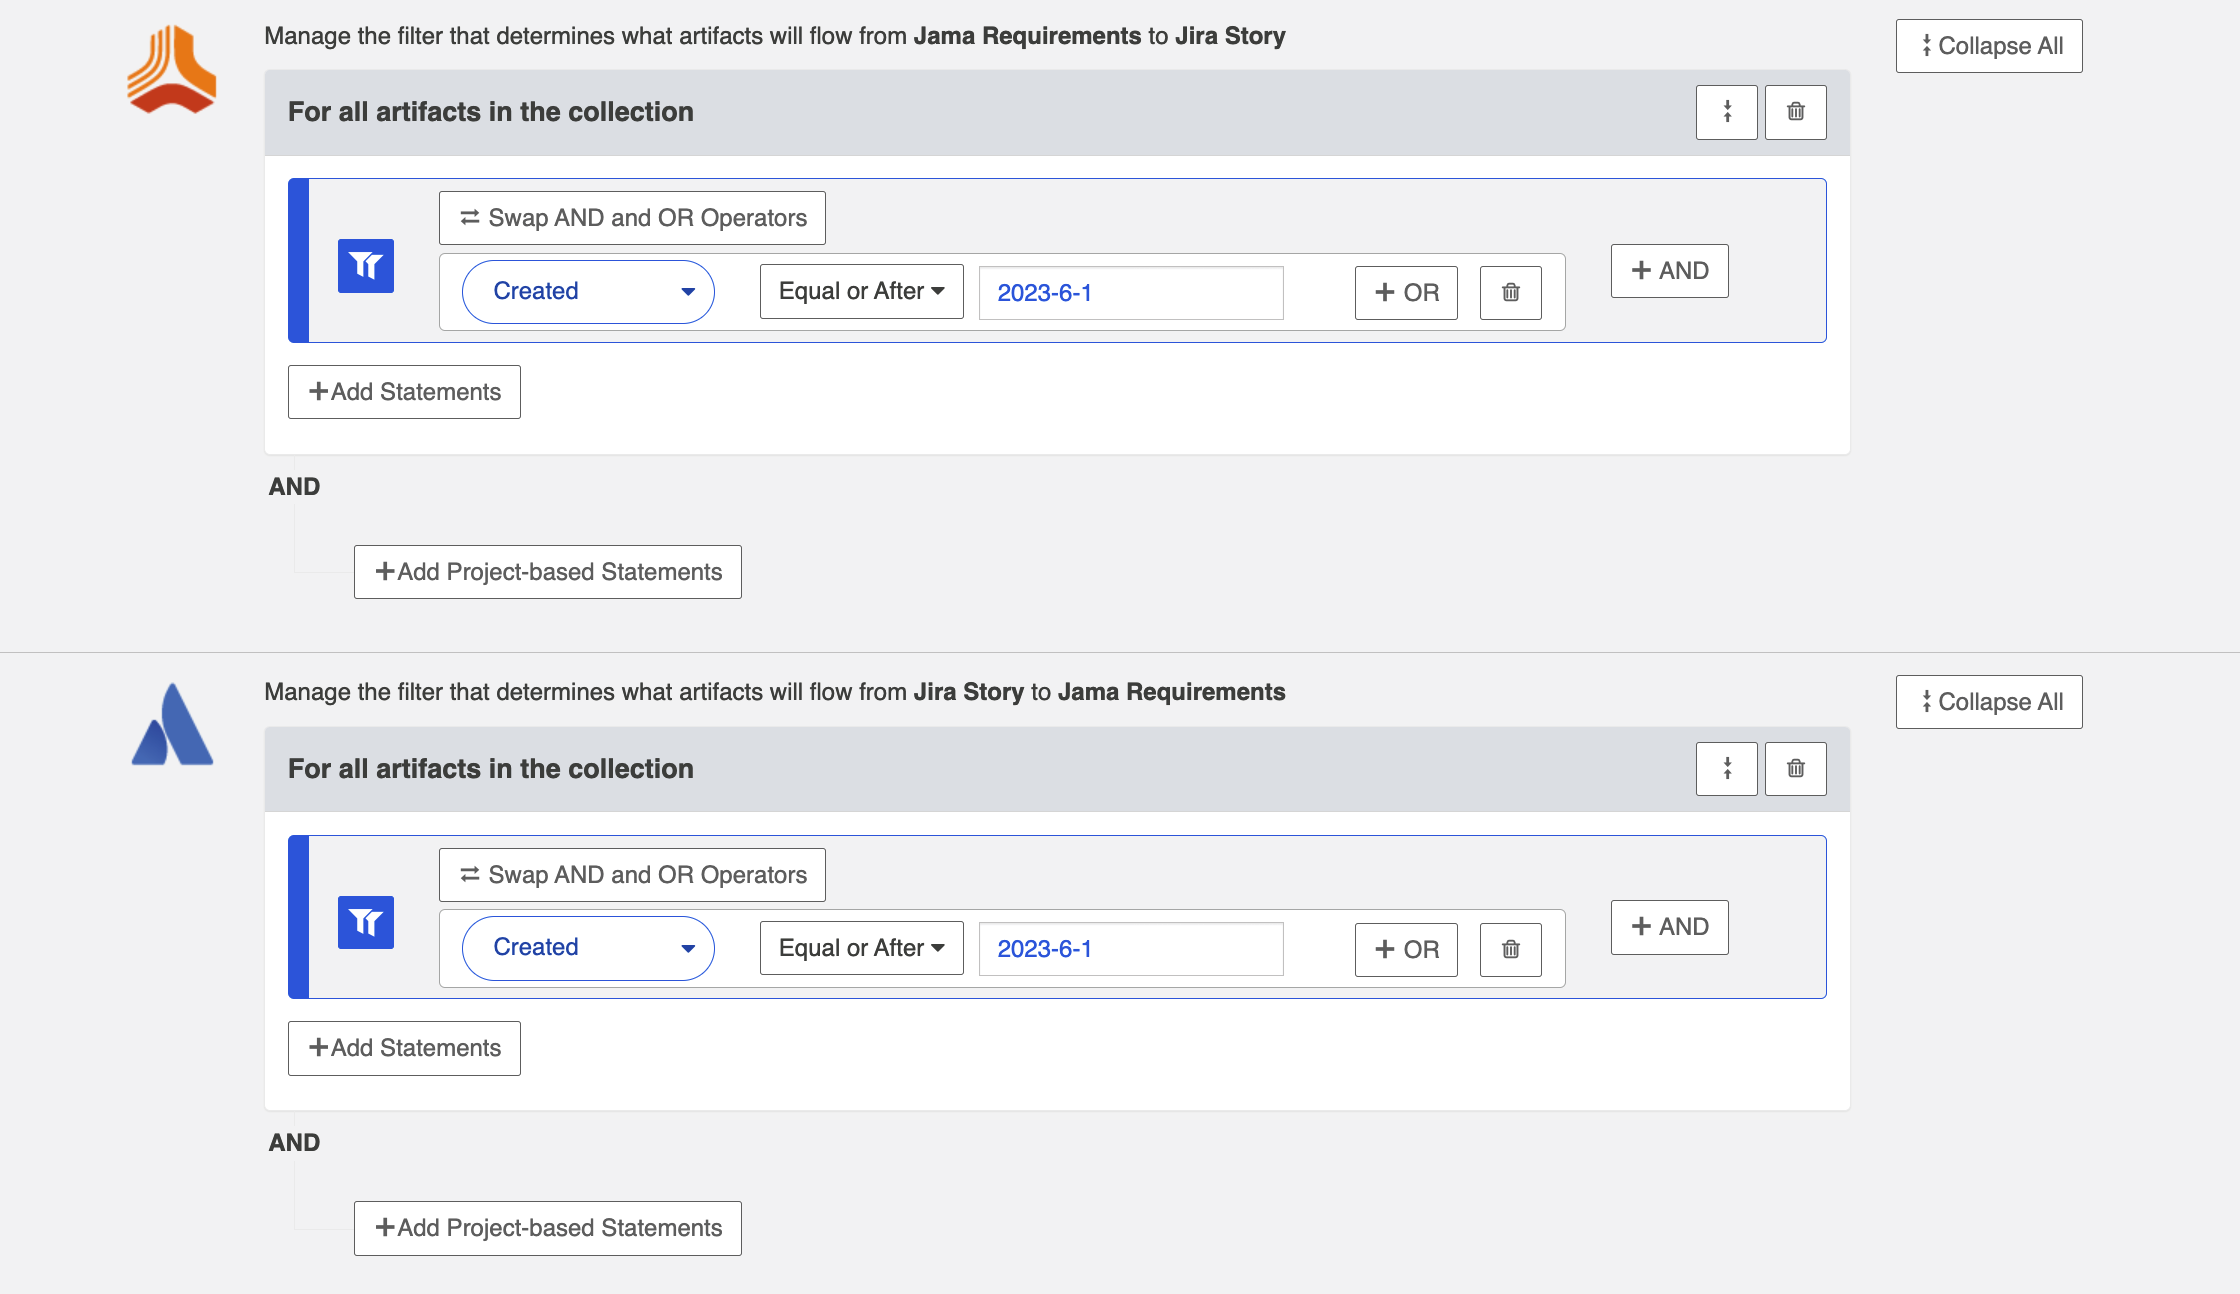
Apply Filter to All Artifacts in Both Collections
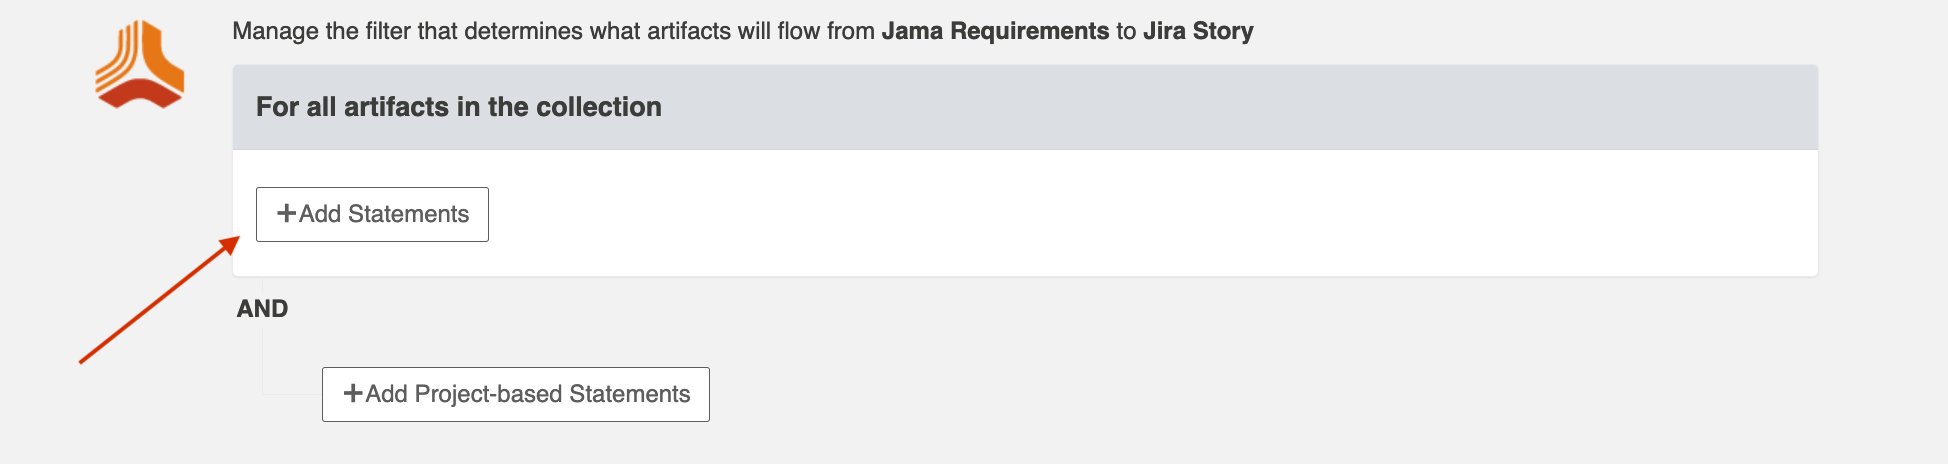
To apply a filter to all artifacts in both collections, click +Add Statements for all artifacts in your first collection.
Then, click the filter button. This will apply your filter to the other collection participating in your integration.
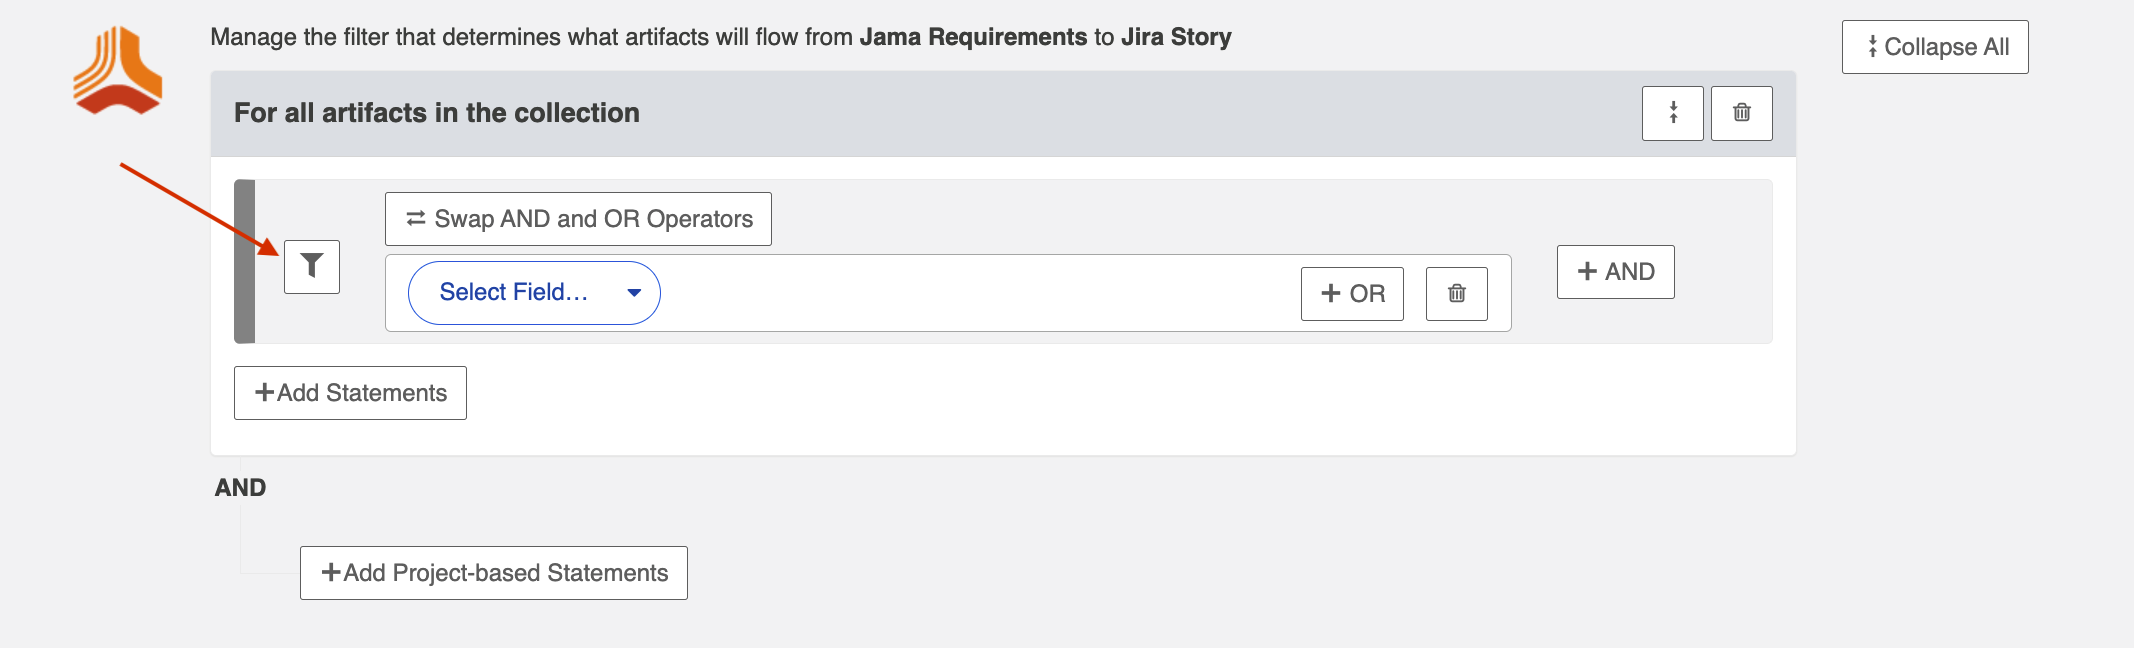
You will notice that the button changes to show two filters, indicating that your filter will apply to both collections.
You'll also notice that any modifications you make to that filter statement will automatically be reflected in the other collection. If you'd like to disconnect the filter from both collections, simply click the double-filter button again, and you will be able to edit each filter individually.
Here we are filtering both collections to only create target artifacts that were created on or after June 1st, 2023.
Apply Filter to All Artifacts in One Collection
To apply a filter to all artifacts in one collection, simply click the + Add Statements button in the desired collection.
Select your artifact filtering fields and values. You'll see that there is only one filter displayed on the left, which tells you that this filter only applies to one collection in your integration.
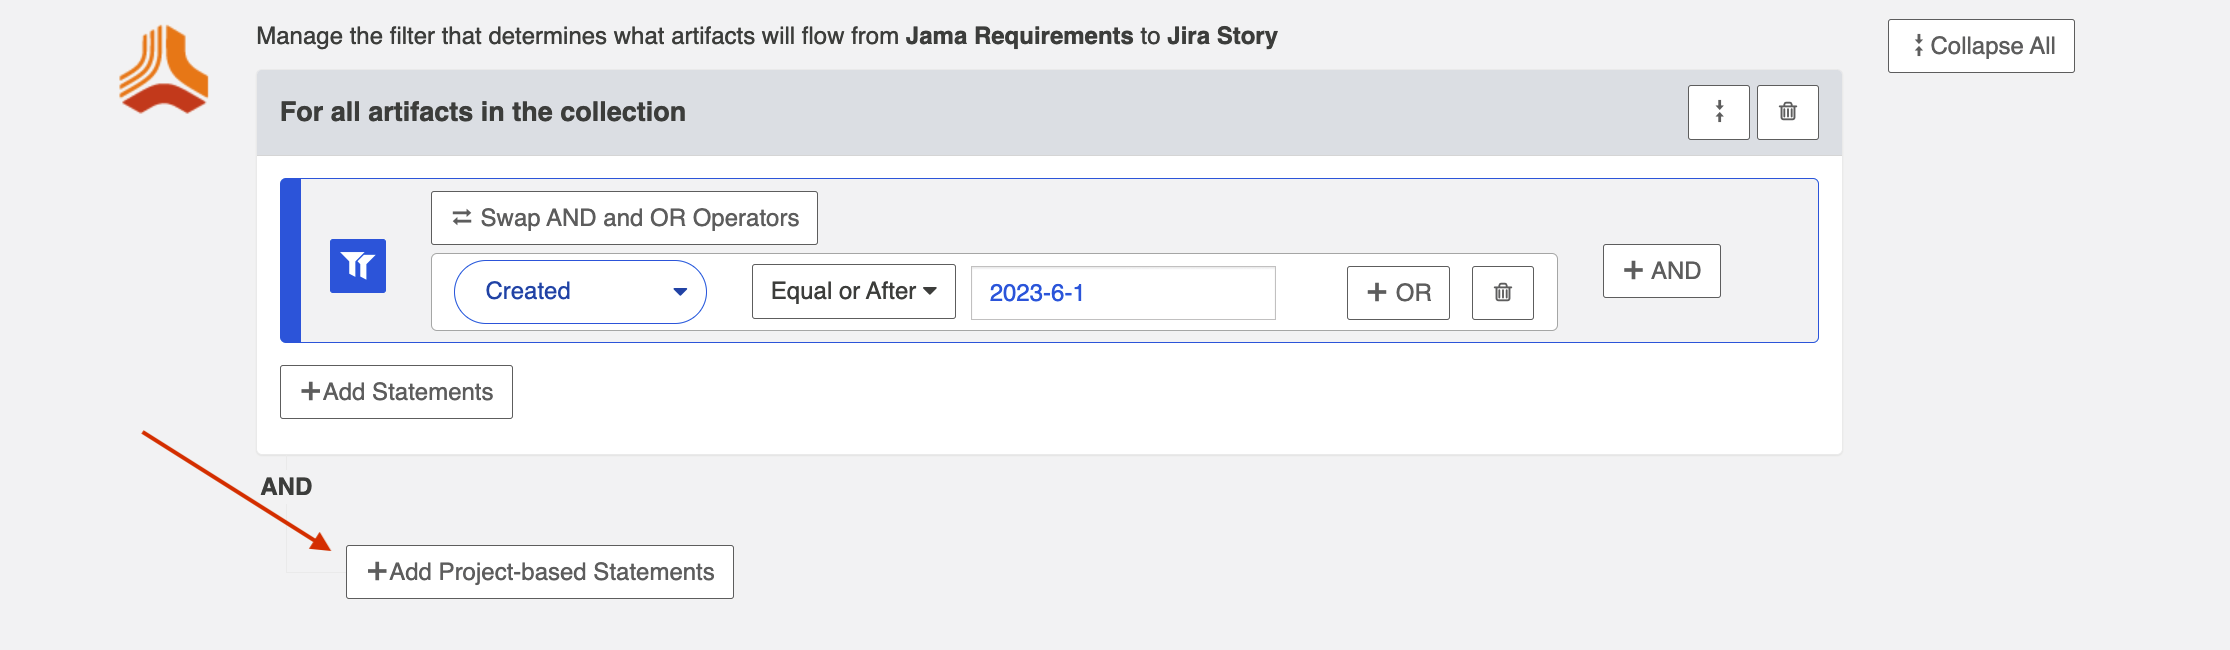
Apply Filter to Artifacts within Certain Projects in a Collection
To apply a filter to artifacts within certain projects in a collection, click + Add Project Based Statements.
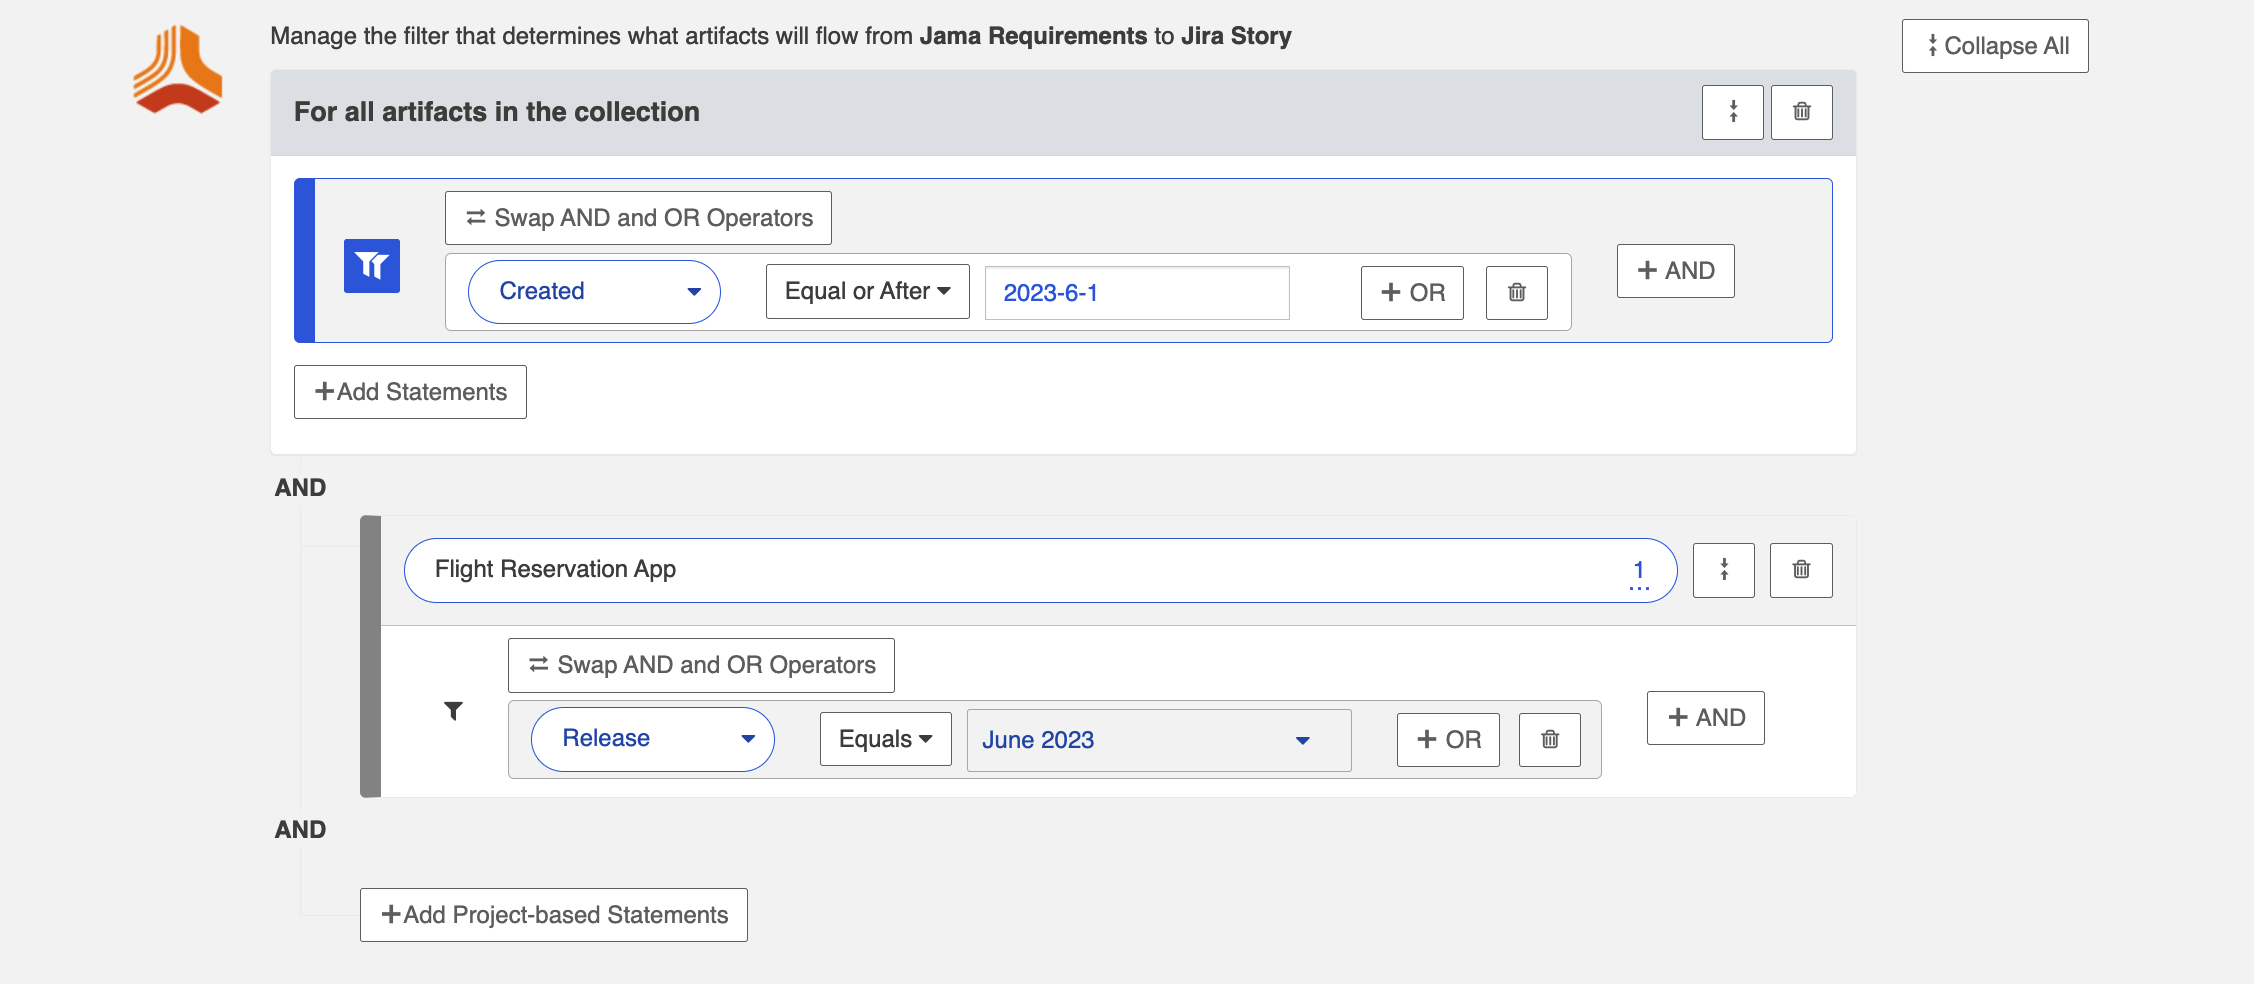
Click + Add Projects to select your project.
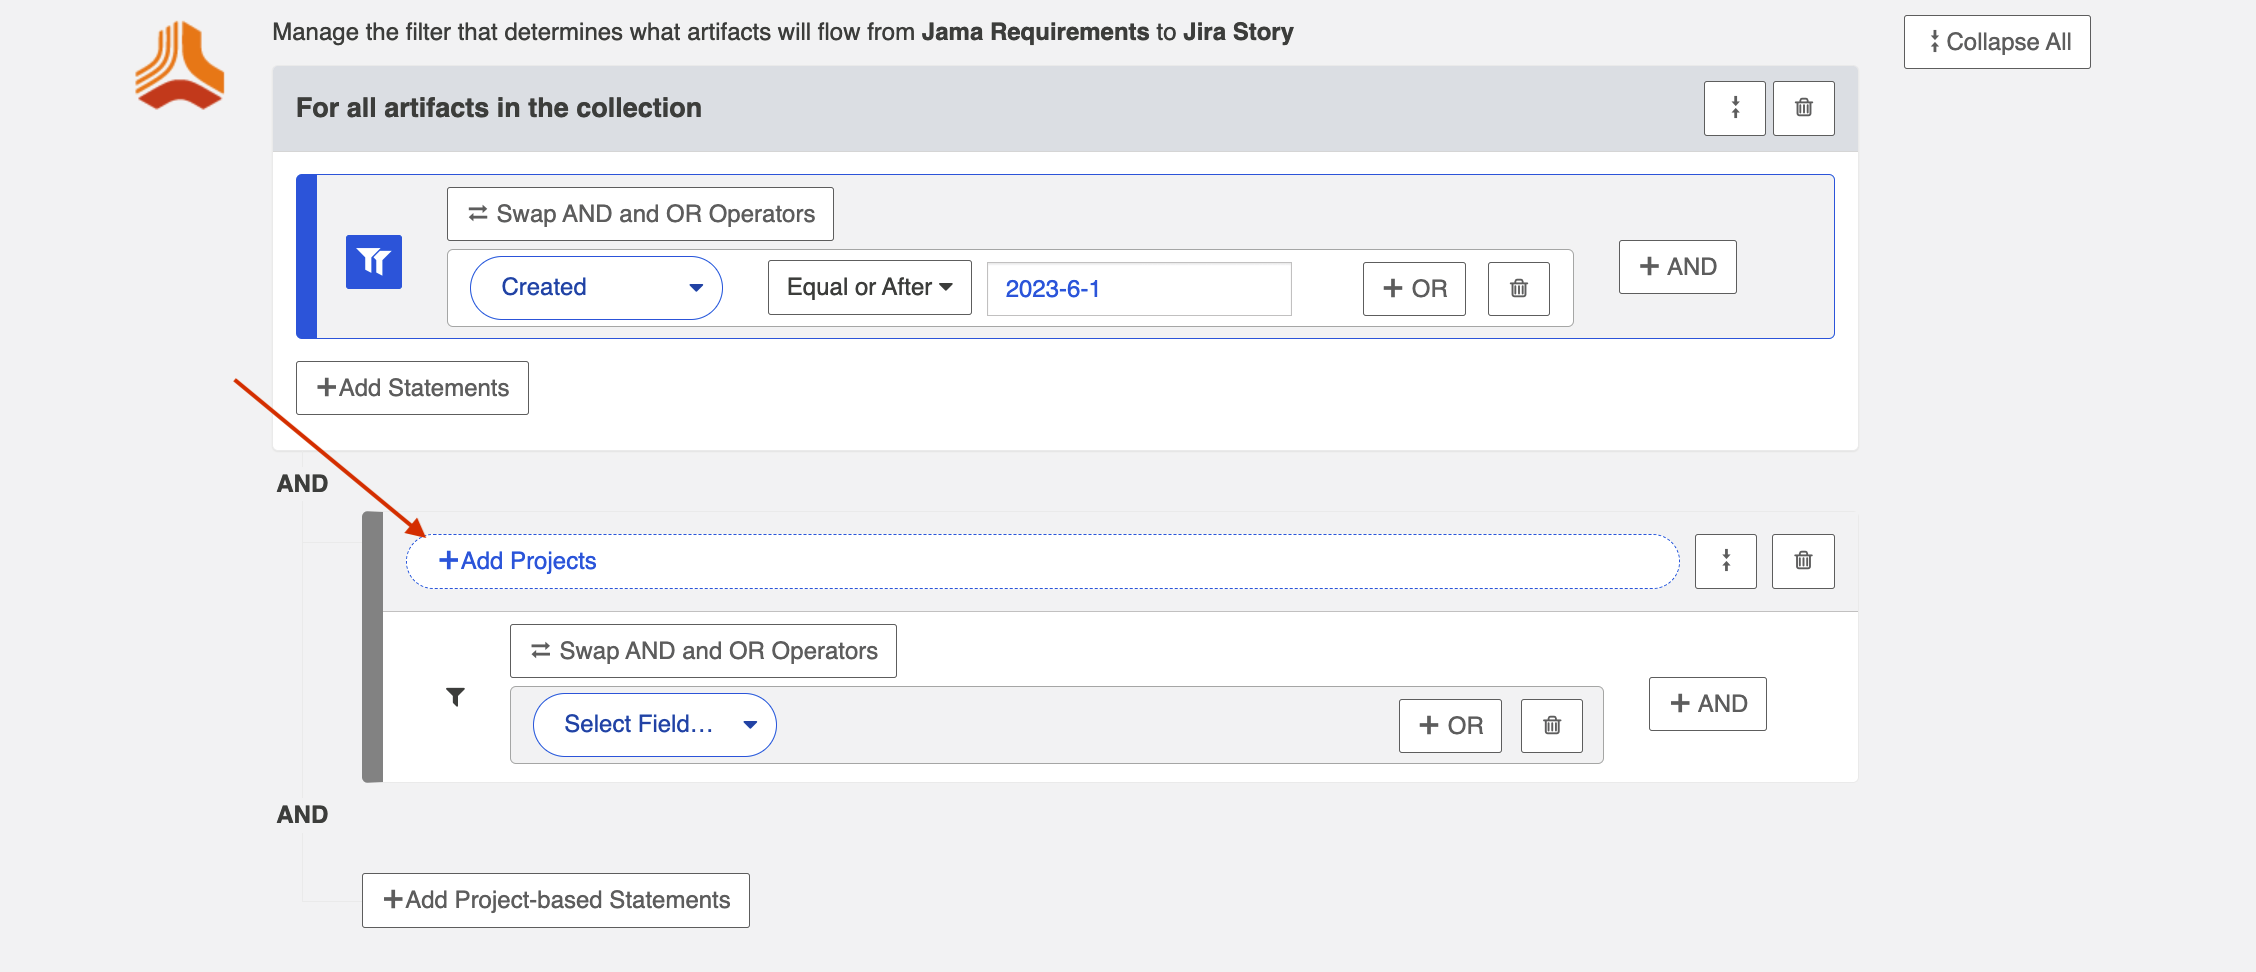
Select the project(s) you'd like your filter to apply to.
Then click Select Field... to begin configuring your filtering statement.
Viewing Artifact Filter Statements
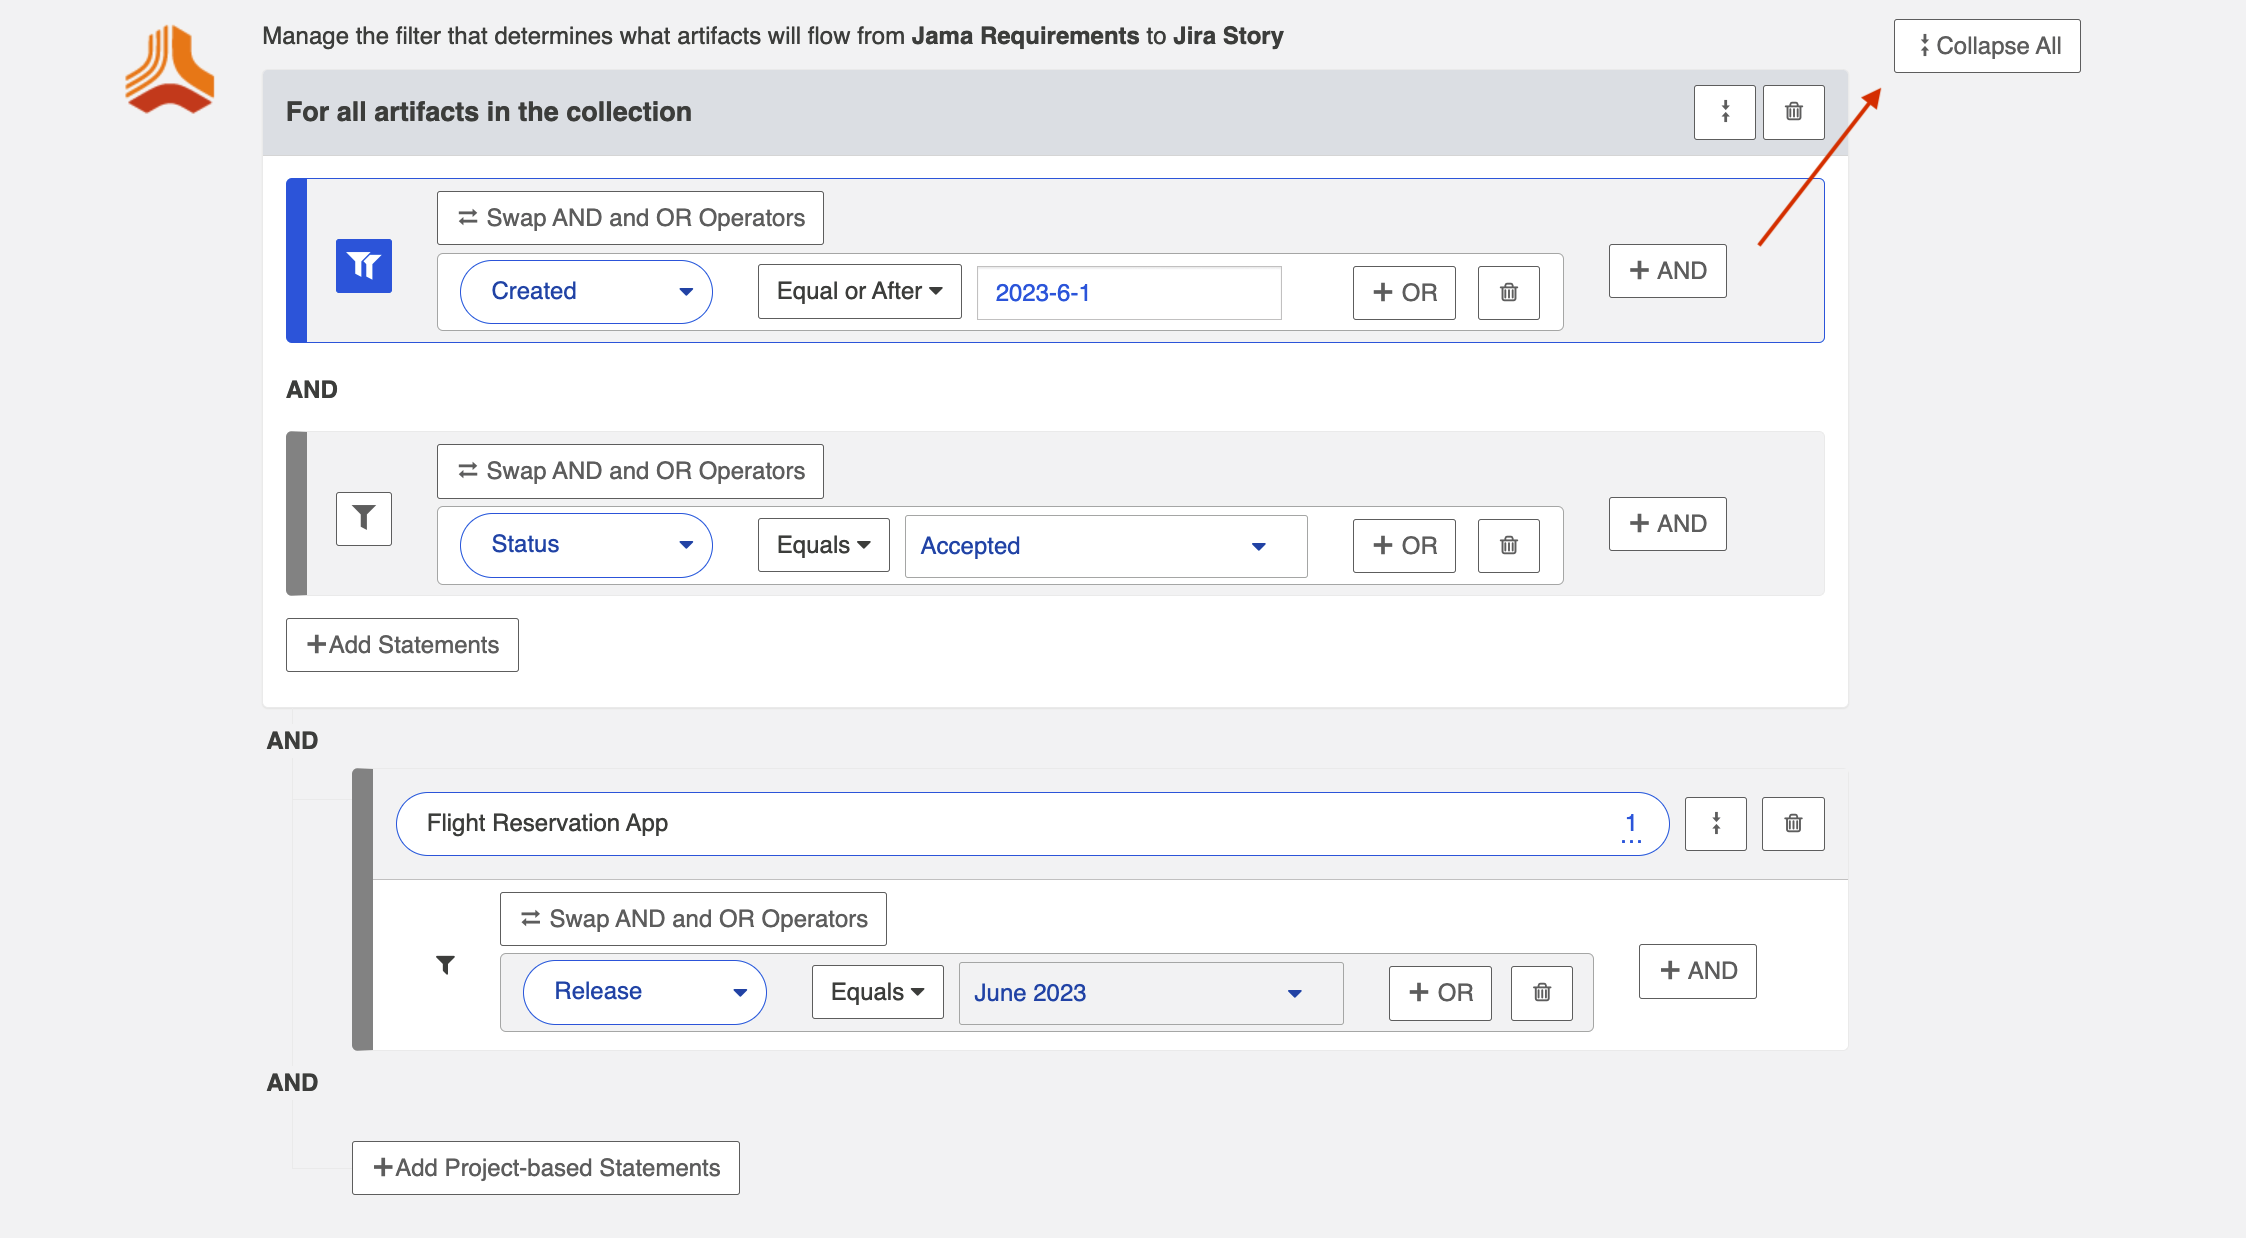
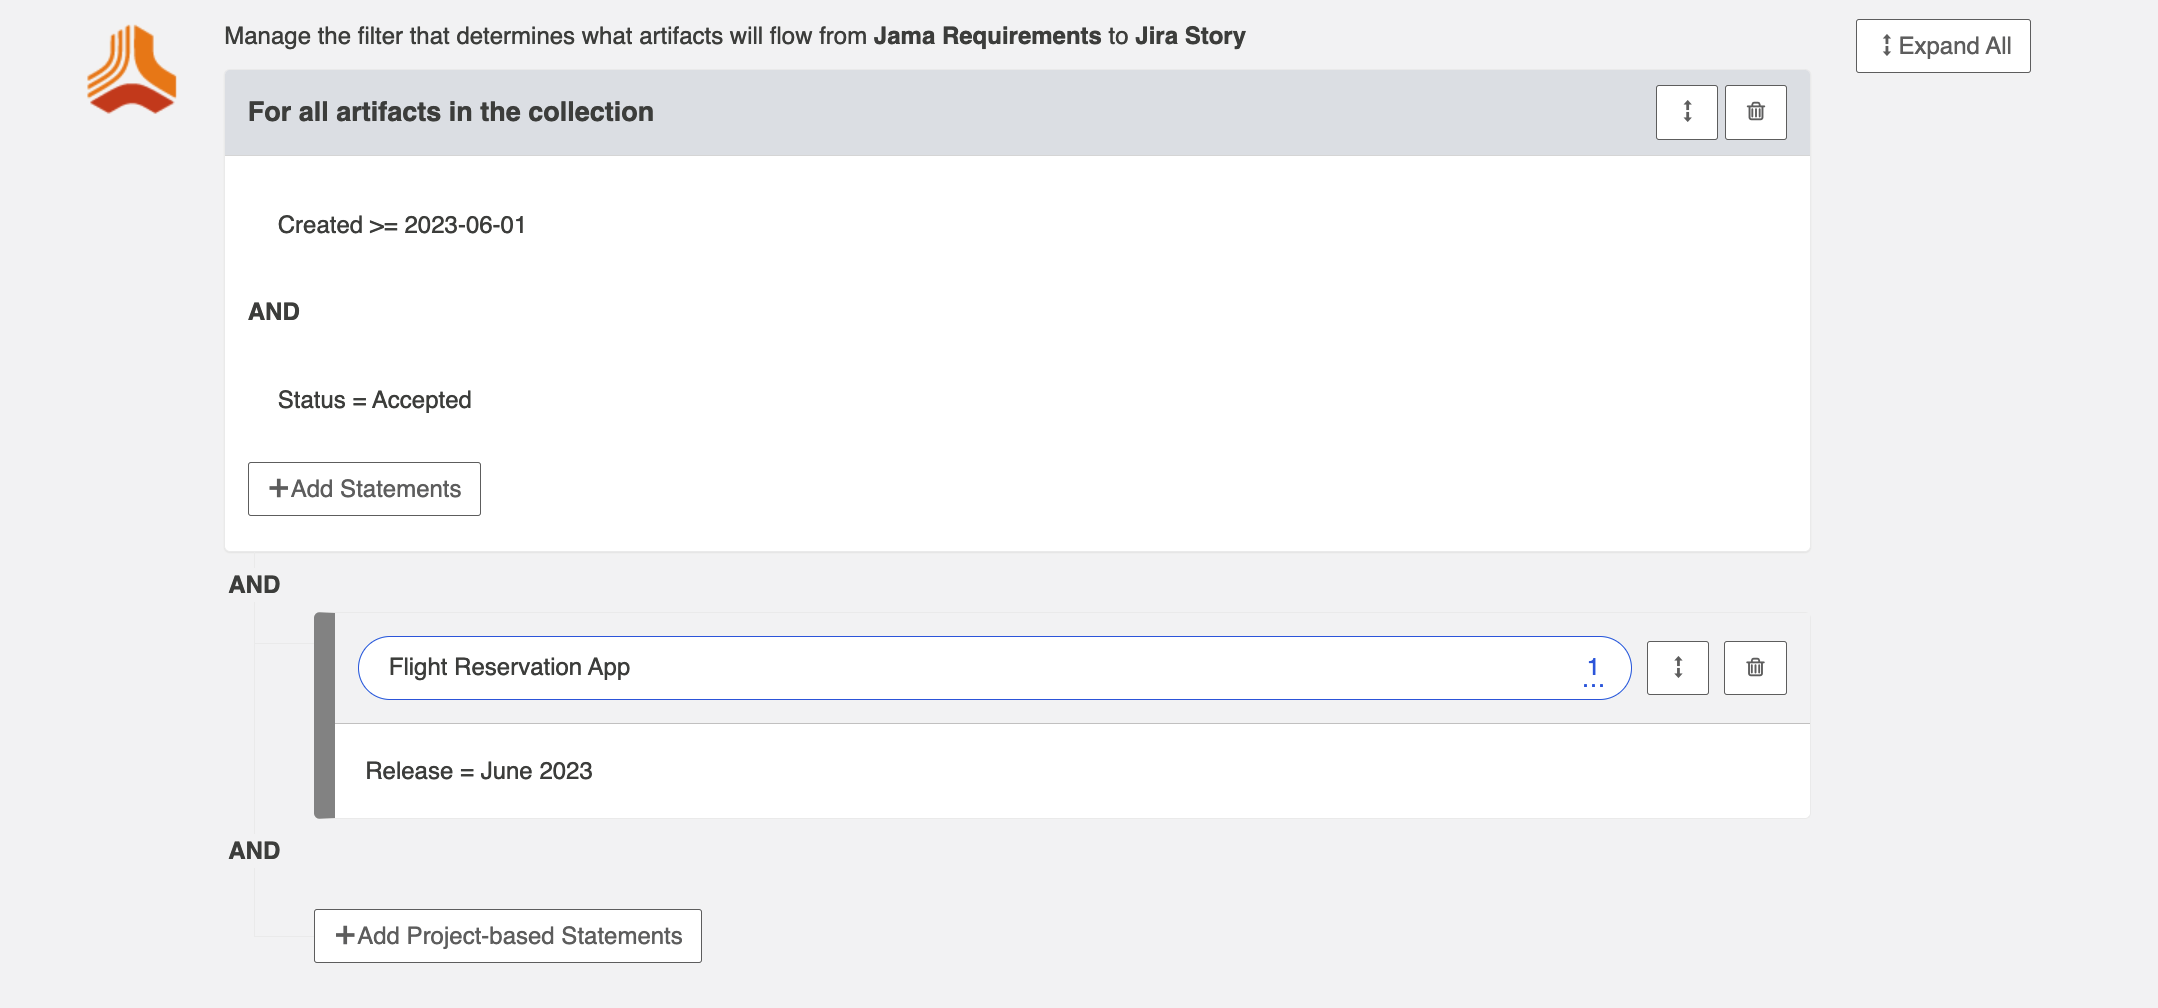
You can click the Collapse All button to view an easy-to-read version of your artifact filtering statements.
Expanding Artifact Filters
If you update an Artifact Filter of a running integration so that it includes additional artifacts, you can choose to initiate a synchronization immediately in order to synchronize the newly eligible artifacts.
To initiate synchronization, go to the main integration configuration screen and click Initiate Synchronization in the upper right corner.

On the pop-up that appears, select the collection and project(s) whose artifacts you'd like to synchronize:
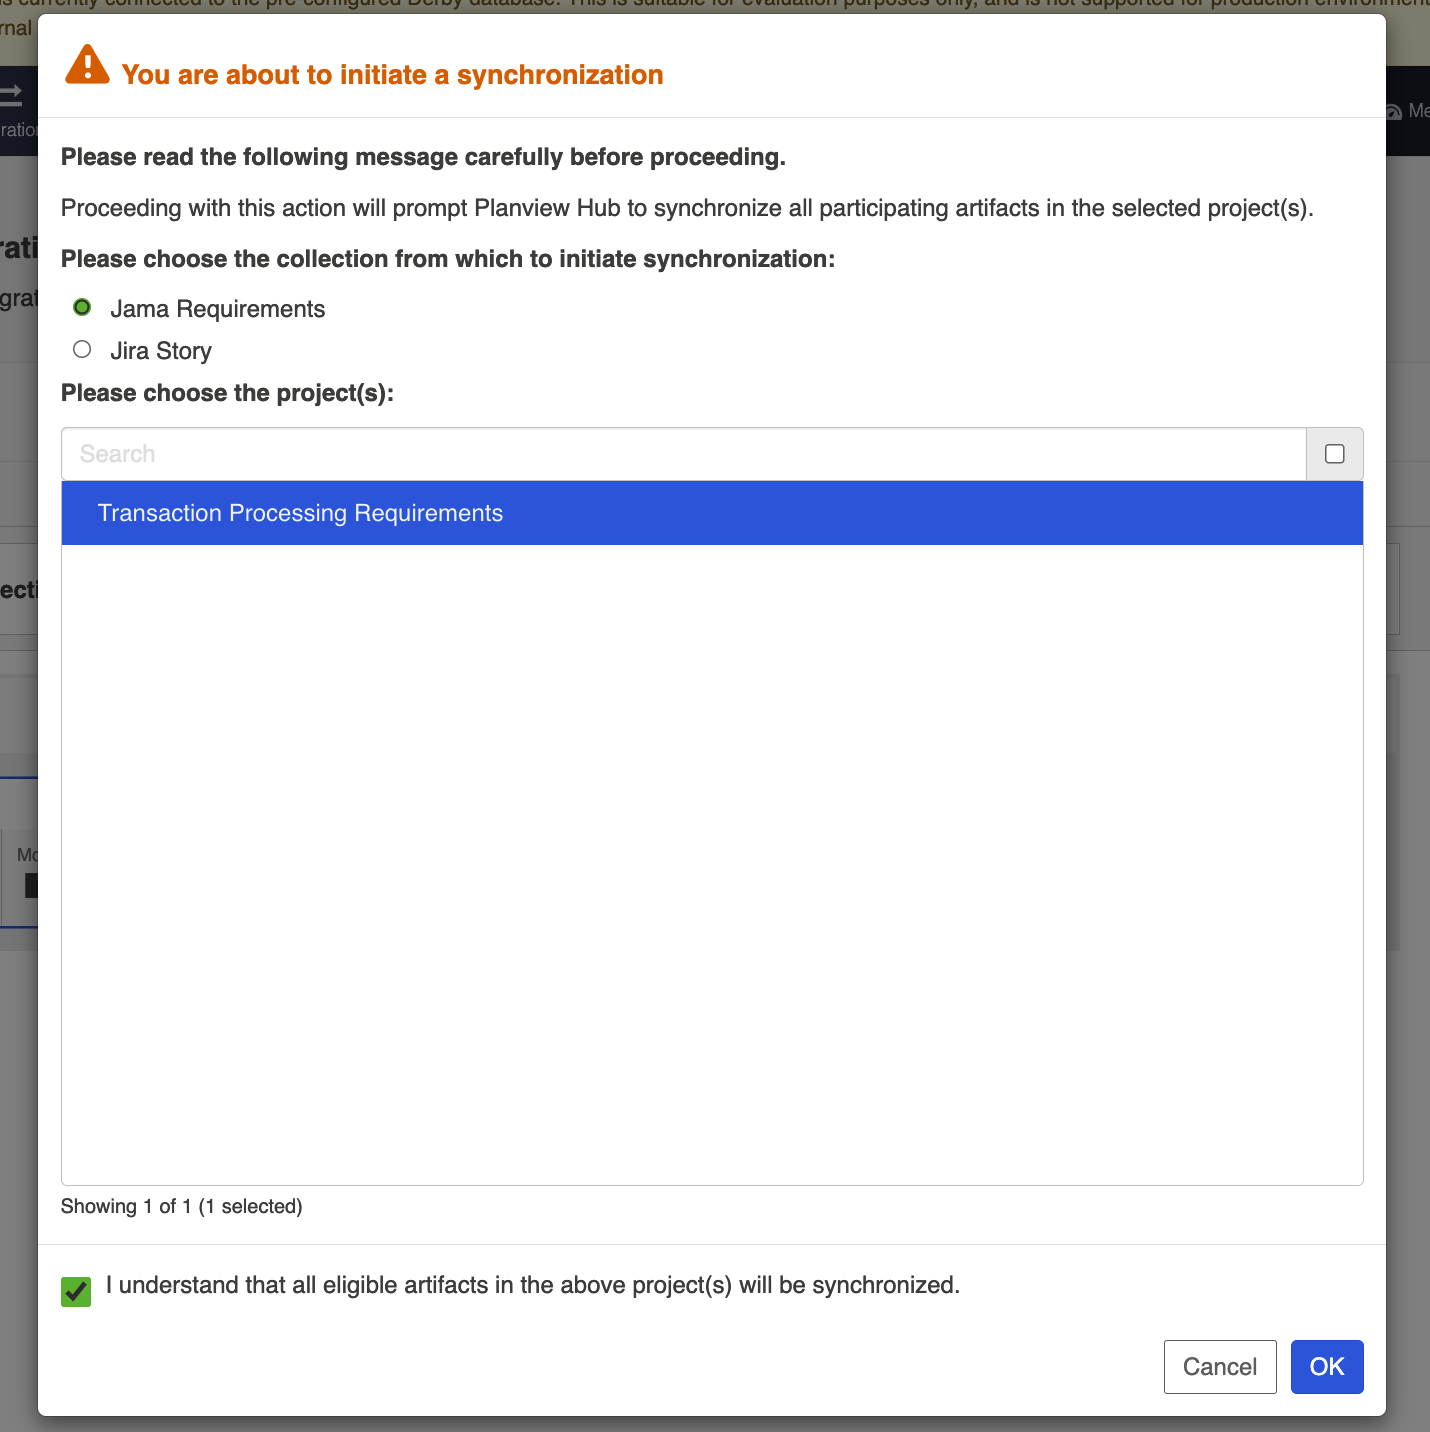
This will immediately trigger a special high fidelity full scan for the project(s) selected, causing eligible artifacts in those project(s) to synchronize.
Next Steps
Once Artifact Filtering is configured, your next step will be to review and configure Comment Flow.