
Change Detection
Introduction
Once you've configured your Conflict Resolution, your next step will be to configure your Change Detection settings.
Hub's default global change detection settings can be found on the General (Settings) screen. If you'd like to override the global defaults, you can configure integration-specific change detection and full scan intervals on this screen.
Note: You can also set repository-specific change detection on the Repository Connection screen.
- The Change Detection Interval is the time between polling requests to detect only changed artifacts. This defaults to 1 minute on the General (Settings) screen, but can be customized as desired.
- The Full Scan Interval is the time between polling requests to detect changed artifacts, in which all artifacts that have previously synchronized in the integration are scanned.
Note: For Planview Hub Cloud instances, we recommend setting the change detection interval to at least 1 minute and the full scan interval to at least 24 hours.
Not all changes to an artifact will register as a change. Some repositories do not mark items as changed when (for example) a relationship is added or an attachment has changed. These may not be picked up by regular Change Detection, but will be picked up by a Full Scan. You can review our connector docs to see types of updates that will require a full scan. The Full Scan Interval defaults to 24 hours on the General (Settings) screen, but can be customized as desired.
Note that since the Full Scan only scans artifacts that have previously synchronized, artifacts that are newly eligible for synchronization due to updated artifact filtering or routing will not be picked up by the Full Scan. These artifacts will only be processed by clicking the 'process all artifacts' button, or when a new integration-eligible change is made to them.
Note: When configuring change detection settings, integration-level change detection has the highest precedence, followed by repository-level change detection, and then global change detection. This means that if integration-level change detection is configured, the integration-level setting will always be used (even if repository-level or global settings are configured). If no overrides are set, change detection will default to the global settings.
You can learn more about change detection and full scan styles in our FAQ here.
Configuring Change Detection
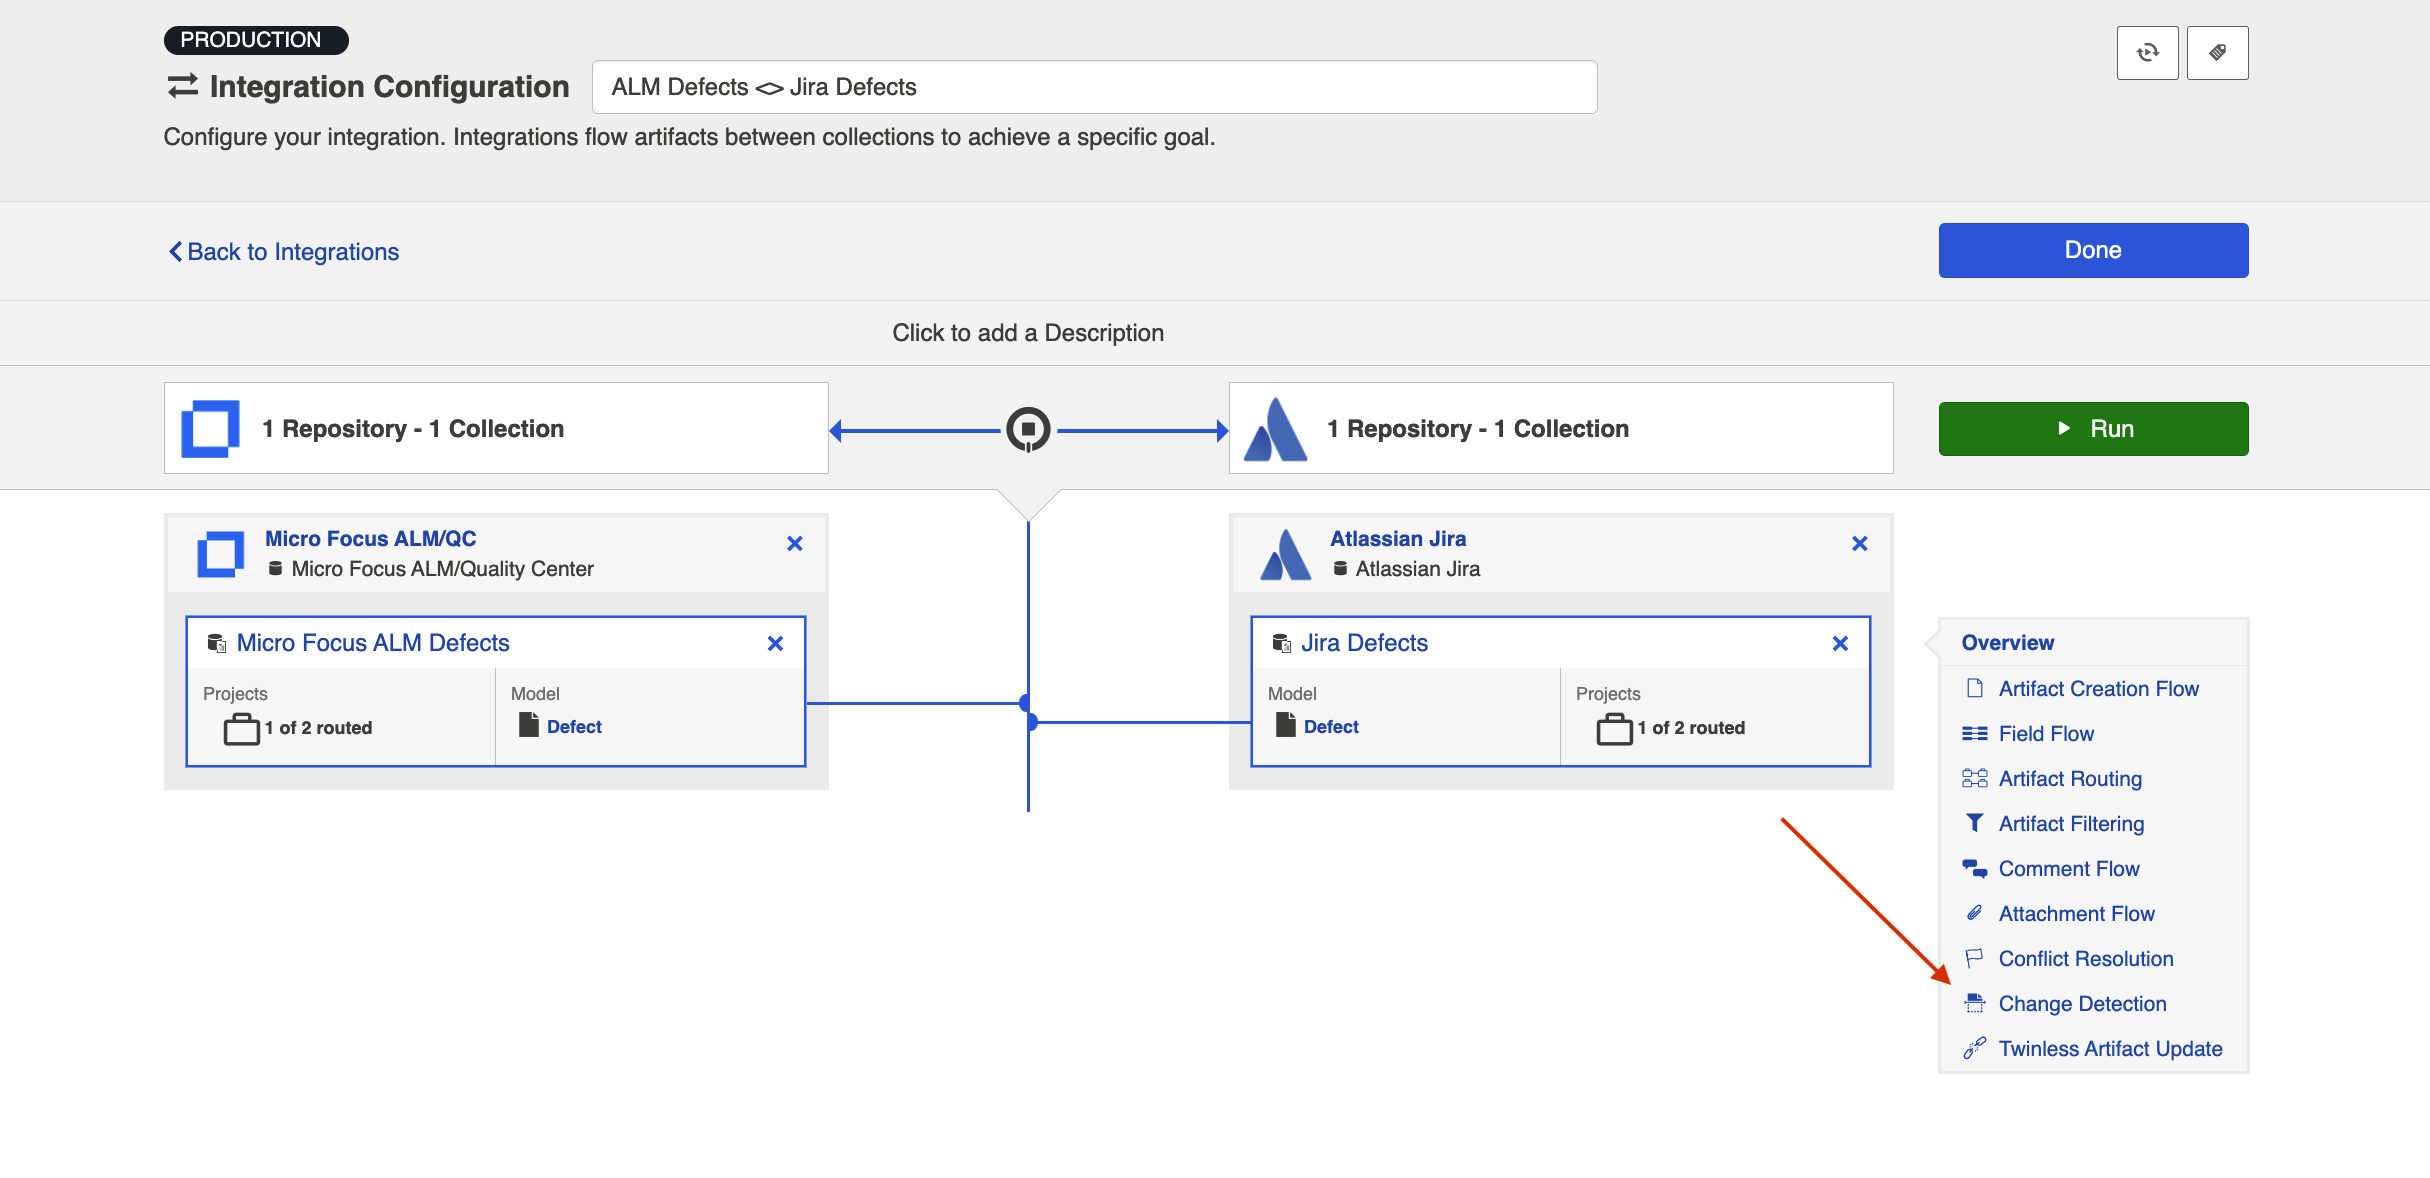
To configure integration-specific change detection, click the Change Detection link on the Integration Configuration screen.
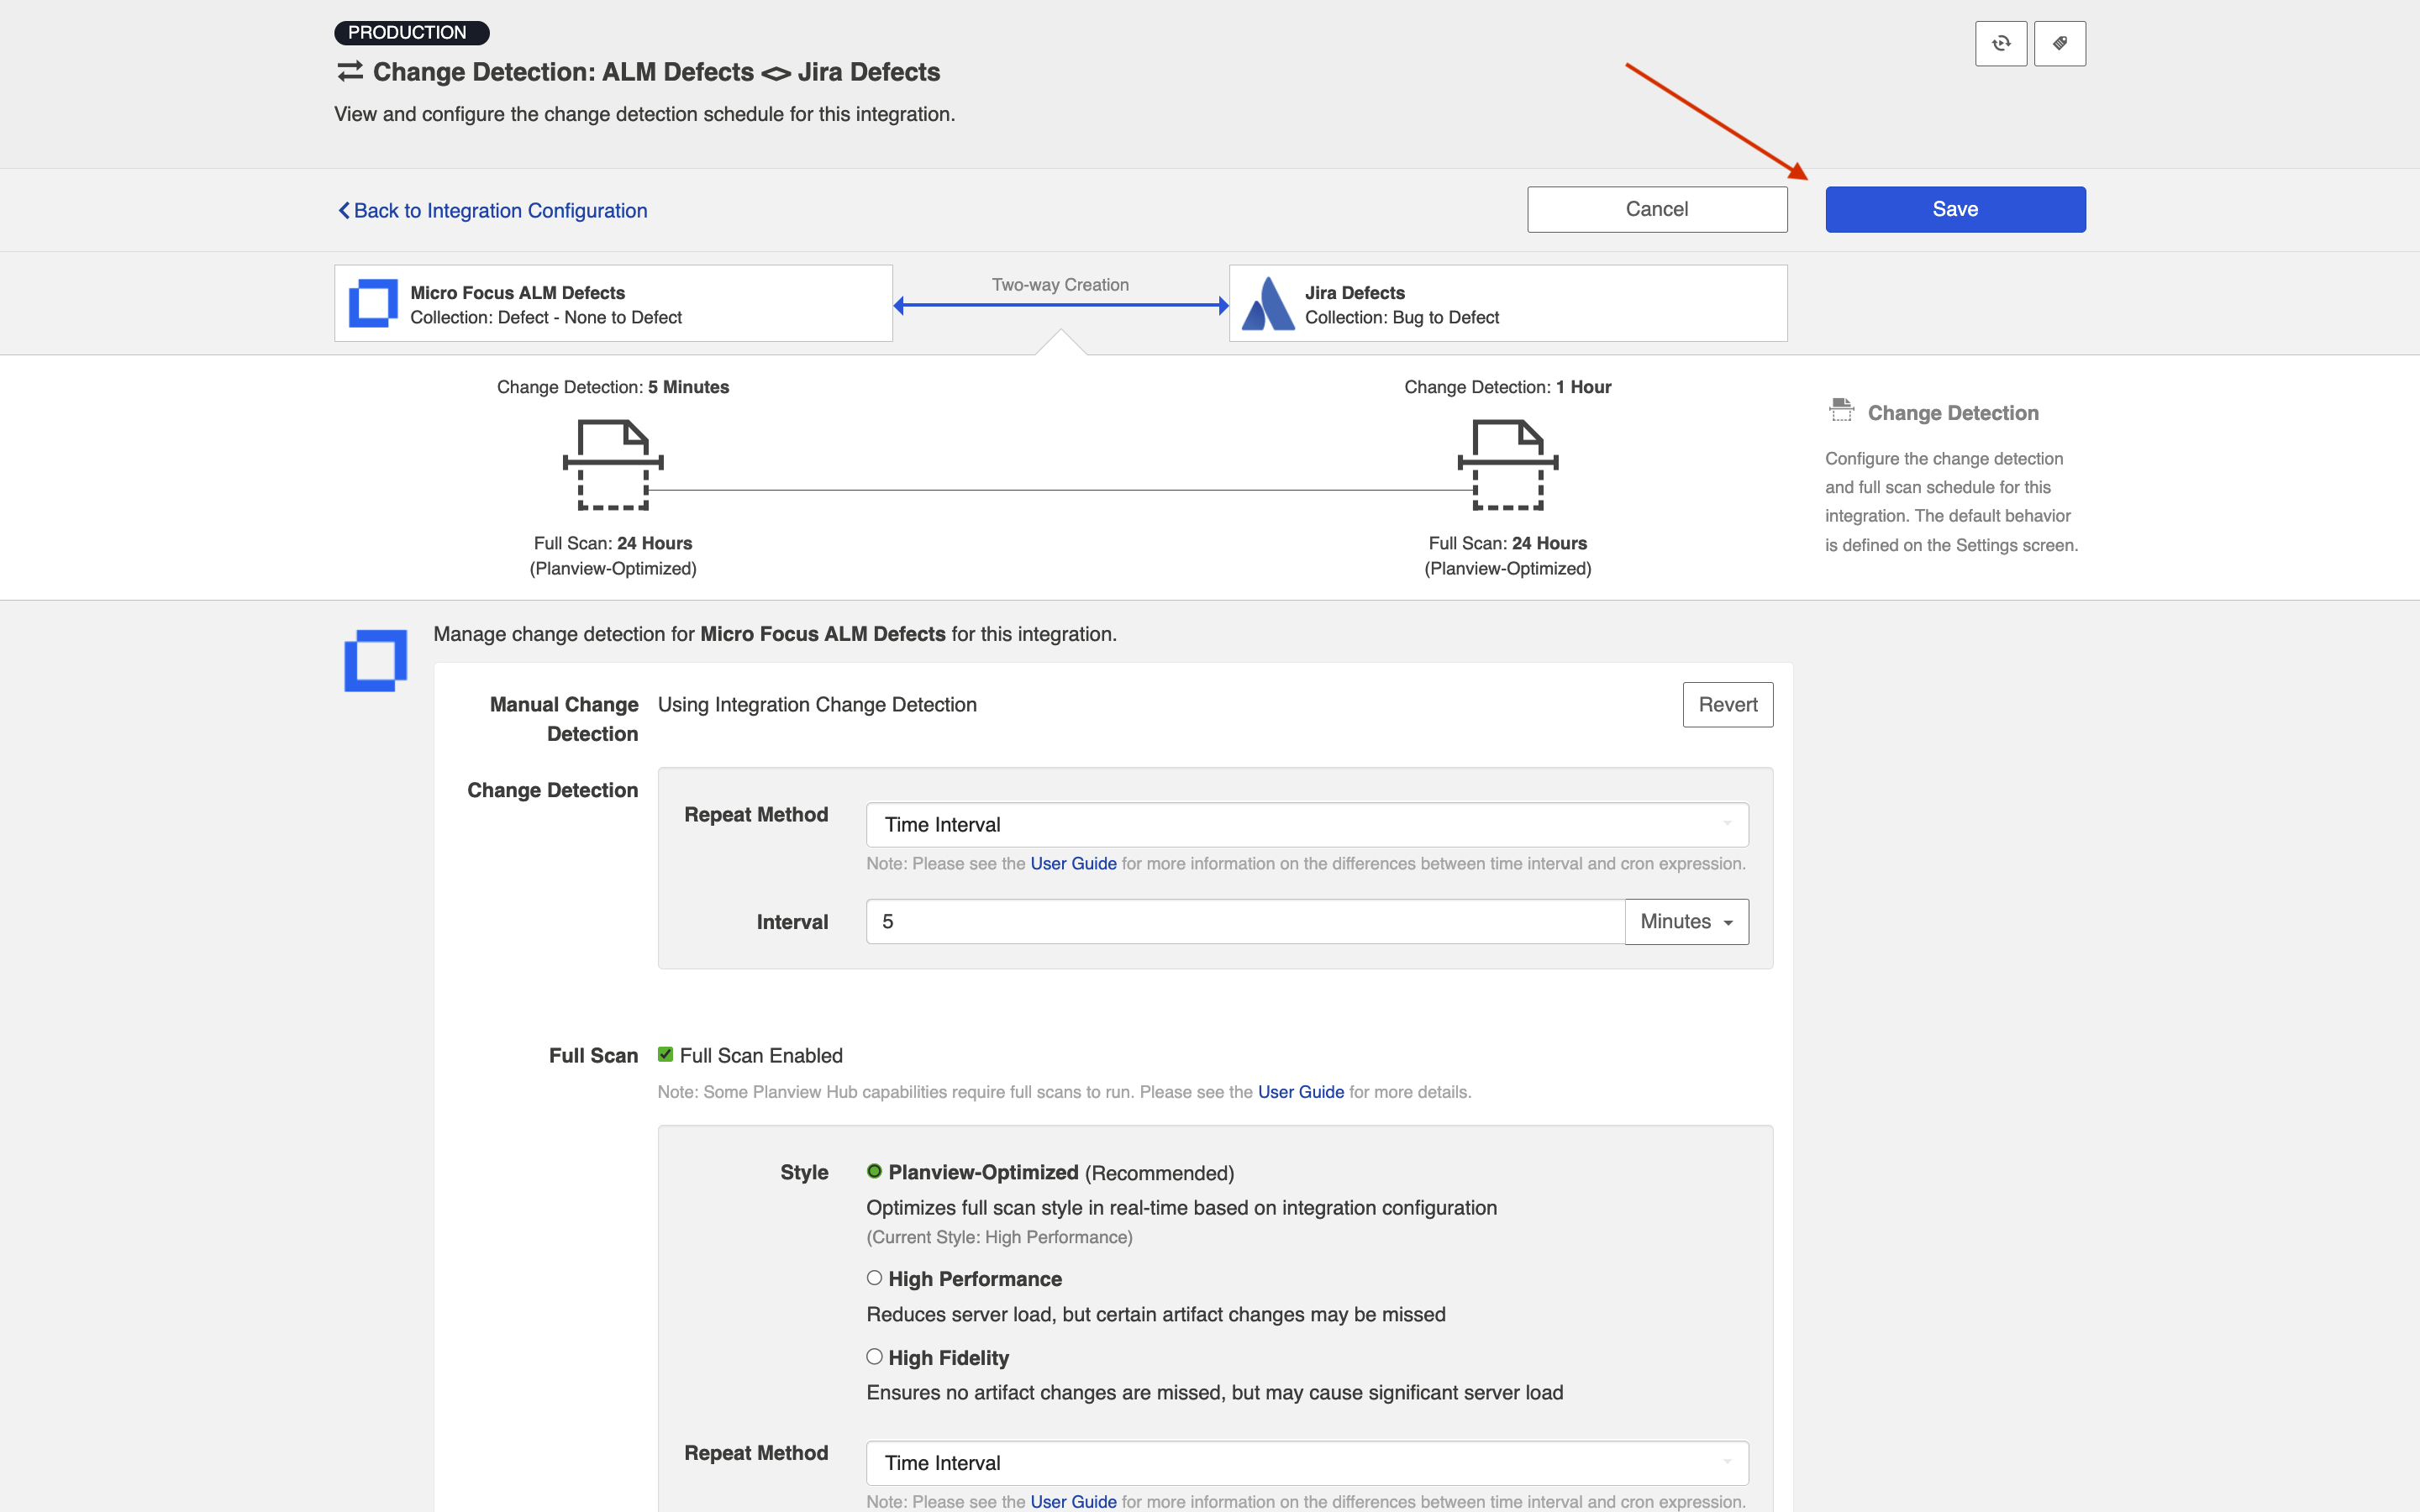
This will bring you to the Change Detection screen, where you can view the current change detection and full scan intervals configured for each collection in this integration. These will default to the global intervals configured on the General (Settings) screen.
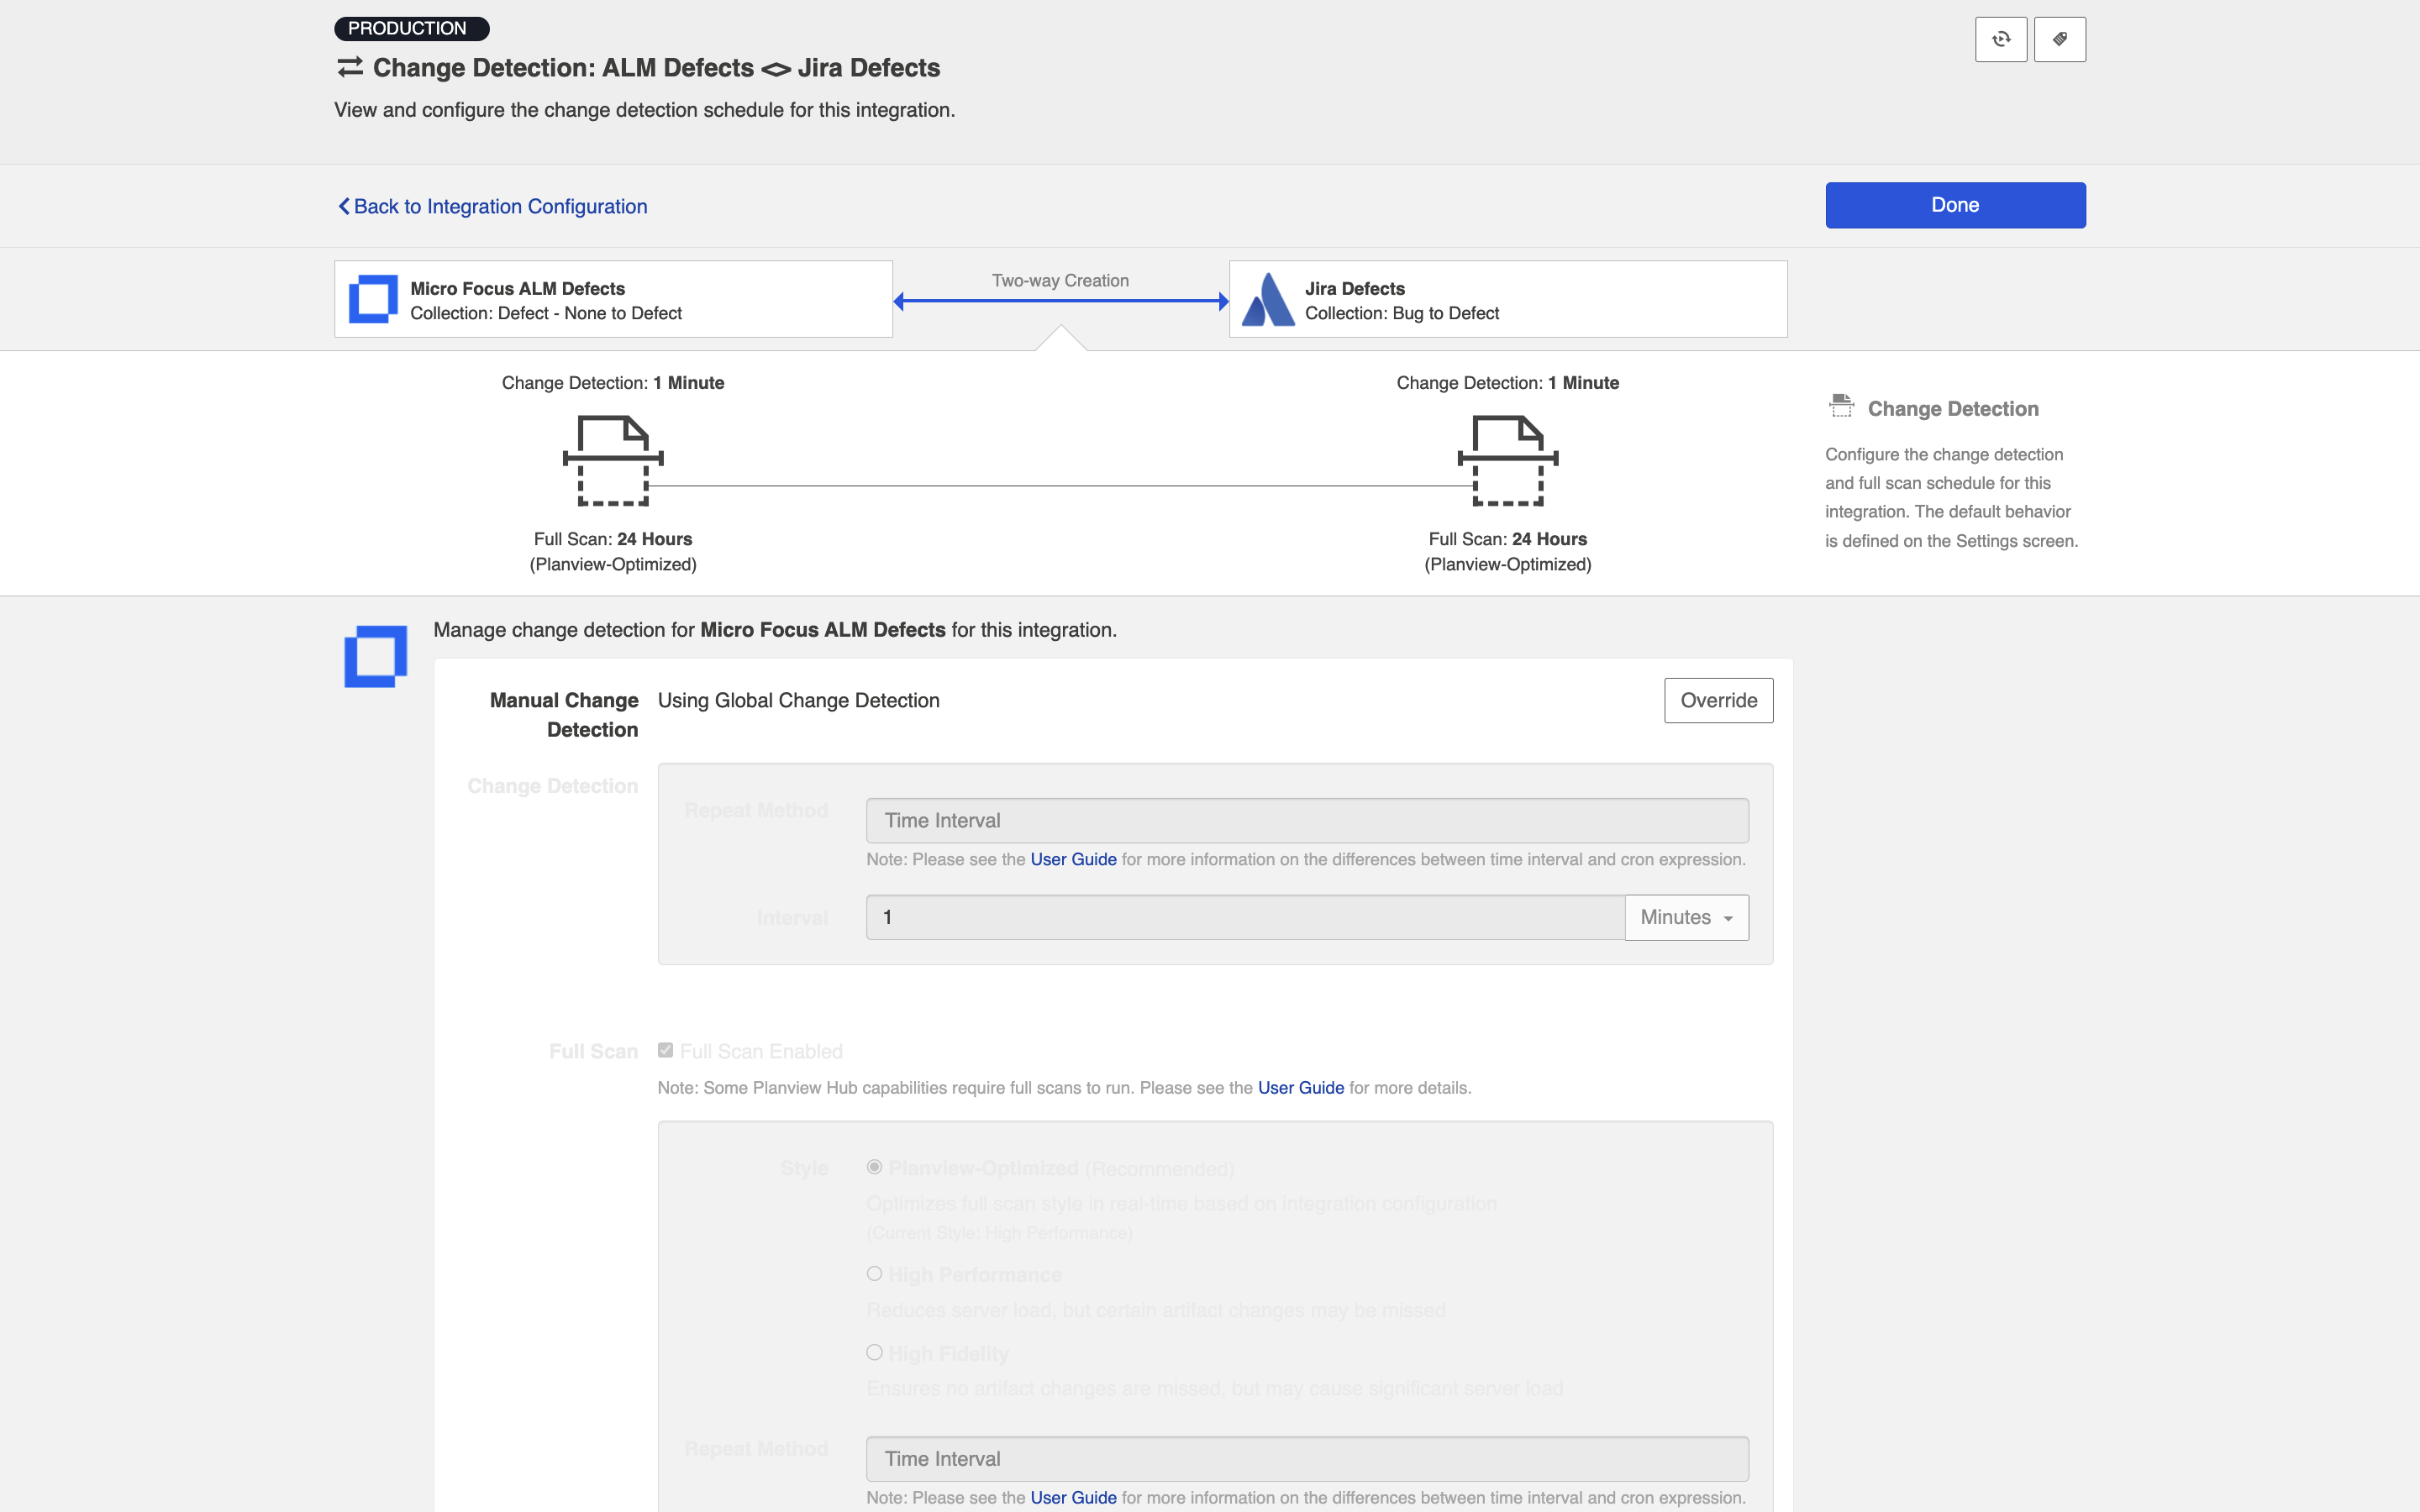
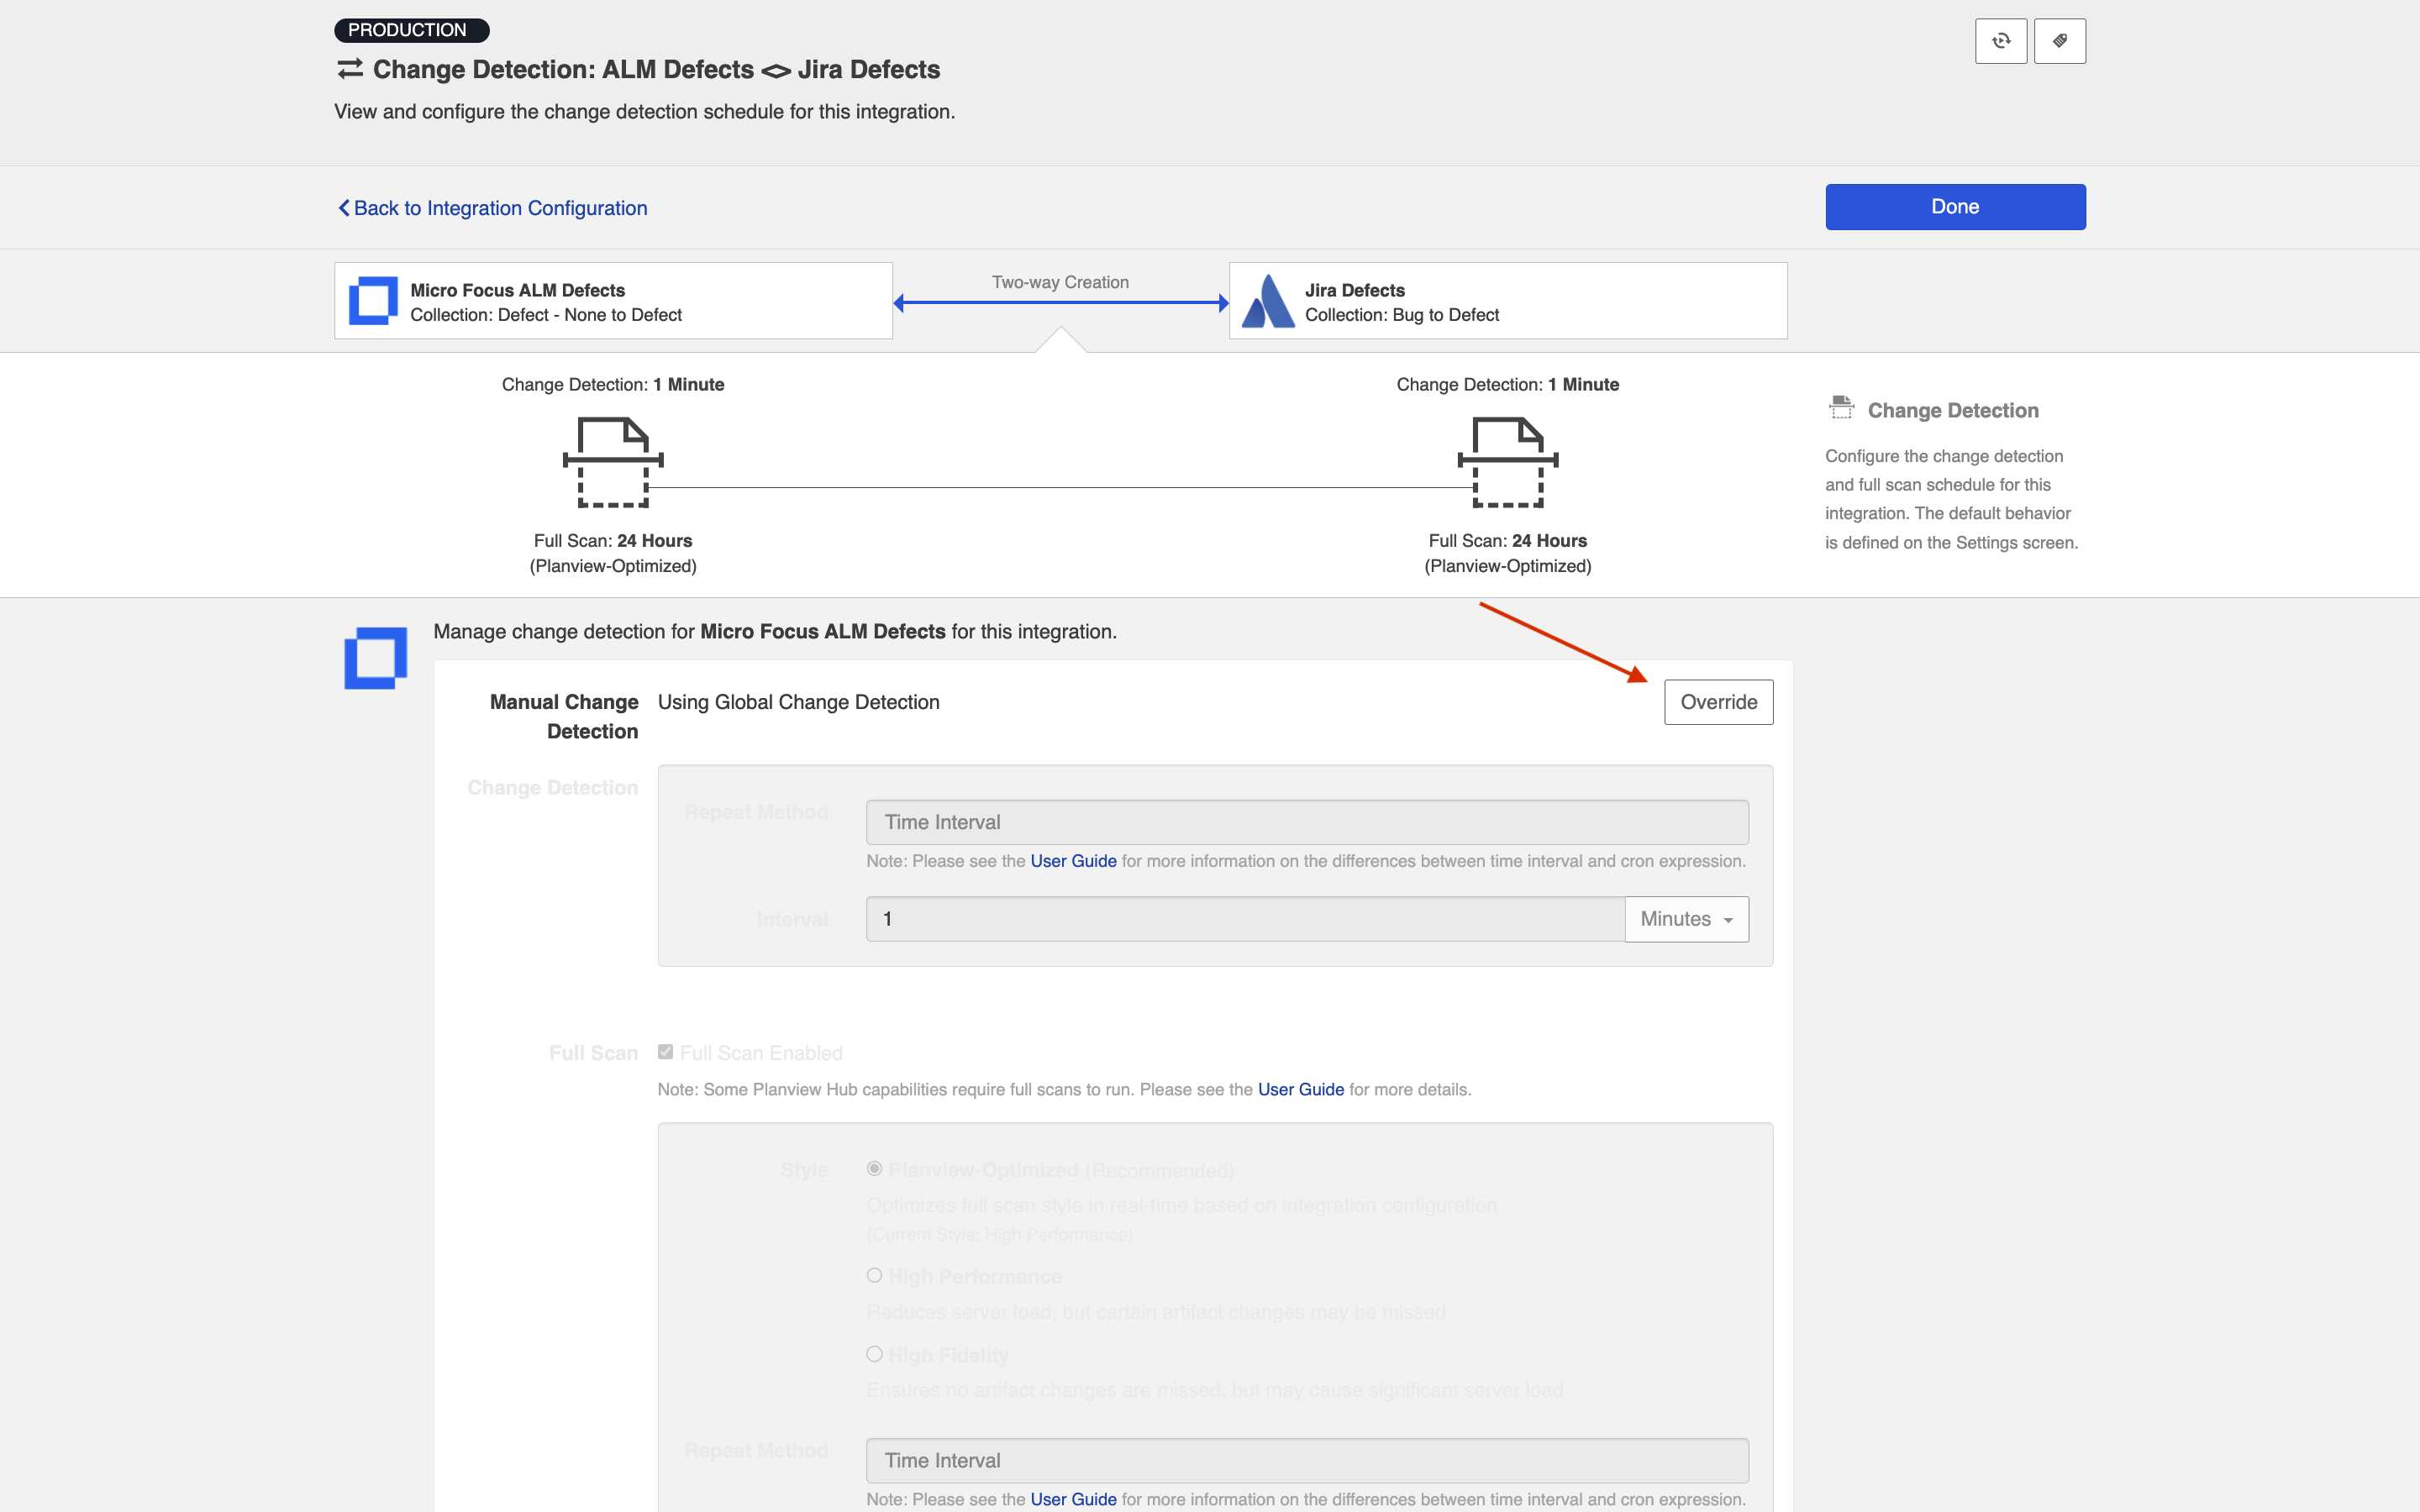
To override the current settings, click the Override button on your desired collection. This will allow you to set a custom change detection and/or full scan interval for each collection within the context of this integration.
Note: These custom settings will only impact this integration; they will not impact other integrations that use the same collections.
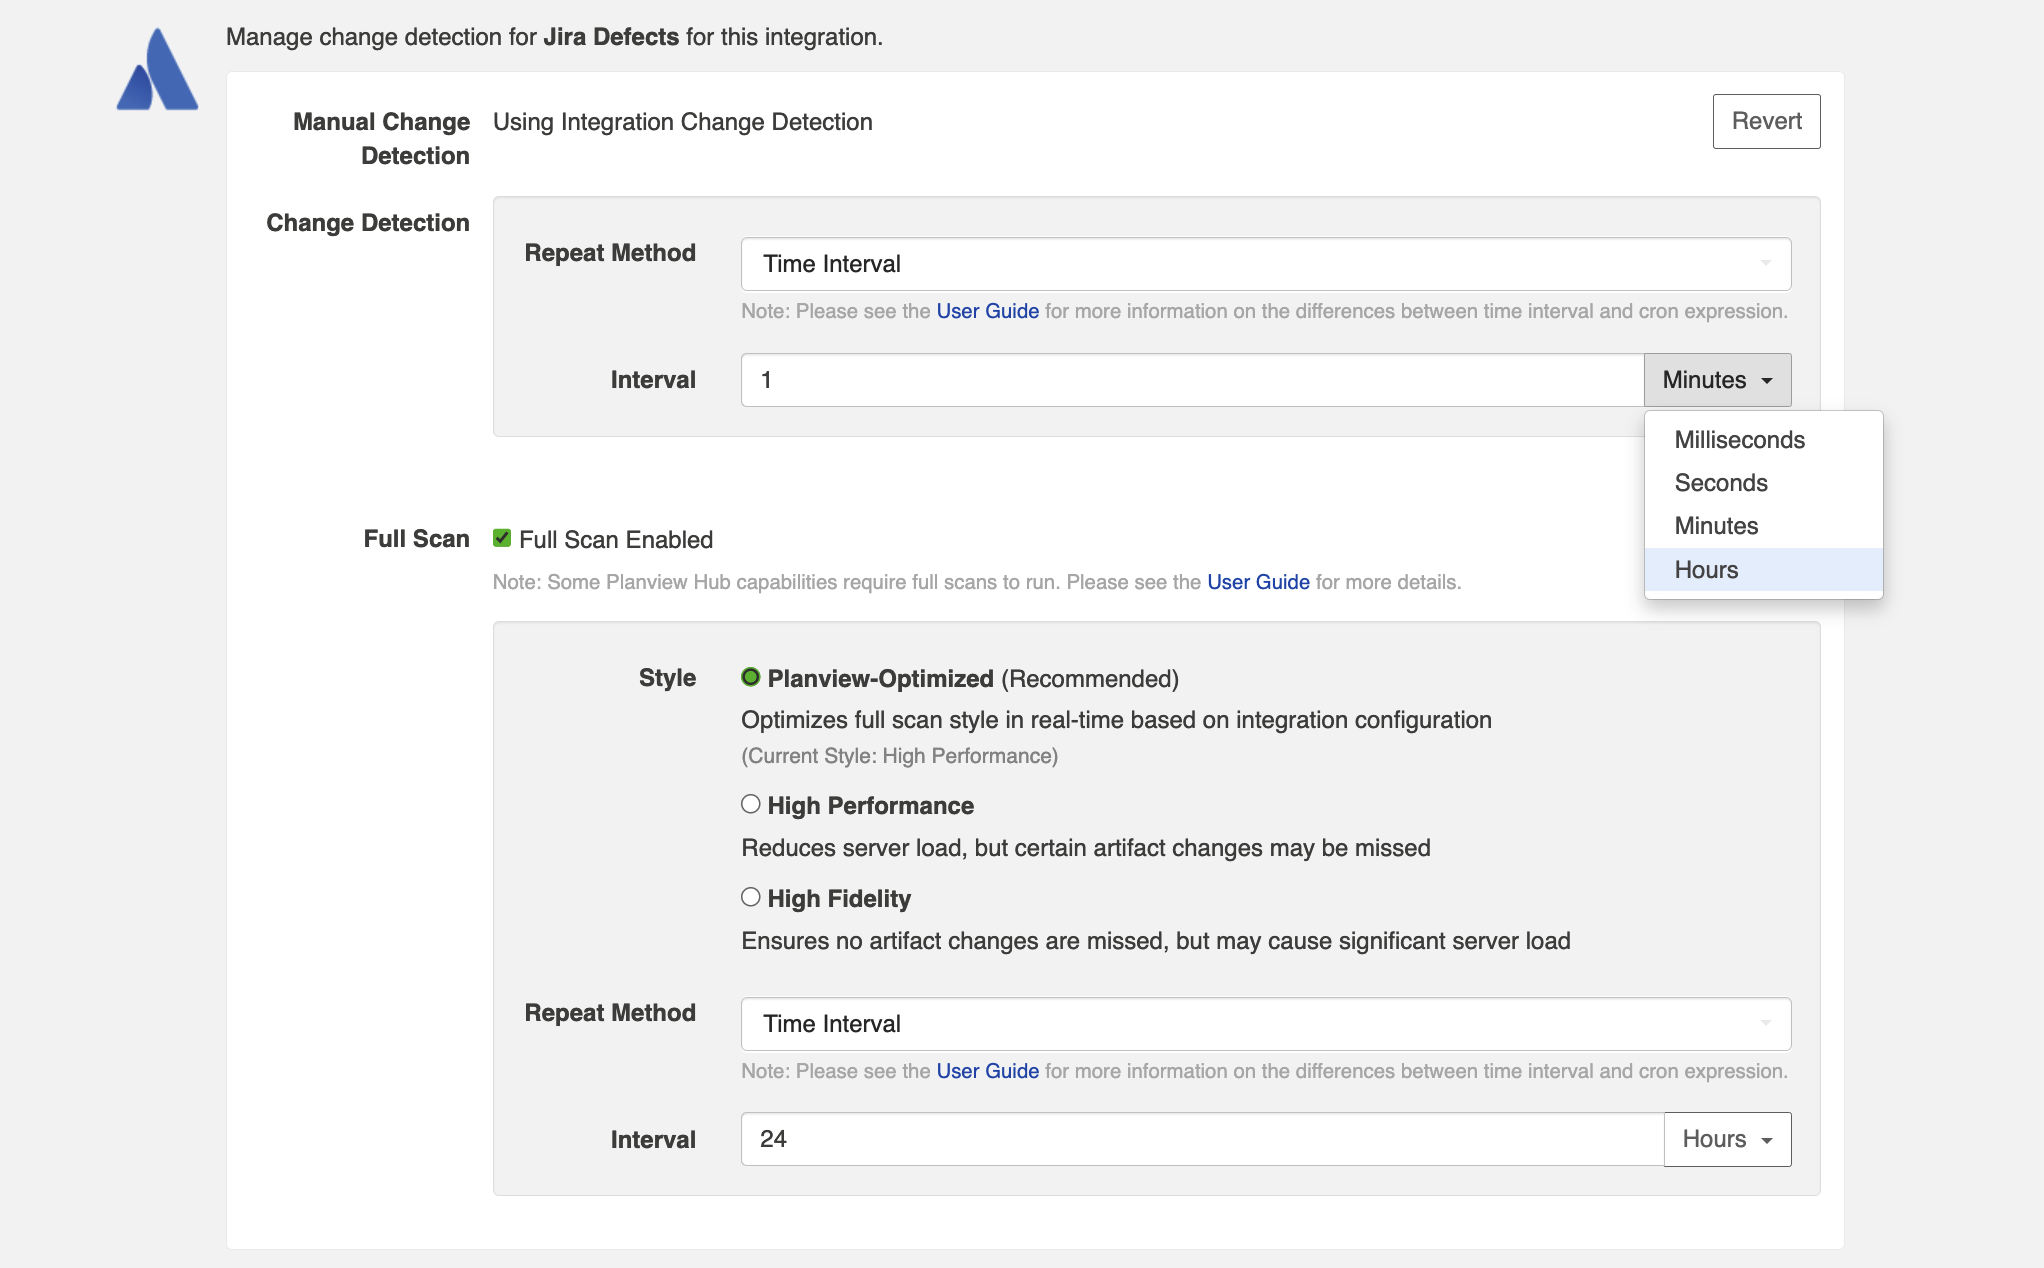
Once you click Override, you will be able to configure custom change detection and full scan intervals for that collection within the context of the integration:
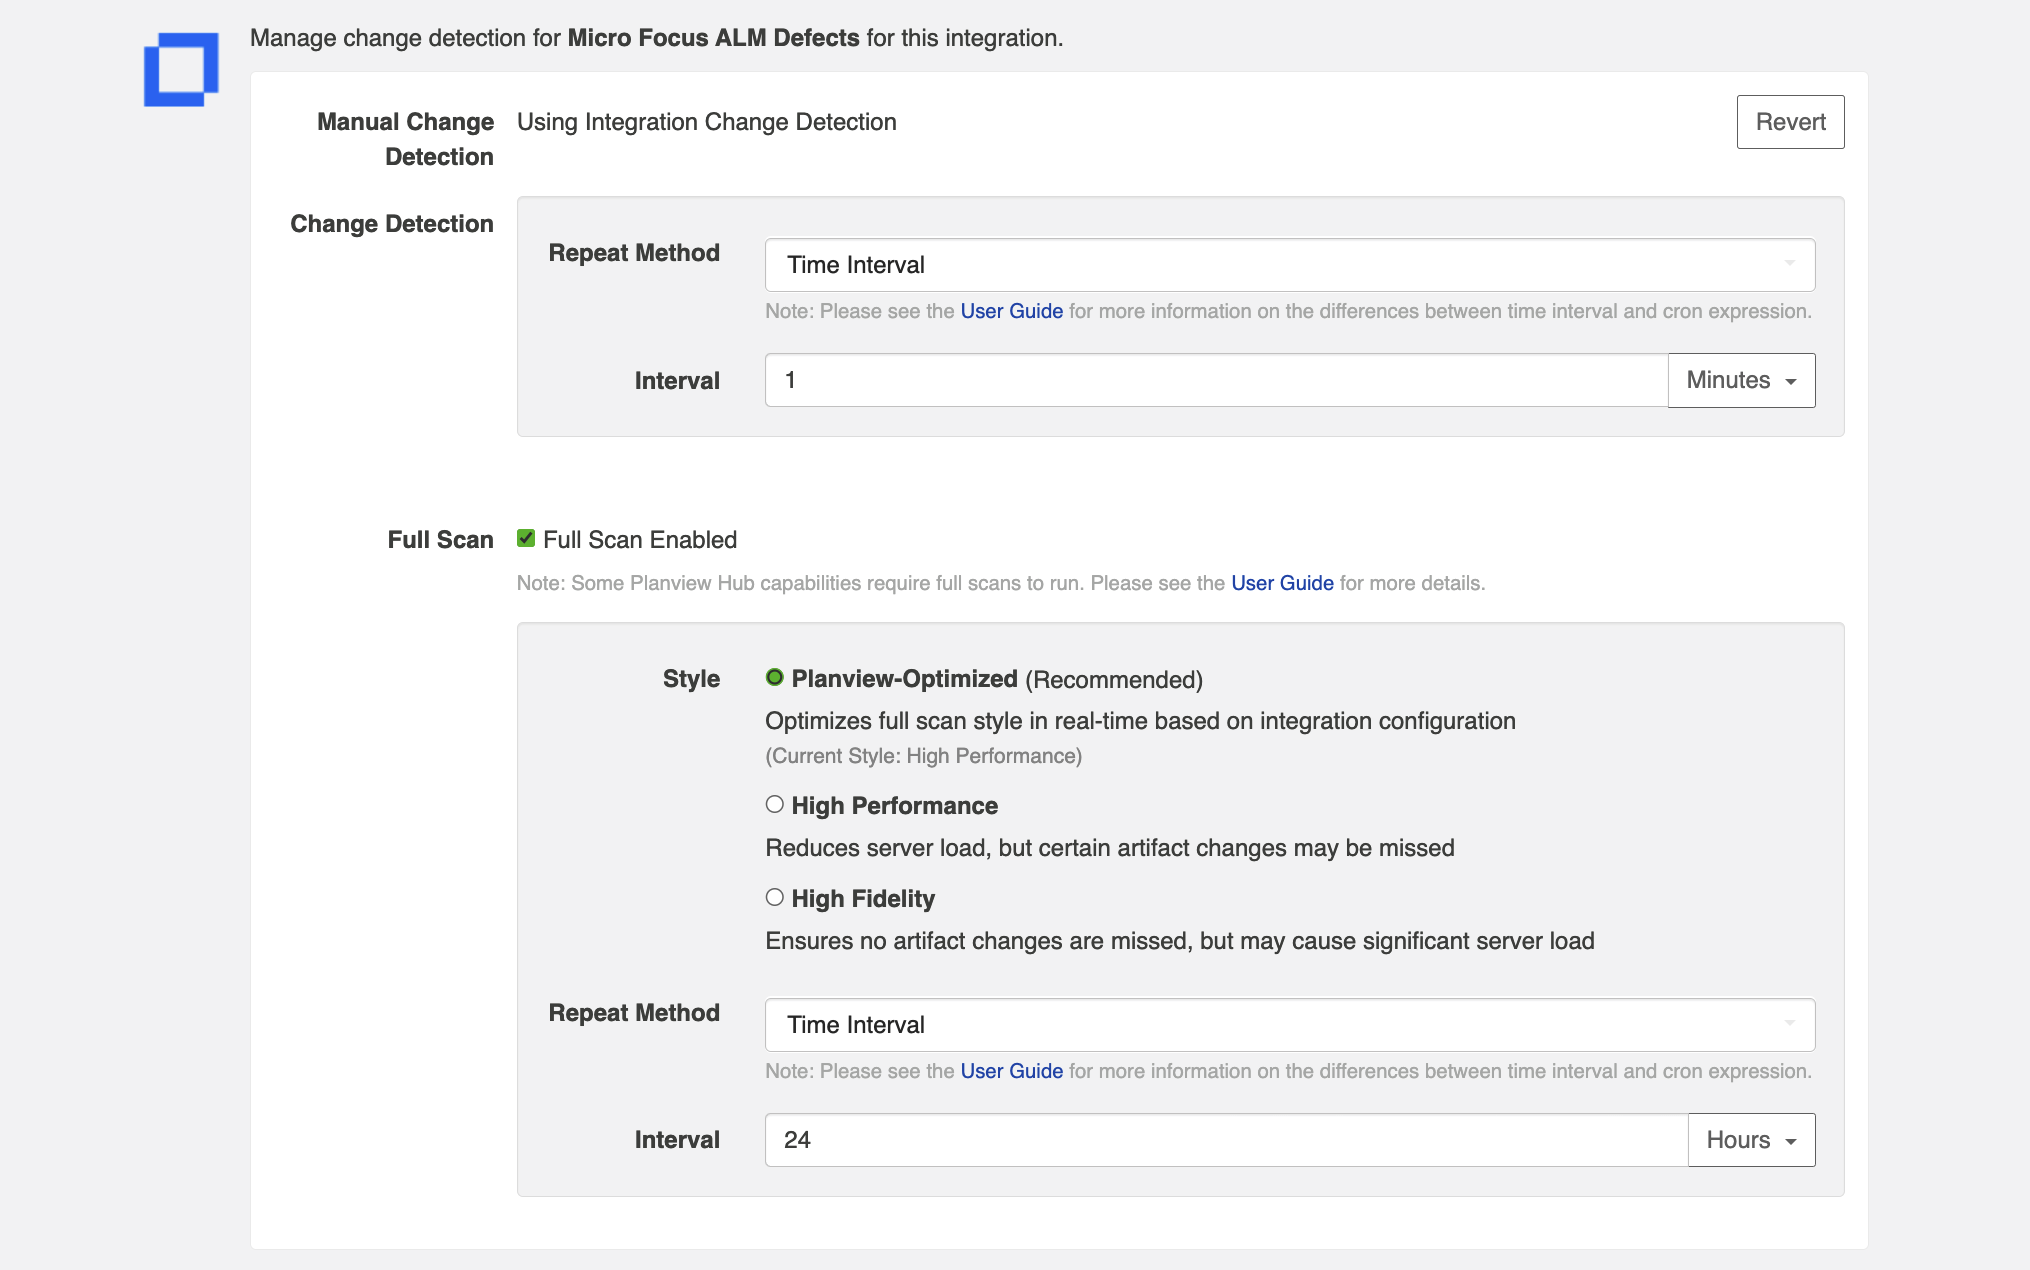
Full Scan Style and Interval
In addition to customizing the full scan interval, you can also select your desired full scan style in order to best meet your specific performance and server load needs.
The following full scan styles are available:
- Planview-Optimized (Recommended): This is the default selection. It optimizes your full scan style in real-time based on your integration configuration.
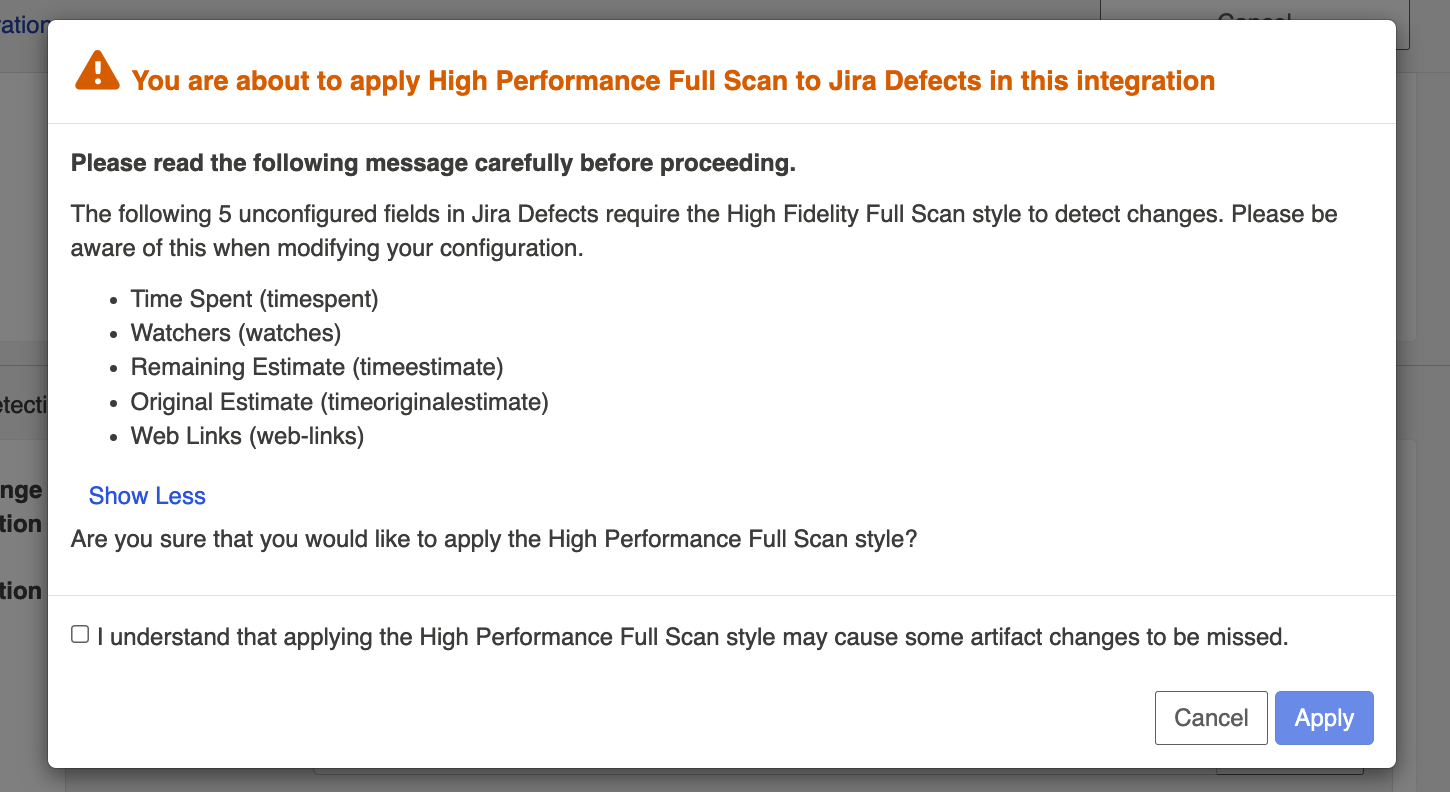
- High Performance: This full scan style reduces server load, but certain artifact changes may be missed.
- High Fidelity: This full scan style ensures no artifact changes are missed, but may cause significant server load.
- Note: High Fidelity full scans will not detect changes to previously filtered artifacts if those changes are not detected by normal change detection.
If High Performance style is selected, Hub will provide a warning identifying any specific artifact changes which may be missed:
Once you have configured your change detection and full scan intervals for your first collection, you can update the settings for the remaining collection, if desired.
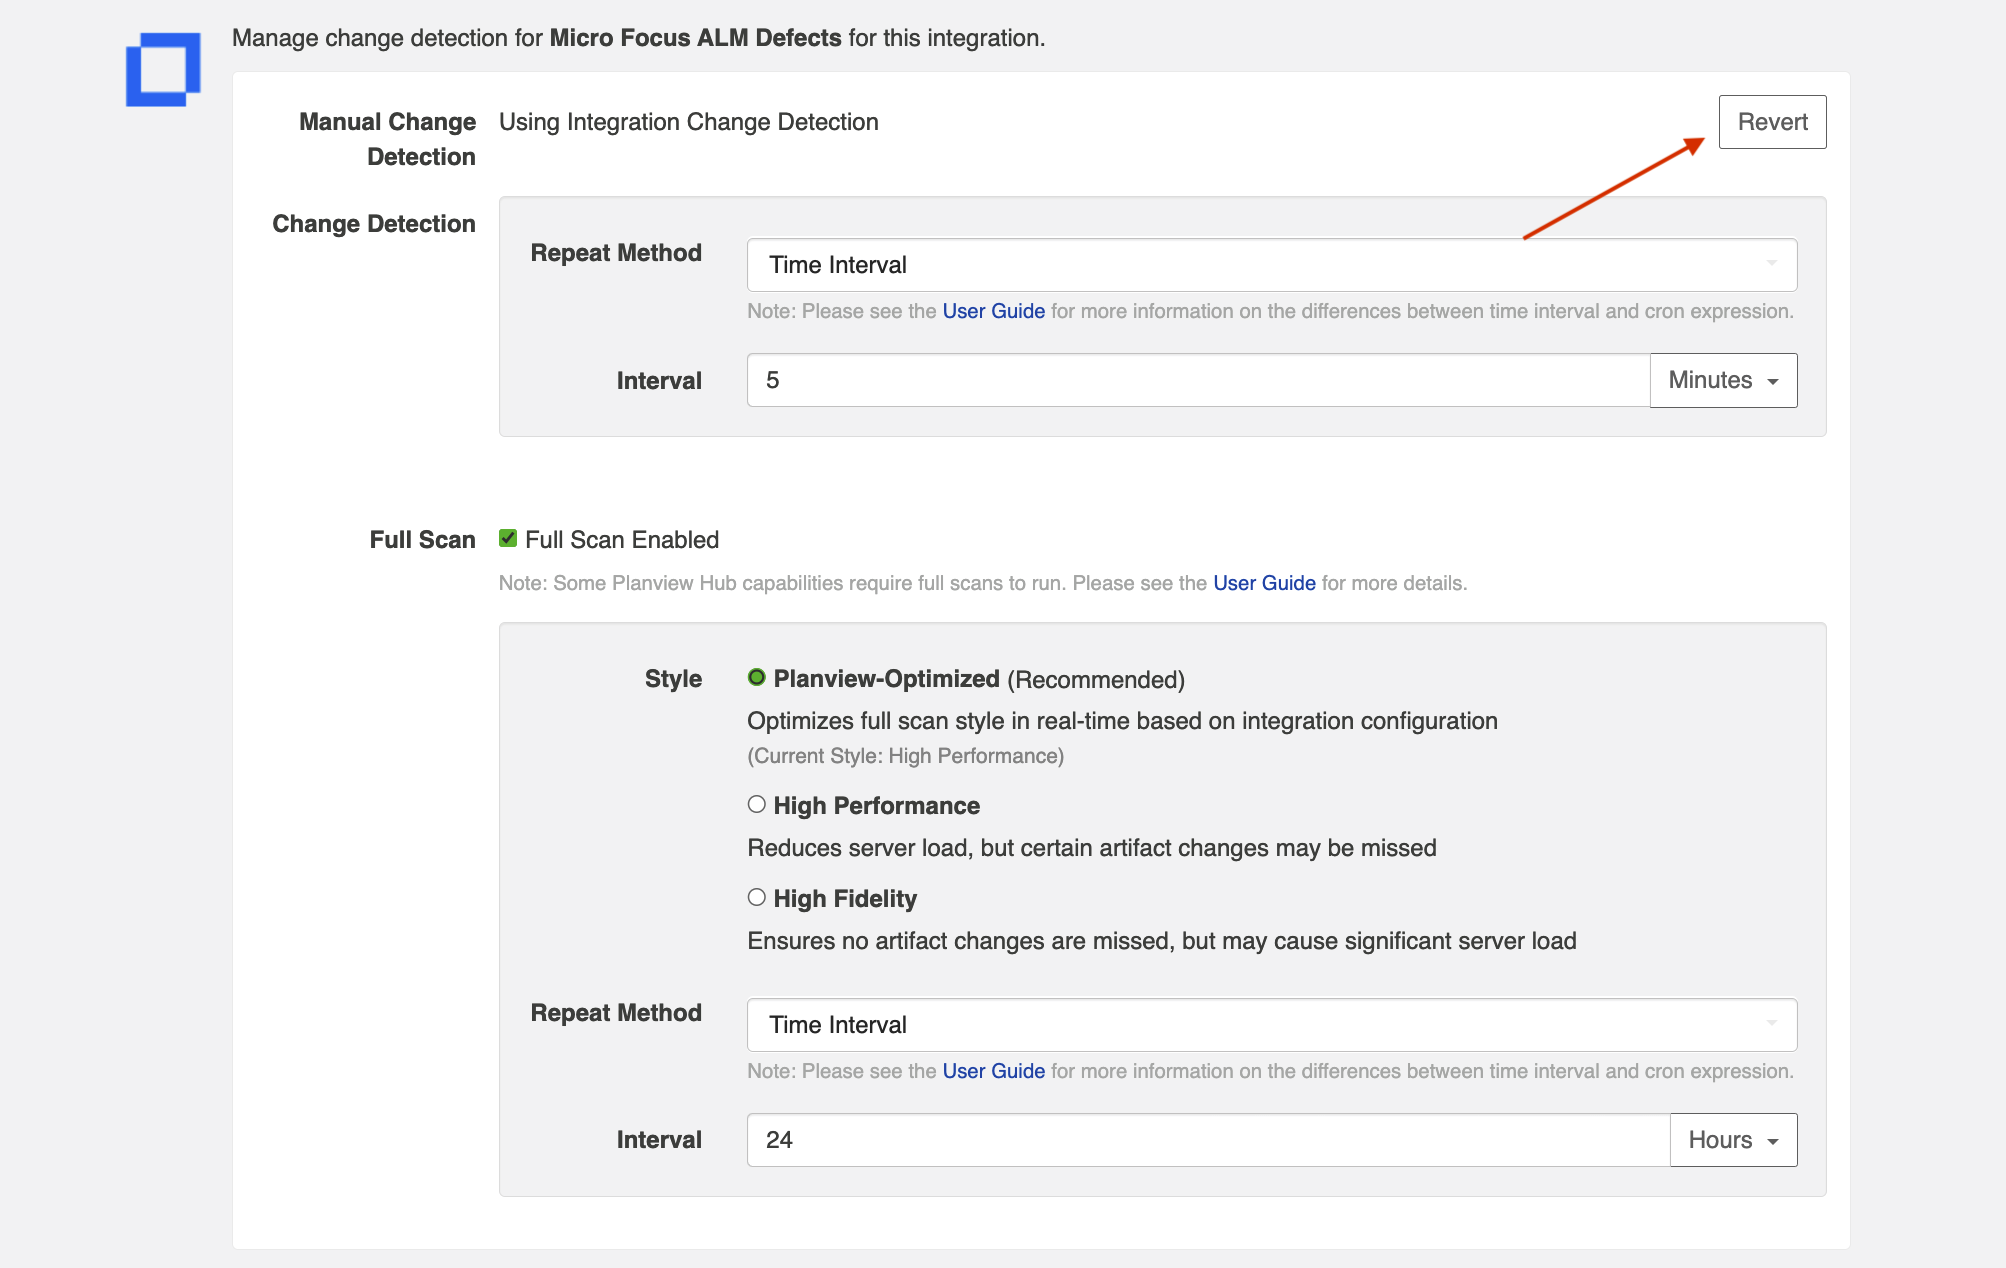
If you'd like to restore the global change detection settings, simply click the Revert button to remove the custom settings:
Once you've updated the change detection settings as desired, click Save and Done to save your changes.
Tip: Clicking ctrl+s on Windows and cmd+s on macOS will save your configuration.
Disabling Full Scan
Full scans can be disabled globally on the General (Settings) screen, or on a per-integration basis via the Change Detection screen. This feature is especially useful for users that do not want to overload their repositories.
Note: Disabling full scans does not disable manually requested full scans. Learn more about manually requested full scans in our FAQ here.
To disable full scan, uncheck the Full Scan Enabled box for the desired collection.
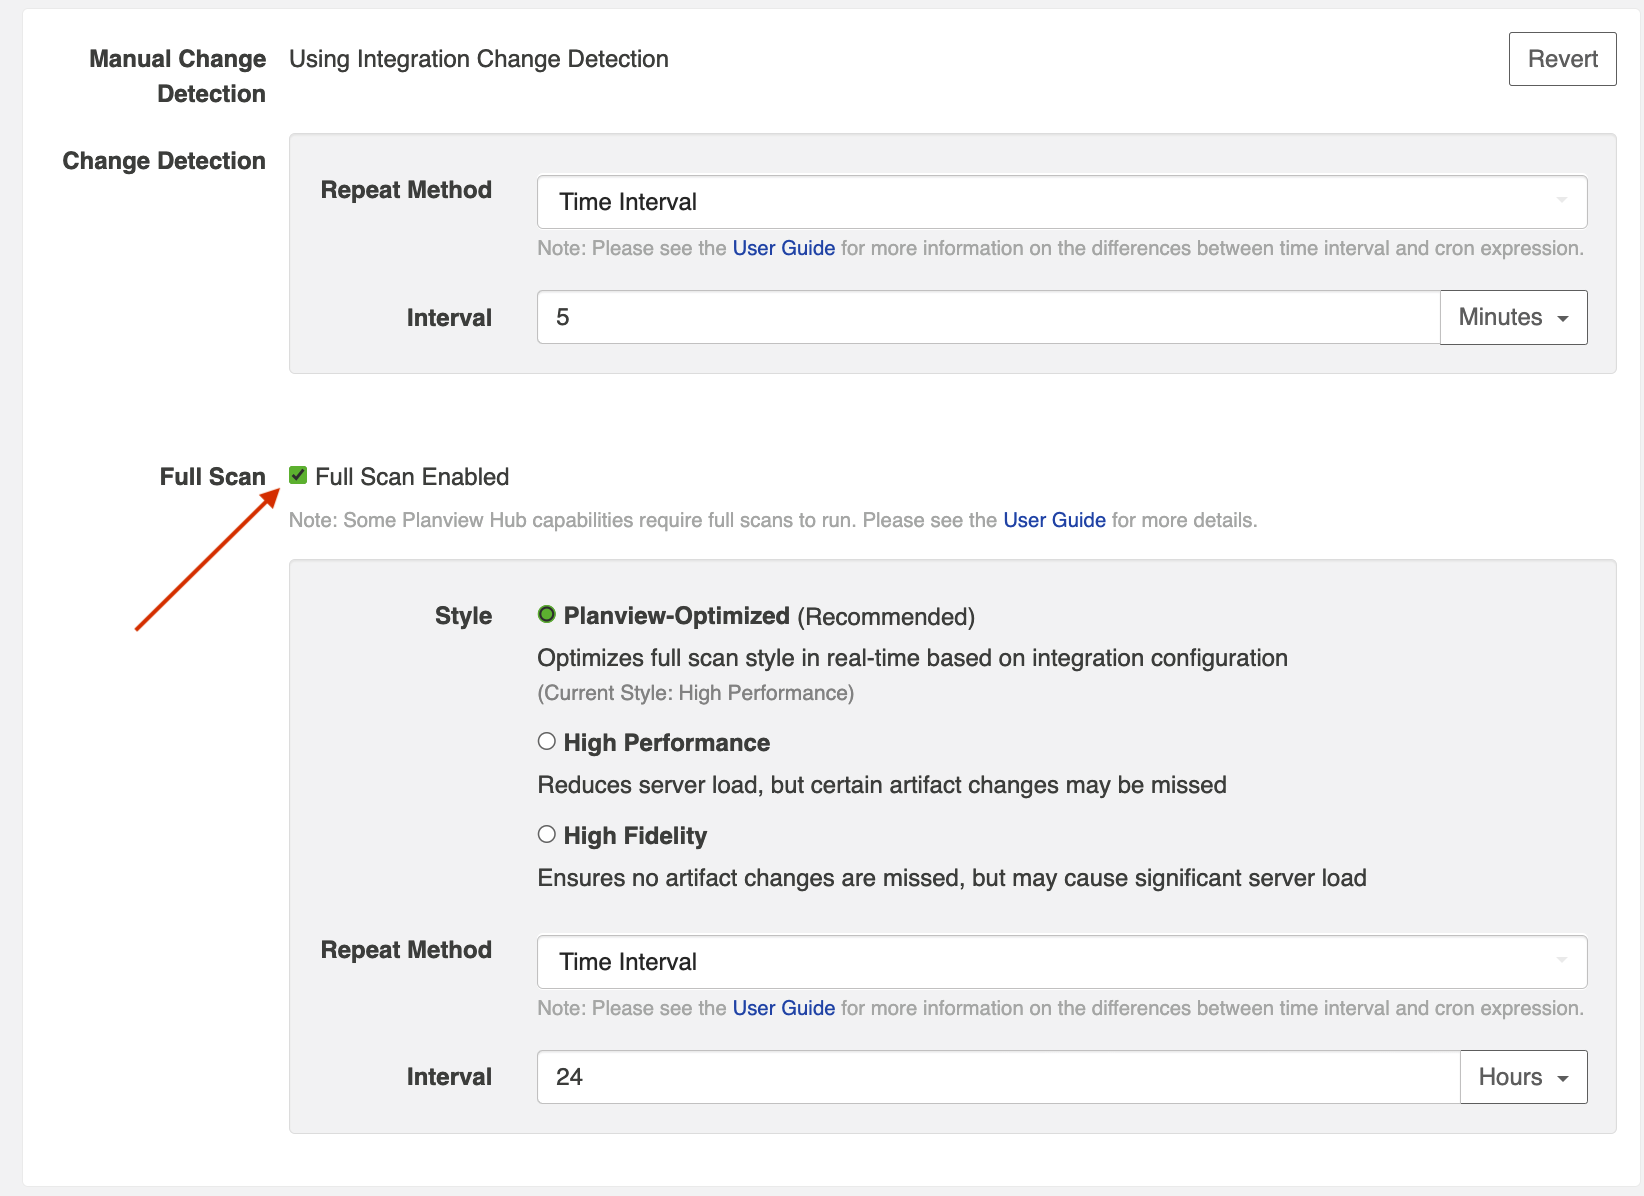
Note: If you choose to disable full scans, note that twinless artifact updates will not work and some artifact updates may be missed.
Configuring Change Detection with Cron Expression
Based on your edition, you may have the ability to configure change detection using a Cron Expression. To configure cron expression, please see the section below.
You can use cron expression to schedule change detection or full scan to your desired intervals. For example, you may only want to perform a full scan Monday through Friday during work hours, to lighten the load on your repositories, and to receive updated information during your workday. Using cron expression, you can configure such complex schedules by running change detection or full scan during certain hours of the day, certain days of the week, or specific days of the month.
Note: Cron expressions must be written using the Quartz cron format to be valid.
Learn more in our FAQ here.
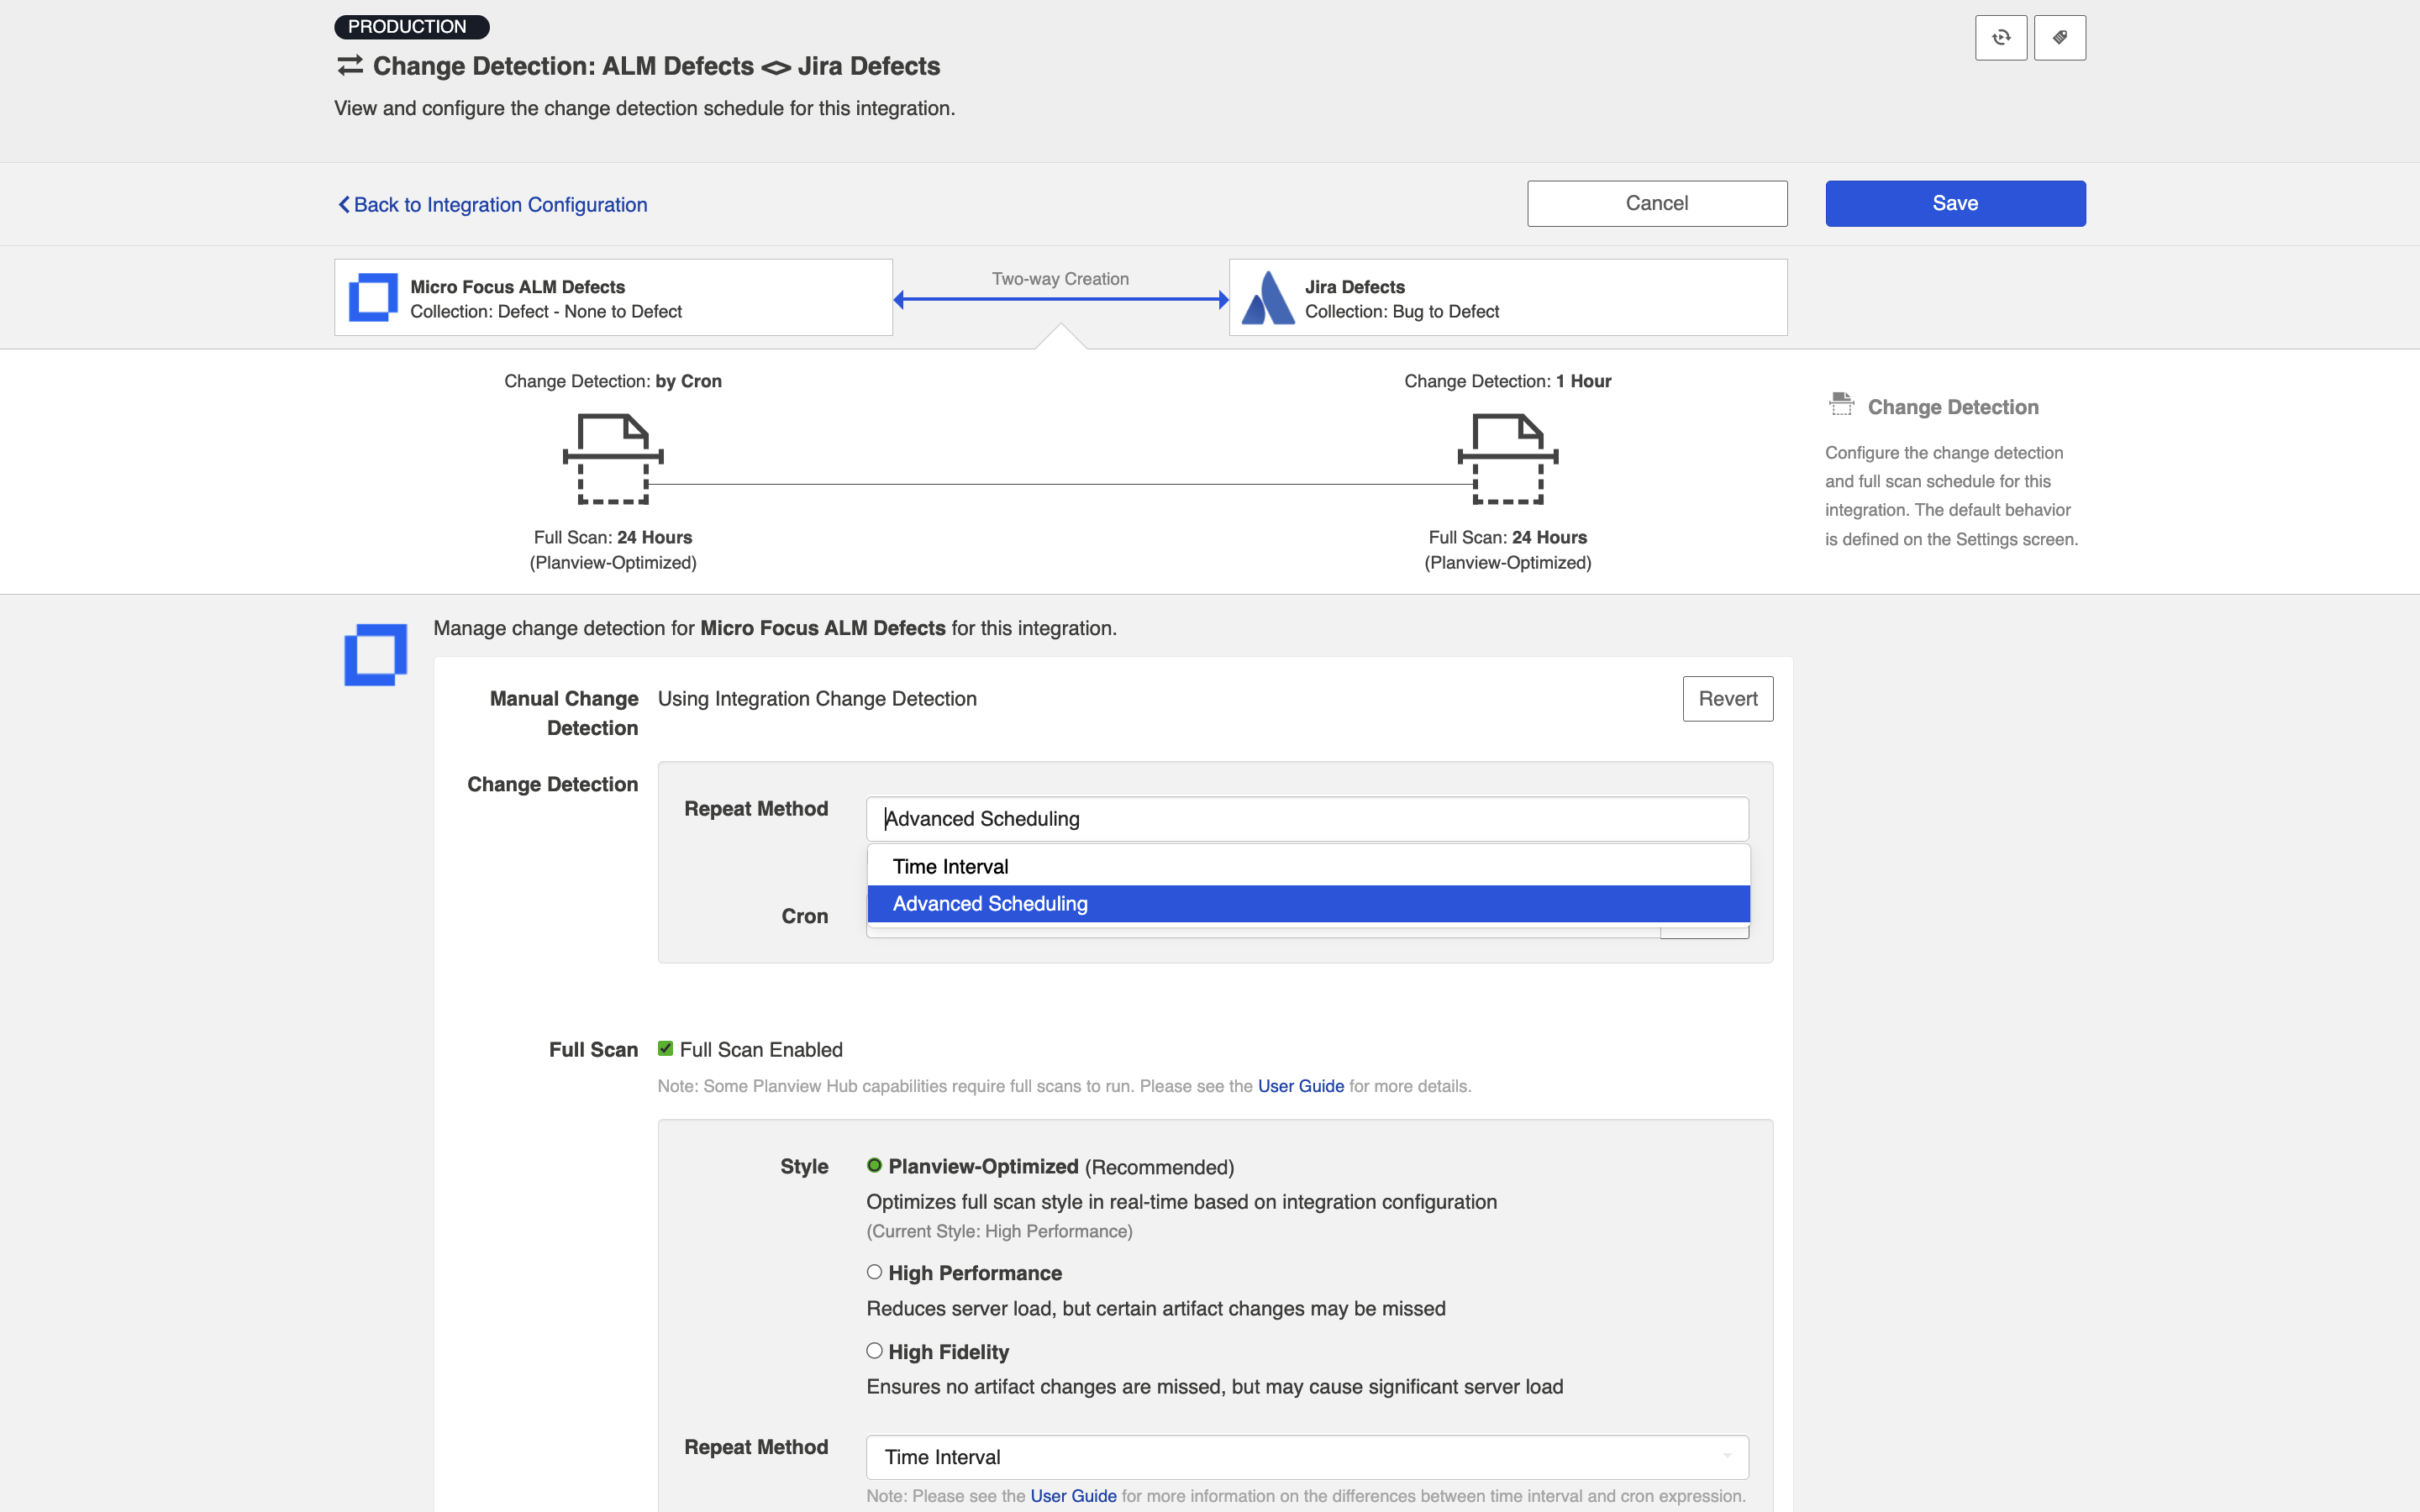
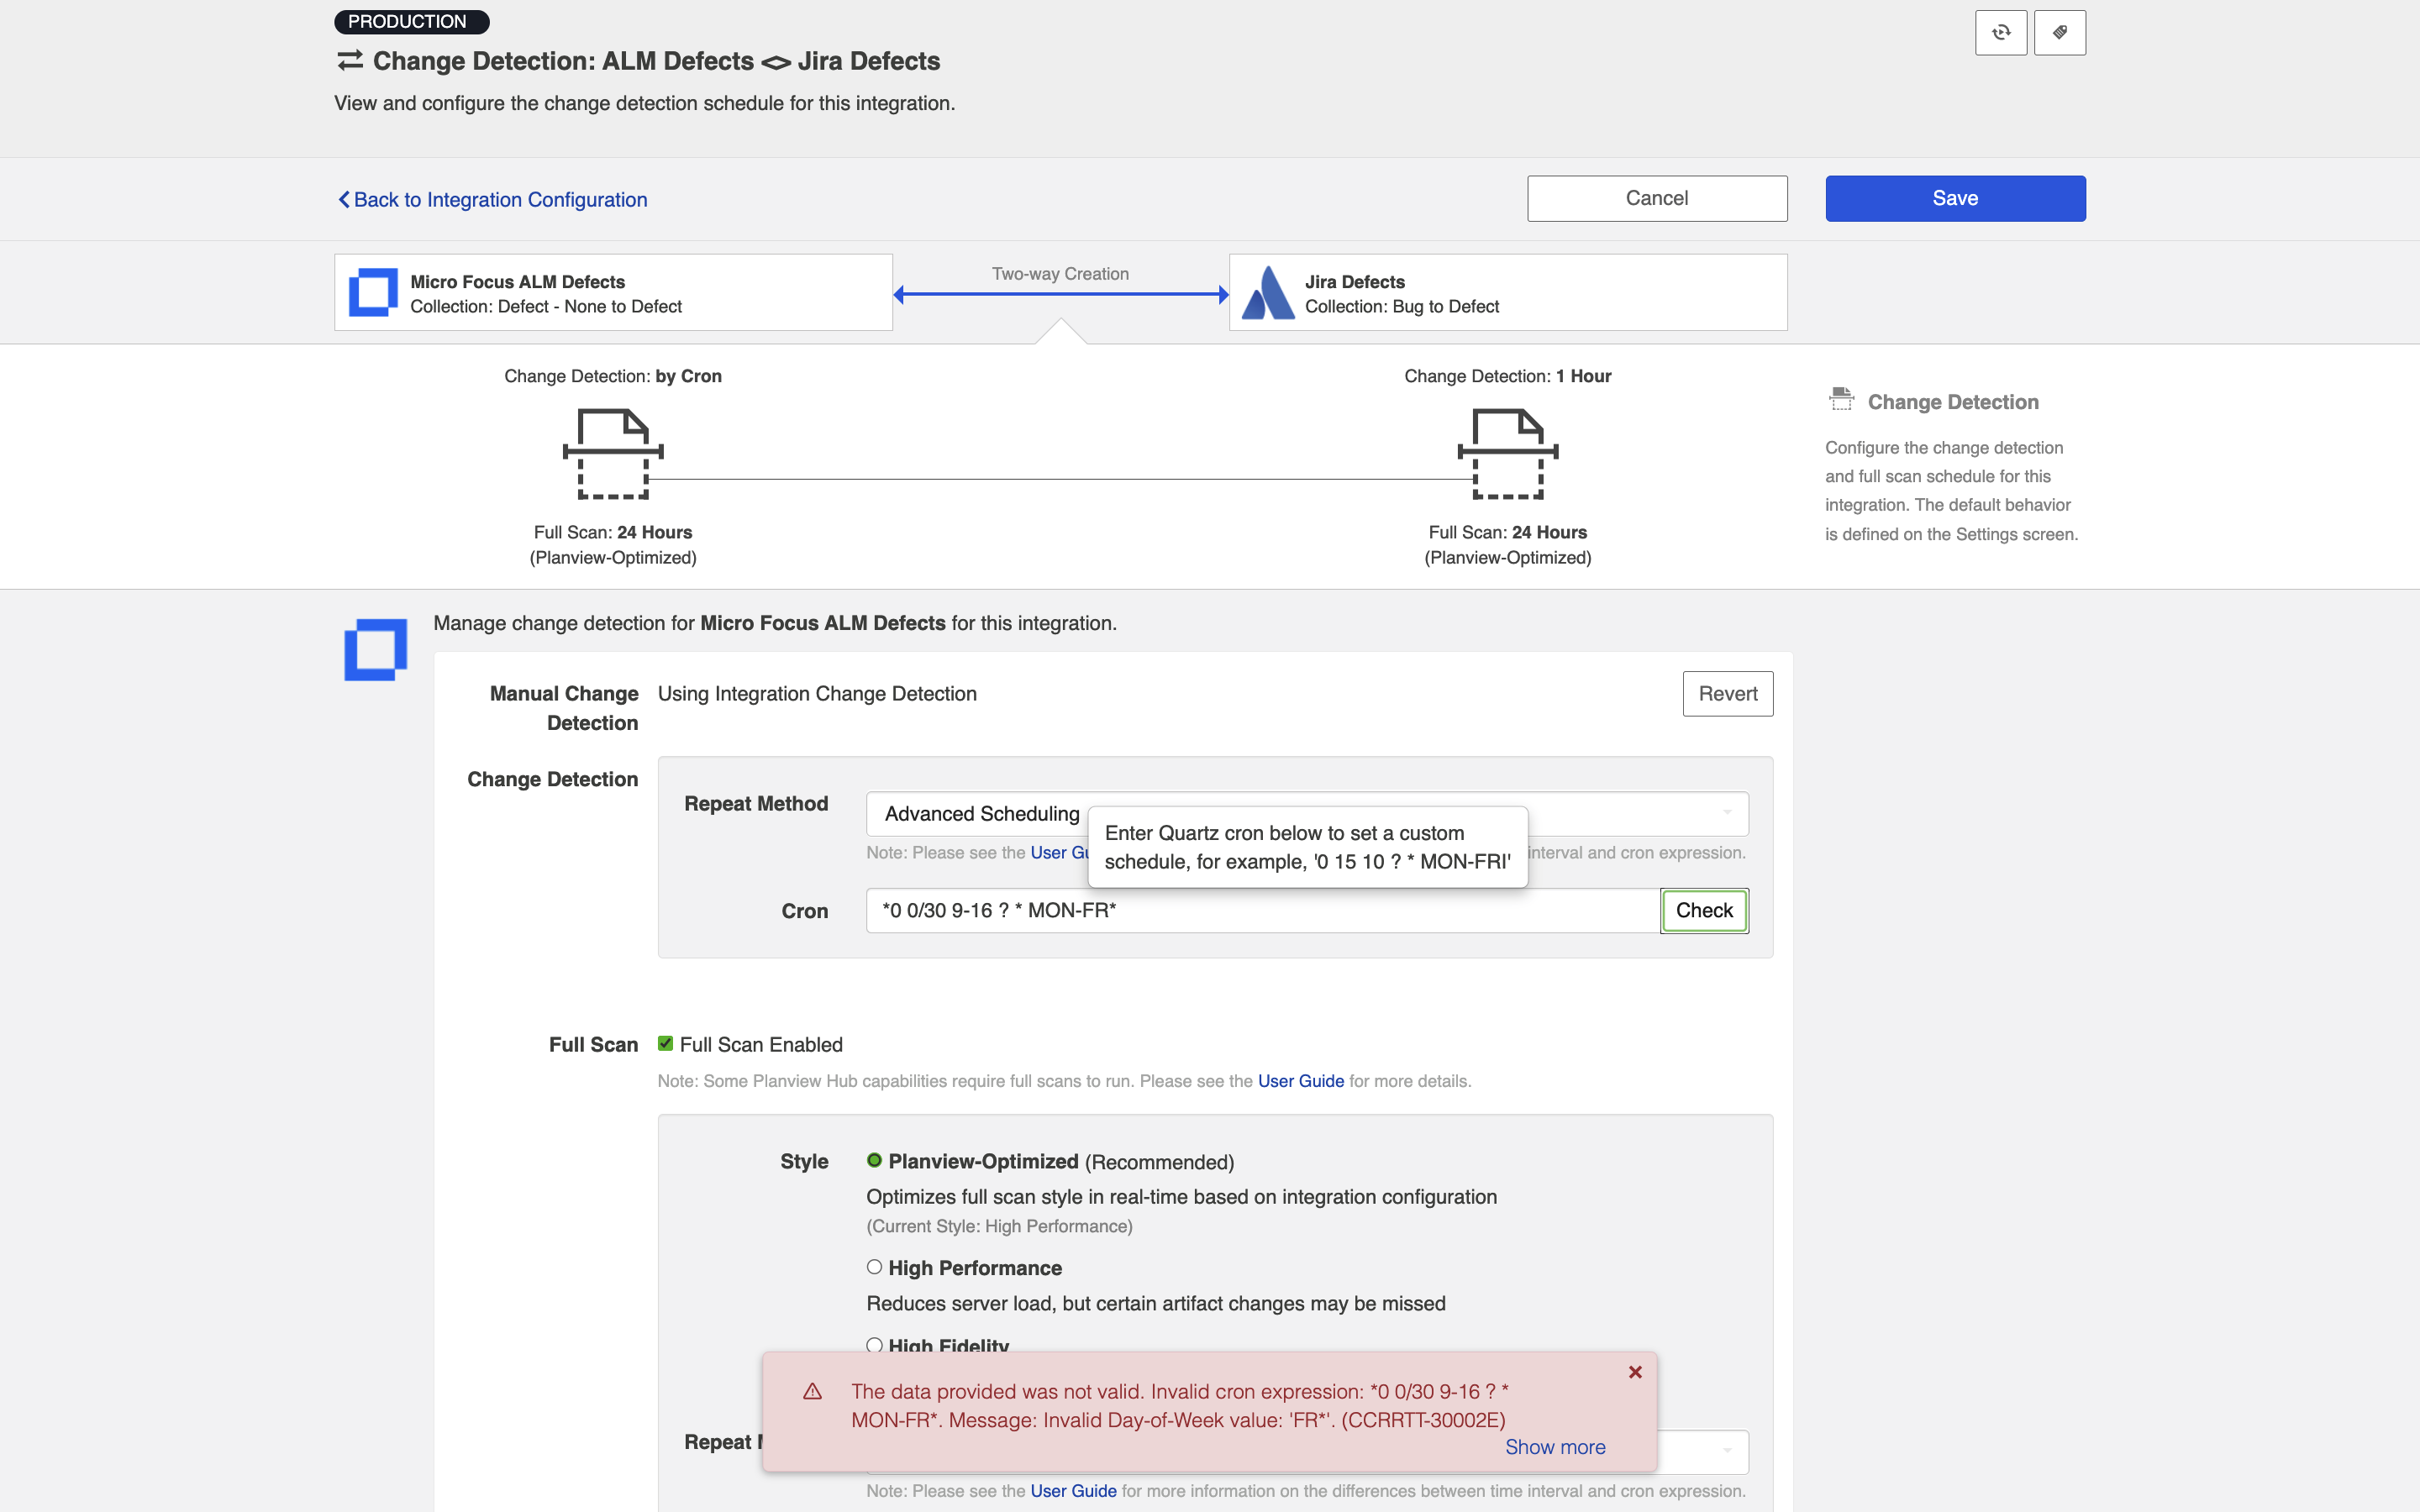
To utilize cron expression for your full scan or change detection, select Advanced Scheduling in the Repeat Method field.
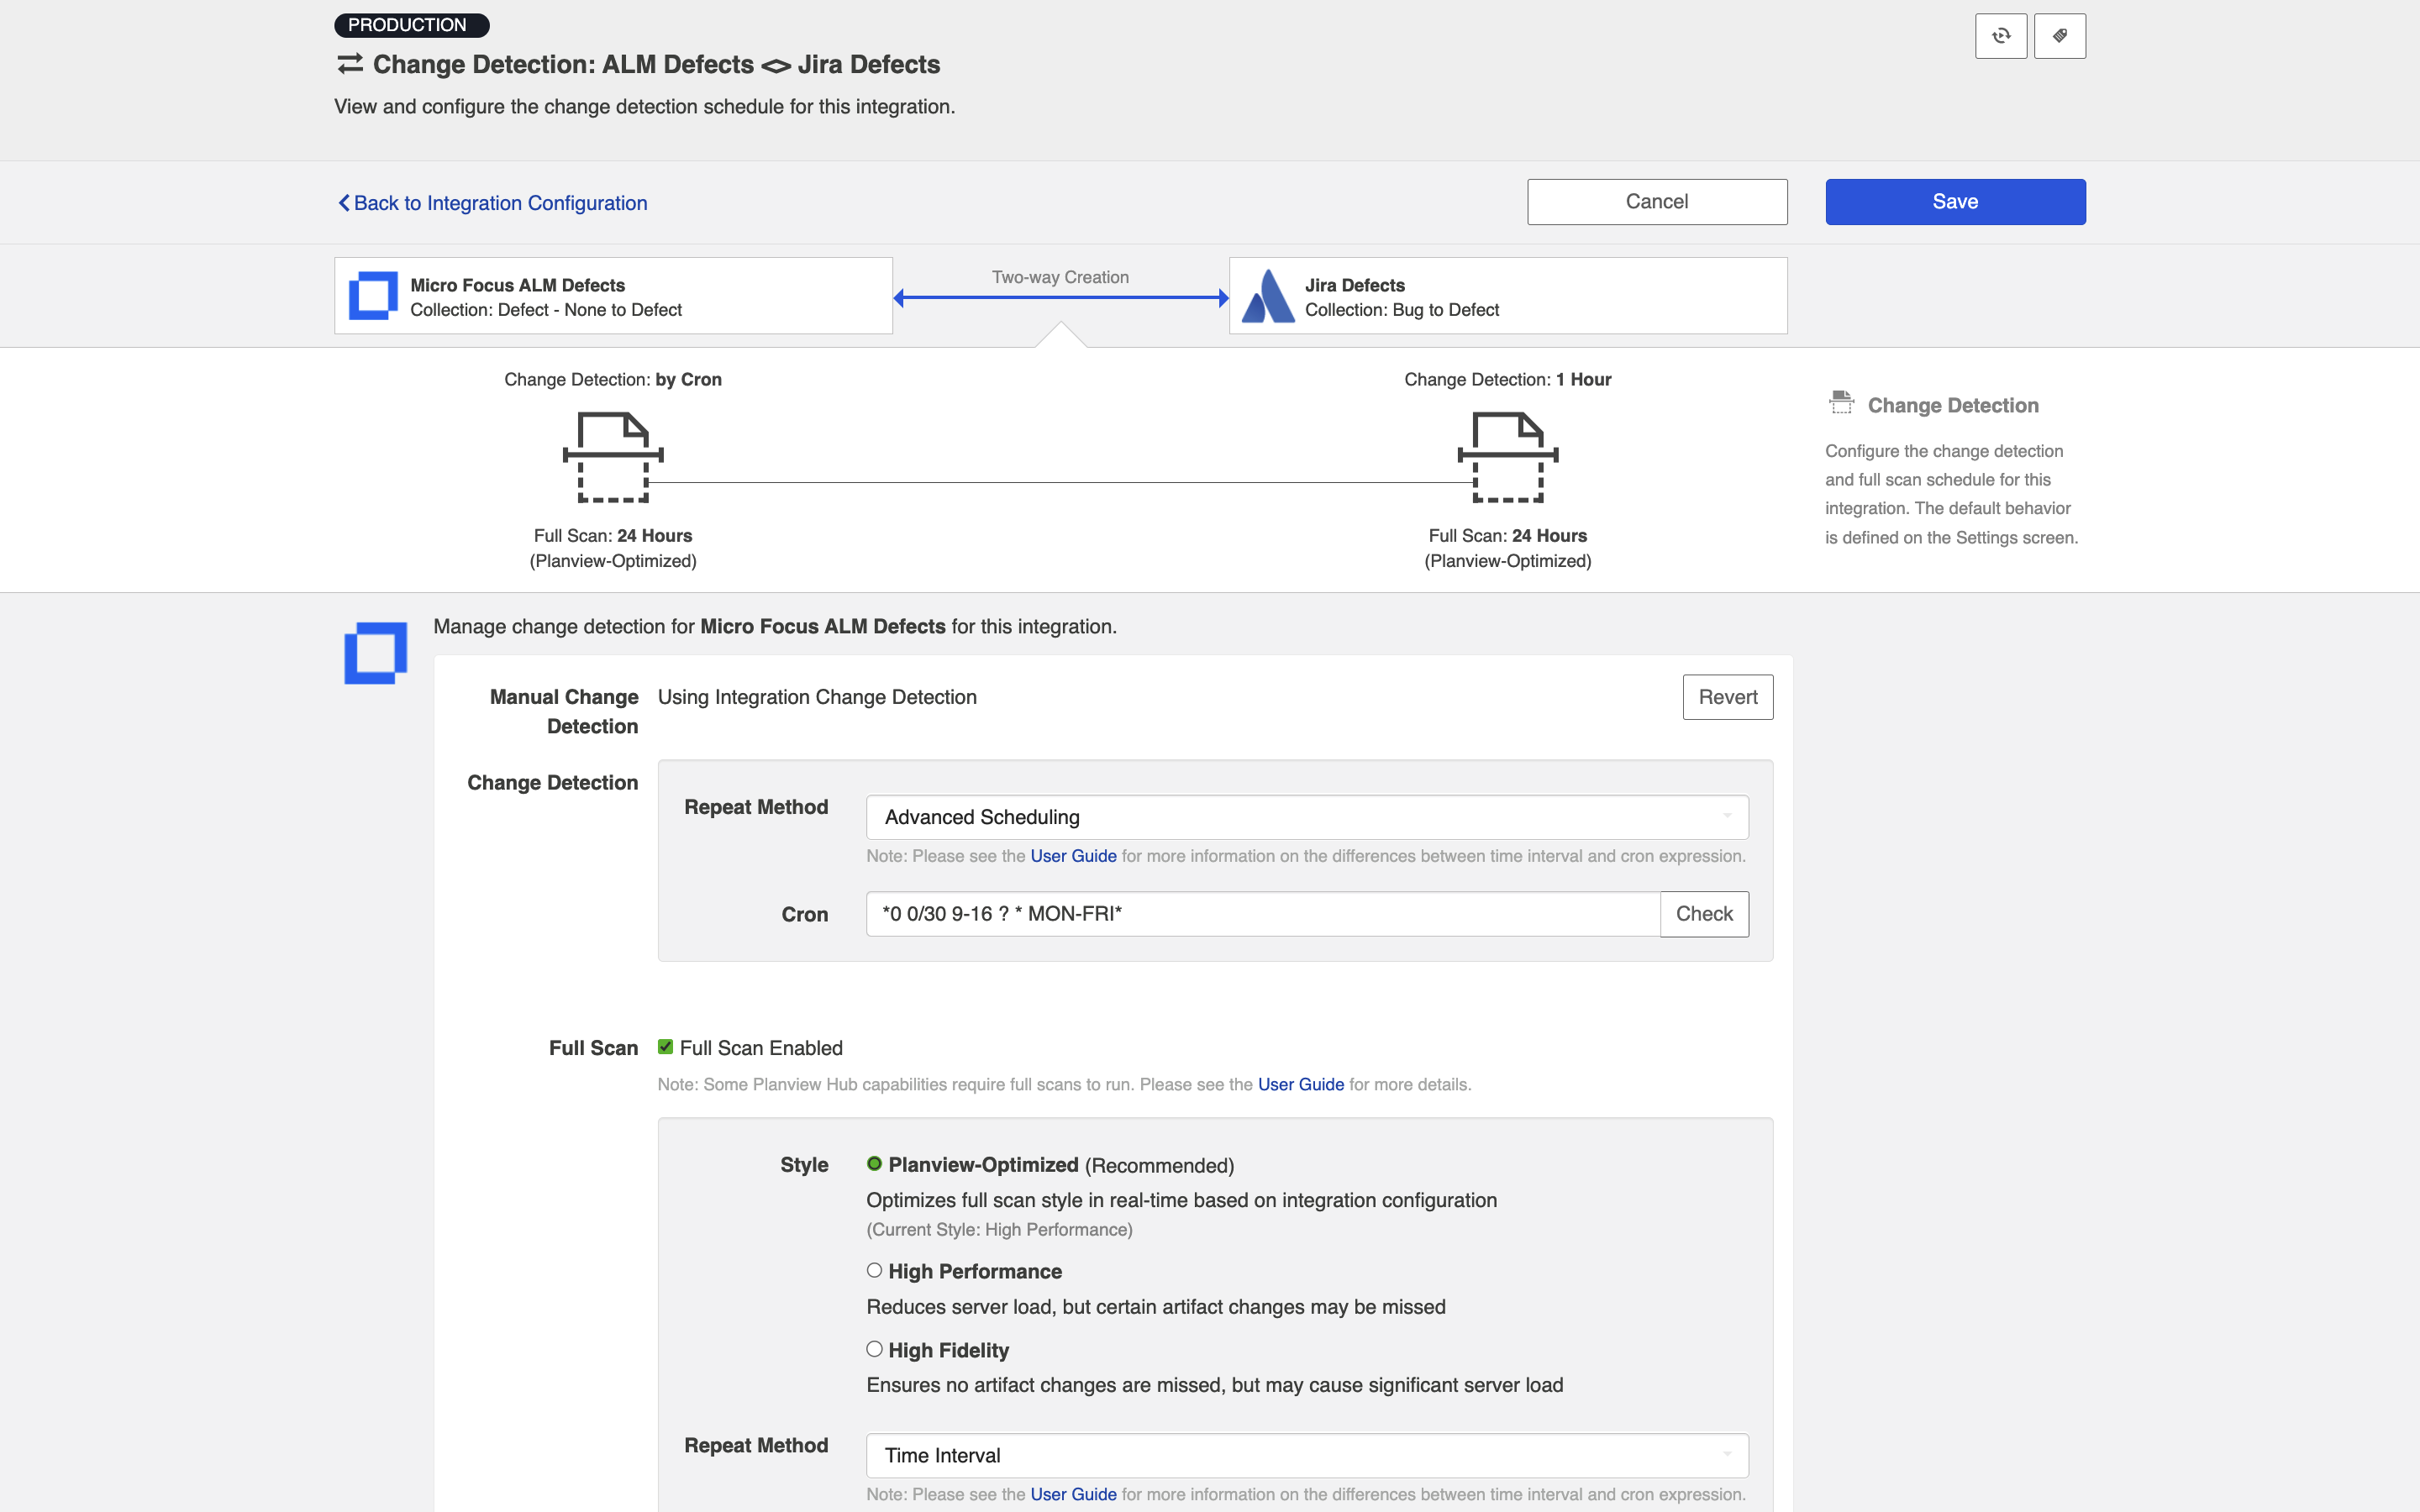
You can then enter the cron expression for your desired scheduling. For example, if you would like to run a full scan every 30 minutes from 9am to 5pm from Monday through Friday, it would be written as follows: *0 0/30 9-16 ? * MON-FRI*
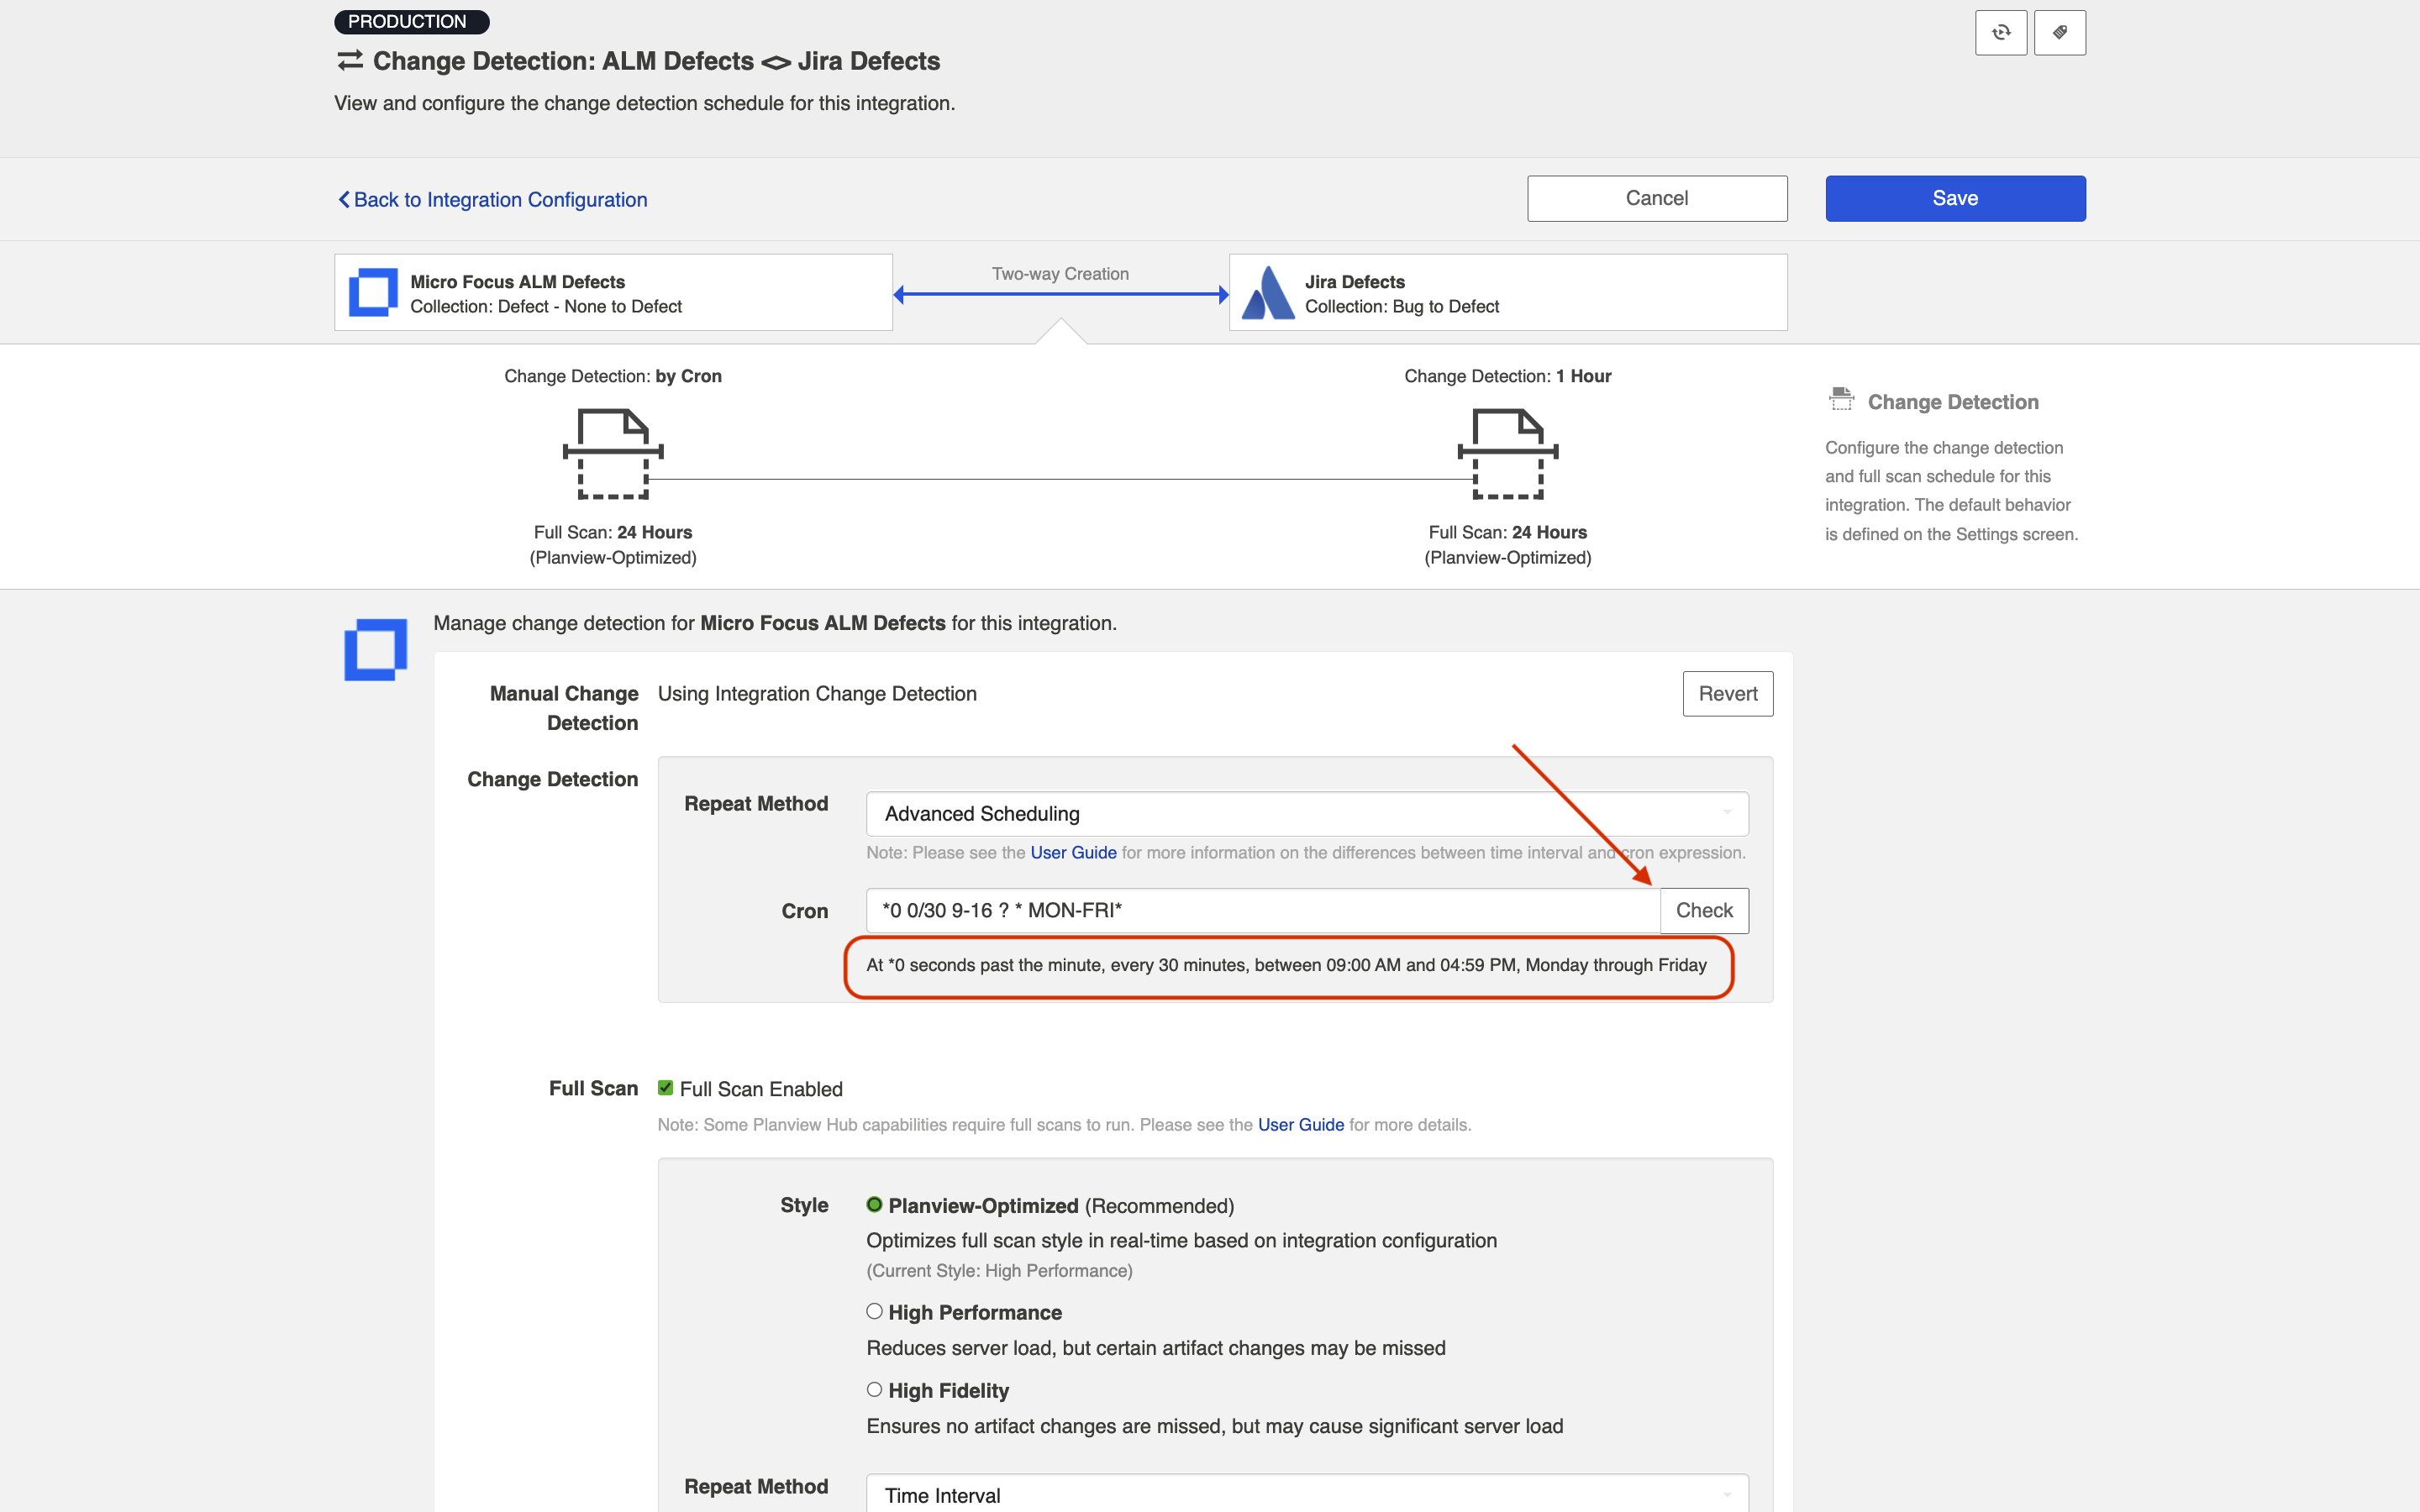
You can check to see if your cron expression is valid by clicking the Check button. If valid, a readable form of the cron expression will be displayed. If the cron expression is invalid, an error message will appear.
Next Steps
Once you've selected your Change Detection settings, your next step will be to configure your Twinless Artifact Update settings for this integration.