Outbound Only Collection
What is an Outbound Only Collection?
Outbound Only Collections are only available in editions that have access to the Git repository.

You can think of a collection as the set of artifacts that are eligible to flow as part of your integration. An outbound only collection contains artifacts like code commits or changesets, which you may want to flow out of your repository, but which would not receive updates into your repository.
You can learn more about collections in the Key Concepts.
Note: Outbound Only collections can connect to the Git repository only. You can learn more about configuring that repository in our Connector Docs.
Creating an Outbound Only Collection
To create an outbound only collection, follow the steps below.
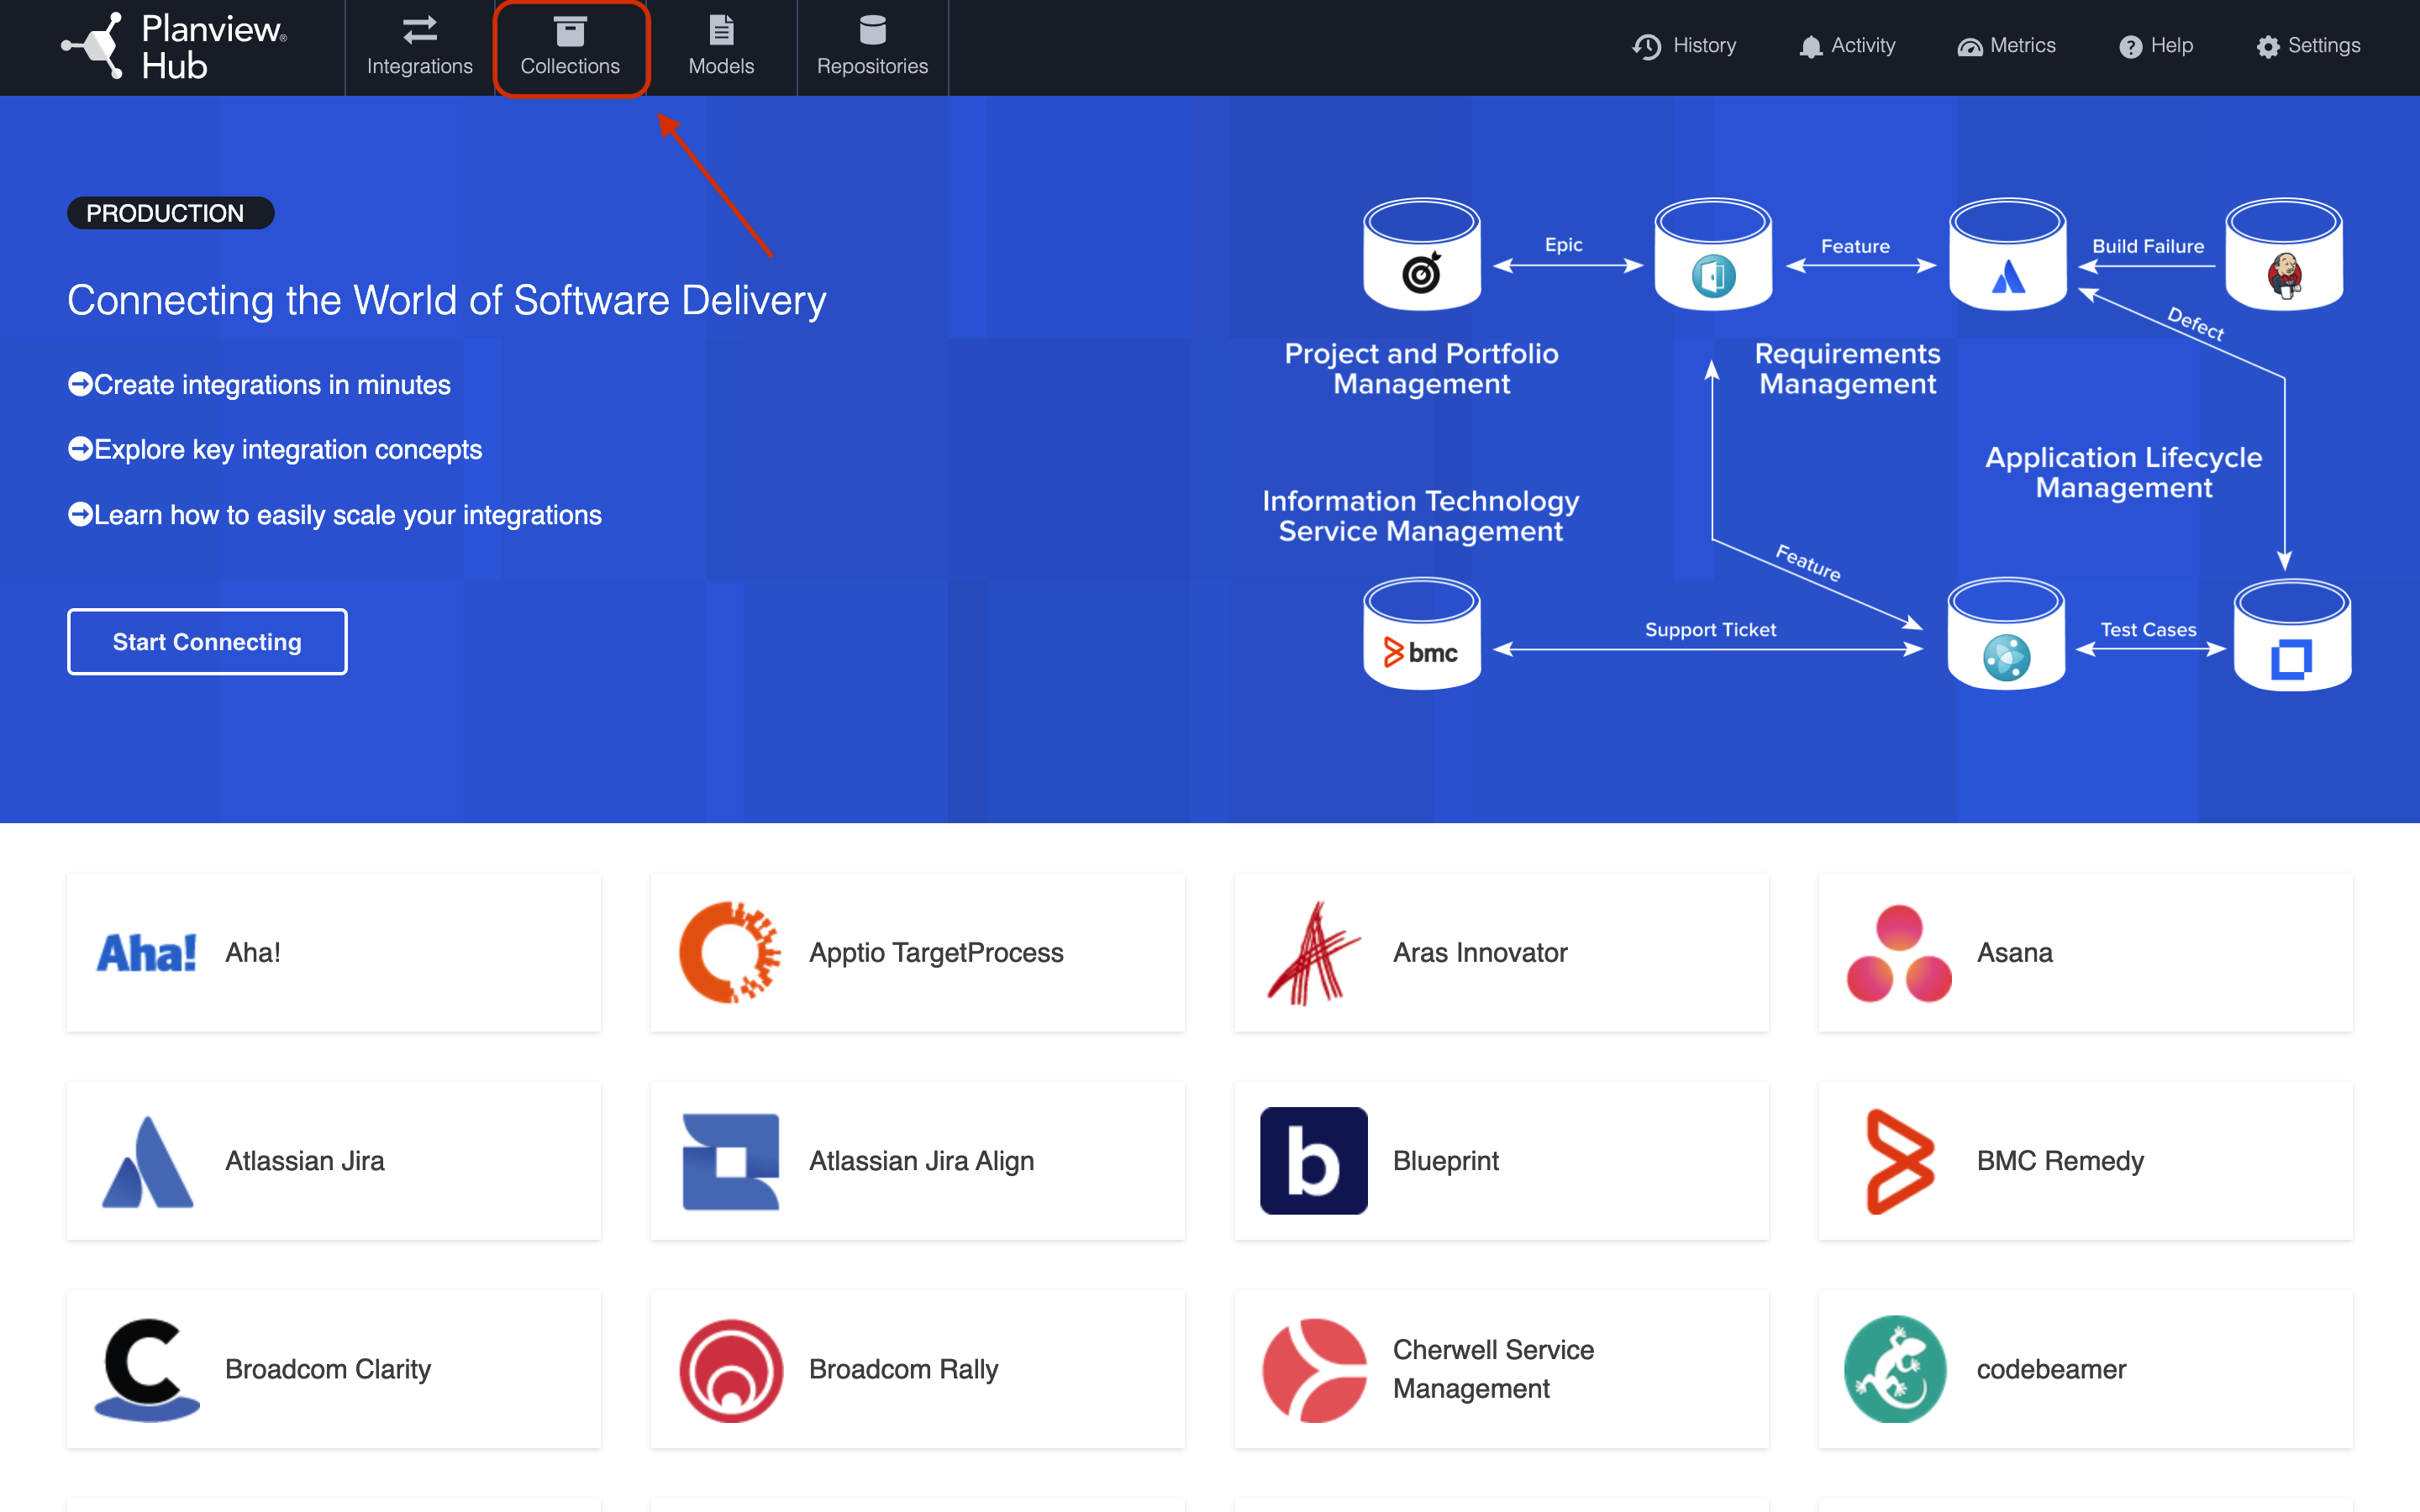
Select Collections at the top of the screen.
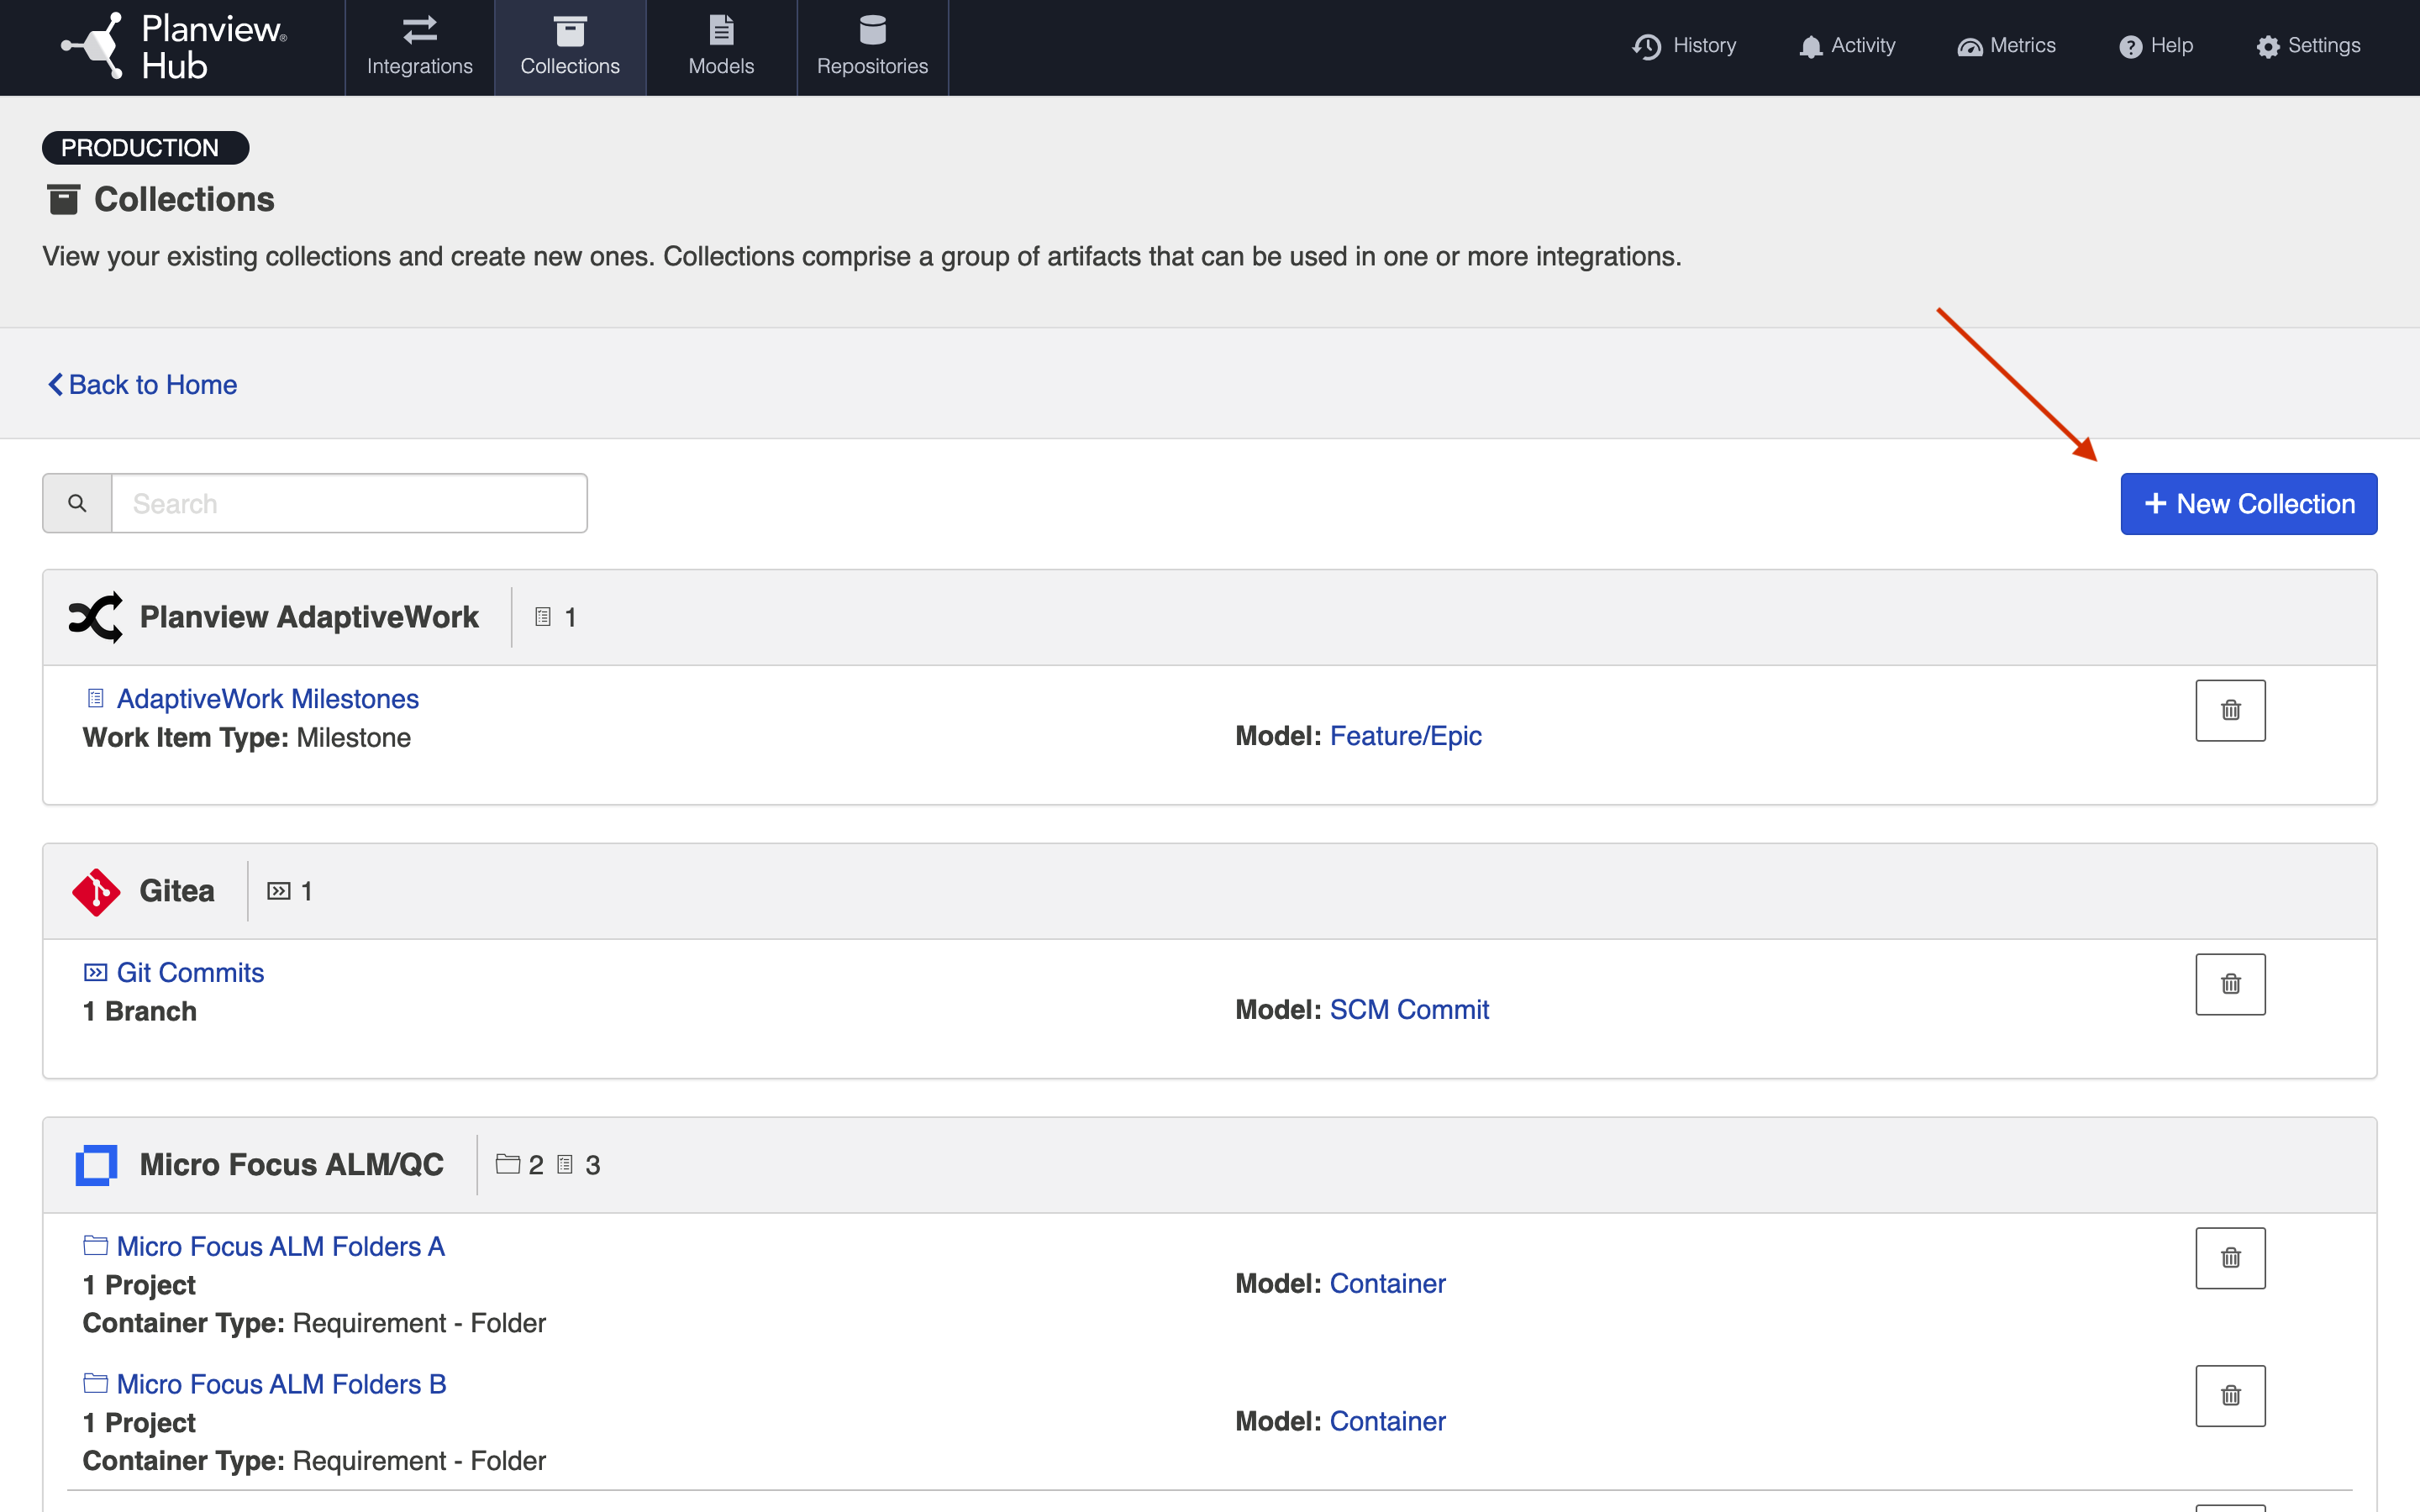
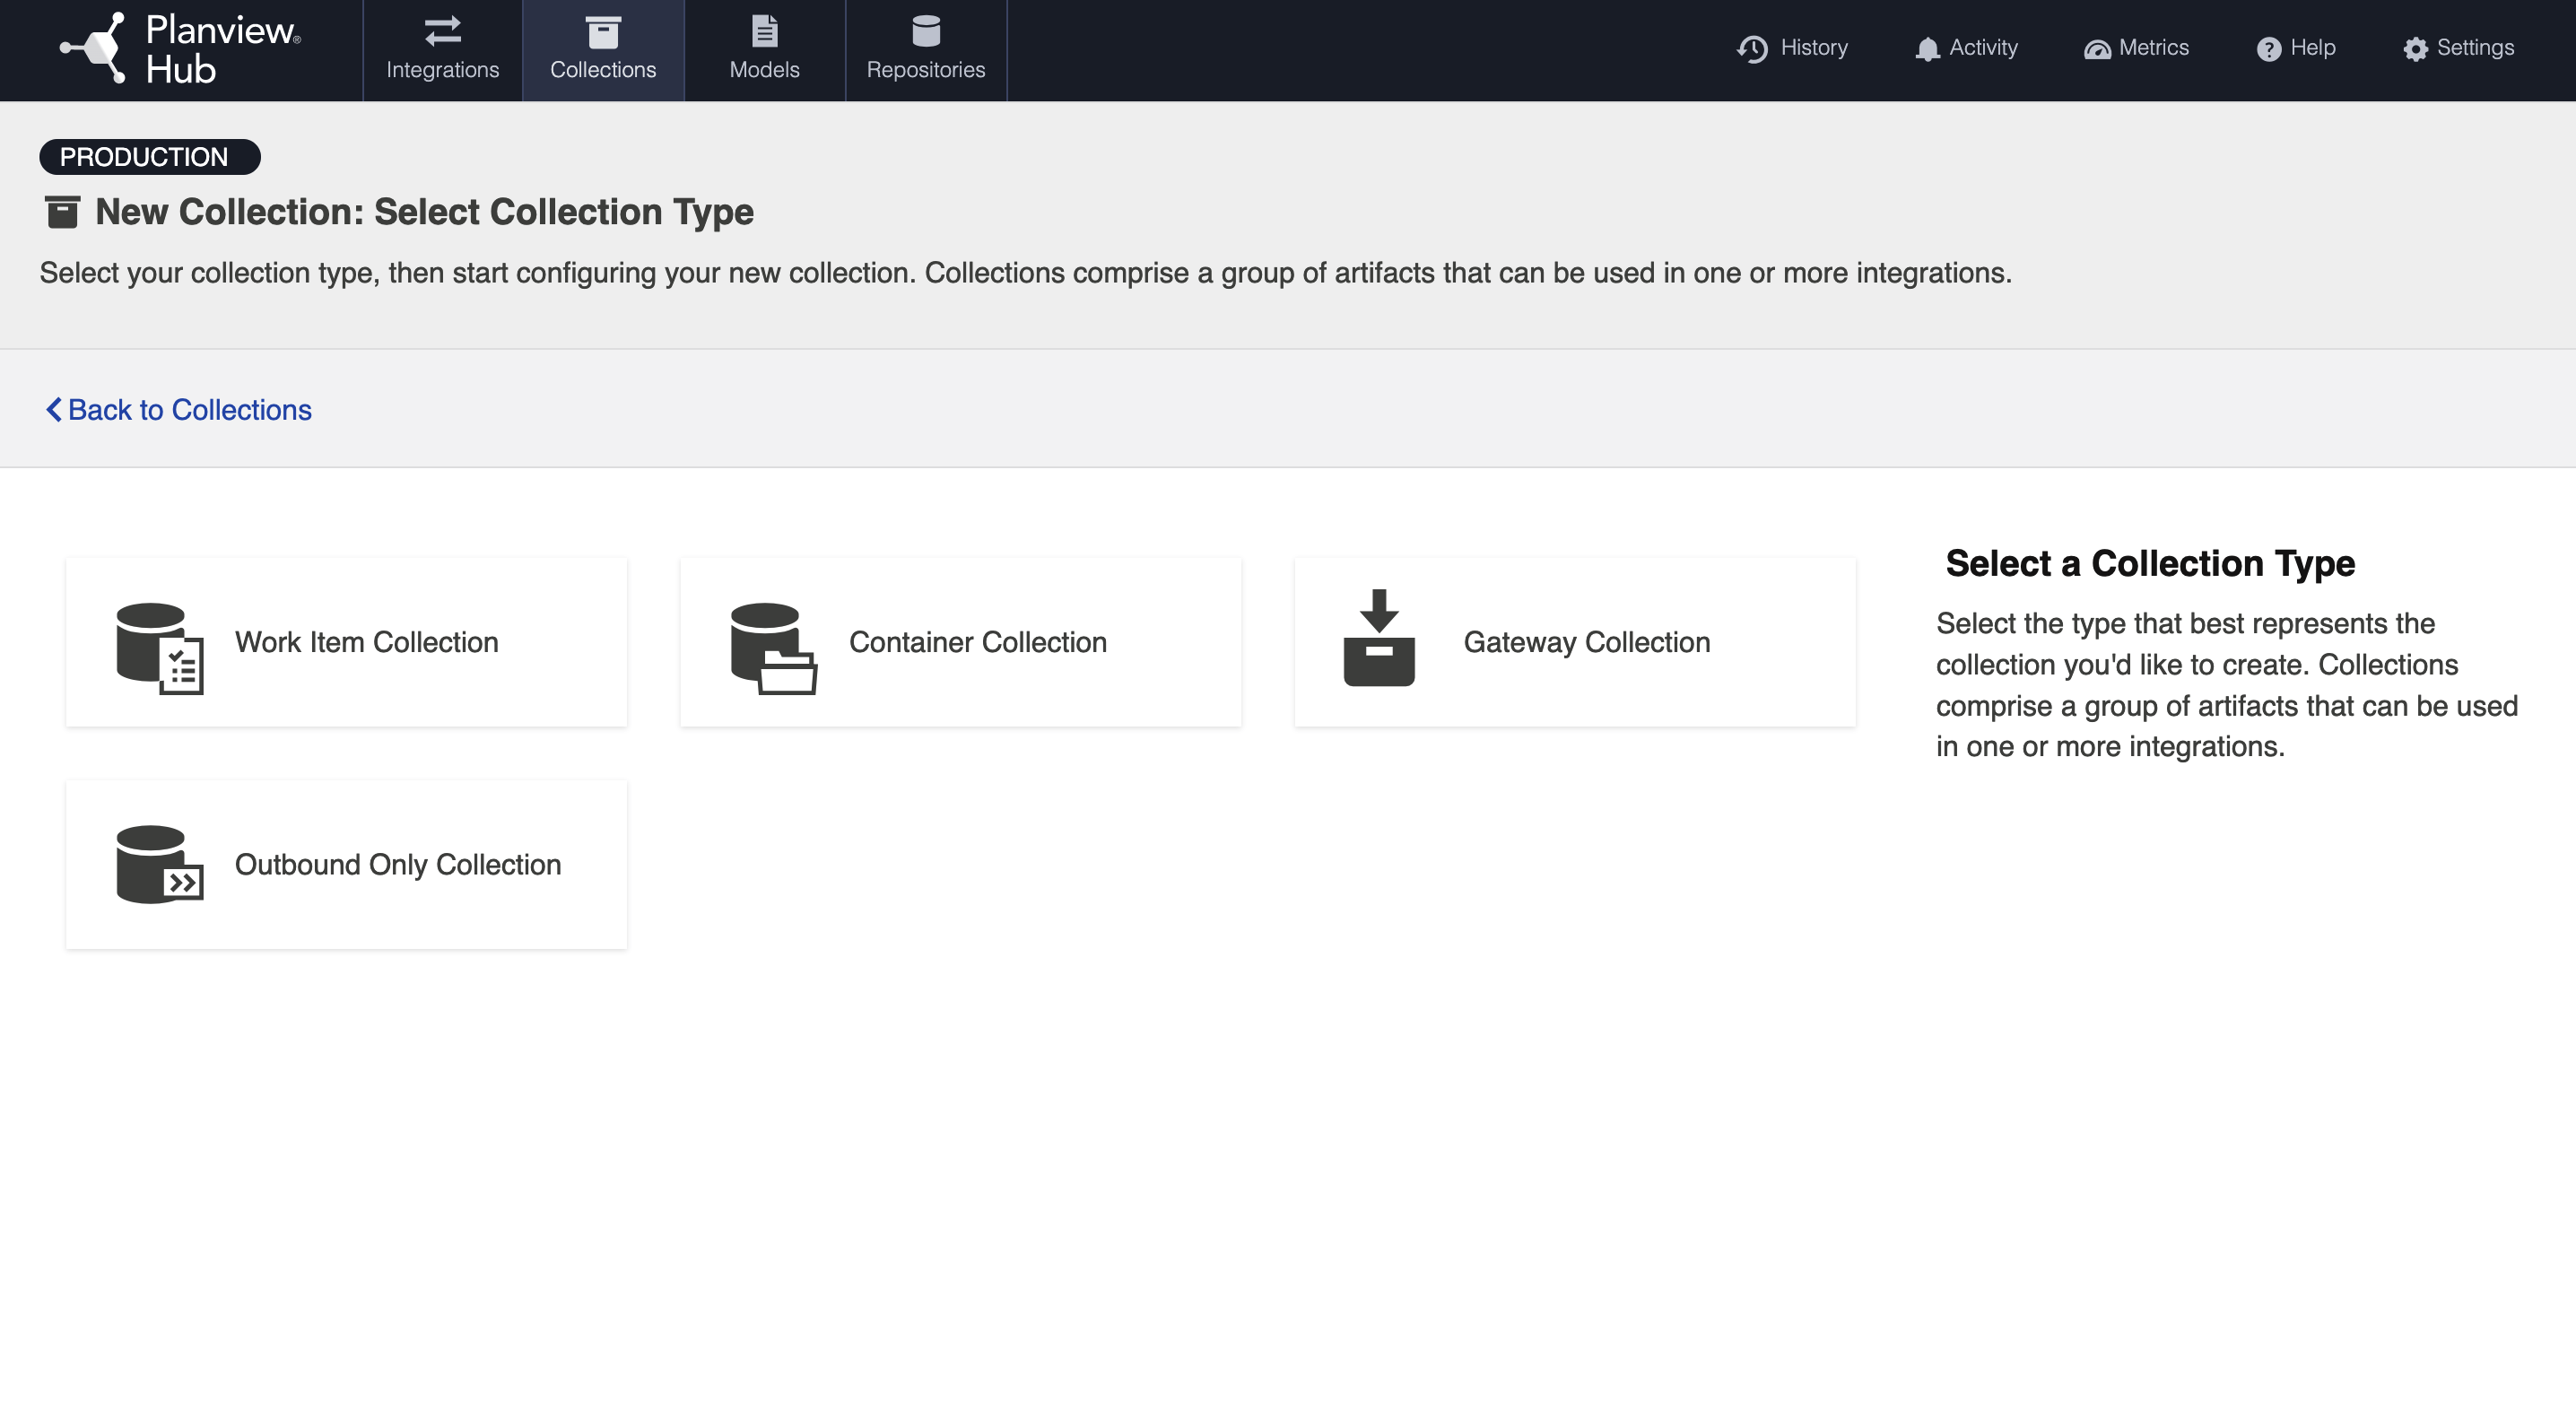
Click New Collection.
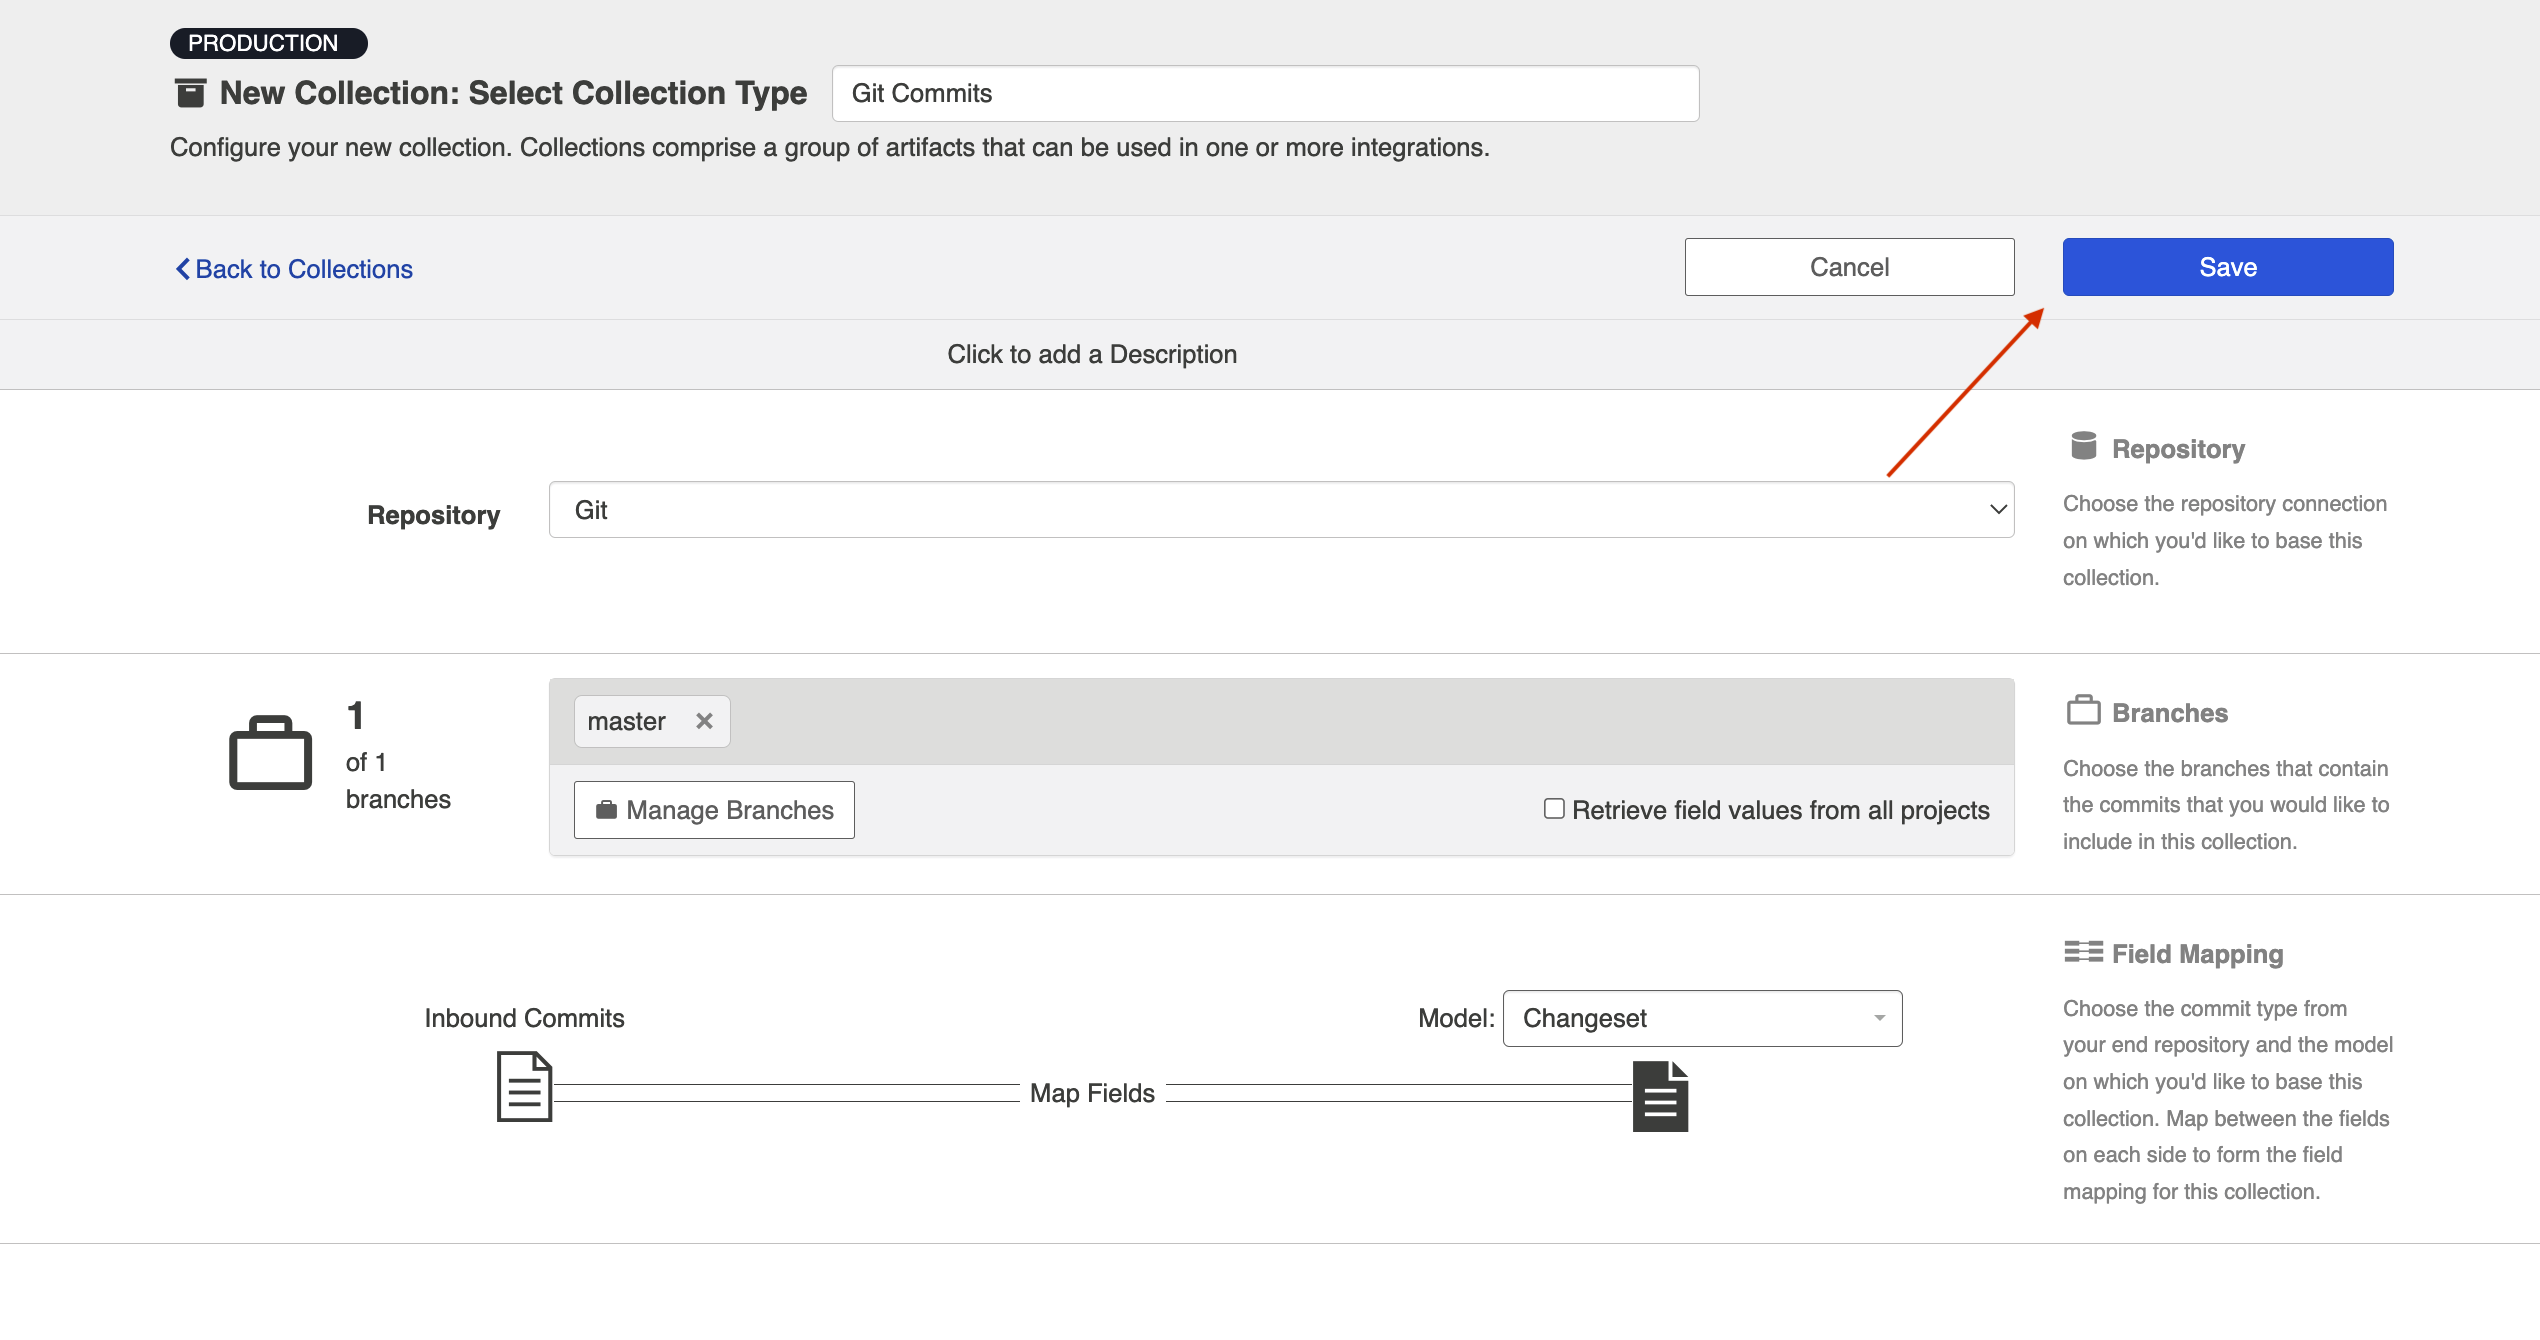
Select Outbound Only Collection as the collection type.
Enter a name for your collection.
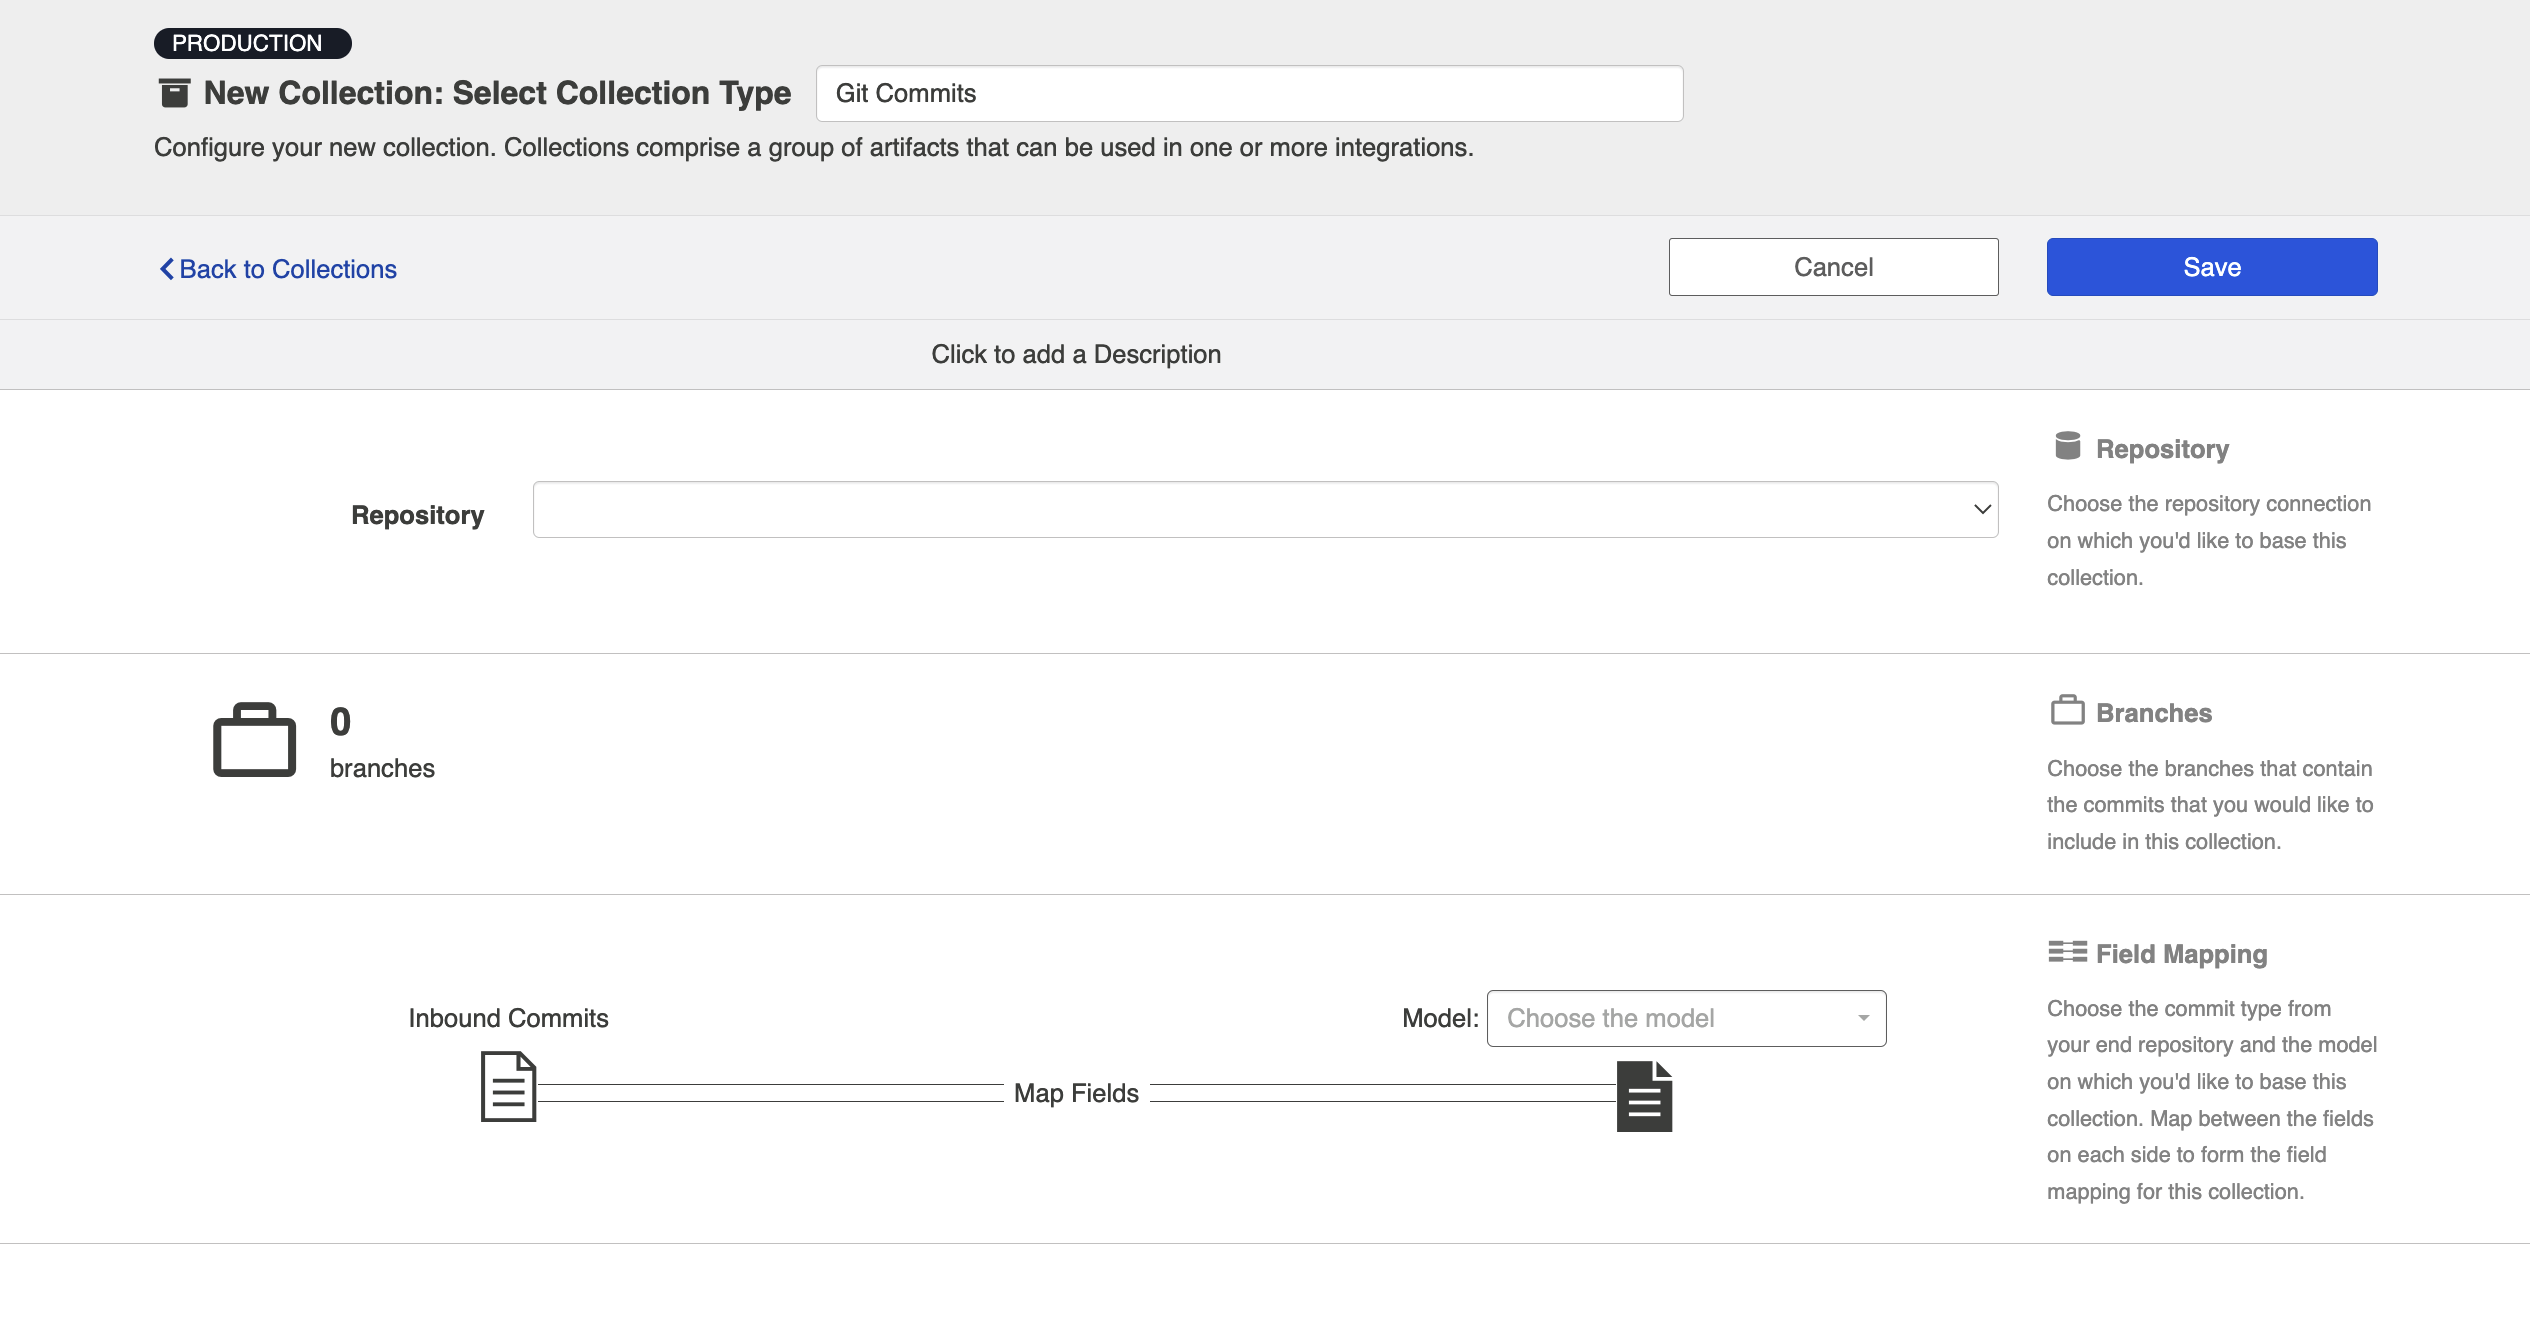
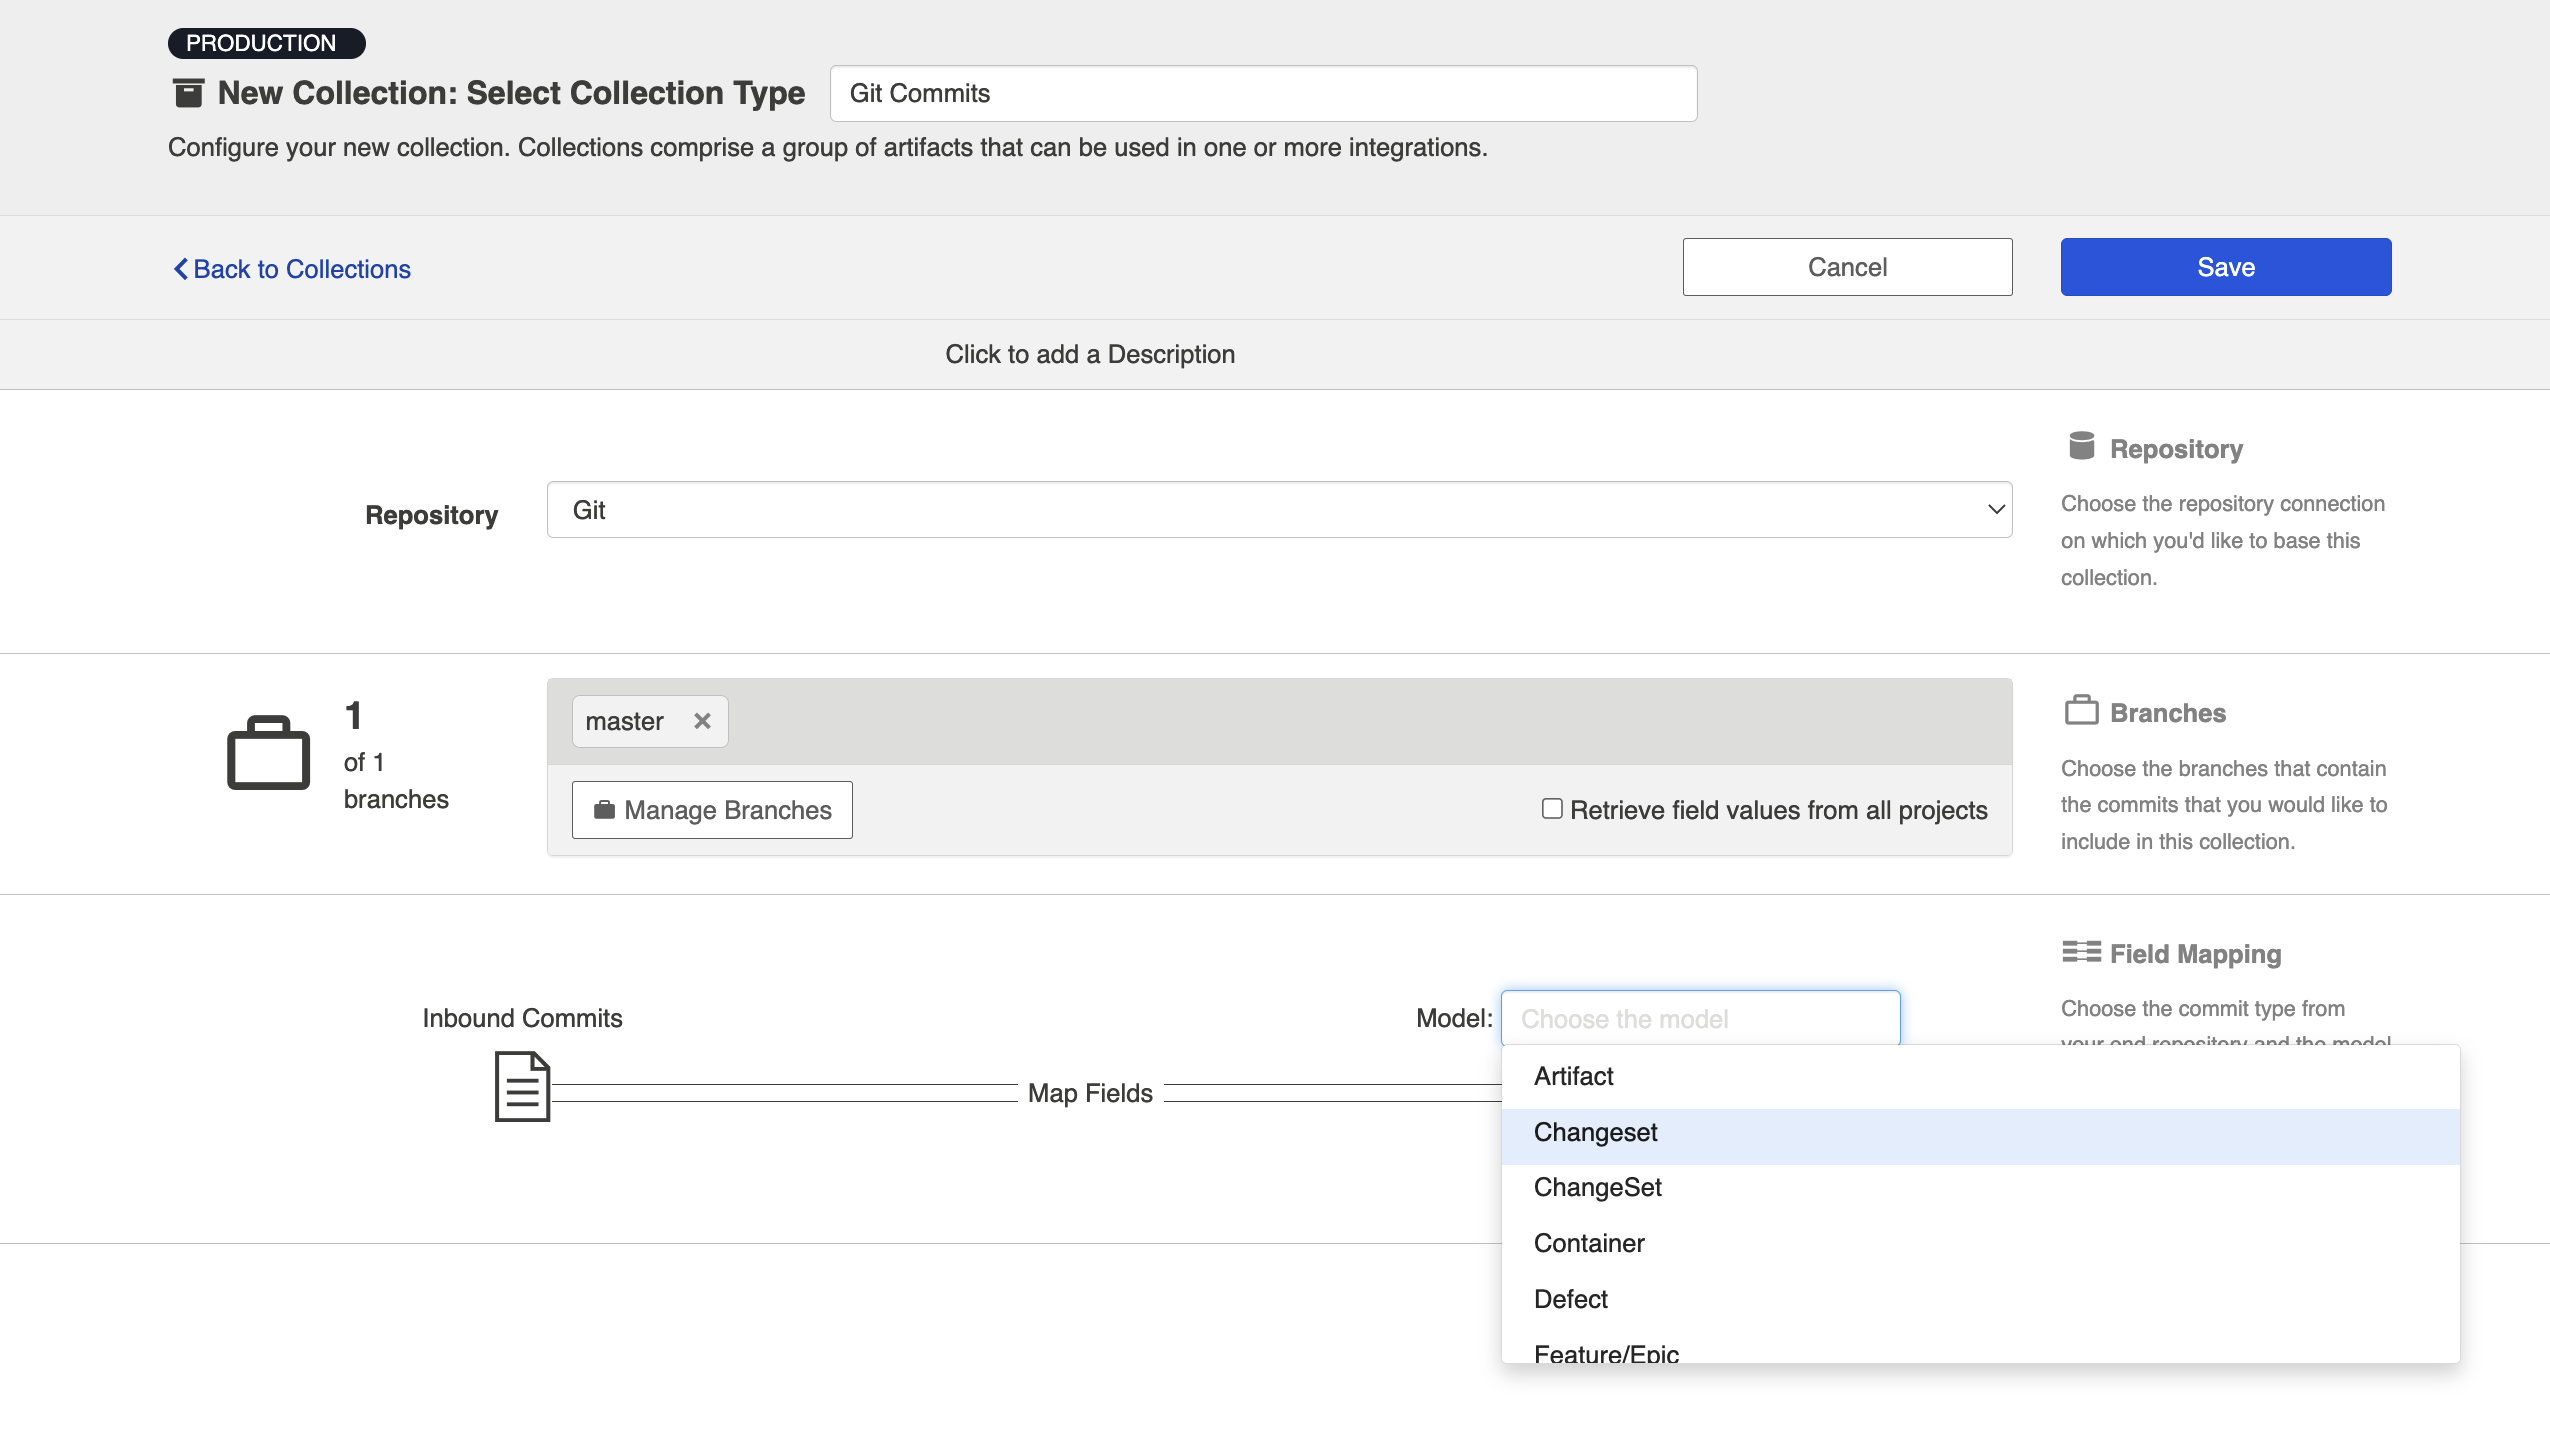
Select the repository that you would like to connect. The Outbound Only collection type can only connect to the Git repository. The collection will include artifacts from the repository you have selected.

Add branches to your collection by selecting Manage Branches. These are the branches from which Hub will be flow code commits, changesets, or other artifacts.

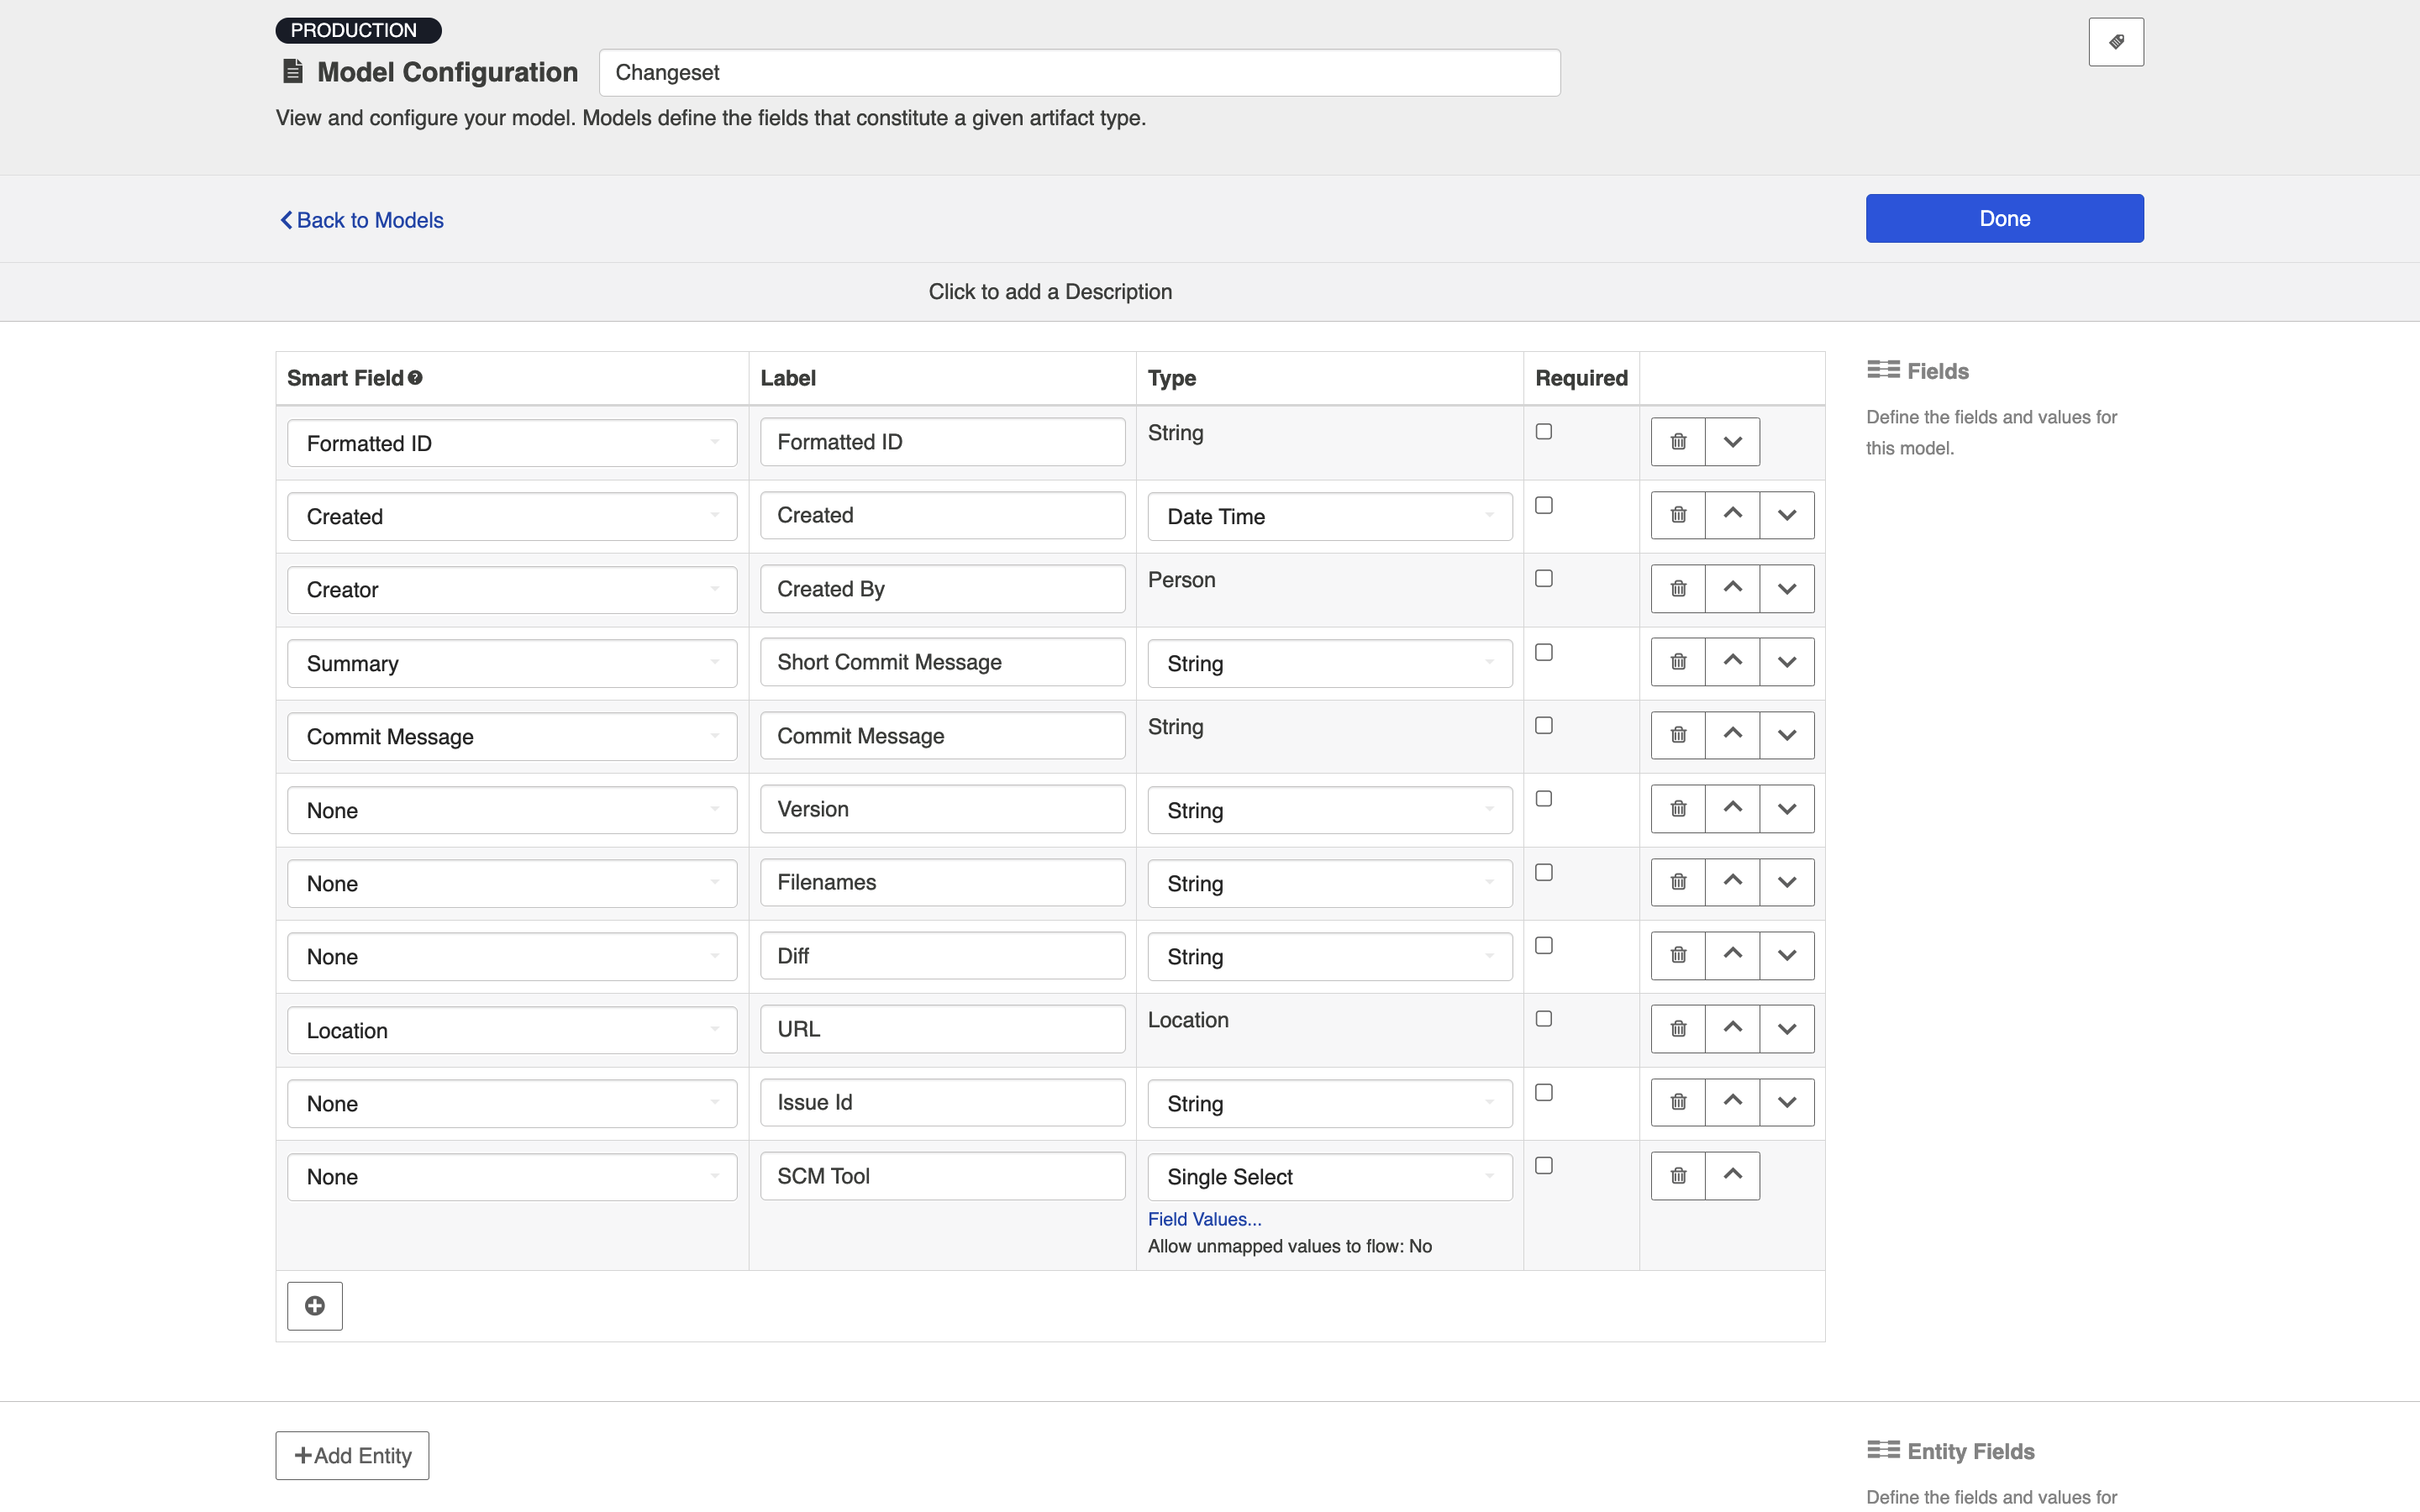
Select the model you'd like to use for this collection. If available, choose the ChangeSet model. We recommend ensuring that your model contains the following fields:
Click Save.
Tip: Clicking ctrl+s on Windows and cmd+s on macOS will save your collection.
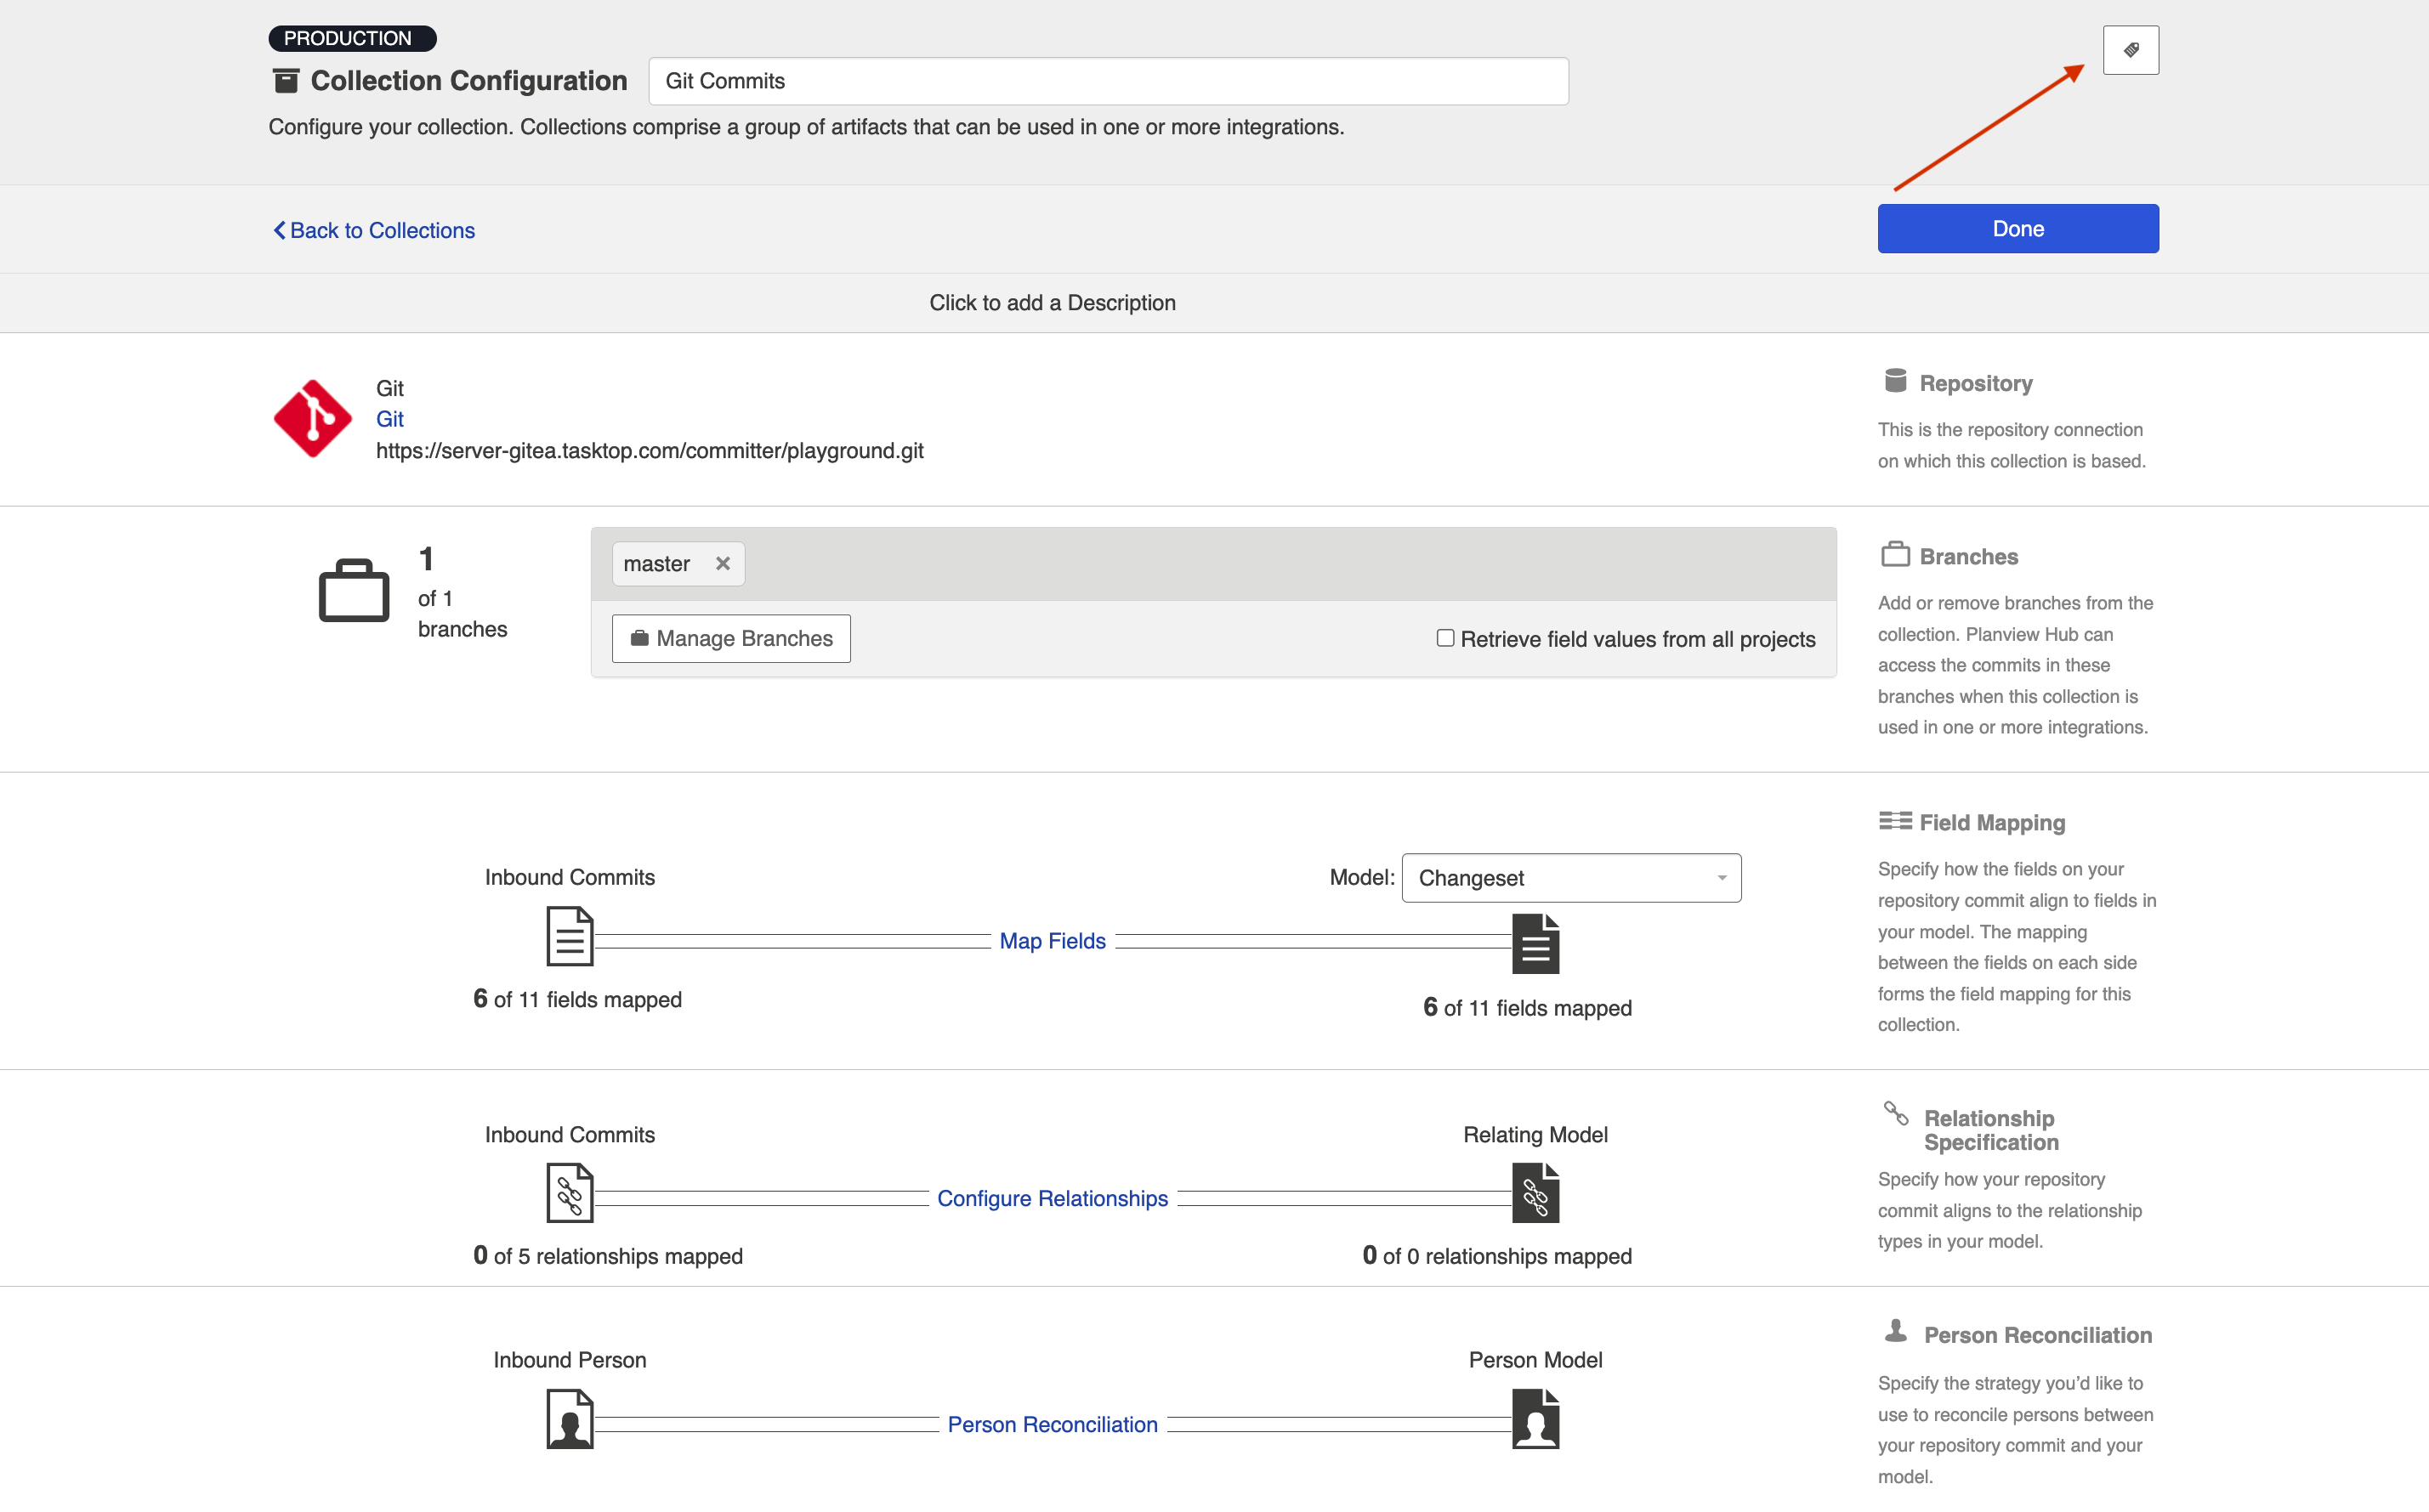
After you have saved your collection, you will be able to configure your collection.
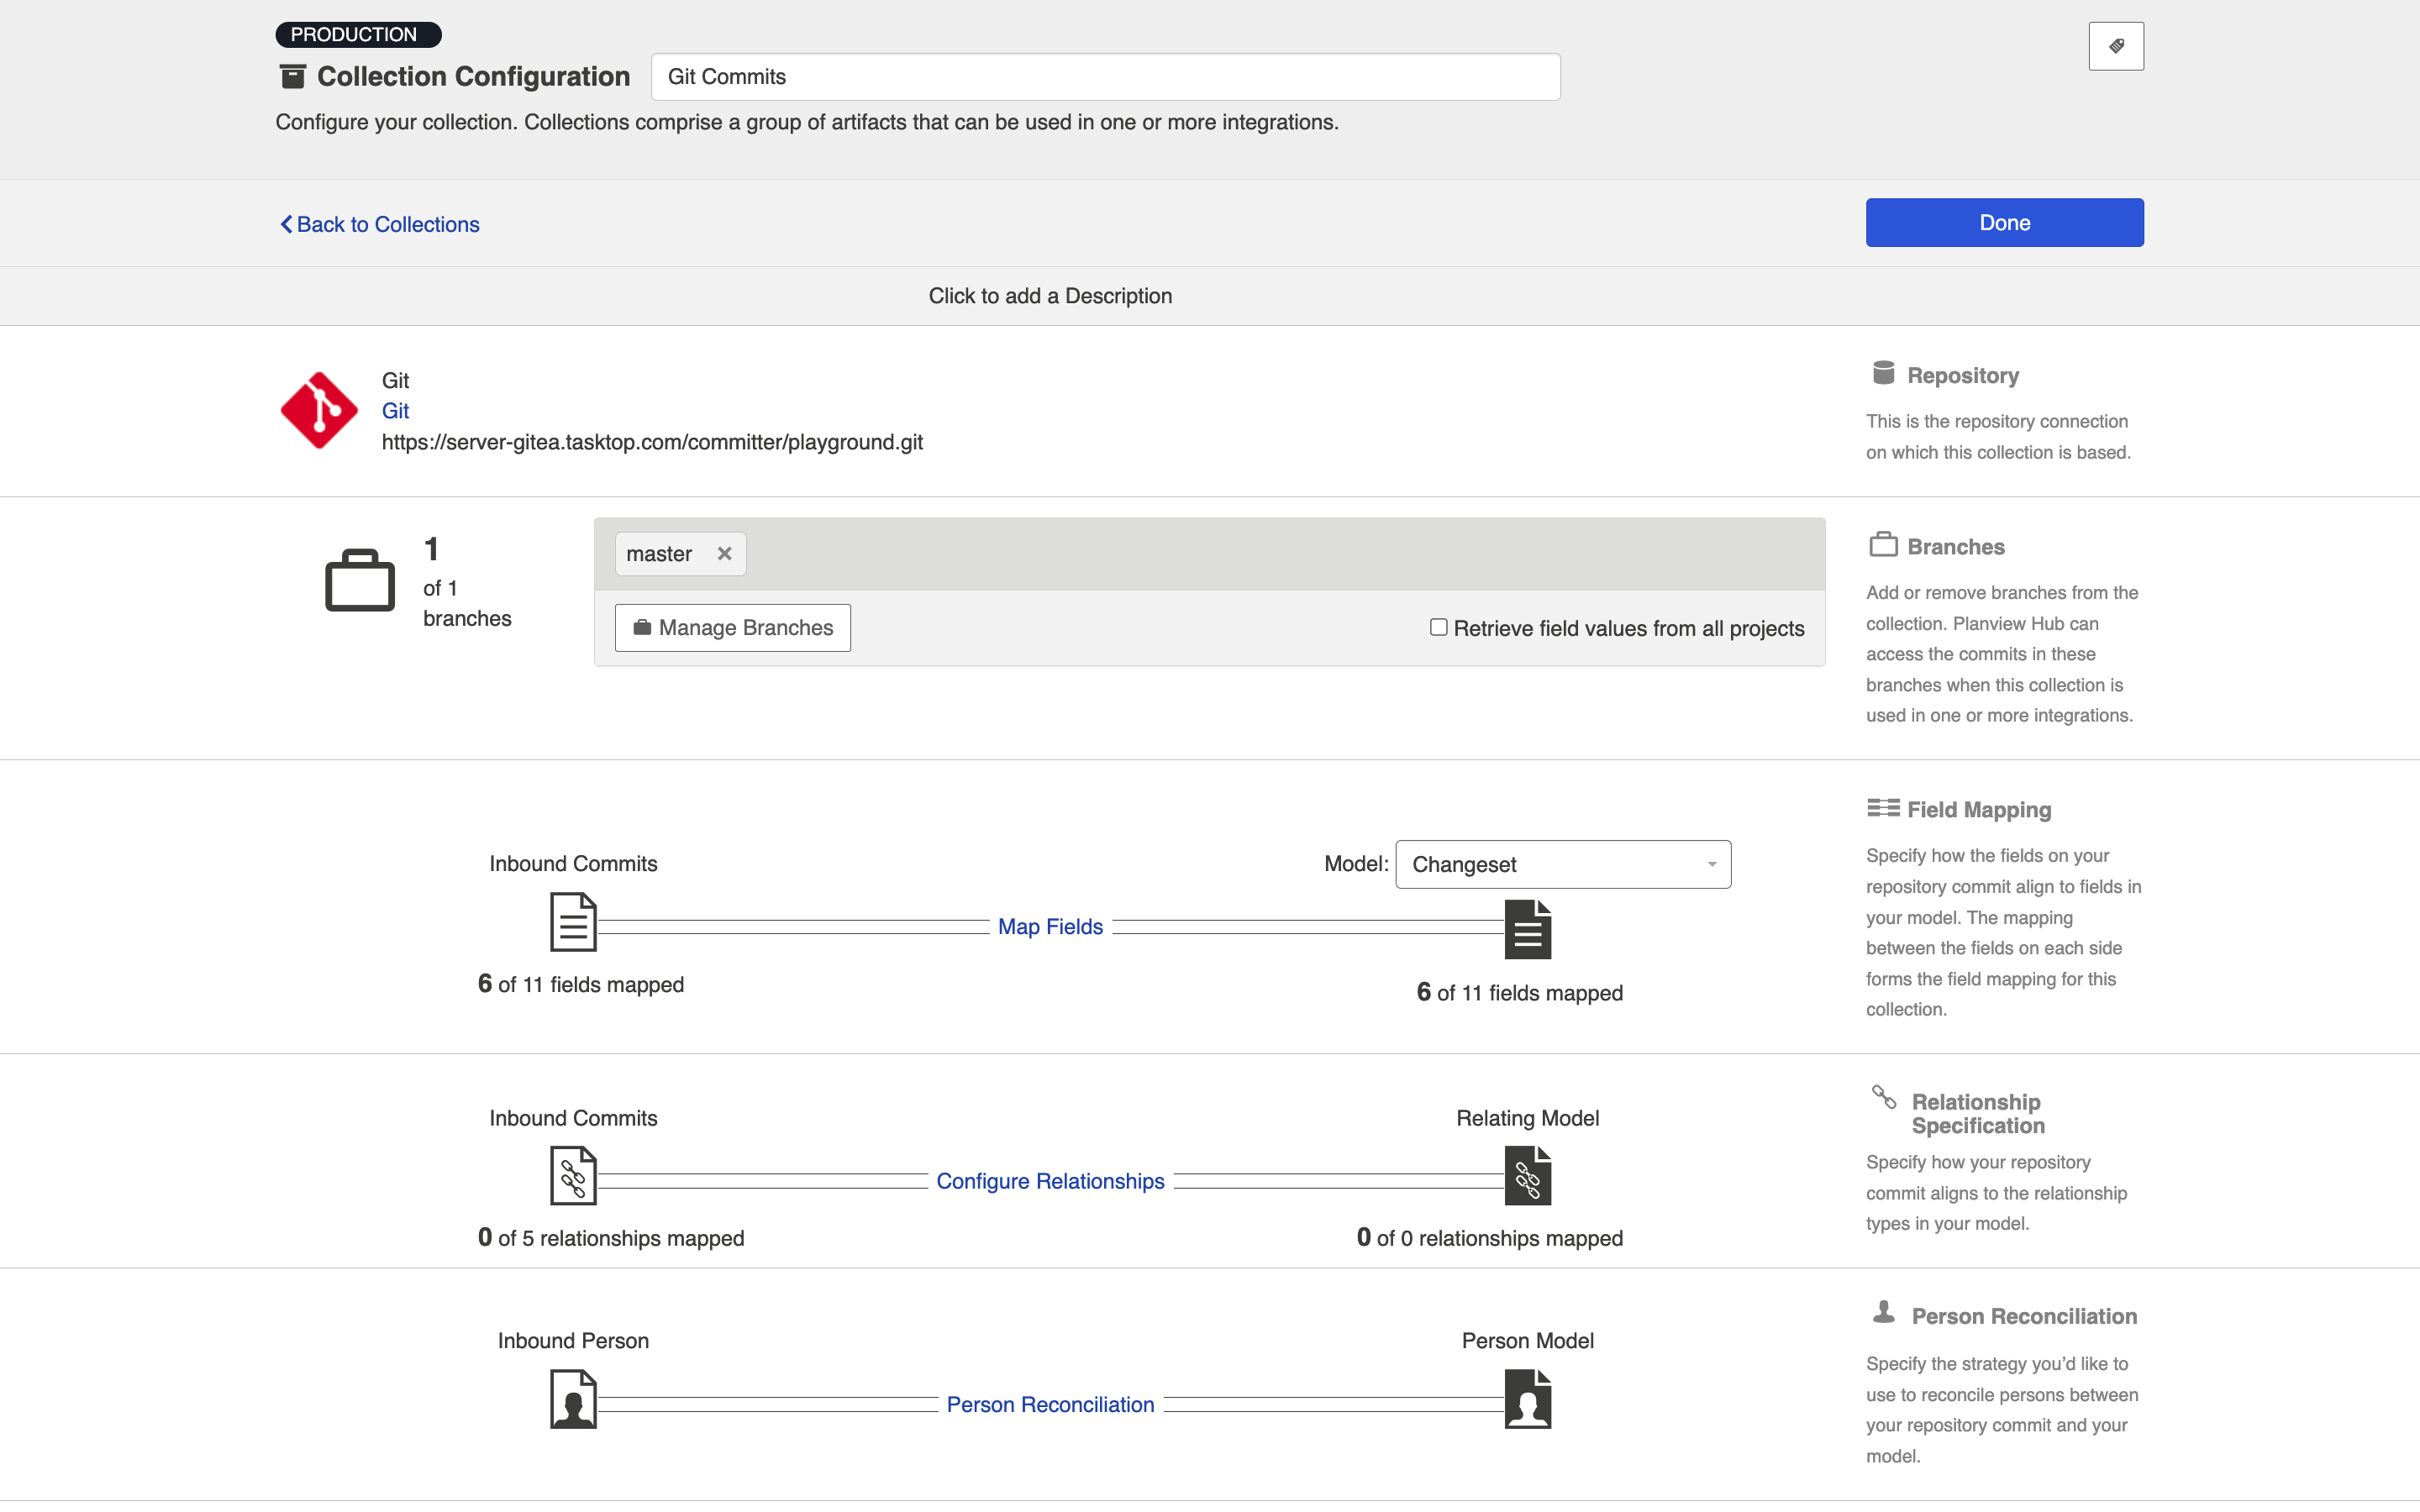
Map Fields
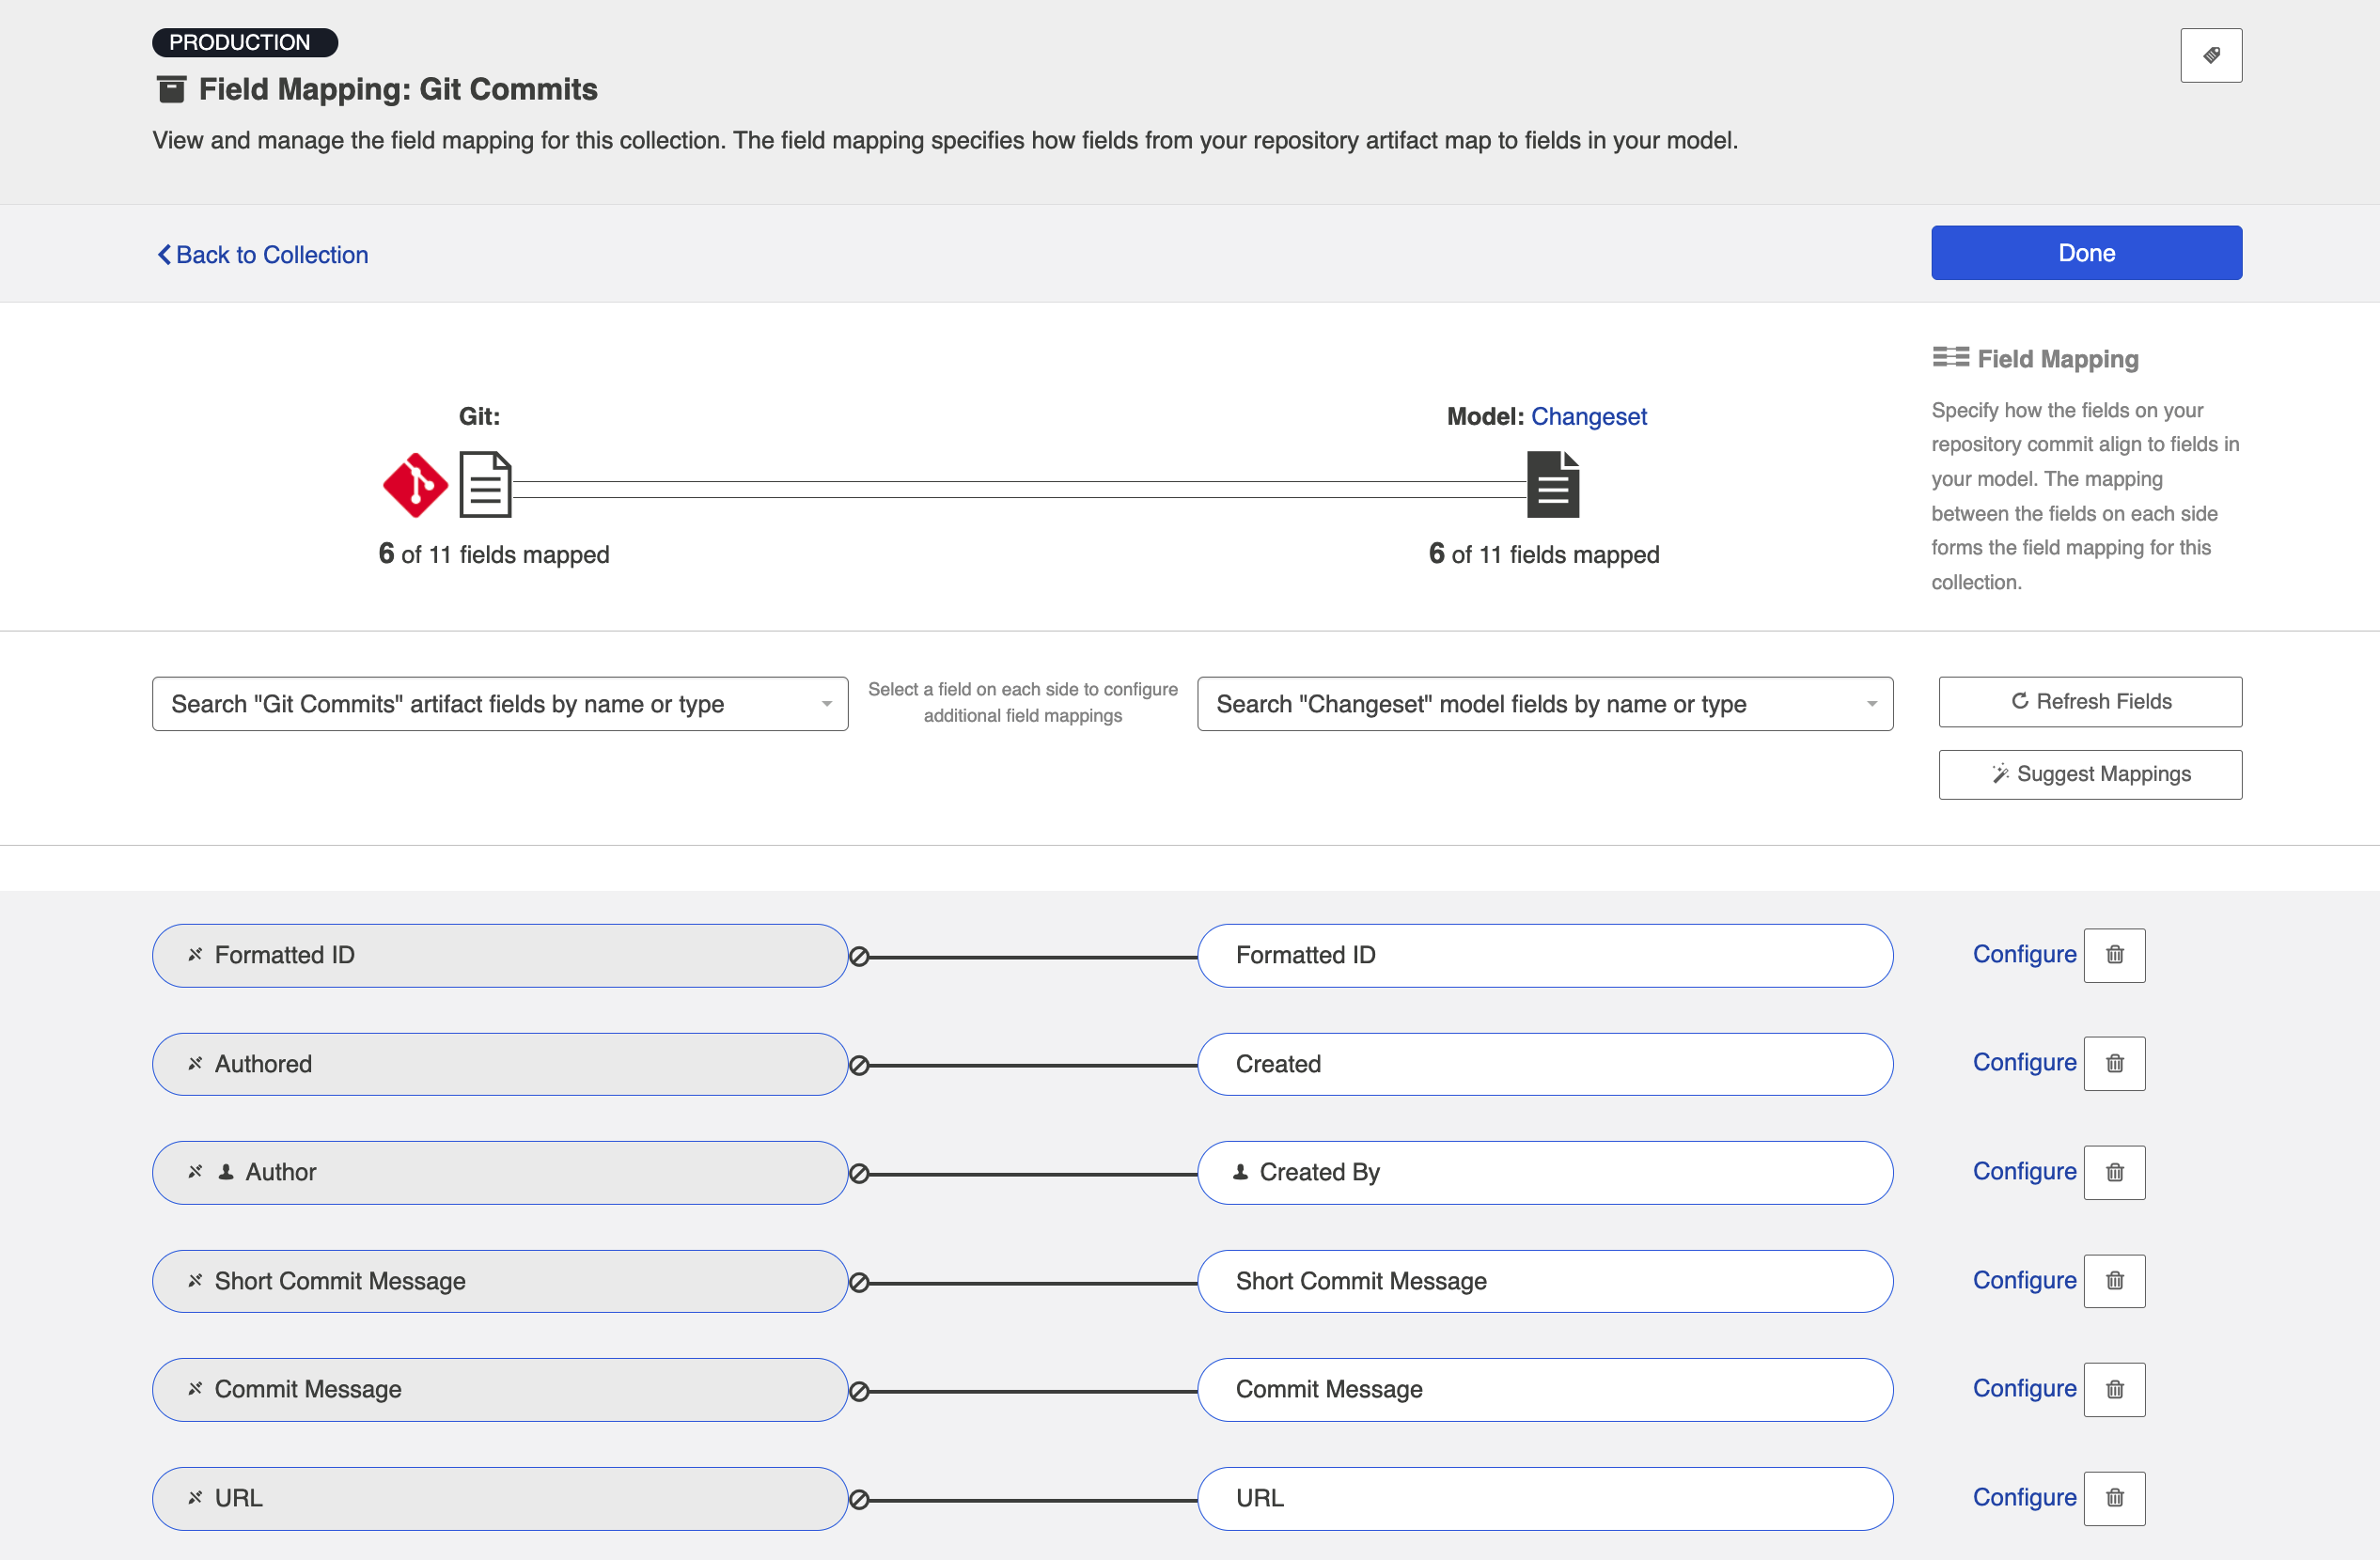
Clicking Map Fields will take you to the Field Mapping screen. On this screen, you will be able to specify how fields in your repository are mapped to fields in your model. You'll notice that for an Outbound Only collection, fields can only flow in one direction: out of your collection, and into your model. This mapping will determine how information flows from fields in your source collection to fields in your target collection.
You can learn more about the Field Mapping screen here.
Here's an example field mapping configuration for a Git Commit collection:
Configure Relationships
Clicking Configure Relationships will take you to the Relationship Specification screen. On this screen, you will be able to specify how relationship fields in your repository are mapped to fields in your model. Relationship fields, such as 'blocked by,' 'is related to,' and 'parent,' enable you to preserve the relationship structure between artifacts as you flow information from one collection to the other.
You can learn more about this process on the Relationship Specification page.
Person Reconciliation
Clicking Person Reconciliation will take you to the Person Reconciliation screen. On this screen, you will be able to specify the strategy you'd like to use to reconcile person fields between your repositories.
You can learn more about this process on the Person Reconciliation page.
Optional: Set a Repository Query
If you have enabled repository queries for the repository that you have connected to, you will also see a Repository Query sash at the bottom of the screen.
Note: Repository Queries are advanced functionality, and should only be used when you are truly unable to filter as desired using the built-in Hub functionality of Repositories, Collections, and Artifact Filtering.
You can learn more about Repository Queries here.
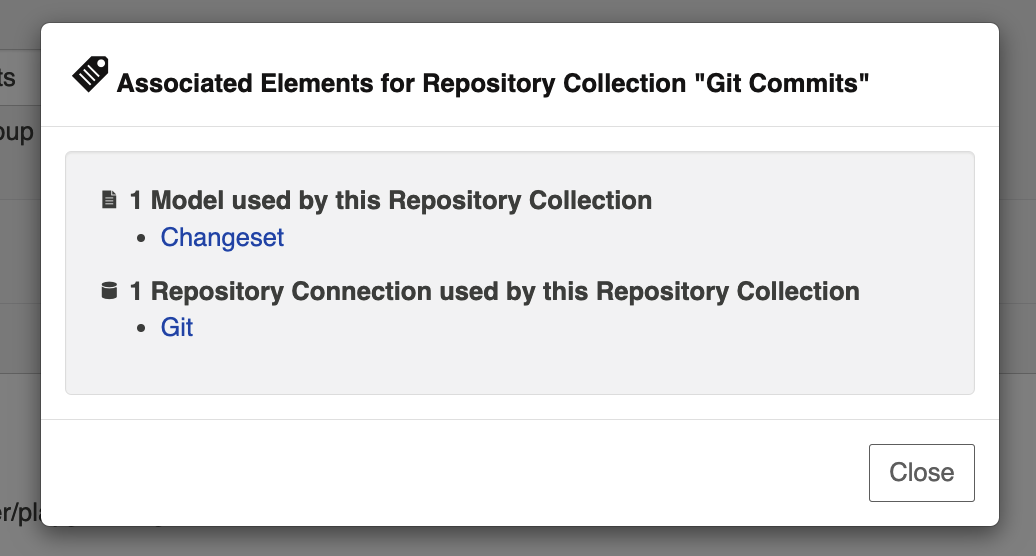
Viewing Associated Configuration Elements
To view associated configuration elements (such as models or integrations that utilize the collection you are viewing), click the Associated Elements tag in the upper right corner of the screen.