
State Transitions
Introduction
Once you've configured your Person Reconciliation strategy, your next step will be to configure State Transitions, if your repository utilizes state transitions or workflows.
Some repositories require that a state transition be performed in order to update the value of certain fields (for example, when an artifact must move from a status of New to In Progress to Closed, but cannot move directly from New to Closed). If state transitions are supported for your repository, you will see a State Transition sash at the bottom of the Collection Configuration screen.
You can also review our Connector Docs to see if state transitions are supported for the repository you are connecting to.
Configuring State Transitions
If state transitions are supported for your repository, you will see a State Transition sash at the bottom of the Collection Configuration screen.
Note: State transitions are not supported in Gateway collections.
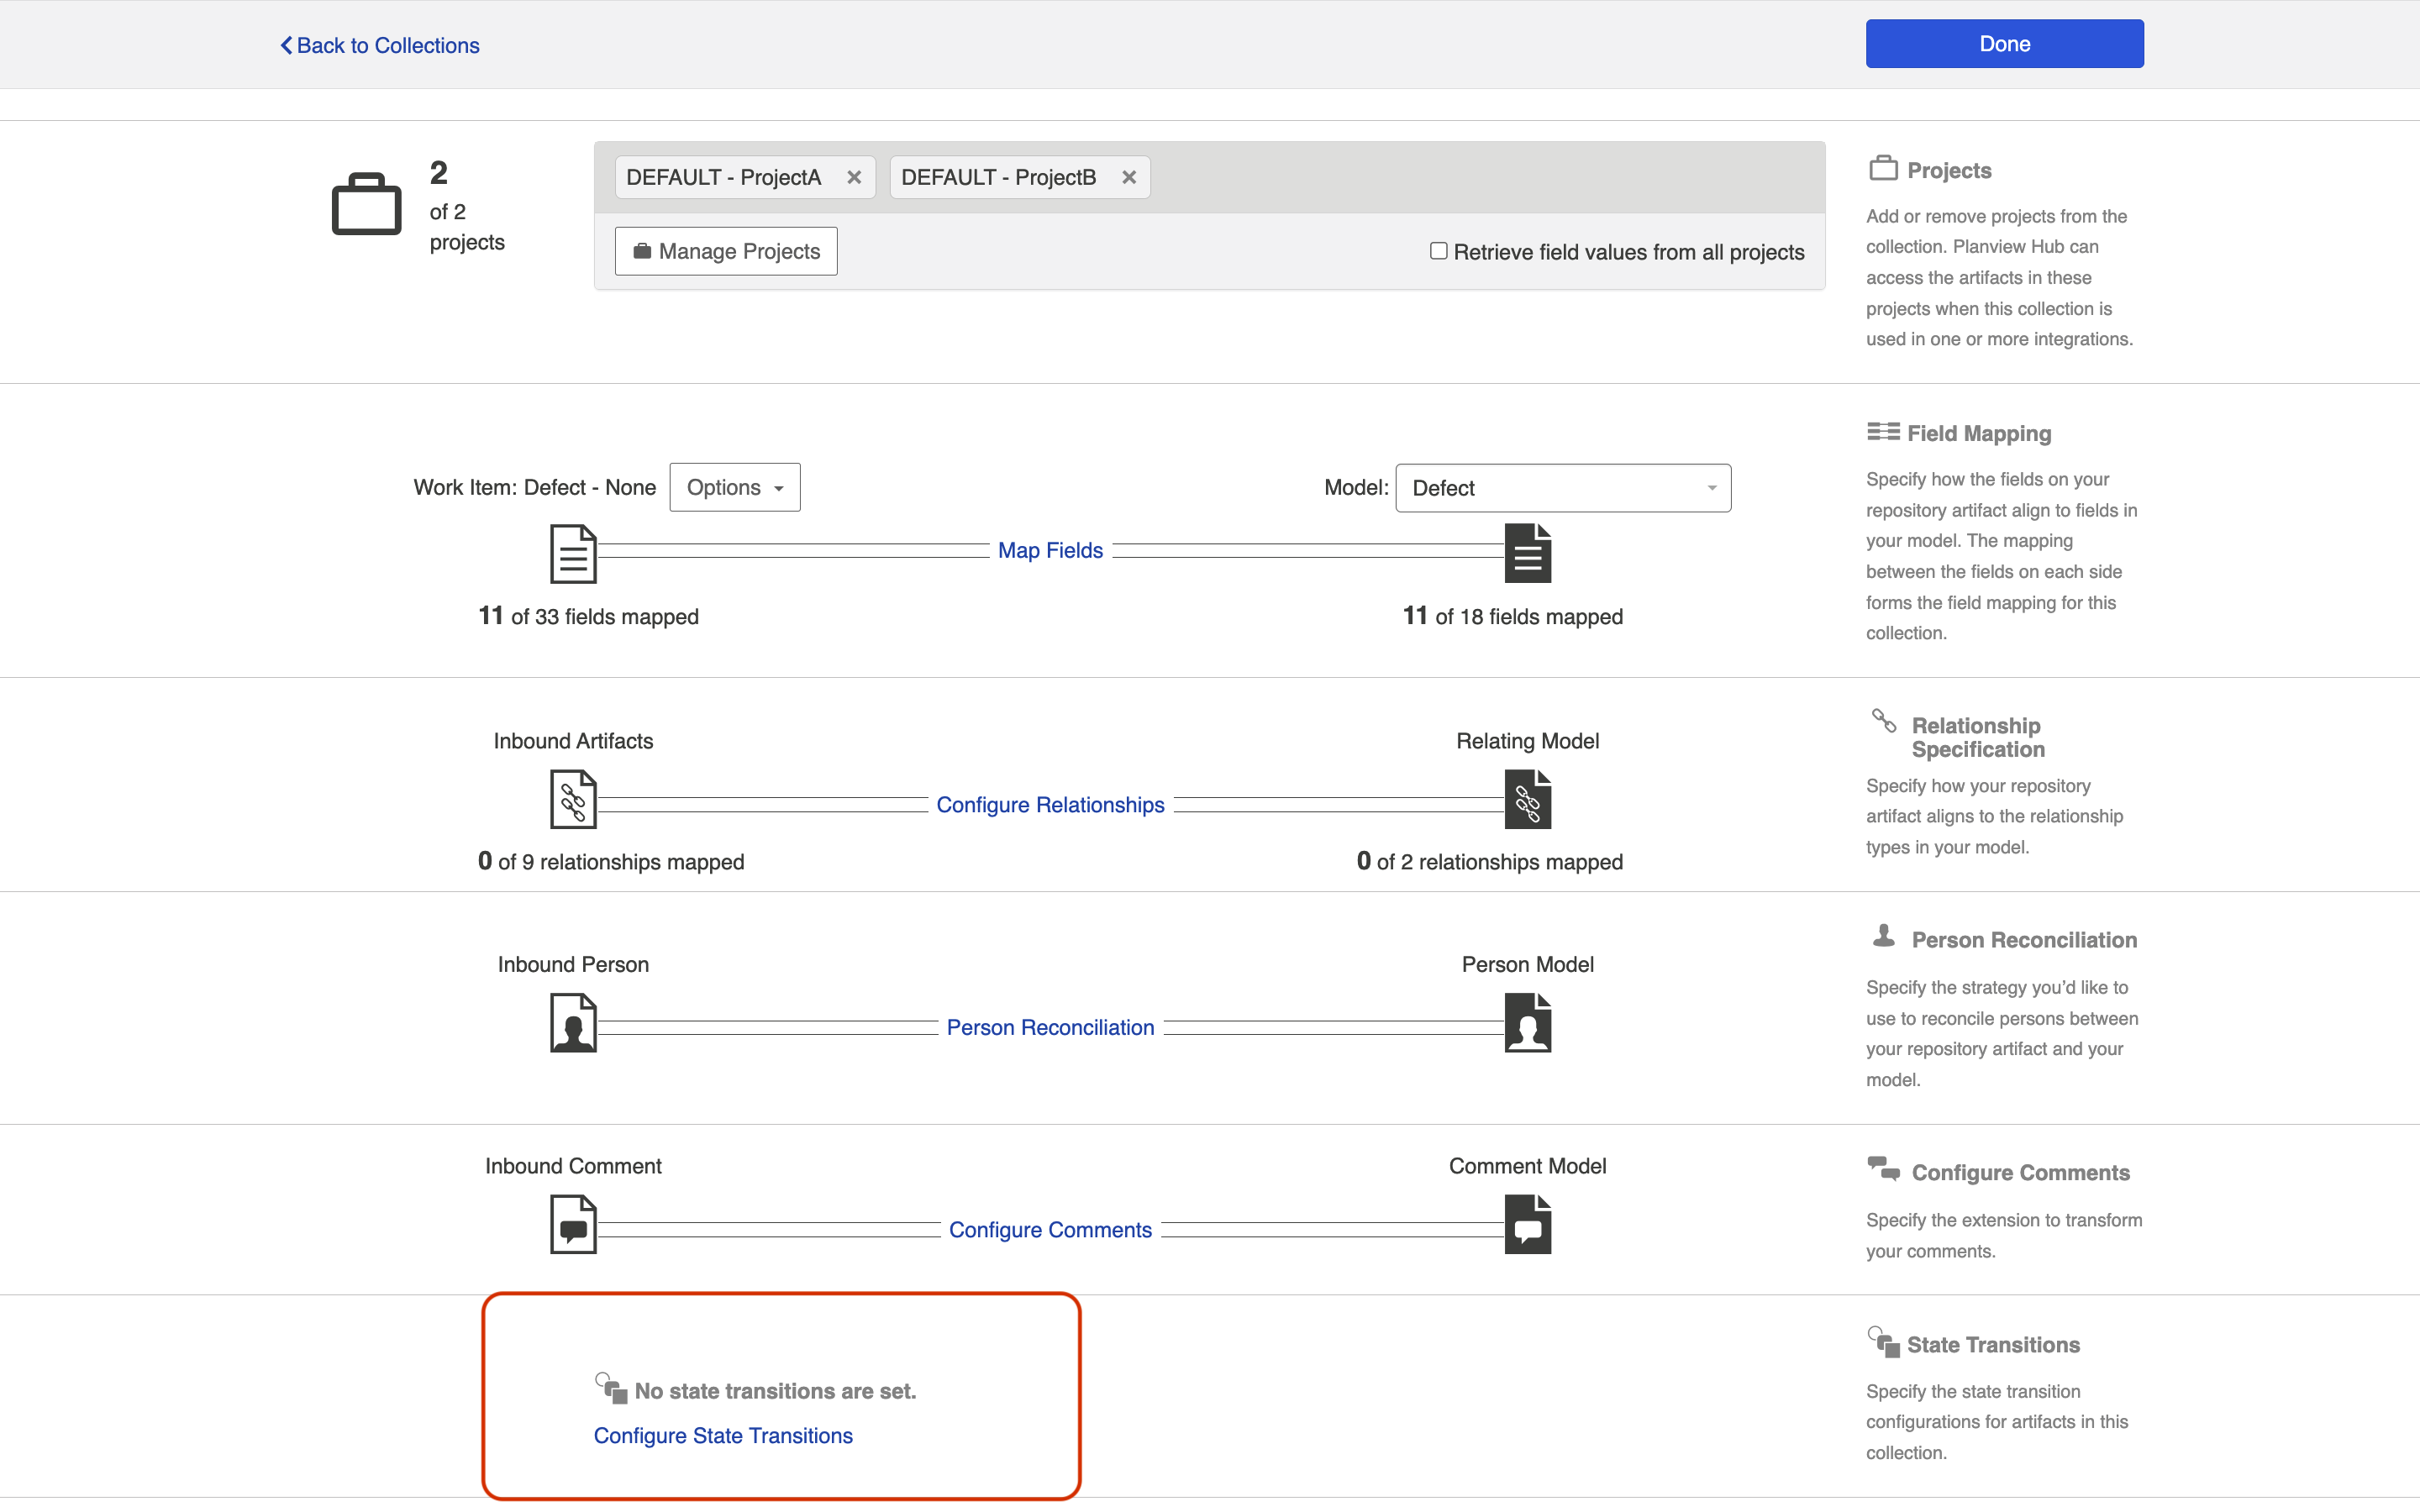
To set a state transition, click Configure State Transitions.
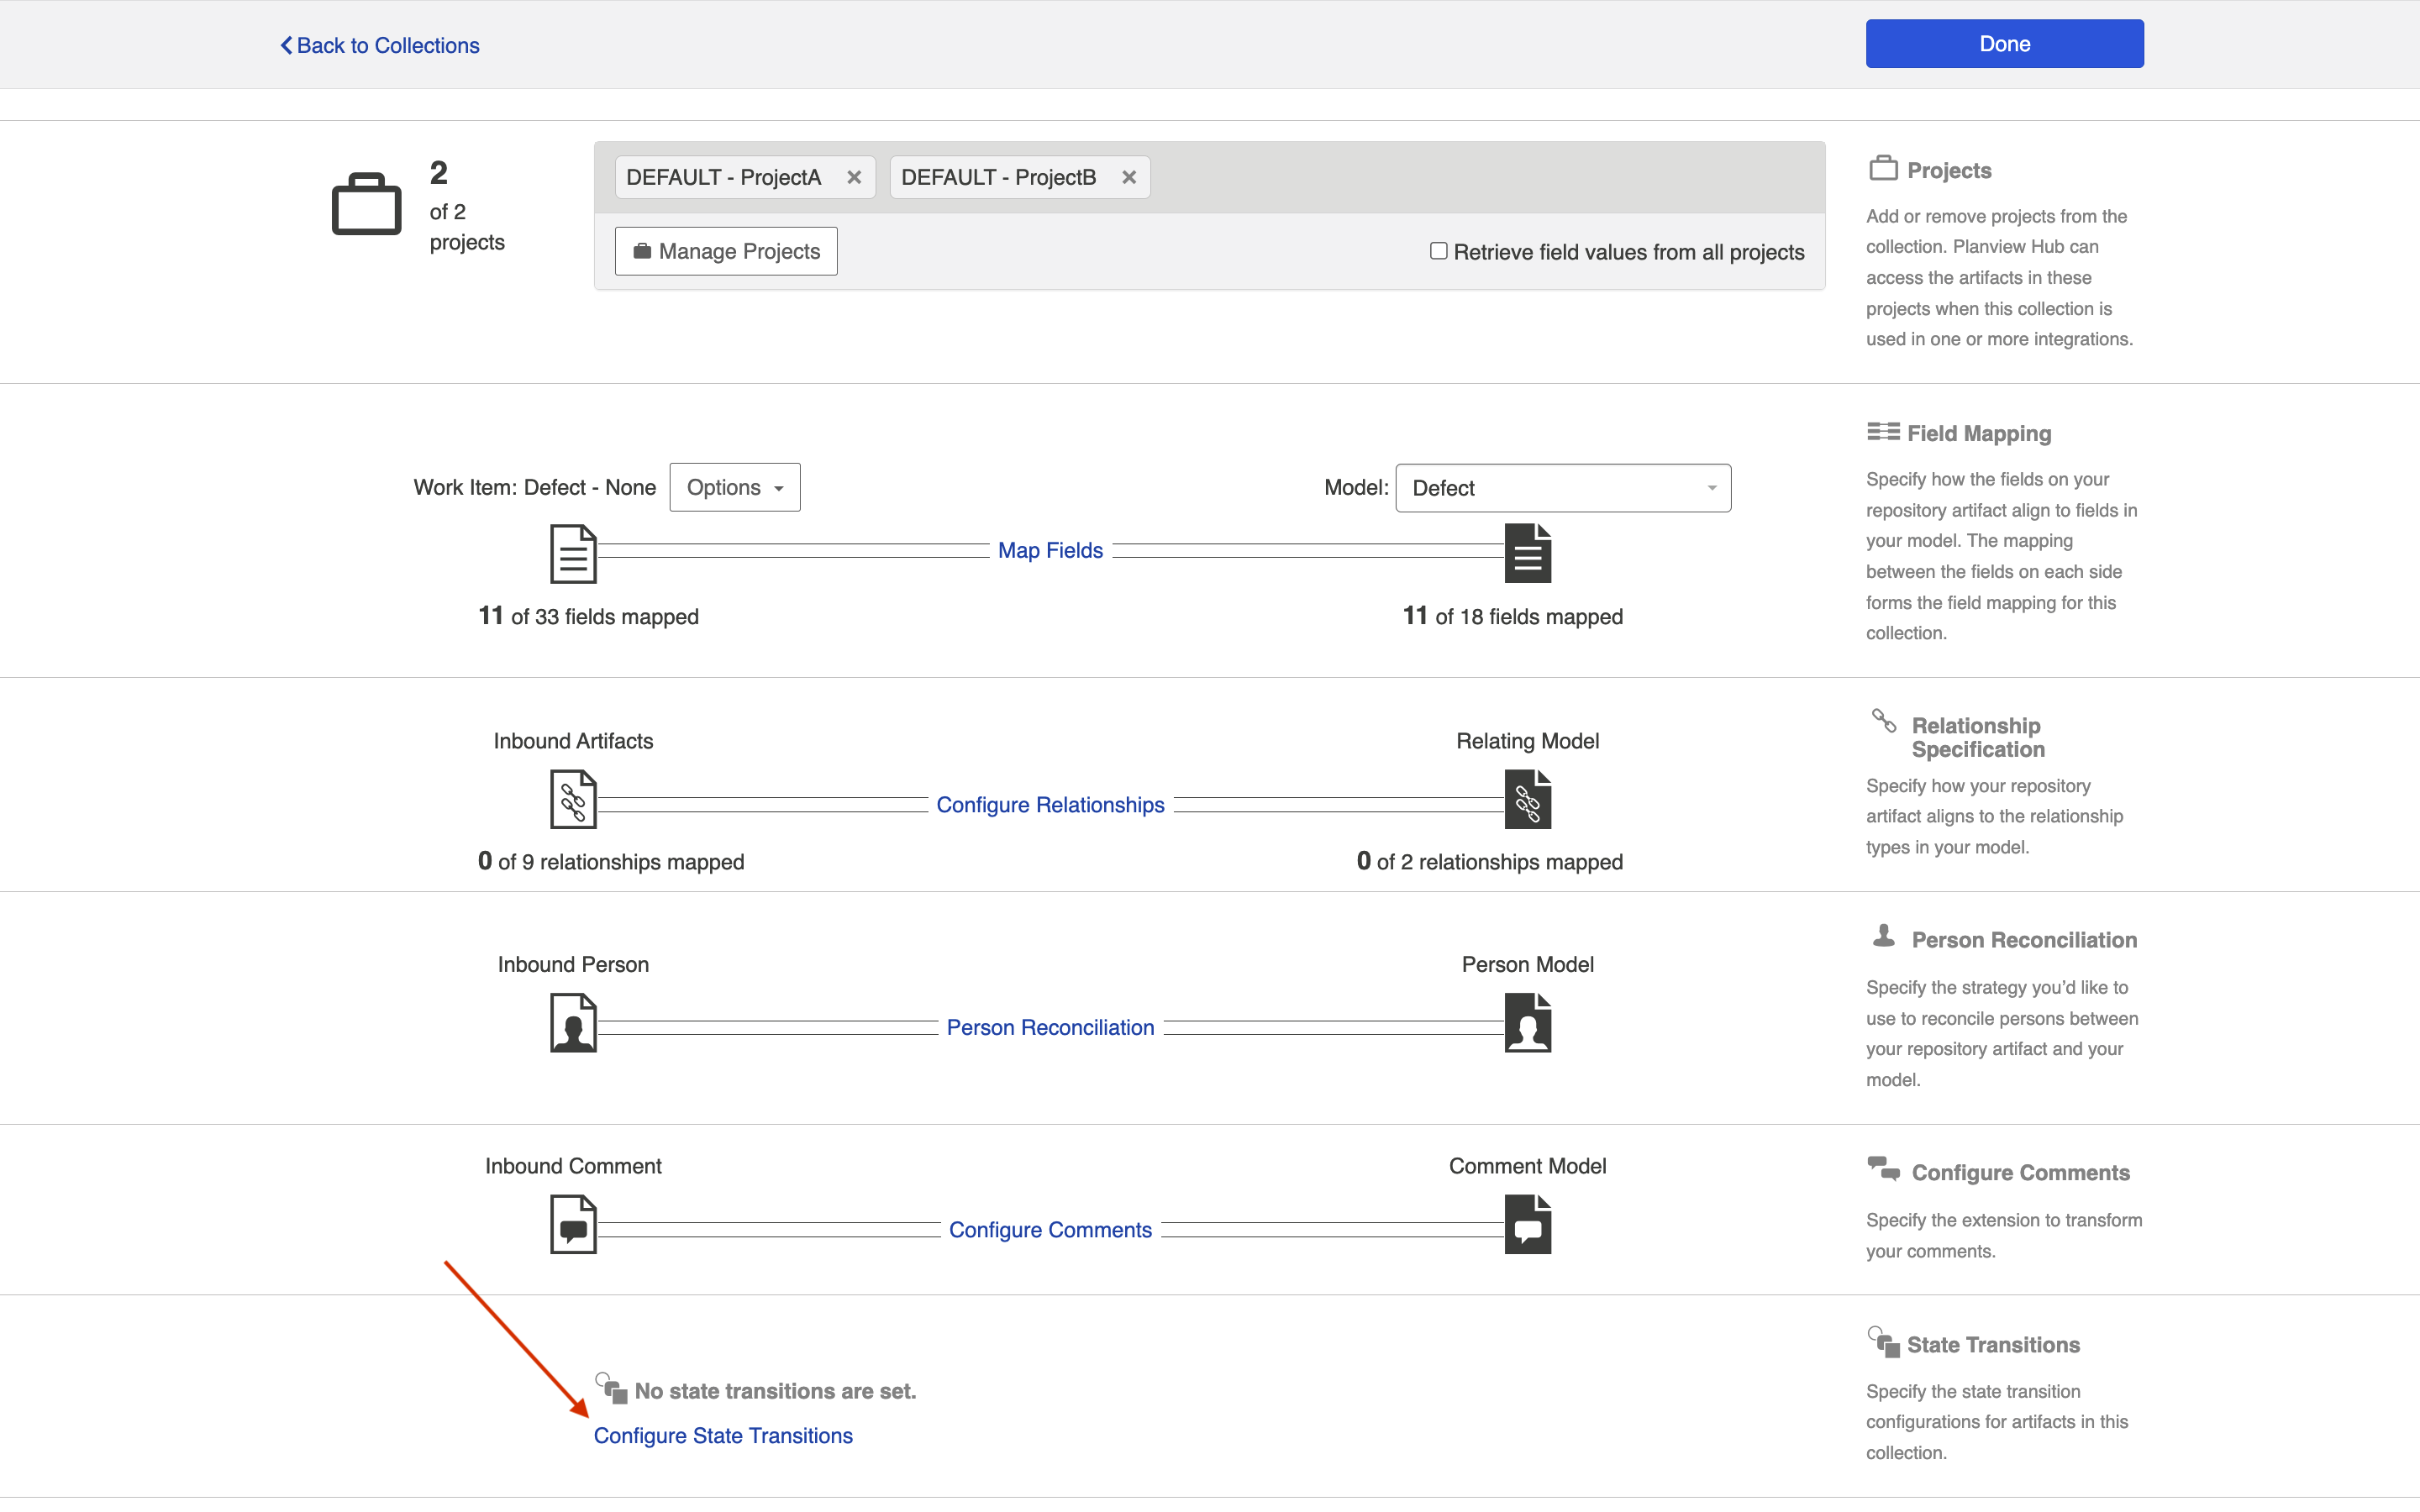
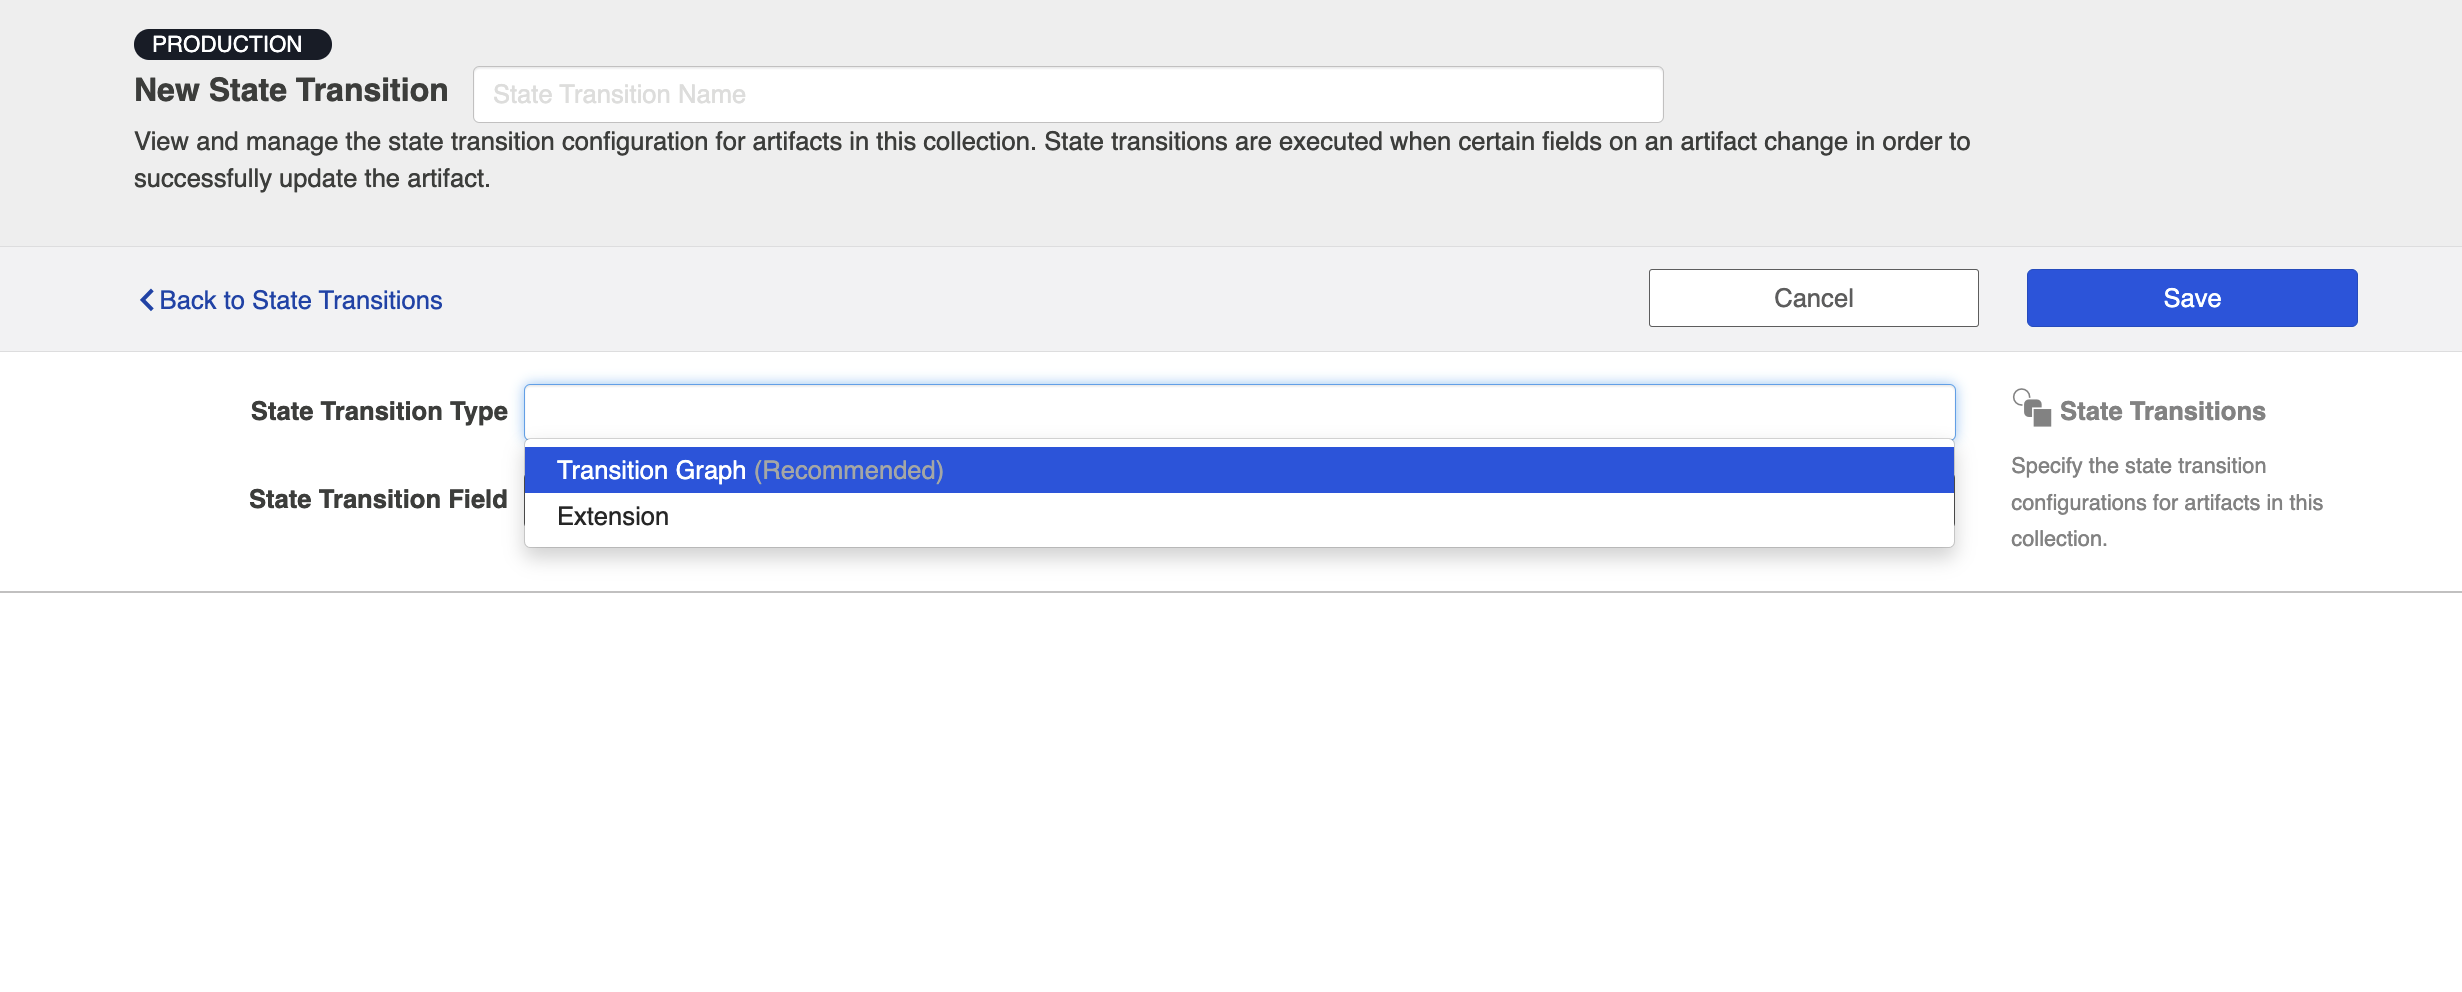
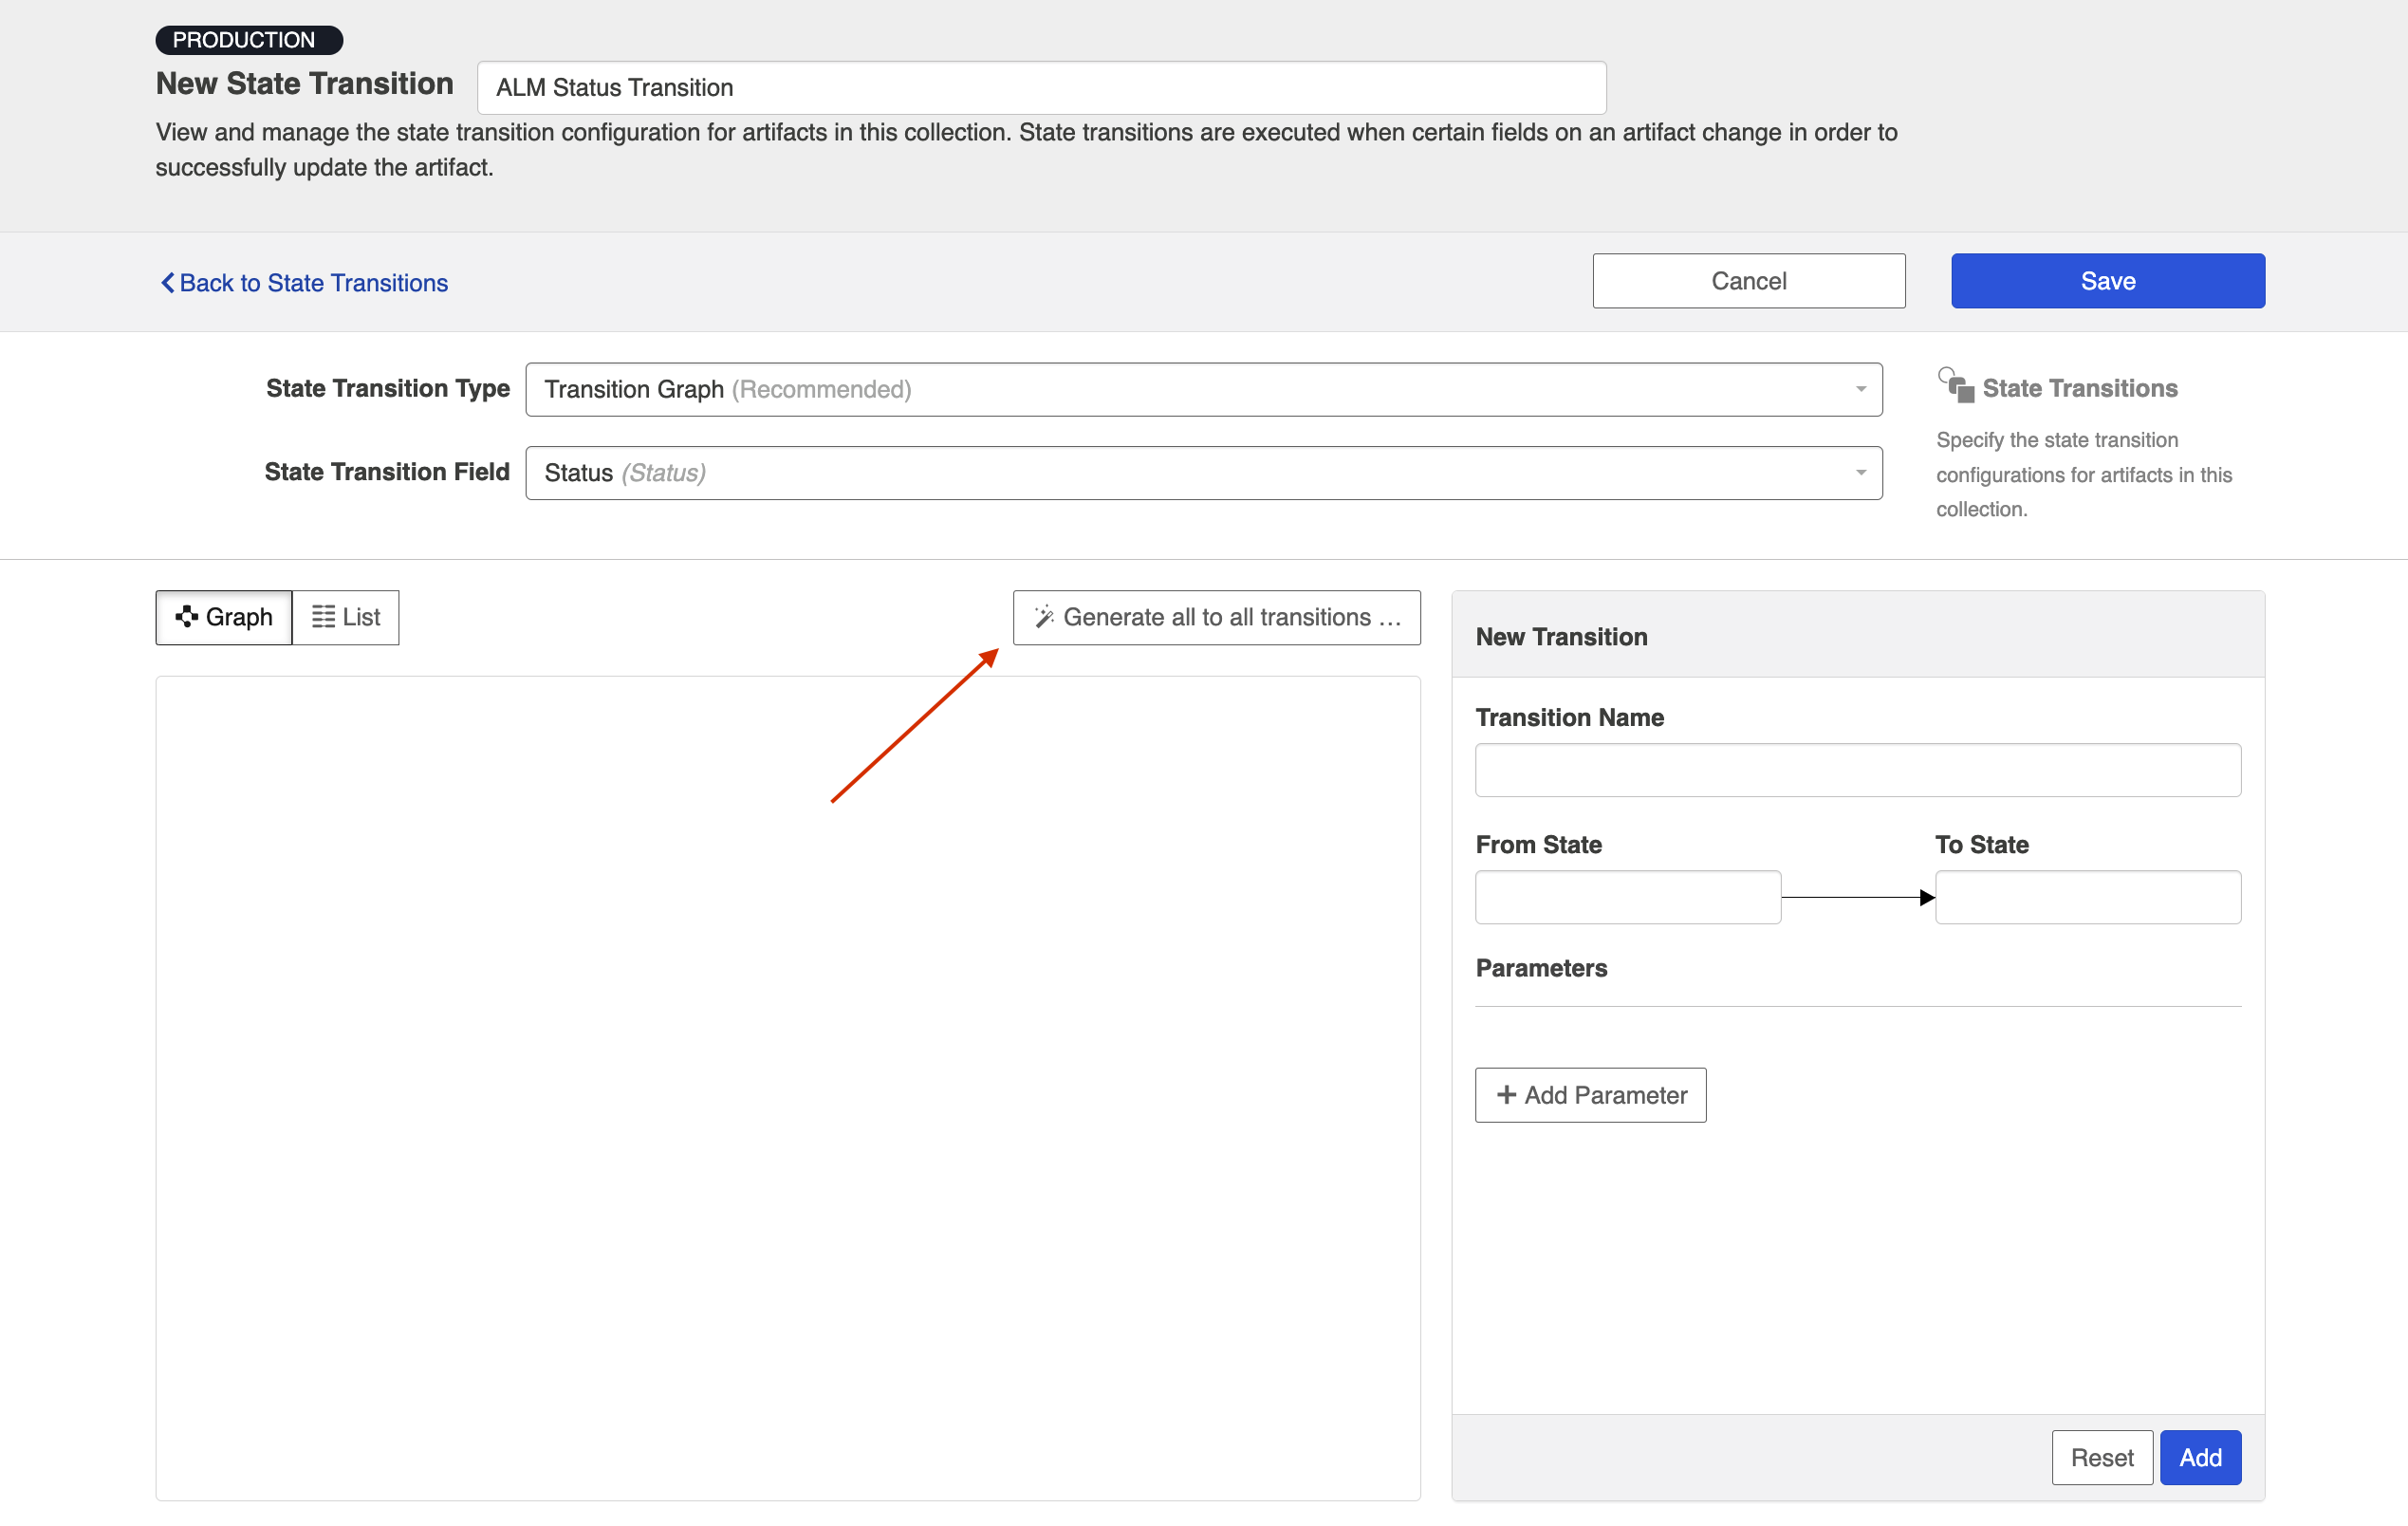
This will lead you to the State Transition screen. Click + New State Transition.
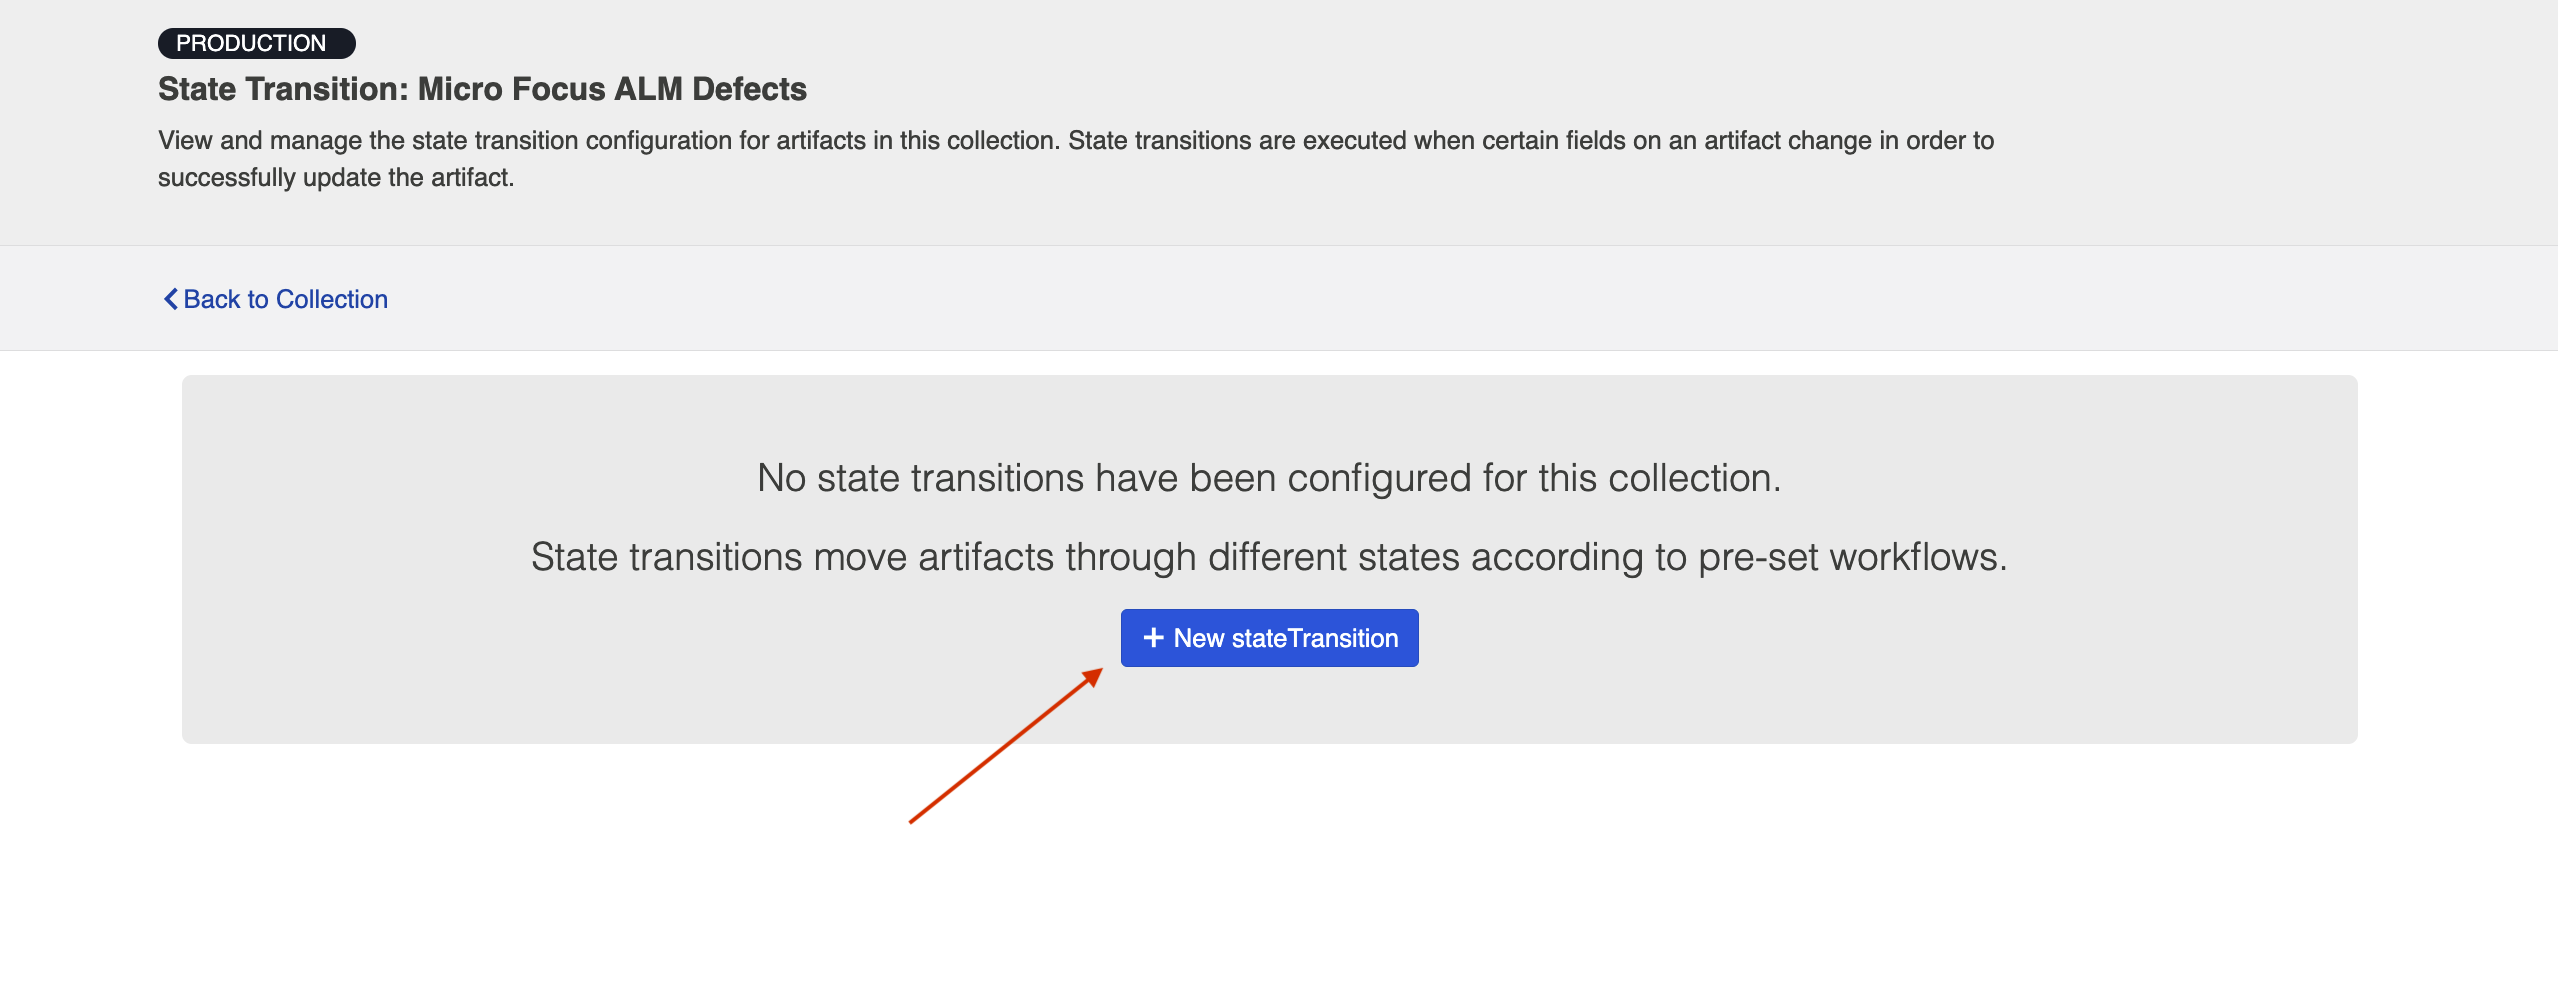
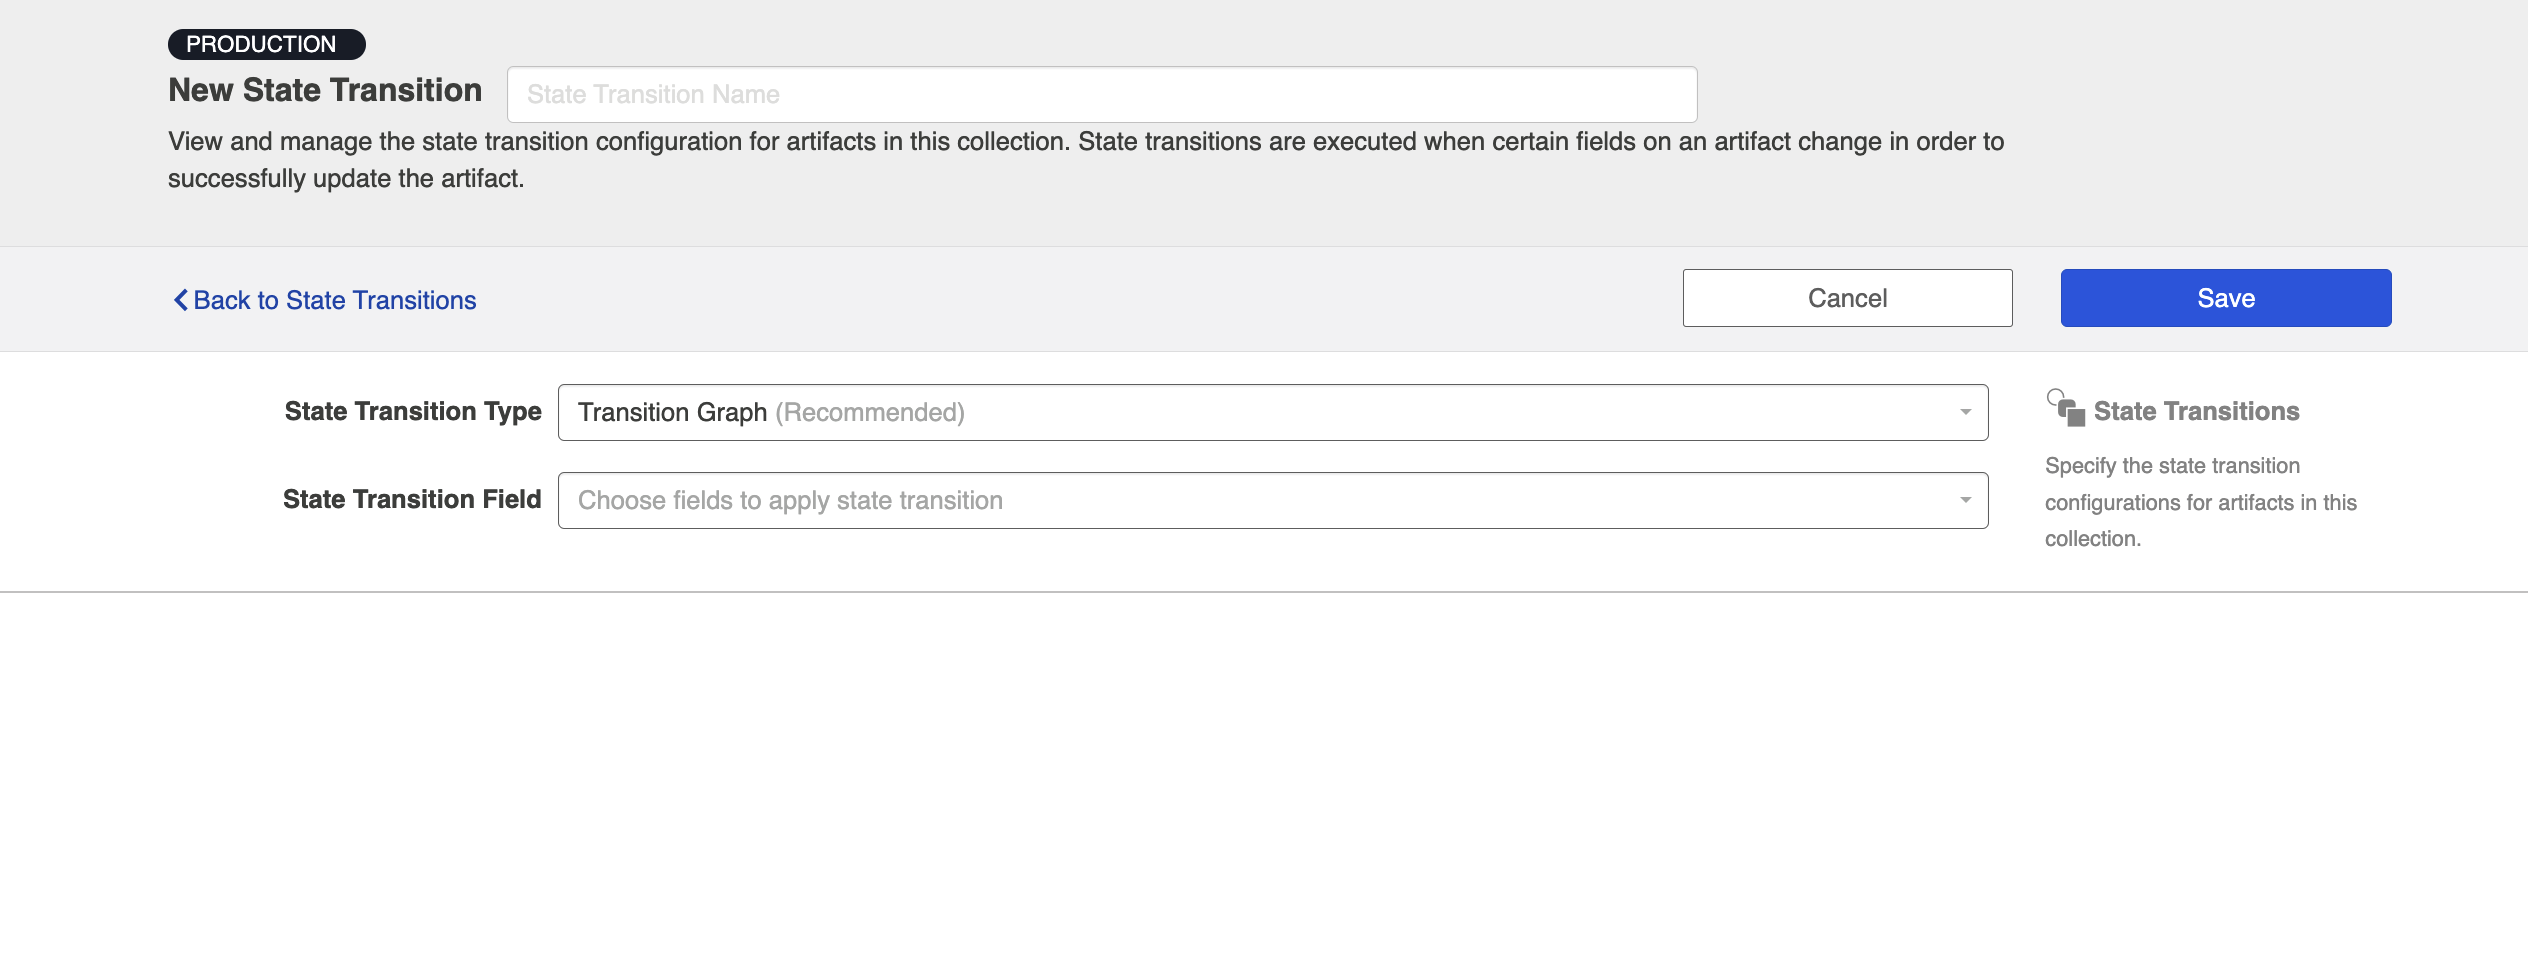
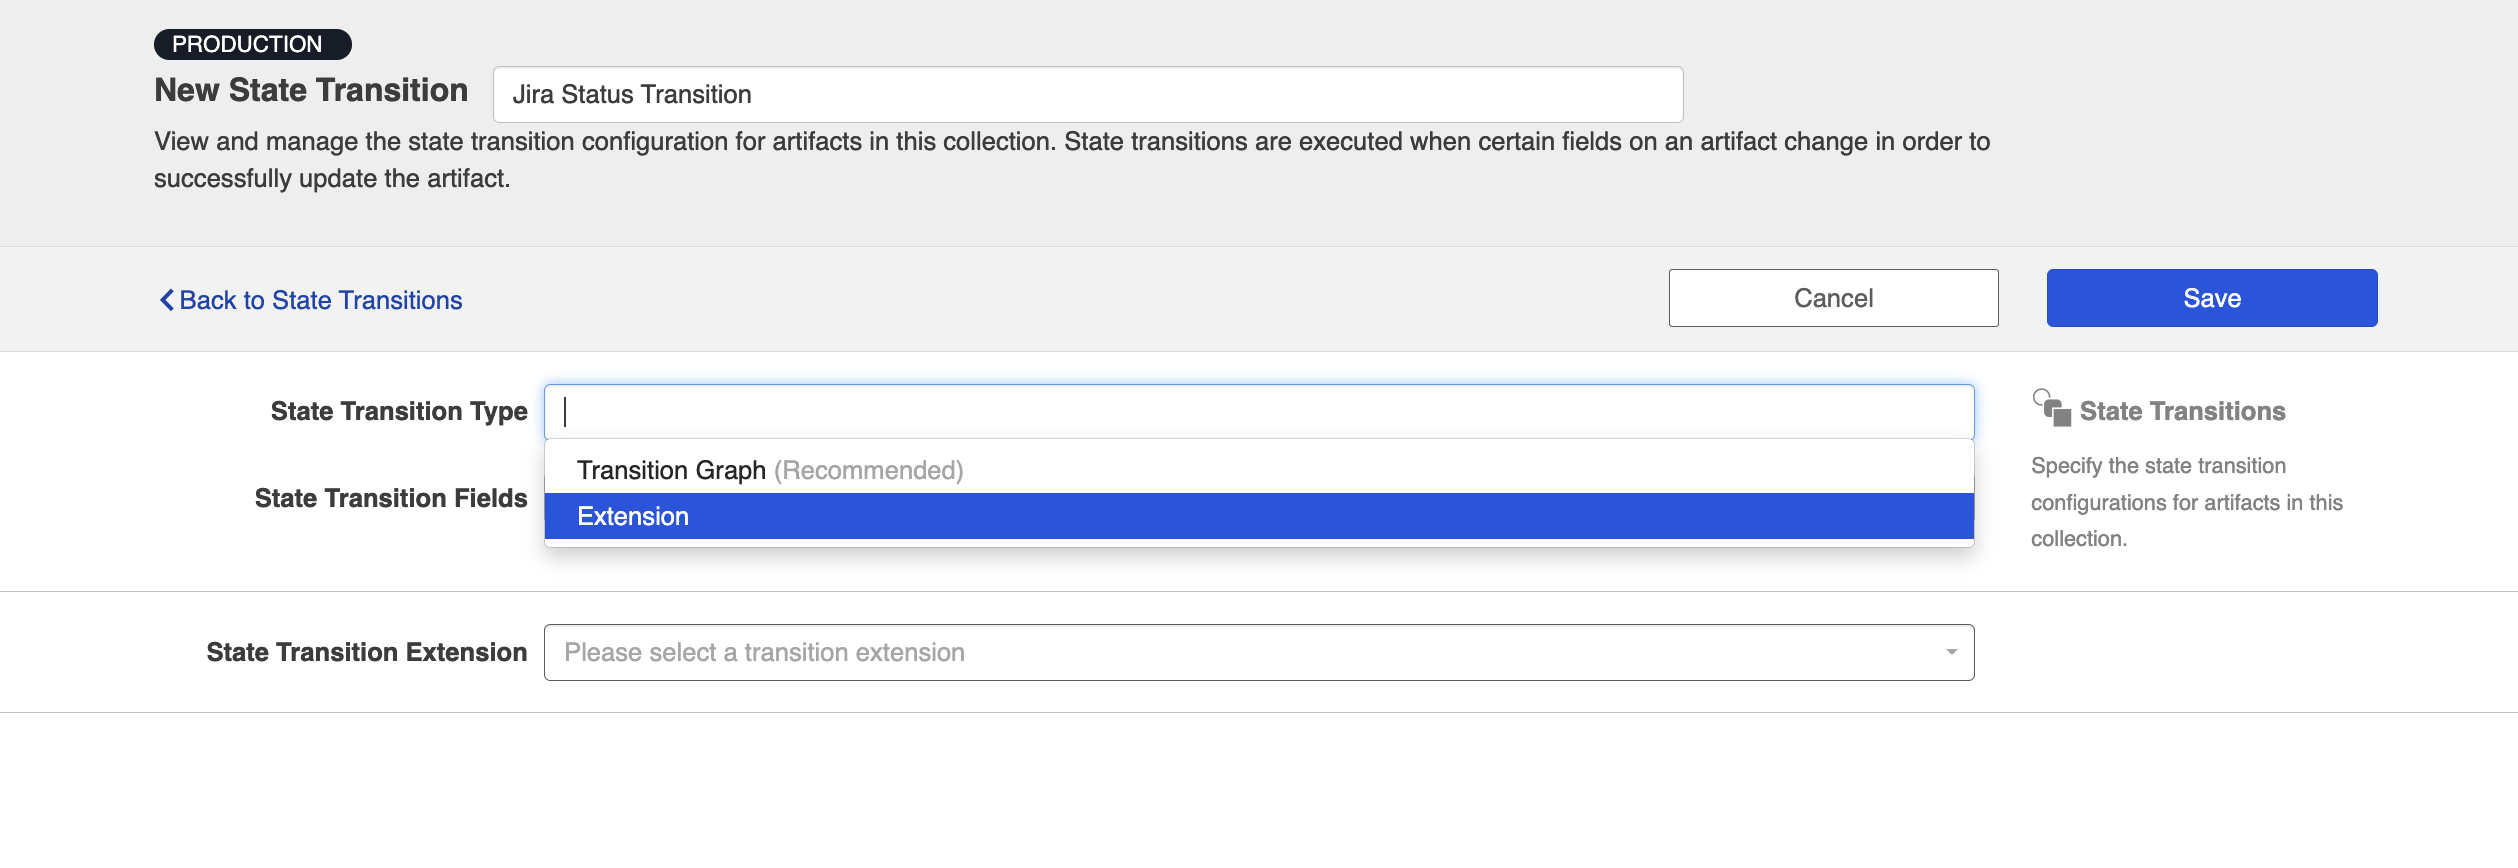
This will lead you to the New State Transition screen. Here you can name your transition and choose between two State Transition Types:
- Transition Graph (Recommended)
- Extension
Transition Graph
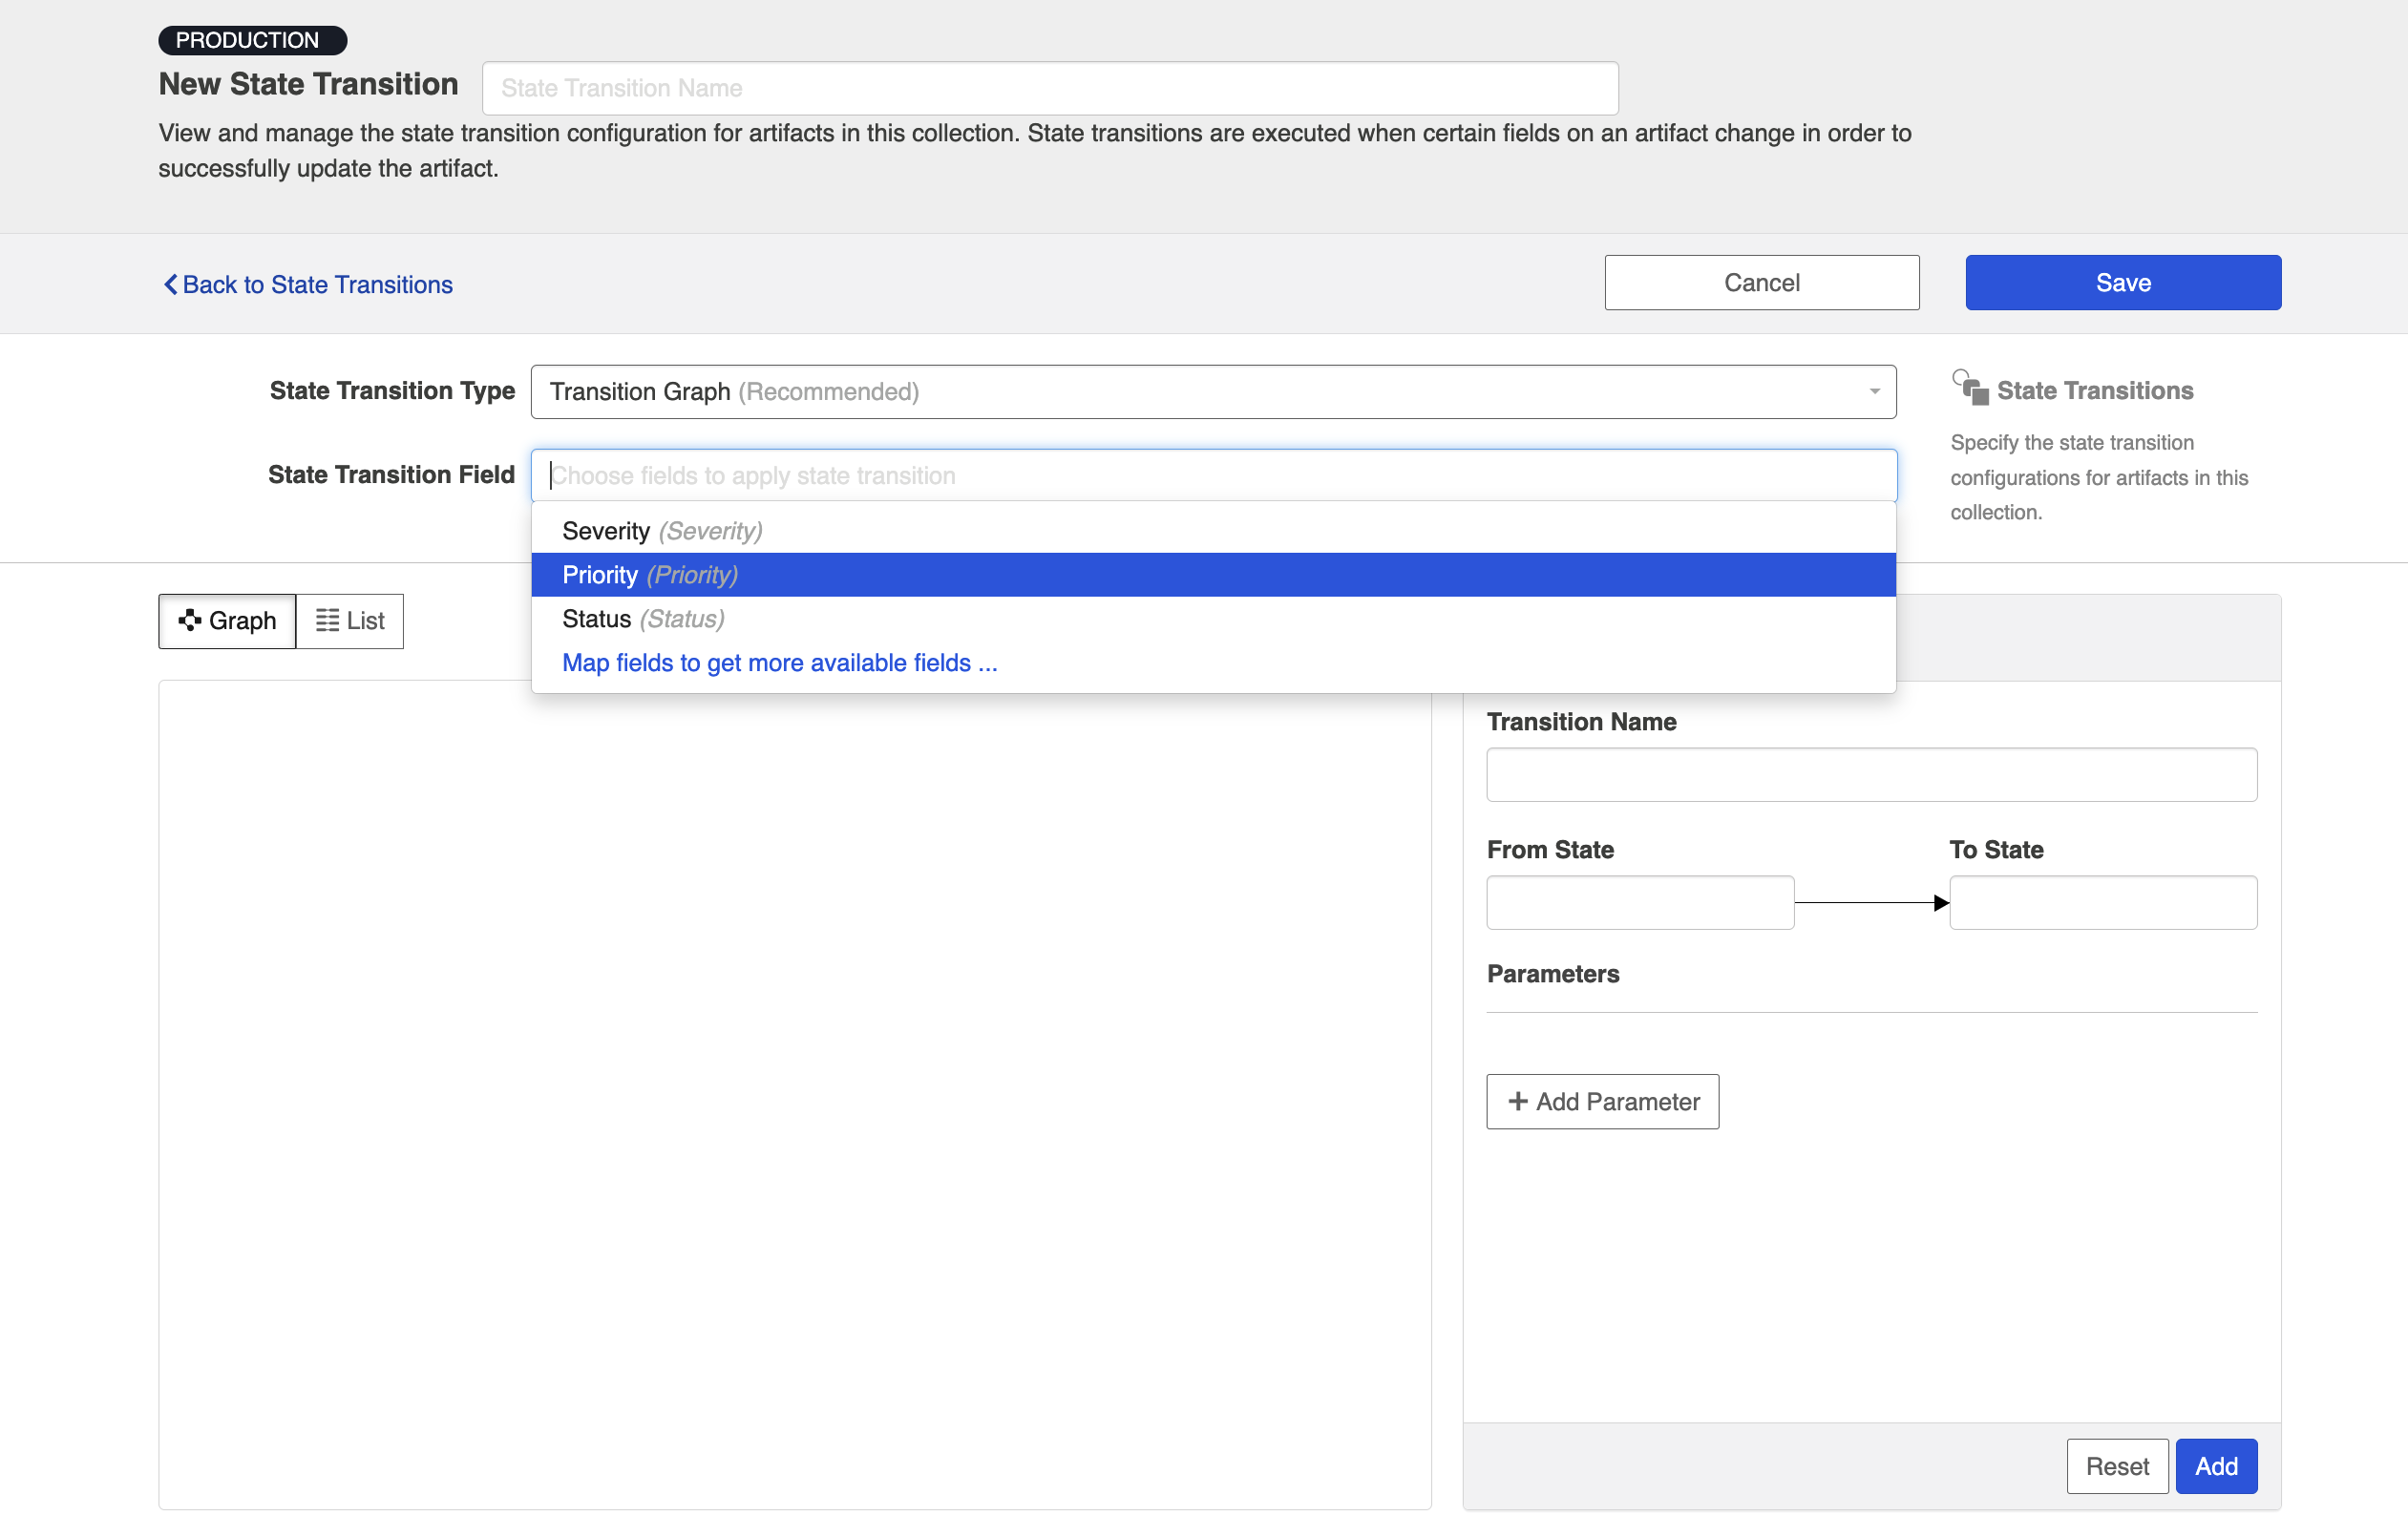
To configure state transitions within Hub's UI, select Transition Graph as your State Transition Type.
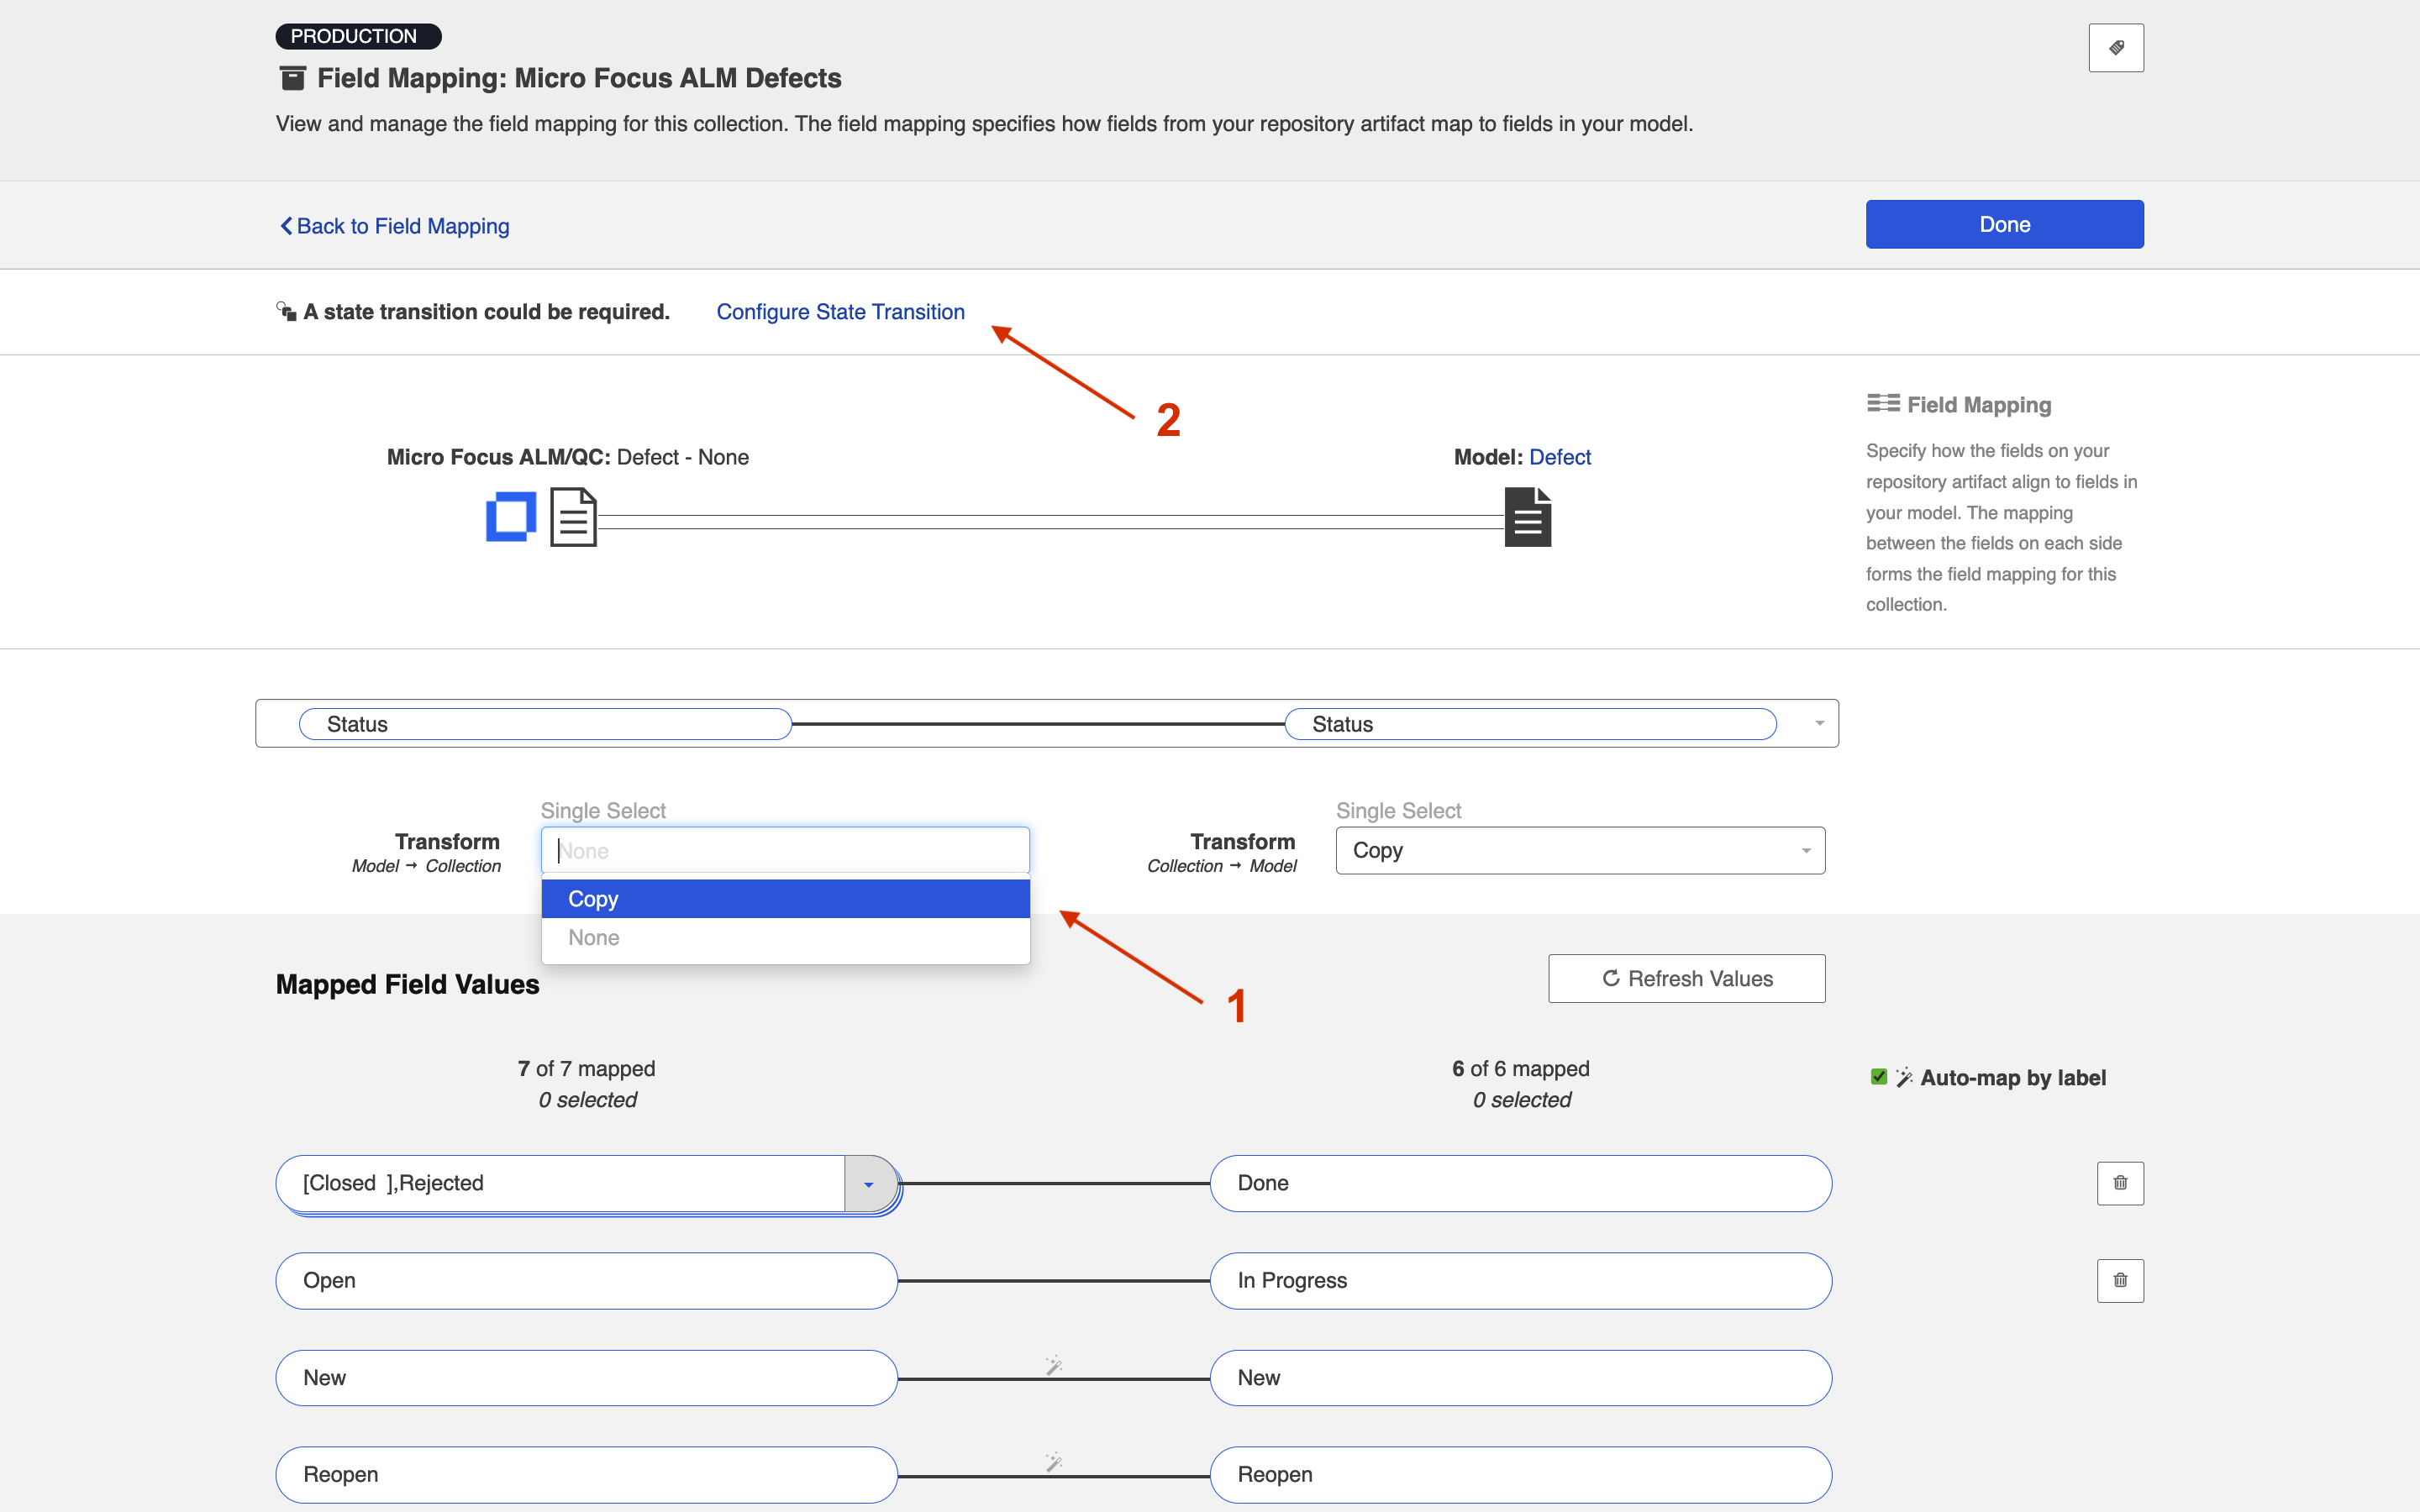
Next, you'll select the repository field you'd like to apply the transition to.
If you don't see the field you'd like to use, make sure that the field is mapped and that its transform is set to copy on the repository side. Once you set the transform to Copy, you will see a Configure State Transition link. Click that link to return to the State Transition screen.
Now you can select the field on the New State Transition screen:
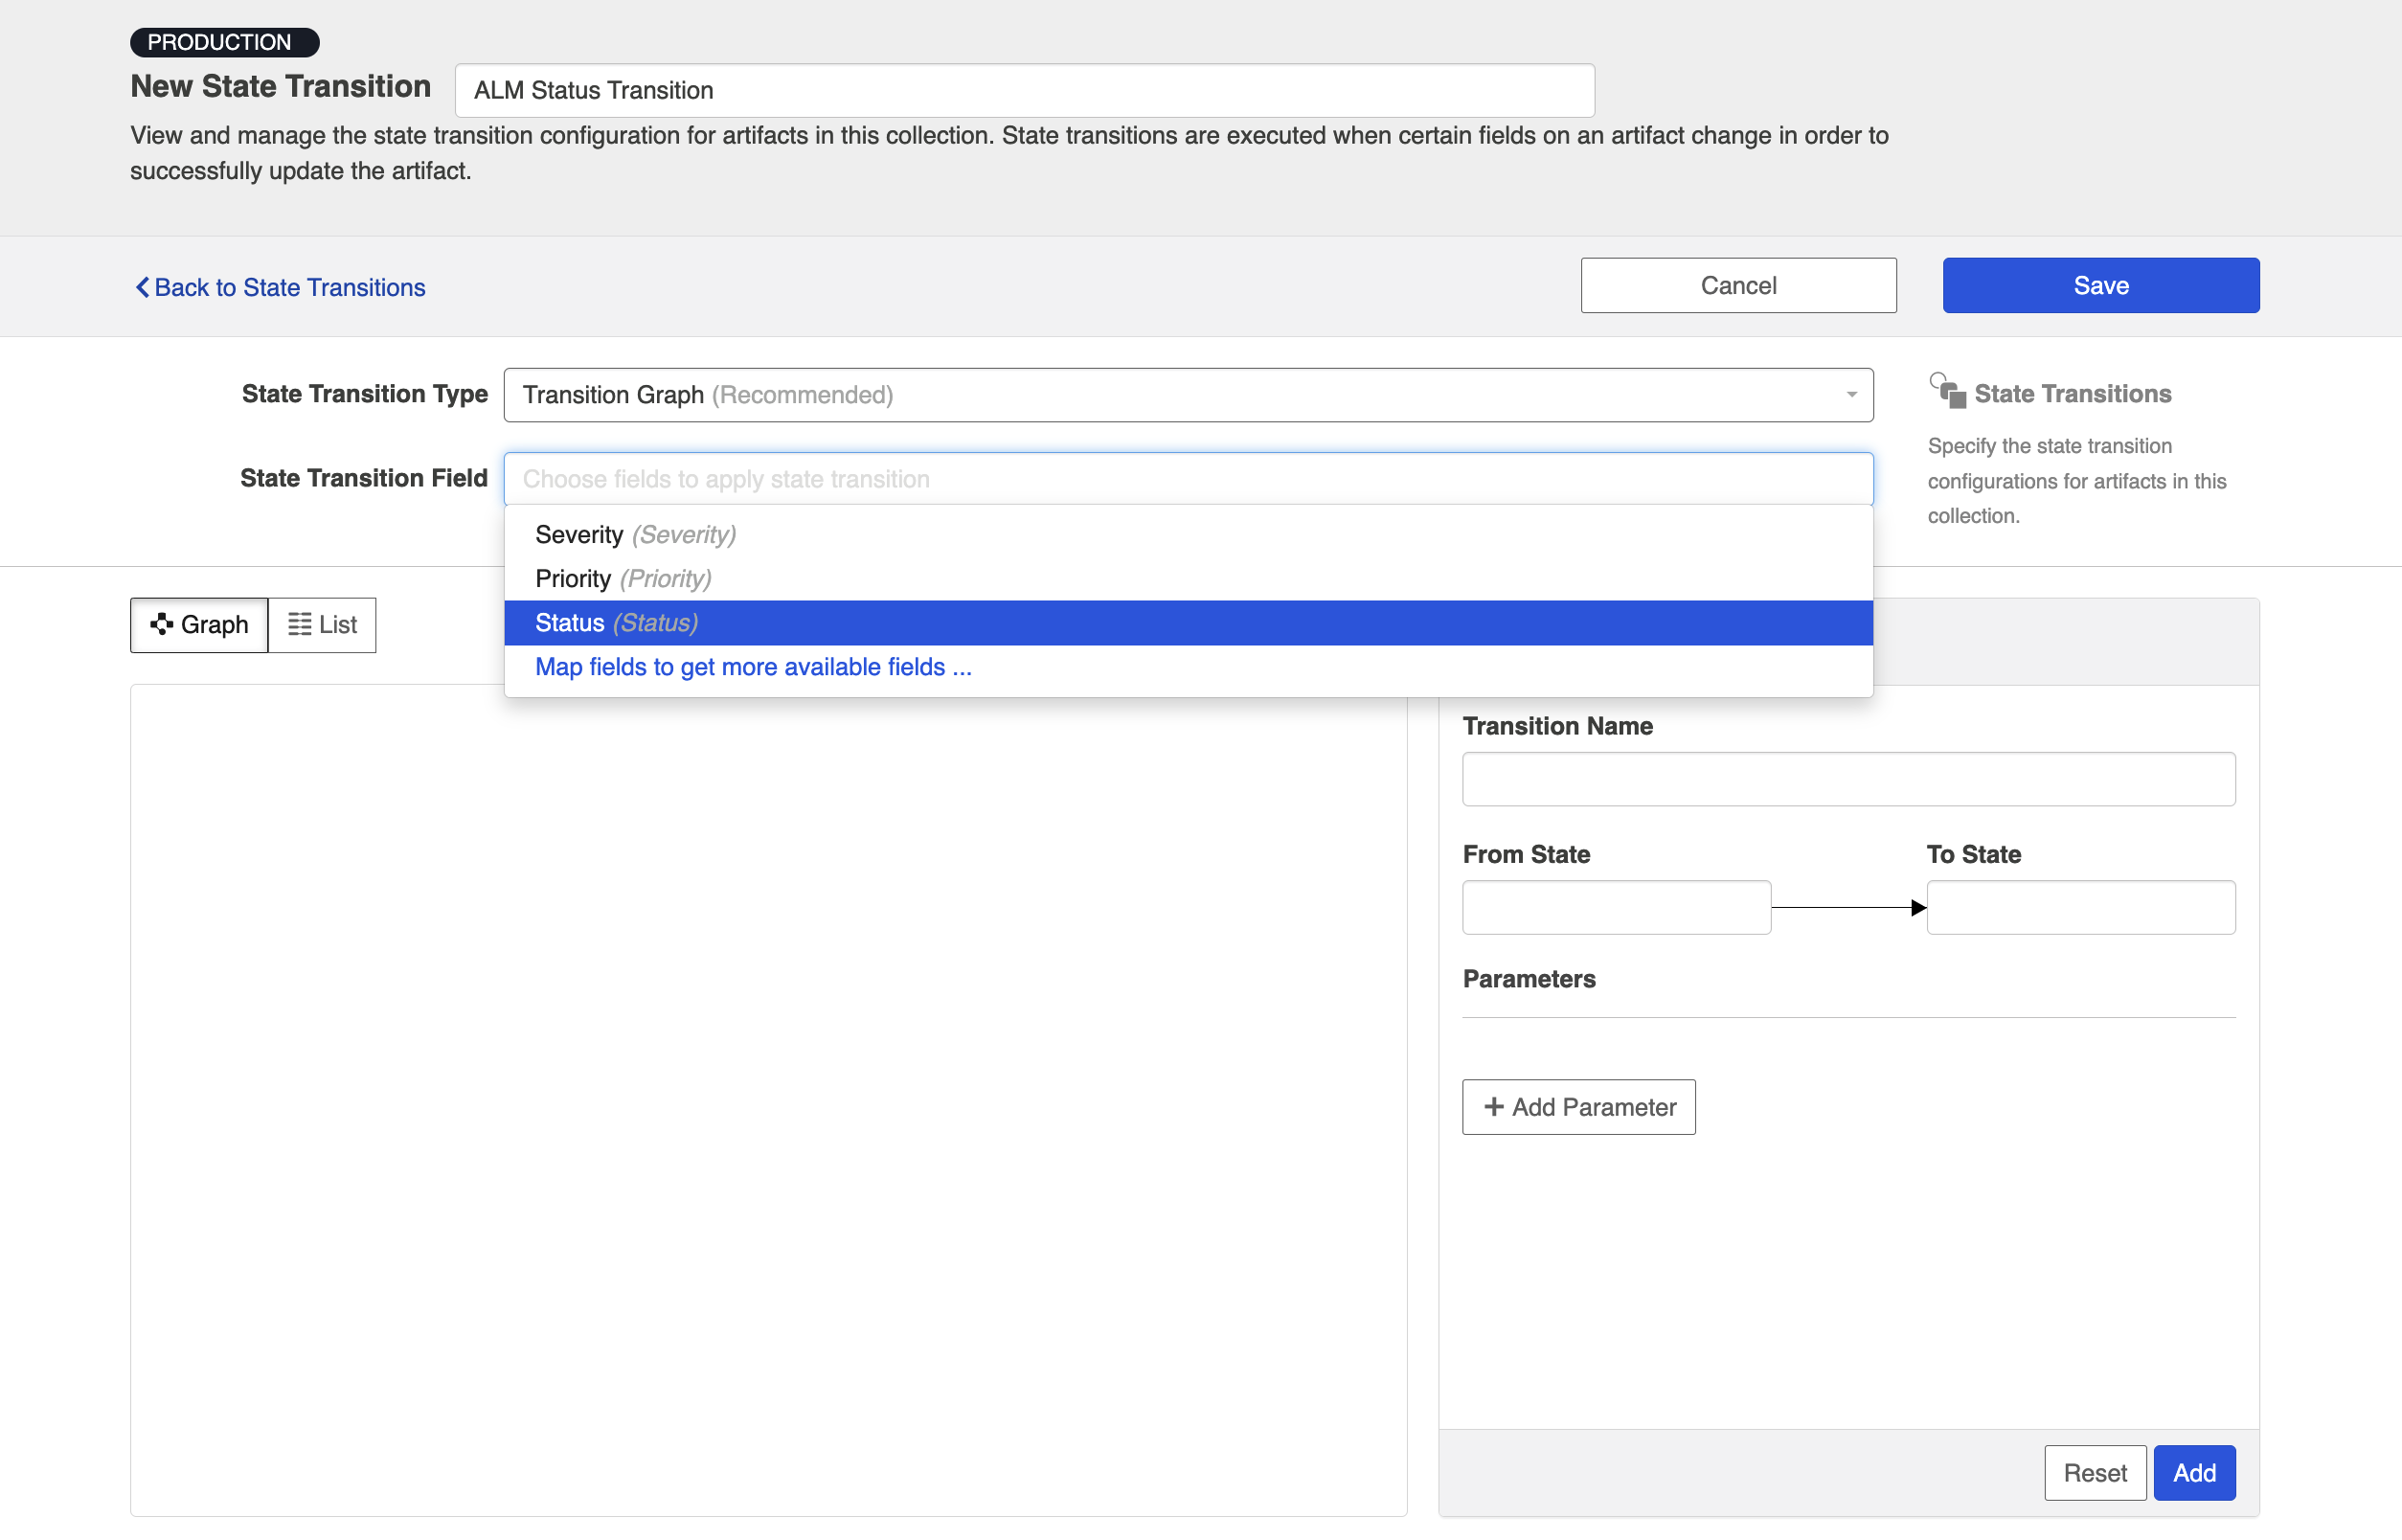
Note: If you encounter a Read-Only error when selecting the field, please ensure the Field Flow frequency for this field is set to No Update on the Field Flow screen.
Now that you've selected your field, you'll see the Transition Configuration panel.
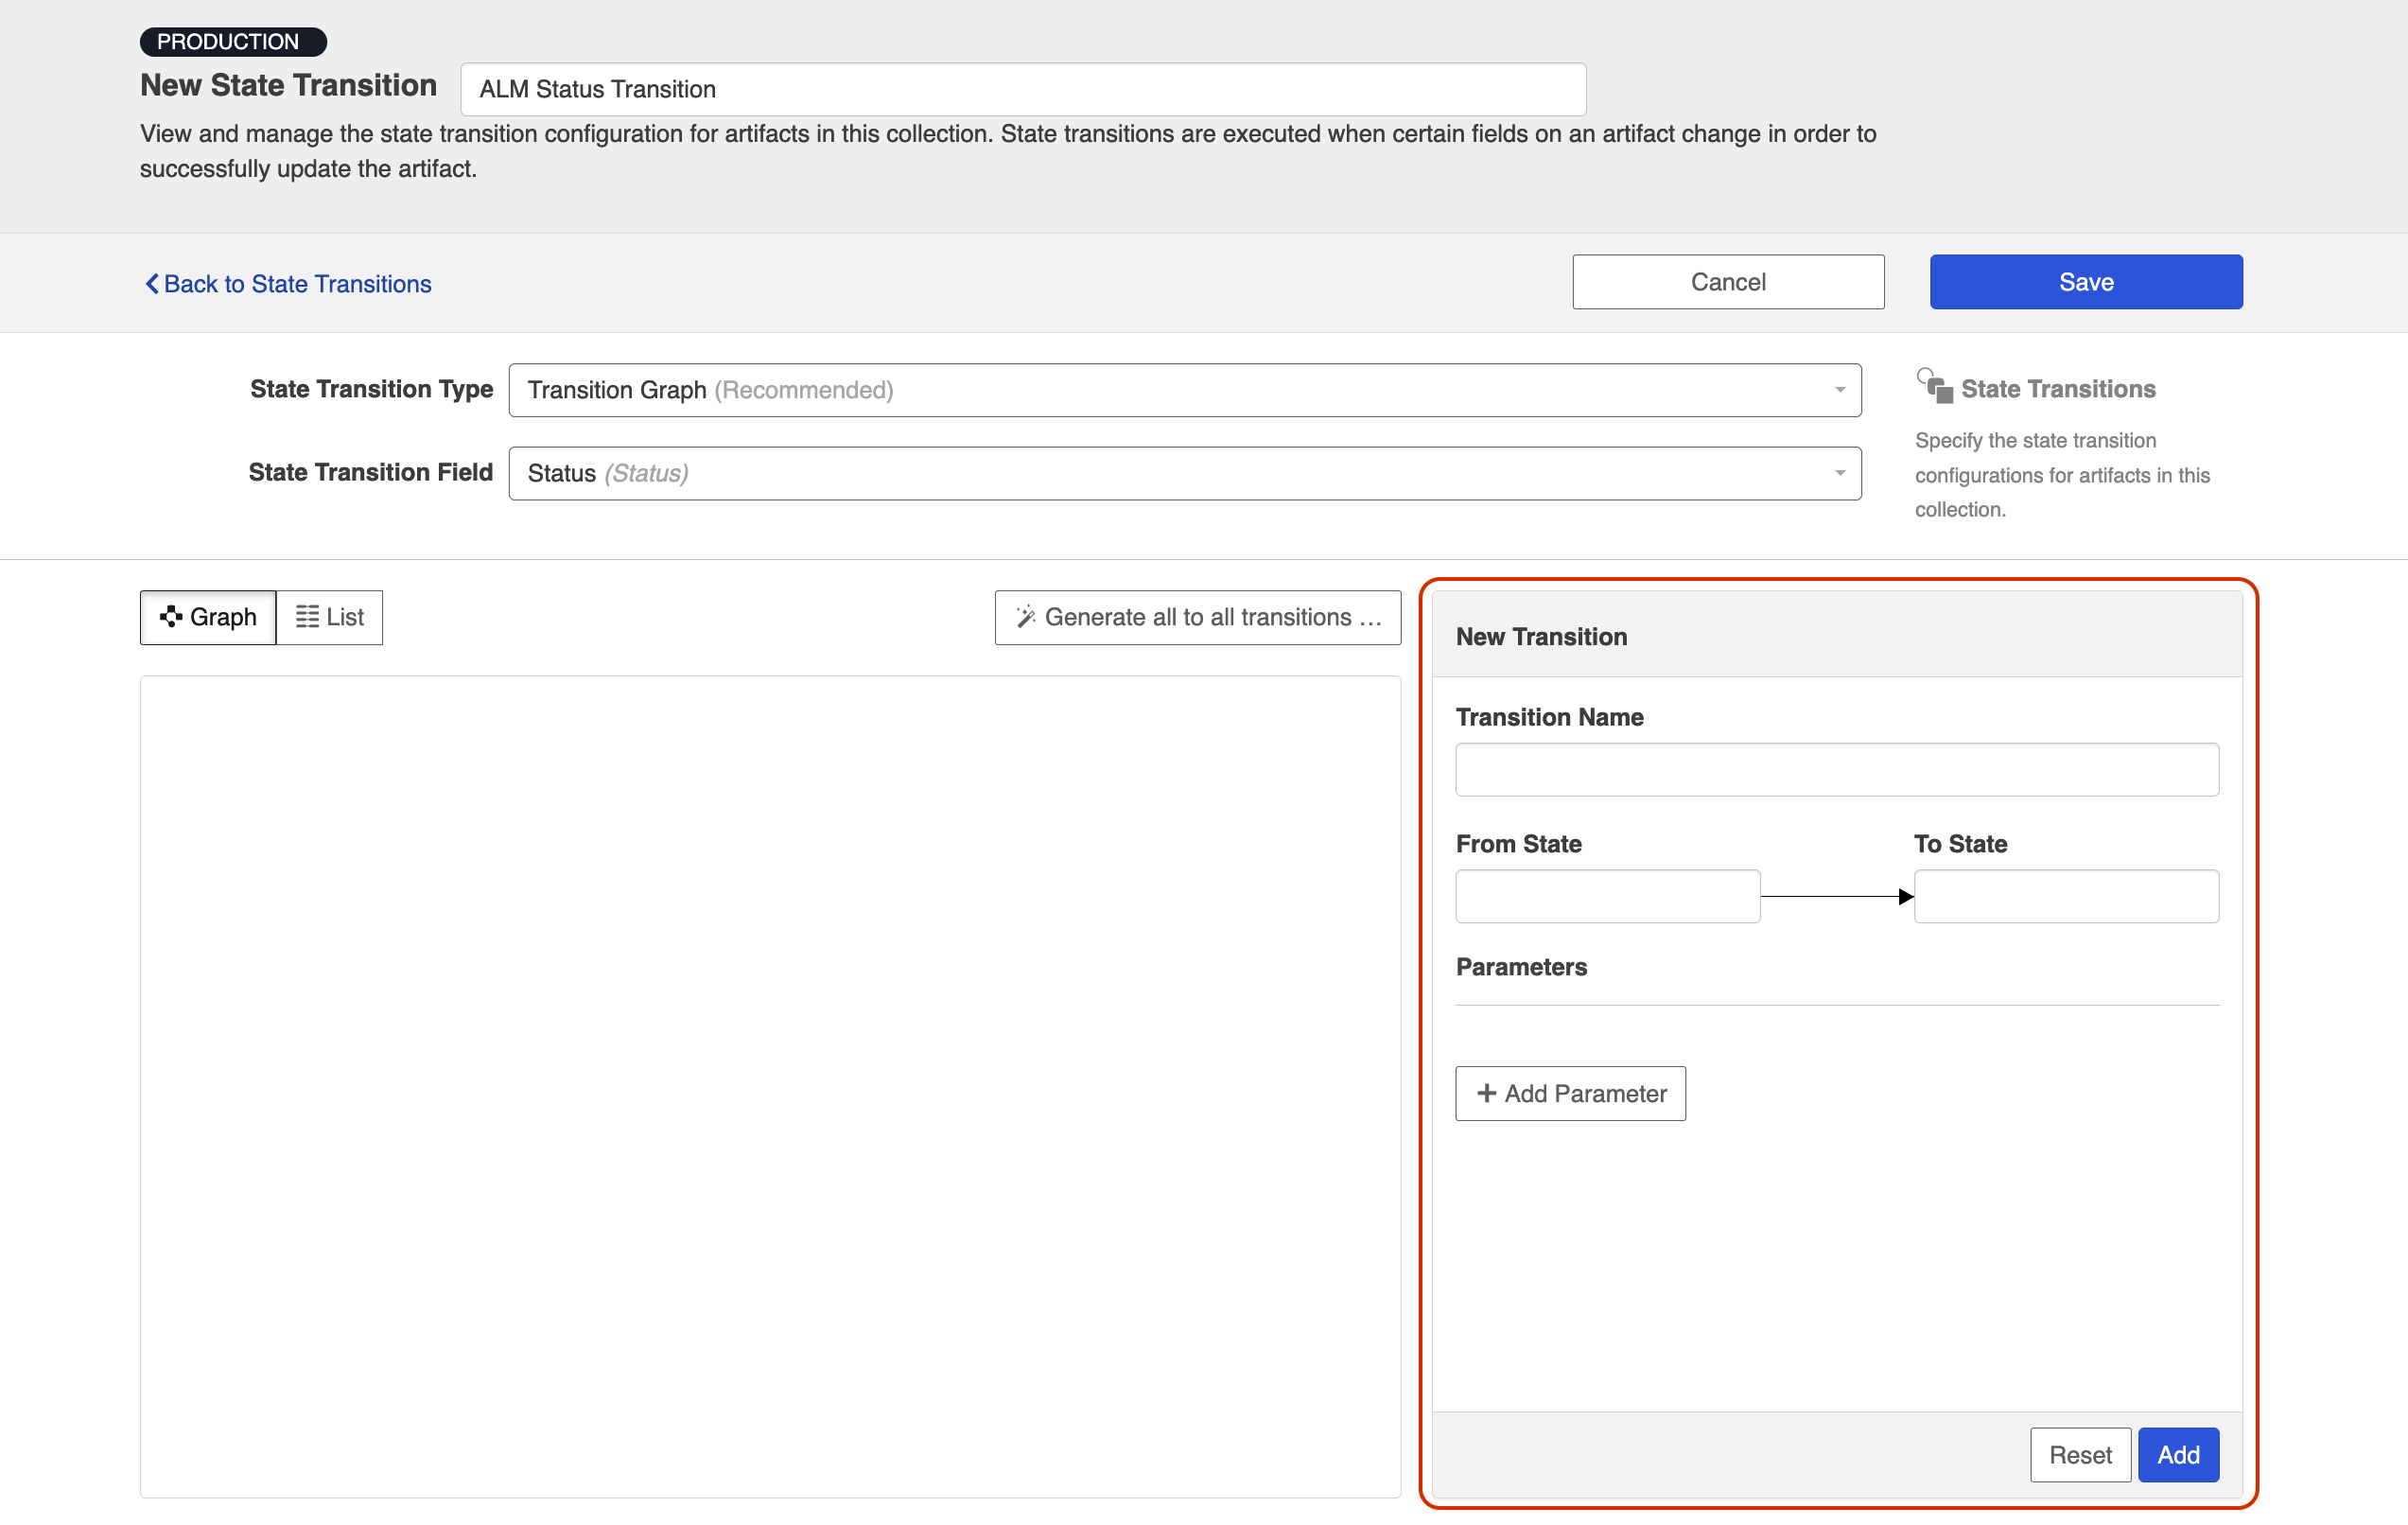
You can use the New Transition pane to configure your state transitions within Hub's UI. In order for your integration to work, these must be configured to match the configuration within the repository itself exactly.
When entering values in the From State and To State fields, the values should match the values within the repository (not the model). They must be entered exactly as they appear in the repository, and are both case sensitive and space sensitive. The Transition Name must also match the transition name that is configured within the repository exactly.
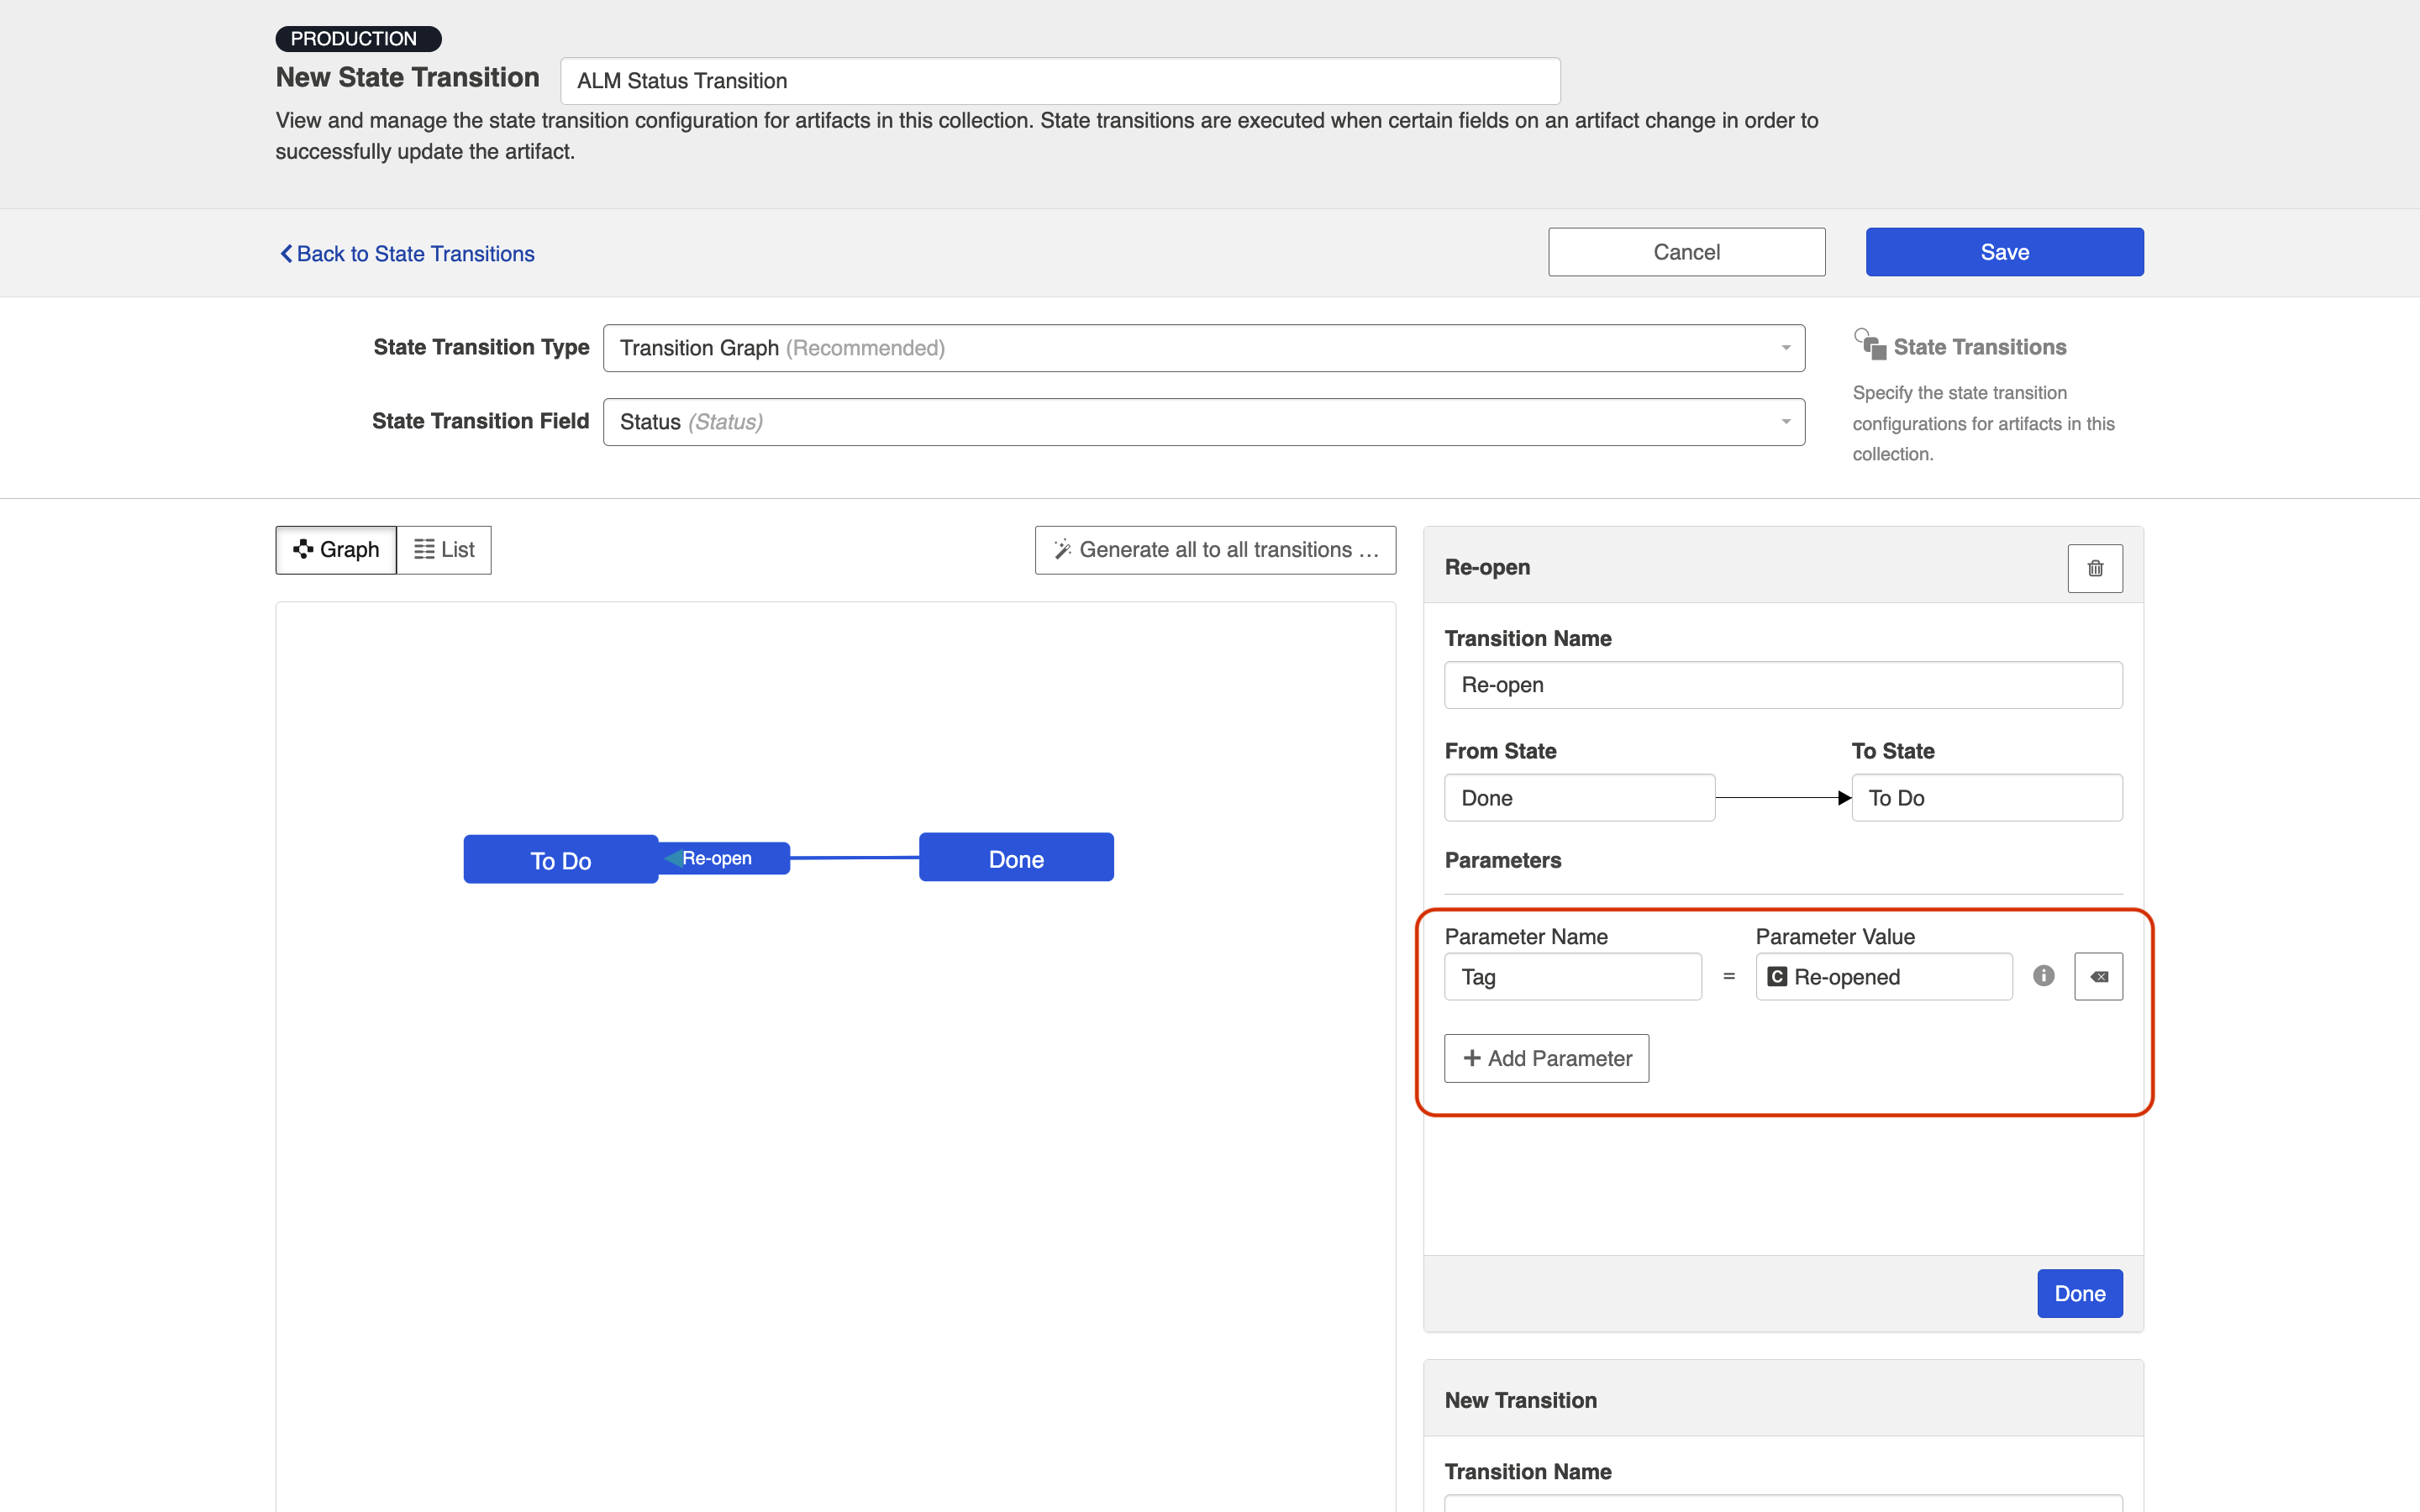
Here is an example of a transition that has been configured. Note that when you view a transition (by clicking on it in the graph), you'll see its configuration on the right so that you can make any needed modifications. You'll also see a New Transition pane immediately underneath, so that you can add additional transitions.
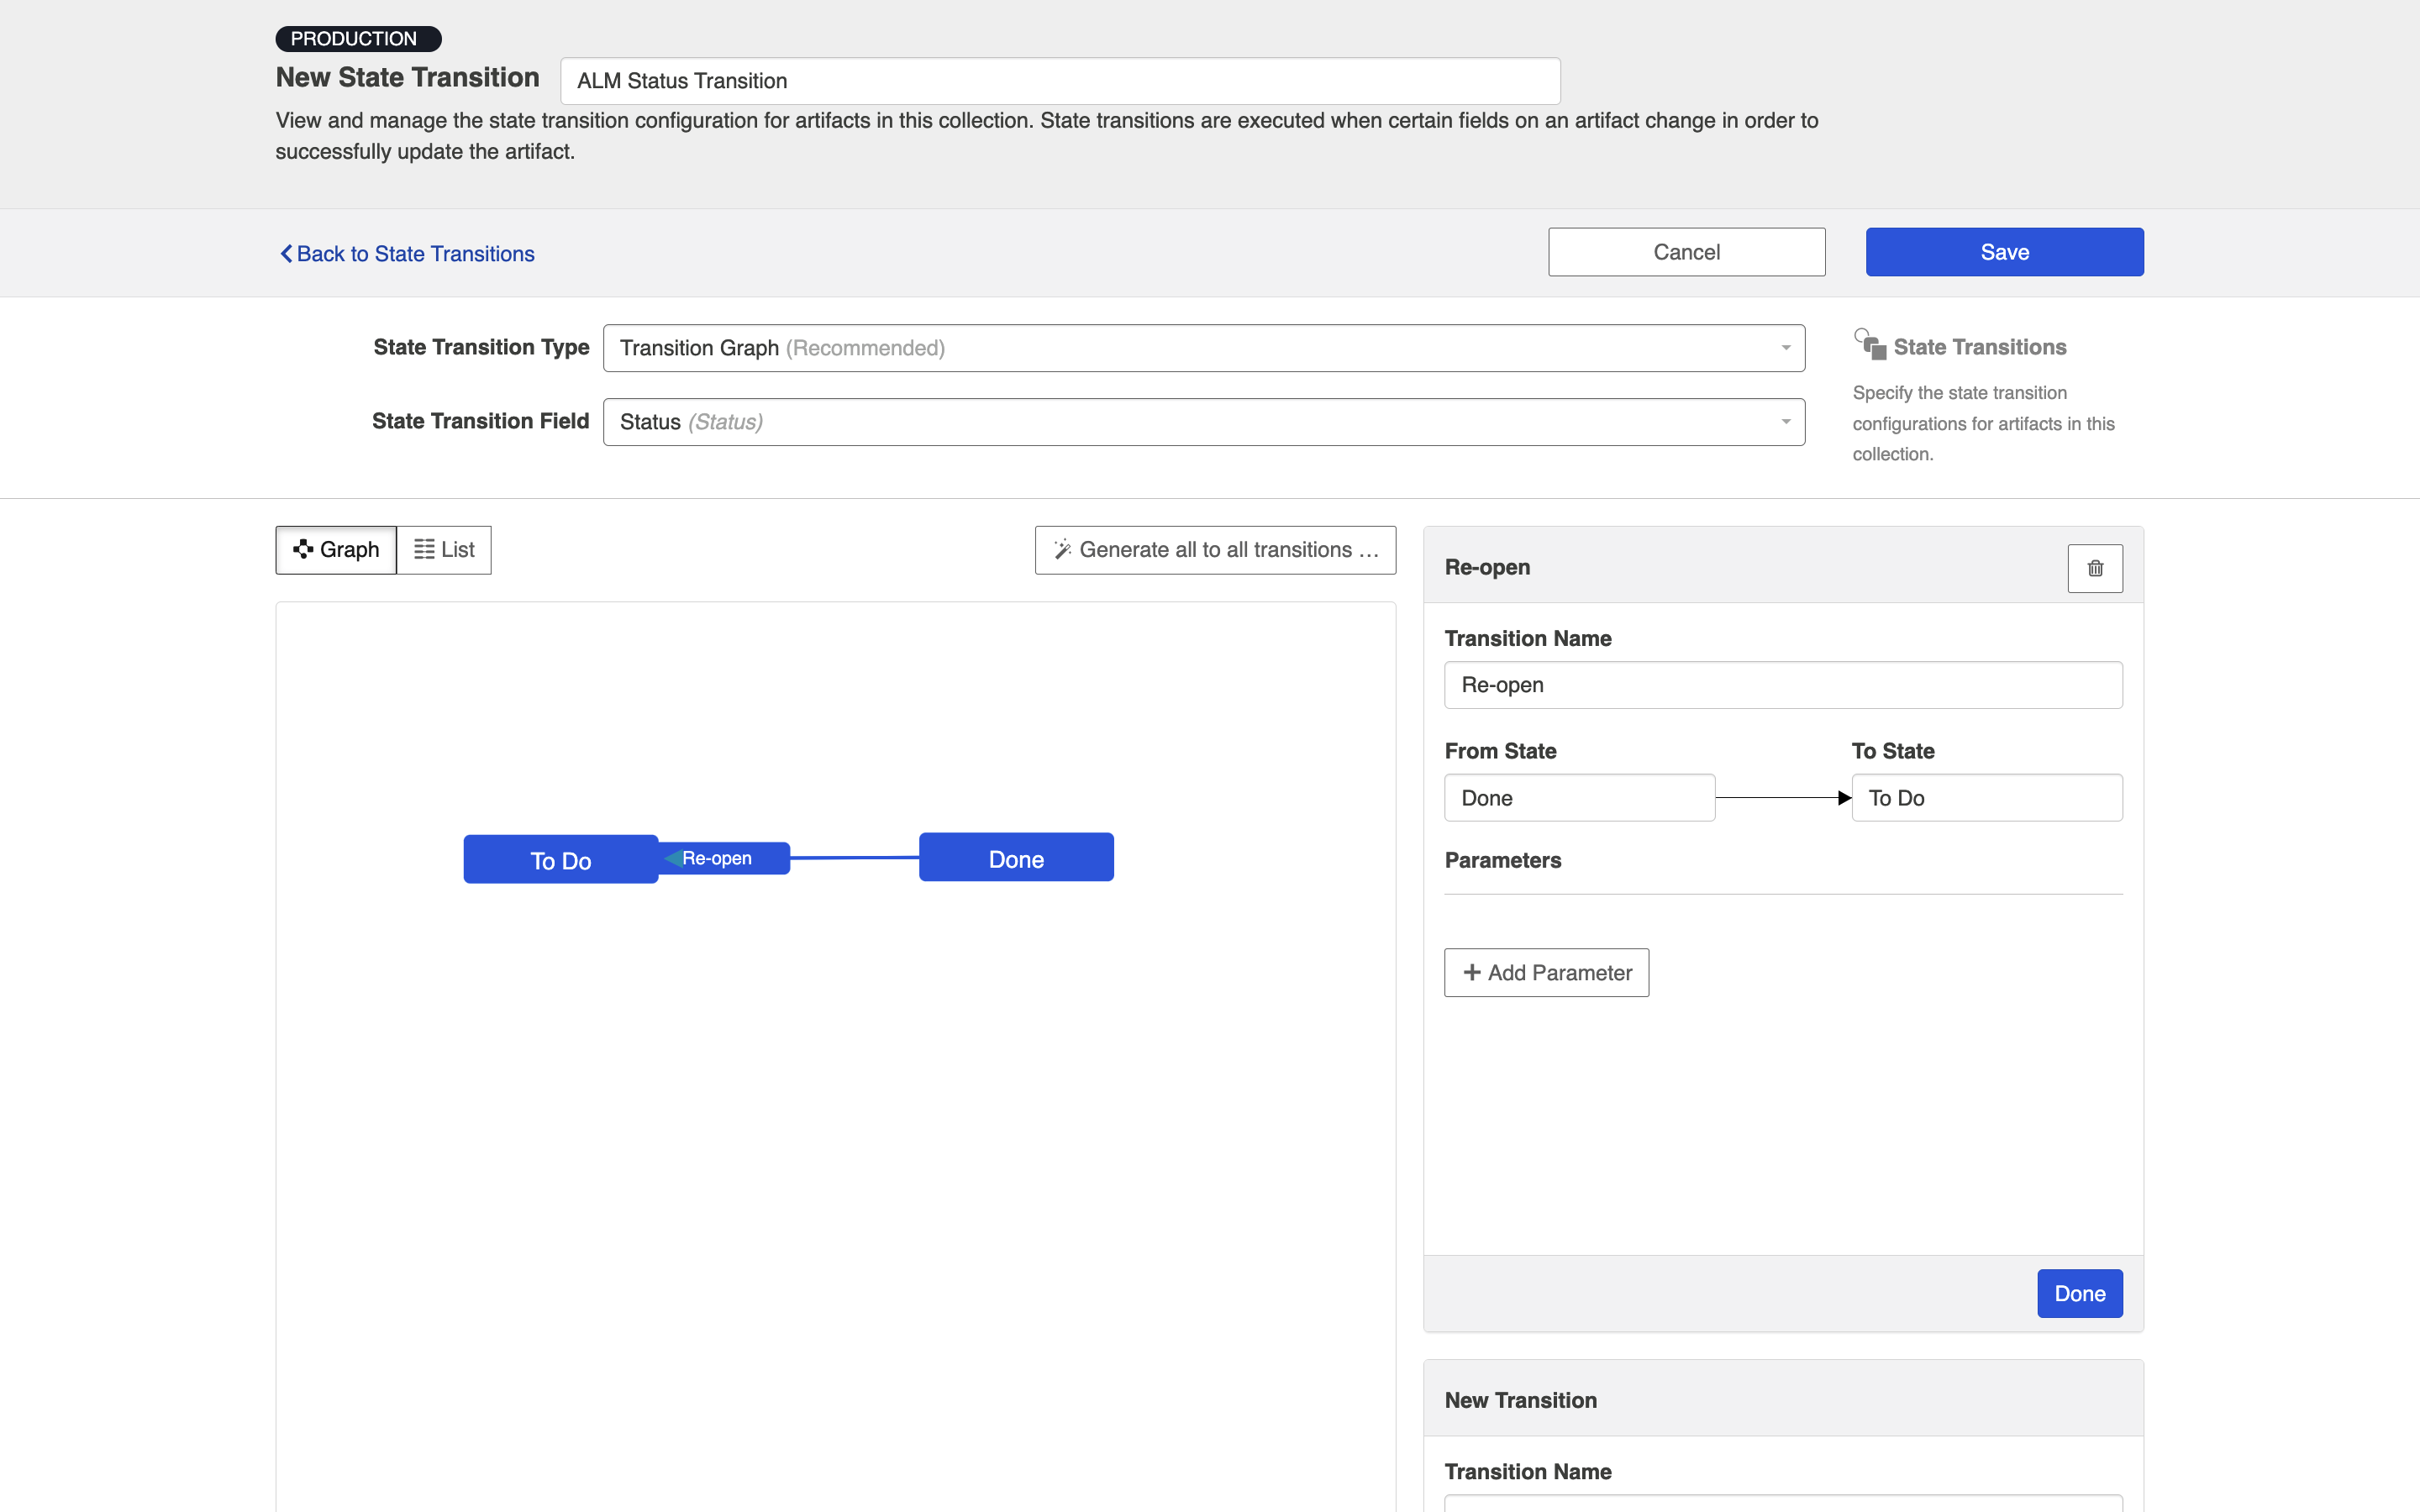
Note: Multiple transitions between two states in a single direction are not supported. Only a single transition to and/or from two individual states can be configured. Transitions that loop over a single state are also not supported.
Adding Parameters
If your transition requires a parameter, click Add Parameter.
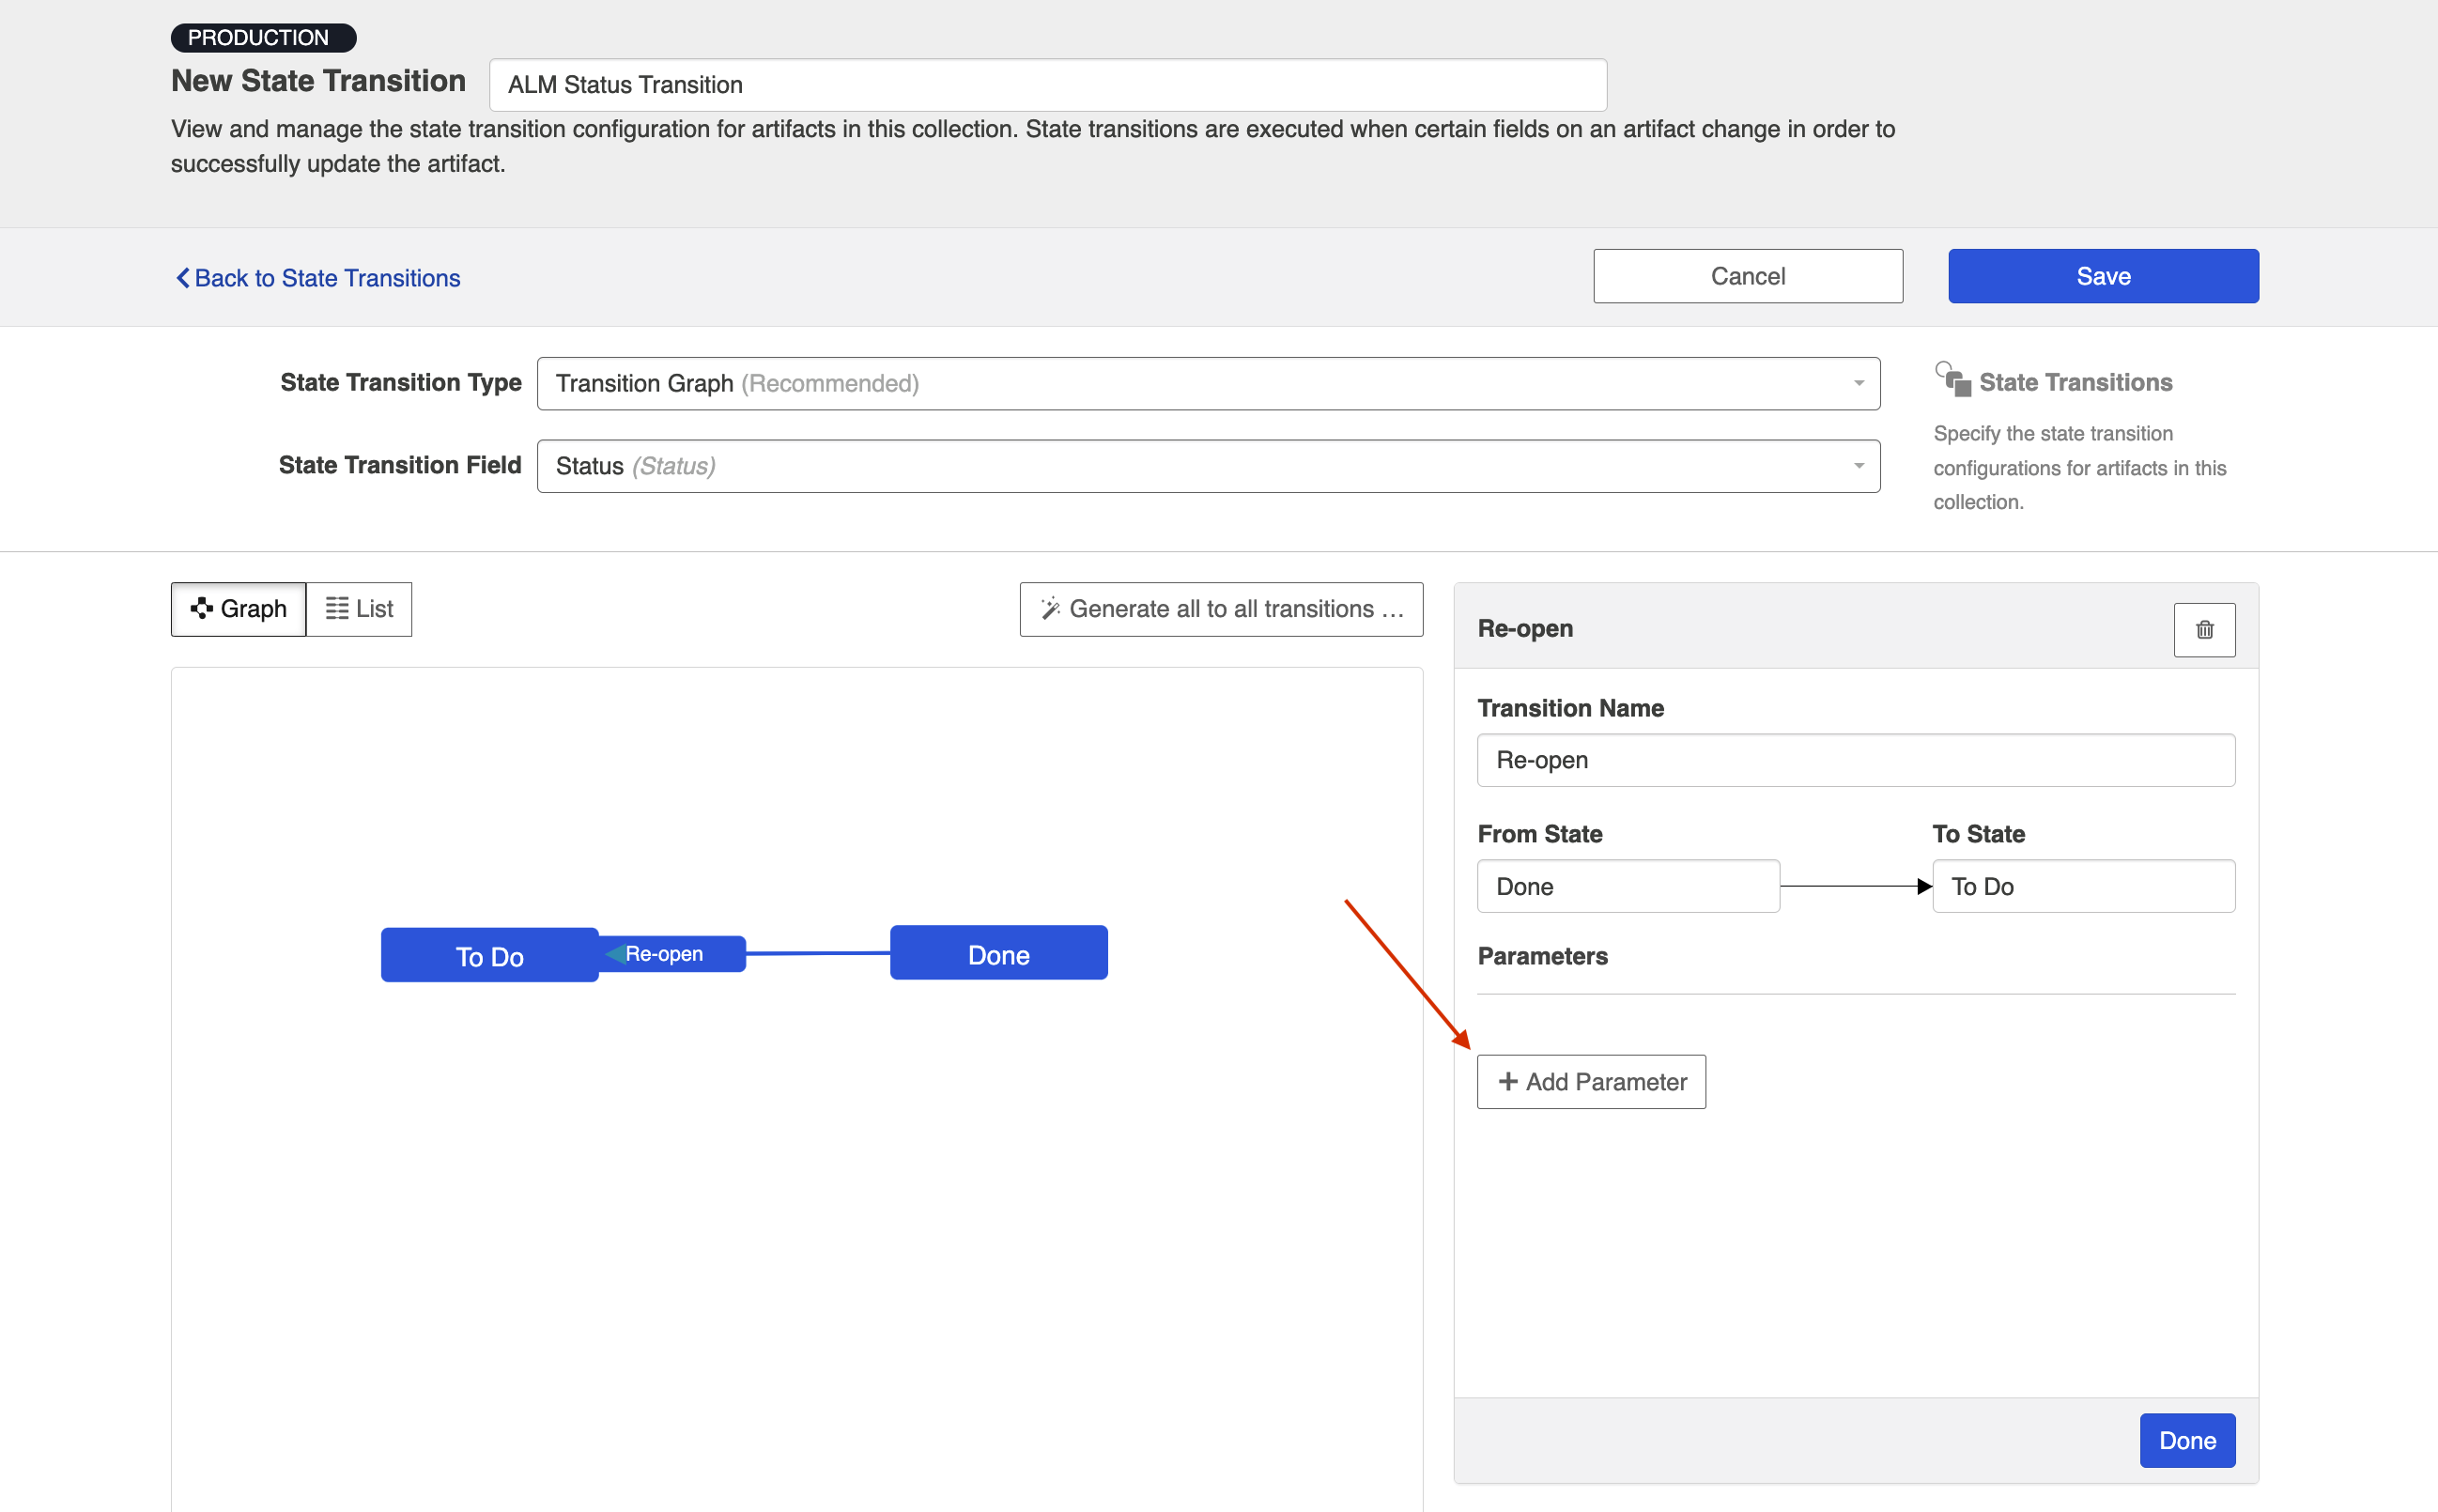
The Parameter name must match the field name within the repository exactly. You can either set a constant value for your parameter, or configure the transition to flow a value based on your field mappings.
In the image below, we've set a constant value, which will tell Hub to add a Re-opened tag to the artifact when it moves through the Re-open transition:
You can also set a Parameter that is set based on a field in the model.
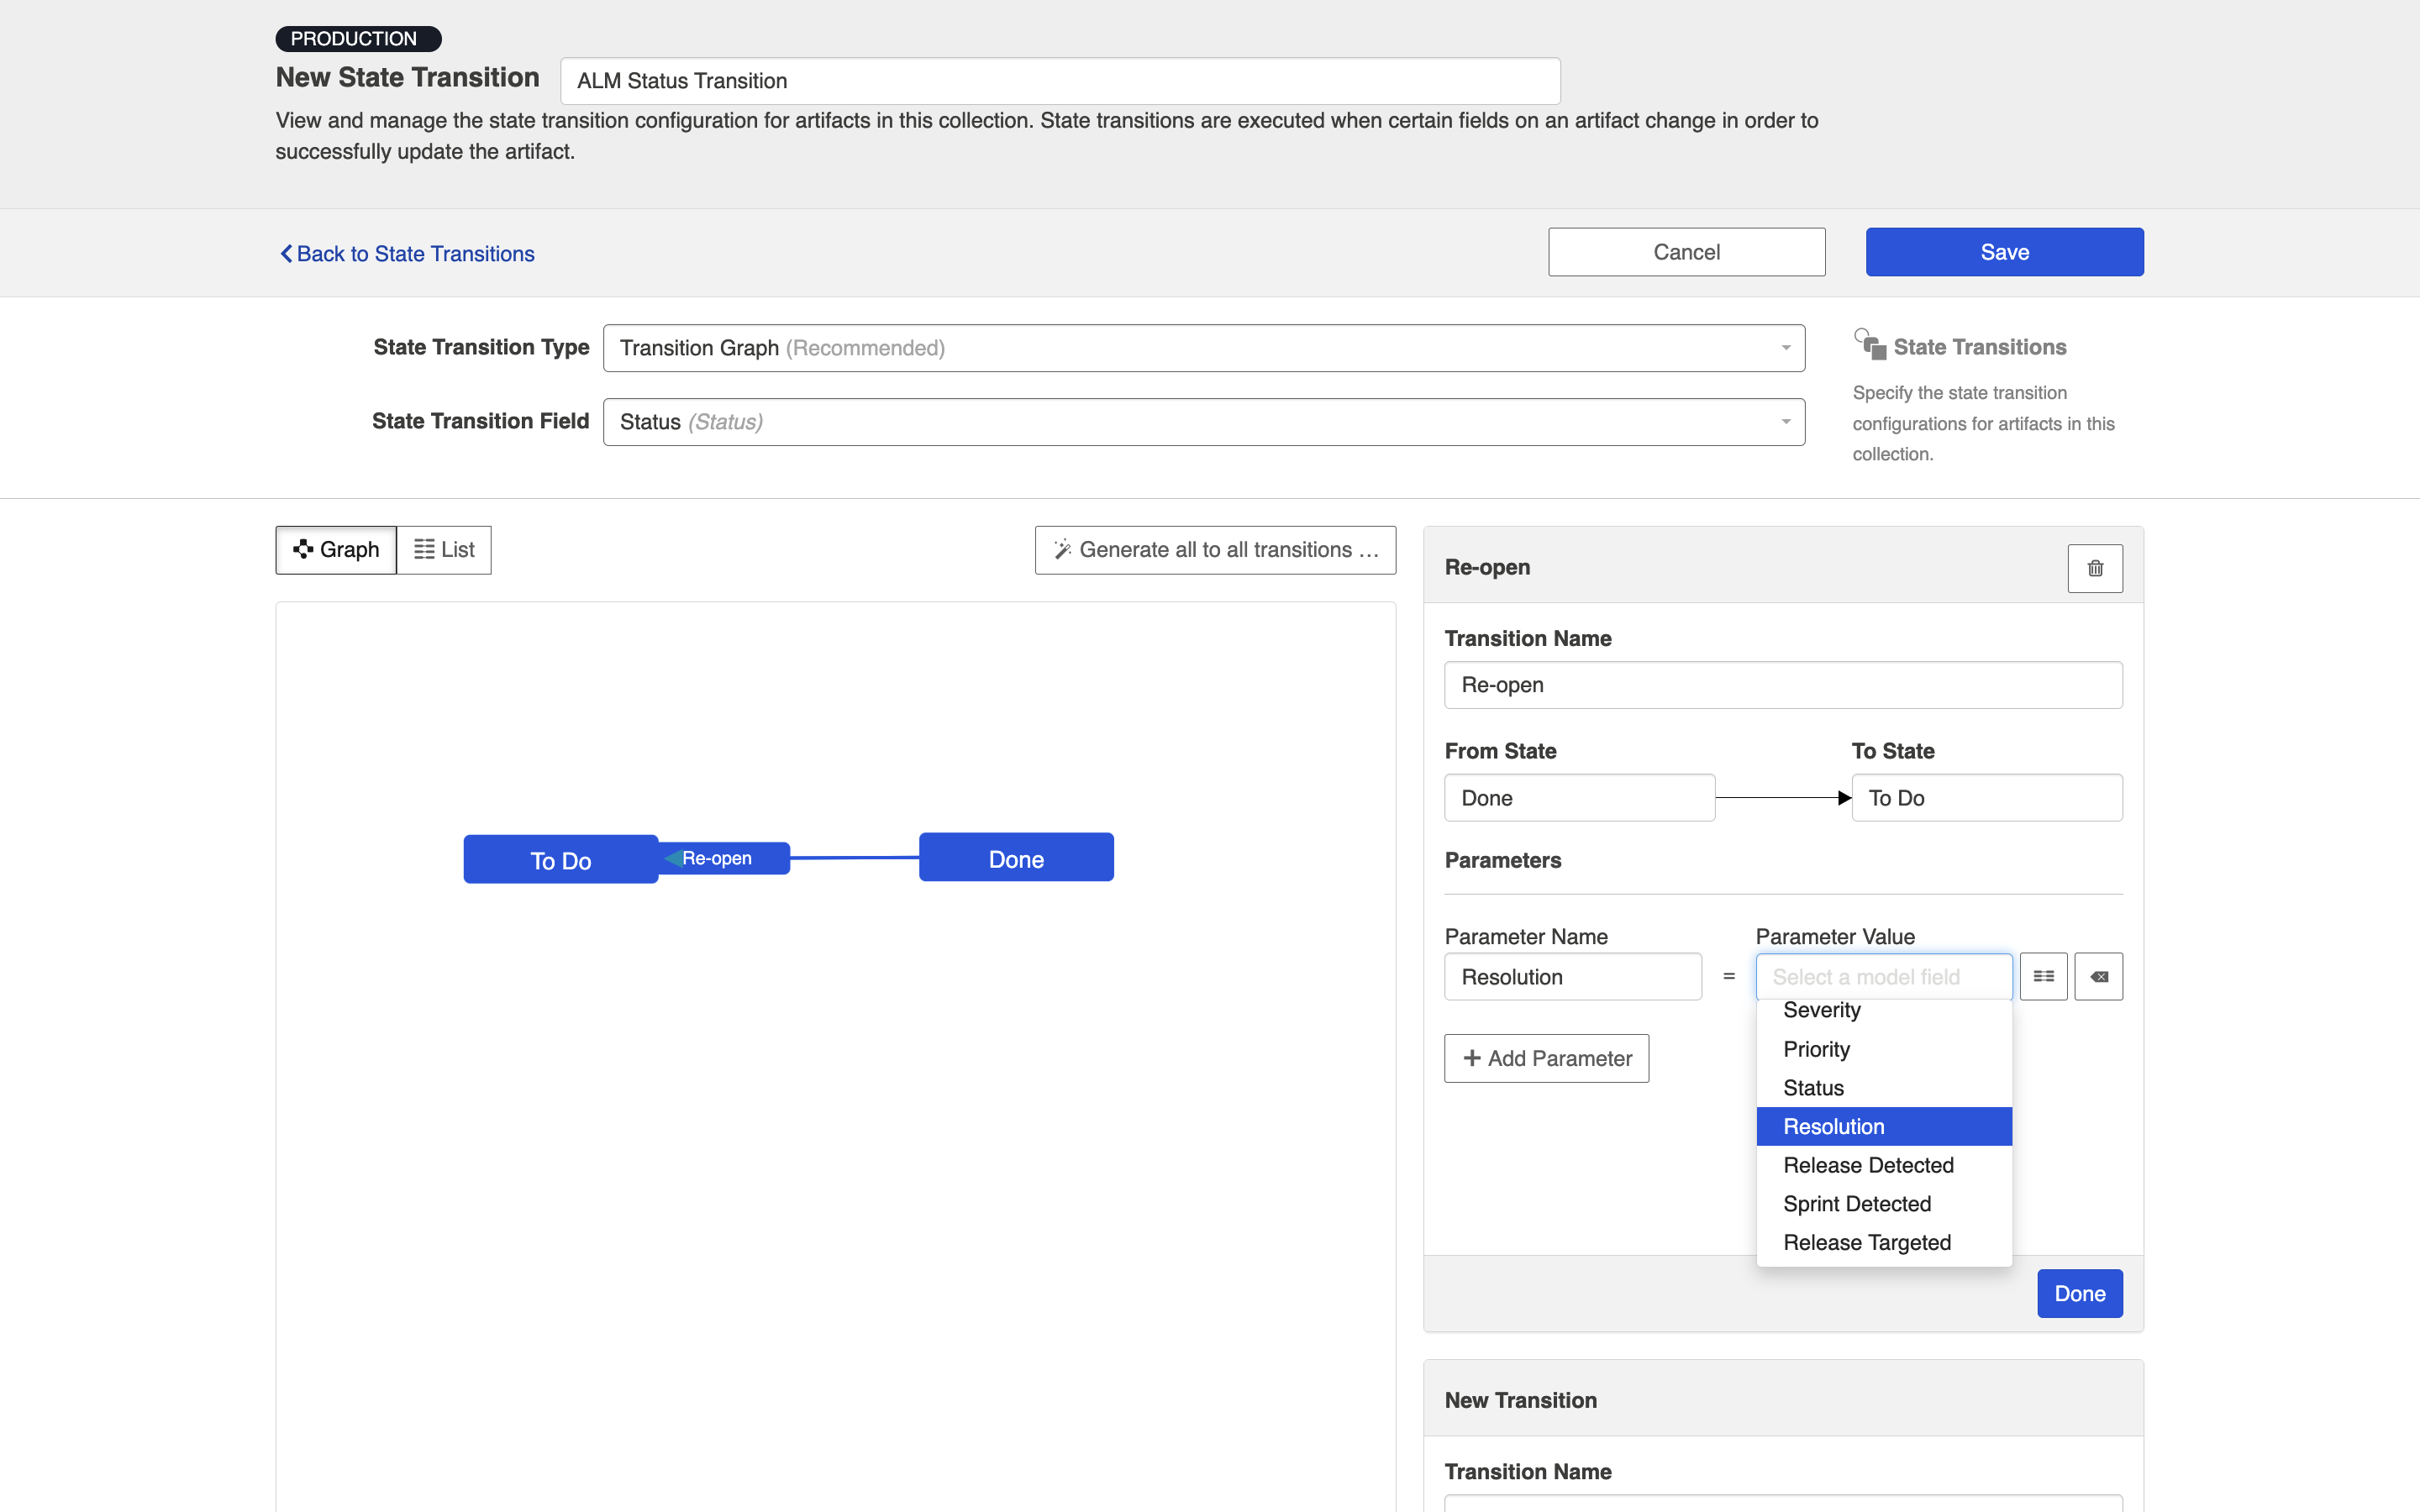
To map the field, click the map icon.
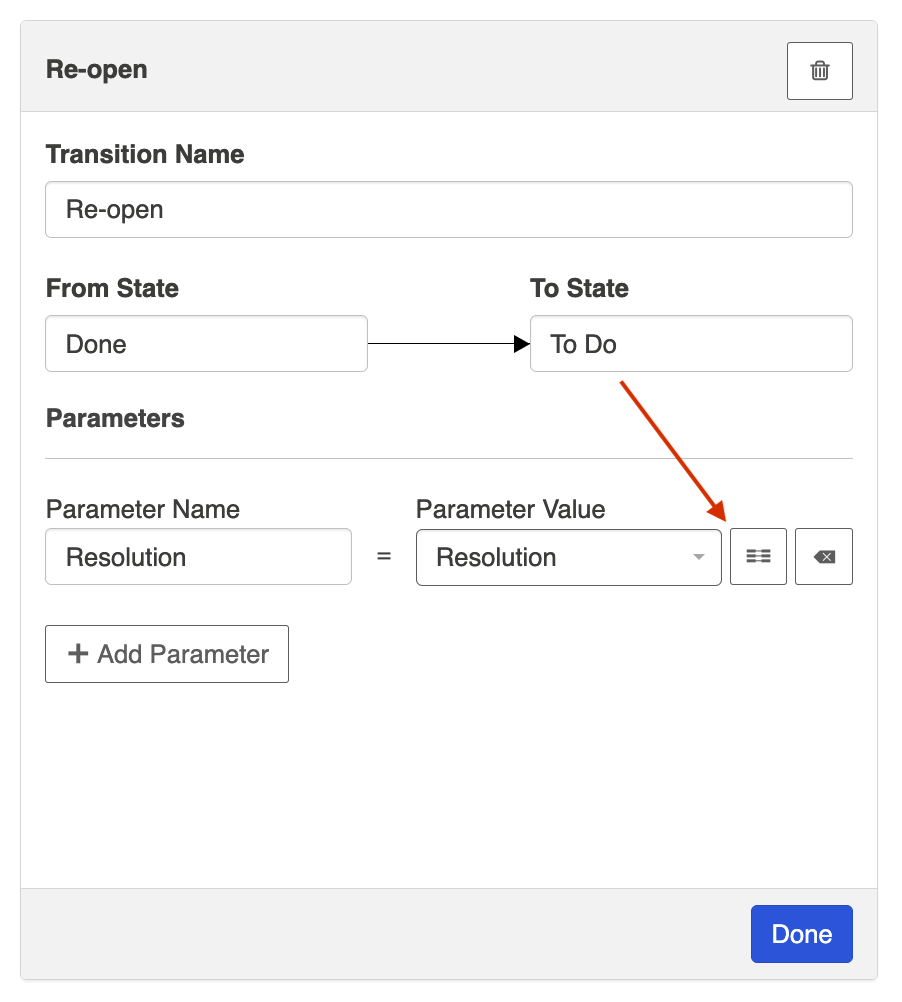
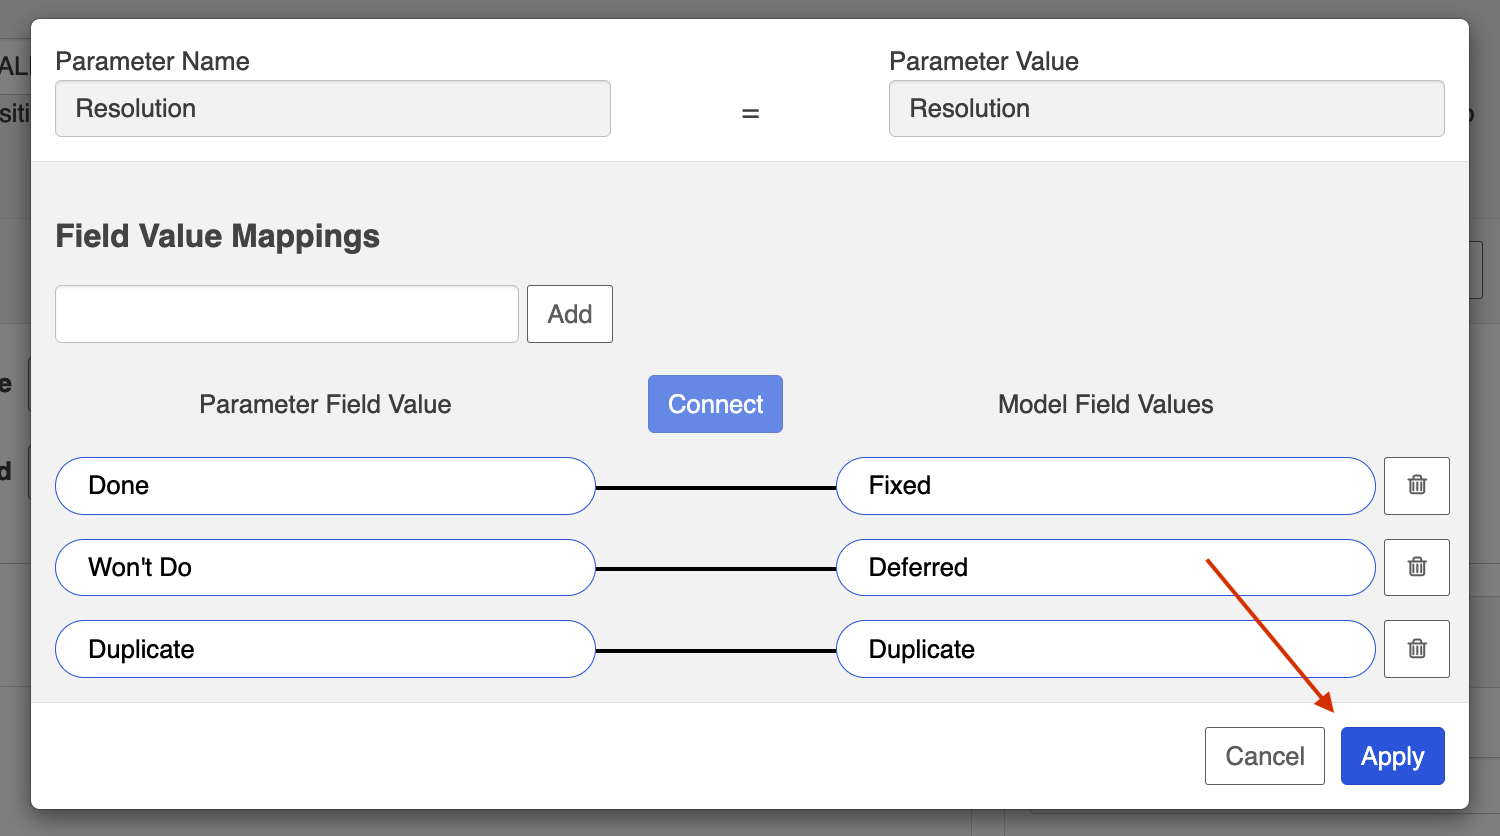
This will bring you to the Parameter Field Value Mappings pop-up.
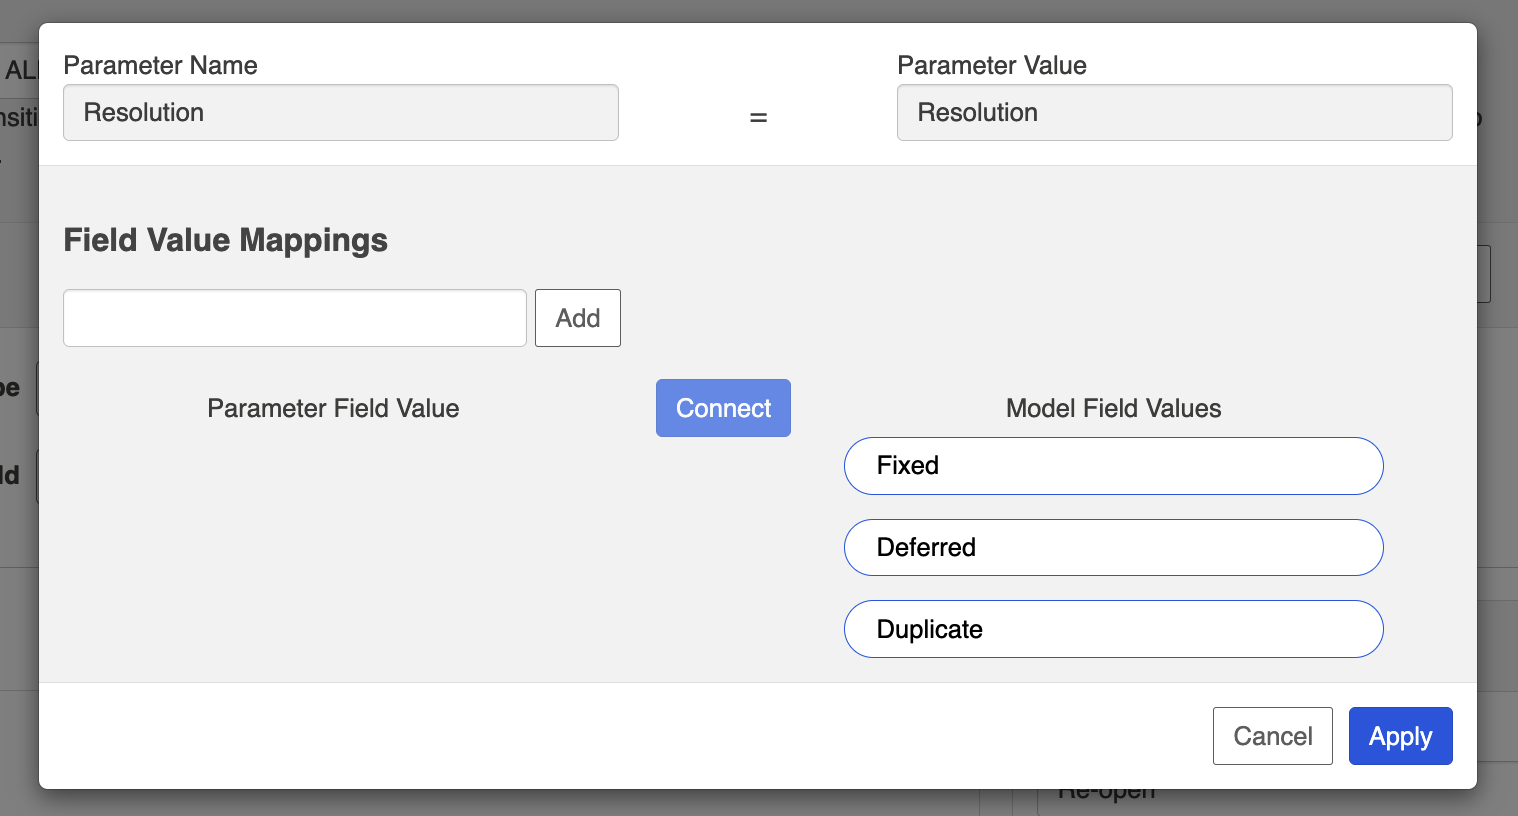
Here you can manually enter the parameter field values on the left that exist within your repository, and map them to the model fields on the right. The field values entered must match the field values that exist in the repository exactly (they are case- and space- sensitive).

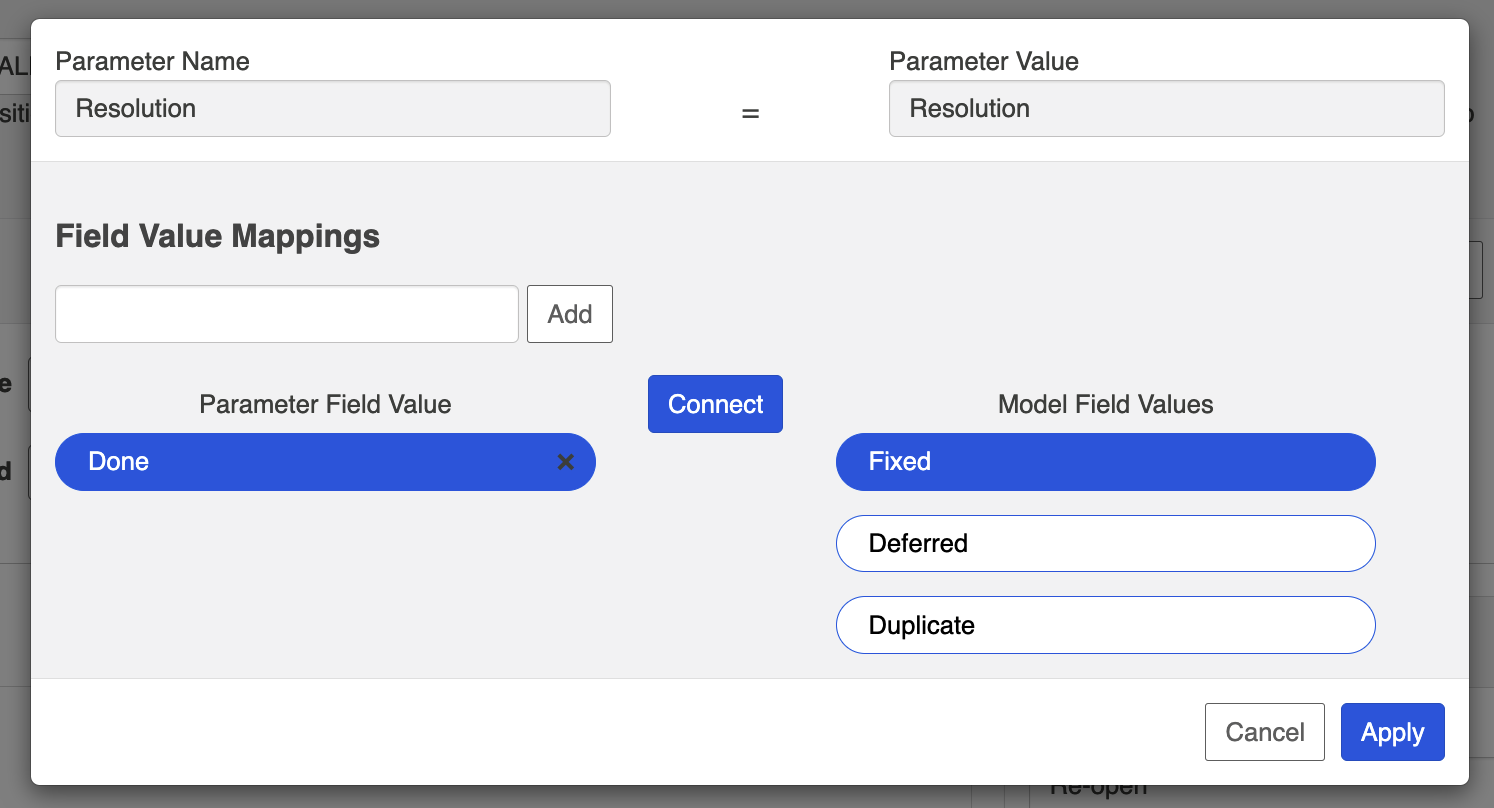
After you have completed mapping your field values, click Apply to apply your changes.
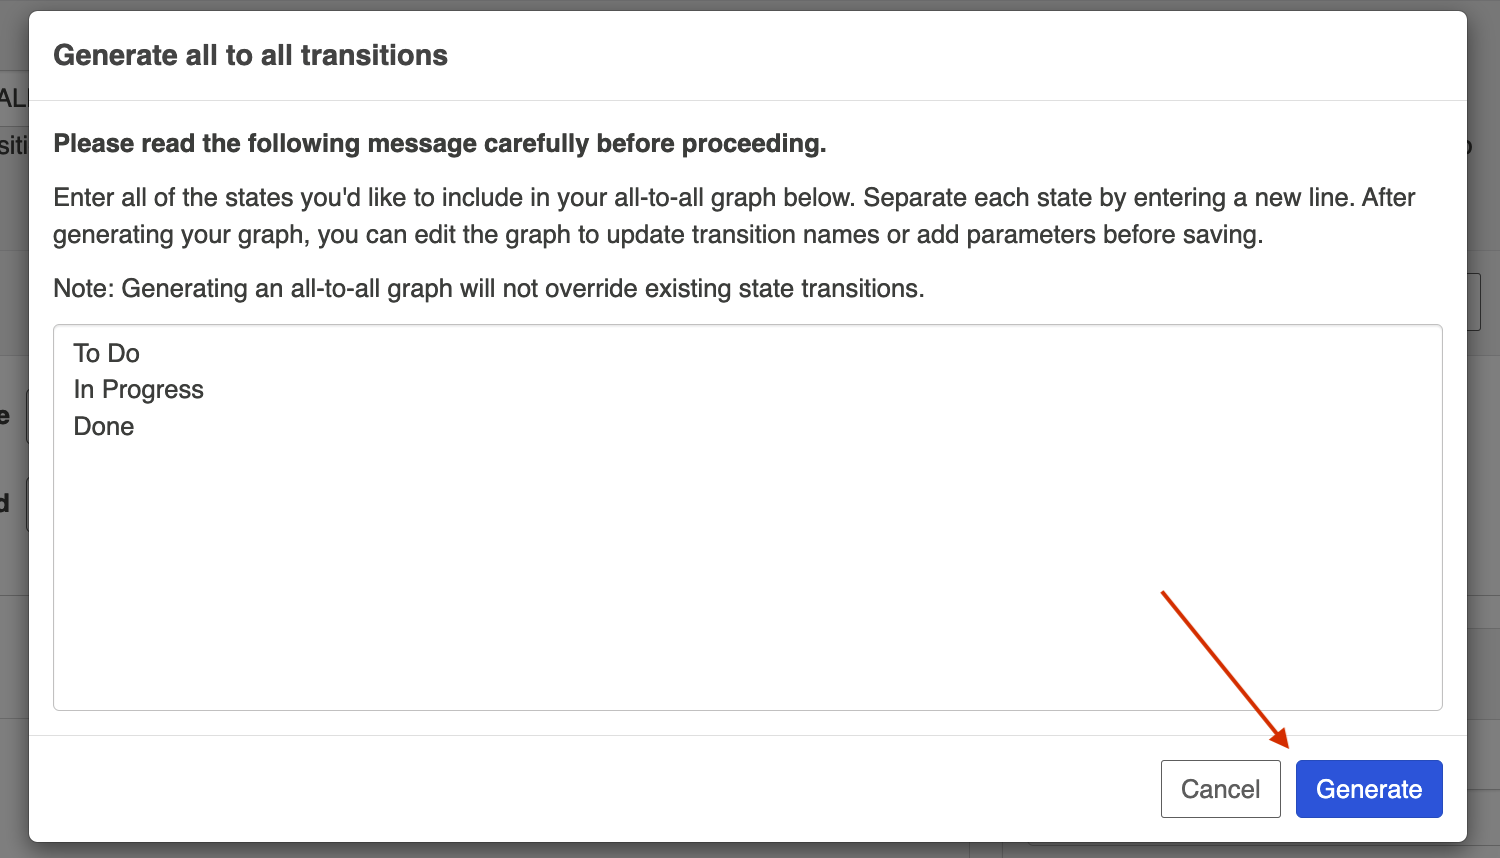
Generating All to All Transitions
Sometimes workflows require all states to transition to all states and depending on how many states the workflow has, this can result in much manual effort (e.g., for 15 states, you need to create 210 transitions). Rather than manually creating these transitions, Hub does most of the work for you by automatically generating an all to all state transition graph.
To use this feature, click Generate all to all transitions.
Note: Generating an all to all transition graph will not override any existing transitions.
A pop up will appear where you can enter all of the states you'd like to include in your graph.
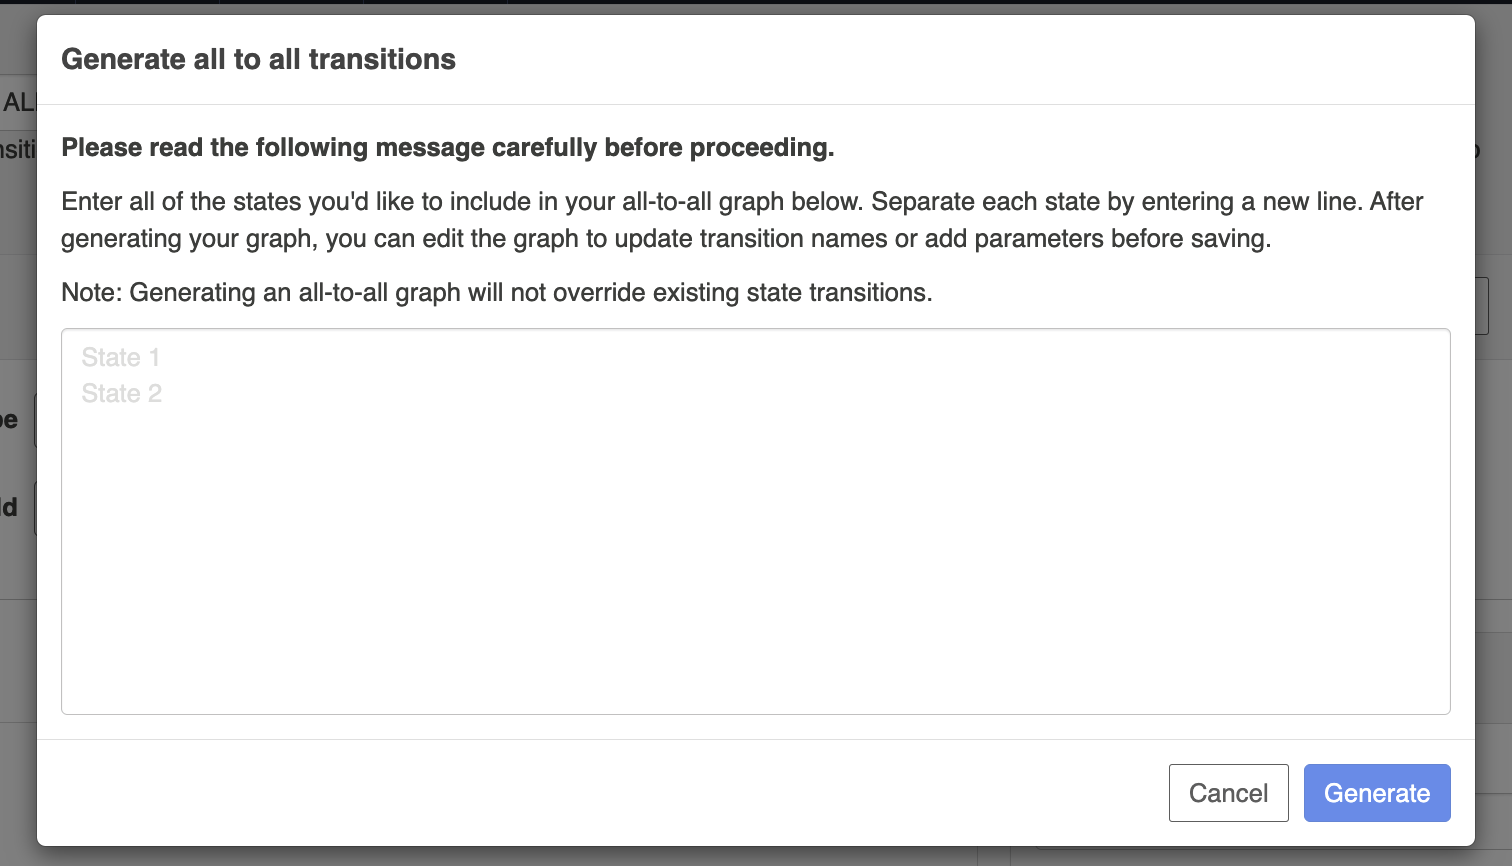
After you've entered all of the states, click Generate.
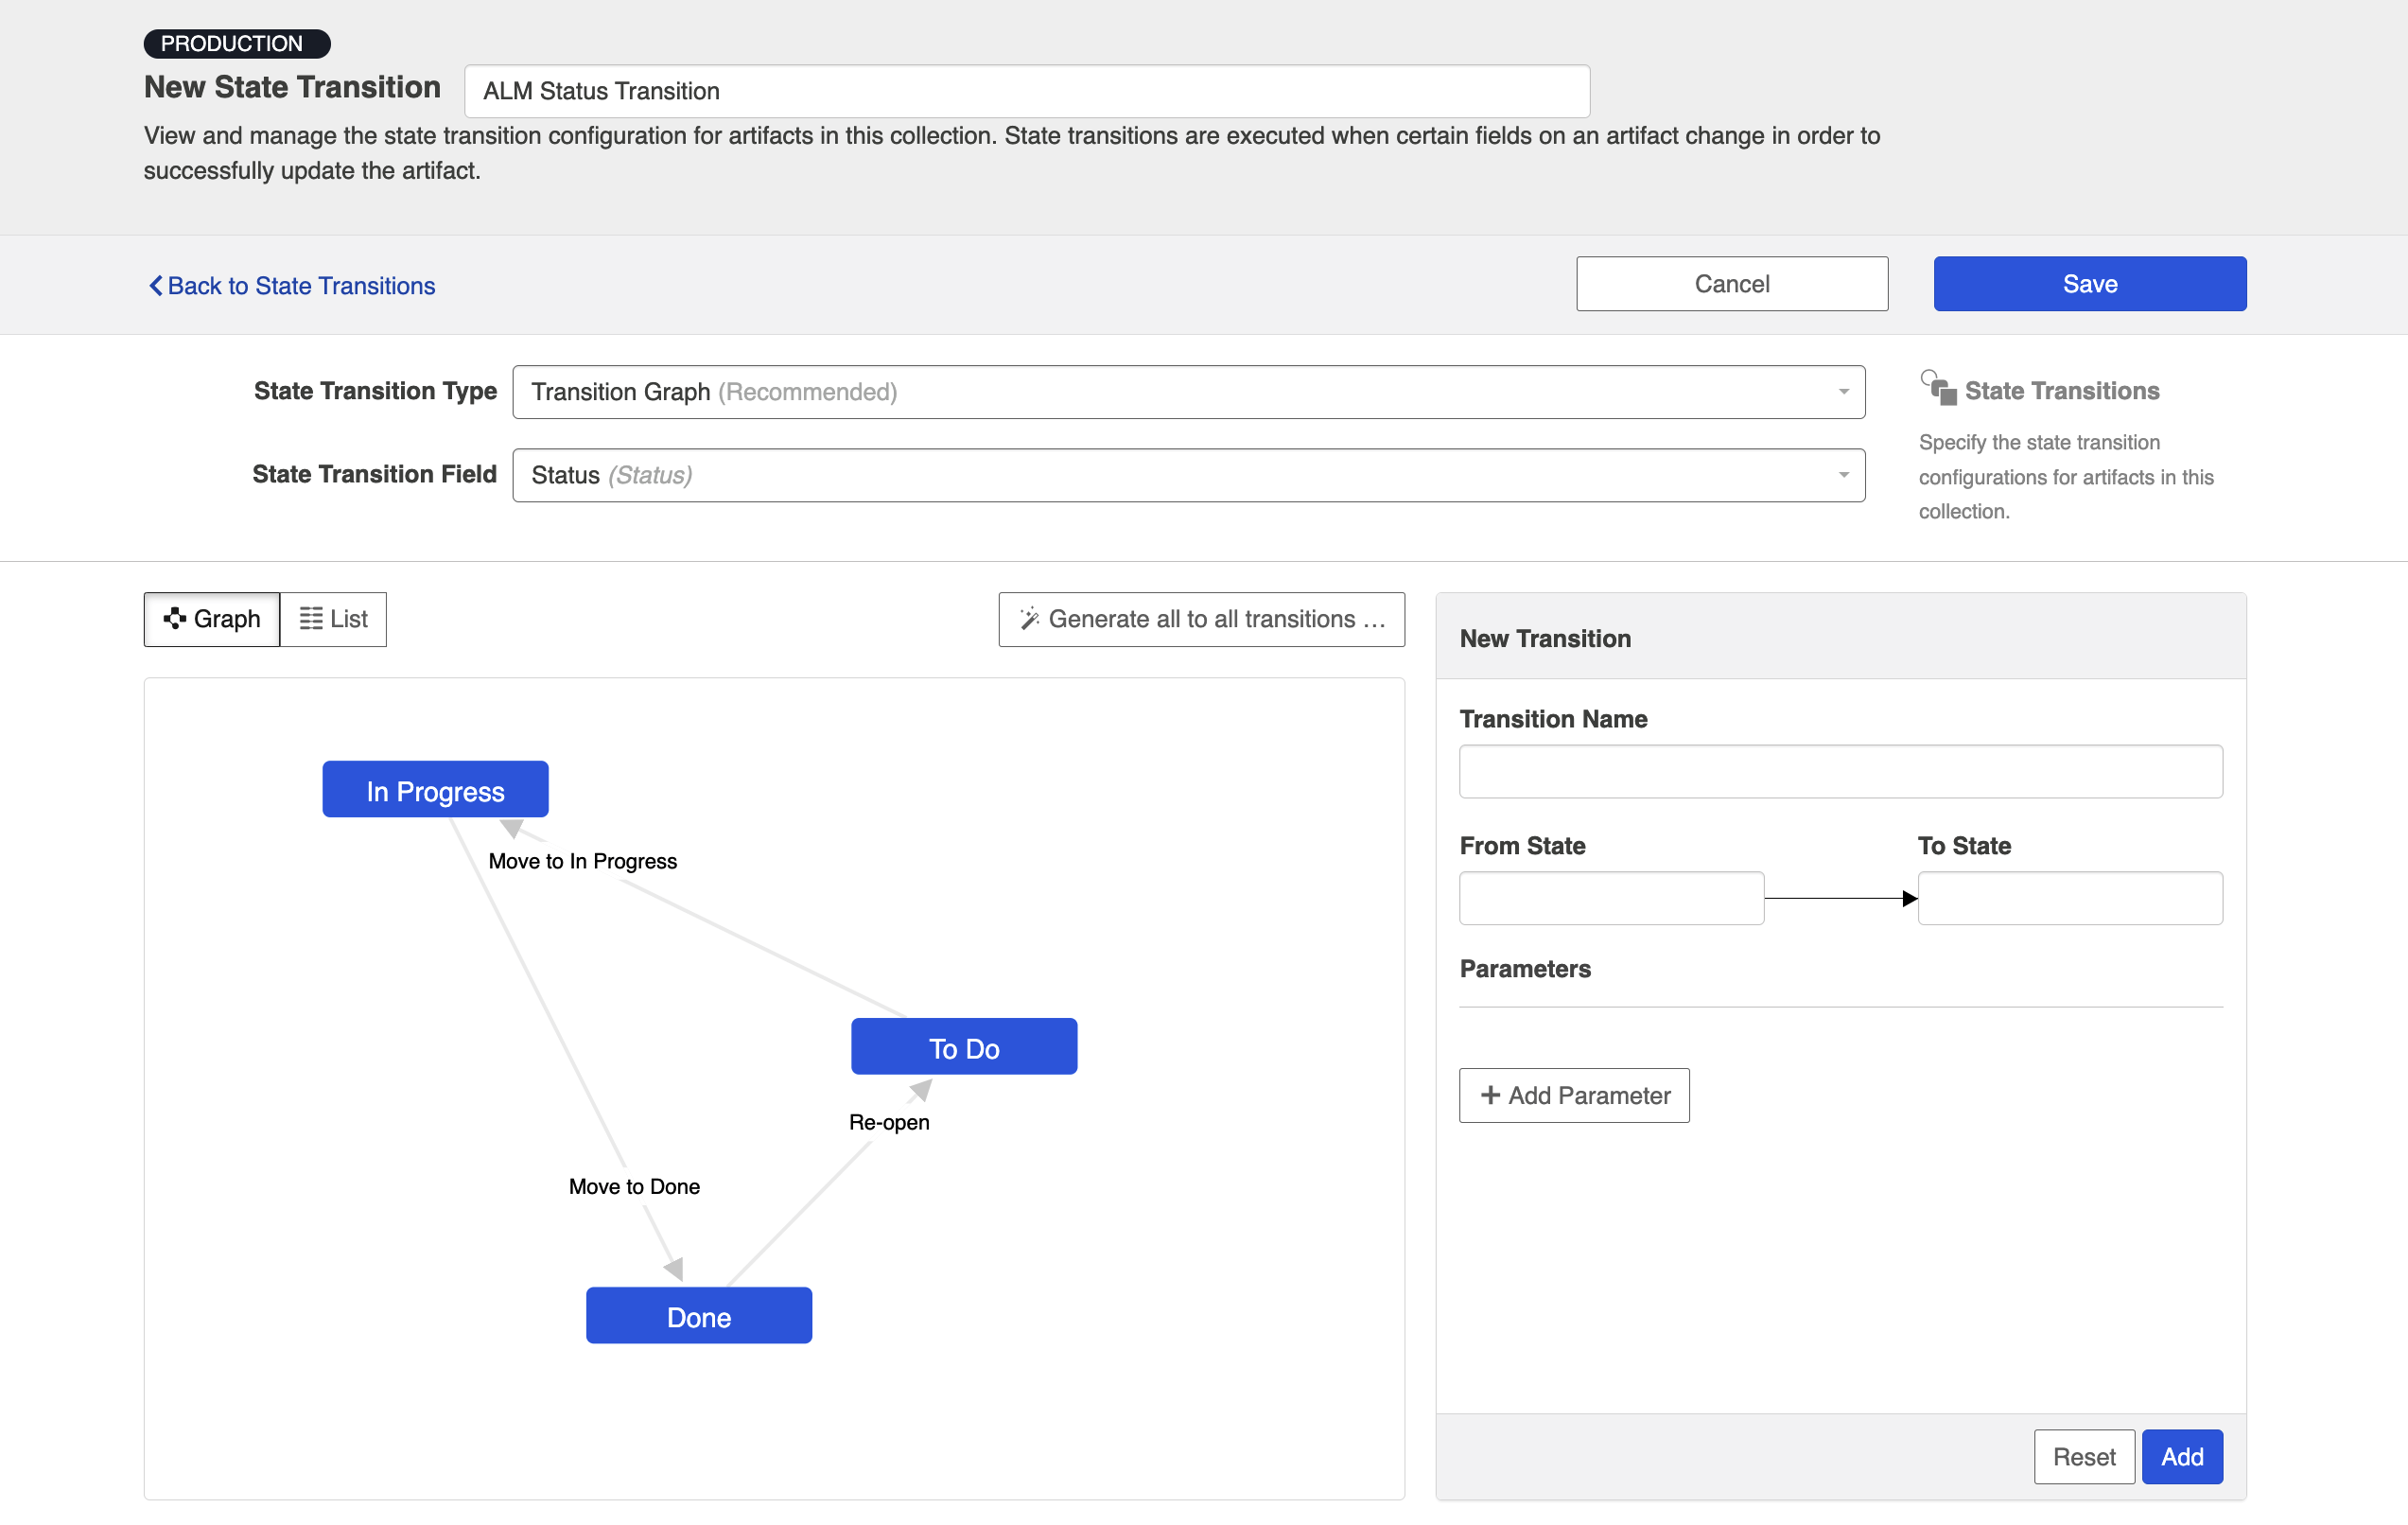
You will then see the automatically generated transition graph with all of the state transitions.
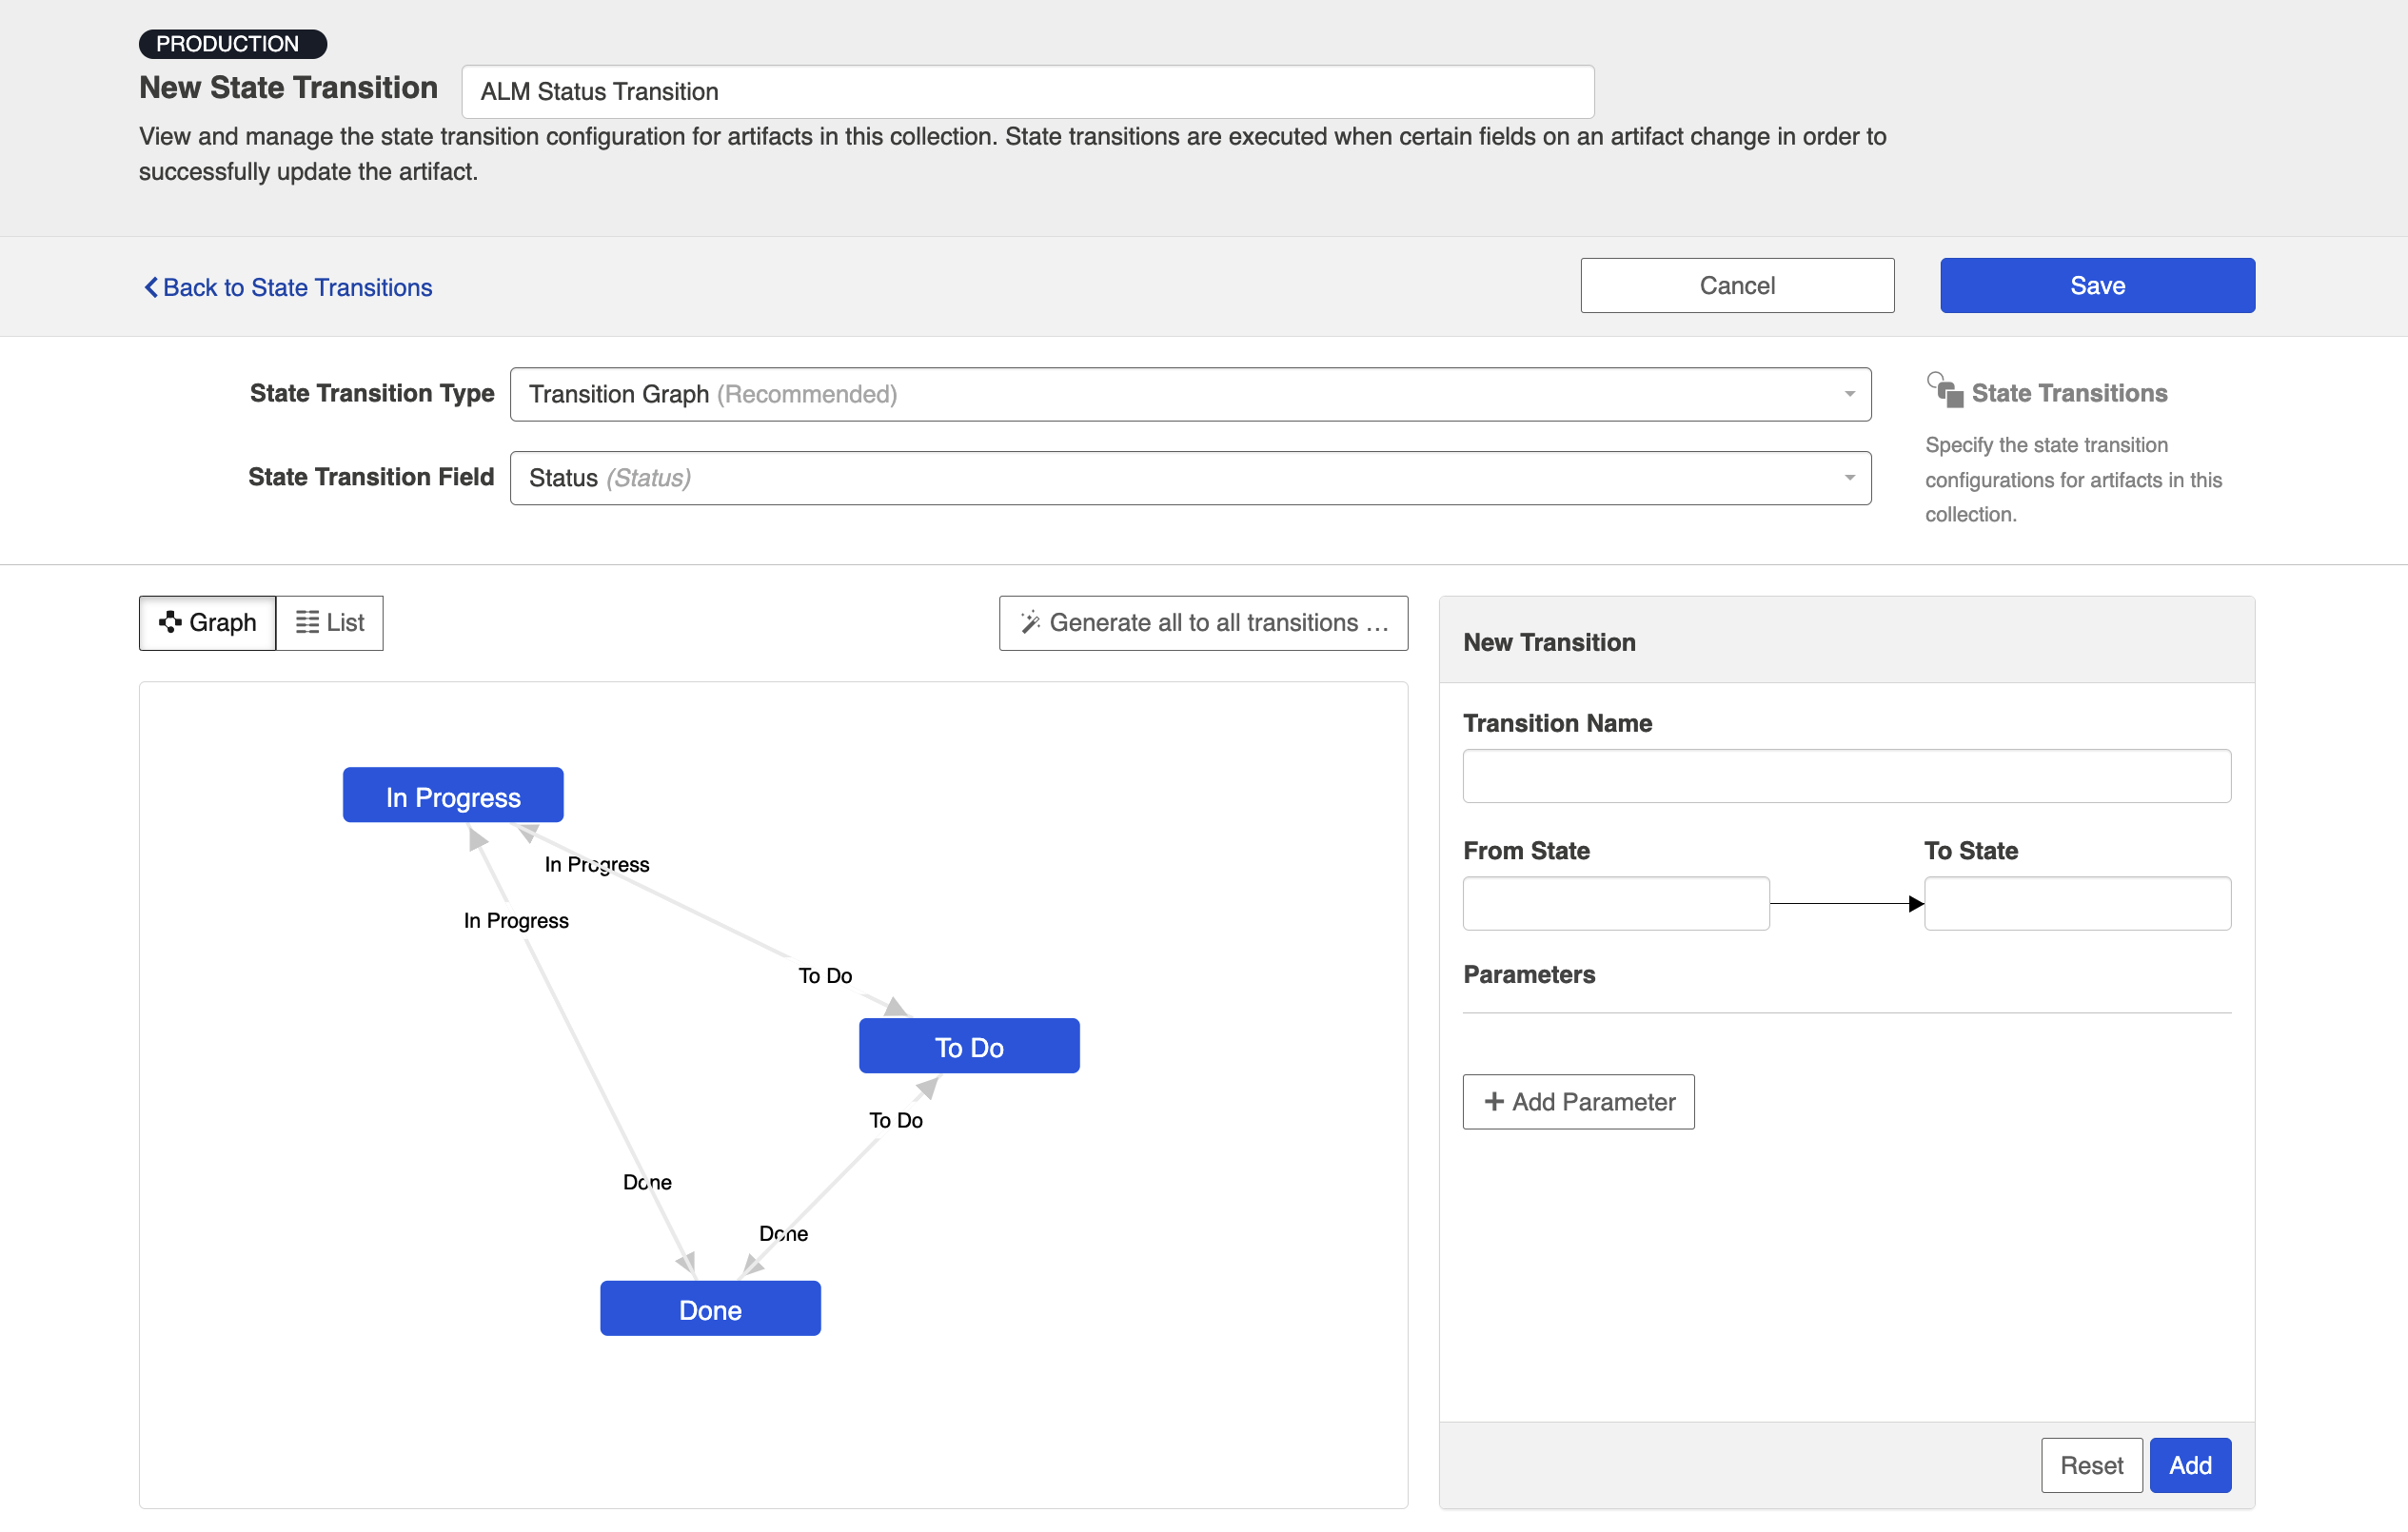
If you'd like to edit a transition, click the transition name and you can edit in the transition configuration panel.

Saving and Viewing
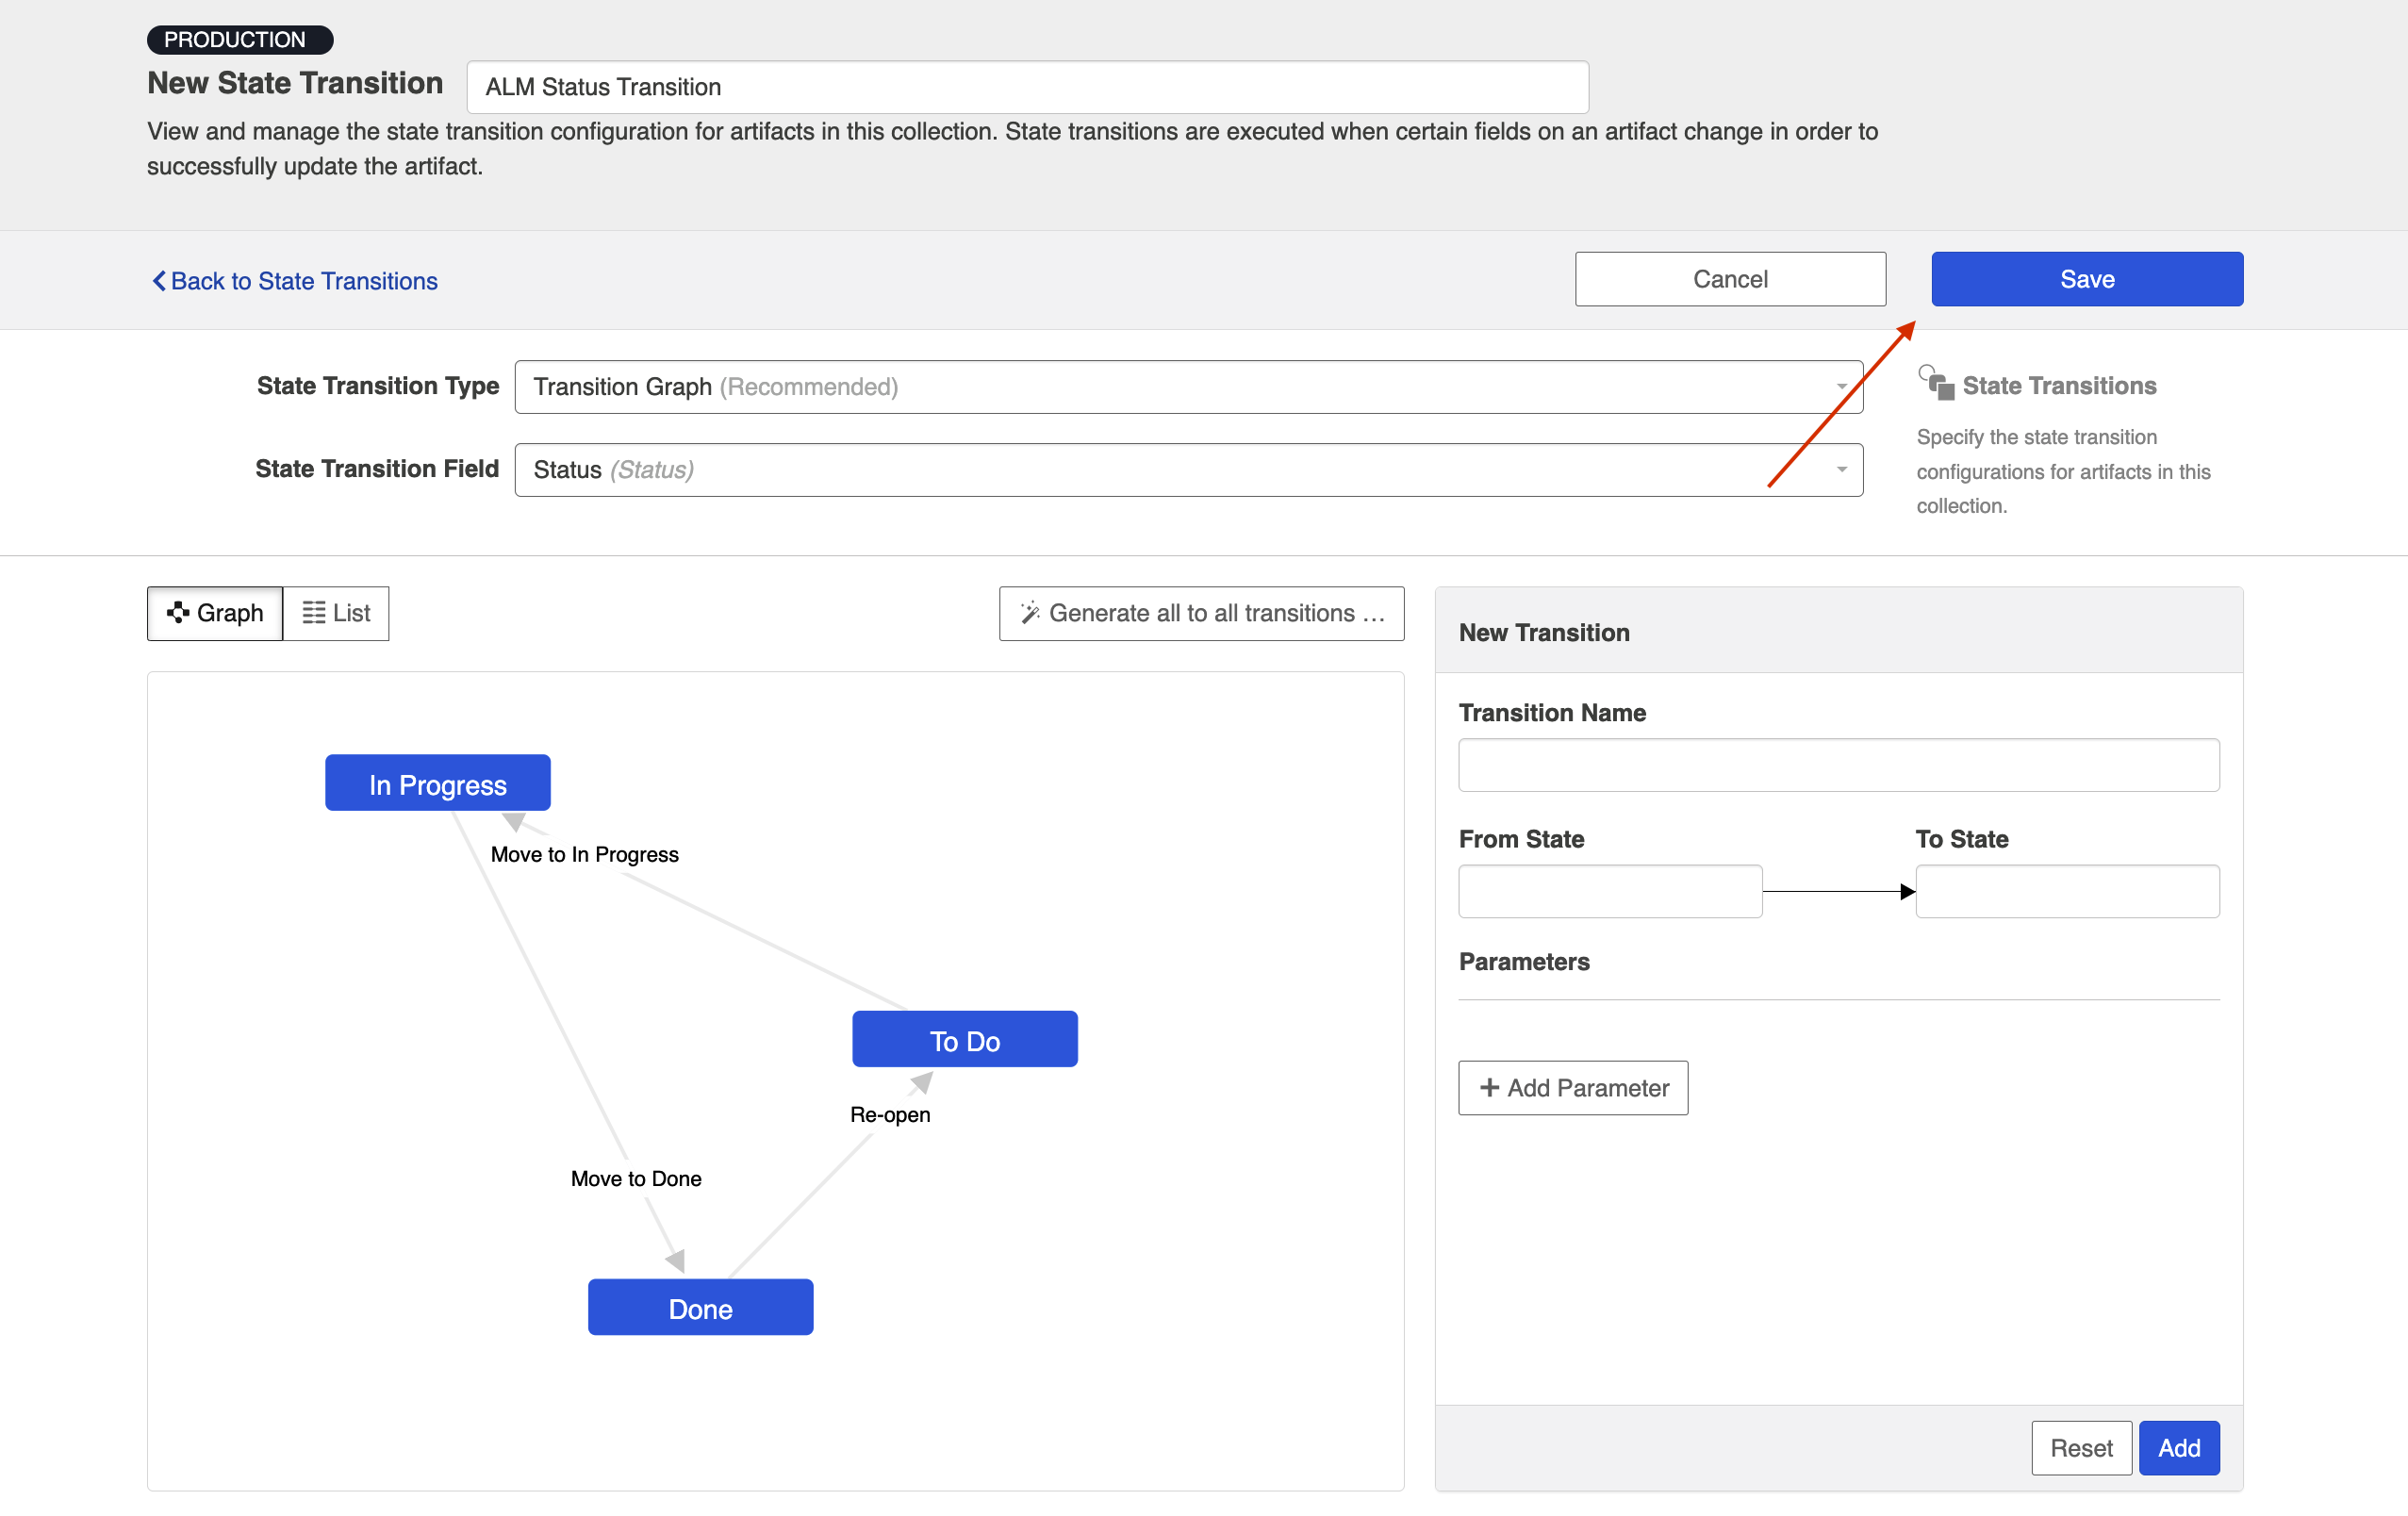
Here's an example of a completed Transition Graph:
Make sure that your completed graph matches the state transition configuration in your repository exactly. If it does not match, you'll see errors when running the integration.
Once confirmed, click Save and Done.
Tip: Clicking ctrl+s on Windows and cmd+s on macOS will save your configuration.
You can then view or copy your State Transition on the State Transition screen.
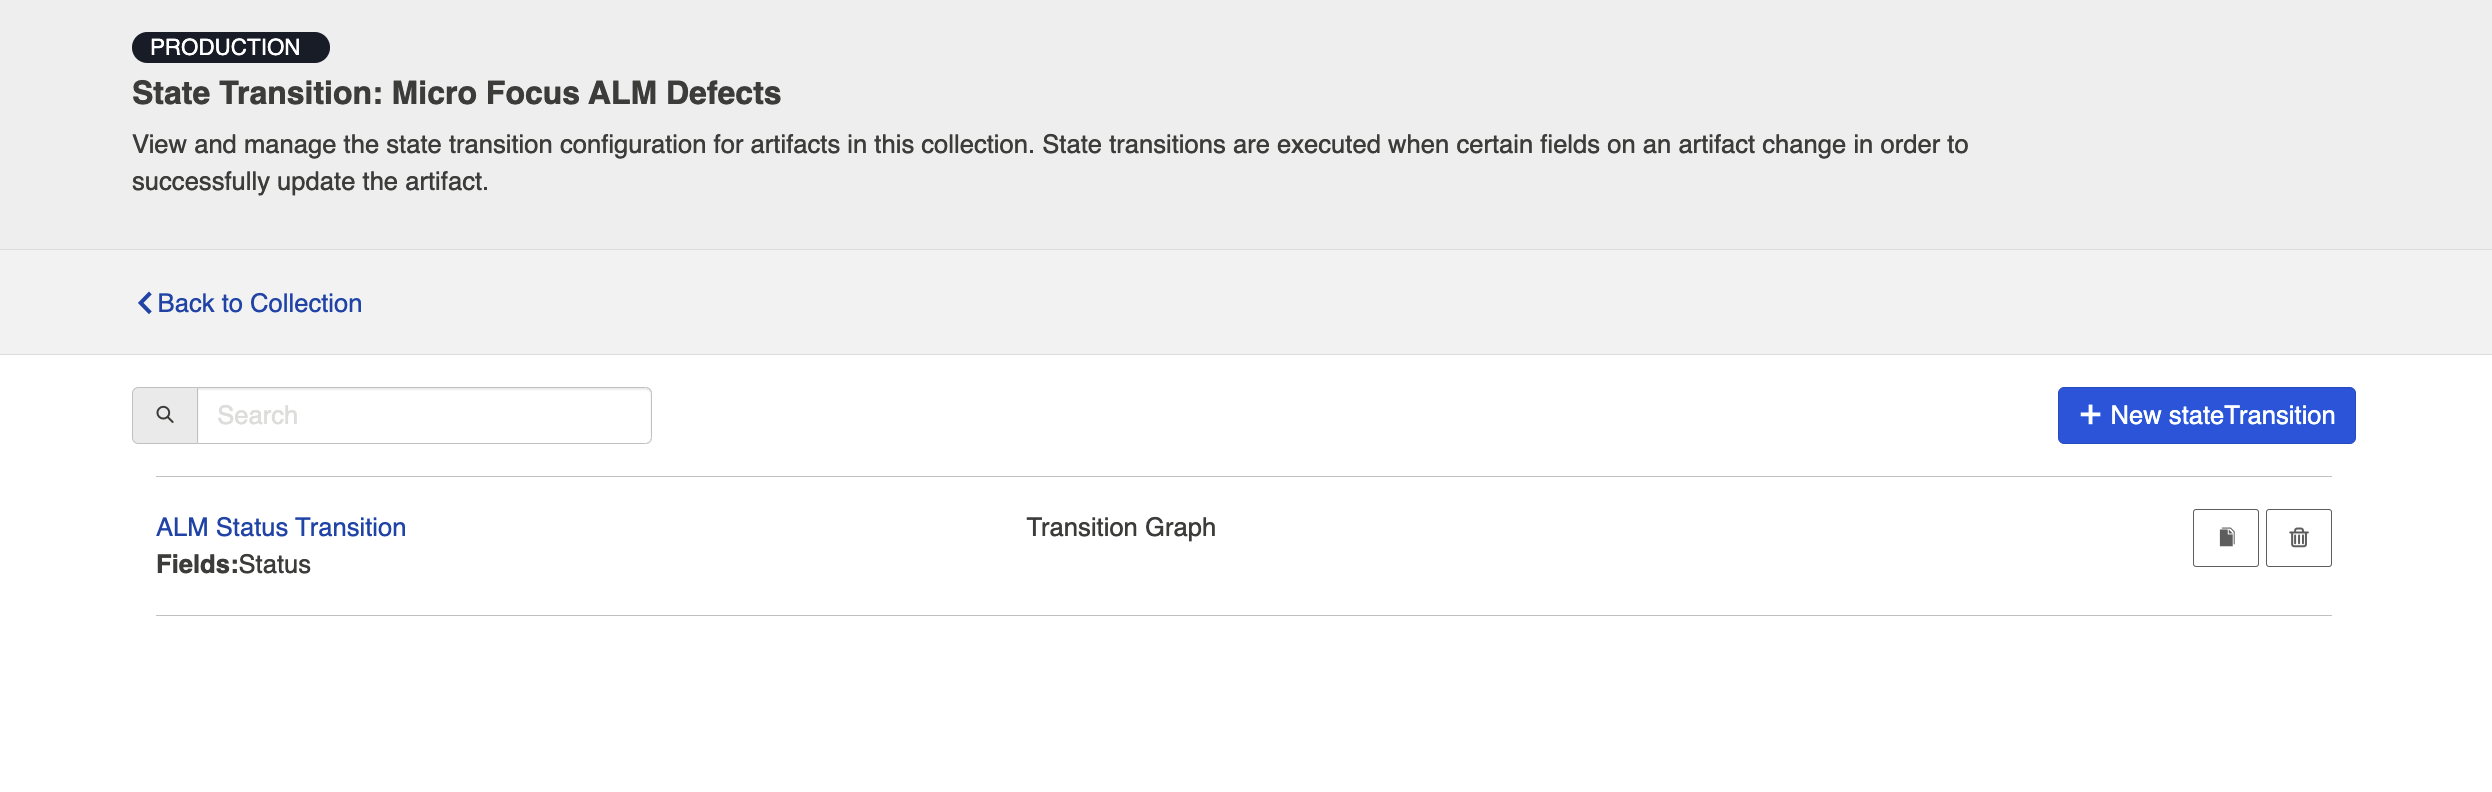
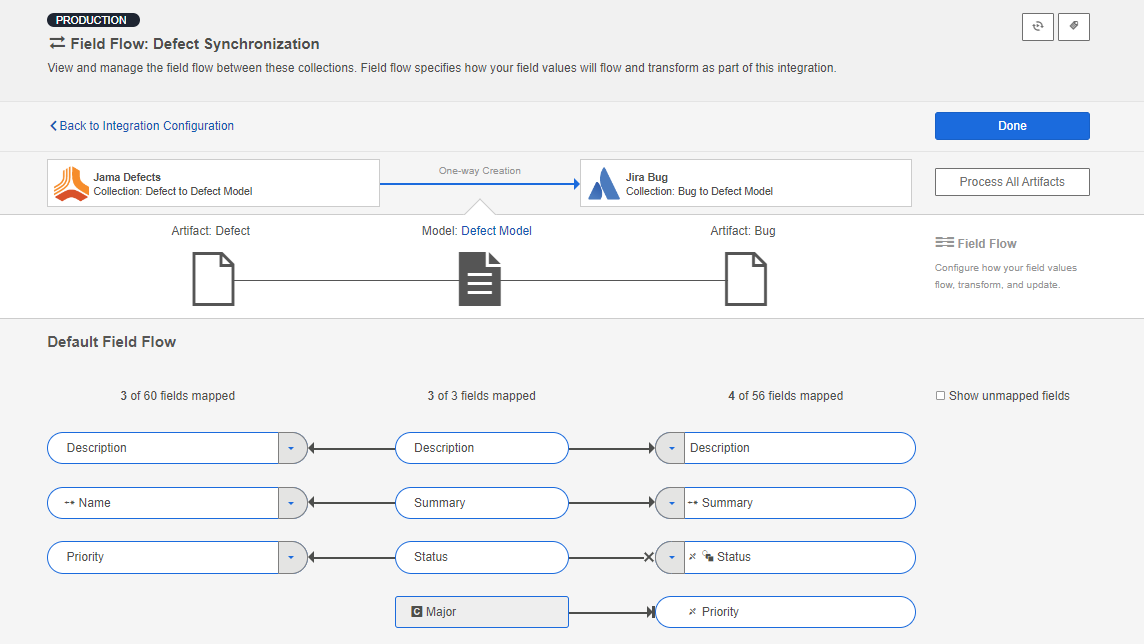
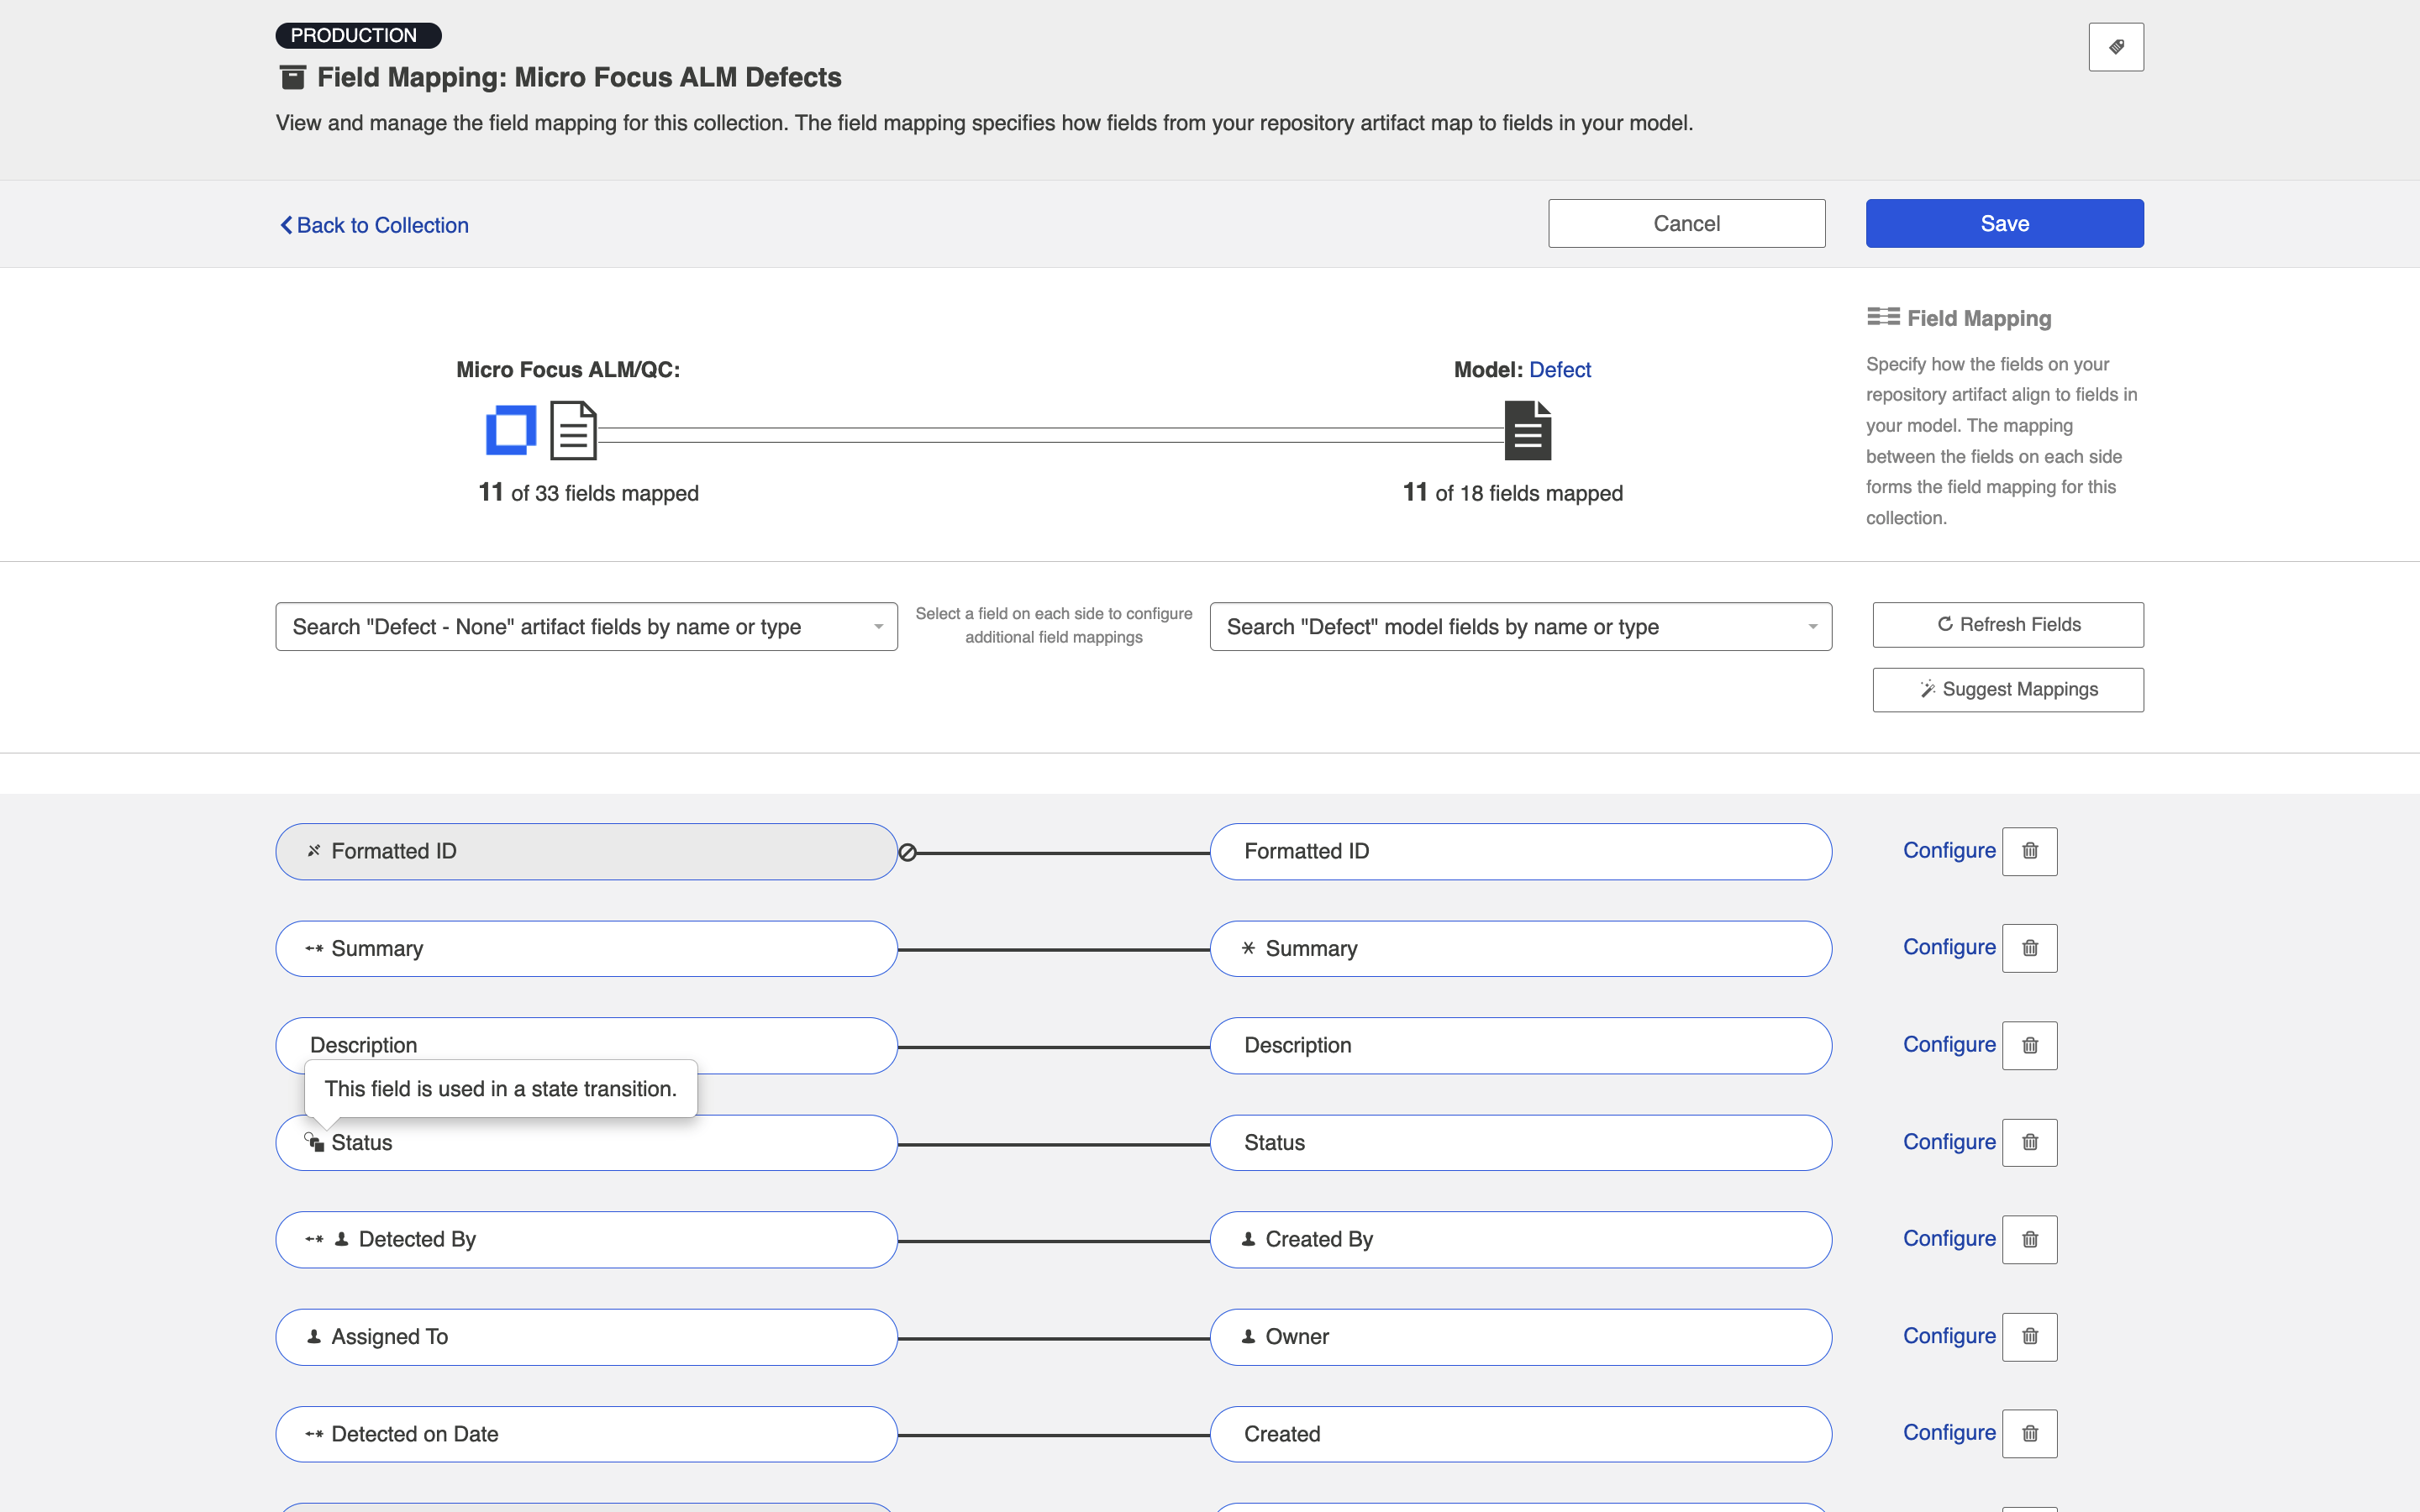
You'll also notice a state transition icon on the collection pill on the Field Mapping screen, denoting that a transition graph is in use.
Extensions
In order to successfully flow field values for fields that require state transitions, a state transition extension can also be set.
If you choose to configure state transitions via an extension, rather than utilizing the transition graph, your first step will be to create and save the extension itself from the Extensions screen. If you need help creating the extension, you can find more information in the Extensions section.
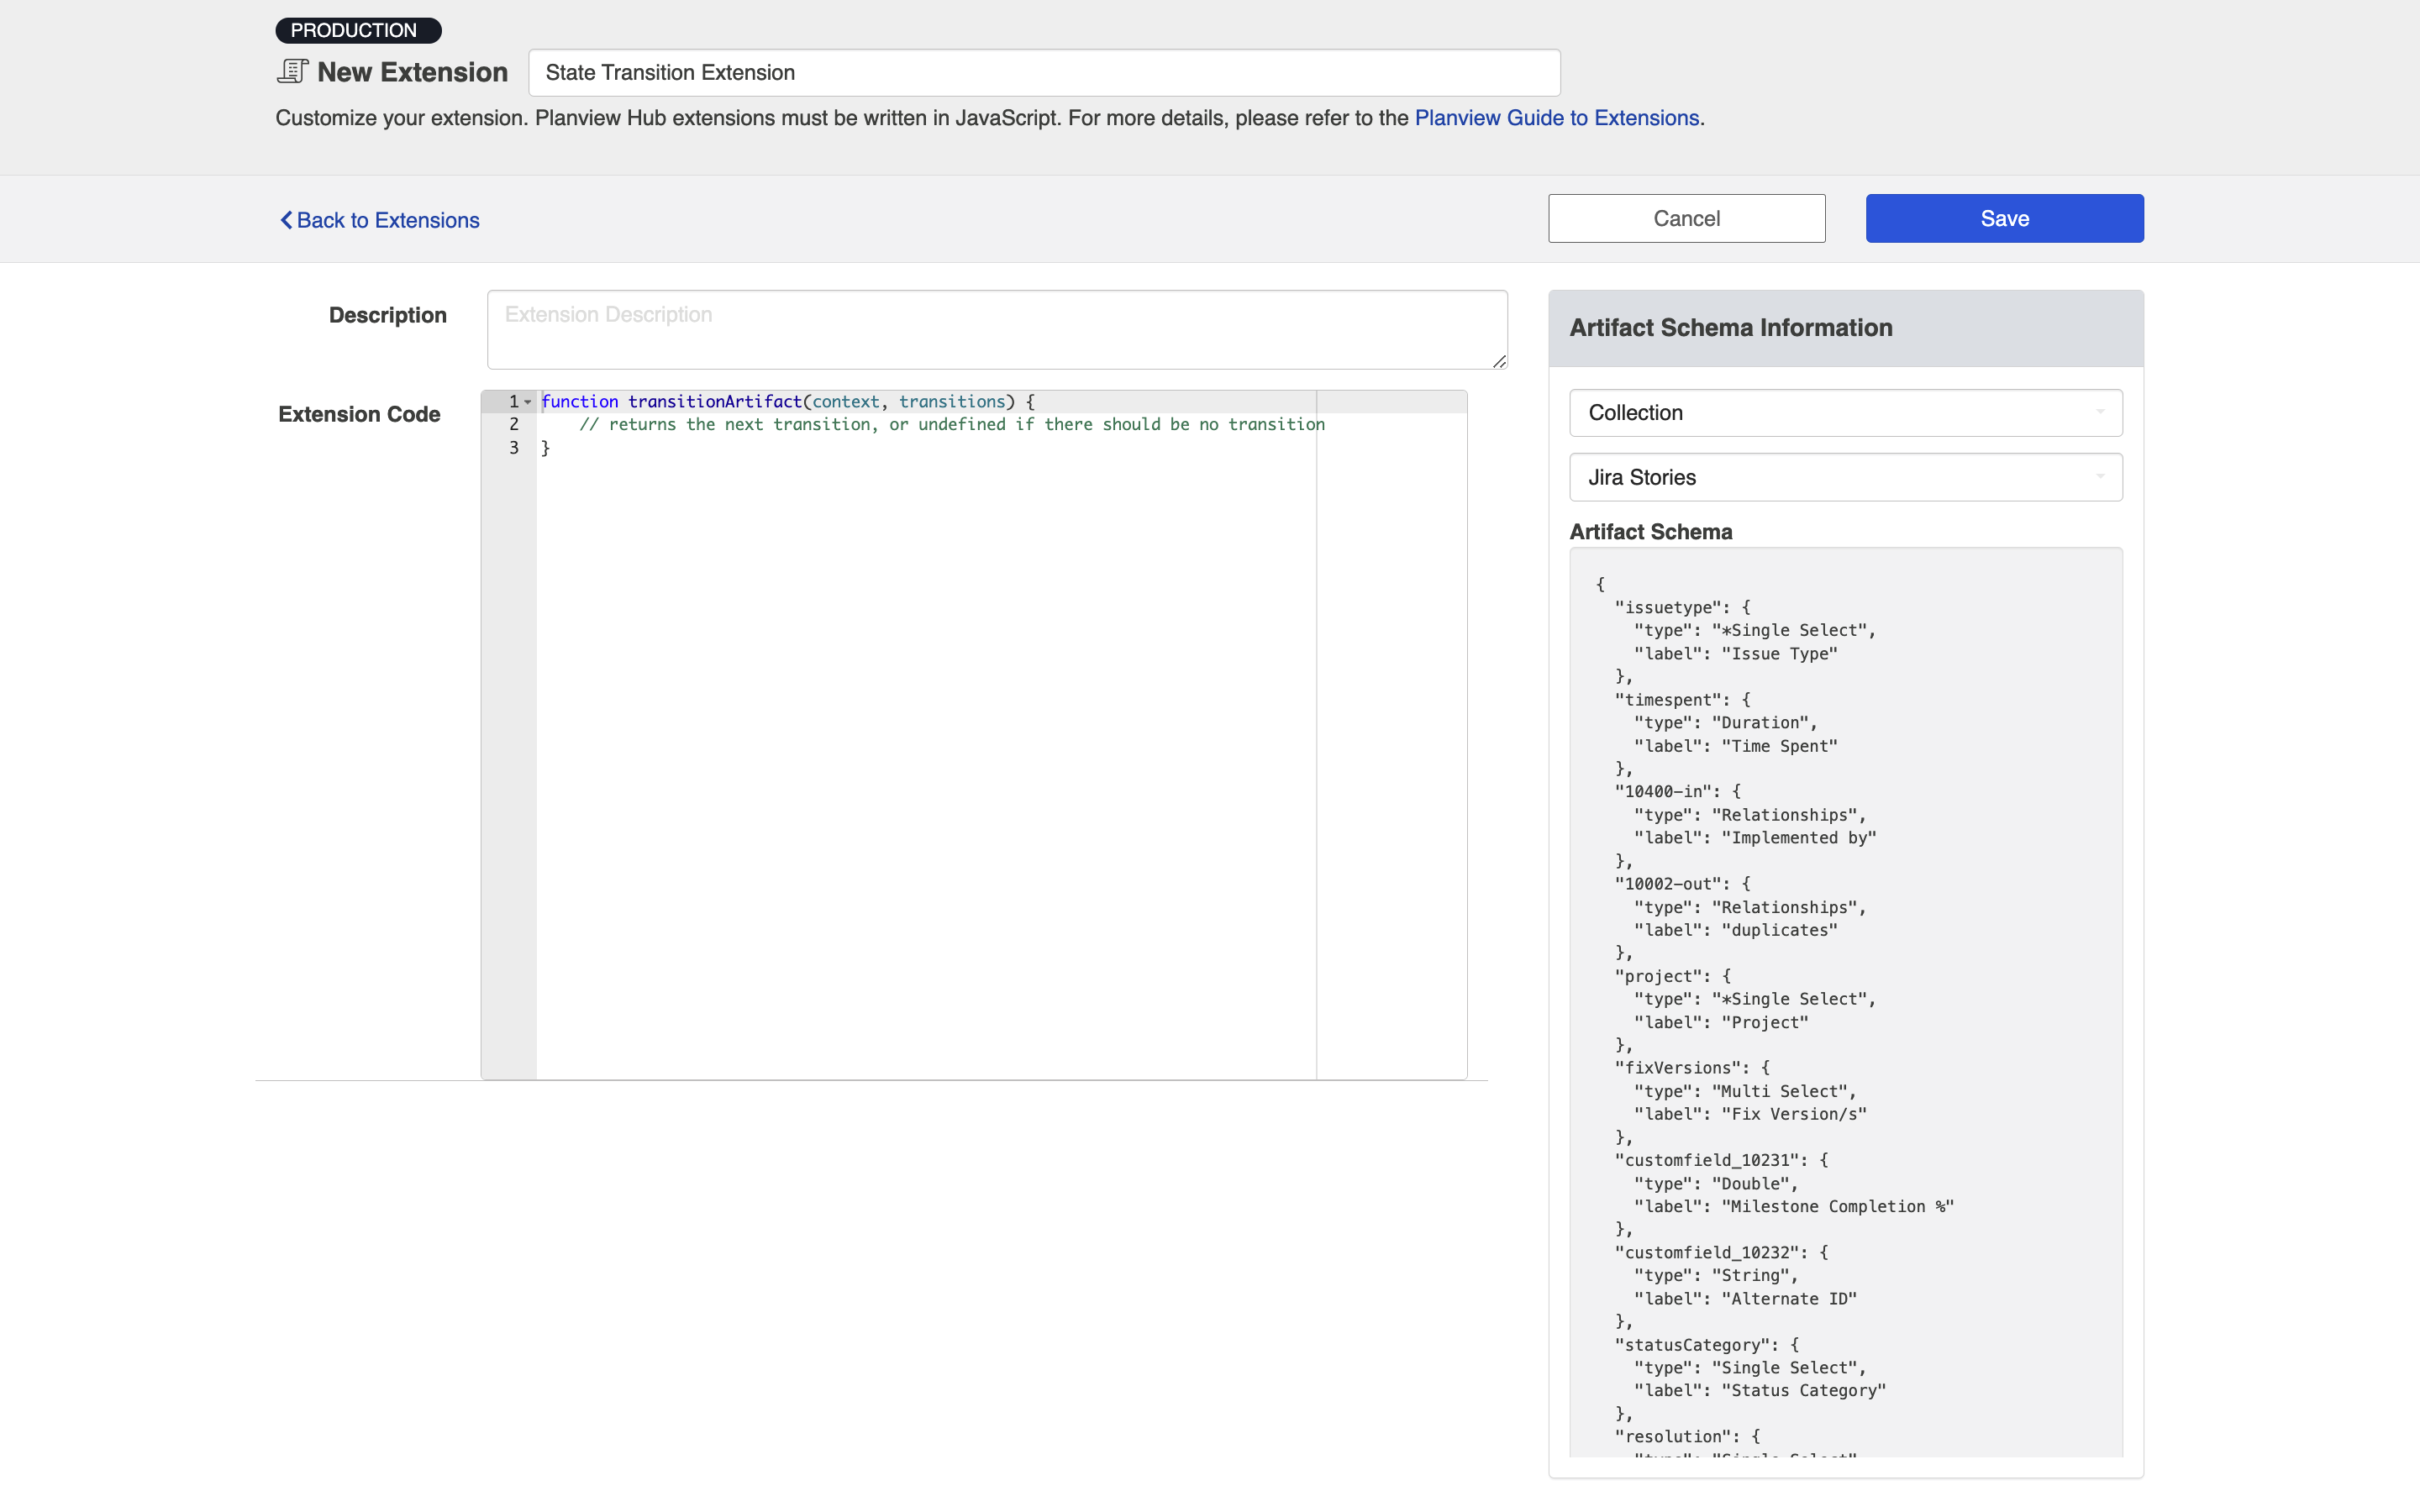
Once the extension is configured, you can select Extension as the State Transition Type on the New State Transition screen.
Next, select the model field(s) that you'd like to apply the extension to.
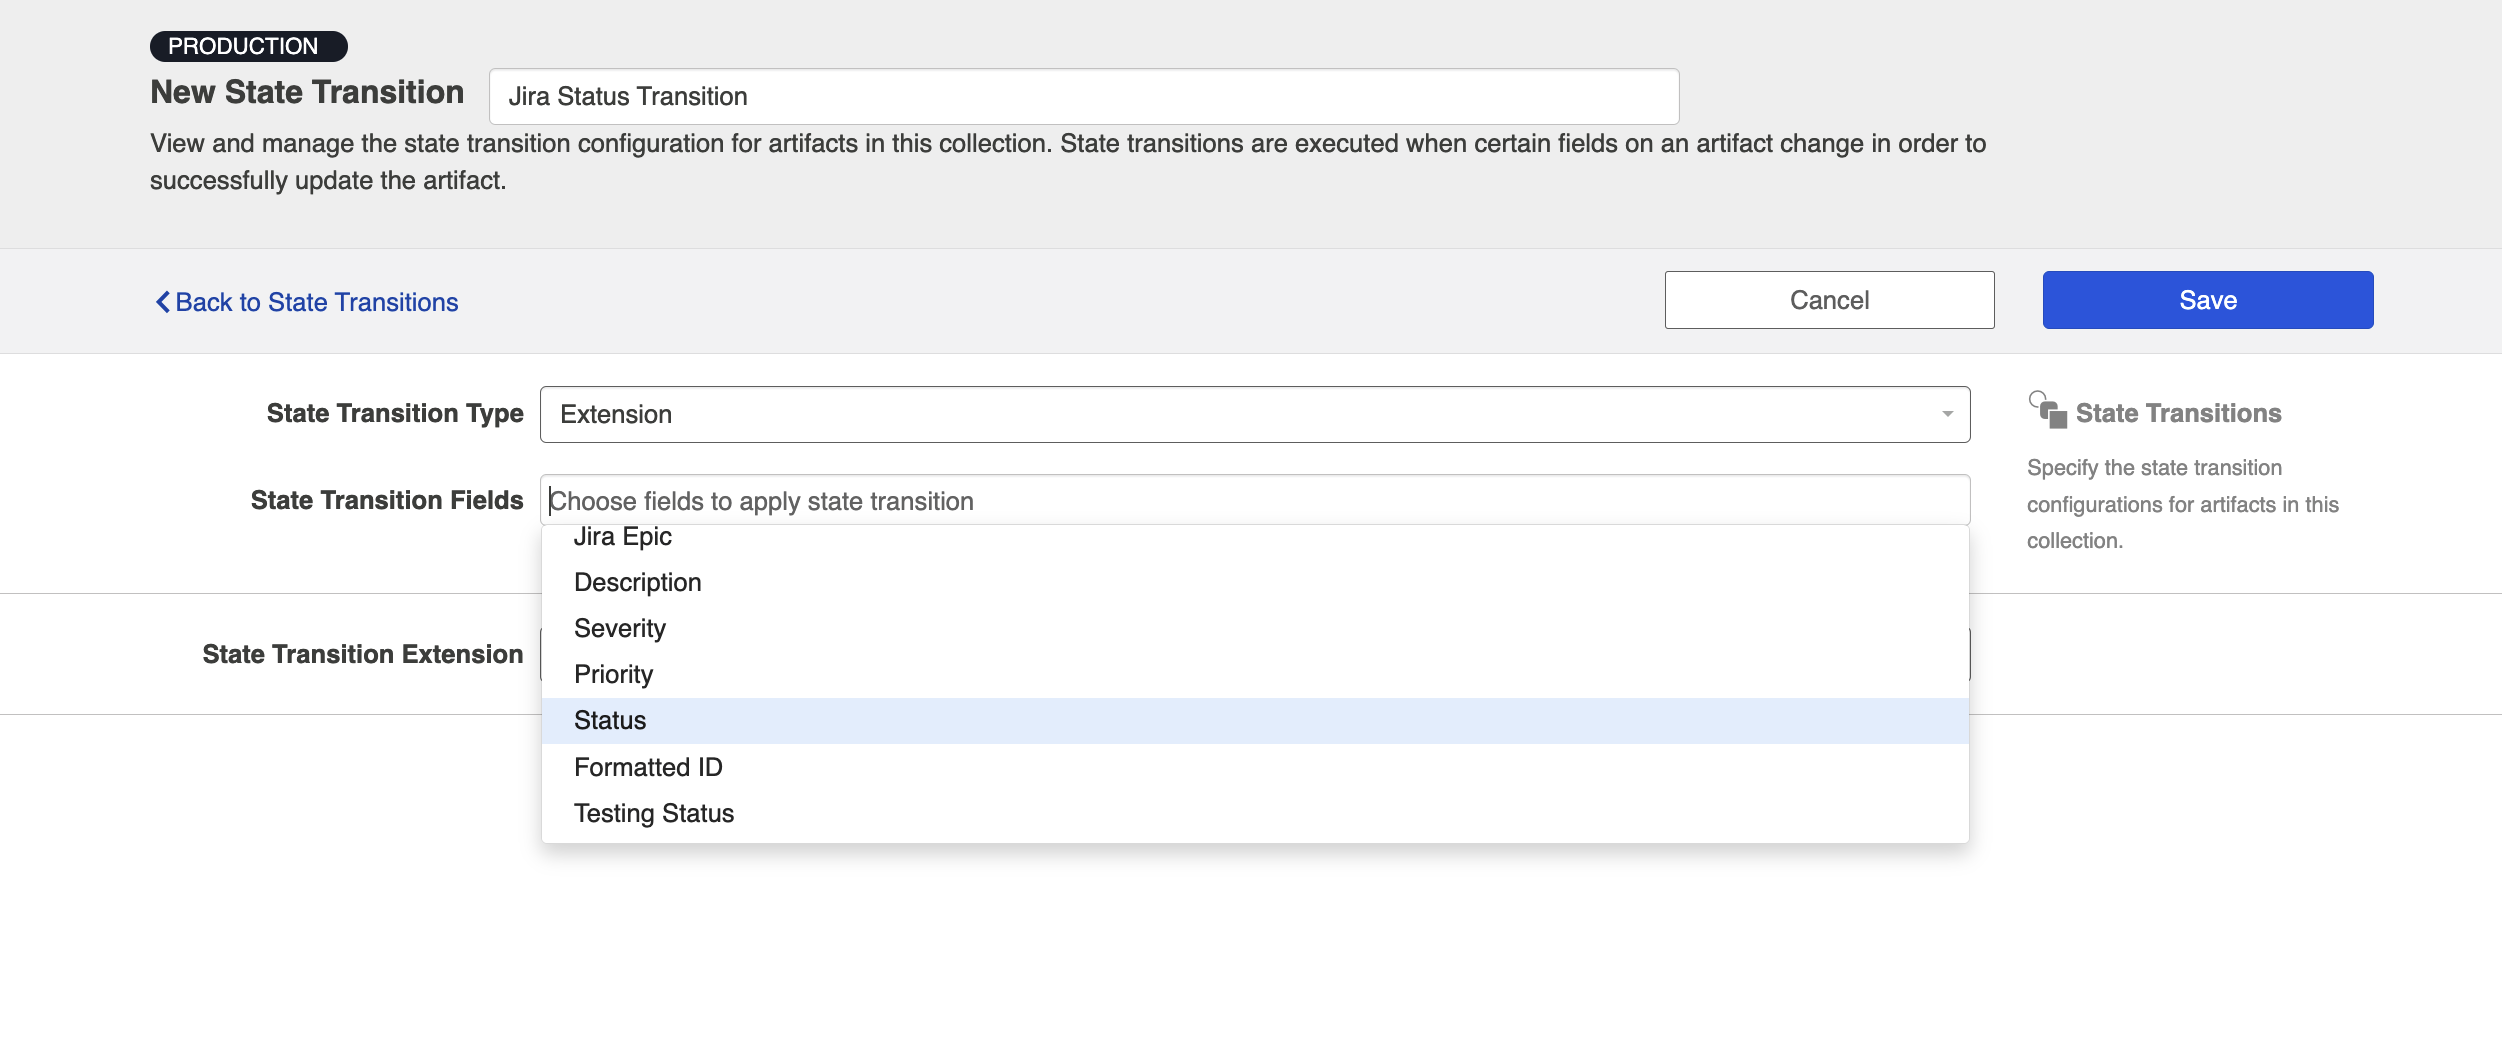
You can then select the extension you'd like to use.
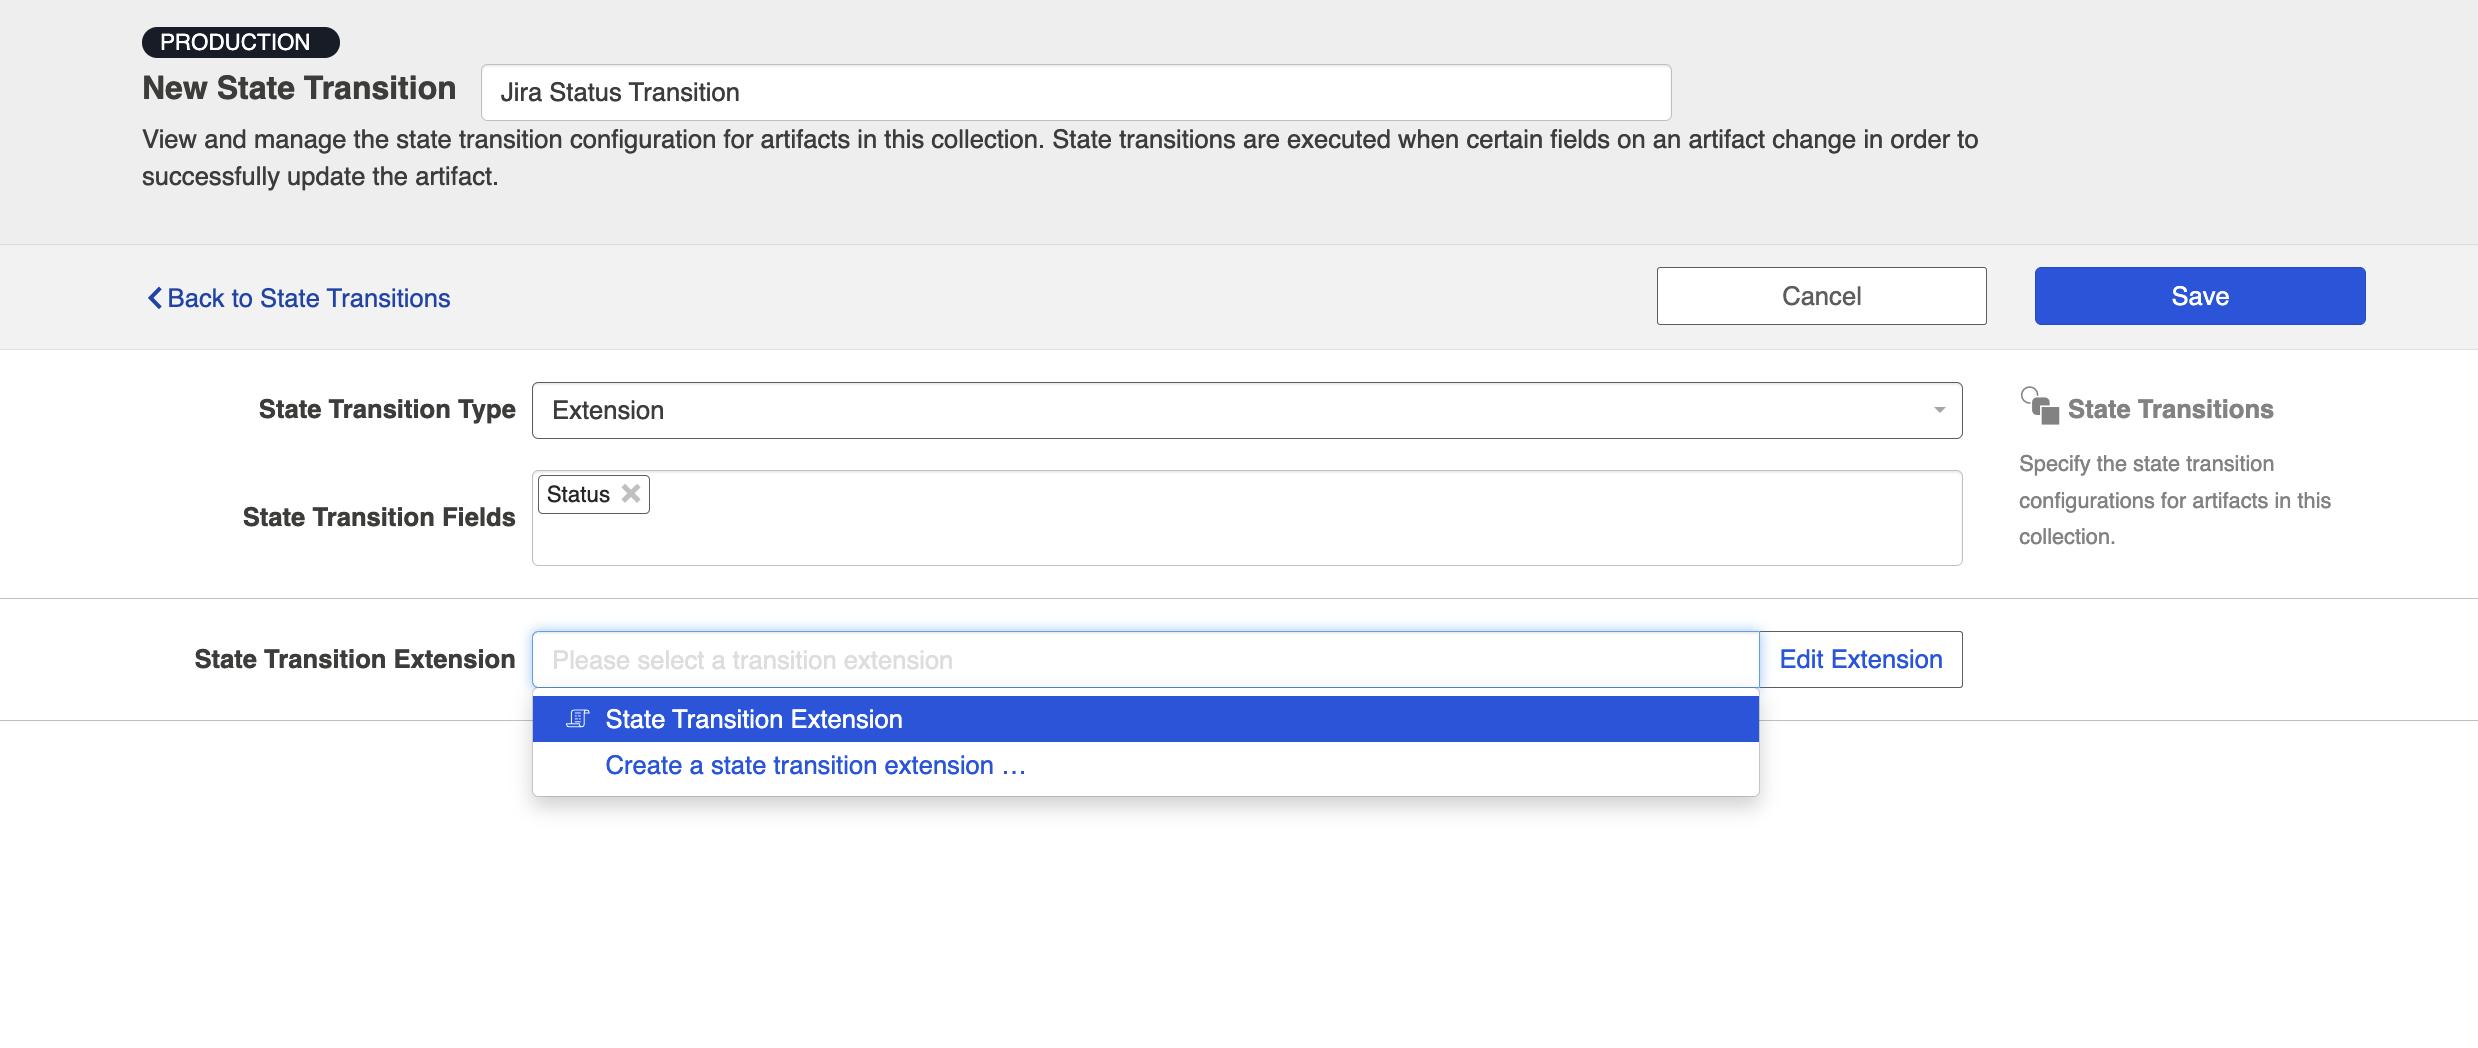
Click Save and then Done.
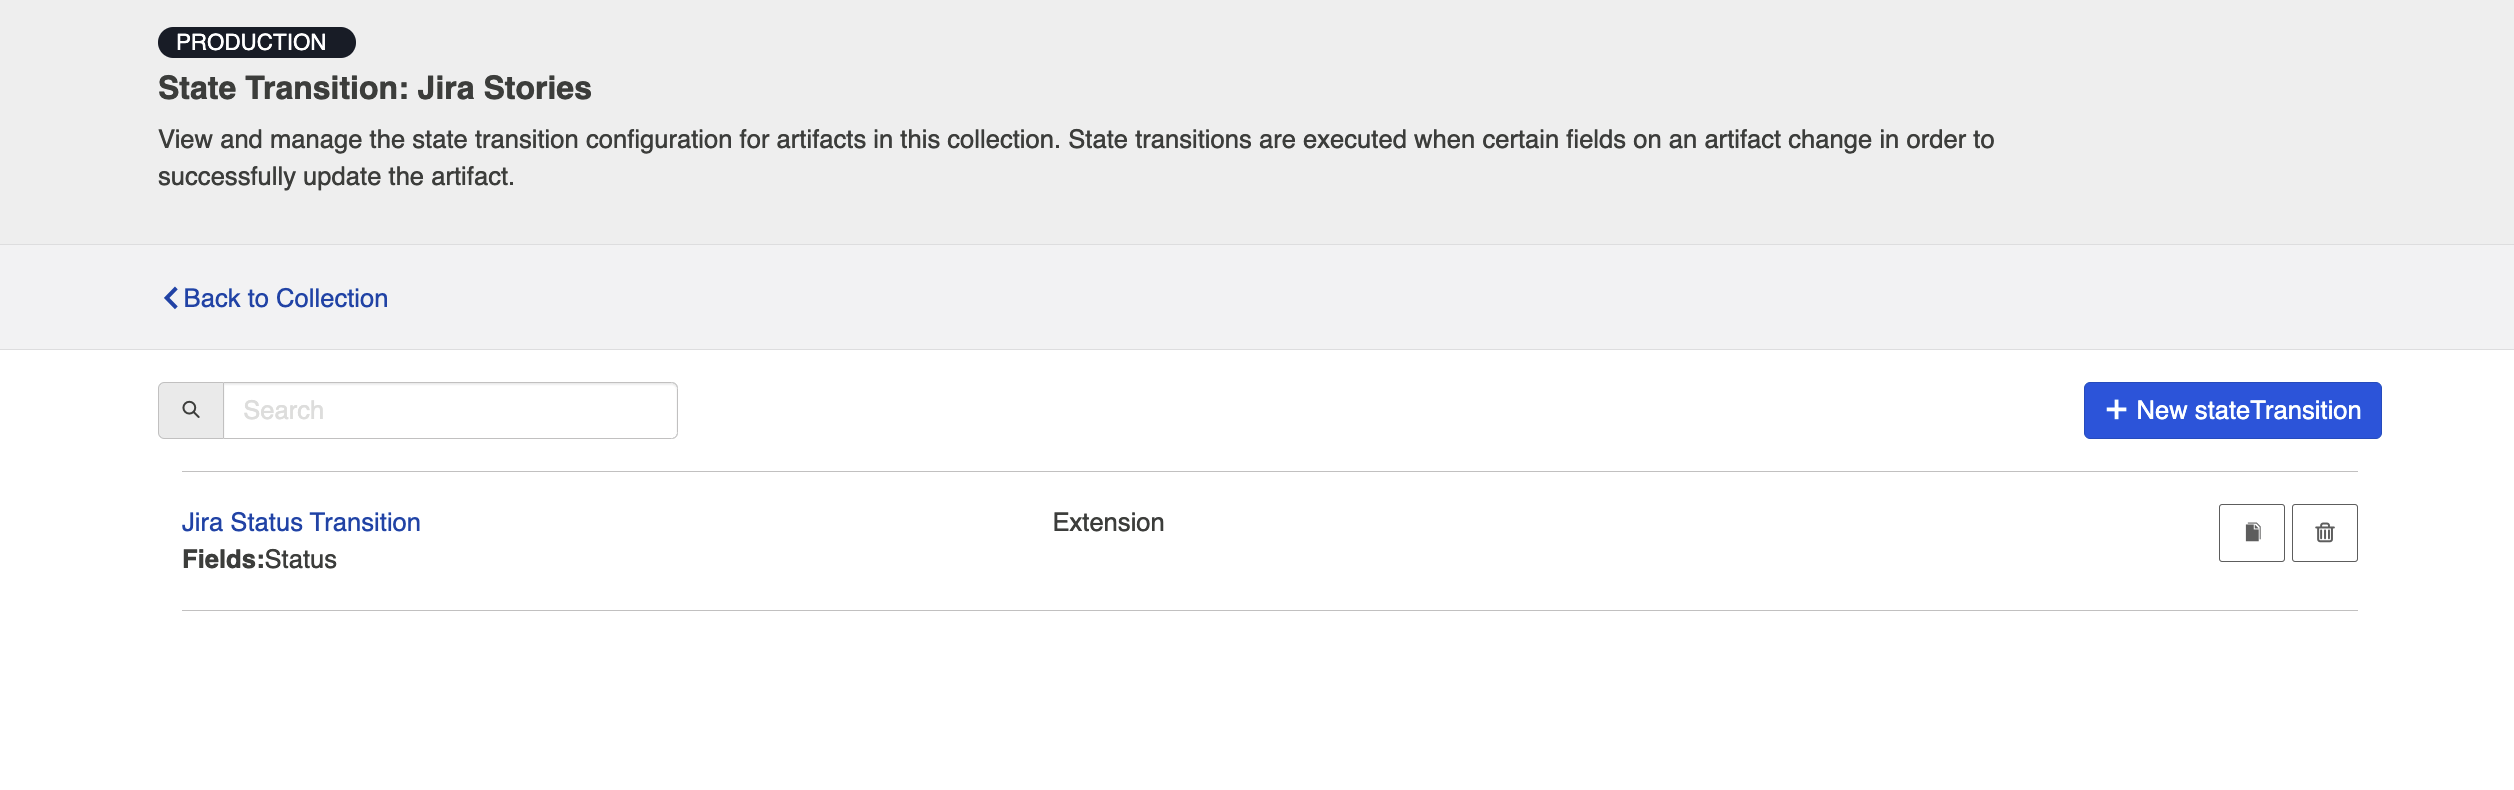
You'll now see the State Transition Extension listed on the State Transition screen.
And you'll notice the state transition icon on the model pill and the model drop-down on the Field Flow screen.
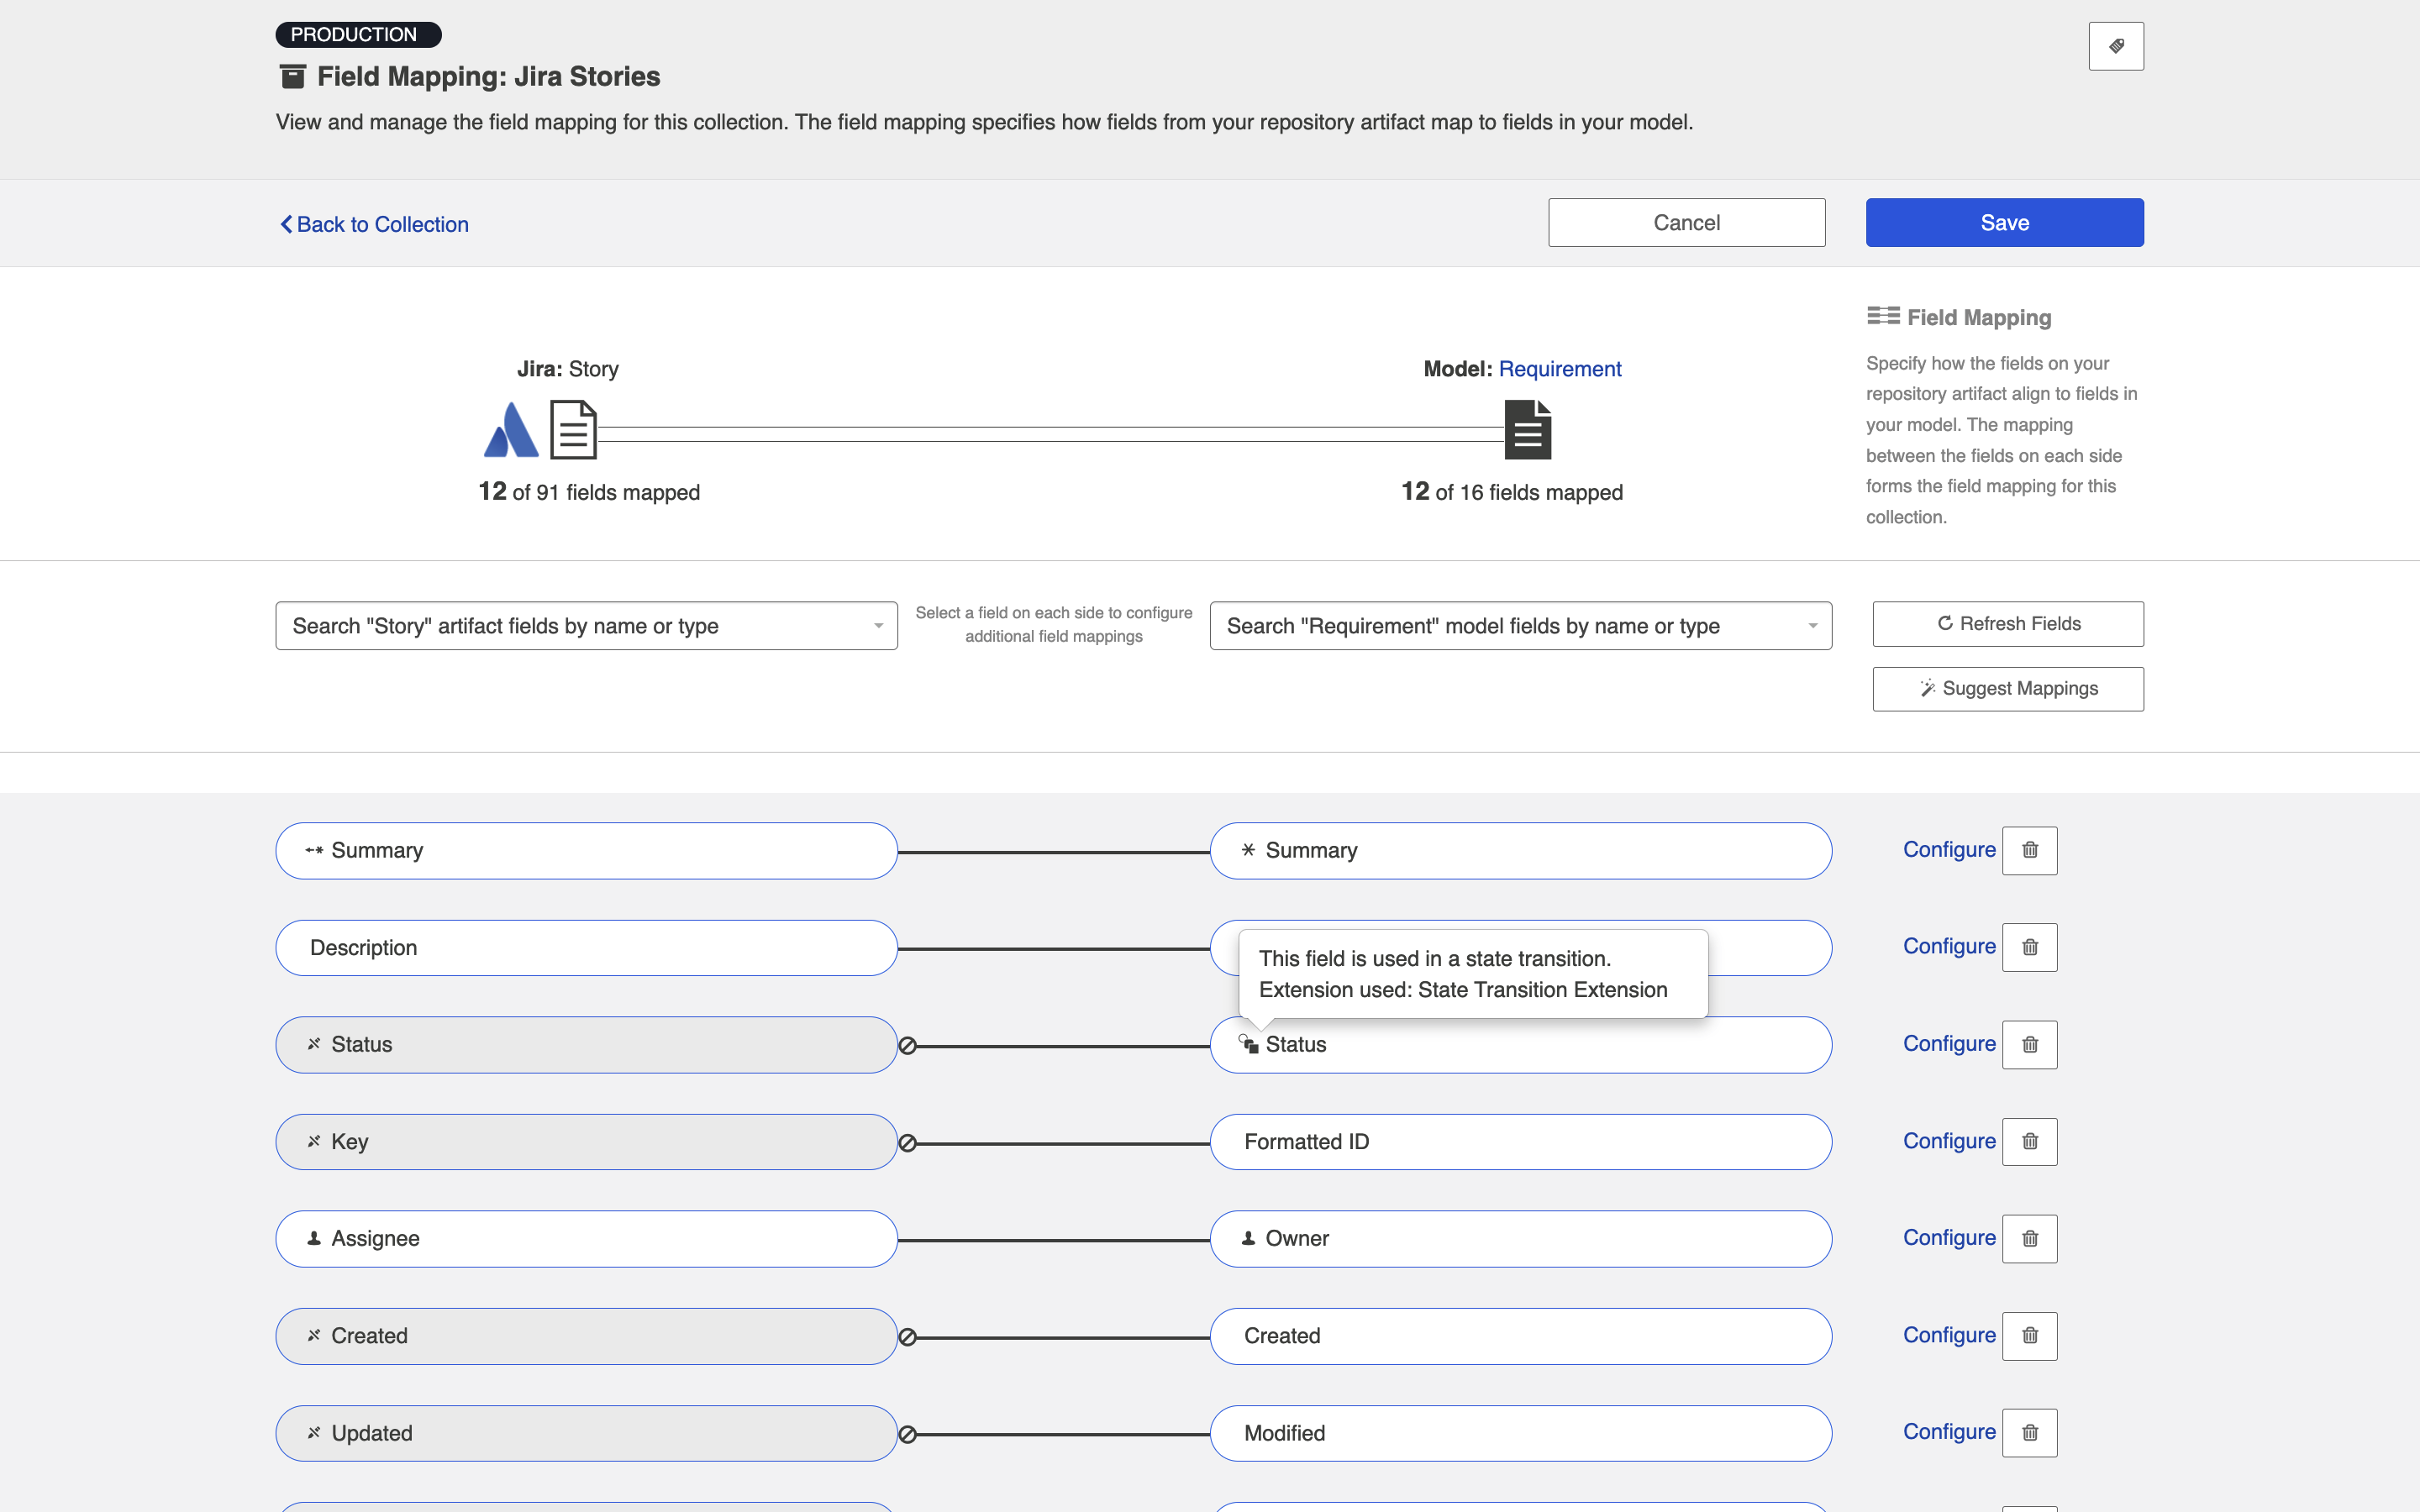
You'll also see it listed at the top of the screen when you view the Field Mapping Configuration screen for that field.
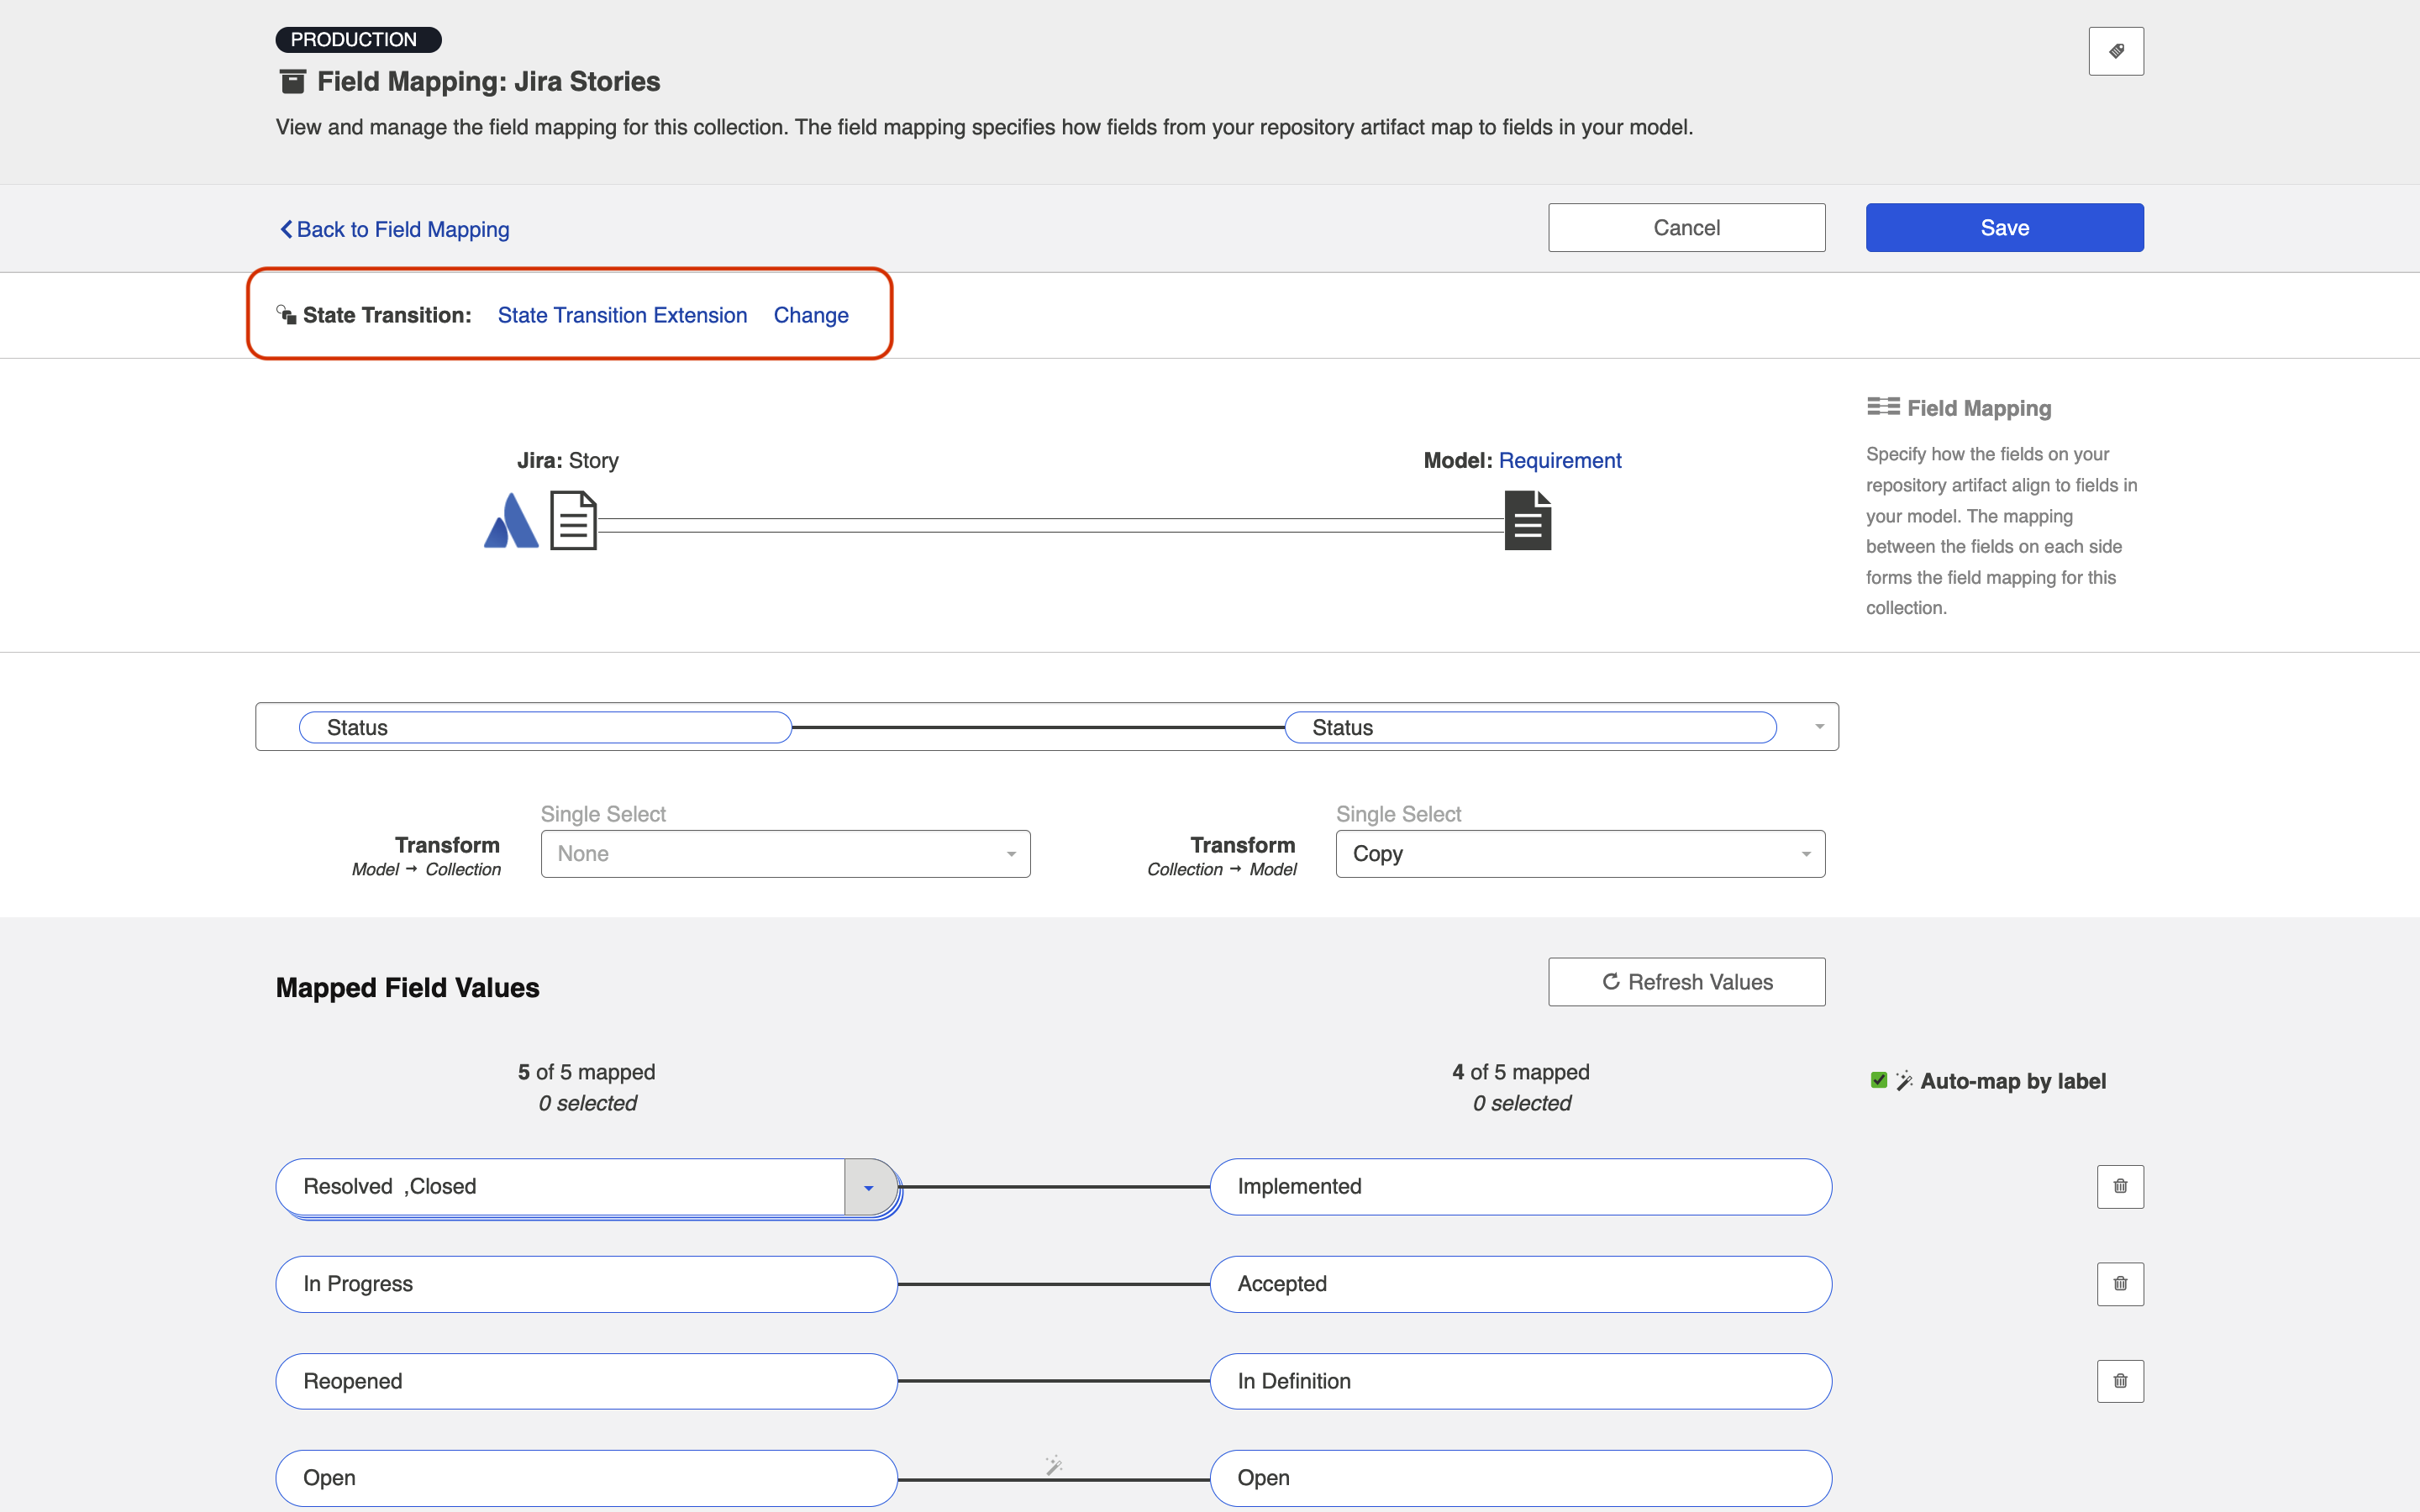
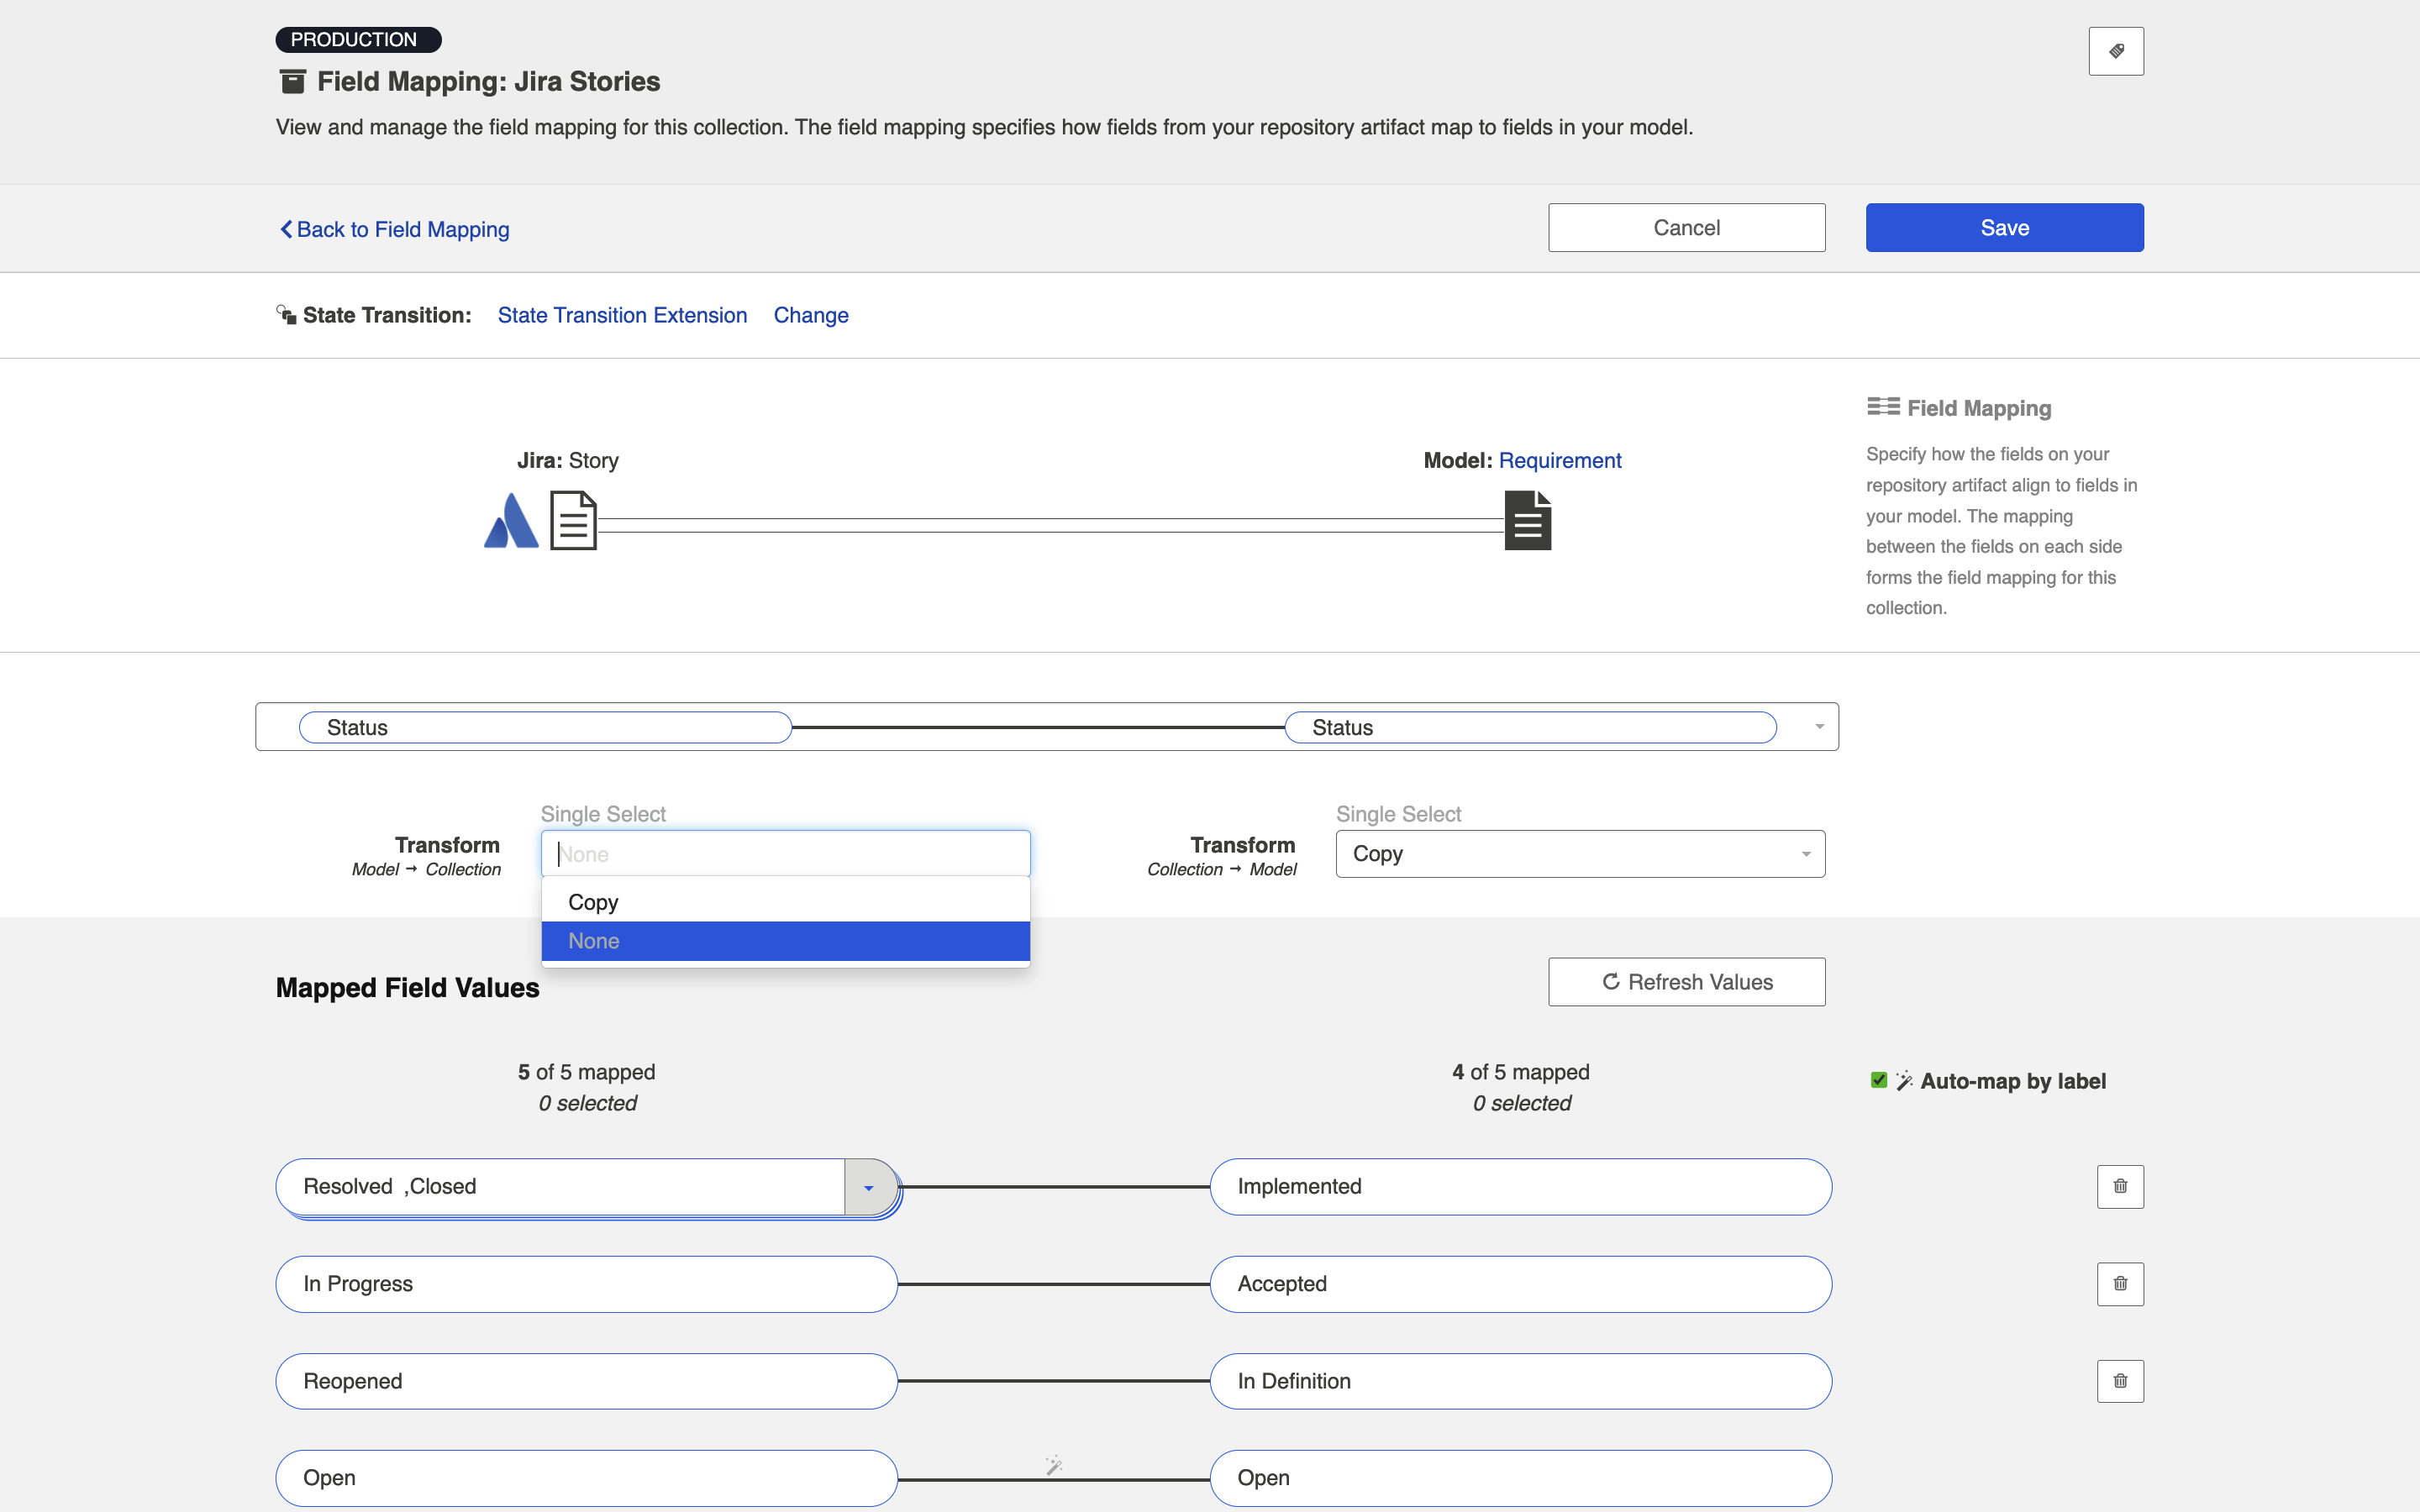
Note: When using a State Transition Extension, the Transform settings of the Status configuration needs to be set from Copy to None on the repository side. This can be done in the Field Mapping screen. Click Save and then Done.
Note: The extension will only impact how data flows from the model to the repository (Jira in this case). If you would like impact how data flows from the repository to the model (and then to whichever target collection is connected on the other side), you will need to configure the field appropriately. If you would like to use a state transition extension on the other side, you must configure that on the corresponding collection's State Transition screen.
Next Steps
Once you have completed your State Transition configuration, your next step will be to configure and review your Artifact Unions if your collection has a single relationship/container field.