
Capability usage
Planview Roadmaps adoption pathway
| 1. Get started | 2. Design and set up | 3. Capability usage | 4. Reports and outputs |
|
Audience |
Project manager, program manager, portfolio manager, product manager |
|
Objective |
Implement the recommendations to get started building your connected roadmap. |
Access Planview Roadmaps
You can access Planview Roadmaps from:
-
Planview Admin
-
Connected Planview product
-
Direct Roadmaps URL
For information about access permissions, see About Access Permissions for Planview Roadmaps.
Get started using Roadmaps-AgilePlace (Roadmaps for Teams)
After accessing Planview Roadmaps, get started building your roadmap with real-time data by adding items to your timeline directly from AgilePlace.
Create roadmap by adding AgilePlace items
Start by adding items to your timeline. There are two ways to add an item to a new roadmap you’ve created.
|
Step |
Description |
Resources |
|
Create an item specifically for the roadmap
|
Create a new roadmap with a name and description. Planned start and finish dates can be assigned manually, or drag items to the interactive timeline to automatically assign dates. |
|
| Add items from connected AgilePlace |
Roadmap items connected to cards in AgilePlace will automatically update with real-time data as work progresses in AgilePlace. Add items to the roadmap from AgilePlace. Filter by board and search for card titles and headers. Items added from AgilePlace with assigned planned start and finish dates are automatically plotted on the roadmap. For items without planned start and finish dates, drag items to the interactive timeline to automatically assign dates, or manually assign dates to the items. Dates can be adjusted on items by clicking and dragging an item directly across the timeline, or by clicking and dragging the end of the item. |
|
Add milestones and dependencies and begin to configure your roadmap
Evaluate your roadmap progress and see potential impacts with milestones and dependencies.
|
Step |
Description |
Resources |
|
Add milestones and dependencies
|
Add milestones to the roadmap to communicate important dates. Assign colors to milestones to visually organize the information on your roadmap. |
|
| Review and manage roadmap |
Configure your roadmap by creating custom roadmap attributes, then use Group By and Color By to visually organize and present information on your roadmap. To present a conceptual roadmap view, hide all dates, or choose to show only planned start or finish dates. Adjust timeframe intervals depending on the level of detail needed. Review, evaluate, and update roadmap items based on changes in planning and delivery activities. Use Date difference mode to visualize and compare the planned start and finish dates on roadmap items to the actual start and finish dates captured from AgilePlace. This feature gives you the option to refresh and update the roadmap with the actual dates.
|

Share with other users and keep stakeholders aligned
Allow stakeholders to have view access only or edit access to make changes to the roadmap.
|
Step |
Description |
Resources |
|
Export your roadmap as an image
|
Publish and export the roadmap as an image to share with cross-functional stakeholders and communicate the vision and expectations with teams and the organization.
|
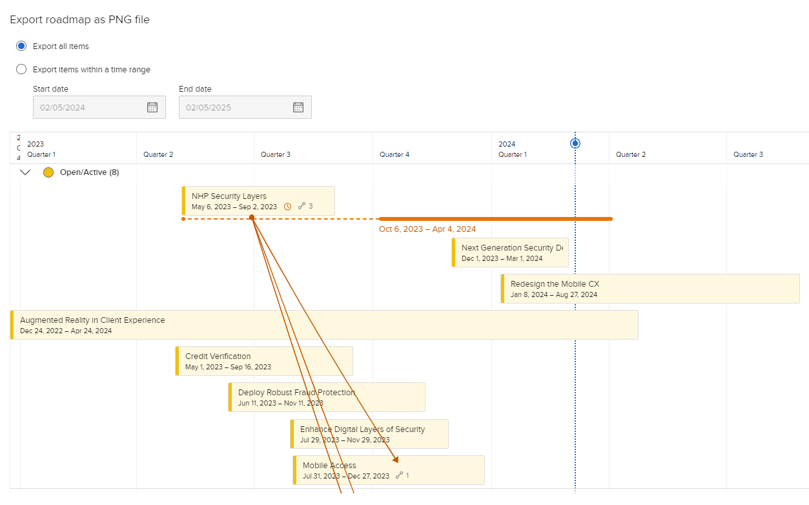
Exporting a roadmap as a PNG file
|
| Manage user access to roadmap |
Share the roadmap for collaboration by granting view-only or editor access to users. When you are giving users permission to access a roadmap, you can specify their ability to collaborate based on level access permissions.
|
Managing user access to a roadmap Viewing User Access to a Roadmap |

Get started using Roadmaps-Portfolios-AgilePlace (Roadmaps for Enterprise)
After accessing Planview Roadmaps, get started building your roadmap with real-time data by adding items to your timeline directly from Portfolios or AgilePlace.
Create roadmap by adding AgilePlace and Portfolios items
You can quickly build your roadmap bringing in work that has been started or is being planned by importing the recommended items from Planview Portfolios (strategic programs, work items, deliverables) or AgilePlace.
|
Step |
Description |
Resources |
|
Manually add items to a roadmap |
Create a new roadmap with a name and description. Planned start and finish dates can be assigned manually, or drag items to the interactive timeline to automatically assign dates. Dates can be adjusted on items by clicking and dragging an item directly across the timeline, or by clicking and dragging the end of the item. |
|
|
Add items from connected AgilePlace |
Add items to the roadmap from connected AgilePlace. You can filter by board or search for card titles and headers. Roadmap items connected to cards in AgilePlace will automatically update with real-time data as work progresses in AgilePlace. Items added from AgilePlace with assigned planned start and finish dates are automatically plotted on the roadmap. For items without planned start and finish dates, drag items to the interactive timeline to automatically assign dates, or manually assign dates to the items. Dates can be adjusted on items by clicking and dragging an item directly across the timeline, or by clicking and dragging the end of the item |
|
|
Add items from connected Portfolios |
Add items to the roadmap from connected Portfolios. Search by entity name or portfolio name to add items to the roadmap. Planview Roadmaps for Enterprise supports adding Strategy, Work, or Outcome entities from Portfolios. Roadmap items connected to Work, Strategy, or Outcomes in Portfolios will automatically update with real-time data from Portfolios. Items added from Portfolios with assigned planned start and finish dates are automatically plotted on the roadmap. For items without planned start and finish dates, drag items to the interactive timeline to automatically assign dates, or manually assign dates to the items. Dates can be adjusted on items by clicking and dragging an item directly across the timeline, or by clicking and dragging the end of the item. |
|
Manage in-roadmap dependencies and milestones and configure your roadmap
Set direction and expectations. You can create outgoing and ingoing dependencies from any item on the roadmap to help mitigate potential risks.
|
Step |
Description |
Resources |
|
Add milestones and dependencies |
Add milestones to the roadmap to communicate important dates. Assign colors to milestones to visually organize the information on your roadmap. Create dependencies between roadmap items to visually show how items interrelate. For more information on potentially impacted items, you can directly access the imported source item to investigate the situation and mitigate any dependency risks.
|
Adding milestones to a roadmap Creating dependencies between items
|
|
Review and manage roadmap |
Configure your roadmap by creating custom roadmap attributes, then use Group By and Color By to visually organize and present information on your roadmap. To present a conceptual roadmap view, hide all dates, or choose to show only planned start or finish dates. Adjust timeframe intervals depending on the level of detail needed. Review, evaluate, and update roadmap items based on changes in planning and delivery activities. Use Date difference mode to visualize and compare the planned start and finish dates on roadmap items to the actual start and finish dates captured from AgilePlace. This feature gives you the option to refresh and update the roadmap with the actual dates.
|
Creating custom attributes for roadmap items Adding additional Portfolios attributes Working with Planview Roadmaps
|

TIP
Configure the settings for individual roadmaps and the options for working in the roadmap timeline to optimize your view. See Working with Planview Roadmaps.
Compare planned dates from AgilePlace and create new work
See impacted items shift and highlight according to the source, AgilePlace or Portfolios. You can see what the potential impacts are by viewing the dependencies, and accessing the source item for more information. Create new work based on any unplanned changes, if neccesary.
|
Step |
Description |
Resources |
|
Users and teams update AgilePlace and Portfolios |
Portfolio leadership updates enterprise/strategic entities in Portfolios. As teams update cards in AgilePlace, roadmap items connected to cards in AgilePlace automatically update with real-time data. Date difference mode visualizes the difference between planned start and finish dates on the roadmap to actual start and finish dates on connected work in AgilePlace. This feature gives you the option to refresh and update the roadmap with the actual dates. |
Viewing differences between dates for roadmap items and source items |
|
Create new work in AgilePlace based on Roadmap plans by converting unlinked items |
You can convert an unlinked roadmap item to a card on an AgilePlace board. When you convert an item, you select from the boards that you have permissions to add cards to and specify the card type. |
Add items for future planned work or as placeholders Converting roadmap items to AgilePlace cards
|
Share with other users and keep stakeholders aligned
Allow stakeholders to have view access only or edit access to make changes to the roadmap.
|
Step |
Description |
Resources |
|
Export your roadmap as an image |
Publish and export the roadmap as an image to share with cross-functional stakeholders and communicate the vision and expectations with teams and the organization.
|
Exporting a roadmap as a PNG file
|
|
Manage user access to roadmap |
You can share your roadmaps with one or more other users. When you are giving users permissions to access a roadmap, you can specify the level and their ability to collaborate.
|
Managing user access to a roadmap Viewing User Access to a Roadmap |
Recommendations
Use these best practices to ensure you are able to realize the value of the connected Roadmaps solution. For more information on how to expand the use of the roadmap to report project status, communicate with stakeholders, and inform decision making, see Gain insights with reports and outputs.
|
Recommendation |
Description |
| Convert unlinked roadmap items into AgilePlace cards |
You can convert an unlinked roadmap item to a card on an AgilePlace board. When you convert an item, you select from the boards that you have permissions to add cards to, and specify the card type. There is also an option to add the custom item attributes to the card description. The resulting card has the same name (title) and description as the item and is created in the default drop lane on the board. A link to the card is added to the item in Roadmaps, and you can no longer edit its name, description, or standard attributes. You can edit the planned dates on the item, but the corresponding dates on the card are not changed in AgilePlace. If the planned dates are edited on the card in AgilePlace, you have the option in Roadmaps to update the planned dates for the item to match. Changes to the other attributes in AgilePlace are updated automatically in the Roadmaps item. |
| Utilize objectives and key results (OKRs) to visualize and communicate how objectives are progressing | Group by objectives and key results (OKRs) to ensure teams and stakeholders are aligned on what is being done, when, and most importantly, why, to facilitate a unified understanding of priorities. The roadmap provides a visual representation of OKRs, timelines, and progress percentages, which can easily be shared with executives, teams, or other stakeholders. Utilize the scalable list view to effectively see and manage OKR alignment. |
| Ensure the right people have access | Ensure that all stakeholders involved in the roadmap deliverables and outcomes have access to your roadmap so they can view up-to-date changes and align across all levels of the organization. This will help you break down silos during the planning process, and bring together the right expertise across business units, teams, and geographies. |
| Review your roadmap regularly | Review your roadmap on an ongoing basis (such as quarterly) and maintain an adaptive and responsive mindset as you learn new information or receive customer feedback. Reassess, adapt, and communicate changes to stakeholders as your roadmap evolves – but to maintain stakeholder confidence in your strategic decision-making process, avoid continuously updating or never updating your roadmap. View and manage your work in the roadmap in a hierarchal view to visualize how high-level strategic goals cascade into actionable initiatives, features or tasks. By viewing work in a hierarchy, stakeholders can effectively allocate resources and teams can prioritize higher-level objectives first, ensuring that critical work is completed before focusing on less essential tasks. |
| Tailor the level of detail |
To gain stakeholder buy-in, your roadmap should have just enough detail to communicate the strategic vision, but not so much that it overwhelms viewers. Tailor the level of detail on your roadmap to your audience. For example, a portfolio roadmap for executives may have a monthly or quarterly planning horizon that covers multiple products with very few detailed activities, whereas a development roadmap may include just one product over a shorter, two-week planning sprint, broken down into detailed development stories and tasks. |
| Use your roadmap as a collaboration tool | Collaboration is at the heart of every successful roadmap. Engage with stakeholders throughout the entire process. Not only does this keep them in the loop so they have a better idea of needs and expectations, but it also ensures that everyone’s priorities are aligned and that all executives and department heads are working together to achieve the same strategic business goals. |
| Use your roadmap for planning | Keep a backlog of unplanned work, such as a list of strategic programs or placeholders for programs for planning purposes. Simply drag the work items to the timeline to visualize scenarios for planning purposes. |