
How do I automate internal workflows using Hub's public API?
Last Updated: March 11, 2025 | Applicable Hub Versions: All
Answer
Planview Hub offers public APIs that requires appropriate authentication for access. Beginning with the 24.4 release, enhanced authentication measures have been implemented. All external inbound API calls must utilize a bearer token generated by Keycloak.
To automate internal workflows using Hub's public API, follow the below steps:
- Create new service client to enable Client authentication
-
Make API call to Hub to get a Bearer token using client ID and secret
-
Make API call to Hub using Bearer token retrieved in step 2
NOTE
The general convention for accessing Hub public APIs is /api/v1/<resource-name>
For example, errors could be retrieved through /api/v1/errors
The full list of the public APIs available can be found at:
https://<hub-site-url>/#/apidocumentation
Detailed Steps
Create new service client that accepts API call
-
Access the Keycloak Admin console with root.
-
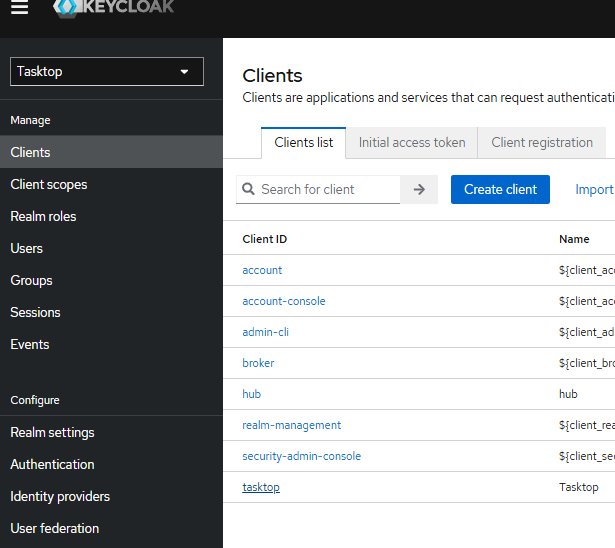
Open the Tasktop Realm.
-
Access the Tasktop client (Client → tasktop).
-
-
Export the tasktop client.
-
-
Select Import client and select the tasktop export json downloaded from the previous step.
-
Provide a new client ID and name (e.g., Hub).
-
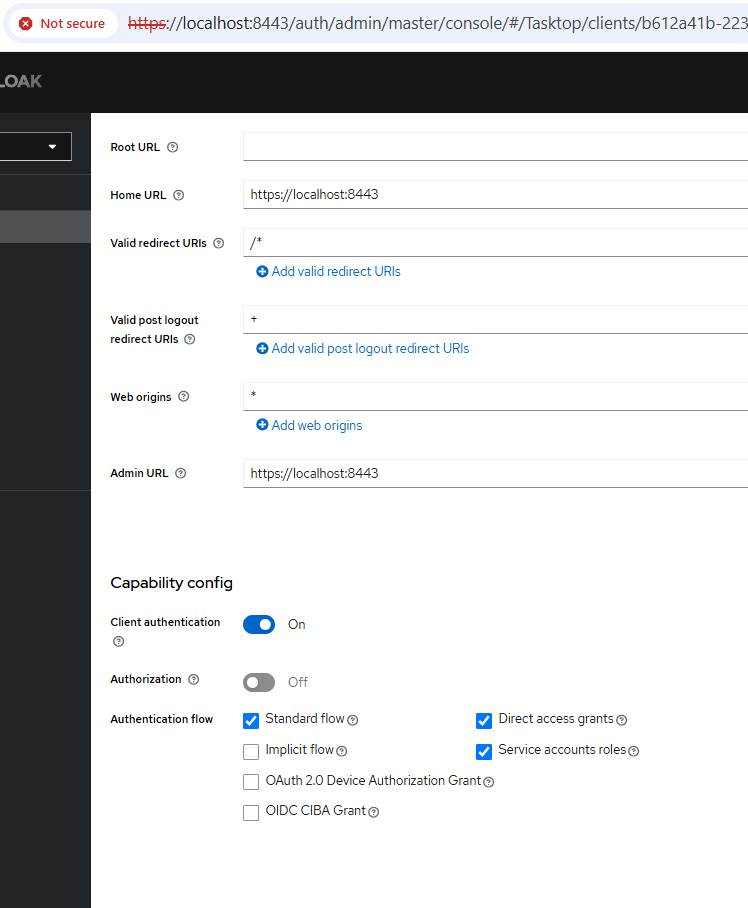
Enable Client authentication on from the setting tab of the new client. This sets OIDC connection to be confidential.
-
Note: For the client enabled this setting cannot use direct UI login.
-

-
-
Enable service account roles and click Save.
-
-
Assign TasktopUser on the Service account role.
-
-
Ensure all changes are saved.


Make API call to Hub to get a Bearer token
-
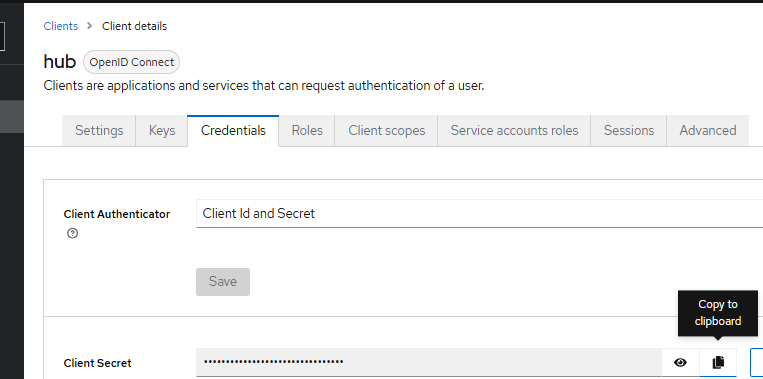
Retrieve the Client Secret from the new client Credentials view from Keycloak.
-
From the Tasktop Realm, Click Clients under the Manage menu.
-
Click the new client created from the previous step in the Clients list under the Client ID column.
-
On the Client details screen for the tasktop client, click the Credentials tab.
-
Click the Copy to clipboard button for the Client Secret.
-
Note: The client secret will be a string of letters and numbers.
-
-
-
-
POST a call to Hub to generate a Bearer token with
client_idandclient_secretin your script or API tool of choice. Depending on whether you have hardcoded authentication in the script or configured the script to prompt for authentication, you can now copy the Client Secret into the script where referenced, or you can submit the client secret when prompted.-
API endpoint:
https://IP_OR_HUB_SERVER_DOMAIN:HUB_PORT/auth/realms/Tasktop/protocol/openid-connect/token -
body data
grant_type=client_credentials&client_id=NEW_ClIENT_ID&client_secret=NEW_CLIENT_SECRET_VALUE -
Example call to Hub with
curl
-
curl -v -k -X POST \
    -H "Content-Type: application/x-www-form-urlencoded" \
    -d 'grant_type=client_credentials&client_id=NEW_ClIENT_ID&client_secret=NEW_CLIENT_SECRET_VALUE' \
    "https://localhost:8443/auth/realms/Tasktop/protocol/openid-connect/token"
Make API call to Hub using the Bearer token
Call Hub APIs with Authorization: Bearer Header with token retrieved from the previous step. Details of each public API can be found here: https://<hub-site-url>/#/apidocumentation
Example call to Hub with curl
curl -k -X GET "https://localhost:8443/api/v1/errors?pageSize=10&type=ALL" \
  -H "accept: */*" \
  -H "Authorization: Bearer <full-token-string>"
Note: localhost only works if Hub is running with ssl.skip-verification=true. For the production instance that ssl.skip-verification is set to false, ensure to use proper domain or IP of the Hub server.