Micro Focus Dimensions RM
- Last updated
- Save as PDF

Overview
Micro Focus Dimensions RM (formerly known as Serena Dimensions RM) offers a unified solution that simplifies the complex process of documenting, analyzing, tracing, and prioritizing requirements, and ensuring that necessary information is communicated to stakeholders.
Connector Setup Details
This section describes the basic steps needed to prepare your Dimensions RM instance for use with Viz.
Minimal User Permissions & Viz User
We recommend that you create a new user within your external tool, to be used only for Viz. This is the user information you will enter when setting up your tool connection within Planview Viz. By creating a new user, you will ensure that the correct permissions are granted.
In general, your user account should have sufficient permissions to read artifacts in your tool.
Your user should have a secure password or token. Please be aware that Viz will not allow you to save a tool connection utilizing a weak password/token, such as 'tasktop.'
Before creating a connection to the Dimensions RM repository, a user with the necessary permissions must be created if one does not exist already. The permissions can be given either to a specific user or to a group of users. Follow the steps below to create a user and a group with the necessary permissions for use with the connector:
- In the RM Manage tool, switch to the Users view.
- Select the Users node in the tree and create a new user.
- Give the new user a name and hit Enter.
- Switch to the Groups view.
- Select the Groups node in the tree and create a new group.
- Give the new group a name.
- Switch to the Projects view.
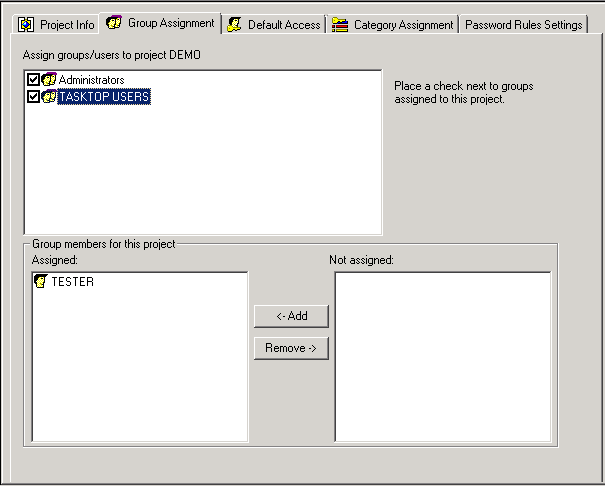
- Select the desired project and switch to the Group Assignment tab.
- Click the checkbox beside the group created above to assign the group to the project.
- Click on the group and make sure that the user created above is in the Assigned bucket.

- Switch to the Default Access tab and expand the tree for the new group created above.
- Select Categories and click the checkbox beside Read.
- Select Classes and click the checkbox beside Read.
- Select Relationships and click the checkbox beside Read.
For the Dimensions RM connector to function properly, the user used for authentication must be assigned to the desired project and must have the following permissions on this project:
- Read permissions on Classes
- Read permissions on Relationships
- Read permission on Categories
Connecting to the Micro Focus Dimensions RM Repository
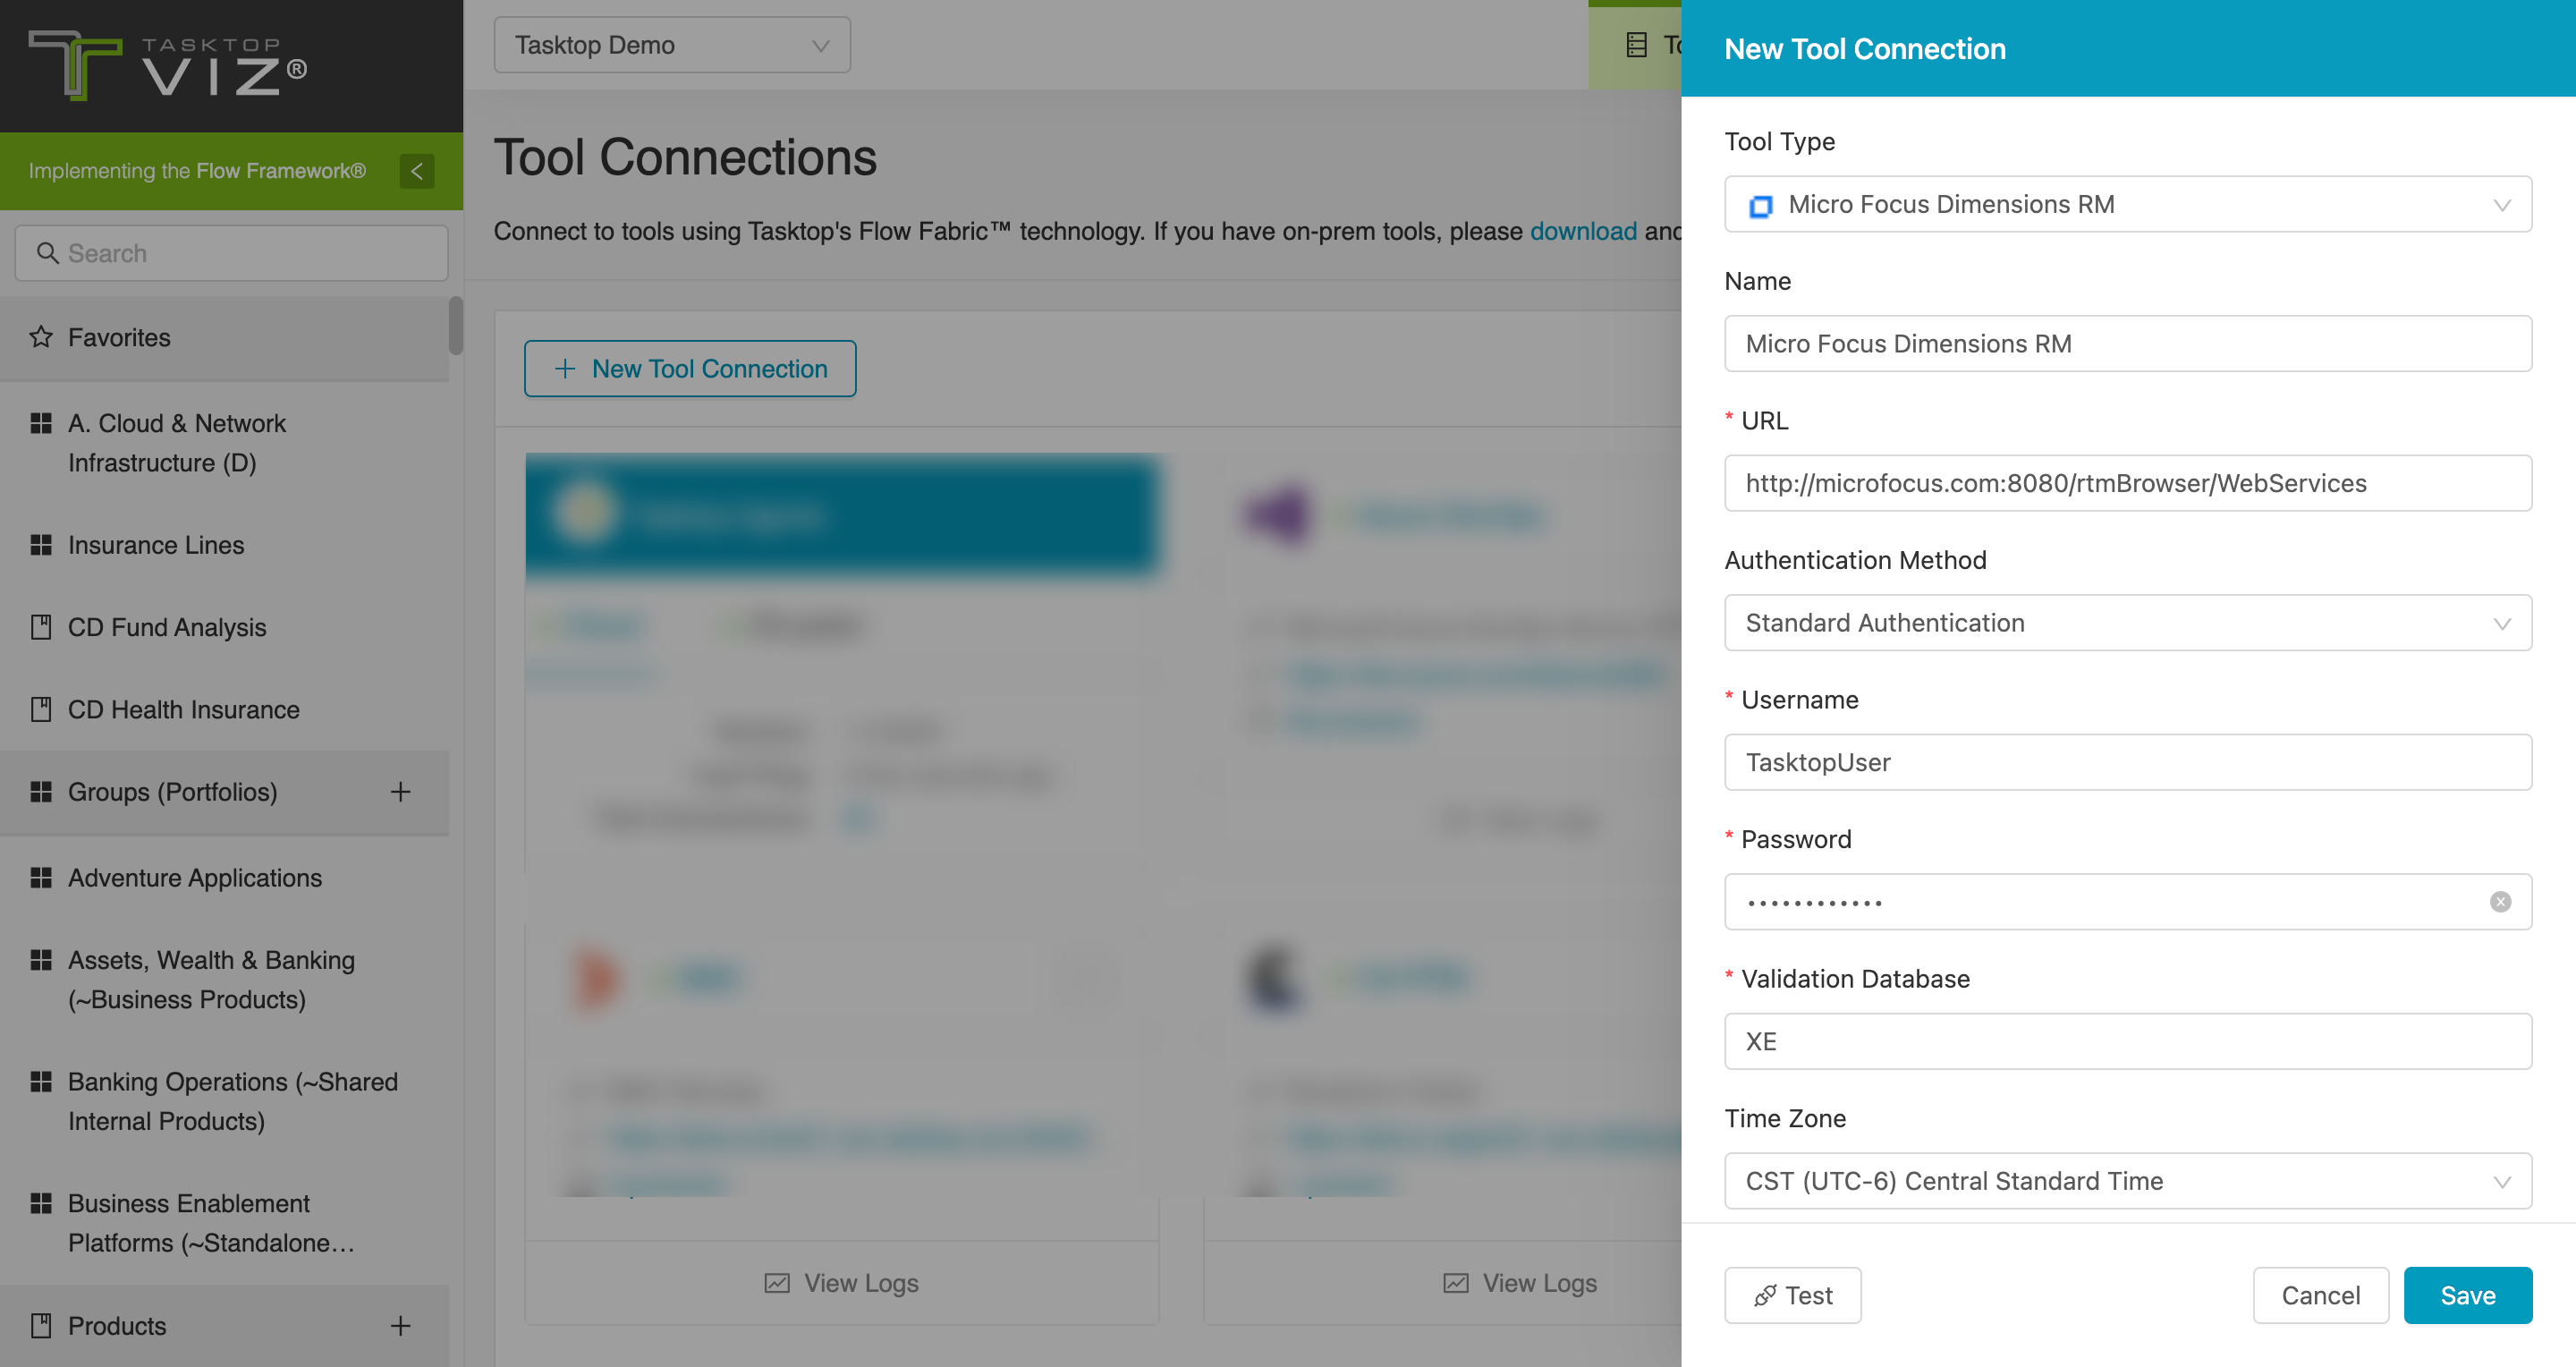
Standard Authentication
Required Fields:
- URL
- Example Format: http://microfocus.com:8080/rtmBrowser/WebServices
- Username
- Password
- Validation Database
- This is the database used for validation of the credentials (artifacts will not be restricted to this database).
- Time Zone
- The time zone used by the Dimensions RM server.

Supported Artifacts
Supported Work Items
|
Supported Artifact Type |
Applicable Repository Versions |
Unique URL? |
|---|---|---|
|
Component Requirement |
Any supported repository version: |
Yes |
|
Product Requirement |
Any supported repository version: |
Yes |
|
Defect |
Any supported repository version: |
Yes |
|
Test |
Any supported repository version: |
Yes |
Supported Containers
|
Containers that can be modeled as Flow Items |
Applicable Repository Versions |
Unique URL? |
|---|---|---|
|
N/A |
|
|
|
Containers used to which artifacts are included in an Artifact Set |
|
|
|
Projects |
Any supported repository version: |
N/A |
Supported Field Types
Planview Viz supports configuring rule-based modeling (i.e., conditional modeling) using the field types shown below.
Note: If one field of a given type is supported, others that are also that type in theory should also work. However, sometimes there are instances in which this is not the case due to the repository. So, while we can claim support for fields at the type level, there is a chance that some specific fields of a given type will not function properly.
|
Standard Field Type |
How is field type referenced in the repository? |
Sample Repository Fields Supported |
Particular Repository Fields NOT Supported |
|---|---|---|---|
|
|
Alphanumeric |
Owner Source Object Paragraph Title Paragraph ID Revision Title |
|
|
|
List |
Verification Status Current Status Workflow State |
|
|
|
List |
|
|
|
|
|
Active Inactive |
|

