Salesforce
- Last updated
- Save as PDF

Overview
Providing superior customer experiences requires that all stakeholders work together. Yet if the software development and delivery teams are using one set of tools, and the customer-facing teams are using other tools, their ability to work together smoothly is often fractured.
Supported Tools
Planview Viz supports the following Salesforce tools:
- Salesforce Sales Cloud
- Salesforce Service Cloud
- Salesforce Marketing Cloud
Additional Salesforce applications and plug-ins not listed above are not officially supported.
Supported Editions
Planview Viz only provides support for editions of Salesforce that allow API access.
Note: While Planview only provides support for Salesforce editions that allow API access, not all editions with API access are supported.
Connector Setup Details
This section describes the basic steps needed to prepare your Salesforce instance for use with Viz.
Minimal User Permissions & Viz User
We recommend that you create a new user within your external tool, to be used only for Viz. This is the user information you will enter when setting up your tool connection within Planview Viz. By creating a new user, you will ensure that the correct permissions are granted.
In general, your user account should have sufficient permissions to read artifacts in your tool.
Your user should have a secure password or token. Please be aware that Viz will not allow you to save a tool connection utilizing a weak password/token, such as 'tasktop.'
See instructions on how to create a user in Salesforce.
List of minimal user permissions:
Go to Manage Users, then Profiles and select your User. Under the Apps section, click on Object Settings, and ensure the following:
- Read is set for all object types (Account, Case, Solution, Contact, Lead, Engagement Case, Events, Tasks, Ideas).
- This should also be done for any custom objects that are created.
Connecting to the Salesforce Repository
Standard Authentication
Required Fields:
- Location/Connection URL
- Example Format: https://server.salesforce.com
- Username
- Password
-
Consumer Key (see details below)
- Consumer Secret (see details below)
Note: If you are unable to log in after entering the required fields, please follow the steps outlined here to retrieve your security token and attach the security token directly to the end of your password.
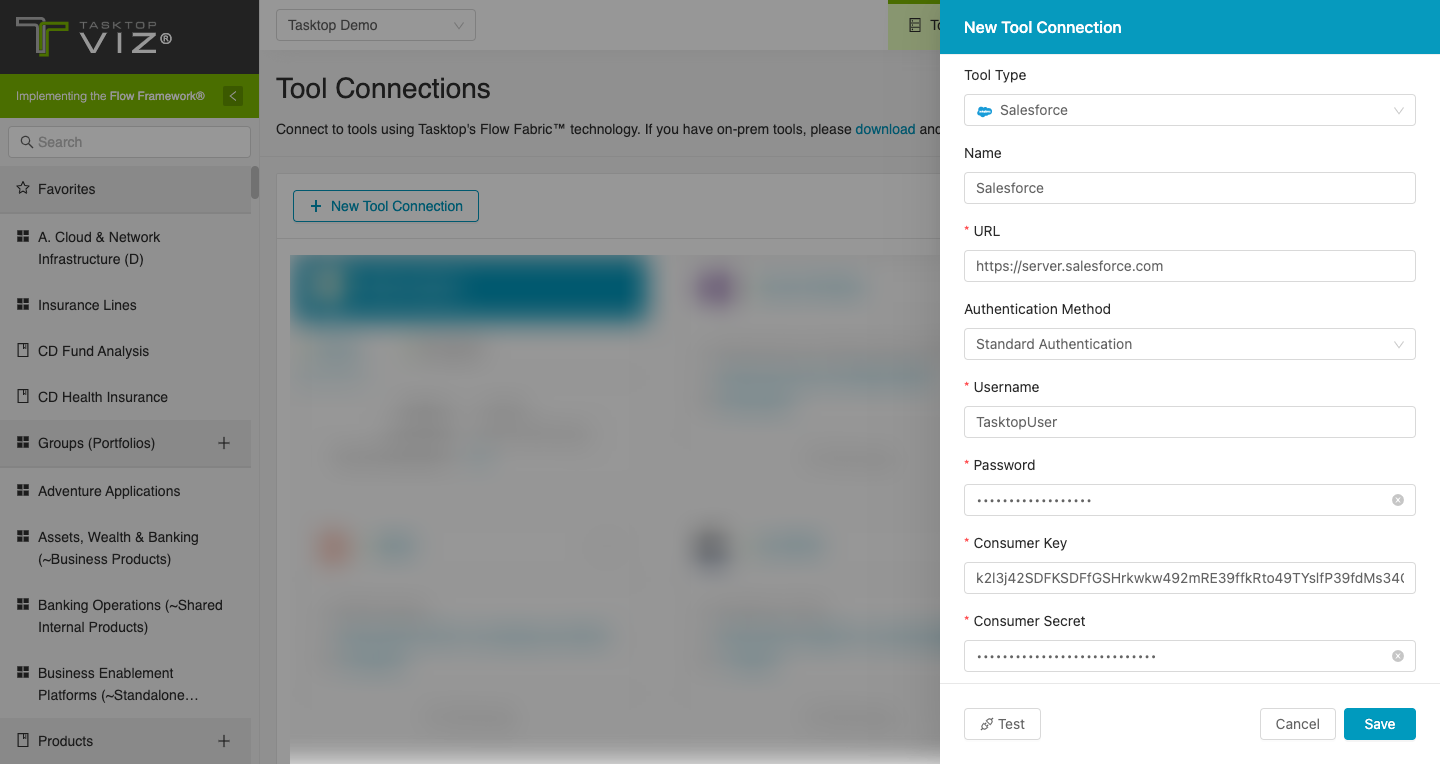
Find Consumer Key and Consumer Secret
Note: You must be logged in as the administrator to access the Customer Key and Customer Secret.
Salesforce Classic
Navigate to the Setup window.
In the left panel, find Build > Create > Apps
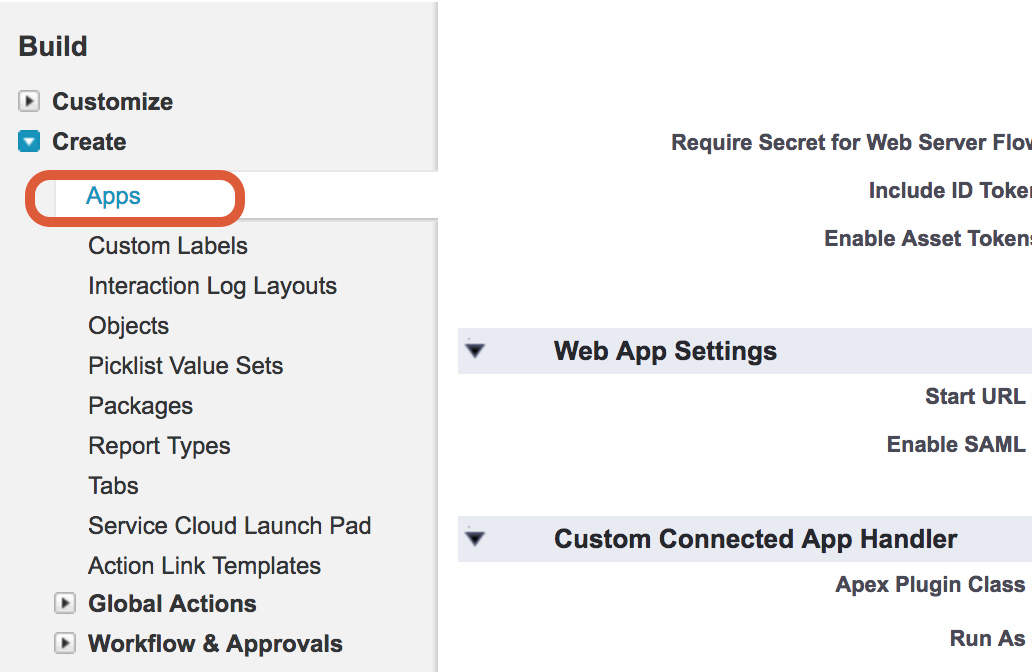
Scroll to the bottom of the page and see the Connected Apps section.

Either select an existing application that allows integration, or click New to create a new one. If creating a new one, specify required fields and enable OAuth Settings and add Full access:

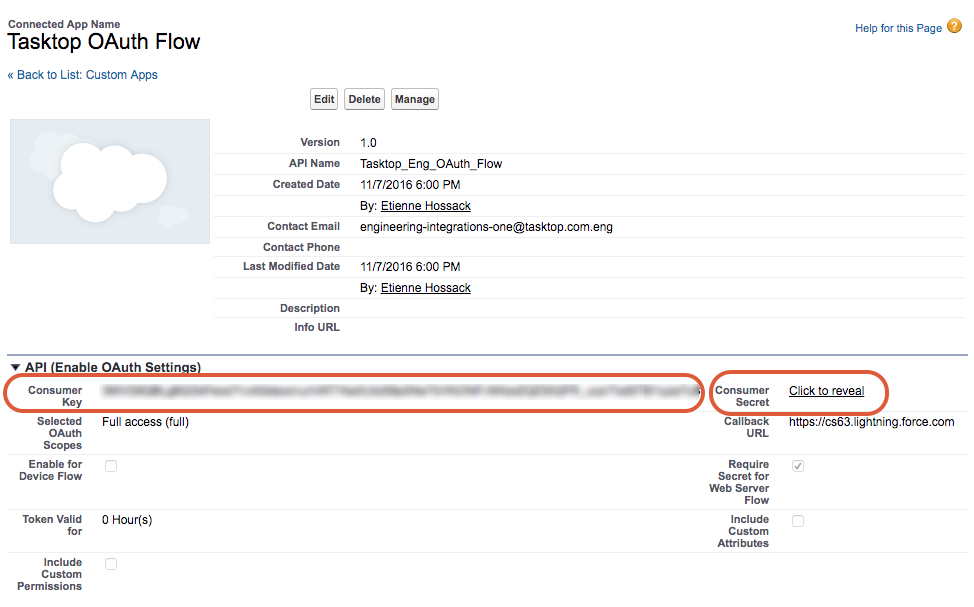
Once saved, select your Connected App from the list.
You will see the Consumer Key and Consumer Secret on that page. Enter those values in the appropriate fields on the Tasktop Repository Connection screen.
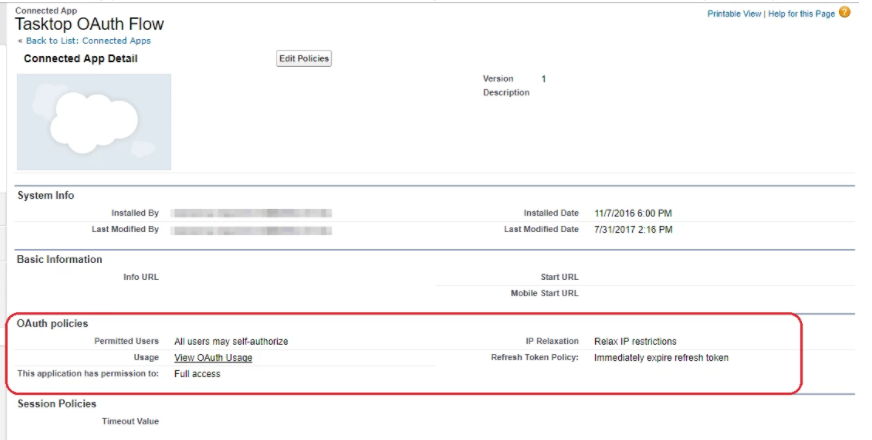
You must also ensure that the user using your Connected App is authorized and not using a restricted IP.
To do this, click Manage at the top of the Connected App page to verify and edit your OAuth policies.
Salesforce Lightning
Navigate to the Setup screen.
In the left panel, click Apps > App Manager

Either select an existing application that allows integration, or click New to create a new one. If creating a new app, specify required fields and enable OAuth Settings and add Full access:
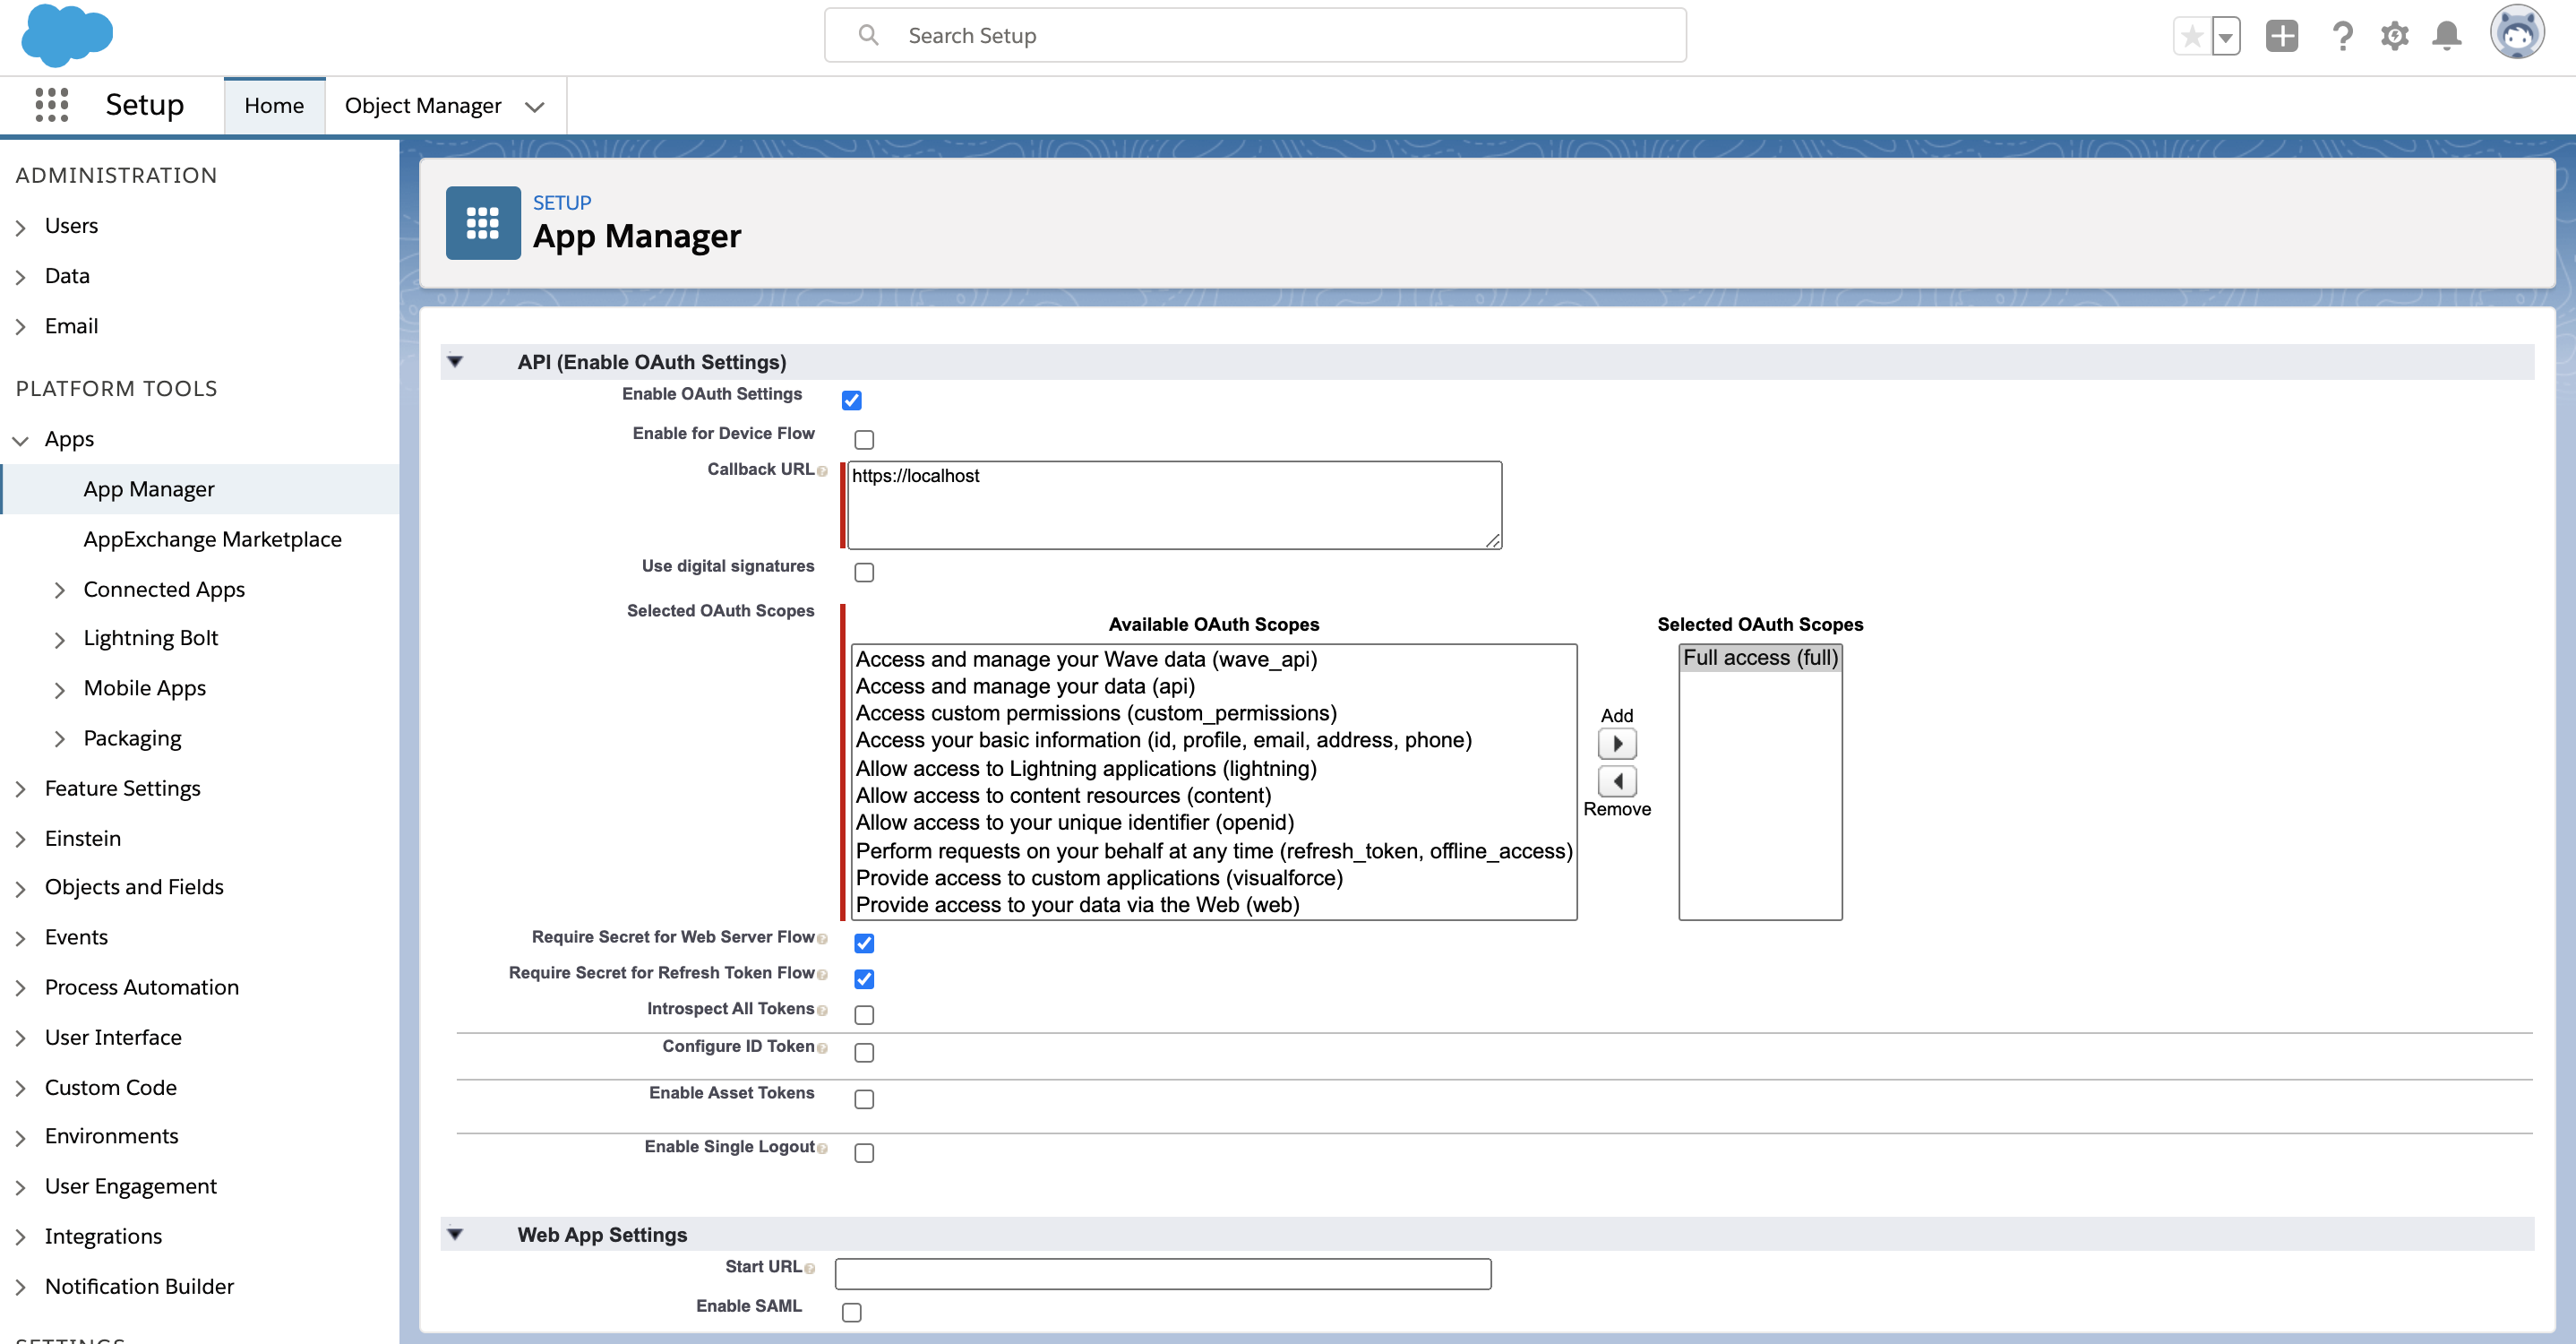
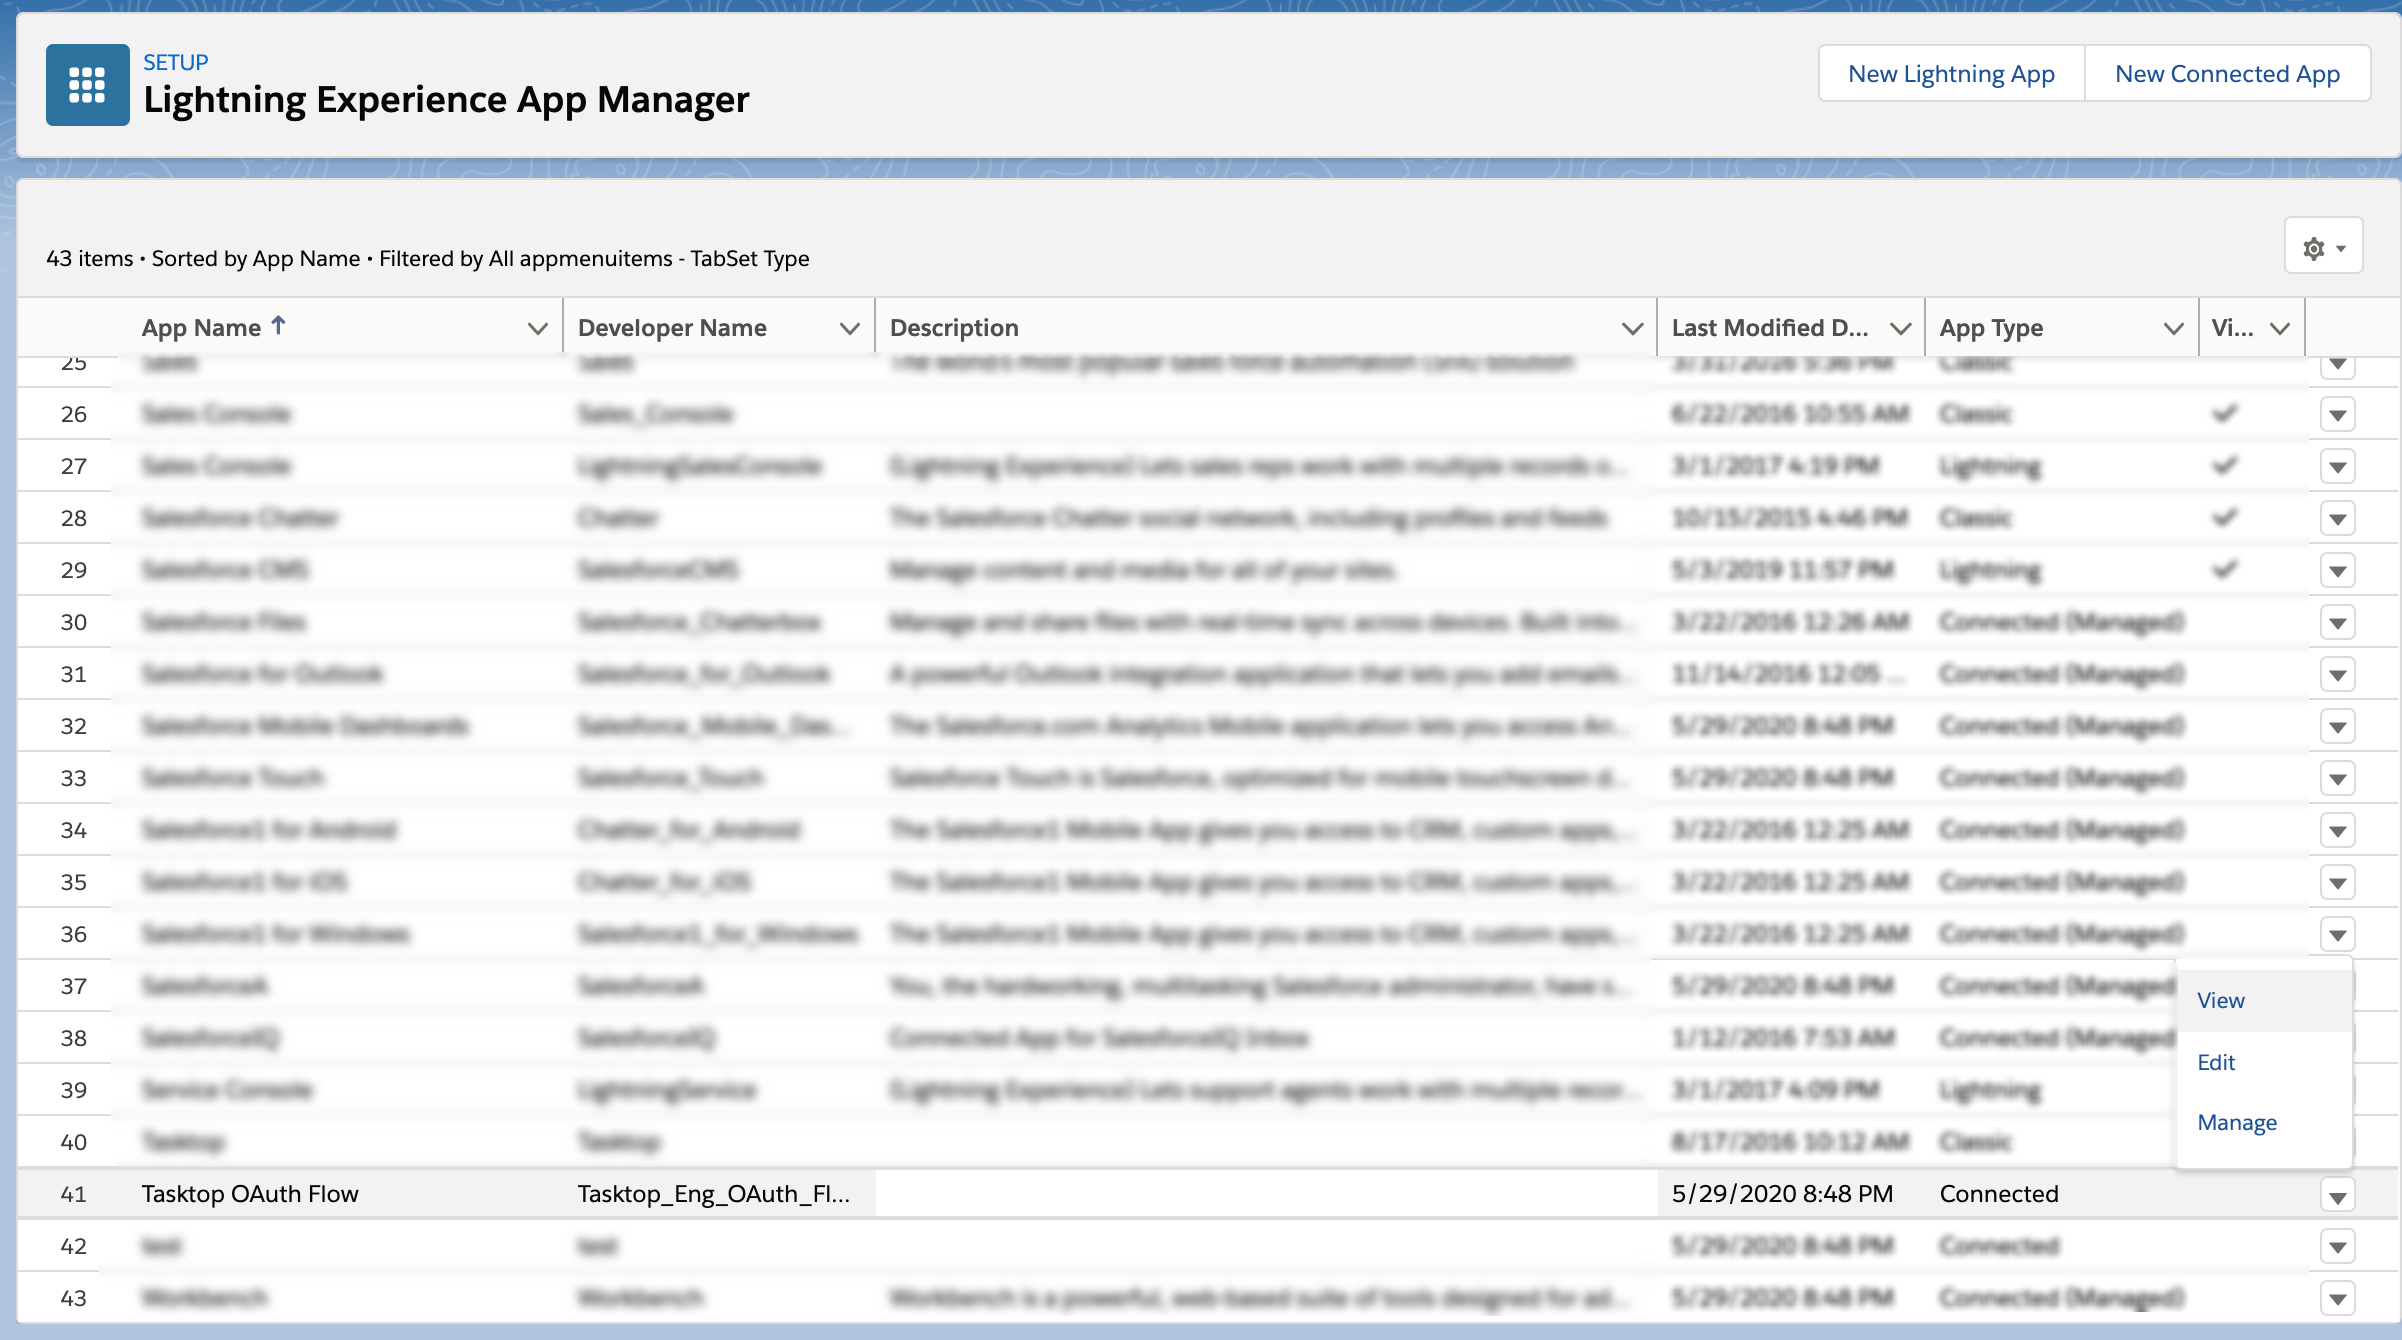
Once saved, select the Connected App from the list.
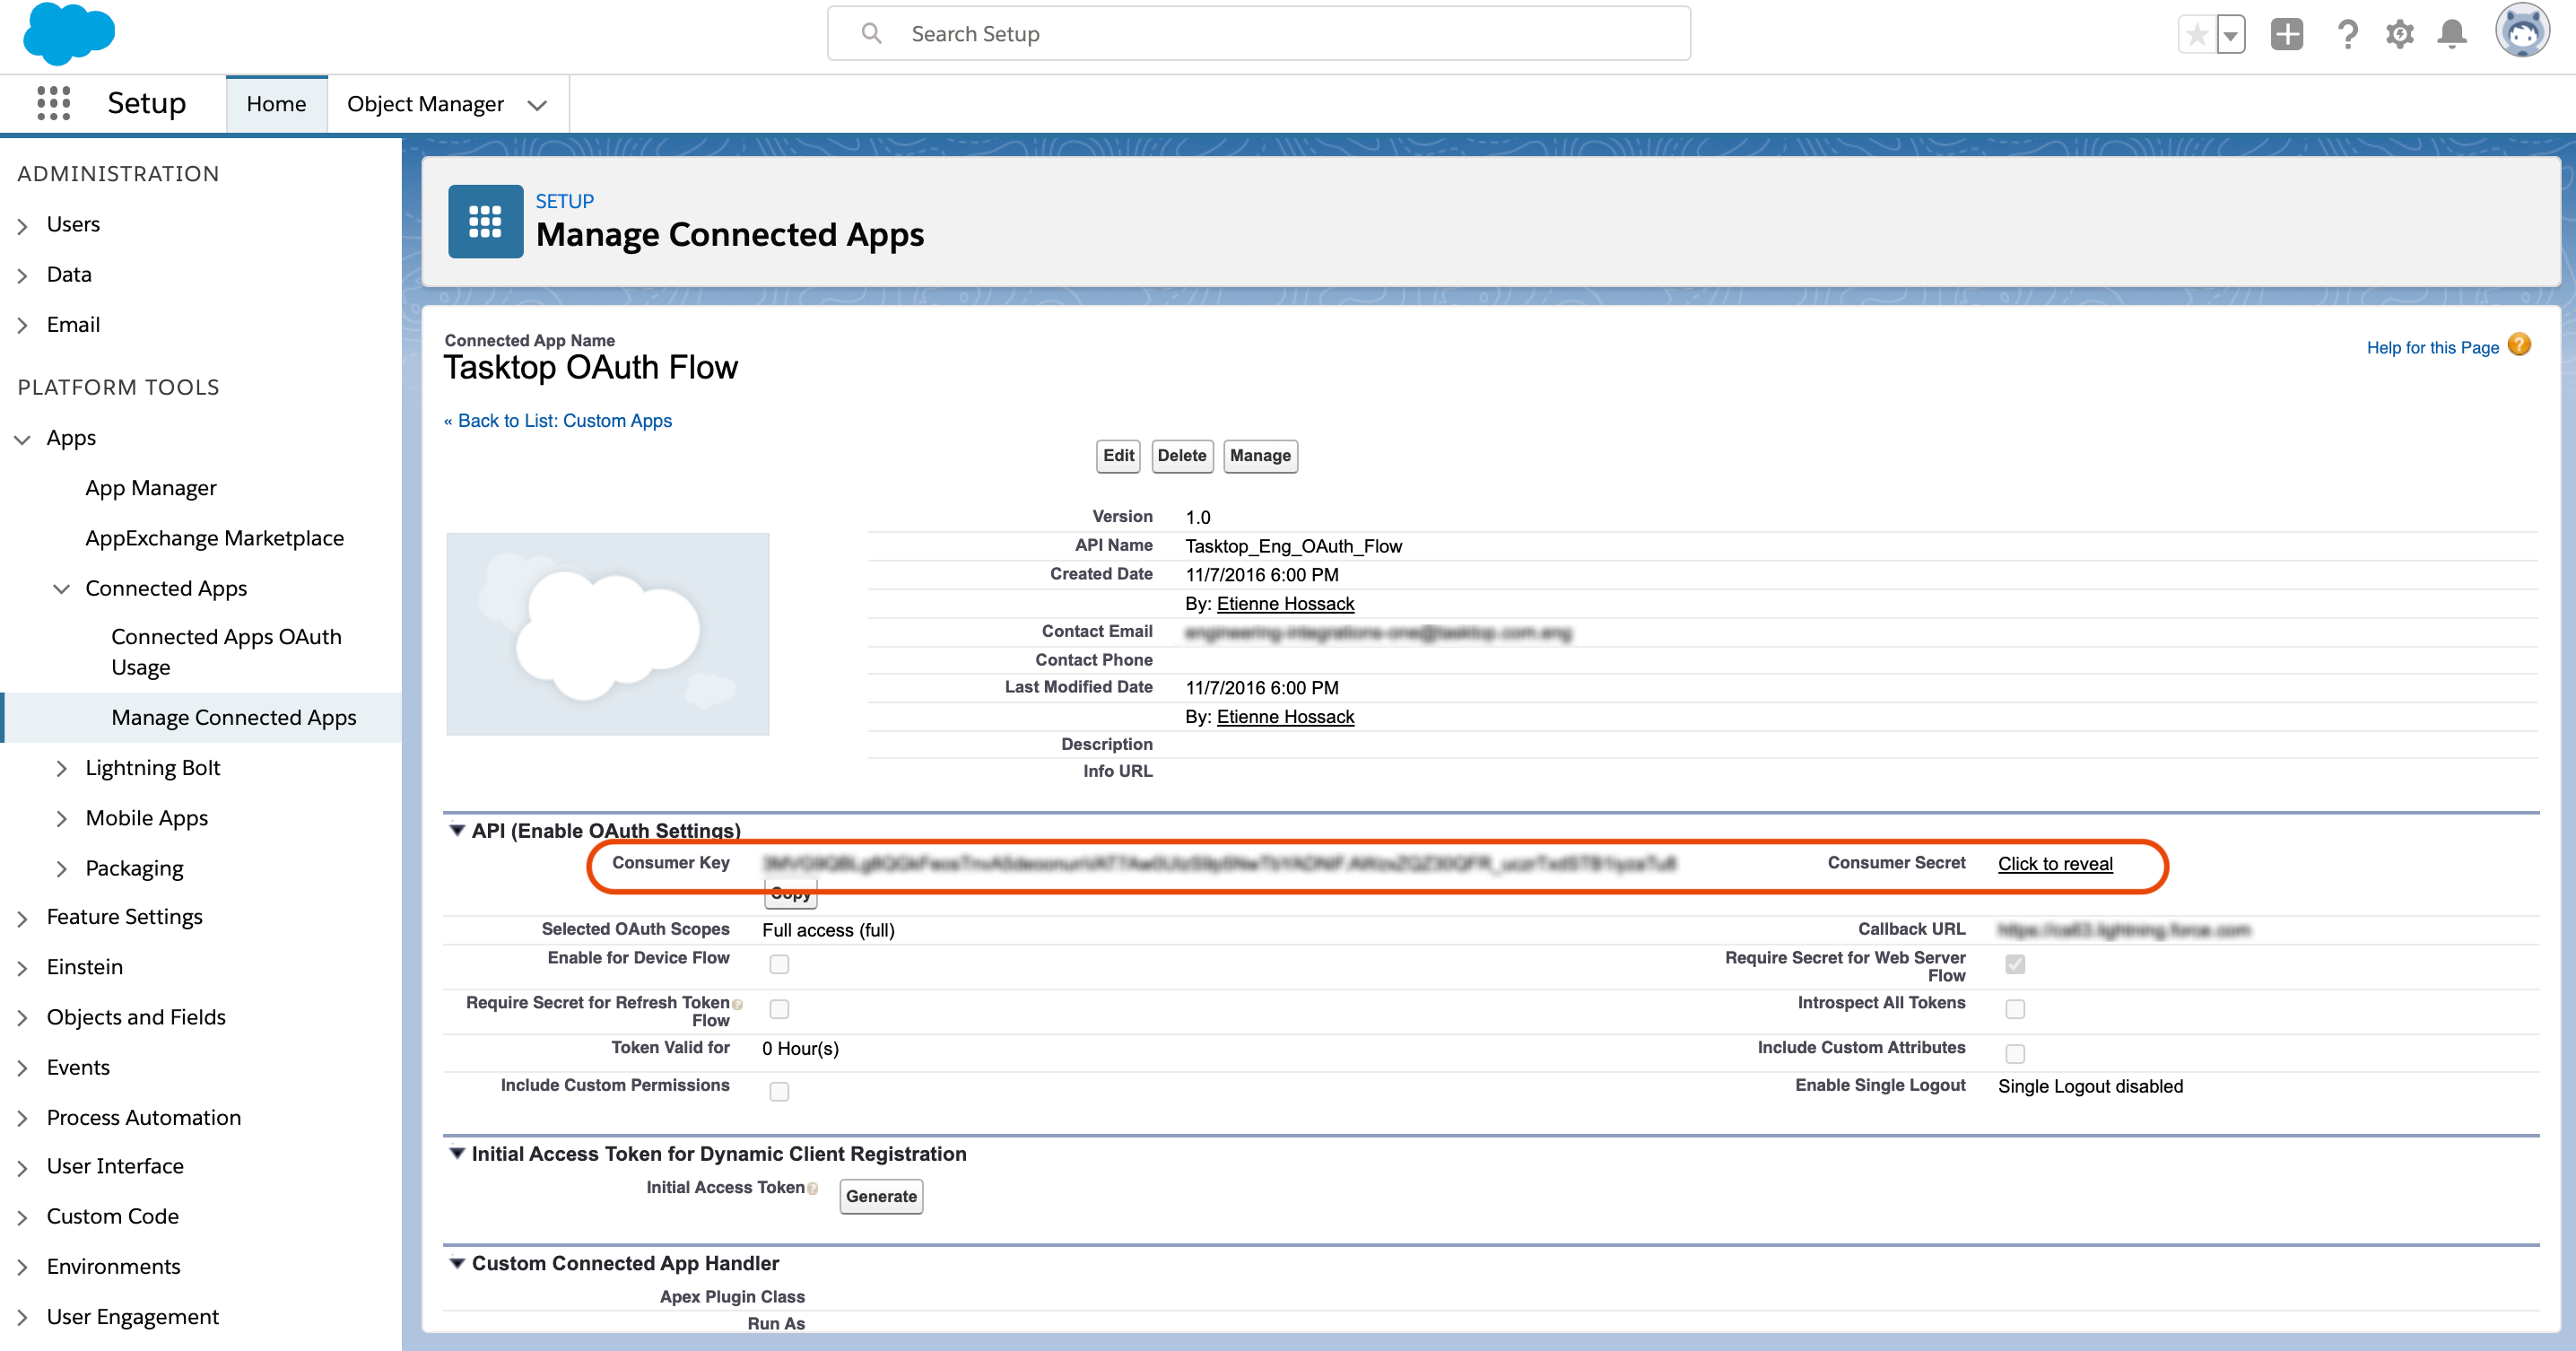
You will see the Consumer Key and Consumer Secret on that page. Enter those values in the appropriate fields on the Repository Connection screen.
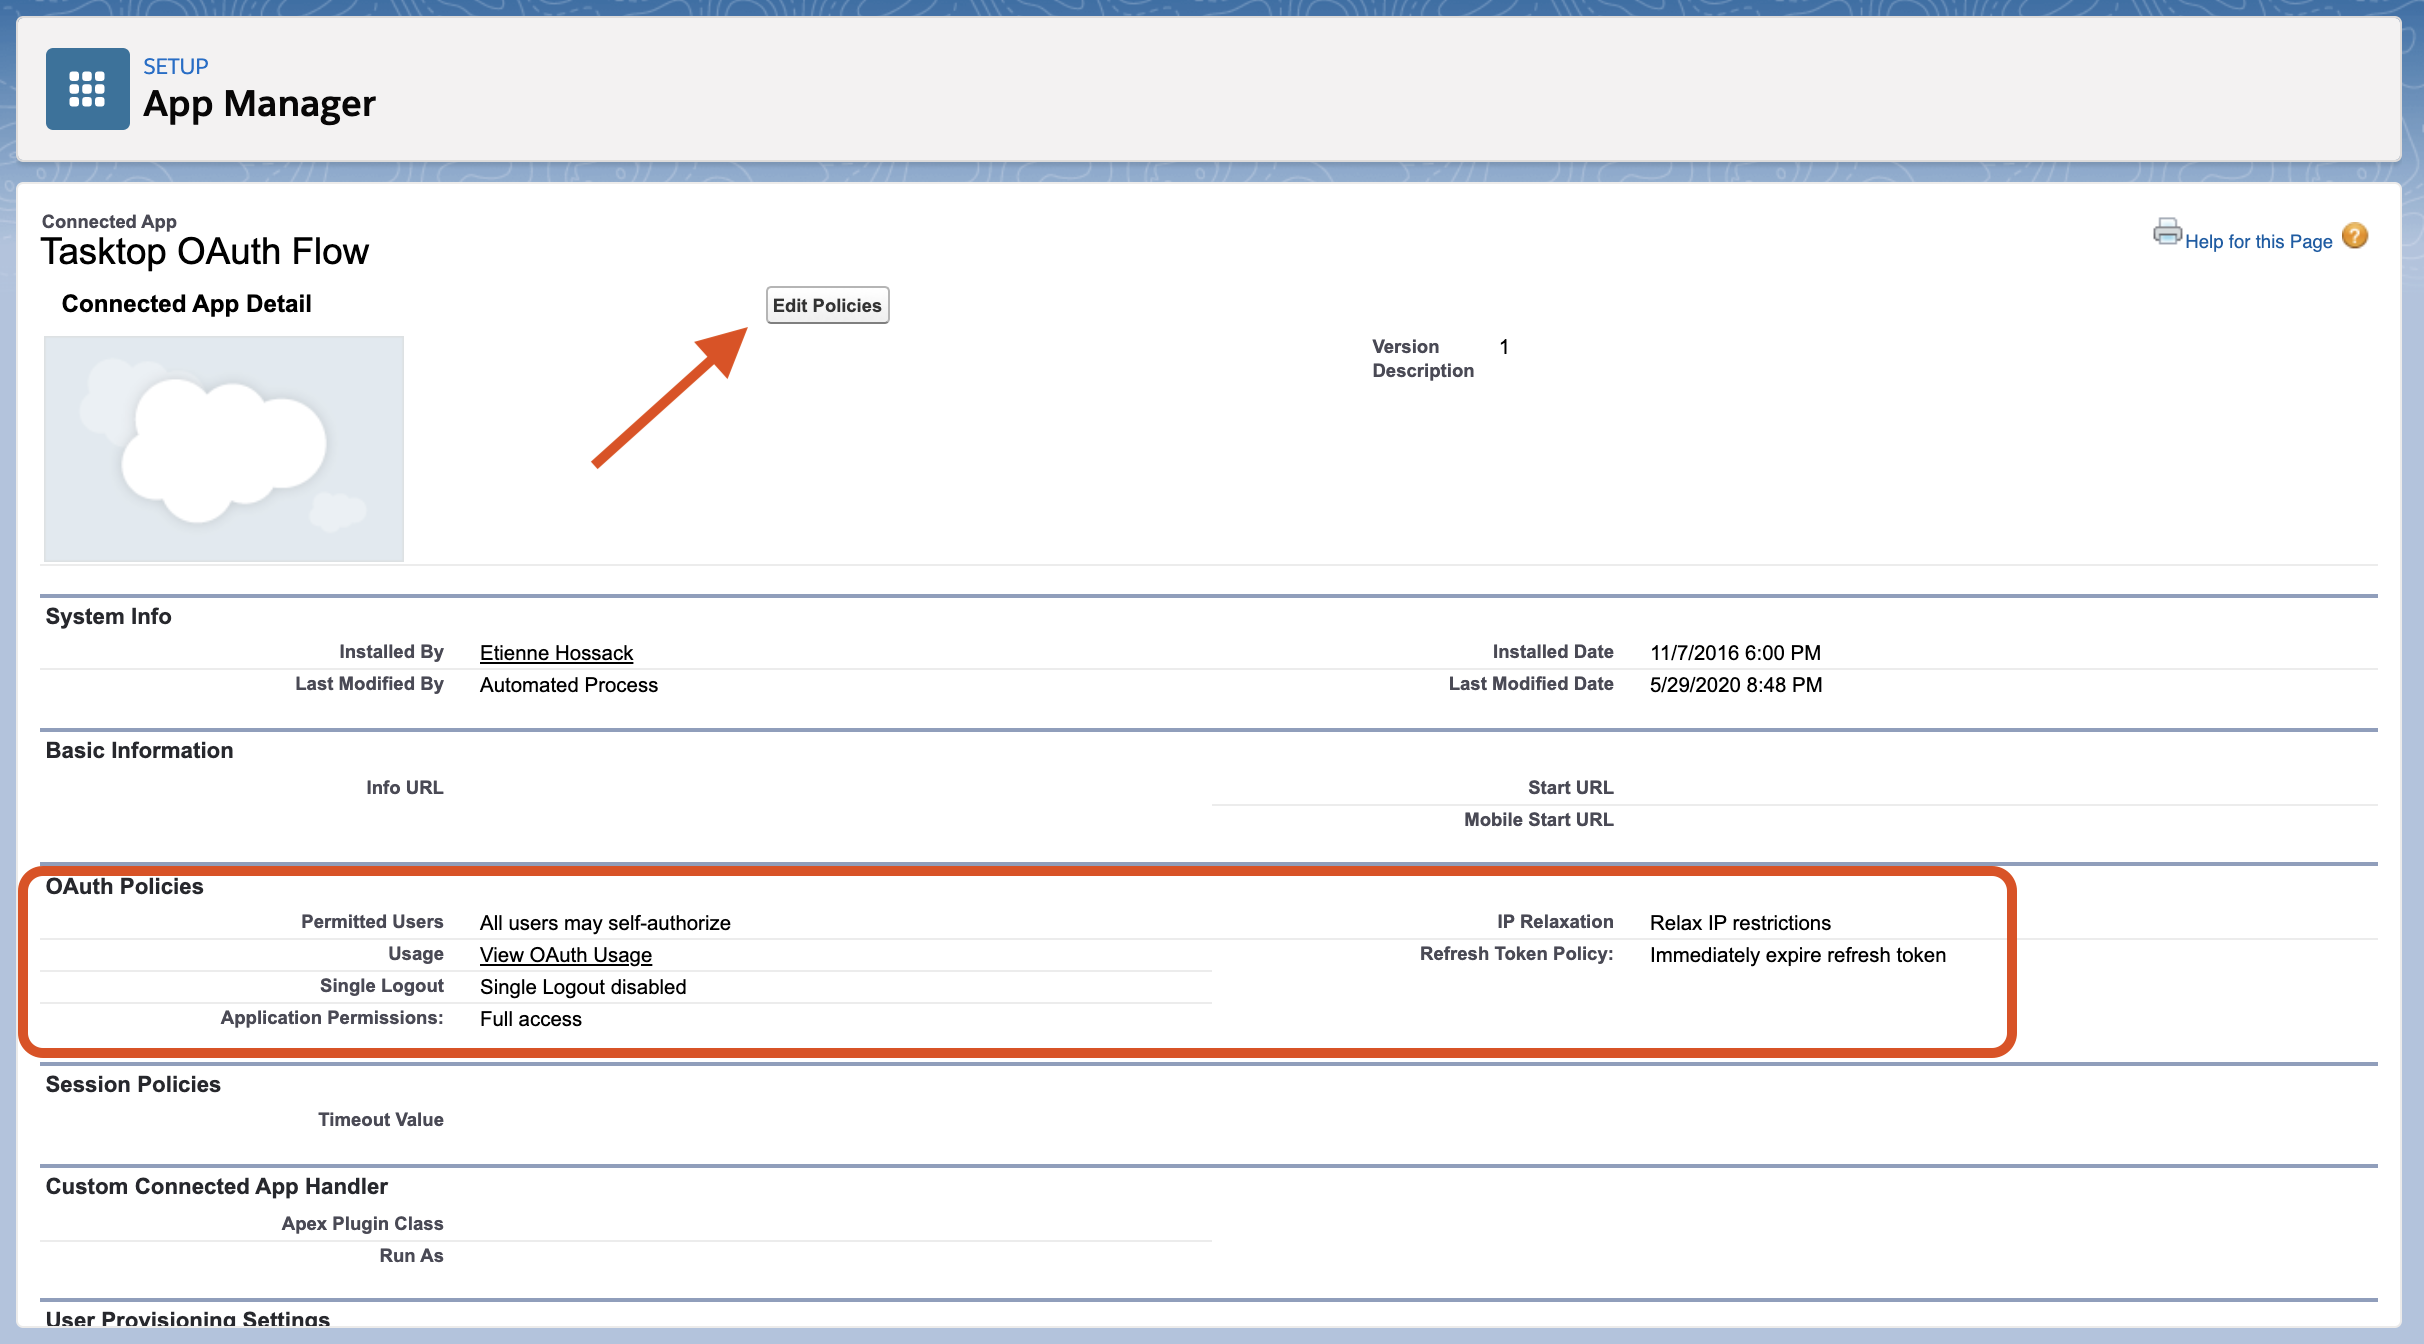
You must also ensure that the user using your Connected App is authorized and not using a restricted IP.
Click Manage on the App Manager screen to verify and edit your OAuth policies.
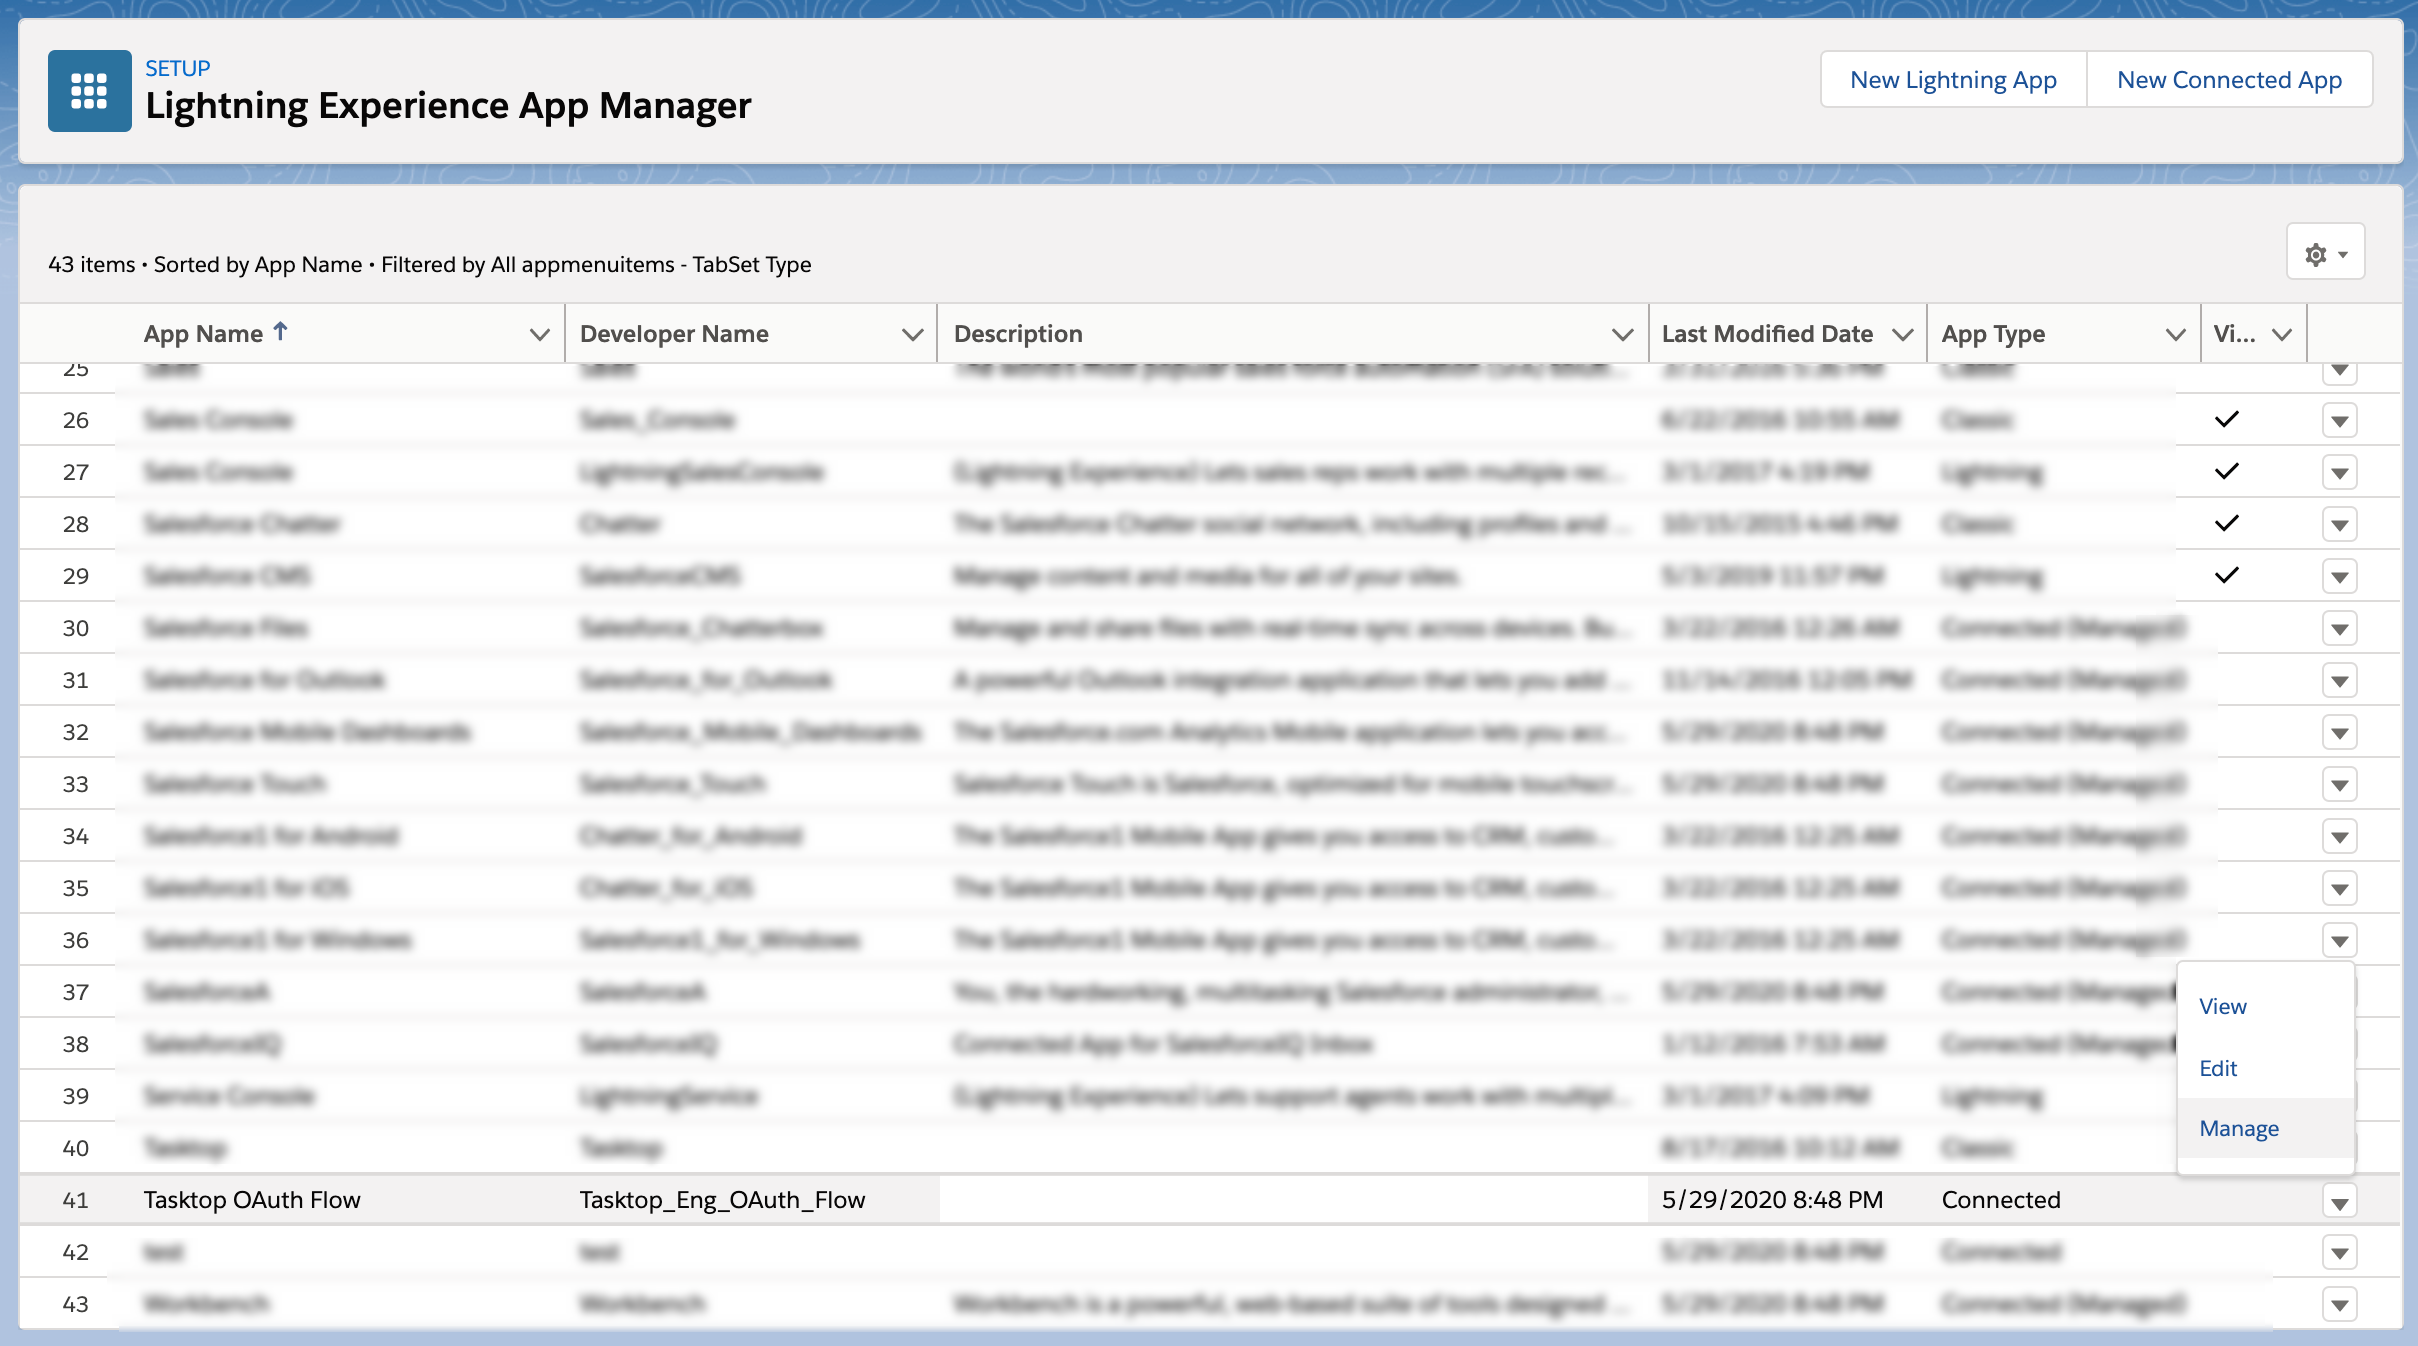
If you'd like to edit your OAuth policies, click Edit Policies.
Supported Artifacts
Supported Work Items
|
Supported Work Item Type |
Applicable Repository Versions |
Unique URL? |
|---|---|---|
|
Case |
Any supported repository version: |
Yes |
|
Any object (custom or out of the box) type |
Any supported repository version: |
Yes |
Supported Containers
|
Containers that can synchronize between repositories |
Applicable Repository Versions |
Unique URL? |
|---|---|---|
|
N/A |
|
|
|
Containers used to define the boundary of a collection (When clicking 'Manage Projects' on a Collection) |
|
|
|
N/A (entire tool serves as container) |
Any supported repository version: |
N/A |
Supported Field Types
Planview Viz supports configuring rule-based modeling (i.e., conditional modeling) using the field types shown below.
Note: If one field of a given type is supported, others that are also that type in theory should also work. However, sometimes there are instances in which this is not the case due to the repository. So, while we can claim support for fields at the type level, there is a chance that some specific fields of a given type will not function properly.
|
Standard Field Type |
How is field type referenced in the repository? |
Sample Repository Fields Supported |
Particular Repository Fields NOT Supported |
|---|---|---|---|
|
|
Text |
Contact Phone Contact Mobile Contact Email Subject Description Case Number Photo URL |
|
|
|
Picklist |
Case Type Case Reason Case Origin Type Status Priority Record Type |
|
|
|
Picklist (Multi-select) |
|
|
|
|
Checkbox |
Deleted New Self-Service Comment Self-Service Commented |
|
Functional Limitations
|
Category |
Limitation |
Applicable Repository Versions |
|---|---|---|
|
Feature Unsupported |
Remedyforce The Salesforce connector does not support the Remedyforce extension. |
Any supported repository version: |
|
Third Party Functional Limitation |
Projects Because Salesforce does not support the notion of ‘projects,' the following behaviors may be observed when using Viz:
|
Any supported repository version: |

