
Creating Template Projects (Project Workflows Enabled)
If an organisation is creating a number of Projects which share the same basic characteristics, it may be pertinent for a Template Project to be created. This Template Project can then be used when creating new Projects, saving time and providing less room for user error when setting flags, fields, etc.
This article provides a step by step guide to the creation of Template Projects with the Project Workflows setting enabled.
- Navigate to the ‘Search’ screen and select the ‘Project’ entity in the ‘Filters’ drop-down list:

- In the section below the filter options and the results table, there are a number of buttons, one of which is called ‘Add Template’:

- Click on the ‘Add Template’ button;
- This will display the ‘Add project Template’ view:

- Select the Project Type from the drop down list. This will determine the Project Type the new Template Project will be available to:

- The ‘Add an empty Project’ and ‘Create Project from a Template’ radio buttons allow the user to select whether the Template Project will be created entirely from scratch or if it will be based on an existing Template Project:
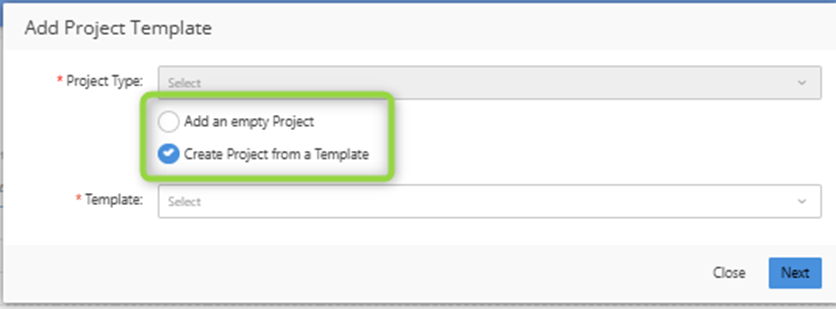
- Note that if the user retains the default option of ‘Create Project from a Template’, they will be required to select the template from the ‘Template’ drop down list as well as setting an ‘Expected Start Date’.
Only templates compatible with the selected Project type will be available in the drop down list.

- Once a template has been selected the ‘Expected Start Date’ is displayed, this will be used as the starting point for the new Project, replacing the Start Date of the Template project chosen. All data will be aligned to this new Execution Start Date (e.g. Tasks, Risks, Issues, etc.).

Once an option has been selected and ‘Next’ has been clicked, the ‘Add project Template’ view will offer the user more options

The ‘Template Options’ tab allows the user to specify whether Tasks, Forecasts, Risks and Issues are copied from the template into new Projects created from it.
- Once the user is happy with the Template, the next step is to select ‘Save’:
- When the template Project has saved, the settings cog will become available:

This allows the user to create settings as they would against a normal Project. These settings will then be propagated to any Projects created from the Template Project.
- When using a Template Project to create a new Project, it is only possible to select Template Projects which were created with the selected Project Type. In this particular example, when creating the Template Project, a Project Type of ‘New Testing Project Type’ was selected (step 5). This means that the Template Project created will only be available when creating new Projects of Project Type ‘New Testing Project’.
For example, creating a new Project of project type ‘New Testing Project’, the newly created Template is available in the drop down list.

If a different Project Type is selected, then the newly created Template is not available:
