
Set up and Configure
Investment and Capacity Planning Adoption Pathway
| 1. Understand the basics | 2. Set up and configure | 3. Adopt and optimize | 4. Gain insights with reports |
Enable planning menu, options, and role features
| Audience | IT PMO; Planview Administrator |
| Section Objective | Set up investment and capacity planning for the cost center work use case. |
The first step for an administrator is to enable the menu, options, and role features essential for utilizing investment and capacity planning.
In this guide:
- Enabling or Disabling Options on the Main Menu
- Enabling the Use of Investment and Capacity Planning
- Enabling or Disabling Action Options
- Review Role Screen Basics for a User Role
Process Steps
| Step | Role | Description | Resources |
|---|---|---|---|
|
Enable the planning menu |
Planview Administrator | Enable the planning menu by checking the Display option. | Enabling or Disabling Option on the Main Menu |
| Enable the use of investment and capacity planning | Planview Administrator |
From the Strategic Management Options page, enable Use Investment and Capacity Planning.
|
Enabling the Use of Investment and Capacity Planning |
| Enable the sub-menus for planning | Planview Administrator |
From the Menu Actions tab, select the planning tab on the left, then select the checkbox to display all the available options. Feature controls may also be added from this page. |
Enabling or Disabling Action Options |
| Enable required features for roles | Planview Administrator |
From the Configure Roles screen, enable the following features for each role that will use planning. Strategic management:
Investment decisions:
|
Review Role Screen Basics for a User Role |
Configure financial planning to use investment and capacity planning
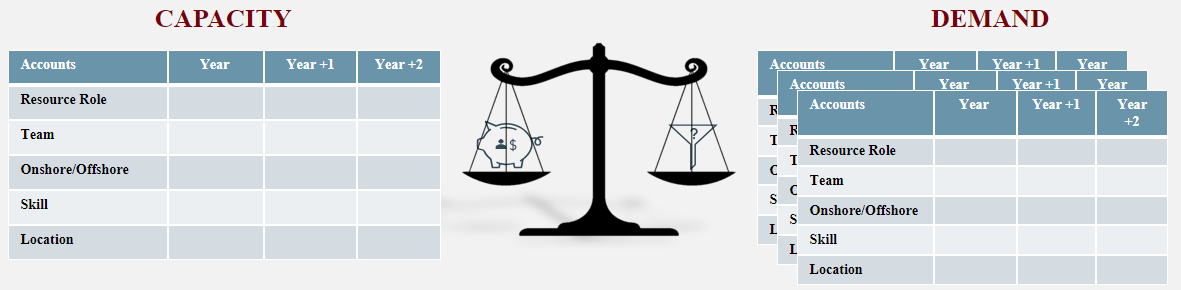
In cost center-based investment and capacity planning, you compare capacity by cost centers to demand entities (work). Capacity is based on the cost center structure and the data is taken from a cost center financial plan version. Demand data is taken from a work financial plan version.
To carry out the required analysis, there must be commonality between capacity and demand. The same account lines must be used in the work financial plan version as in the cost center financial plan version.
To use cost center-based investment and capacity planning, a cost center financial planning model, including relevant accounts and versions, must be set up to capture the capacity financial data. Demand data will use an existing financial model.
In this guide:
- Adding Financial Planning Models
- Configure Versions for Financial Planning Models Screen Basics
- Business Rules of Financial Management and Financial Planning
- Job Stream Management
- Configuring Financial Plan Load Job Parameters
- How to Load Data into a Work Financial Plan
- Editing a Financial Plan
- Adding Financial Planning Models
- Configuring Financial-Planning Accounts
- Setting an Account's Line Attributes
- Setting Additional Account Options
- Adding Versions of Financial-Planning Models
- Configure Versions for Financial Planning Models Screen Basics
- Loading, Scheduling, or Deleting Cost Center-Based Financial Plans
- Business Rules of Financial Management and Financial Planning
- Configuring Financial Plan Load Job Parameters
| Step | Role | Description | Resources |
|---|---|---|---|
| Ensure Use Providing Organization (Cbs1) is selected for the work (demand) financial model | Planview Administrator |
In order for the comparison between the enterprise or work financial model and the cost center financial model to work, Use Providing Organization (Cbs1) must be selected on the enterprise or work financial model. To confirm this is configured correctly, go to the Administer Financial Planning Models screen, find the model used for Work Financial planning, select Edit Financial Planning Model, and confirm that the option Use Providing Organization (Cbs1) is checked. |
Adding Financial Planning Models |
| Confirm work (demand) financial model configuration | Planview Administrator |
Confirm demand financial model configuration:
|
Configure Versions for Financial Planning Models Screen Basics Business Rules of Financial Management and Financial Planning |
| Review and add data to the work (demand) financial model | Planview Administrator |
If the financial plan for a potential project is blank, or contains lines with no financial data within the horizon dates, the project will not pull into the investment and capacity planning portfolio.
How data is added to work (demand) financial plans:
See What is Needed to Make it Work for more information. |
Configuring Financial Plan Load Job Parameters |
| Create a cost center financial model | Planview Administrator |
When adding the new model, select Cost Centers from the dropdown. Use the same calendar, planning horizon start and finish dates, forecast period, and other fields as in the enterprise or work financial model. |
Adding Financial Planning Models |
| Add accounts | Planview Administrator |
For the new cost center financial model, the next step is to configure accounts. At a minimum, the labor account is required. Select Use Account, Allow Edit, and Allow Loads for the labor account. Depending on how the cost center structure is configured, you may want to enable a generic benefit, capital, or expense account. Select Allow Edit and Allow Load as needed, based on usage in other parts of Planview Portfolios. Use in Investment and Capacity Planning must be checked for all accounts that will be used. |
Configuring Financial-Planning Accounts |
| Configure the labor account's line attributes | Planview Administrator |
From the Add Accounts screen, click the Line Attributes icon for the labor row, and select the line attributes that you want to set capacity constraints for. The attributes selected should also already be selected on the enterprise or work financial model, as the attributes must match. Attributes which are selected here and also have a matching attribute or account on the enterprise or work financial model will make up the capacity and demand primary "pivot." Note that Cost Center Availability Type is automatically selected and required. Best practice: As you consider which attributes to include on each account, consider how your company makes investment decisions. The attributes selected will make up the content and depth of the pivot table between the capacity and demand financial plans, so we recommend to minimize the number of attributes if possible. Example: Split by CapEx/OpEx.
|
Setting an Account's Line Attributes |
| Configure the labor account's line attributes | Planview Administrator |
From the Add Accounts screen, click the Account Options icon on the labor row. Deselect any unnecessary options to customize the display according to your preferences. |
Setting Additional Account Options |
| Configure non-labor accounts' line attributes | Planview Administrator |
If investment and capacity planning is going to also include non-labor accounts, you will need to configure the attributes for those accounts as well. This is not required. From the Add Accounts screen, click the Line Attributes icon, and select the line attributes that you want to set capacity constraints for. The attributes selected should already be selected on the non-labor accounts for the enterprise or work financial model, as the attributes must match. Best practice: As with the labor account and attributes, consider the level of detailed required to make investment decisions. |
Setting an Account's Line Attributes |
| Configure versions | Planview Administrator |
The next step is to configure versions for the new model. At least one version is required, but it's advisable to add two – one as a working version and another as a baseline version. Configure the working version to allow editing and loads, aligning its sub-options with those of the work financial versions. |
Adding Versions of Financial-Planning Models Configure Versions for Financial Planning Models Screen Basics |
| Load capacity into the capacity (cost center) financial model | Planview Administrator |
From the Configure Versions screen, load the working cost center version. The load can be manually performed, or scheduled within job stream management. For information about scheduling a financial plan load job by using a job stream, see Configuring Financial Plan Load Job Parameters.
|
Loading, Scheduling, or Deleting Cost Center-Based Financial Plans Business Rules of Financial Management and Financial Planning |


Configure planning: column sets and optional features
In this guide:
- Creating and Editing Column Sets
- Allowing Users to View Published Investment Ranking Details
- Adding Subtotal Financial Planning Columns
- Adding Calculated Financial-Planning Columns
- Adding Internal Rate of Return (IRR) Columns
- Configuring Investment and Capacity Planning Alerts
- Understand Thresholds and Time Periods of Investment and Capacity Planning Alert
- Enabling or Disabling the Analyze Tile
- Understanding Impact Analysis Report Tiles
- Create an Impact Analysis Report Tile
- Using Configurable Visualizations
- How to use Investment Dependencies in Investment and Capacity Planning
- Investment Dependencies
- Reviewing Dependencies in Investment and Capacity Planning
- Reviewing Work Investment Dependencies
| Step | Role | Description | Resources |
|---|---|---|---|
| Create a column set for investment and capacity planning and edit the underlying columns, if needed | Planview Administrator |
Columns included in the investment and capacity planning column set will drive how you rank the potential investments. Create a new column set that includes all criteria that should be considered for ranking and prioritization. This should include all relevant financial subtotals and prioritization attributes. Key actions:
|
Creating and Editing Column Sets
|
| Create column sets for screens outside of investment and capacity planning to share published decisions with the rest of the organization | Planview Administrator |
To communicate published portfolio planning decisions to project and resource managers, configure the application to support viewing details about a scenario's investment ranking values. These details typically include:
You can add the columns to column sets relevant to the Investment and Capacity Planning screen, Resource Management and Assignments screen, or Work Portfolio View screen. The investment ranking details a user will be able to view after selecting one of the column sets you configure is dependent on which investment ranking columns you add to that column set. |
Allowing Users to View Published Investment Ranking Details |
| Edit financial subtotals and calculated columns for use with investment and capacity planning | Planview Administrator |
Identify and configure financial subtotals you want to make investment decisions against. Make sure they are configured for the correct level of capacity and demand. Key actions:
|
Adding Subtotal Financial Planning Columns |
|
Alerts (optional) |
Planview Administrator |
Alerts are dynamic calculations that an administrator can configure to help users resolve issues as they make investment decisions. For example, you can configure the Count of Cost Center Overutilized alert to be displayed when the demand for cost centers reaches 75 percent of the capacity available for those cost centers. As an administrator, alerts are configured by enabling one or more alerts on the Investment and Capacity Planning Alerts screen within System Configuration, and then entering information that defines the alert using the grid. If no alerts are enabled by the administrator, the alerts pane will not show within investment and capacity planning. |
Configuring Investment and Capacity Planning Alerts Understand Thresholds and Time Periods of Investment and Capacity Planning Alert |
|
Understand and configure Impact Analysis visual tiles (optional) |
Planview Administrator |
Impact analysis tiles provide portfolio managers with the ability to visualize and compare investment scenario impacts across portfolios. Users with access to the Planning menu can create as many tiles of this type as needed to analyze data in different ways. Impact Analysis tiles are a unique type of report that are created on the Planning menu, using the Analyze button. They can only be viewed on the Planning Portfolio View ribbon. As an Administrator, the Analyze tile can be enabled or hidden from the Ribbon Options screen within Global Options. |
Enabling or Disabling the Analyze Tile Understanding Impact Analysis Report Tiles |
|
Using investment dependencies (optional) |
Planview Administrator |
An investment dependency is a connection between two entities that describes how those entities influence one another from an investment perspective. For example, if project A is dependent on project B, you must commit to project B if you are going to pursue project A. If project C is codependent with project D, both must be pursued, or neither pursued. Work and project dependencies are often created on the Work View screen, but the decisions on which investments to approve are done within Investment and Capacity Planning. The system uses both investment approval status and dependency type to help determine whether an dependency between investment entities is valid or results in a conflict. As an administrator, Use Investment Dependencies can be enabled within Global Options. Then you can configure alerts for dependencies, add information about them to Planning Column Sets, and use them on both Work and Planning menus. |
How to use Investment Dependencies in Investment and Capacity Planning |
Configure planning: investment approval status
Investment approval status is an alternate structure configured for use within investment and capacity planning and is used to show or exclude potential project investments within specific sections on the planning pages, or trigger successive lifecycle workflows for the relevant projects based on the selected value.
The chart below outlines when they should be used and where they can be found on the Investment and Capacity Planning screen.
| Status | Description | Visibility |
|---|---|---|
|
Pending |
Indicates the investment opportunity has been identified; however, the business case has not been completed and the opportunity is not ready to be considered. Investments with this status are not displayed on the Investment and Capacity Planning screen. |
Will not appear on Investment and Capacity Planning screen |
|
Analyze |
Indicates the investment opportunity has been identified and the business case prepared. The opportunity can be considered; however, no final investment decision has been made. |
Below the line – Analyze view
|
|
Accept |
Indicates the investment opportunity has gone through the investment and capacity planning process and that your organization has chosen to proceed with the investment. Anything approved in the previous planning cycle will already appear above the line (in-flight). |
Above the line – Analyze view Included in Shift and Balance Views |
|
Conditional |
Indicates the investment has gone through the investment and capacity planning process and has been accepted under certain conditions. |
Above the line – Analyze View Included in Shift and Balance views |
|
Refuse |
Indicates the investment opportunity has gone through the investment and capacity planning process and your organization has chosen not to accept it. |
Below the line – Analyze View |
|
Resubmit |
Indicates the investment opportunity has gone through the investment and capacity planning process via a lifecycle, and your organization initially refused to accept it. The opportunity has been revised and should be reconsidered. This status is used in investment and capacity planning if your system is configured for lifecycles. |
Below the line – Analyze View |
In this guide:
| Step | Role | Description | Resources |
|---|---|---|---|
| Understand and configure investment approval status (OpCapAppr) | Planview Administrator |
Investments – or in this case, projects – must have an investment status (OpCapAppr alternate structure) of Analyze, Accept, Conditional, or Refuse to be included in a planning portfolio. As an administrator, you must configure the investment demand structure, then the status must be added to all potential investments/projects. Things to consider:
|
Configure planning: create planning portfolio and confirm configuration

In this guide:
- About Creating Planning Portfolios as a User
- Creating Planning Portfolios
- Planning Menu Basics
- Understand Where Investment and Capacity Planning Obtains Its Information
| Step | Role | Description | Resources |
|---|---|---|---|
| Create a planning portfolio | Planview Administrator |
Create a new planning portfolio. |
About Creating Planning Portfolios as a User
|
| Confirm configuration | Planview Administrator |
From the planning menu, navigate to the Investment and Capacity Planning tab. Use the View dropdown to select each view option, and make sure the portfolio displays rows for each option. If no data displays, review this criteria:
|
Understand Where Investment and Capacity Planning Obtains Its Information |