
Single Sign-On Settings for Planview Admin
What is Required to Use SSO with Planview Admin?
To use Single Sign On (SSO) functionality for your organization, you must first configure your SSO provider to work with Planview Admin before enabling SSO in Planview Admin. If your organization uses Microsoft Active Directory Federation Services (ADFS) for example as your SSO provider, you must perform the steps in set up SSO for ADFS.
Setting up SSO for Microsoft Azure AD
This document provides instruction on how to set up an application in Azure that can communicate with Planview Admin via SAML.
-
On the left navigation pane, select the Azure Active Directory service.
-
Navigate to Enterprise Applications and then select All Applications.
-
To add new application, select New application.
-
In the Add from the gallery section, type Planview Admin in the search box.
-
Select Planview Admin from results panel and then add the app. Wait a few seconds while the app is added to your tenant.
-
In the Azure portal, on the Planview Admin application integration page, find the Manage section and select single sign-on.
-
On the Select a single sign-on method page, select SAML.
-
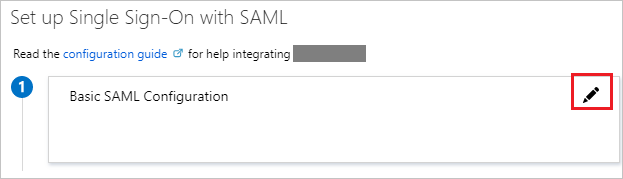
On the Set up single sign-on with SAML page, click the pencil icon for Basic SAML Configuration to edit the settings.
-
On the Basic SAML Configuration section, perform the following step:
-
In the Identifier (Entity ID), enter your EntityID from the Planview Admin Settings page.
-
In the Reply URL textbox, type a URL using the following pattern:
https://<Region>.id.planview.com/api/loginsso/callback
-
-
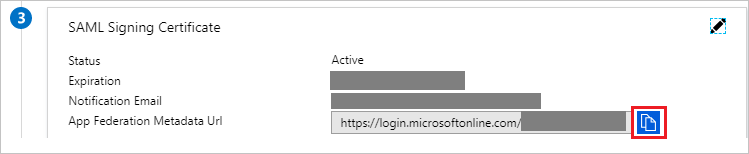
On the Set up single sign-on with SAML page, In the SAML Signing Certificate section, click copy button to copy App Federation Metadata Url and save it on your computer.
-
You can now go to Enabling SSO in Planview Admin to finish the remaining steps to activate SSO.
Setting up SSO for Okta
If your organization uses Okta as your SSO provider, you must perform the following steps when setting up SSO within Planview Admin.
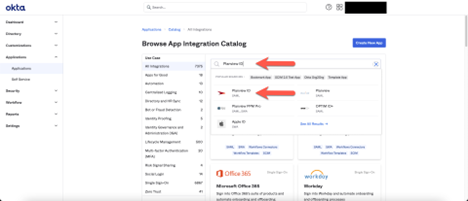
- In Okta, in the left pane, click Applications, and then in the main pane, click Browse App Catalog.
- Search for and then select Planview Admin.
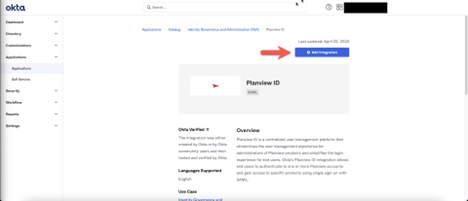
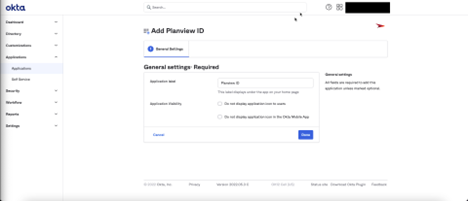
- In the Planview Admin view, click Add Integration.
- In the General settings: Required section, you can leave the settings as is or edit them, and then click Done. The application is created.
- In the Sign On section, select Edit and update the Regulatory region in accordance to what your Planview Admin organization is setup for. (US, EU, AP)
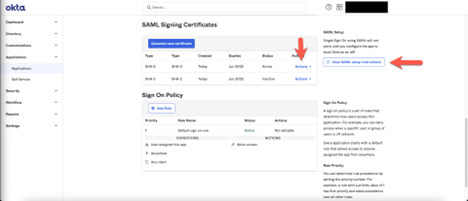
- Locate and copy the SAML metadata URL:
- In the Sign On section click View SAML setup instructions.
- Copy the URL, which is to be pasted into the Planview Admin Settings page.
NOTE
Using the SAML metadata URL is recommended because signing certificates can be updated without having to update Planview Admin. However, you can use the entire SAML XML metadata instead (see below).
- To use the SAML XML metadata instead of the SAML metadata URL:
- In the SAML Signing Certificates section, click Actions > View IdP metadata.
- Copy the metadata, which is to be pasted into the Planview Admin Settings page.
- Enable SSO in Planview Admin.
Setting up SSO for OneLogin
Follow this procedure to set up an application in OneLogin that can communicate with Planview Admin via SAML.
- In the top bar in OneLogin, click Administration.
- In the menu bar, click Applications > Applications.
- Click the Add App button.
- Search for and then select SAML Custom Connector (Advanced).
- Enter a name and description for the application, and then click Save.
- In the left pane, click Configuration.
- Complete the following fields:
- Audience (EntityID): Enter the EntityID from your Planview Admin Settings page.
- ACS (Consumer) URL Validator*: .*
- ACS (Consumer) URL*: Enter the URL based on your location as per Configuring Your SSO Provider to Work with Admin, above.
- Click Save.
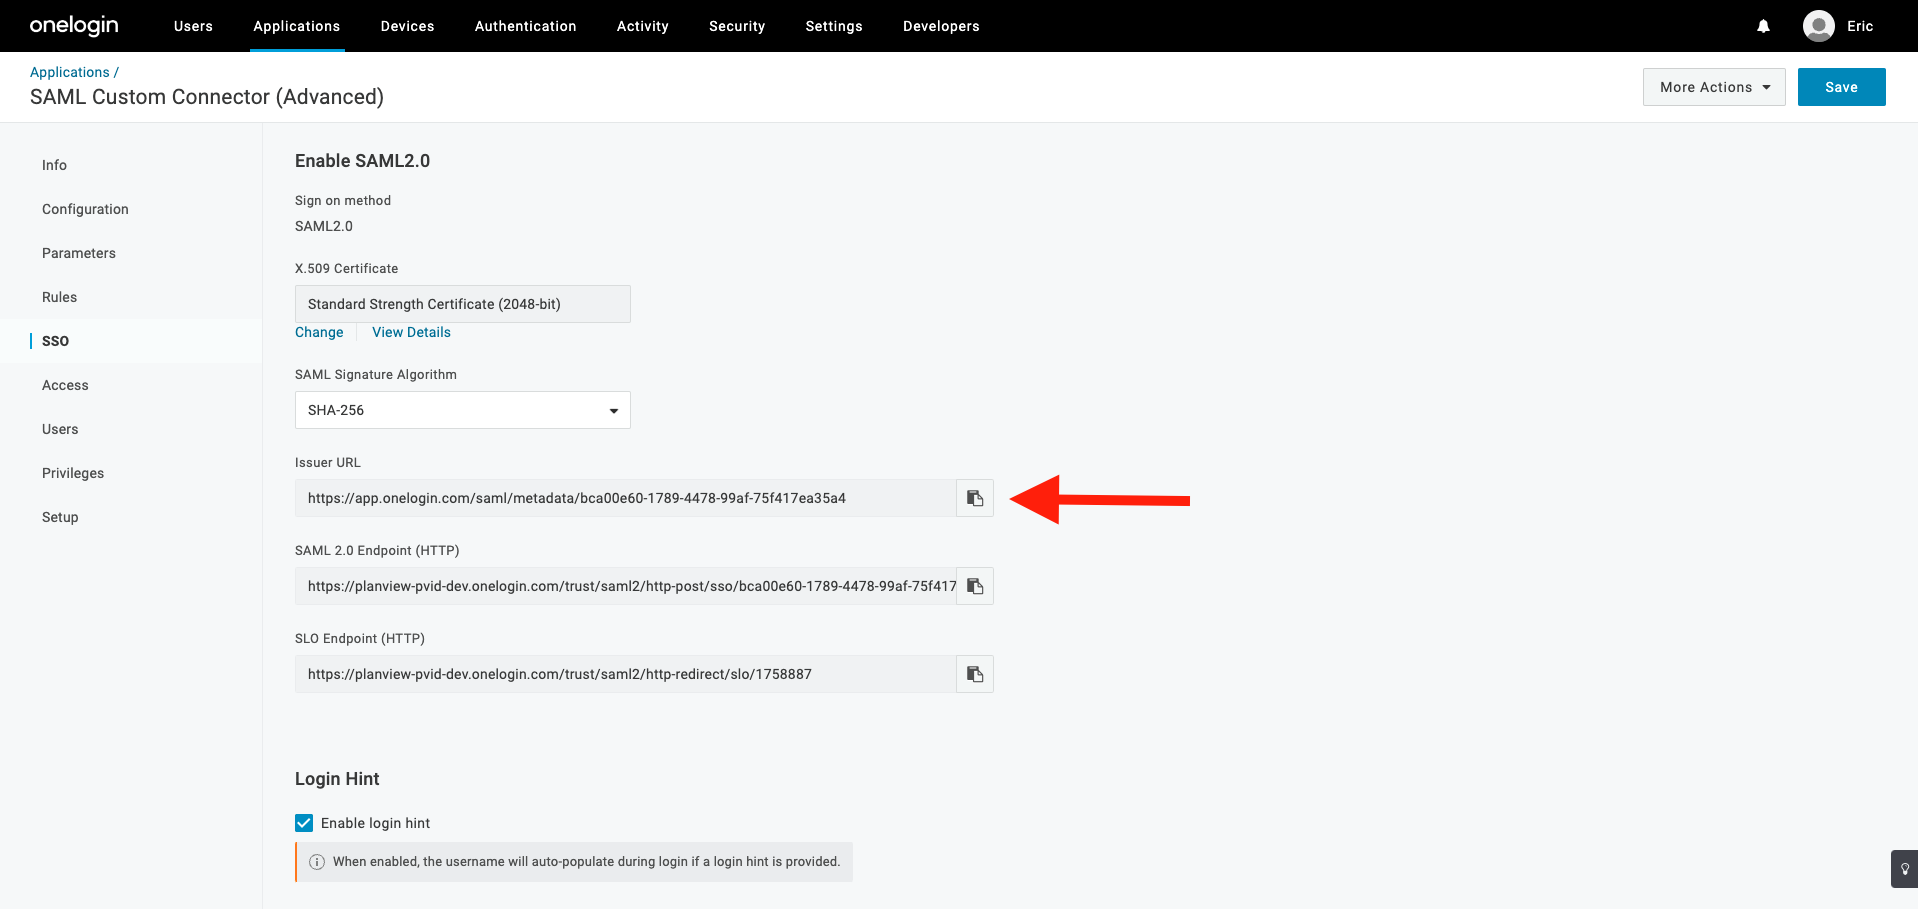
- Locate and copy the SAML metadata URL:
- In the SSO section copy the Issuer URL which is pasted into the Admin Settings page.
NOTE
Using the SAML metadata URL is recommended because signing certificates can be updated without having to update Planview Admin. However, you can use the entire SAML XML metadata instead (see below).
- In the SSO section copy the Issuer URL which is pasted into the Admin Settings page.
- To use the SAML XML metadata instead of the SAML metadata URL:
- Click More Actions > SAML Metadata. Save the XML file, which you will use for the following step.
- Enable SSO in Planview Admin.