Project Teams Experience for the PMO

Today’s PMOs are expected to easily adapt to change, increase efficiency, and respond quickly to market and customer demands, as well as making sure projects are completed on time and on budget. In addition to the big, strategic programs and projects that require visibility at the portfolio level, there are also simpler work items that just need to “get done” (e.g., BAU or KTLO projects) and the PMO is often responsible for providing the tools for this work.
The Project Teams module of Planview Portfolios enables efficient management of these work items, while giving teams the right capabilities to collaborate and get work done. In this guide, you’ll learn how to:
- Set up a shared workspace that is the central place for teams to collaborate, serving as the single source of record for project data
- Create a project plan and connect the plan to team boards where work is executed, so project data is automatically kept up to date
- Review, compare and assess project data across multiple workspaces
- Easily manage documents and develop standardized processes for workflows, documents, and task cards
- Visualize workload across team members, manage individual and team capacity, and adjust the project plan based on available resources
- Monitor risks and issues and actively work with other team members to resolve them
Click into each section below to learn more.
TIP
We're here to help! If you need assistance with implementing any of the steps below, don't hesitate to reach out to your CSM.
Set up Your Workspace
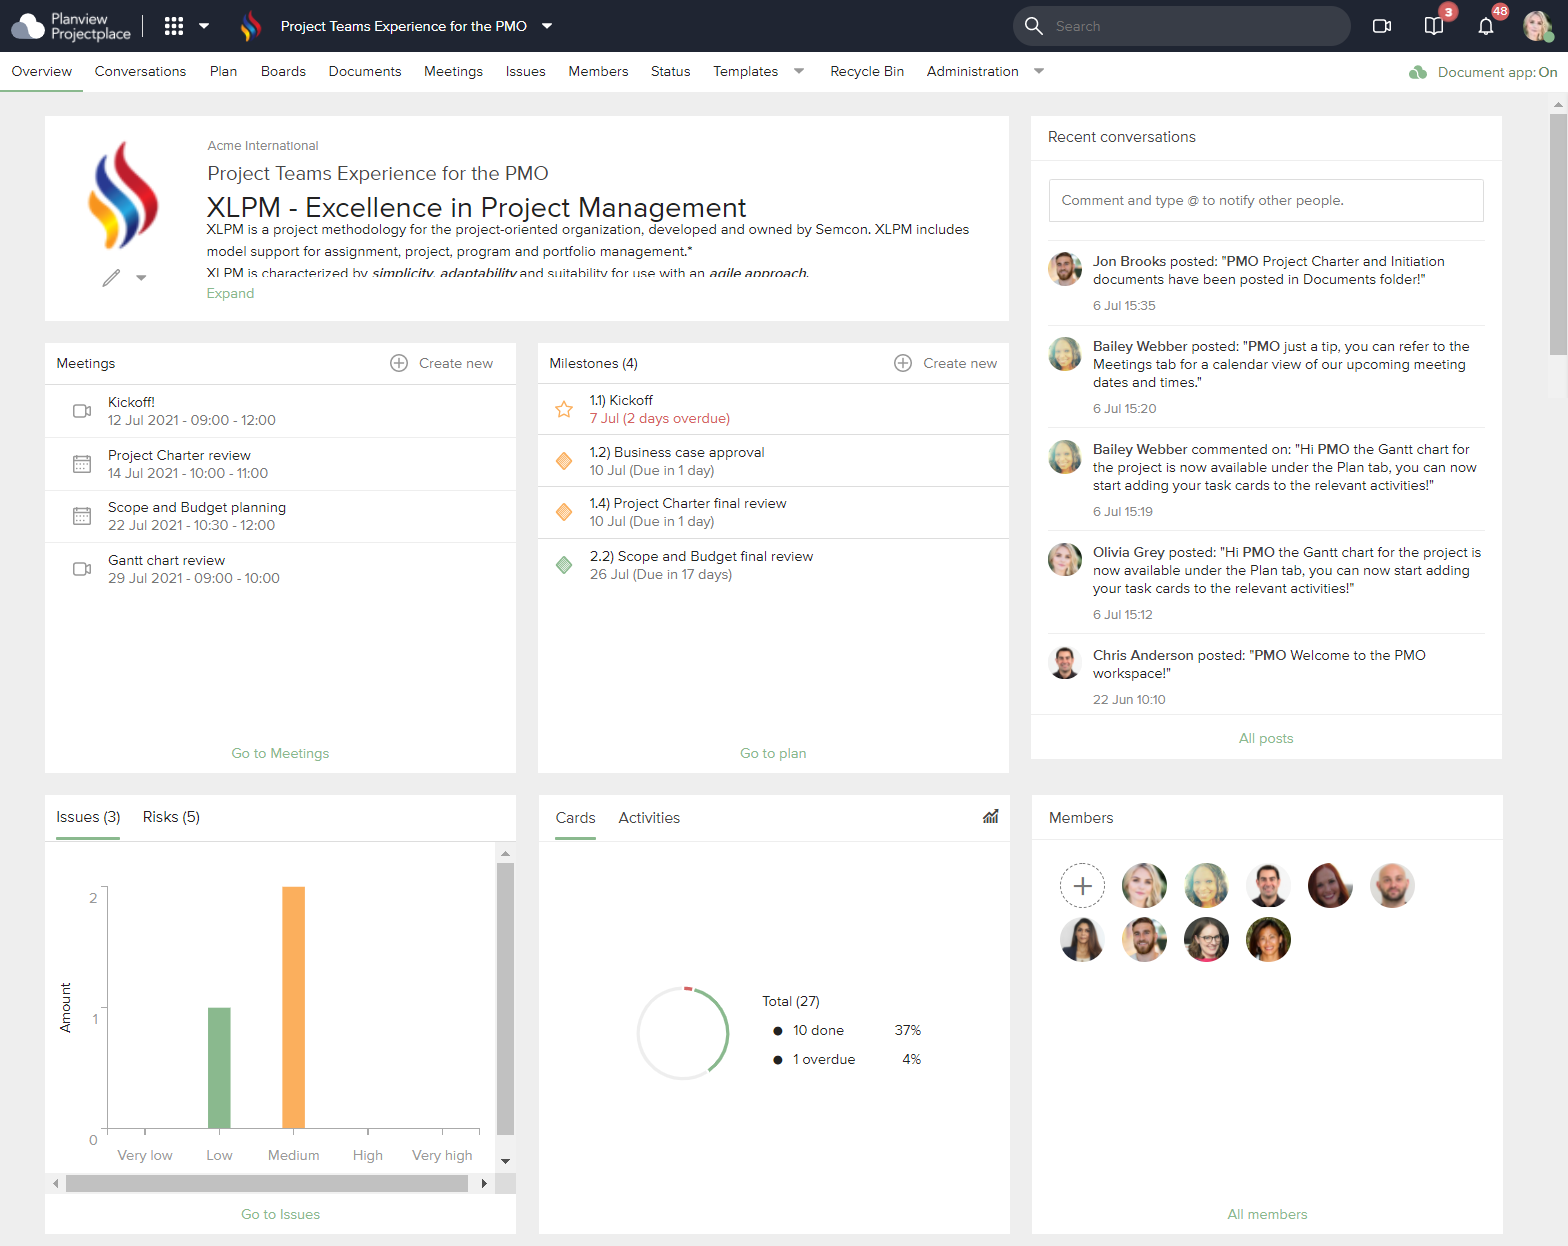
Workspaces are the central place where teams collaborate to complete their work based on a defined project schedule. New workspaces can be based on a template, or you can create a blank workspace from scratch. The ProjectPlace account administrator manages workspace templates for your organization's account.
To set up your workspace:
- Create a workspace based on a template. We recommend choosing a template that corresponds with the type of project you're managing, or the planning approach you prefer to use. For example, if your project is heavily governed and you're using a top-down planning approach, choose a detailed template with a predefined plan, boards, cards, and document folder structure. If you've adopted more of an agile, bottom-up approach to your projects, choose a minimal template that allows teams to create their own boards and cards.
TIP
If your administrator hasn't created any workspace templates for the account, ProjectPlace has a variety of built-in templates to choose from.
- Invite members to the workspace. Include your team members and other stakeholders in the project.
- Add members to team groups. If your organization is starting to leverage agile ways of working, account administrators can set up cross-functional team groups. This fosters the agile tenets of collaboration and collective responsibility for work, enabling the whole team to view an overview of all their work on the Team Overview page and receive requests from others in the organization.
TIP
Transparency and collaboration are the keys to a successful project, but if you need to restrict access to specific tools, boards, or documents within a workspace, workspace administrators can do so using member groups.
Create a Project Plan
The Plan tool makes it easy for everyone involved in the project to get visibility into important due dates and milestones. After creating activities and milestones, connect the activities to the team boards where the work is being done, so progress on task cards is visualized in the project plan. Based on that progress, you can reevaluate and adjust the due dates of activities as needed.
TRY IT
Click here to launch an in-app guide that walks you through the basics of setting up a plan!
To create a project plan:
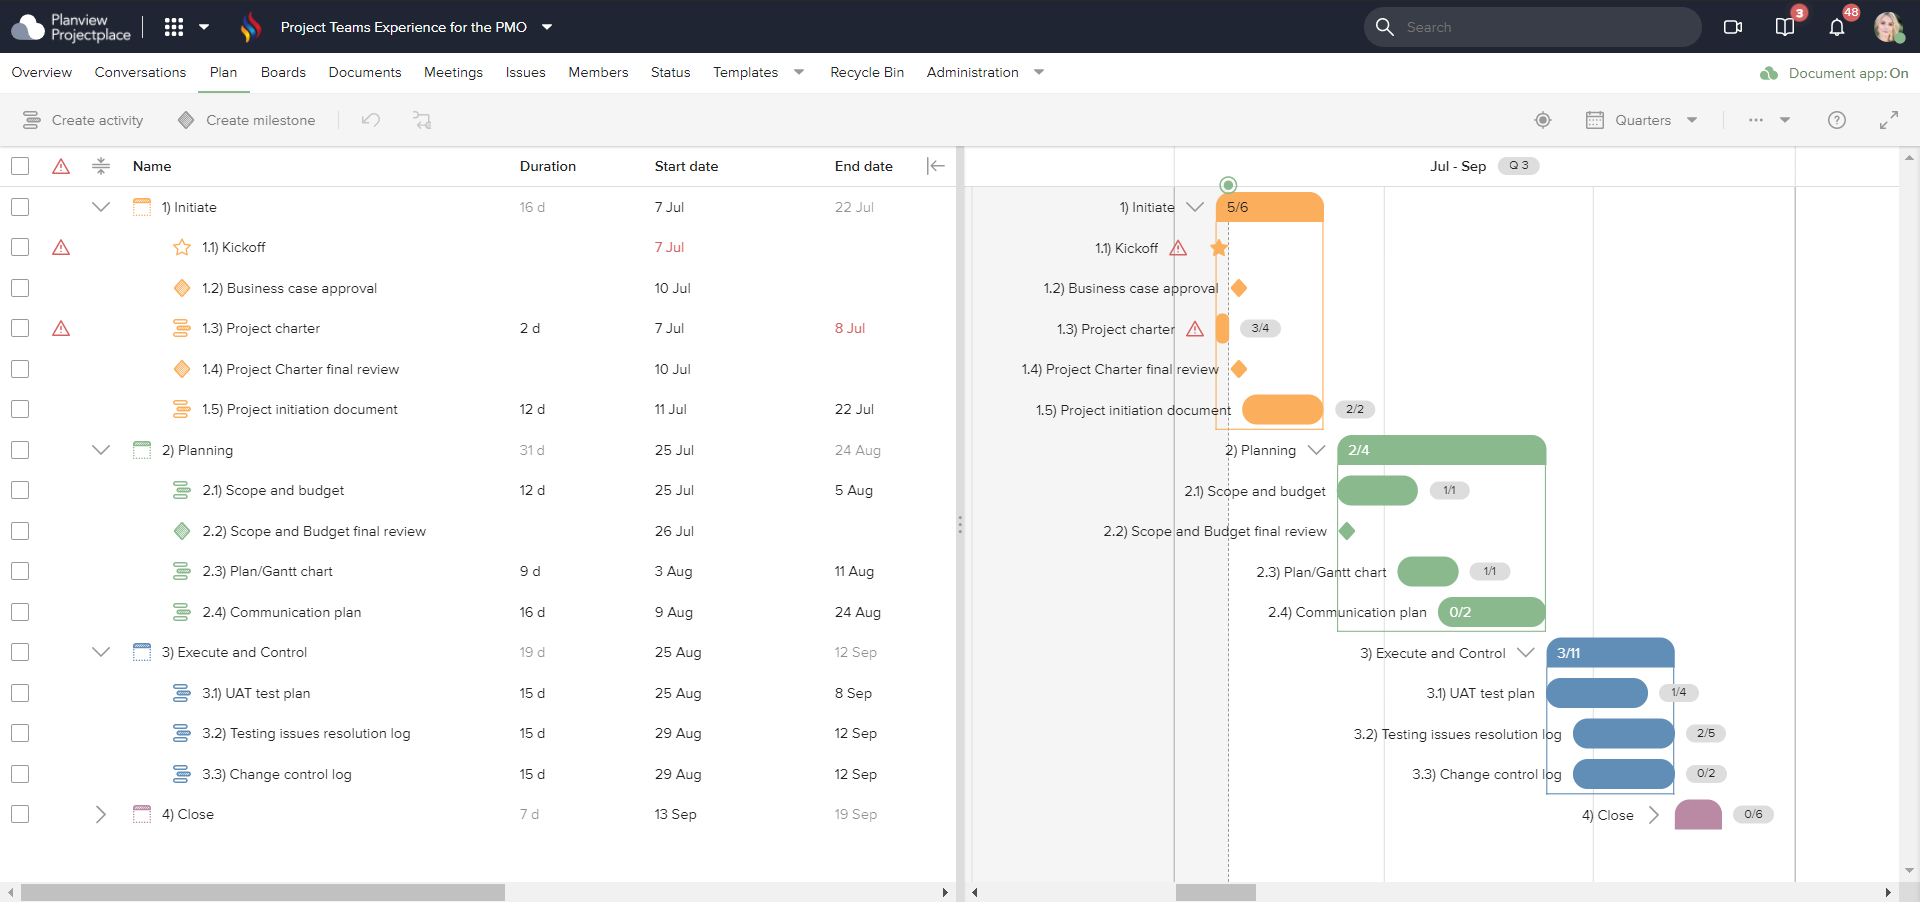
- Create a hierarchy of activities. Your project plan activities can be as detailed as needed. As mentioned above, you can use workspace templates with default plans based on your company’s typical types of projects. For example, smaller projects might have a plan that is as simple as the project phases:
- Initiate
- Plan
- Execute and Control
- Close
Larger projects may require more sub-activities with more detail about specific tasks. For example, the Execute and Control activity above could be broken down into these sub-activities:
- Coding
- Testing
- QA
- UAT
- Create milestones that represent important dates, such as:
- Project Charter Approved
- UAT Completed
- Installation
- Lessons Learned/Documented
- Use the lock date toggle to ensure that an activity or milestone's date doesn't get changed.
- Connect cards to activities. Connecting cards with activities allows you to keep a higher-level plan, while tracking progress to completion on the cards. If you're not sure which activity a card belongs to, you can leave a comment and @-ref the card assignee to ask for more information.
TIP
Utilize card templates to pre-fill standard information for cards (such as checklists, tags, etc.) to minimize setup time for a new project. For example, you could create an Installation Preparation card template that includes checklists for the paperwork, processes, and approvals needed prior to scheduling an installation, as well as all the contact departments.
-
As work progresses, you may need to adjust the plan. If you need to change the date or duration of any activities or milestones, it's easy- just drag and drop in the Gantt.
- Mark activities as done. When work on the activity has been completed, mark the activity as Done. Marking an activity as done will clear the cards associated with the done activity from the board, so that teams can focus on work that is still in progress.
Monitor Portfolios and KPIs
In the Portfolios tool, you can group multiple project workspaces into portfolios that then can be used to review, compare and assess project data across multiple workspaces. The PMO will have designated resources that have the authority to create and manage portfolios, for which then other users can reference and review the project data.
To monitor portfolios and KPIs:
- Create a portfolio and connect your project workspaces to the portfolio. When you create a portfolio, you are automatically assigned the portfolio administrator role, enabling you to update the portfolio's details.
- Select which KPIs the portfolio should track. If needed, workspace administrators can create custom KPIs to add to the portfolio. For example, a custom percentage KPI to represent completed IT requests as a percentage of total requests, or expense as a percentage of the total budget.
- Add portfolio stakeholders. Portfolio stakeholders can access project status information, and discuss the portfolio in the comments section.
- View the portfolios overview. On this screen, you can easily see which portfolios have deviated from the plan, those that are at risk, and those that are performing according to plan. Click on a portfolio to see more details about the projects facing challenges which may require more attention.
- Download project status reports. Download workspace status reports to share with stakeholders who are not using ProjectPlace or the Portfolios tool, or to keep a log of historic reports.
Resource and Capacity Planning
One of the main tenets of project management is effective resource demand and capacity tracking, which can help ensure that you're utilizing your resources as efficiently as possible. Knowing the true capacity of work resources allocated to a project can be challenging, especially when factoring in time spent on PTO, administration work, and "keep the lights on" work. After getting better visibility into which resources are over- or underutilized, you'll be able to more effectively distribute work to the people with capacity to take on more.
There are a few different tools you can use to do resource and capacity planning:
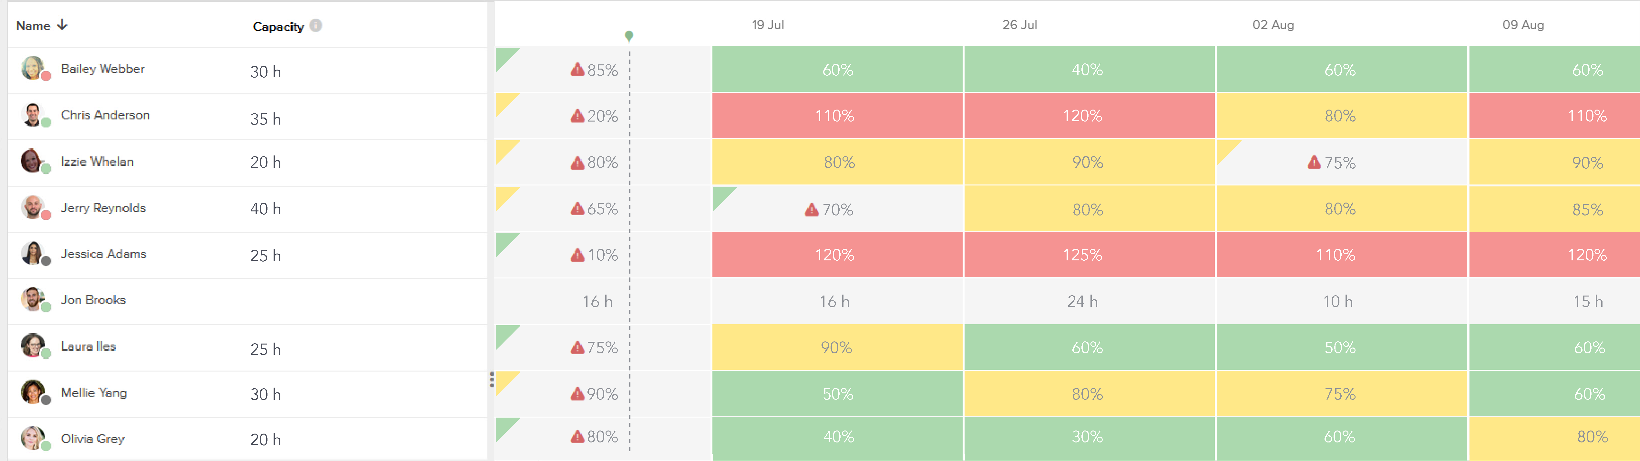
- In the Workload tool, use the capacity overview to get a complete picture of available resources and their total capacity. In the detail pane for a workspace member, the Assignments section displays cards assigned to them in each workspace they are a member of. Here, you can reallocate overloaded resources by transferring their cards to another user.
- In the Plan tool, estimated and reported time is displayed for each activity. If the end date of an activity has been reached but there are still cards to be done, a warning signal is displayed for that activity. When reported time exceeds estimated time for an activity, it is displayed in red in the activity details. When tasks are taking longer than expected, the project manager can then effectively and quickly start to understand and mitigate the risk to the project schedule.
- In the Boards tool, team members can assign points to cards to represent the effort associated with each task.
- The Team Overview screen provides an at-a-glance view of the team's ongoing work, including a Members widget with a list of members included in the team and their individual workload trend charts, and a Team Workload trend widget which displays the team's total workload over time.
- Use the Issues tool to keep track of any risks or issues related to resources or capacity that are currently affecting your project schedule, or may affect the schedule in the future.
TIP
Encourage team members to use the workload self assessment to indicate whether they feel stressed or comfortable about their workload.
Standardize Documentation
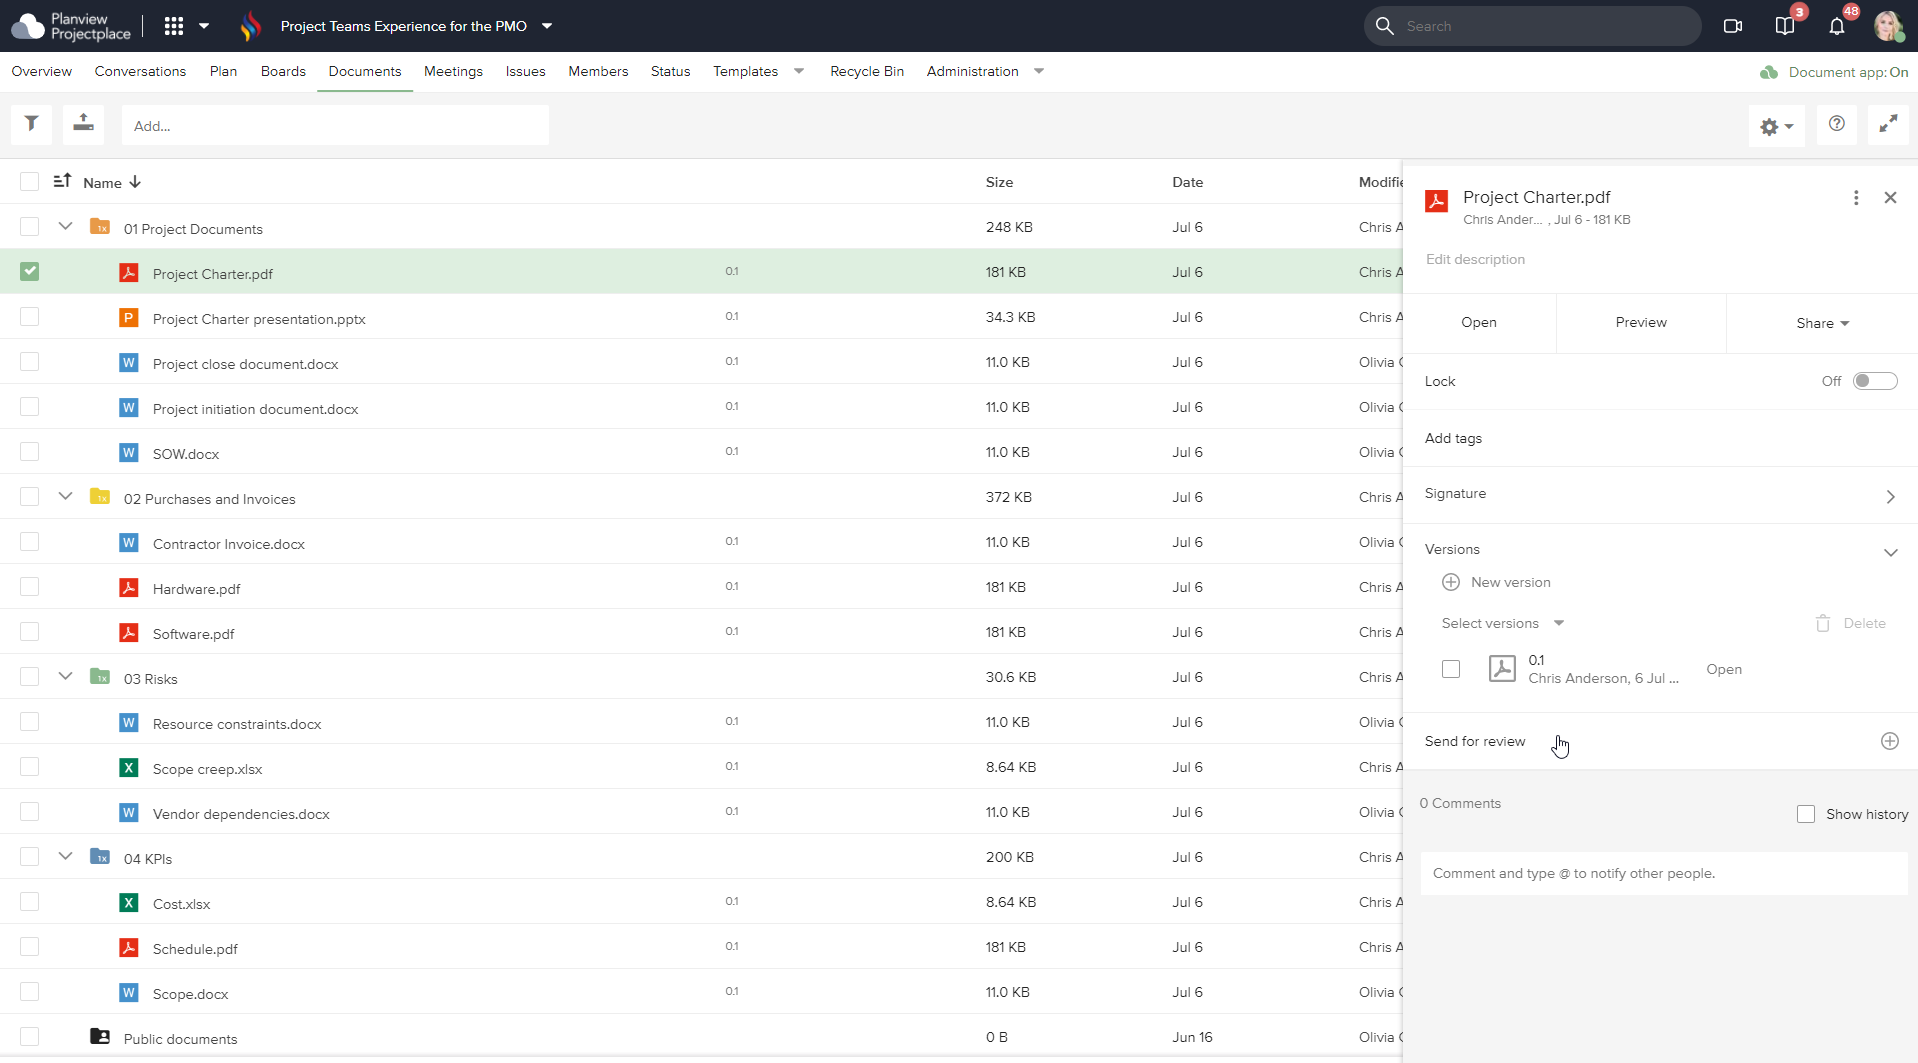
ProjectPlace has a robust Documents tool that includes document storage, templates, customizable processes to route and approve documentation. Teams use the Documents tool to easily collaborate, review, and approve documents related to their projects. Documents are stored in one central place, and it's easy to control access and security permissions so people can only see the documentation that is appropriate for their role.
To standardize documentation within your project workspace:
- Create or upload a document folder structure. If you used a workspace template, the folder structure may already be defined, but you can adjust the folders as needed or create your own folder structure to suit the needs of your project.
TIP
Workspace administrators manage access to documents by setting the access rights at the folder level.
- Create document templates. Document templates are very useful in projects where many documents of the same type are created. For example, you can create a project charter template so everyone starts with the same framework for starting the charter, or other templates defined for requirements, risk register, installation plan, or lessons learned.
- Create document review workflow templates. Document reviews are used to gather feedback on documents in a structured workflow, where you can add multiple review steps and assign different reviewers to each step. For example, you may want to create a document review workflow process for approving project charters.
Manage Issues and Risks
The Issues tool is a centralized place to track all issues and risks related to a project, giving visibility into what is currently impacting the project or a potential future concern, so you can deliver on time and within your defined budget and scope.
To manage issues and risks:
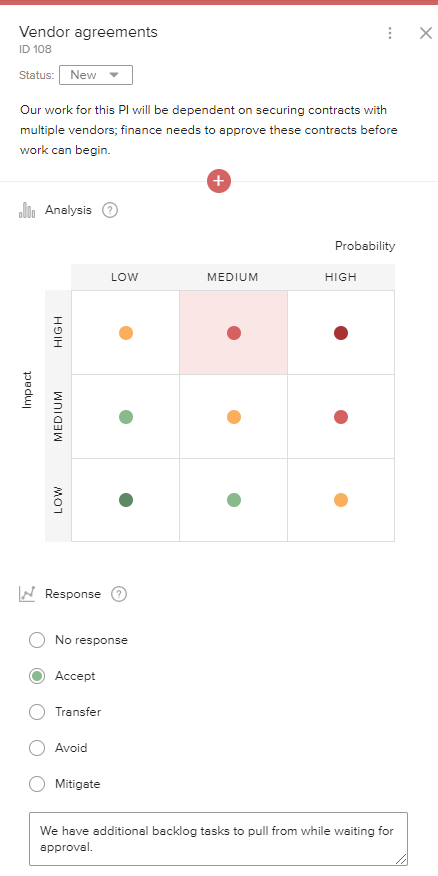
- Create issues to keep track of currently active disruptions to your project plan. To help determine which issues should be fixed first, you can assign each issue a priority value of very low, low, medium, high, or very high. Be sure to also fill out key details for each issue, such as who is responsible for resolving the issue, and a due date for the issue to be resolved.
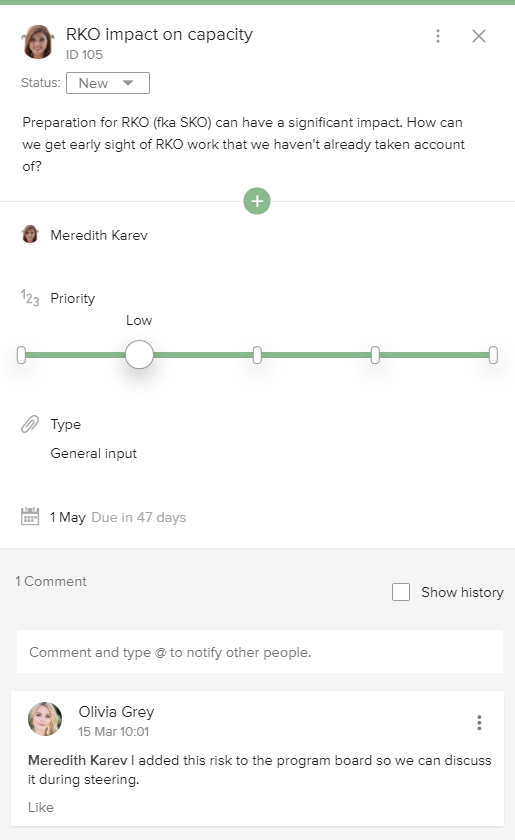
- Create risks to keep track of potential issues that may happen in the future. Use the risk matrix to assess risk level (the probability the risk will occur multiplied by the severity or impact of the risk). After evaluating the risk, use the Response section to indicate how the risk will be handled.