
Projectplace for Human Resources Management

Managing hiring and onboarding processes is challenging for most organizations. Without a shared system in place, it's often difficult to know which onboarding steps have been taken by new employees, such as completing required paperwork, reviewing orientation materials, and receiving necessary training. And with decreased visibility into the process, new hire ramp time can take much longer than expected.
ProjectPlace enables HR professionals to efficiently manage hiring and onboarding processes, so you can get new employees up and running quickly. In this guide, you’ll learn how to:
- Keep track of potential candidates and new employees in a central workspace
- Manage shared recruitment and onboarding boards, so everyone can see who is responsible for each task and ensure that no steps are missed
- Set new hires up for success by creating an engaging onboarding workflow with a prioritized list of tasks to complete
- Provide a consistent onboarding experience for all new employees that can be easily updated as processes and organizational requirements evolve
- Organize, standardize, and collaborate on documents in a shared document repository
TIP
We're here to help! If you need assistance with implementing any of the steps below, don't hesitate to reach out to your CSM.
Create a Workspace
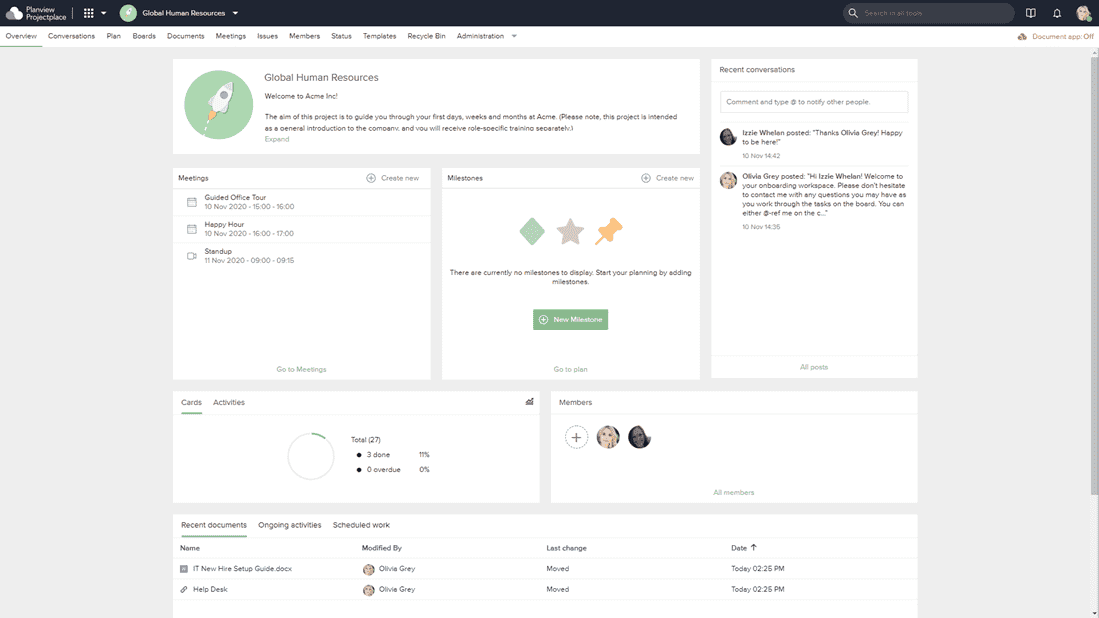
Your new workspace will give you a central place to manage recruitment and hiring processes, store important documents, communicate with stakeholders, and collaborate with your team.
To set up your workspace for human resources:
- Create a new workspace and name it Human Resources. (If your company is international, you may want to name the workspace Global Human Resources, to specify that it is the central to the entire organization.)
- Invite members to the workspace. This includes your team, department heads and managers, IT professionals, and anyone else you want to be involved in the process.
- Set up workspace security:
- First, create two new groups and name them HR Admins and New Hires.
- Add the appropriate members to their respective groups. When you set up your boards later, you'll use these member groups to make private information inaccessible to new employees.
- Deactivate any tools each group isn't likely to use (for example, new hires aren't likely to use the Plan tool.)
TIP
You can use account automation and workspace automation rules to automatically trigger certain events in ProjectPlace. Here are some examples of rules you may find helpful for your new workspace:
- Automatically add new members to the workspace if they belong to a certain department.
- When a member joins a workspace, create a new card on the board and assign it to them
- Delete older versions of documents if the workspace storage usage has exceeded a specific limit
Create a Board for Recruitment Workflow
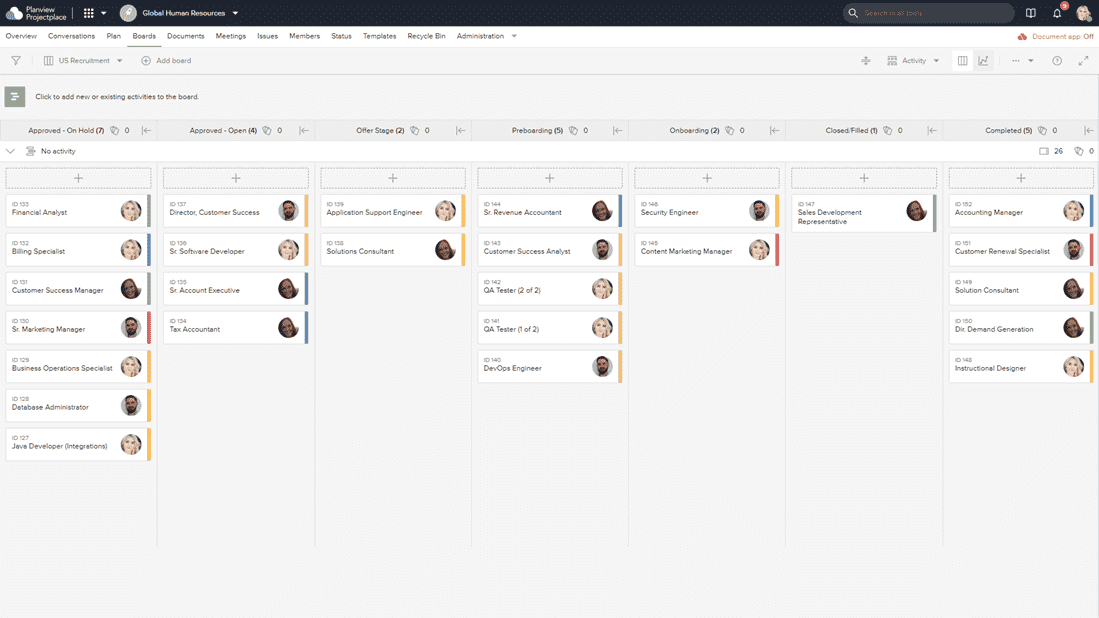
Your recruitment board makes it easy for everyone on the team to get visibility into what stage of the recruitment process open reqs are in, identify which team members are responsible for each task so that no steps are missed, and keep each applicant's information organized.
To set up your recruitment board:
- Create a new board and name it Recruitment. If your company is international, you may wish to specify a location (for example, Recruitment - Stockholm).
- Customize your board to define columns that represent the different stages in your recruitment process. Here are some example columns to get you started:
- Approved
- Offer Stage
- Preboarding
- Onboarding
- Closed/Filled
- Completed/Archived
- Set up board security:
- To make sure your board is only seen by HR Admins, set the access rights for the HR Admins group to Read and write, and the access rights for the New Hires group to No access.
- Set the access rights for the Members not in a group group to No access.
- Create a card for each open req your organization currently has and edit each card's details to include the following information:
- Card description: Make any notes about if the position is new or a backfill, any budget considerations, who the reporting manager is, etc.
- Assignee: Assign the card to the recruiter who is responsible for managing the open req. If you're out of the office, you can assign the card to one of your team members, so the process doesn't get delayed.
- Checklist: Keep track of smaller tasks associated with any stage of the process.
- Tag or Label: As a visual aid, you may wish to use colored tags or labels to represent which department (for example, Marketing, Development, Professional Services) the open req belongs to.
- Attachments: Attach or link to any relevant documents stored in your ATS (applicant tracking system) or the Documents tool.
TIP
Use card templates to standardize information on cards and speed up the card creation process.
Create a Board for Onboarding

Your shared onboarding board helps engage new employees in the onboarding process, and enables them to ramp up quickly by gathering essential pieces of information that they can refer back to at any point throughout the process. In this step, you'll create a master onboarding board that you can copy and share with each new hire. And if policies and organizational requirements evolve, it's easy to update the board to reflect any changes.
To set up your onboarding board:
- Create a new board and name it Onboarding. If your company is international and onboarding processes differ from country to country, you may wish to specify a location (for example, Onboarding - U.S).
- Customize your board to define columns that divide the steps in your onboarding process into manageable sections. For example, you may wish to divide tasks into Day 1, Week 1, and Week 2 sections. Different columns could also represent concurrent onboarding processes in different departments, such as IT setup.
- Set up board security:
- To make sure both HR Admins and New Hires can access and use the board, set the access rights for both groups to Read and write.
- Set the access rights for the Members not in a group group to No access.
- Create a card for each step you want new employees to complete. Steps can range from abstract tasks like Review the company mission statement to more concrete tasks such as Complete security training. A few key fields you may want to include on your cards are:
- Card description: Include a detailed explanation of the task.
- Tag or Label: As a visual aid, give each card a color-coded category (such as information, action item, or training) to represent what kind of task it is.
- Checklist: Break down the task into smaller subtasks.
- Attachments: Attach or link to relevant documents stored in the Documents tool.
To help users know which cards to complete first, you may also want to arrange cards according to priority in each column by dragging the cards that employees should complete first to the top of each column.
TIP
Use card templates to standardize information on cards and speed up the card creation process.
Create a Document Repository

The Documents tool enables you to store and share documents from a centralized, secure document repository. You can organize documents into a folder hierarchy, and you're also able to control access to the entire repository and individual folders. You'll also be able to use version control and document reviews to easily collaborate with your team when documents need to be updated.
To create a shared document repository:
- Create a folder structure or upload an existing folder structure.
- Set folder access rights. Document security is controlled at the folder level, so any documents stored inside a folder all have the same access level. Utilize your HR Admins and New Hires groups to grant access to (or hide) documents from specific people.
- Upload your documents. If you store documents in another system, ProjectPlace's third-party integrations make it easy to upload documents from Box, Dropbox, Sharepoint, and more. If you store documents in other applications, such as ADP or other applicant tracking systems, you can create links to those documents so they can be attached to the relevant cards.
- Use document reviews to gather feedback and update documents if requirements or processes change.
TIP
If you store documents in other applications, such as ADP or other applicant tracking systems, you can create links in the Documents tool so they can be attached to the relevant cards.
Go Live

Now you’re ready to start using your new workspaces! Remember that if you’ve set up your boards and documents security correctly, each group will have access to only the specific workspaces and document folders you want them to see.
- Invite HR Admins to the workspace.
- When a new employee is hired:
- Make a copy of the onboarding board and name the copy US Onboarding - [Employee Name]. Be sure to select Include cards so that all cards will be copied over (access rights settings are copied automatically.)
- Invite them to the workspace:
- In the Add to group section, select the New Hires group so they will be able to access the board.
- In the Message section, be sure to give them instructions on how to access the board (it may be helpful to include a link to their board and encourage them to bookmark it.)
- Employees will begin to work through the cards at their own pace, and @-ref you in the comments if they need help on a task. And if you notice that a card is stalled in a column or marked as blocked, you can quickly check in with them by commenting on the card.
- Follow a card to get notifications when the card is moved to another column, or when comments are added to the card.
TIP
If your organization has a large number of new hires, consider implementing some of these best practices to keep your workspace organized and information easy to find:
- Hide and delete boards after new hires complete the onboarding process, so unused boards don't appear in the list.
- To avoid having a large number of boards in your workspace, you may choose to further segment your workspaces by department (for example, Onboarding – Sales, Onboarding – Marketing, etc.) Since these workspaces will likely be similar, you can use workspace templates to reduce time spent creating multiple workspaces.
- Another way to avoid a large number of boards in a workspace is to use the Plan tool to track new hires' progress. To do this, create an activity in the plan for each employee, and connect the activity to the board. Then group cards on the board by activity and have each employee work in their individual swimlane. When they complete the onboarding process, mark the activity as done, and their swimlane and cards are cleared from the board.