
Get Started with Team Foundation

The first step in modernizing your project portfolio management practices is to empower teams with the right tools for their way of working. Traditionally, project teams have had their work managed by the Work Breakdown Structure (WBS) – a rigid set of tasks with strict dates, hours, and assignments controlled by the project manager – and any unforeseen event or unexpected change meant reconfiguring and rescheduling the entire WBS.
Modern ways of working empower teams to use the right tools to track and manage work – whether using collaborative workspaces, Kanban boards, or even the WBS – while the project manager maintains the control and visibility necessary to ensure the project delivery is as expected.
With Planview’s Project Teams powered by ProjectPlace and Team Kanban powered by Planview AgilePlace, project team members can collaborate and get work done in project-specific workspaces, while agile teams can plan and execute work using customized Kanban boards. Providing team members with the right tools to suit their way of working reduces the cost of misaligned and duplicate work, while ensuring overall strategic alignment. By breaking free of the traditional WBS constraints, teams are empowered to work in new and modern ways, and can respond more quickly to change and uncertainty.
Project Teams
Get Started with Project Team Delivery
ProjectPlace: Create a Workspace
Before you can create a workspace in ProjectPlace, you'll need to activate your user account and log in. You will receive an activation email from Planview's fulfillment team after your ProjectPlace instance is set up and ready to go (if you have not received the activation email, please reach out to your Customer Success Manager).
After you log in to ProjectPlace for the first time, you'll create your workspace and populate it with content before you add members to the workspace. A workspace is the place where you can communicate, collaborate, plan your project or work to be done, and follow up on progress. You can create an empty workspace, or choose to base it on a template.
To create a new workspace:
- Click the tool selector
 and select Workspaces.
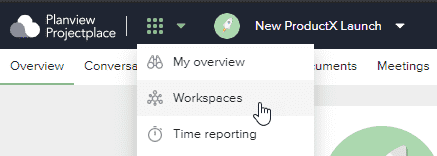
- From the Workspace menu, select the + Add workspace option.

- In the New workspace window, you can choose to create a new, empty workspace or create a workspace from a template.
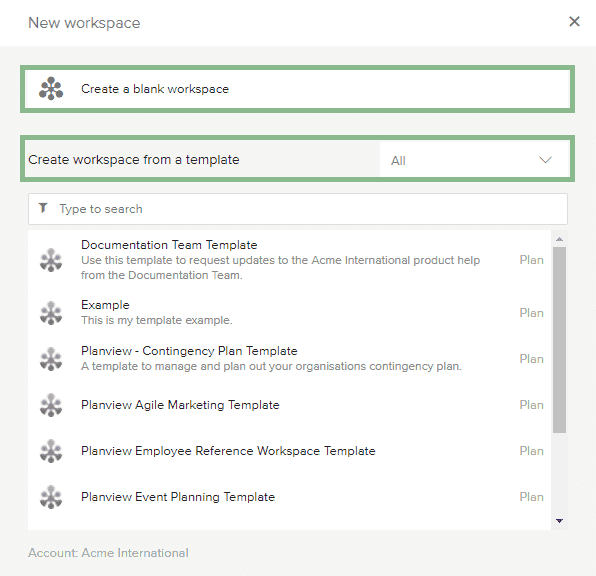
Create a new, empty workspace
- Click Create a new, empty workspace.
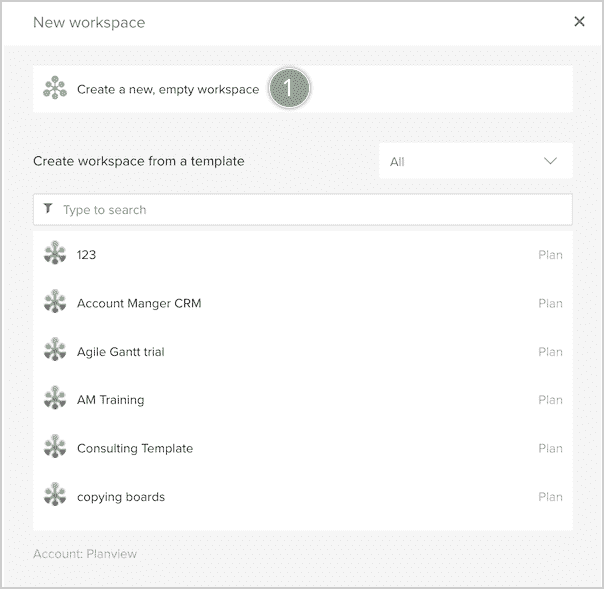
- Select the Plan planning tool to use in the workspace.
NOTE
The ability to create new Roadmap workspaces has been temporarily suspended; however, existing Roadmap workspaces will continue working. Planview is planning to revise the Roadmap tool in 2022.
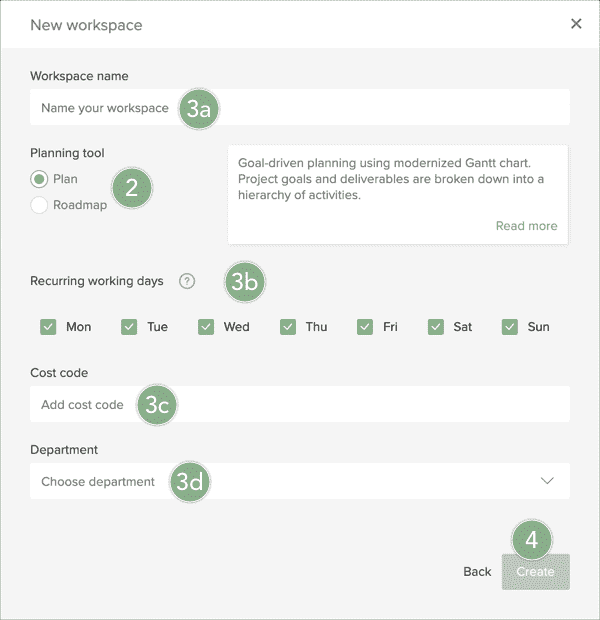
- Complete the relevant details in the provided fields:
- Type the Workspace name.
- Under Recurring working days, click the checkboxes to select the days of the week that you want to set as working, and deselect the days that you want to set as non-working. You will later be able to manage the working days settings, adding more custom days if needed.
- Type the Cost code (if any).
- Use the dropdown menu to select a Department.
- Click Create.
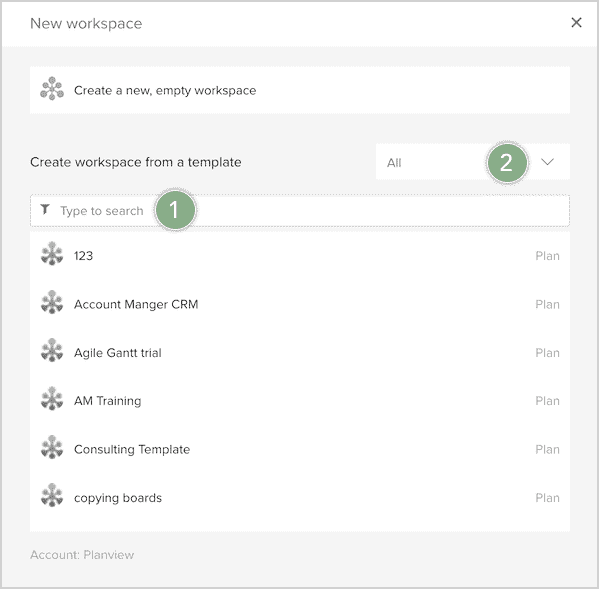
Create a workspace from a template
- Search from one of the available templates by typing the name of template in the search field.
- You may choose from one of the four categories when selecting a template:
- Personal templates
- Account templates
- ProjectPlace or Global templates
- Partner templates
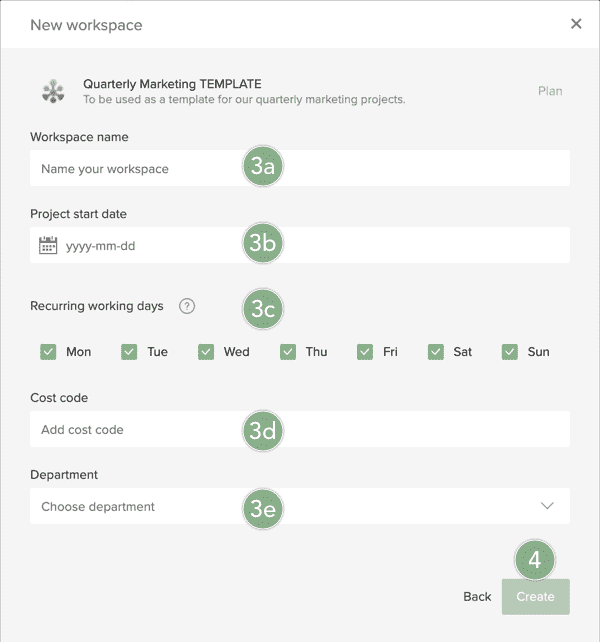
3. Complete the relevant details in the provided fields:
3a. Type the Workspace name.
3b. Select a Project start date.
3c. Under Recurring working days, click the checkboxes to select the days of the week that you want to set as working, and deselect the days that you want to set as non-working. You will later be able to manage the working days settings, adding more custom days if needed.
3d. Type the Cost code (if any).
3e. Use the dropdown menu to select a Department.
4. Click Create.
NOTE
Global templates are made available to both ProjectPlace and ProjectPlace Trial users who are U.S. customers from the U.S. datacenter.
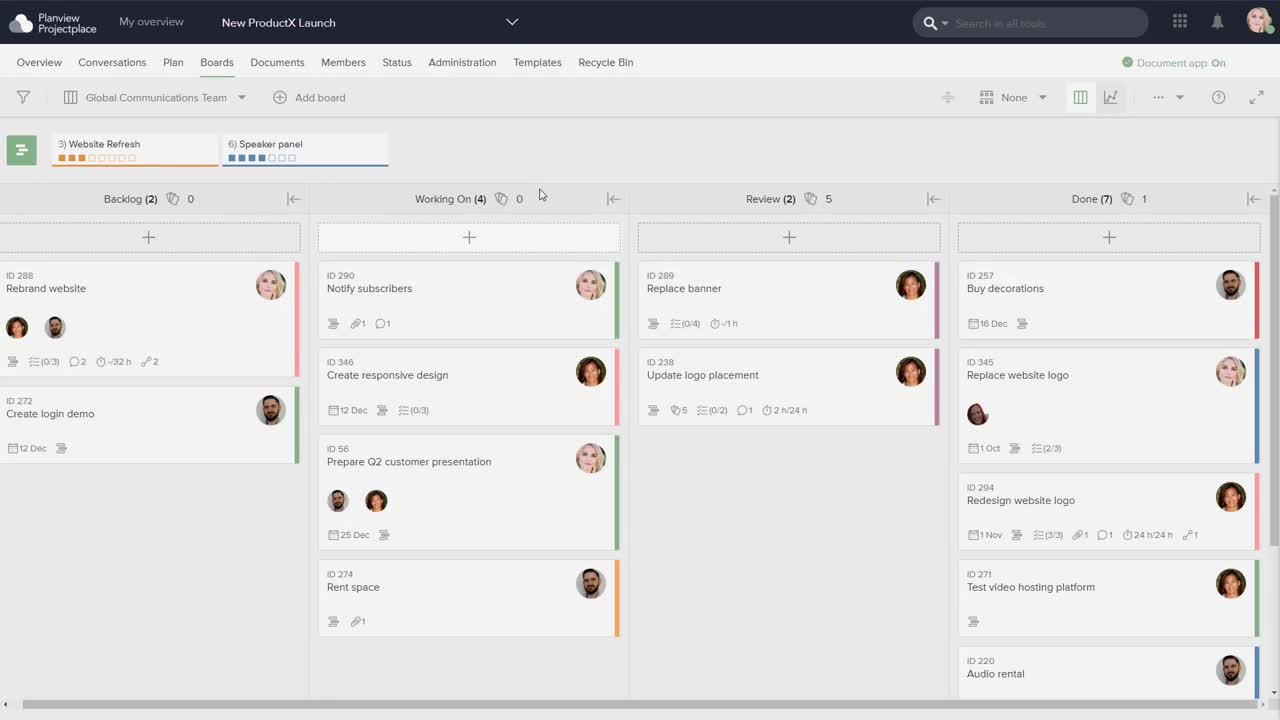
ProjectPlace: Create a Board
You can create any number of boards in a workspace, but keep in mind that having too many boards reduces the strength of a board to visualize all related work at once. A good practice is to create one board for each team.
To create a board:
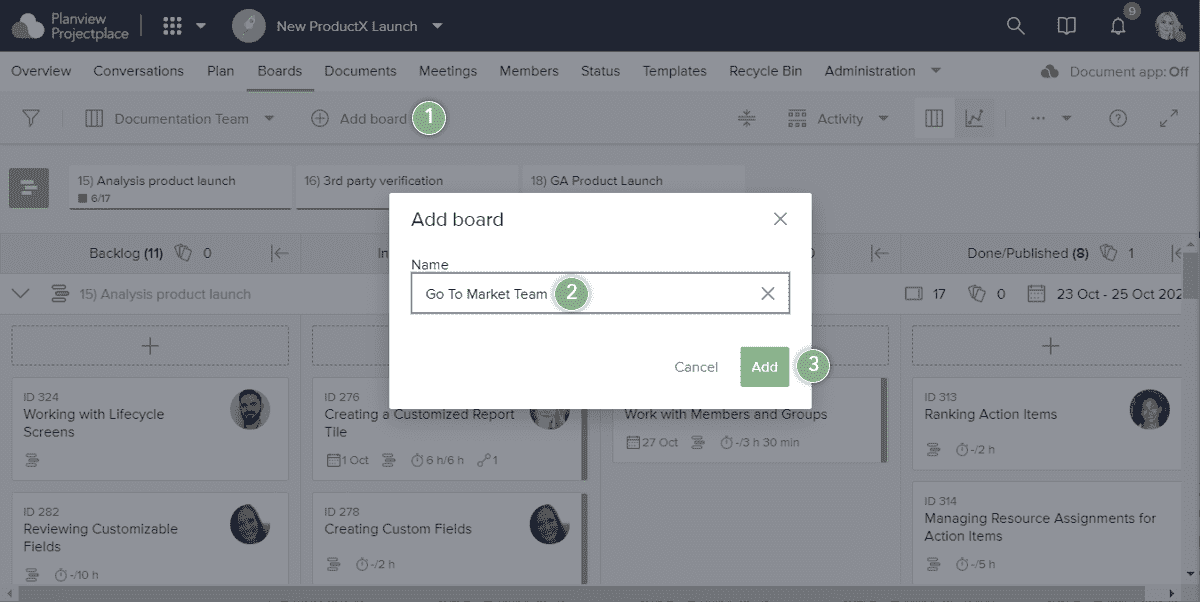
- Navigate to the Boards tool and click the Add board icon.
- In the Add Board window, enter a name for the new board.
- Click Add to create the board.
Looking for board design inspiration? Check out our article on customizing boards to fit your way of working!
Additional Resources for Project Team Delivery
Below you will find links to assets from across the organization that will be useful for both your self-learning and your work to utilize ProjectPlace in the Team Foundation stage of the PPM Modernization Journey.
Visit the ProjectPlace Video Library

Introducing ProjectPlace |
Getting Started with ProjectPlace |

How to manage documents in ProjectPlace |

Empower Teams with Templates in ProjectPlace |

Project Teams Experience for the PMO |

ProjectPlace for Product Delivery |

ProjectPlace for Human Resources Management |
ProjectPlace Enablement and Adoption
Managing Users in ProjectPlace
Working in ProjectPlace
Team Kanban
Get Started with Team Kanban

Planview AgilePlace: Basics
The Concept
When teams rely on text-based lists, spreadsheets, and emails to keep track of their work, all too often things “fall between the cracks.” Regardless of the type of work you do, if it involves multiple steps and a team of people to get it done, then you’re probably familiar with the misunderstandings, oversights, and hand-off delays that can easily occur.
Using a Kanban board to visualize the work as it’s being worked on helps to reveal problems earlier in the process to eliminate them quickly. To create a visual representation of their work, teams define the series of actions, steps, or stages that a piece of work goes through to be considered “done” and depict this process using lanes on a board.
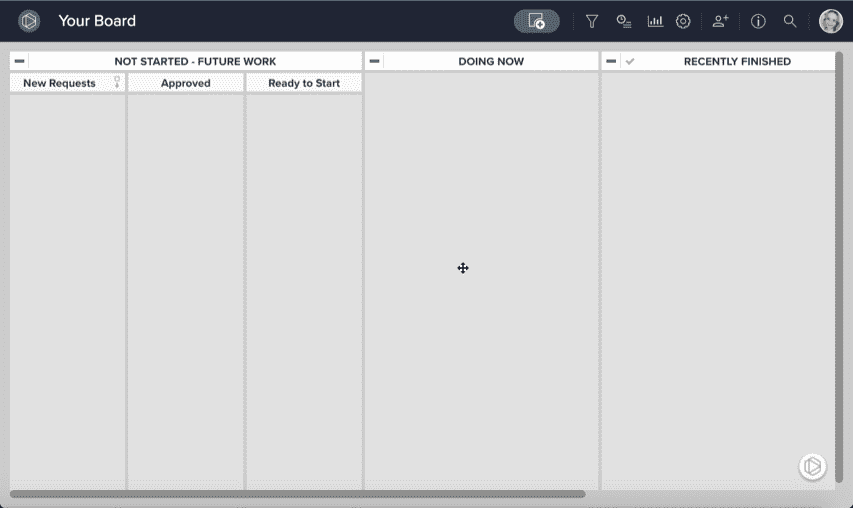
In the example above, the columns represent the different steps a work item can move through from initial planning through to completion. The specific lanes a team uses should meet the needs of the team and be tailored to their context.
Cards are used to represent work items on the board. This ensures that anyone looking at the board can instantly see what’s being worked on and the latest status.
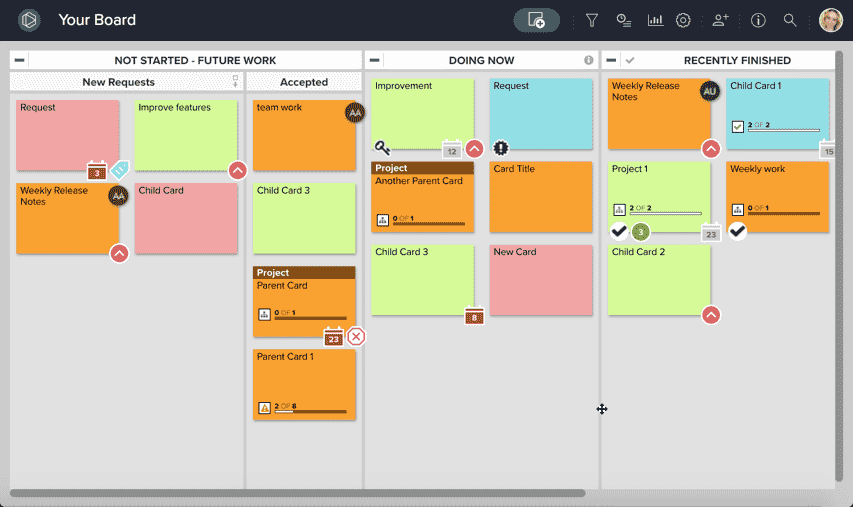
Cards can be moved across the board easily using drag and drop to reflect the current status of each work item.
The combination of being able to see how work gets done and what is being worked on makes information a lot easier to consume, understand, and share.
Key Terms
Here’s a quick explanation of the most common terms you’ll see used in AgilePlace and related resources:
- Kanban Board - Kanban is the Japanese word for "signal card." A Kanban board is a visual way to manage activities by signaling the status of those activities in a highly visible way.
- Work in Process (WIP) - Work that has been started but is not yet finished.
- Board - A visual representation of your workflow, separated into lanes that represent stages of work with cards that represent individual work items.
- Card - A visual representation of a piece of work that can be moved through the lanes on your board. Cards help you visually track each work item as it is moved through the stages of your process.
- Lanes - Rows and columns on a board that represent different steps or stages in a work process.
- Planview AgilePlace Account - Each Planview AgilePlace account has its own unique web address, one or more users, and one or more boards. Within one Planview AgilePlace account, multiple users can collaborate and manage their work on boards they share. The web address is created during the initial account set up, but can be changed at the request of the account owner.
- User - Each account can have multiple users. Each person needs their own user login to access a particular AgilePlace account. Each user can either be enabled or disabled; only enabled users can login or otherwise access the account.
- User License Limit - Determines the number of users that can be enabled at the same time within an AgilePlace account. Only enabled users count against or "consume" the number of user licenses available.
Learn more key terms in the Planview AgilePlace Glossary.
Visualize a Process or Project
As you start out, it’s good to have a project or process in mind that you want to visualize. To give you some ideas, here are three examples of how different teams use AgilePlace.
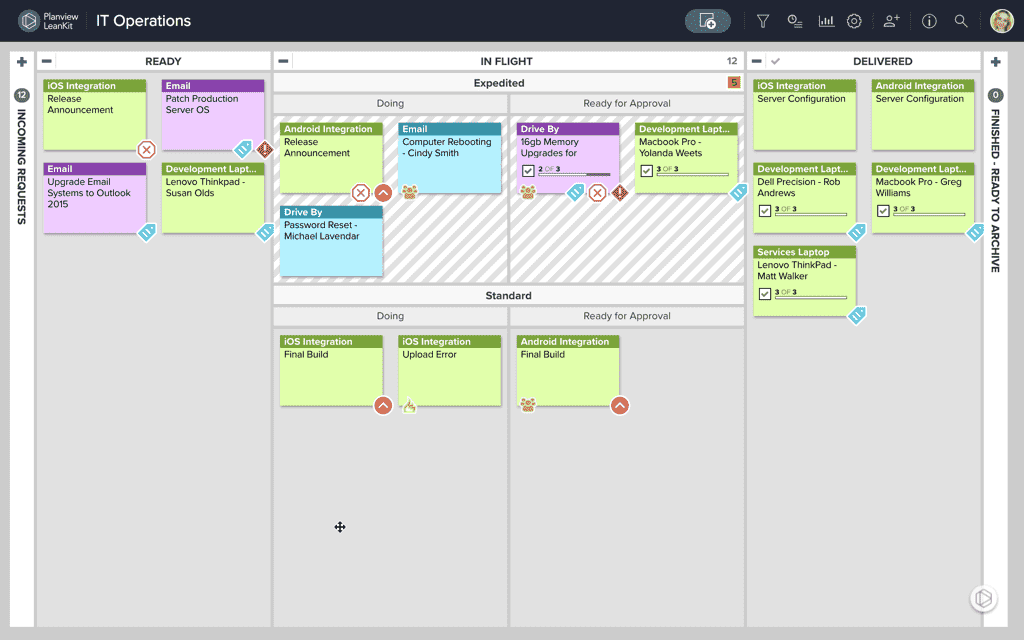
This example shows how an IT operations uses AgilePlace to manage conflicting priorities:
In this example, a software development team is using AgilePlace to apply scrum:

Here’s an example of AgilePlace being used at the portfolio level to prioritize strategic business initiatives:

Each of these teams has configured their AgilePlace board completely differently. What all three examples have in common is that anyone can understand what the team is working on and where each work item is in the process simply by glancing at the board.
Planview AgilePlace: Create a New Board
Before you can create your first AgilePlace board, you'll need to activate your user account and log in. You will receive an activation email from Planview's fulfillment team after your Planview AgilePlace instance is set up and ready to go.
After you log in to AgilePlace for the first time, you'll create a board and invite others to create cards on the board. You can create your own board design from scratch, or choose from a variety of pre-built templates that fit your workflow.
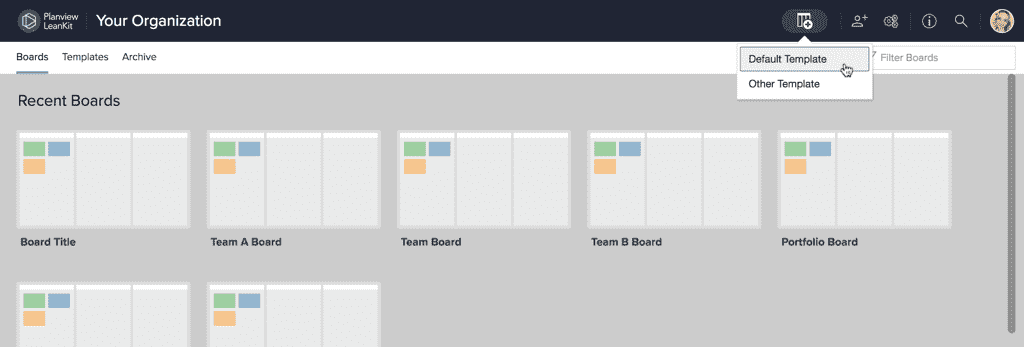
To create a new board in AgilePlace, click the New Board dropdown at the top of the home screen and then click either Default Template or Other Template.
NOTE
You must be an Account Administrator or a Board Creator to see the New Board option. Only Account Administrators will see the Duplicate option.
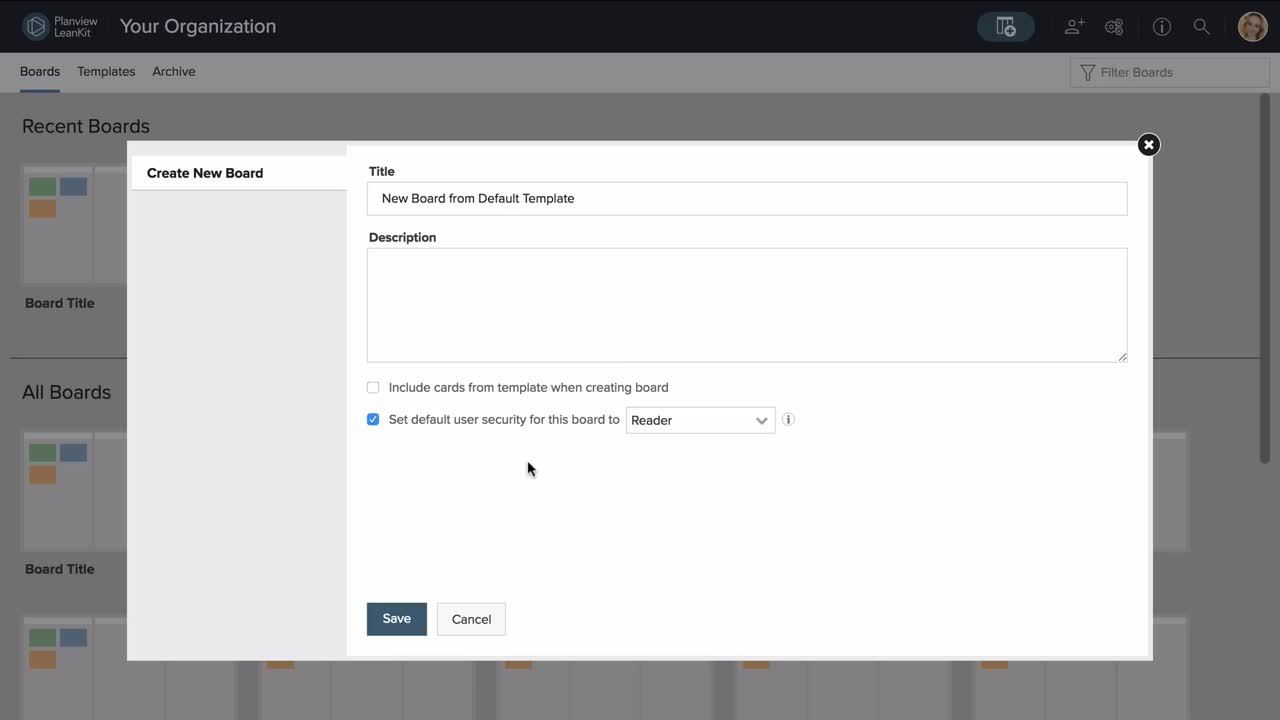
Create a New Board Using the Default Template
Choosing to create a new board using the default template opens the Create New Board dialog where you can add a Title and Description for your board.
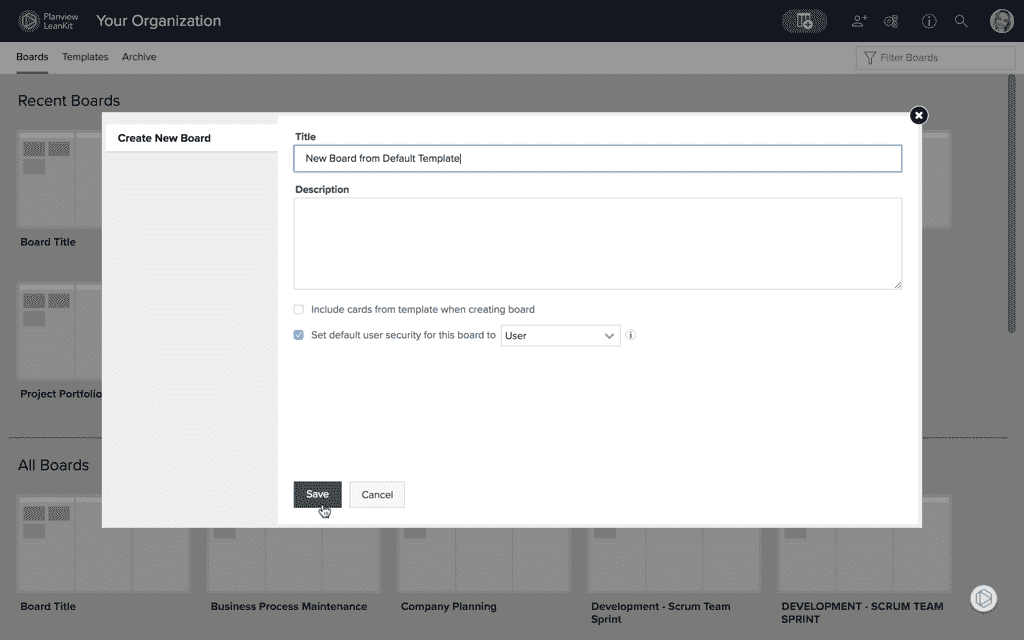
Here you can also set the level of access that non-account administrator users in this account will have to this board unless they are granted different access user-by-user:
Learn more about different levels of board access rights.
When finished, click Save to create this Board.
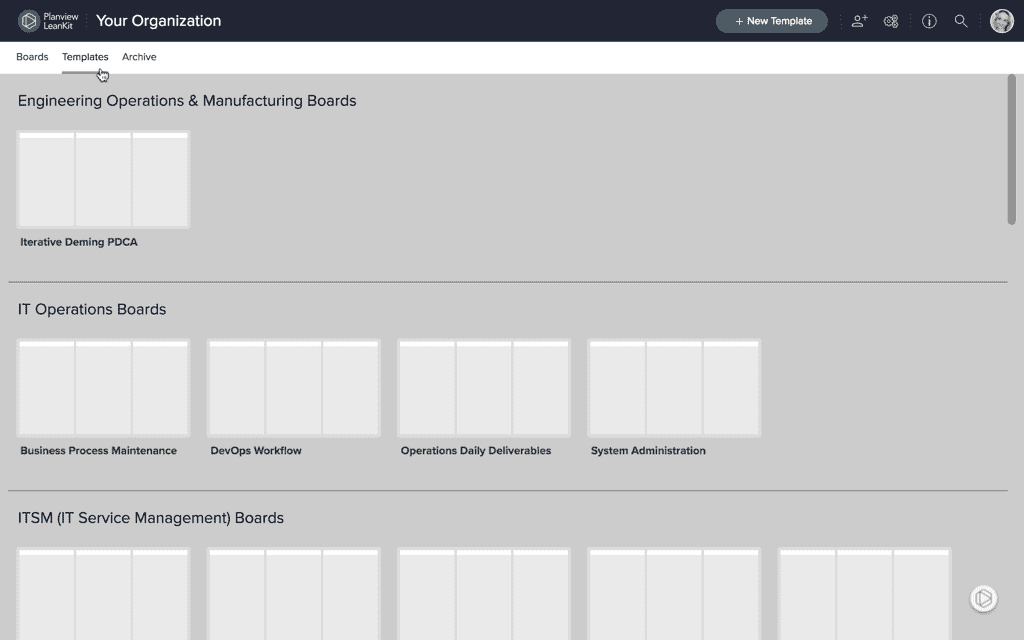
Create a Board from the Template Library
Choosing Other Template will take you to the Template Library. It’s organized in groups of similar templates. You can choose one from our ever-expanding Template Library, or any saved Template from your own account.
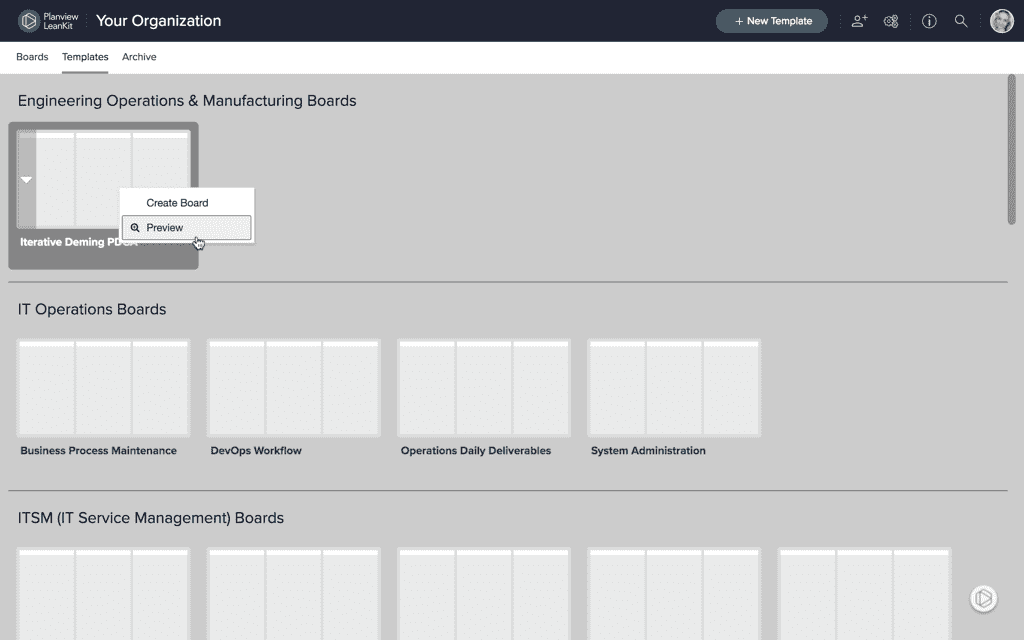
TIP
Right click on the template thumbnail and click Preview for a preview of the template you’d like to select.
Click on the thumbnail image of the template you want to use for your new board. This opens the Create New Board dialog where you can add a Title and Description for your board.
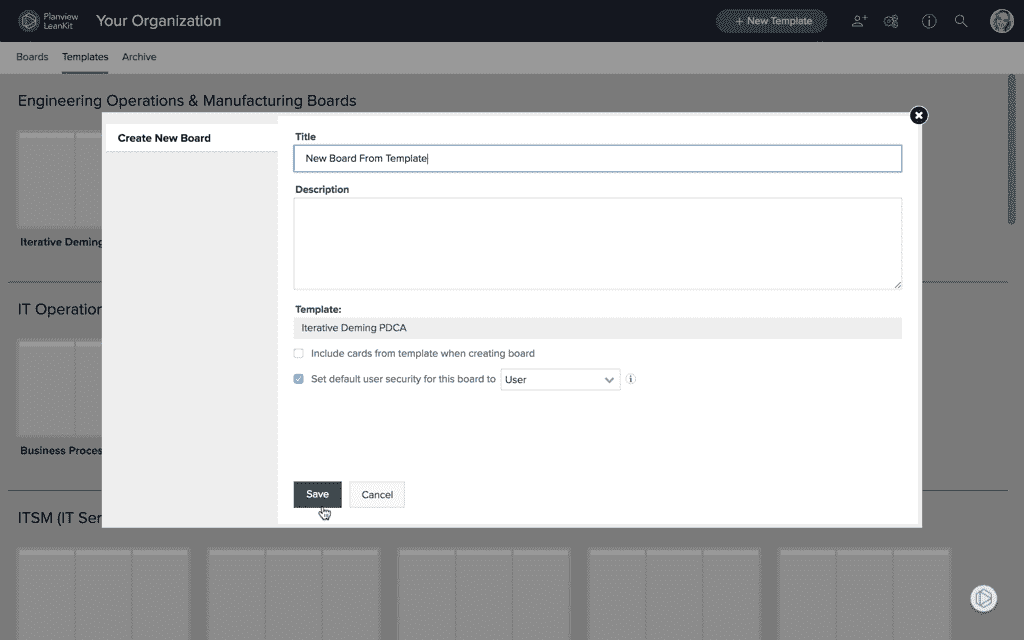
TIP
Some templates include cards, and you can check the box next to Include cards from template when creating board to include these cards when the board is created.
You can also set the level of access that non-account administrators in this account will have to this board unless they are granted different access user-by-user:
Learn more about different levels of board access rights.
Additional Resources for Team Kanban
Below you will find links to assets from across the organization that will be useful for both your self-learning and your work to utilize Planview AgilePlace in the Team Foundation stage of the PPM Modernization Journey.
Visit the Planview AgilePlace Video Library
|
Introducing AgilePlace |

Team Kanban Experience for the PMO |

AgilePlace for Manufacturing Teams |

AgilePlace for DevOps |

Objectives and Key Results with Planview AgilePlace |
Planview AgilePlace Enablement and Adoption
Next Steps
Now that you have turned on the Project Teams/Team Kanban work management modules to align work to your organization's strategic objectives, the next step in your modernization journey is to surface detailed project information in your portfolio by Getting Started with Connected Delivery.