
Managing Ribbons and Tiles
- Click Save. The new tile appears under the Available Tiles section of the Manage Ribbon Tiles window.
- In the Manage Ribbon Tiles window, click Save. The tile will be available for all users to add to the portfolio you specified.
Configuring Default Tiles for a Component Type
Troux Administrators can make changes to the default tile configuration for all portfolios that display a specific component type. To configure default tiles for a component type:
- From the menu bar, click Administration > UI Management > Ribbon and Tile Management.
- Click
 > Manage Tiles next to the component type whose tile configuration you want to edit.
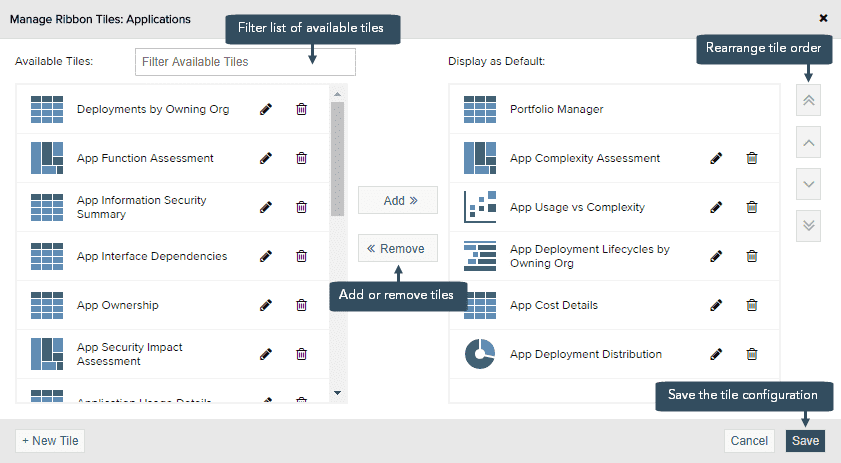
- In the Manage Ribbon Tiles window, perform any of the following actions:
- Add tiles: Select the tile you want to add from the Available Tiles section, then click the Add » button.
- Remove tiles: Select the tile you want to add from the Selected Tiles section, then click the « Remove button.
- Rearrange tiles: Use the
 or
or  controls to move a tile to the first or last position on the ribbon, and the
  or
or  controls to move a tile one place up or down.
- Click Save.
Please sign in to see this content.