
Delete PIR Items
Introduction
You can delete PIR Items from the ‘PIR Manager’ page. This article provides an overview of steps to
- delete a PIR Item from the ‘PIR Manager’ grid
- delete a PIR Item from the ‘PIR Item’ dialog
- bulk delete PIR Items.
Pre-requisite
To be able to delete the PIR Items, you must have ‘Delete PIR Item’ user permission.
Navigation
PIR > Manager
Delete PIR Item from the Grid
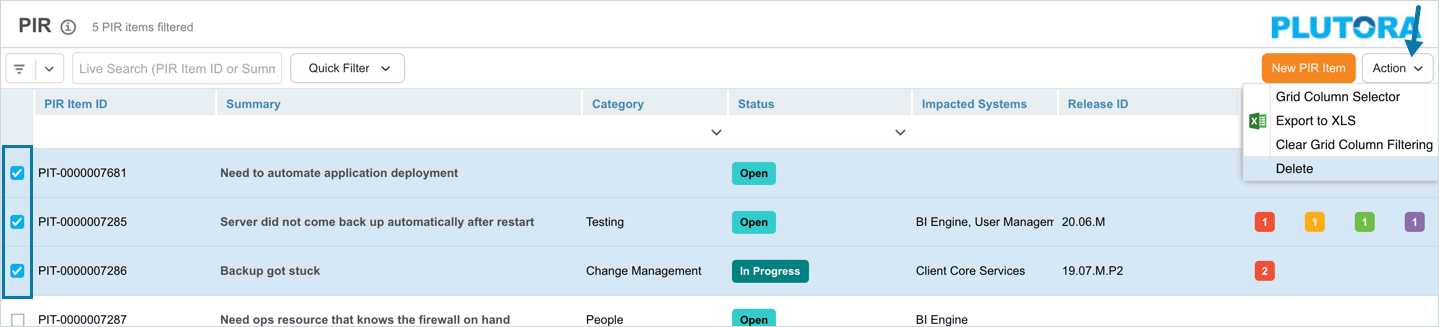
To delete a PIR Item:
- Go to PIR > Manager.
- Select a PIR Item’s checkbox.
- Click
 .
. - Click Delete from the drop-down menu.
- Click
 on the ‘Delete Confirmation’ pop-up.

The selected PIR Item is deleted and no longer appears on the grid.
Delete PIR Item from ‘PIR Item’ Dialog
To delete a PIR Item from the ‘PIR Item’ dialog:
- Go to PIR > Manager.
- Search and open the PIR item.
- On ‘PIR Item’ dialog click in the bottom-left corner.
- Click on the ‘Delete Confirmation’ pop-up.

The selected PIR Item is deleted and no longer appears on the grid.
Bulk Delete PIR Items
To bulk delete PIR Items:
- Go to PIR > Manager.
- Select two or more PIR Item checkboxes.
- Click
.png?revision=1) .
. - Select Delete from the drop-down menu.
- Click on the ‘Delete Confirmation’ pop-up.
The selected PIR Items are deleted and no longer appear on the grid.