
Add Or Edit Users
Introduction
This article provides an overview of steps to add (or register) a new user in Plutora.
Pre-requisite
- To be able to add a new user to Plutora, you must have ‘Create Users’ user permission.
- To be able to edit an existing user, you must have ‘Update Users’ user permission.
Navigation
Settings  > User Management
Add/Edit User
To add a new user:
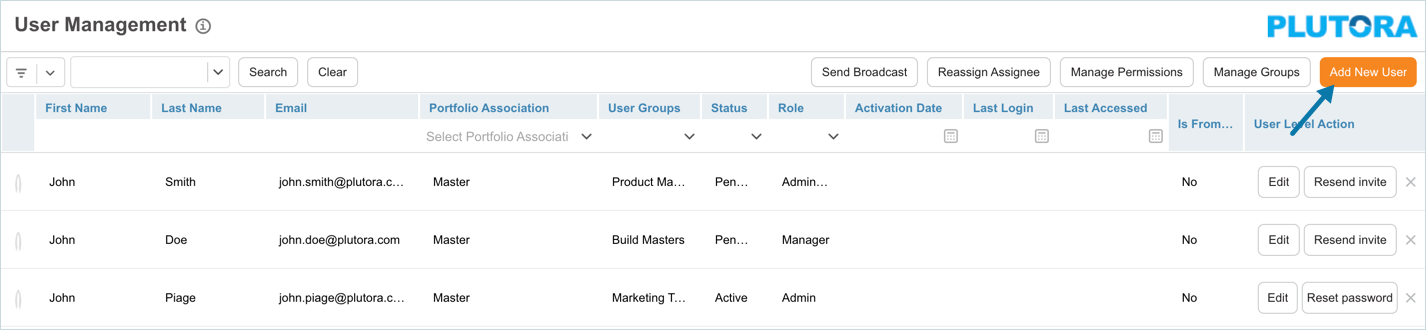
- Navigate to the ‘User Management’ page.
- Click
 .
.
To edit an existing user, search the user using the filter options available and then click  against the user entry on the ‘User Management’ page.
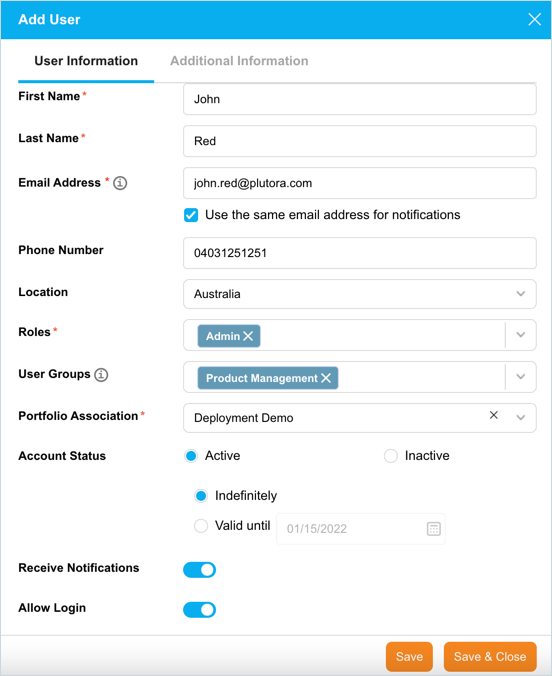
‘Add User’ dialog displays. If editing, the ‘Edit User’ dialog displays. Fill in the template as follows:
| Fields | Description |
|---|---|
| First Name/Last Name | Mandatory; Enter user's first and last name. |
| Email Address | Mandatory; Enter the email address. This is the primary email address, used for administrative purposes such as account activation, logging in, and obtaining a new password. Every user must have a unique email address. Email addresses cannot have two @ symbols, any of the following symbols , .. + = / : ? # %, spaces, or a single character address, such as r@plutora.com. Two characters, such as ra@plutora.com, are acceptable. |
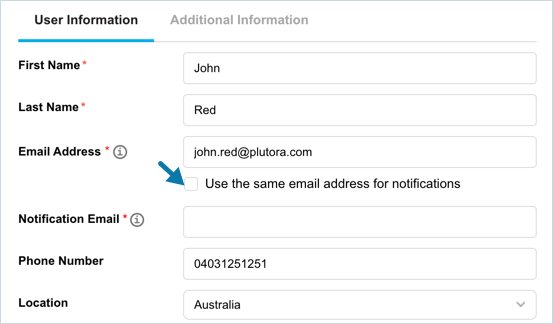
| Use the same email address for notifications | Selected by default; Select to use the same email for logging in and notifications. If unselected, another field Notification Email will display. Enter email ID to receive notifications. |
| Phone Number | Enter user's phone number |
| Location | Select the user's location from the drop-down. |
| Roles | Mandatory; Select one or more user roles. |
| User Groups | Select one or more user groups. |
| Portfolio | Mandatory; Select a Portfolio Association from the drop-down. |
| Account Status | Select Active to allow the user to log in to Plutora (unless Allow Login is toggled off). The system will send email notifications. To manage when the user's account will be automatically set to Inactive, select Indefinitely or set a date in Valid Till. Select Inactive to prevent user from logging in to Plutora. For more information, see Account Status. |
| Receive Notifications | Toggle 'On' or 'Off' to allow/disallow the user to receive email notifications. |
| Allow Login | Toggle 'On' or 'Off' to allow/disallow Active users to log into Plutora. Inactive users cannot log into Plutora. |
Click  .
.
Additional Information Tab
Click the Additional Information tab and fill in the template. The Additional Information tab contains custom fields, added by the administrator using the User Custom Fields Customization. These fields will vary between each Plutora installation. Consult your administrator for assistance with filling these fields.
This tab will be grayed out for new users if you did not click . If you are editing a user, you must have permission to edit the User Custom Fields.
After making the required additions and edits, click  .
.
The page will refresh and navigate back to the ‘User Management’ page. The new user is now added to Plutora. You can search the user using the filter options available.

More Information
Notification Email
If you uncheck Use the same email address for notifications, an additional field Notification Email will display. It is the user’s secondary email address used for email notifications related to user actions in Plutora. You can update this email address in their User Profile. It is a mandatory field, enter the email ID to receive notifications.
Account Status
You can set the account status as Active or Inactive:
Active Status: When a user is Active they can log into Plutora (unless Allow Login is toggled off) and they will be sent email notifications. To manage when the user’s account will be automatically set to Inactive:
- Select Indefinitely to keep the user’s account Active.
- Select Valid until and a date for the account to timeout to automatically set a user to become Inactive on that date. At 11.59 pm (23:59:59) on that date the user’s status will become Inactive and they will be unable to log into Plutora.
Inactive Status: If set to inactive:
- This status closes the account for a user that has left the company.
- The user cannot log into Plutora.
- Email notifications will no longer be sent.

Remove Assigned Roles and User Groups
To remove a role/user group assigned to a user, click ![]() on the role/user group.
on the role/user group.
Add New User in Deployment Plan Page
If ‘Add Stakeholder-Only’ user permission is activated, you can add new users using  button in Deployment Plan. Users added in this way can be managed like any other user of Plutora.