
JIRA Integration Customization
Jira Integration allows users to synchronize data between Jira and Plutora.
TIP
Basic authentication using passwords and cookies was deprecated for Jira Cloud on June 3, 2019. Please use OAuth for Jira Cloud instead. Jira On-Premises can still use Basic Authentication.

1. Set Jira Time Zone
Set the time zone in Jira so that the correct data synchronizes.
To set the time zone in Jira:
- Open Jira in your browser.
- Log in as the user that is used for the integration.
- Click Account Settings.
- On Atlassian Accounts page click Account Preferences.
- Update the Time Zone.

- Under Time Zone, select GMT Offset and (GMT+00:00) GMT.
TIP
Plutora and Plutora Test use UTC dates
- Click Update.
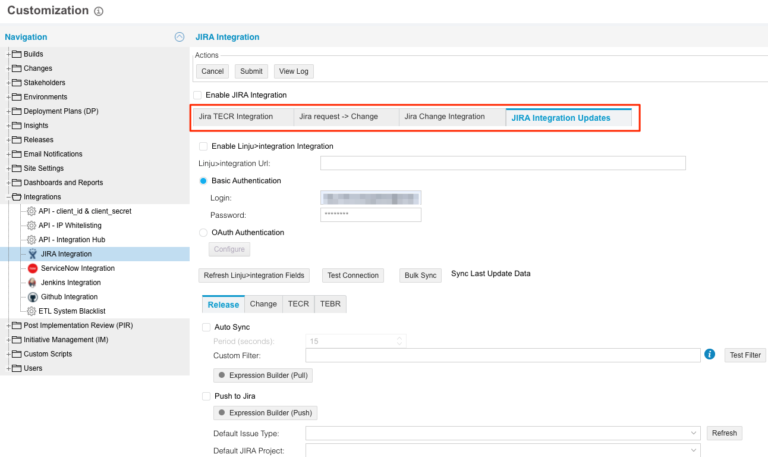
2. Enable Jira Integration and Manage Job Tabs
Now you can run multiple Jira integration jobs at once by creating a new tab for each new job.
To enable Jira Integration and manage Jira integration job tabs:
- Go to Settings
 > Customization > Integrations.
 - Click Jira Integration.
- Click to select the Enable Jira Integration checkbox to toggle on Jira Integration.
TIP
Jira Integration can also be toggled off using this checkbox, without losing any of your settings.
Manage Jira integration job tabs:TIP
Multiple enabled Jira integration job tabs auto syncing more than once a minute may impact on the performance of Plutora.
- Add a tab:
- Click the green cross.

- Type a title for the new tab in the Name field.
- Click Add.
- Click the green cross.
- Edit a tab:
- Hover your mouse cursor over the tab until the cogwheel-shaped button appears.

- Click the cogwheel-shaped button.
- Type a new title in the Name field.
- Click Save.
- Hover your mouse cursor over the tab until the cogwheel-shaped button appears.
- Delete a tab:
- Hover your mouse cursor over the tab until the cogwheel-shaped button appears.
- Click the cogwheel-shaped button.
- Click Delete Tab.
- Hover your mouse cursor over the tab until the cogwheel-shaped button appears.
- Add a tab:
- Click to select the tab you would like to set up.
- Click to select the Enable [tab name] Integration checkbox in the tab.
For example, a tab called New Tab would have a checkbox called Enable New Tab Integration. - Go to Step 3b to enable Jira integration with OAuth Authentication.
3a. Enable JIRA Integration with Basic Authentication
TIP
Basic authentication using passwords and cookies was deprecated for Jira Cloud on June 3, 2019. Please use OAuth for Jira Cloud instead. Jira On-Premises can still use Basic Authentication.
To enable JIRA integration with basic authentication:
- Type the JIRA URL.
- Click to select Basic Authentication radio button.
- Type login and password.
- Click Submit.
The yellow Your changes have been saved pop up opens and closes.
If you click away from the Customization page without clicking Submit, your changes will not save. - Click Test Connection.
3b. Enable Jira Integration with OAuth Authentication
To enable Jira integration with OAuth authentication:
- Go to Settings> Customization > Integrations.
- Click Jira Integration.
- Click to select the Enable Jira Integration checkbox.
- Select a tab.
- Type the URL.
TIP
This field will have the tab’s name. For example, if the tab’s name is Default, the URL field will be called Default URL.
- Click to select OAuth Authentication radio button.
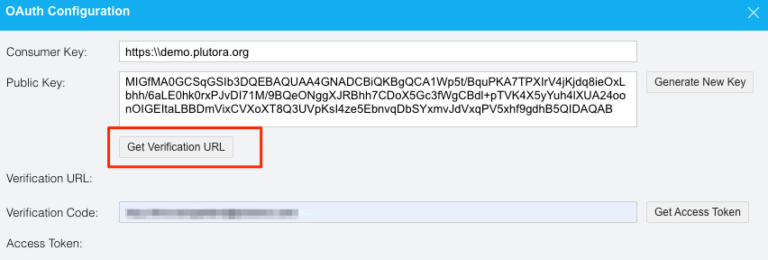
- Click Configure.
- Type a value for Consumer Key. For example, https://demo.plutora.org. Record the value as you will be using it later.

- Click Generate New Key to create a Public Key.
TIP
Do not click Get Verification URL as the connection is not yet configured.
- Copy the Public Key.
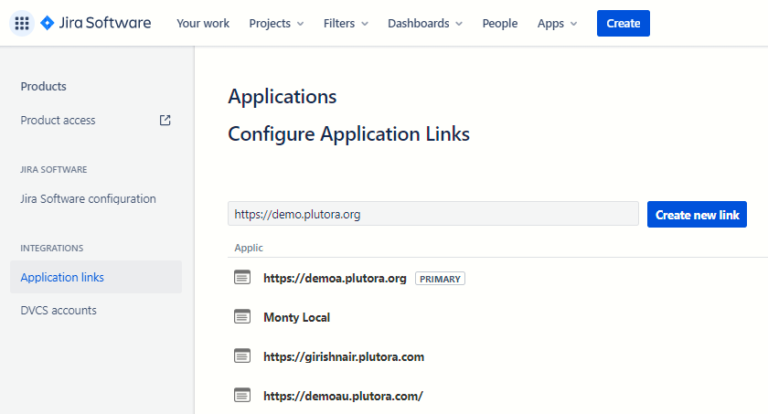
- Follow these instructions to create an Application Link on the Jira side:
- Open Jira in a new browser tab and go to Jira > Settings > Products > Application Links under the Integrations section.
TIP
Users require administration rights to add application links.
- Type the URL of your site into the Create new link field. For example (replacing <<YourDomain>> with your domain):
https://<<YourDomain>>.plutora.com - Click Create new link.
The Configure Application URL window opens.
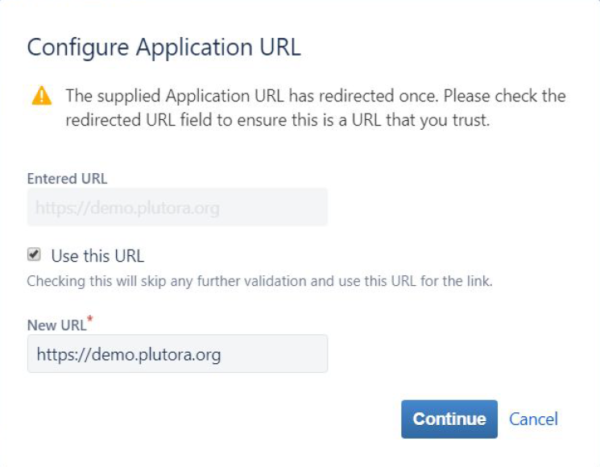
- Click Continue.
- Type the following values. (But use your own domain.)

- Application Name = https://demo.plutora.org
- Application Type = Generic Application
- Service Provider Name = https://demo.plutora.org
- Consumer key = https://demo.plutora.org
- Shared secret = [your “Public Key” from Plutora]
- Request Token URL = https://demo.plutora.org
- Access token URL = https://demo.plutora.org\
- Authorize URL = https://demo.plutora.org
- Click to select the Create incoming link checkbox.
- Click Continue.

- Type the same Consumer Key from Step 8 into Consumer Key and Consumer Name.
- Paste the Public Key from Step 9 into Public Key.
- Click Continue.
- Open Jira in a new browser tab and go to Jira > Settings > Products > Application Links under the Integrations section.
- Return to Plutora and click Get Verification URL.
- Click the verification URL to open a new window.
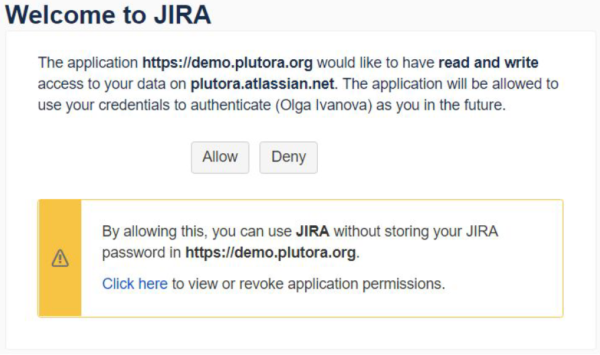
- Click Allow.
Your verification code will appear.

- Copy your verification code.
- Paste the verification code into the Verification Code field.
- Click Get Access Token. The Access Token should appear.
- Click the X in the top right corner to close the pop up.
- Click Submit.
The yellow Your changes have been saved pop up opens and closes.
If you click away from the Customization page without clicking Submit, your changes will not save. - Test your connection by clicking Test Connection or by creating a sample record to push and pull to and from Jira and Plutora.
4. Sync between Jira and Plutora
Once you have authenticated with Jira, you can sync with Plutora or push Plutora data to Jira.
Jira issues can be saved into Releases, Changes, TECRs or TEBRs.
When syncing is set up, as items change in Jira they will be synced with Plutora. This process will also happen in reverse if you click to select the Push to Jira checkbox.
To sync all items, even those that have not recently changed, use Bulk Sync (see below).
To sync between Jira and Plutora:
- Go to Settings> Customization > Integrations.
- Click Jira Integration.
- Click to select the job tab.
- Click one of the following sub-tabs:
- Release.
- Change.
- TECR.
- TEBR.
- Manage auto syncing:
TIP
Auto syncing imports data from Jira.
- Click to select the Auto Sync checkbox.
- Set the sync rate by selecting a time (in seconds) from Period (seconds). (Mandatory field.)
- Type a Custom Filter as a Jira query string. (Optional. See Advanced Searching for more information.)
- Click Test Filter. The filter is functional if issues are selected (see screenshot below).
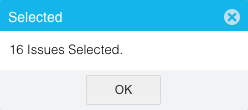
- Click Test Filter. The filter is functional if issues are selected (see screenshot below).
- Click Refresh [Tab Name] Fields.
- Jira fields will refresh based on the selected Jira project.
- If the name of the tab is Default, the button will be called Refresh Default Fields.
- Manage Pull from Jira to Plutora:
- Click Expression Builder (Pull) (Optional):
TIP
User can specify detailed PULL rules following next template:
If [Jira Issue Field] [condition]
Then [Plutora Entity Field] [value]- Click Add Statement.

- Click to select each drop-down menu and choose a data field.
- Click the red delete button to remove a statement.
- Click Save & Close.
- Click Add Statement.
- Click Expression Builder (Pull) (Optional):
- Manage Push from Plutora to Jira:
TIP
Push to Jira exports data from Plutora to Jira.
- Click to select the Push to Jira checkbox.
- Click Expression Builder (Push). (Optional.)
TIP
User can specify detailed PUSH rules following next template:
If [Plutora Entity Field] [condition]
Then Set Jira Project To [Value] And Set Jira Issue Type To [Value]
[extra conditions can be added here i.e. Set [Jira Issue Field] To [Value]- Click Add Statement.
.png?revision=1)
- Click to select each drop-down menu and choose a data field.
- Click the red delete button to remove a statement.
- Click Save & Close.
TIP
If the name of the tab is Default, the button will be called Refresh Default Fields.
Selected Jira Projects appear as tabs.

- Click Add Statement.
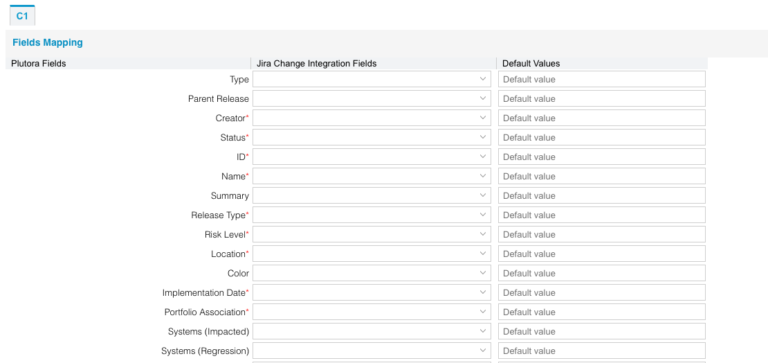
- Under Fields Mapping associate Jira fields (Default Fields) with Plutora Fields:
- Search Default Fields using Live Search or select Jira fields from the drop-down menus.
TIP
Live Search has been added to every Default Field in Fields Mapping.
TIP
For example, to import Jira systems into Plutora:
- Click Release tab.
- Select Jira systems for the Plutora Systems (Impacted) and Systems (Regression) fields.
- Search Default Fields using Live Search or select Jira fields from the drop-down menus.
- Import set data (for example, only Enterprise Release Types) by typing those values into the Default Values fields.
TIP
Entering a User Group into the User Group Default Value field does not currently work. Workaround: Enter an email address into User Groups instead.
- Click Submit.
The yellow Your changes have been saved pop up opens and closes.
If you click away from the Customization page without clicking Submit, your changes will not save. - View log files by clicking View Log.

5. Bulk Sync from Jira
Bulk syncing synchronizes all items from Jira to Plutora from a selected date to the present date.
To bulk sync from Jira:
- Check that the Auto Sync checkbox is selected under all required tabs.
- Click Bulk Sync.
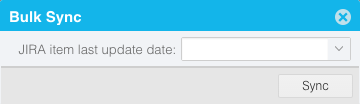
- Select a date from Jira item last update date.
- Click Sync.