
Change Custom Lists Customization
Introduction
Change Custom Lists customization allows you to add, edit or delete items from the following field types created in Changes Custom Fields:
- List fields (drop-down menus)
- List select (combo boxes)
Pre-requisite
- To be able to add and customize Change Custom Lists, you must have ‘Access Customizations’ User Permission.
- You must have already created the Change Custom Fields with Data Type ‘List Fields’ or ‘List Select’.
Navigation
Settings .png?revision=1) > Customization > Changes > Custom Lists
> Customization > Changes > Custom Lists
Add/Edit Changes Custom List
To add or edit a Change Custom Lists:
- Navigate to the ‘Customization’ page and double click Changes.
- Click Custom Lists.
- Select a Change Custom Field from the Select Custom Field drop-down.
- Click
.png?revision=1) . The system adds a line on the grid for the new field. To edit an existing custom list, search and click on the custom list from the grid and then click
. The system adds a line on the grid for the new field. To edit an existing custom list, search and click on the custom list from the grid and then click .png?revision=1) .
. - Enter/update the Changes Custom List item into the Value field.
- Click
.png?revision=1) .
.
Your changes will be saved and a confirmation message will display.

Sort Changes Custom Lists
Sort Manually
Sorting ‘Change Custom Lists manually’ changes their order in the drop down menus
To sort manually:
- On the ‘Customization’ page, navigate to Changes > Custom Lists.
- Hover your mouse cursor over the sort column of the Value that you want to sort.
.png?revision=1) appears.
appears. - Drag and drop the Value as you require.
- Click .

Your changes will be saved and a confirmation message will display.
Sort by Column Header
Sorting Change Custom Lists by column header only changes their order on the ‘Customization’ page.
To sort alphabetically on the ‘Customization’ page by column header, click on the column header. ↑ or ↓ displays indicating the ascending or descending column sort.

Delete/Replace Changes Custom List
Deleting a Changes Custom List will not delete it from Change records. But it will no longer be available when adding or editing a Change.
While deleting, you can either select another list item that will replace the item to be deleted or simply delete the item from the list. Replacing a Changes Custom List will replace it in existing Change records.
To delete a Change Custom List:
- Navigate to the ‘Customization’ page and double click Changes.
- Click Custom Lists.
- Select a Change Custom Field from the Select Custom Field drop-down.
- Select the Changes Custom List item that you want to delete.
- Click
.png?revision=1) .
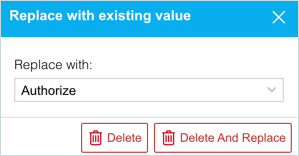
. - The ‘Replace with existing value’ dialog displays.
- To replace: select the item that will replace the item to be deleted from Replace with. Then click
 .
. - To simply delete the item, click
 .
.
- To replace: select the item that will replace the item to be deleted from Replace with. Then click
The item is now deleted and the page navigates back to the Custom List page.
More Information
To locate the fields added via this feature:
- Navigate to the ‘Change’ page (Release > Change).
- Search and click to open a Change.
- On the ‘Change’ tab scroll down to the Additional Information section. The Custom Lists that you had added/updated are displayed.

Custom Lists Greyed Out
The Custom Lists page will remain grayed out until a Custom Field is selected from the Select Custom Field drop-down menu.