Introduction to Release Manager
Introduction
Releases capture the software delivery lifecycle used to go from “idea to production” and include the phases, gates, activities, and criteria.
You can create three types of release: Enterprise, Project, and Independent. This article provides an overview of the Release Manager feature.
Pre-requisite
You must have customized the Release menu by using the ‘Releases Customization’ feature.
Navigation
Release > Manager
Release Manager Grid Layout and Features

On the Release Manager page, you can:
- View, search, and filter Releases
- Add and edit Release template
- Add and edit Release (Enterprise, Project and Independent)
- View Release Analytics
- Manage Gates and Approvals
- Duplicate Releases
- Bulk update Releases
- Delete a Release
- Export Releases To XLS
Search and Filter Options
Filter by Query Builder
Query Builder allows you to create and save your own private searches and use public searches.
You must have the ‘Create/Delete Release Public Query Builder’ user permissions to create, edit or delete public queries.
To use Query Builder, click ![]() on Release Manager. See Query Builder for more information. Clicking
on Release Manager. See Query Builder for more information. Clicking![]() opens the quick access menu, which lists private and public queries.
opens the quick access menu, which lists private and public queries.
Grid Column Filter
The grid column filter is the set of search fields and menus at the top of the data columns, under the column headers.
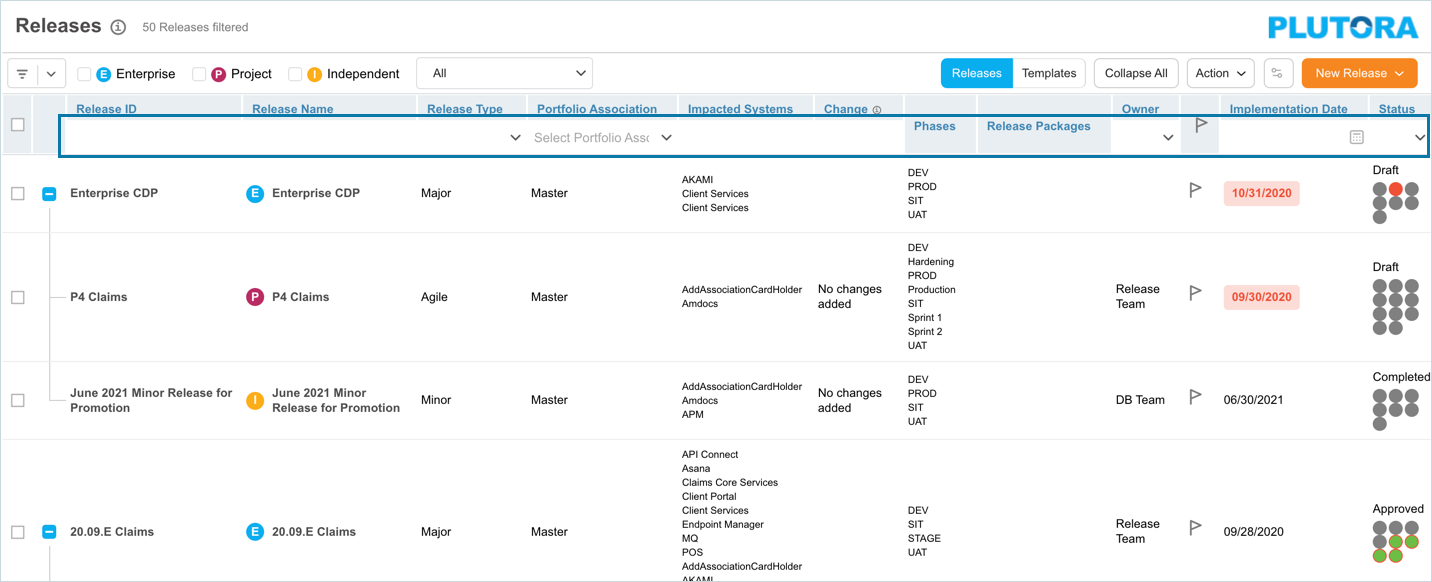
To filter Releases using the Grid Column,
- Search field: Type a search term.
- Drop-down menu: Click to select a list item.
- Combo box: Click to select one or more checkboxes.
- Date field: Select a date and click Done.
Press the Enter key to run the filter. To clear the filter, click the cross or select Action > Clear Grid Column Filtering to clear all the filters.
Filter Releases with Custom Fields columns
You can also filter Releases using their custom fields columns. To add custom field columns to the Release Manager page, select Grid Column Selector from the ![]() drop-down menu.
drop-down menu.

On the ‘Select Additional Columns’ dialog drag and drop custom fields into Selected Columns.
If any fields in this dialog contains  , it means that field is locked by the administrators using the Release Custom Fields Customization. Fields can also be made uneditable or hidden by administrators using these customizations.
Click  . The selected custom fields will appear as new columns to the right of the ‘Status’ column.
Filter by ‘My Filter’ Dropdown
Click on the ‘All’ drop-down to view the ‘My Filter’ options.
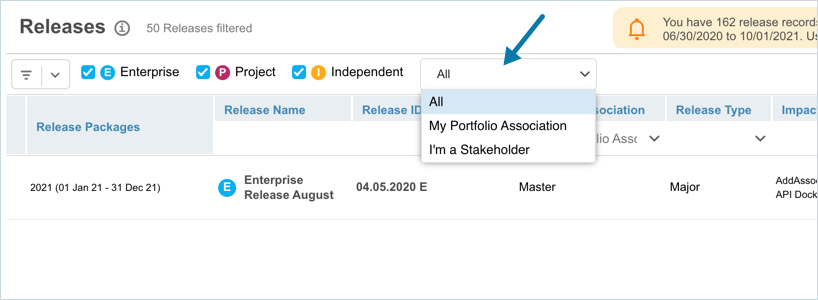
- All: Show all Releases.
- My Portfolio Association: This shows Releases from your portfolio association. You can check to which Portfolio Association you belong to in Profile.
- I’m a Stakeholder: Show Releases for which you are a stakeholder.
Filter by Release Type
There are three Release Types: Enterprise, Project, and Independent. You can filter the releases based on their types. To filter click on the respective checkbox(s):
- Enterprise: Filter by Enterprise releases. Note: Enterprise releases can contain project and independent releases.
- Project: Show project releases only.
- Independent: Show independent releases only.

If the Query Builder filter is active (the button is green) the Enterprise, Project, and Independent checkboxes enable you to further filter the results.
Checking the Show Related Releases checkbox (only visible when Query Builder has an active filter) will auto-select the Enterprise, Project, and Independent checkboxes and show parent and child releases associated with the filtered results.
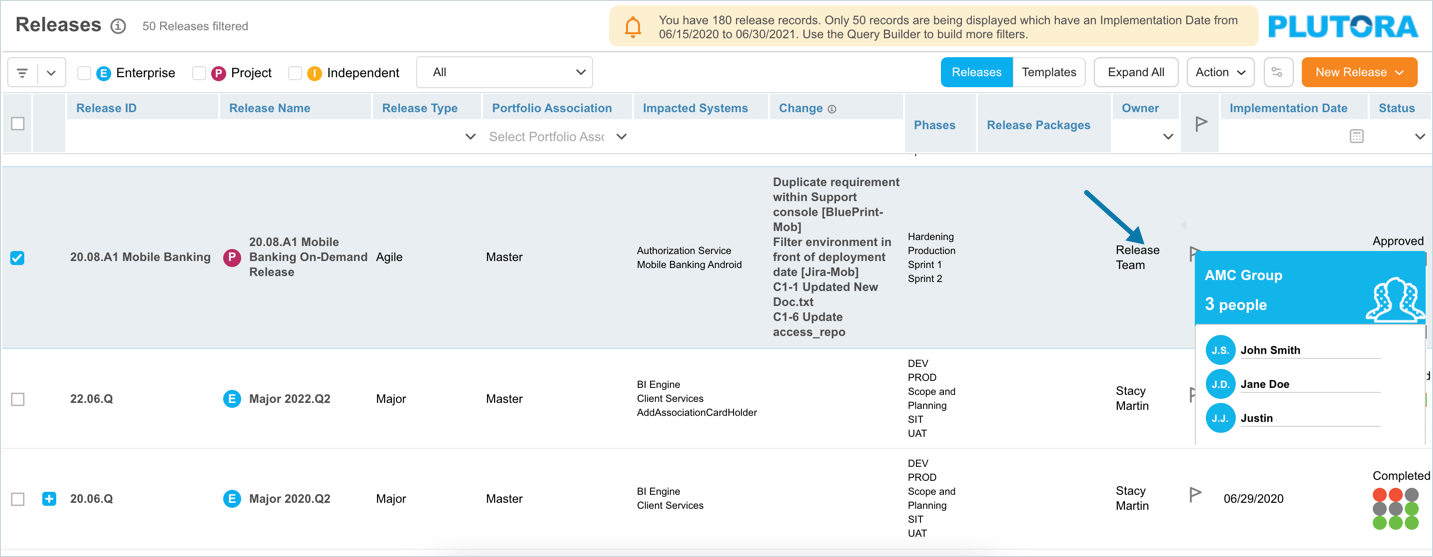
NOTE
On the Release Manager grid, if you have not applied any of the above mentioned filters, you can view only upto 50 records. You can use Query Builder to filter out more records. If an Enterprise Release has several child Releases and it reaches the limit, it will display the additional child Releases. In this case, you can view more than 50 records on the grid
View Release
To view a release, click on the ‘Release ID’ or ‘Release Name’. The respective release pop-up displays.
Show/Hide Columns
Releases grid has a number of default columns, you can show or hide these columns using the grid column selector. Hover your mouse cursor over the column header to see  .
.

Click the button and select Columns. The list of columns available on the Release Manger grid will be displayed. Select or deselect the checkboxes to show or hide columns.
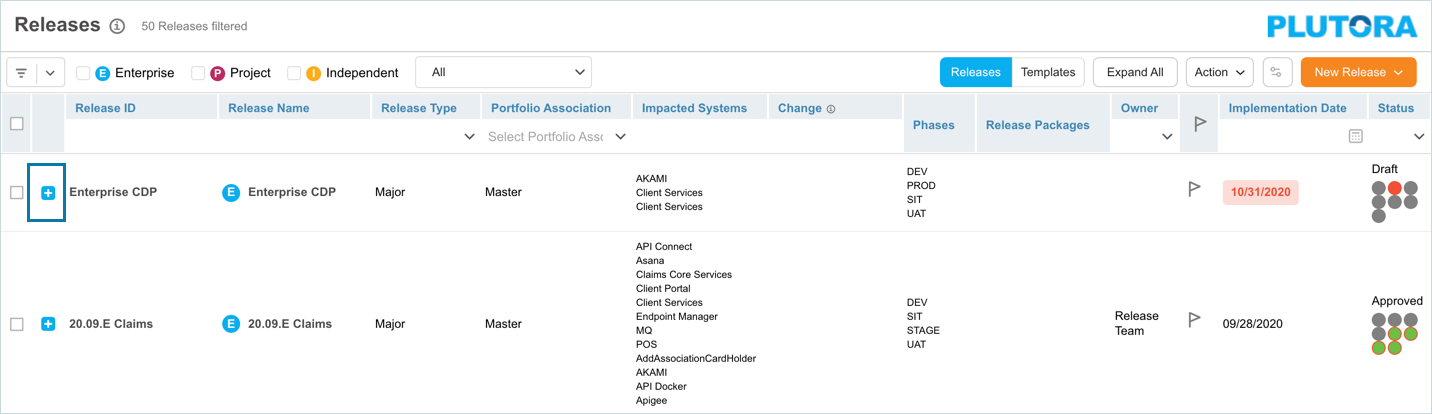
Expand All and Collapse All Buttons
Click the Expand All / Collapse All button to show or hide all the child Releases of parent Enterprise Releases on the Release Manager page.

Example of expanded view: Showing the child releases of the Enterprise Release.

Example of collapsed view: Enterprise Release appears but its child releases are hidden.
View Gates and Approvals
Gates and Approvals in Release Manager is a convenient way to add Stakeholders as Approvers to Gates and for those Approvers to select options to approve. Access Gates and Approvals view by clicking on the flag ![]() next to any Release in Release Manager. To return to the Release Manager page, click Go back to Releases on Gates and Approvals page.
next to any Release in Release Manager. To return to the Release Manager page, click Go back to Releases on Gates and Approvals page.
View Release Templates
Click Templates to view the Release Templates grid. The Releases Templates toggle button allows you to toggle between the Releases grid (containing the list of Releases) and the Templates grid (containing the list of Release Templates).
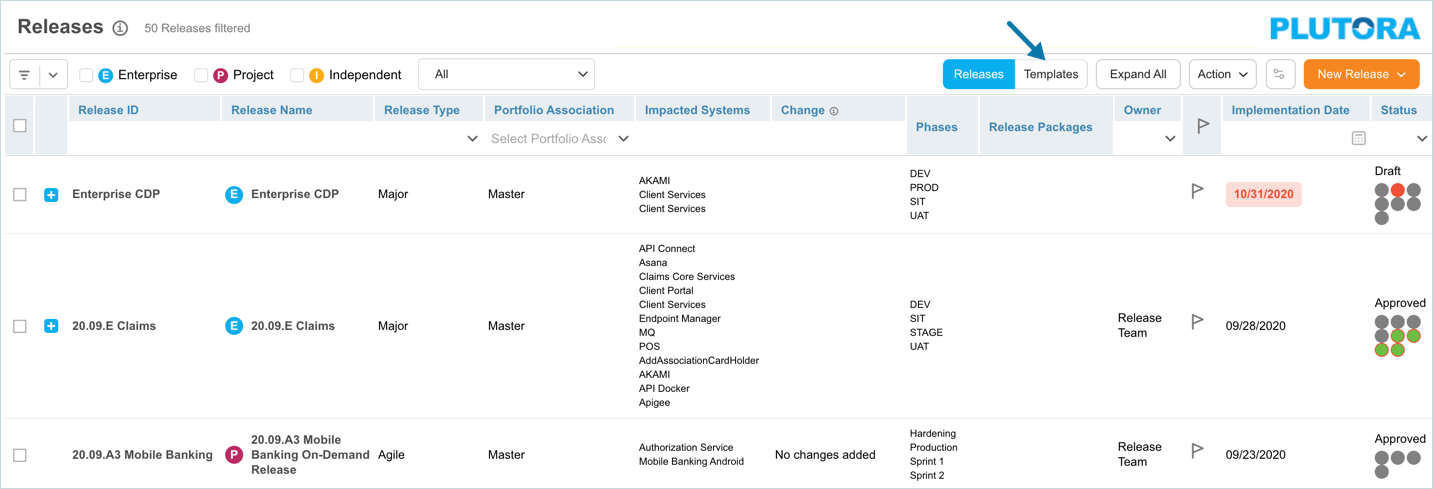
The Templates grid functions in a similar way to the Releases grid and has a Query Builder and a grid column filter.
The Releases Templates toggle button appears for
- administrators with the ‘Manage Release Templates’ user permission.
- all users if the ‘Enable Create Release From Templates’ checkbox is selected in Release Setup Customization.
Release Templates can be used to create Releases if you have the correct user permissions, see Create Release From Template. For example, you can create an Enterprise Release from an Enterprise Release template if you have the ‘Create Enterprise Release’ user permission. See Setting Up Release Templates to create Release Templates.
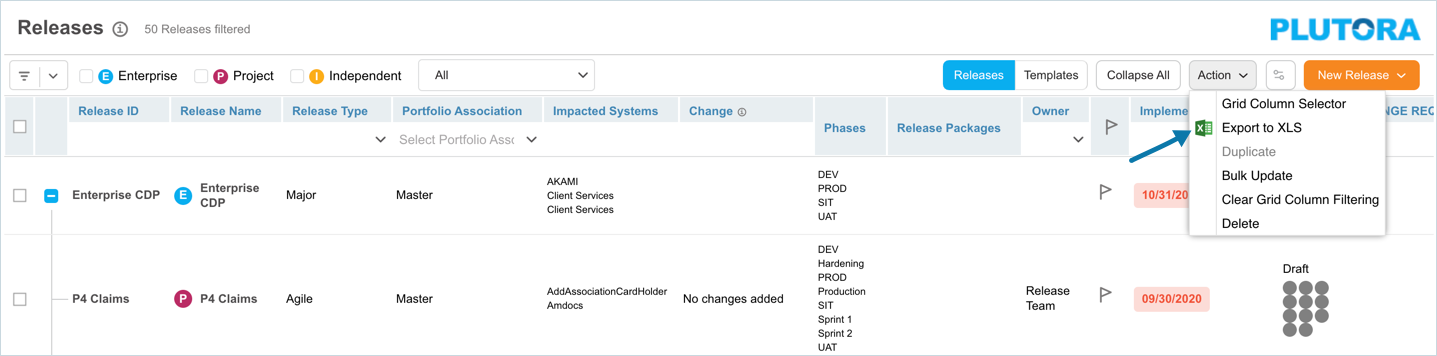
Export to XLS
Export Release Templates
To export your Templates to XLS, with the ‘Templates’ option selected click  and then click Export to XLS.

Your Excel file should start downloading immediately. If it doesn’t, check your pop up blocker settings. Save the file to your hard drive if prompted.
Export Releases
To export your Releases to XLS, with the ‘Releases’ option selected click and then click Export to XLS.
Your Excel file should start downloading immediately. If it doesn’t, check your pop up blocker settings. Save the file to your hard drive if prompted.
Phases and Gates Traffic Lights
Phases are periods in a release where activities need to be completed, eg design, development, testing, deployment, etc. Whereas, Gates are milestone points in time where a criterion or approval needs to be met for the release to remain on schedule. For more details on Phases and Gates see Manage Phases and Gates.
View the phases and gates in a Release and their status in the ‘Status’ column.
The Traffic Lights enable you to identify the Phase/Gate that is overdue and needs attention. Release Manager Traffic Lights colors represent:
- Gray: The Phase/Gate start date is in the future (Not Started).
- Green: The Phase/Gate start date is in the past and end date is in the future and there are NO overdue incomplete Activities/Criteria (On Track).
- Amber: Phase/Gate start date is in the past and end date is in the future and there are overdue incomplete Activities/Criteria (At Risk).
- Red: Phase/Gate end date is in the past and there are overdue incomplete Activities/Criteria (Overdue).
- Blue: Phase/Gate end date is in the past and all Activities/Criteria are completed (Completed).
Enable Traffic Lights
To enable traffic lights, click .
.
On the ‘Release Grid User Settings’ pop up the following options are available to display traffic lights:

RAG status (Traffic Lights):
- Show Gates RAG Only: Select to view only gates traffic lights.
- Show Phases RAG Only: Select to view only phases traffic lights.
- Show both Phases & Gates RAG: Select to view both phases and gates traffic lights.
- Show None (Disable RAG Traffic Lights): Select to disable the traffic lights. Selecting this option will hide the ‘Status’ column on the Release Manager.
Late Release Highlighting:
- Release Implementation Date: Select this option to highlight a release as ‘Late’ based on the release implementation date.
- Release Last Phase End Date: Select this option to highlight a release as ‘Late’ based on the release’s last phase end date.
After making your selections, click  .
.
The Phases and Gates traffic lights display in the ‘Status’ column in chronological order, sorted by their Start and End Dates.
More Information
Show User Groups
Hover your mouse cursor over a user group in the ‘Owner’ column to show the group members.
Edit Release Custom Fields in Release Manager
You can edit Release Custom Fields directly in Release Manager by clicking on a cell in the grid.
All the functionality associated with updating Release Custom Fields will occur when they are updated in this way, including sending emails through the Email Template Wizard.
To update Release Custom Fields in Release Manager, you must first add the custom fields to the Release Manager grid, See Filter by Custom Fields.
Once added go to the respective custom field column(s) (usually located on the right-hand side of the page) and click a cell in one of the custom fields columns.

- The cell can be edited and saved, just like a cell in Microsoft Excel.
- Drag and drop fields and Channel Impacting are not editable from Release Manager.
- The usual user permissions still apply. You must have the ‘View Additional Information Tab’ permissions to see the Release Custom Fields columns and the ‘Update Release’ permission to edit the Release Custom Fields columns.
Click outside the cell to save your changes.