Key Concepts
Overview
Planview Hub is a powerful tool for connecting your software delivery systems to empower teams, enhance communication, and improve the process of software development as a whole. Below is a look at some of the concepts Hub utilizes to facilitate integration.
The key concepts to understand are:
Integration
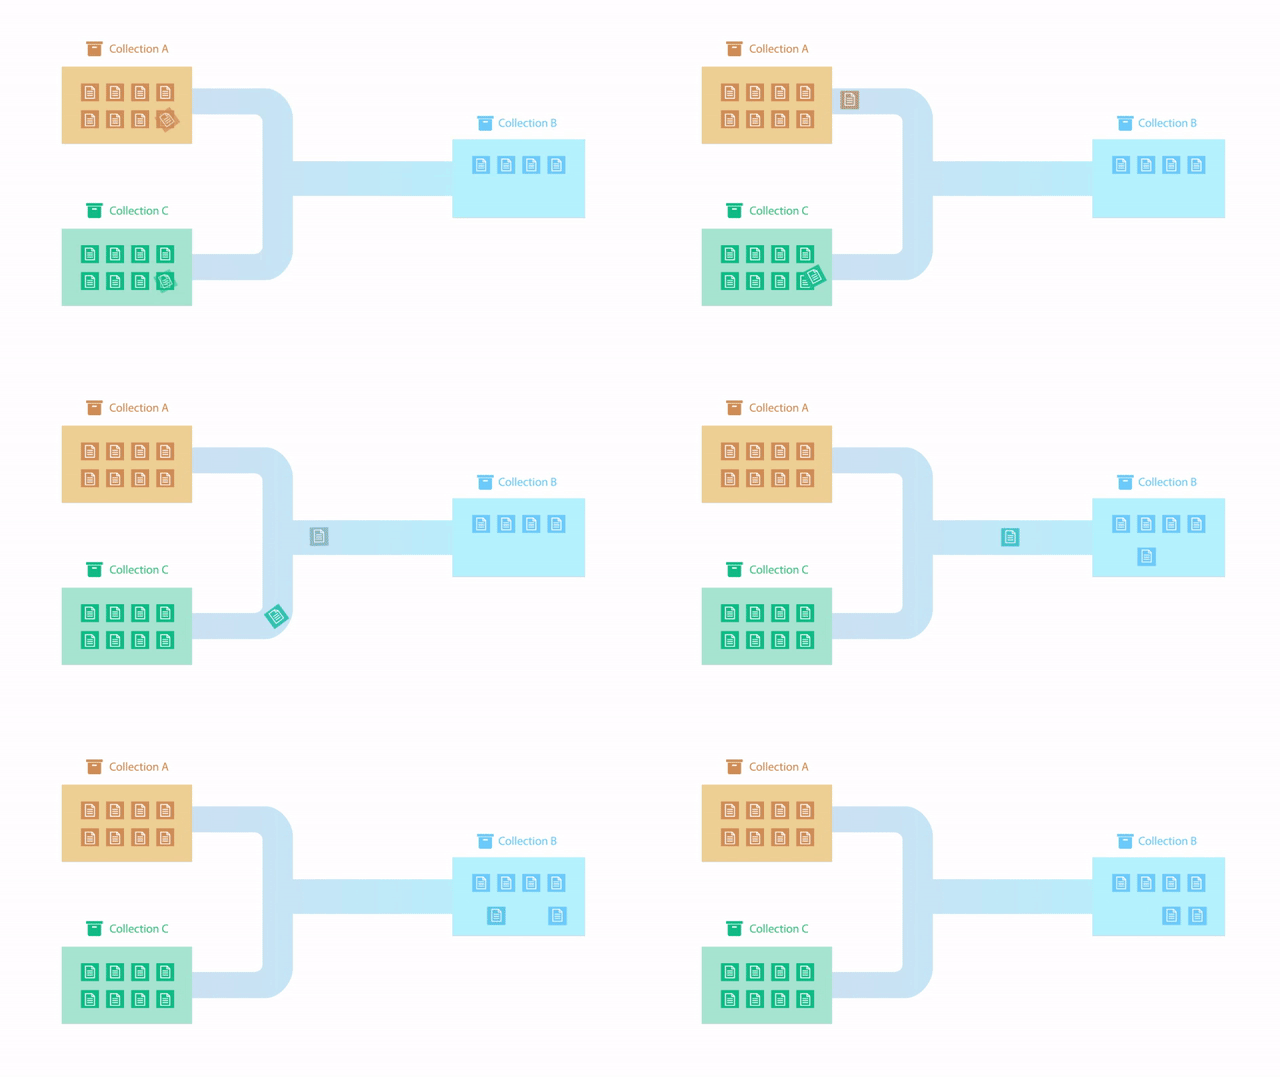
At the highest level, the definition of an integration is simply the flow of information between two or more tools. If you dig a little bit deeper, the definition of an integration is the flow of information, defined by the flow specification, between two or more collections. And collections are sets of artifacts. But that is probably too much to swallow right at the beginning – so don’t try to!
Take a look at a conceptual picture of what an integration looks like in the figure below, and just keep that in mind as we walk through all of the other concepts — then when you come back to this it will make a lot more sense!
So let’s first talk about the underpinnings of how Hub communicates with end systems, which we call Repositories. For all repositories Hub connects to, we create what we call a Repository Connection. Once we’ve introduced those concepts, we’ll talk about Artifacts and Collections and then we will come back to Integrations and talk more about the flow specification.
Repository
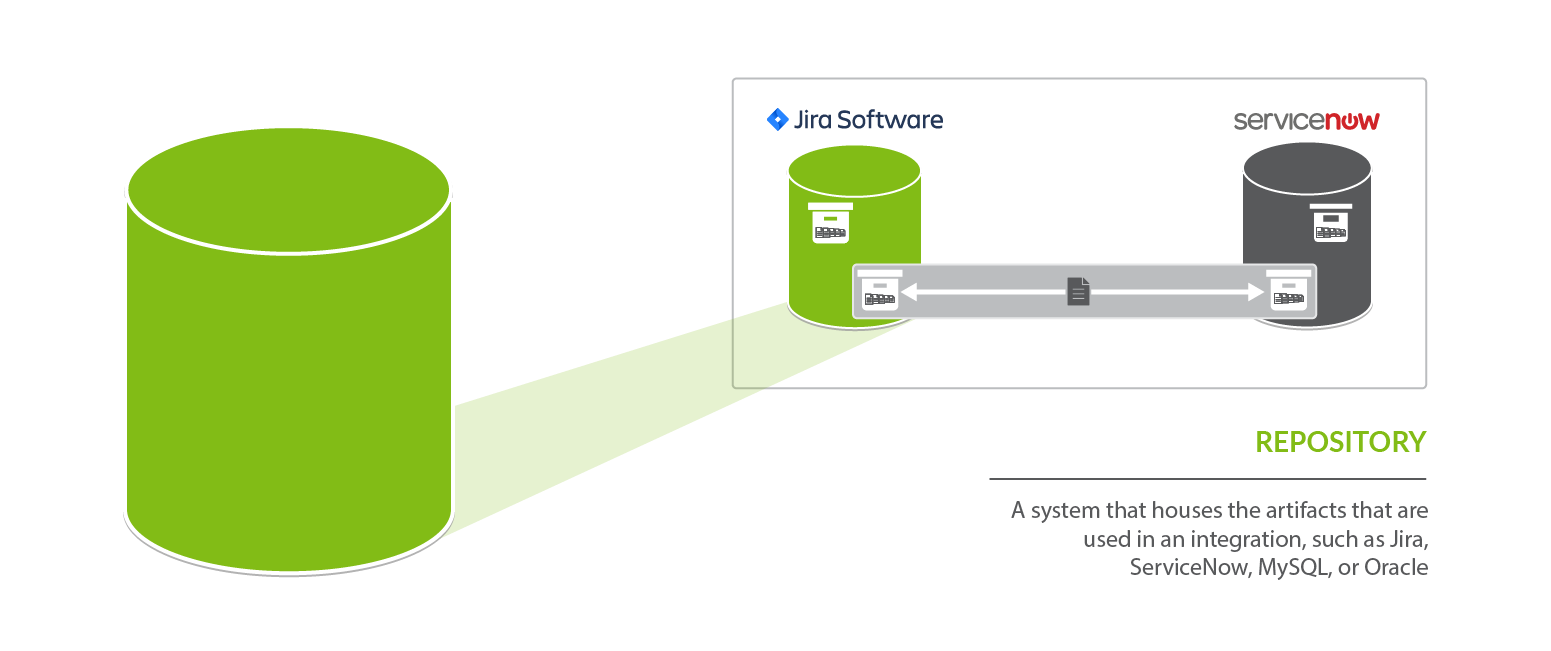
A repository is any system that houses the artifacts that can be used in an integration. Repositories can be systems used as part of the software delivery process, like Micro Focus ALM/Quality Center, Broadcom Rally, Jira, etc., or repositories can be more generic databases, like MySQL or Oracle.
A repository connection is a connection to a specific instance of a given repository that permits Hub to communicate with that repository. To configure a repository connection, users will need to provide base credentials such as a server URL, a username, and a password.You can learn how to set up a repository connection here.
Artifact
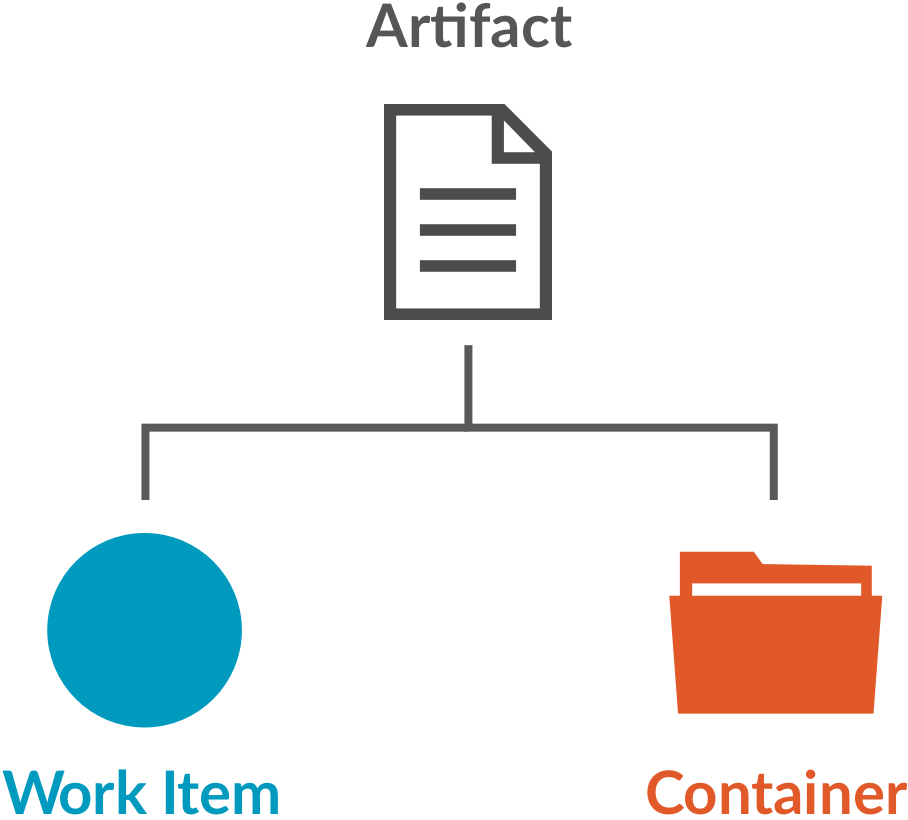
An artifact is any object containing metadata that resides within your repository. There are two main types of artifacts: work items and containers. Work items and containers have some similarities, and some key differences, with regard to how they behave within Hub.
Work Item
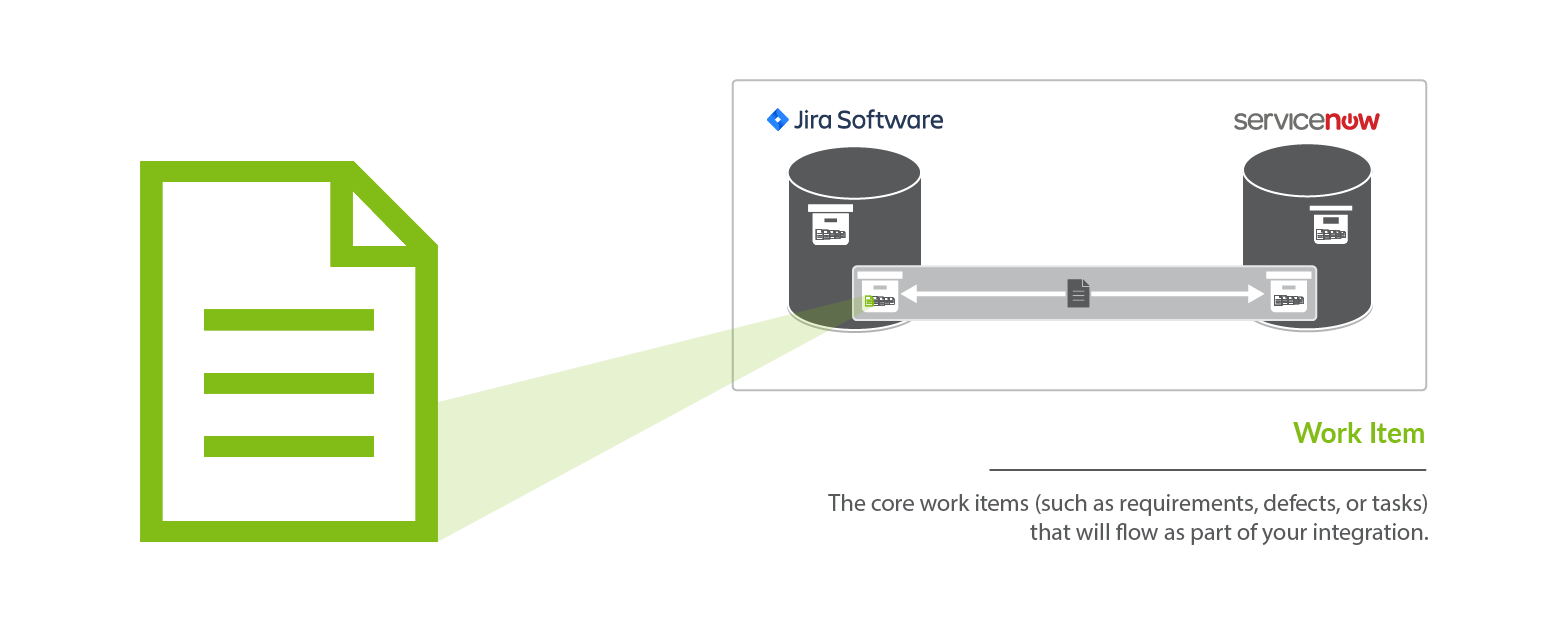
Work items are the artifacts that are produced by different teams during software development. They are the core items that will flow as part of your integration. Some examples of common work items are defects, stories, requirements, test cases, and help tickets, to name just a few. Serving as the core currency of communication, work items are the means by which all the work around software production is recorded and tracked. Work items are at the core of any integration and are the entities that Hub can create or modify as a part of an integration.
Within Hub, you will primarily use work items to:
- Serve as the entity that flows from one repository to the other as part of your integration. For example, you can flow requirements in your source repository to your target repository, where they will create corresponding requirements.
Container
Containers are artifacts that are used to group work items. They define where, within the repository, each work item resides. Some examples of common containers are projects, folders, modules, workspaces, and sets. The main purpose of a container is to define a set of work items.
Within Hub, you primarily use containers to:
- Define the scope of your collection. For example, you could add Project A and Project B to your collection, which would mean only artifacts within those projects would be eligible to flow in your integration (we'll explain this more in the Collection section).
- Define routing for your collection. Routing defines where artifacts will be created within your target collection. For example, if you route Project A in Jira to Project B in Jama, that will tell Hub to flow artifacts in Project A in Jira over to Project B in Jama, where they will create corresponding artifacts.
- For specific low-level container types, you can create a Container Collection, which will allow you to flow Containers from a source Collection to a Target Collection — allowing you to recreate your container (i.e., folder, module, component) structure, as well as the work items contained within them in the target repository.
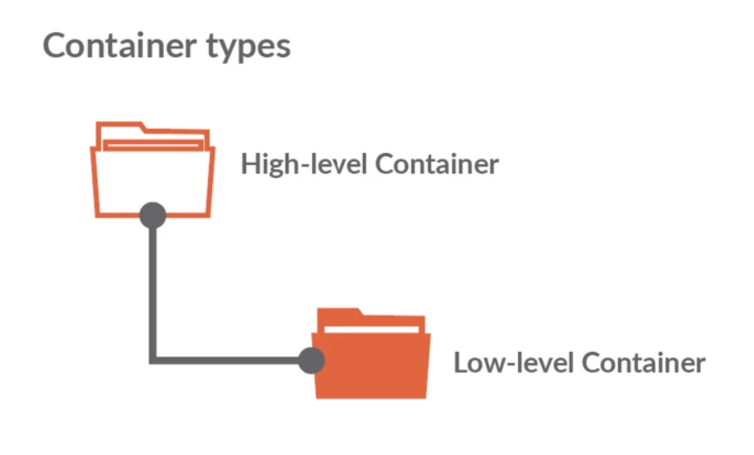
High-Level Containers vs. Low-Level Containers
Some repositories contain high-level containers, such as workspaces, which are then broken into low-level containers, such as projects.
Containers are a key component of creating your collection, as each collection is defined by its artifact type (i.e. defect, requirement, test case, etc), by the model it is mapped to, and by the high-level containers it includes. In this way, containers are essential for how you define which artifacts can flow as part of your integration.
You can learn more about how to select the containers included in your collection here.
Your containers also become important during the Artifact Routing stage of configuring your integration. On the Artifact Routing Screen, you are able to determine how artifacts should flow from one collection's containers to the other's. Some repositories allow you to route at only the low-level container level, some allow you to route at the high-level container level, and others allow a mixed approach.
You can learn more about how to configure artifact routing here.
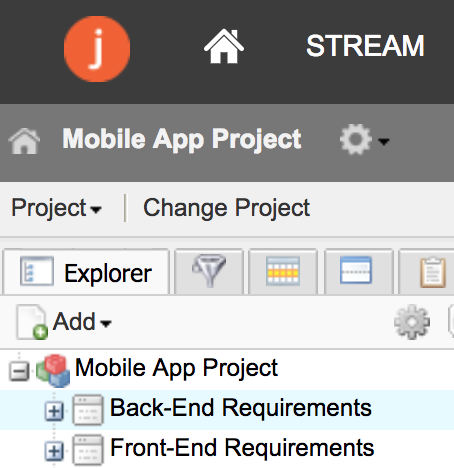
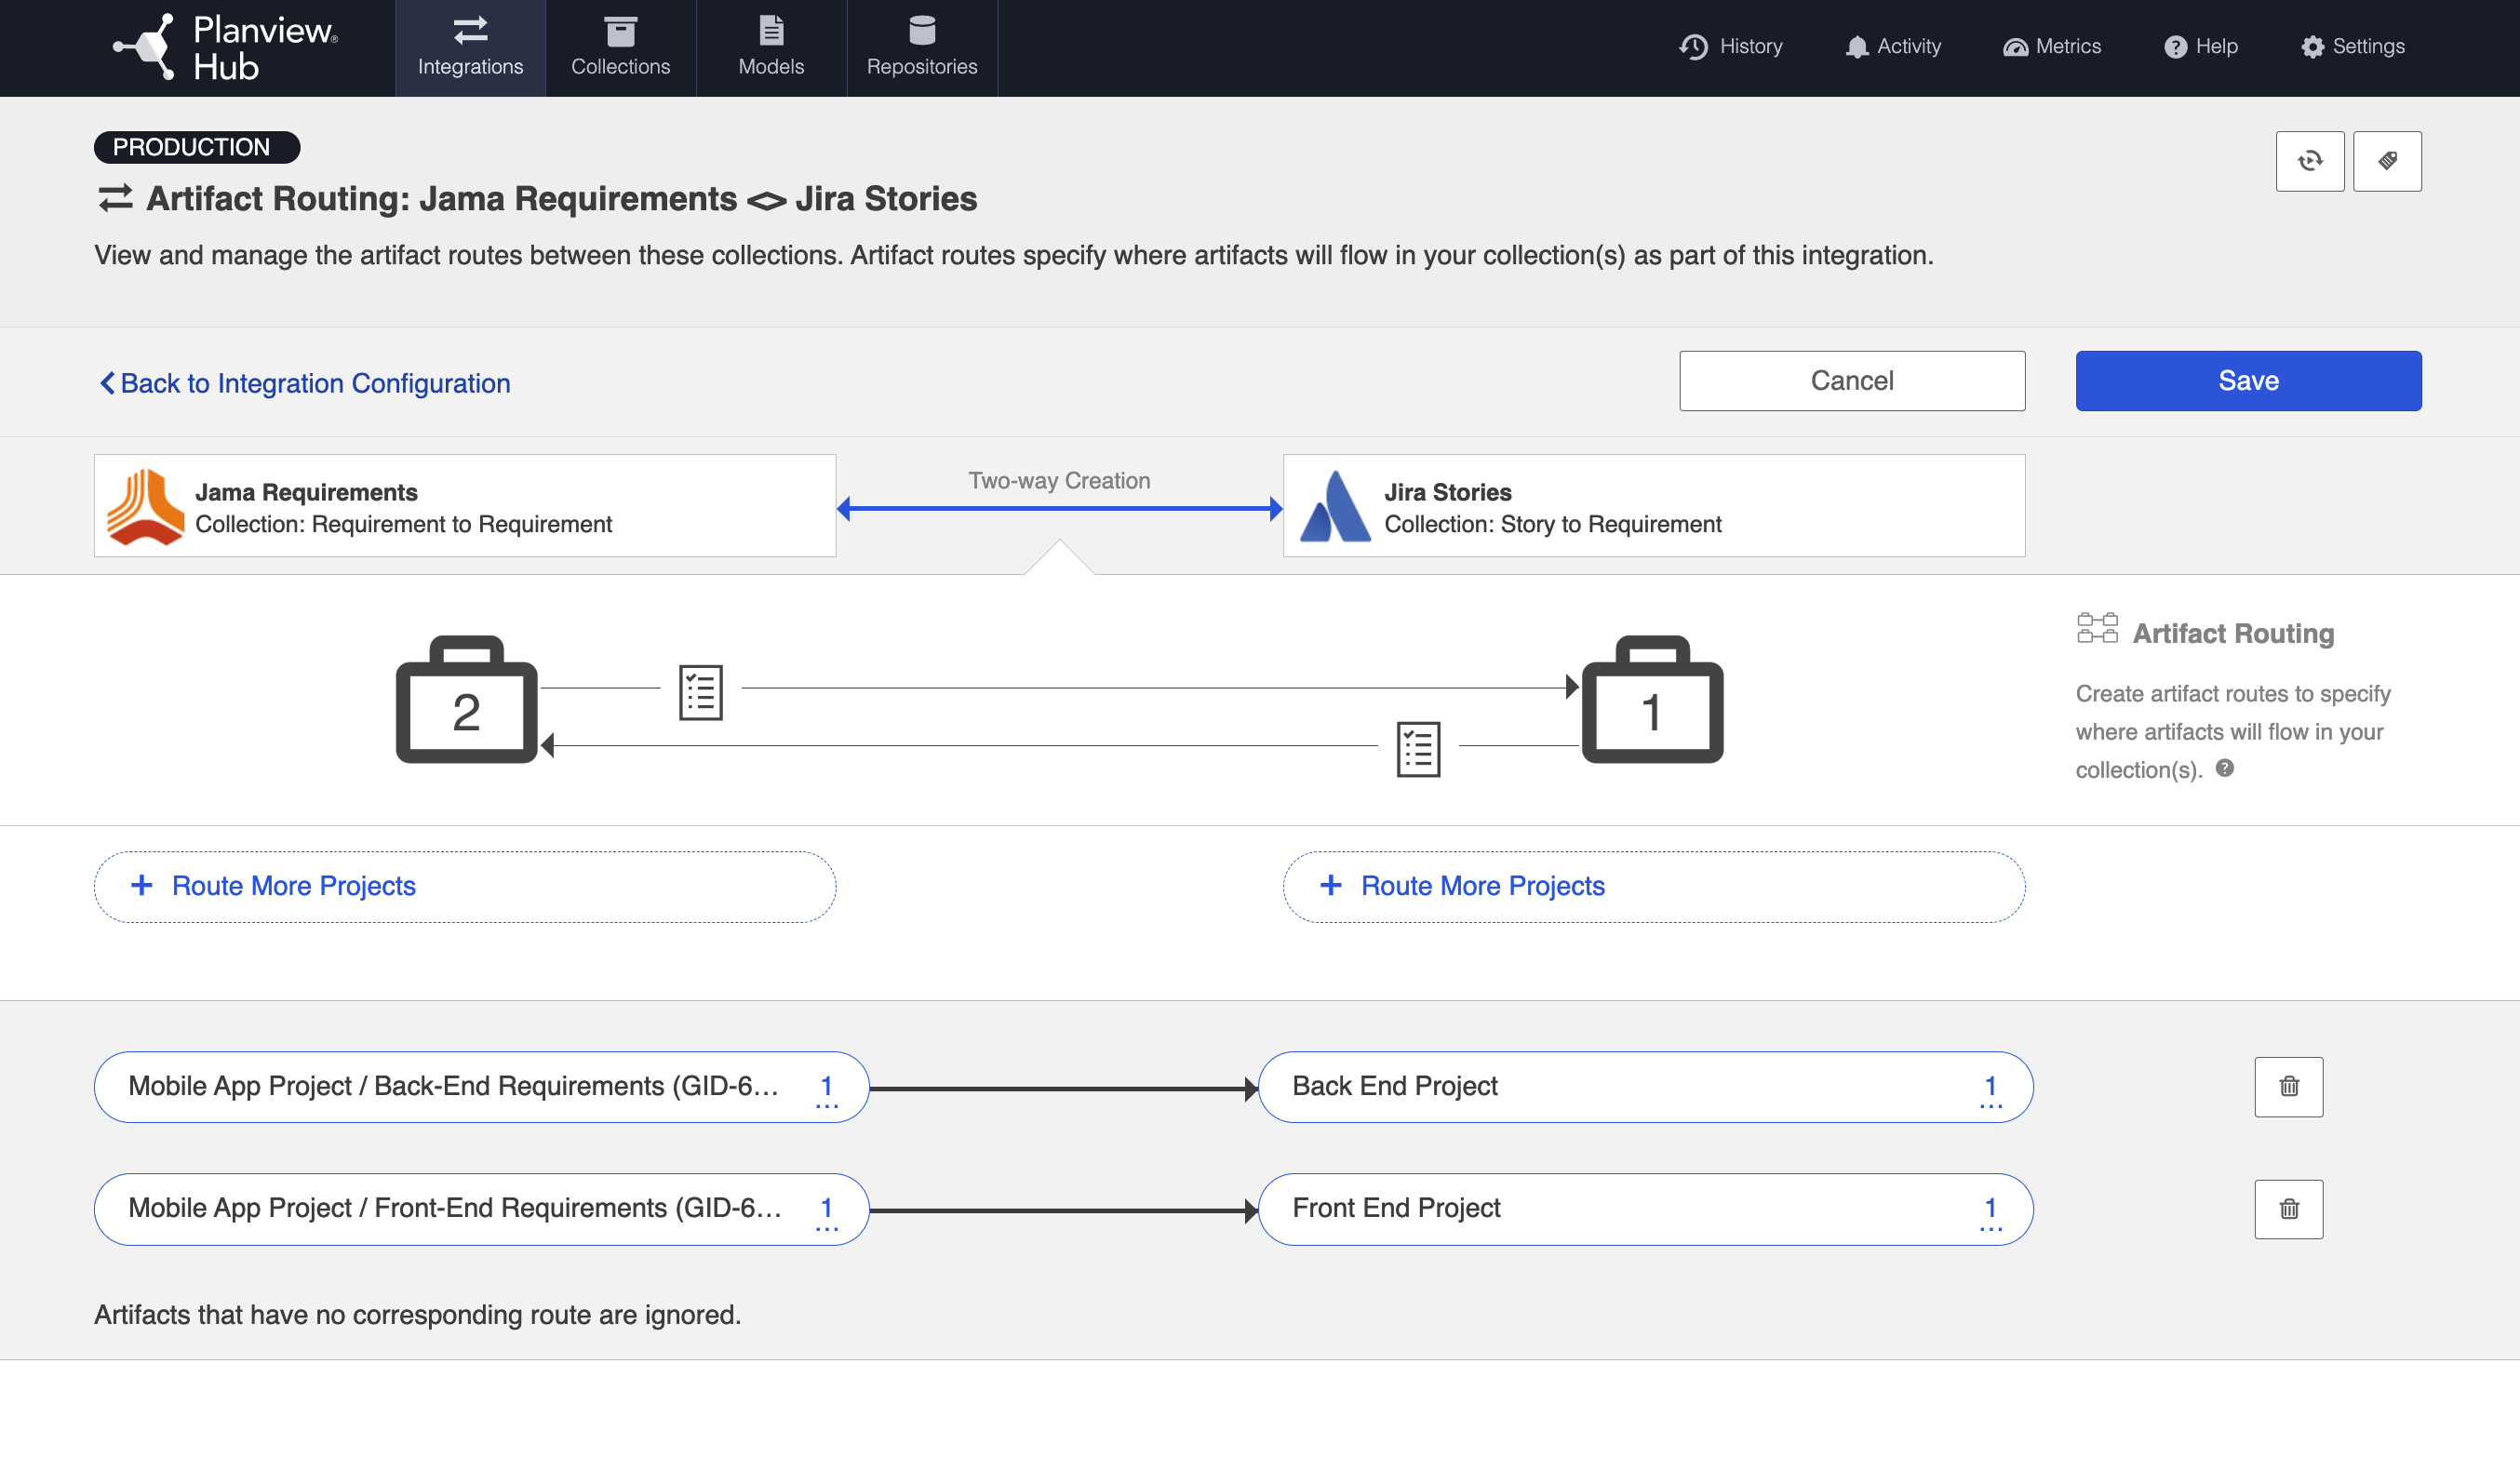
To understand this better, let's look at an example in Jama. Jama contains high-level containers (projects) which are then divided into several low-level containers (sets), which contain work items (requirements, in this case). Here, our high-level container is the Mobile App Project, which is then divided into two low-level containers: the Back-End Requirements set and the Front-End Requirements set.
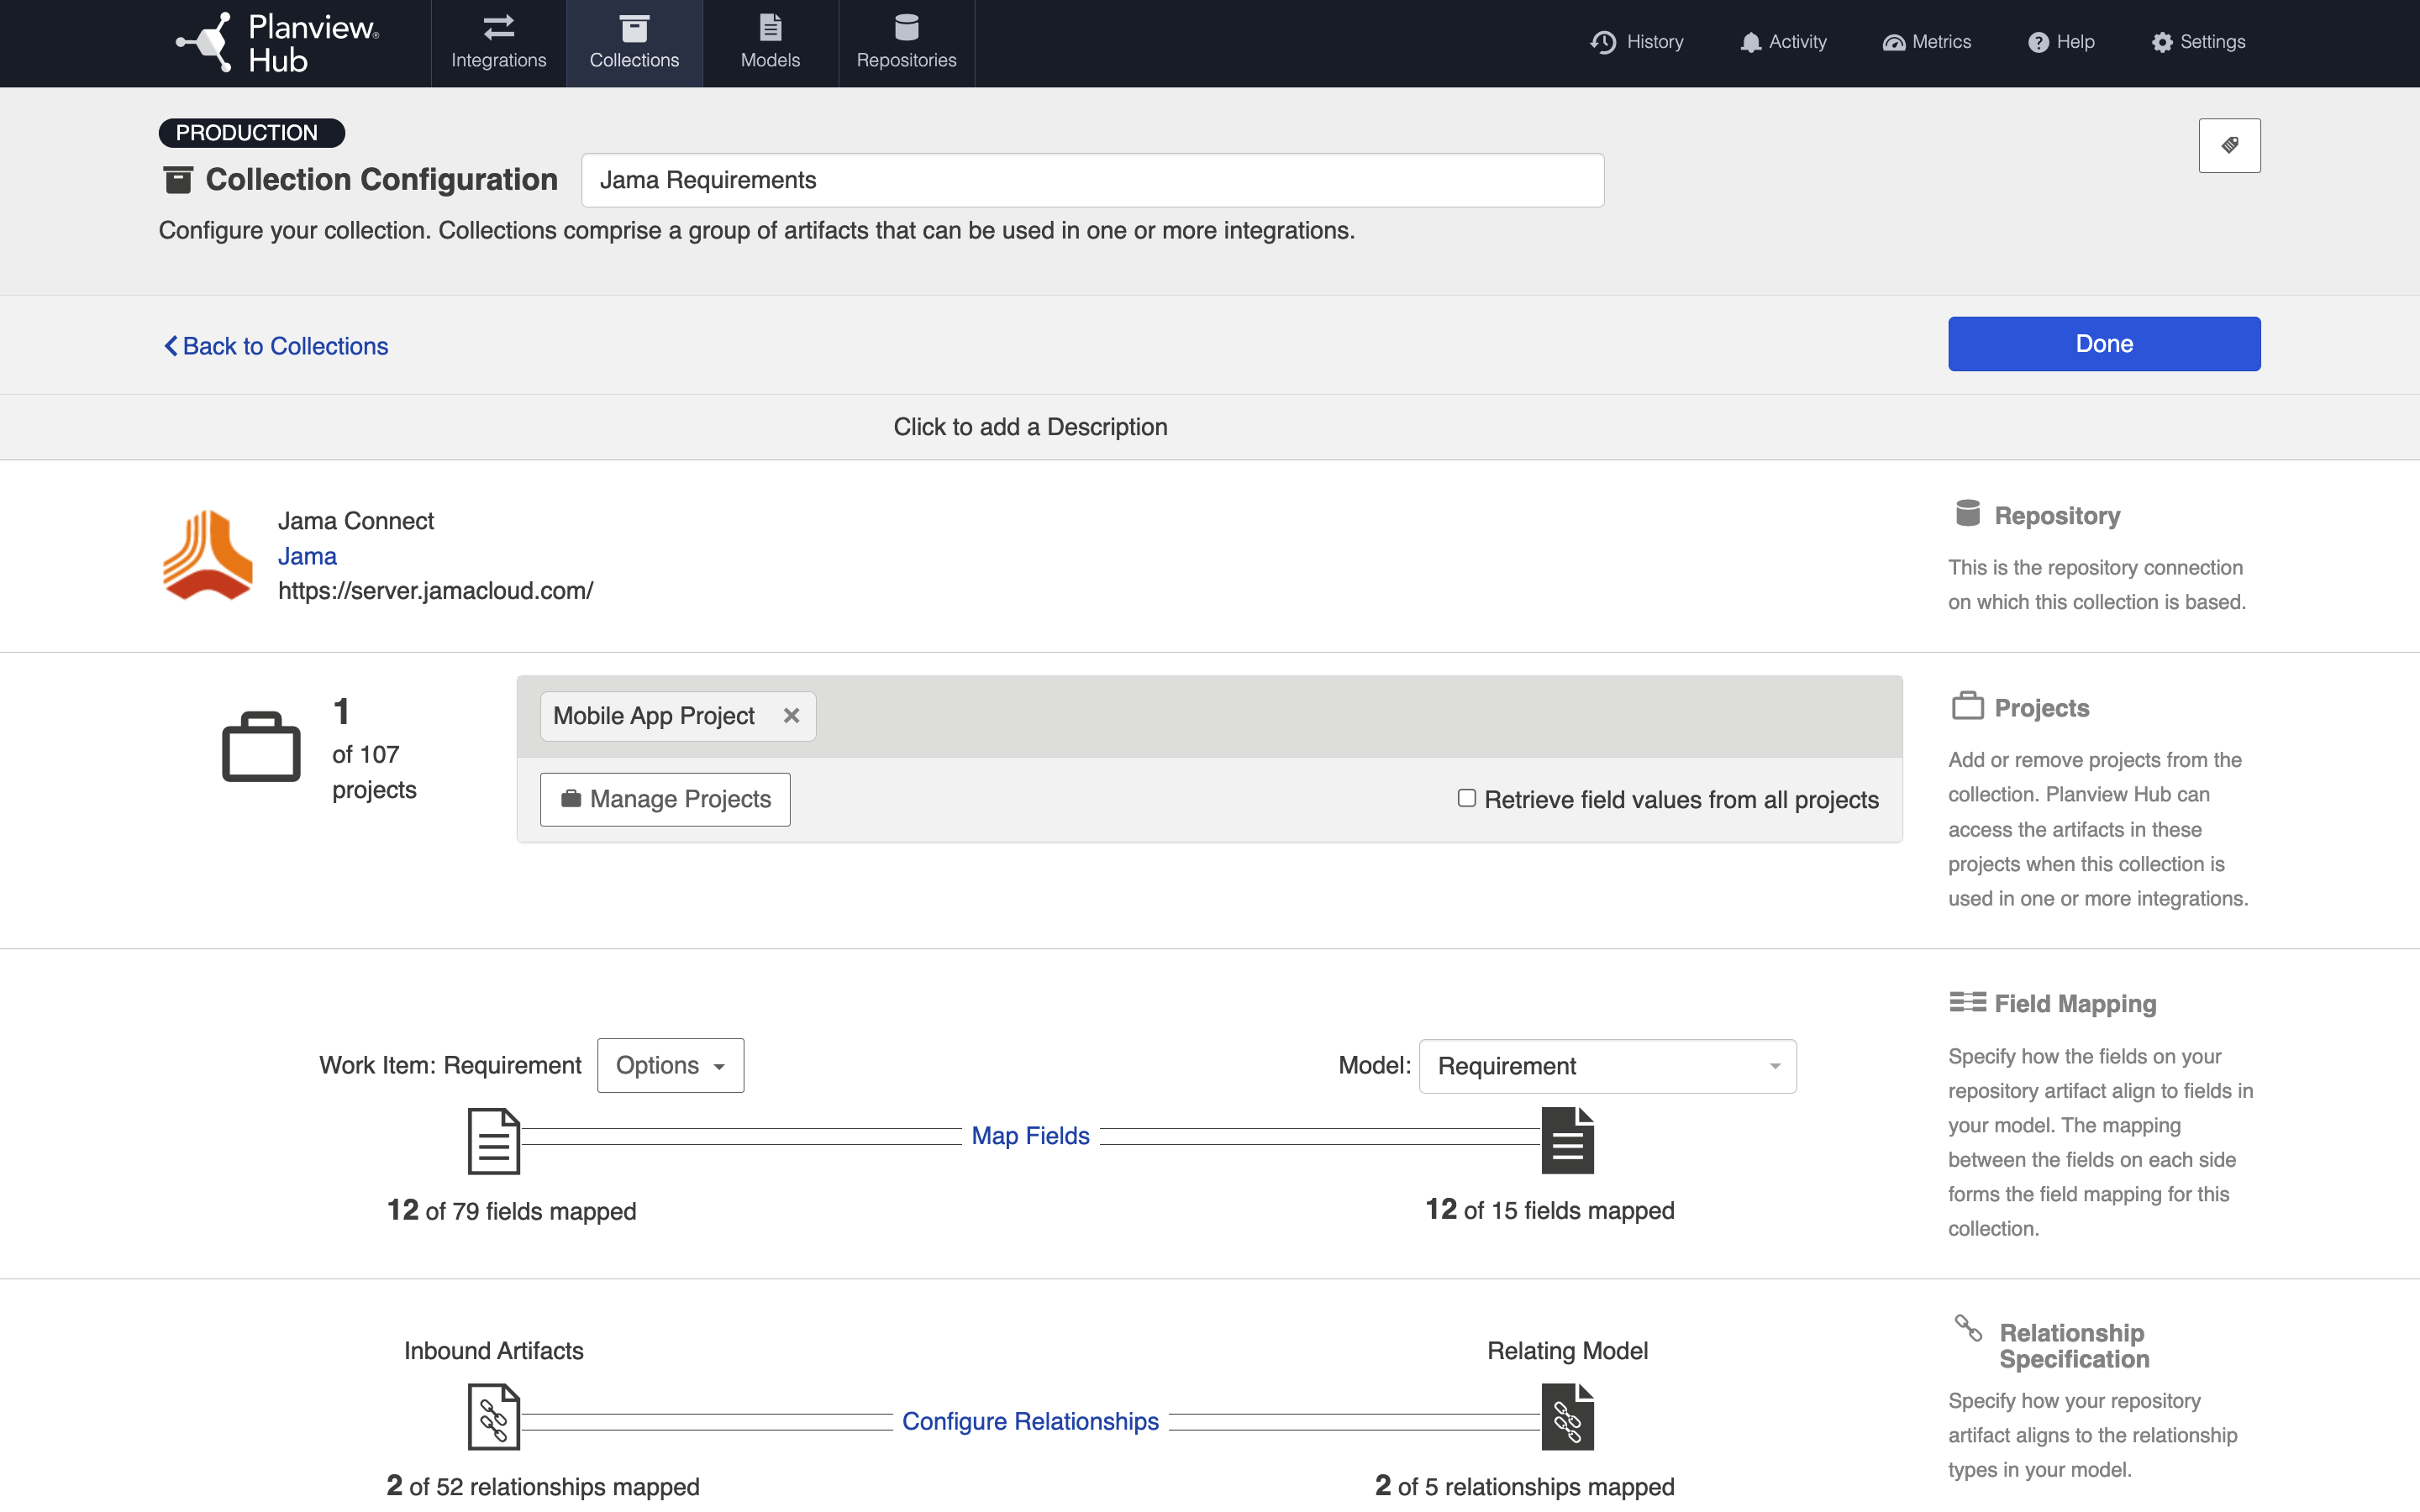
When we configure our Jama collection, we will define that collection at the high-level container level: this means that we can define the collection based on projects. Here, we have selected the Mobile App Project for use in our collection.
However, when routing artifacts, we will utilize low-level containers (sets) to determine which container Jama artifacts will flow to in our target repository. In the example below, the Back-End Requirements set in Jama will flow to the Back-End Project in Jira, and the Front-End Requirements set in Jama will flow to the Front-End Project in Jira. Both the Front End Requirements set and the Back End Requirements set are contained within the high-level Mobile App Project, within Jama.
Collection
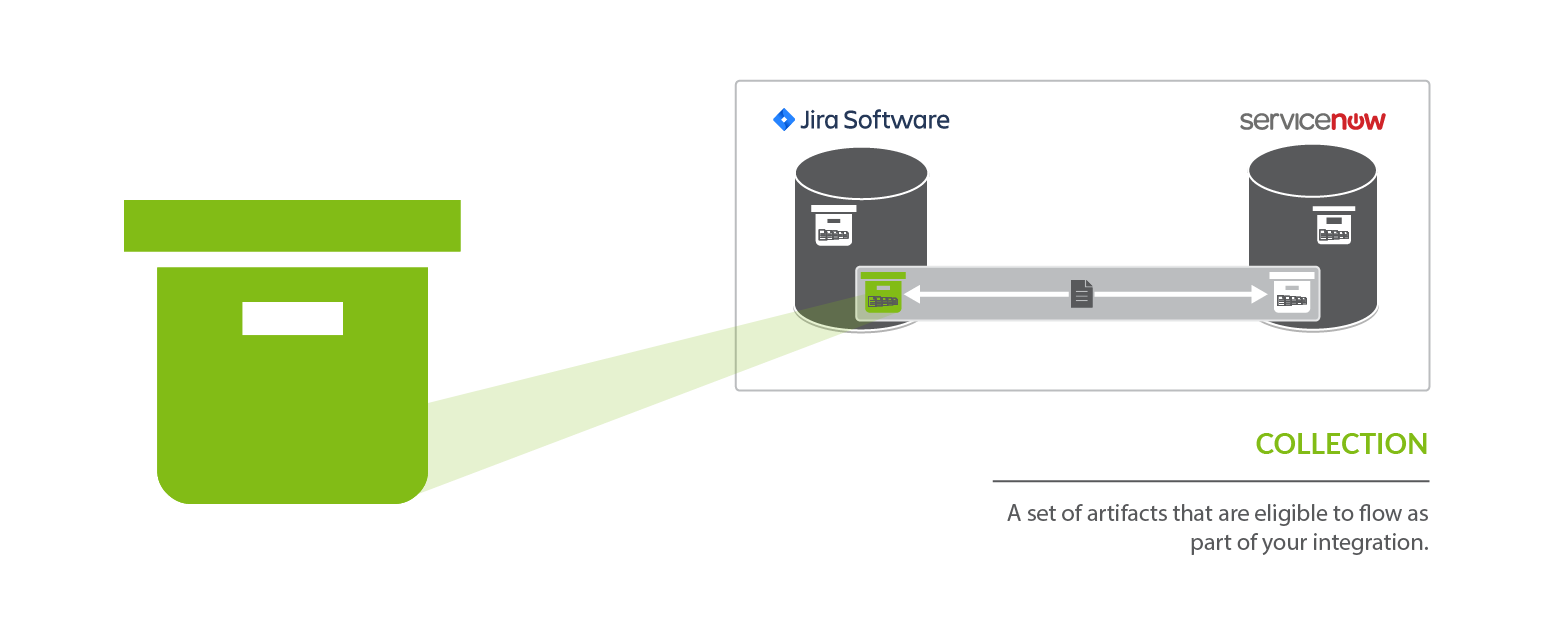
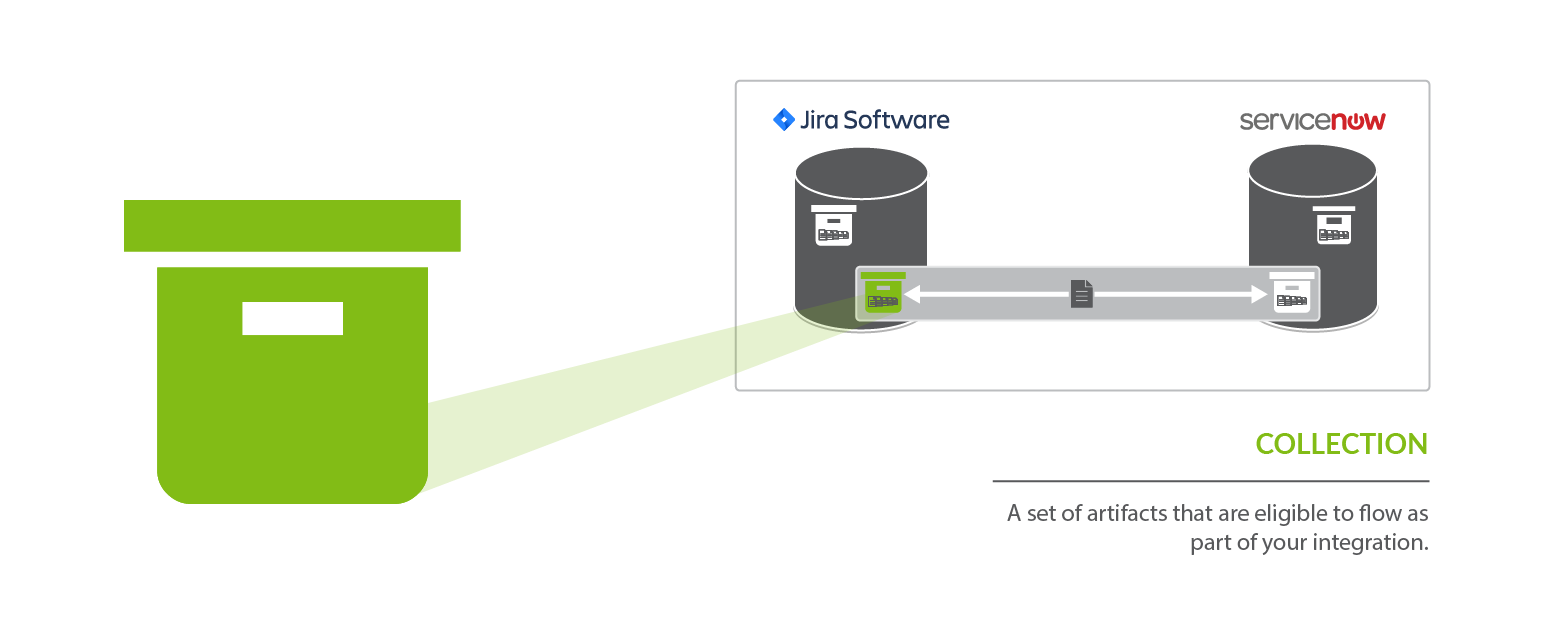
A collection is the set of artifacts that are eligible to flow as part of your integration. They have the following characteristics:
- All artifacts in the collection are the same core artifact type (e.g., defect, user story, feature, etc)
- The artifacts in the collection are mapped to one model
- Artifacts can be sourced from multiple projects (containers)
A concrete example of a collection would be a set of defects from an organization’s Jira instance.
The artifacts in a collection can come from one or more projects from a given repository connection. Getting back to the example provided, if your Jira instance had 50 projects, you could include artifacts from any or all of those projects. Once projects are added to a collection, those artifacts are eligible for inclusion in an integration.
(Note: The term project is used here generically — sometimes repositories have different names for projects, or may not have more granular projects at all, but let’s stick with this for simplicity’s sake.)
The artifacts in a collection share a set of fields that have repository-specific names and values. Creating a collection involves choosing a model on which to base the collection and mapping these repository-specific fields and values to those defined in the model. The concept of models will be discussed in the next section.
There are four types of collections in Hub:
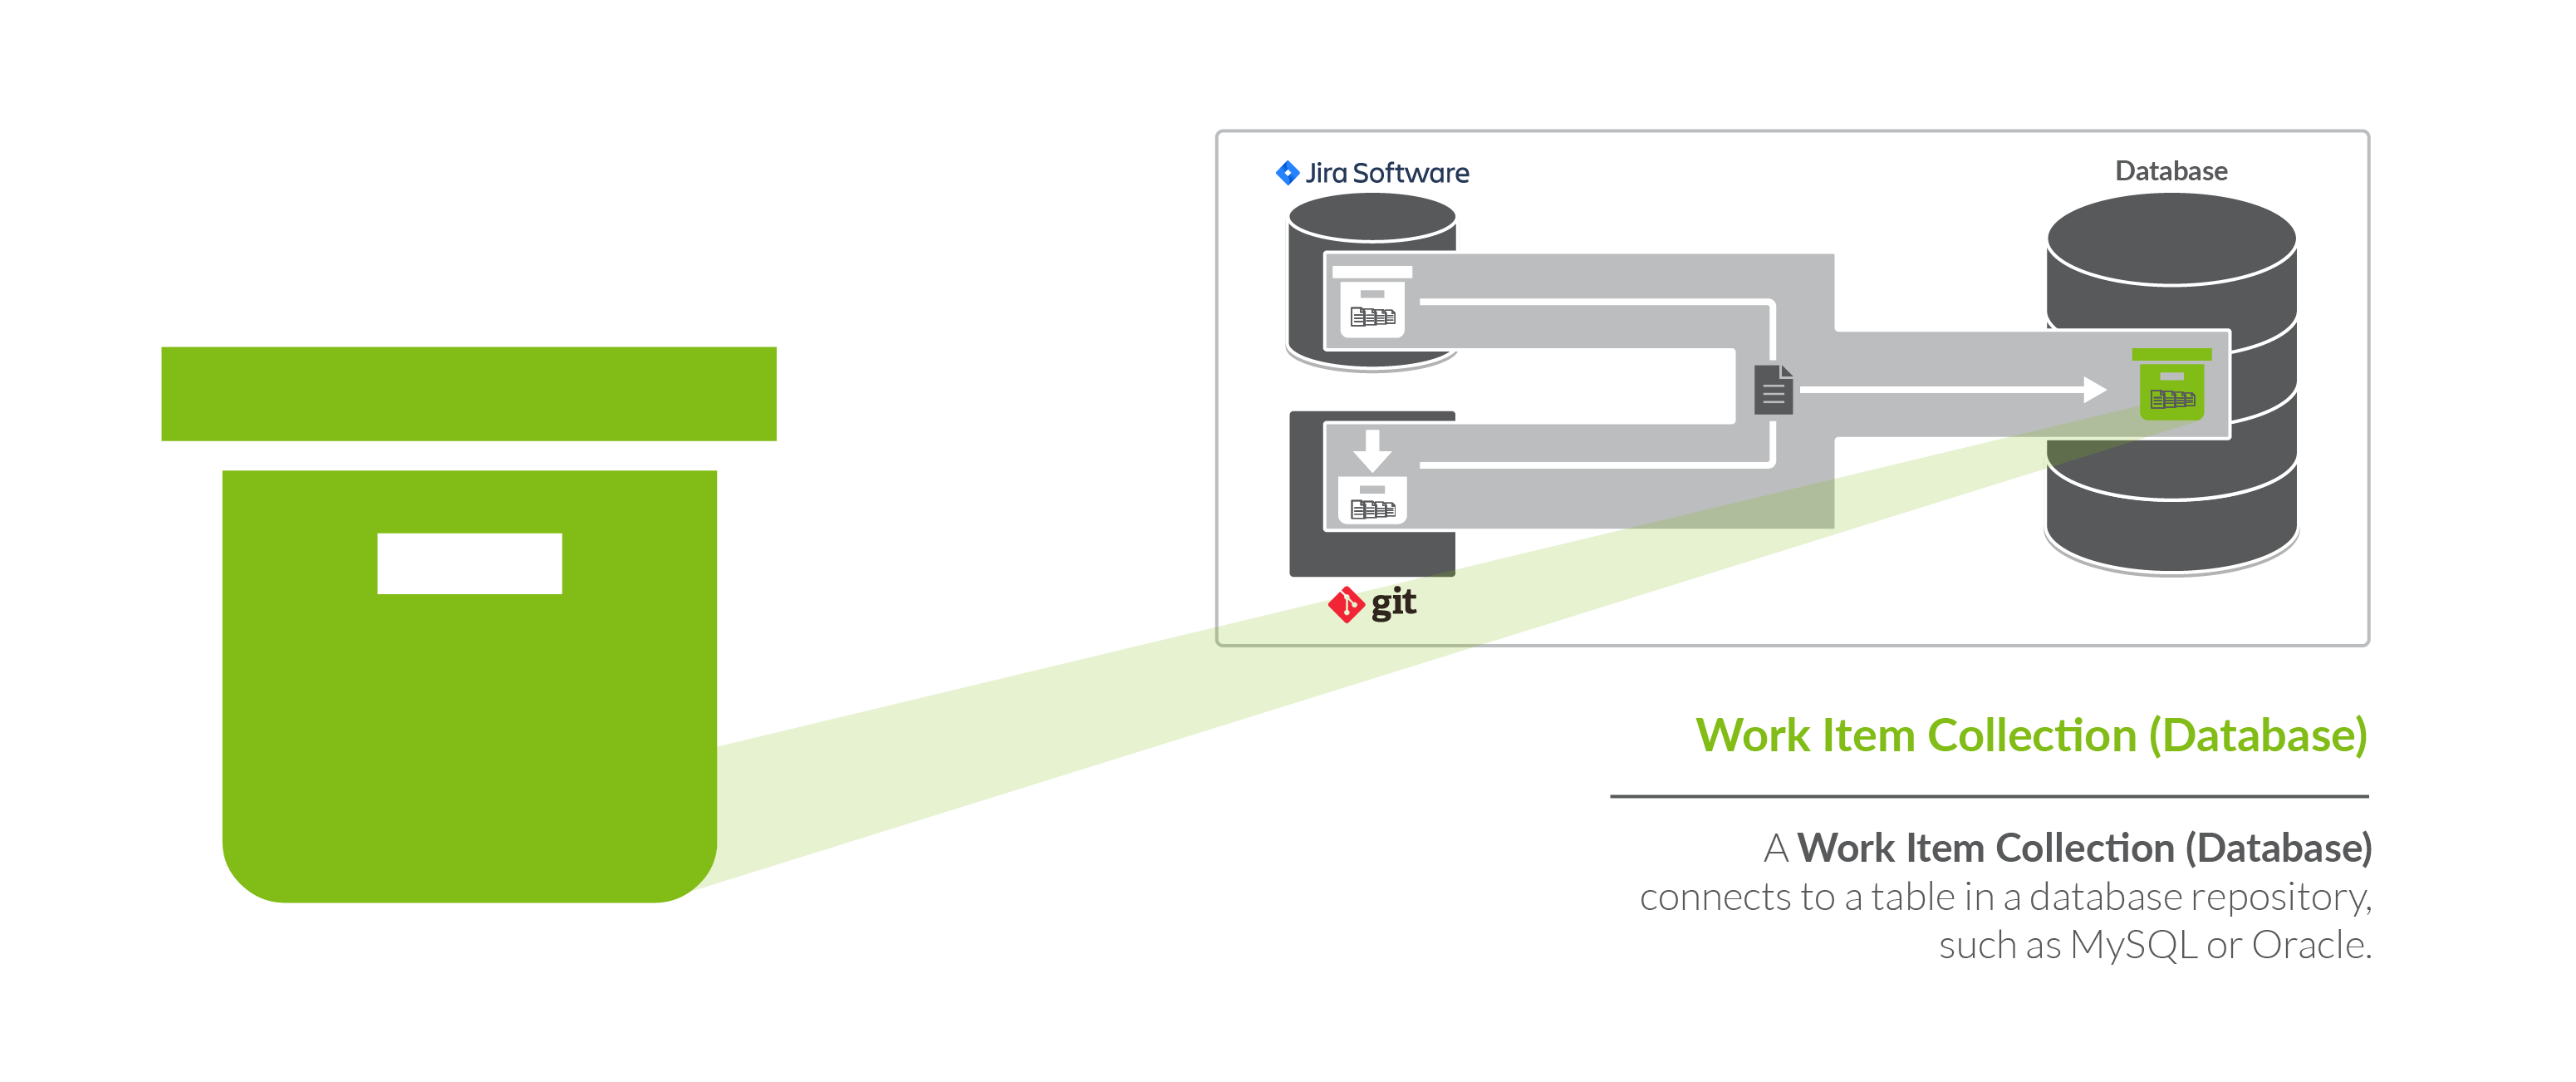
- Work Item Collections, which typically include work items, such as requirements or defects, from typical repositories, such as Jira or Micro Focus (HPE) Octane. Work Item Collections can also be utilized to connect to a Database, such as MySQL, for use in an Enterprise Data Stream Integration
- Container Collections, which include certain container types from external repositories (such as Jama Components and Micro Focus/HPE ALM Folders)
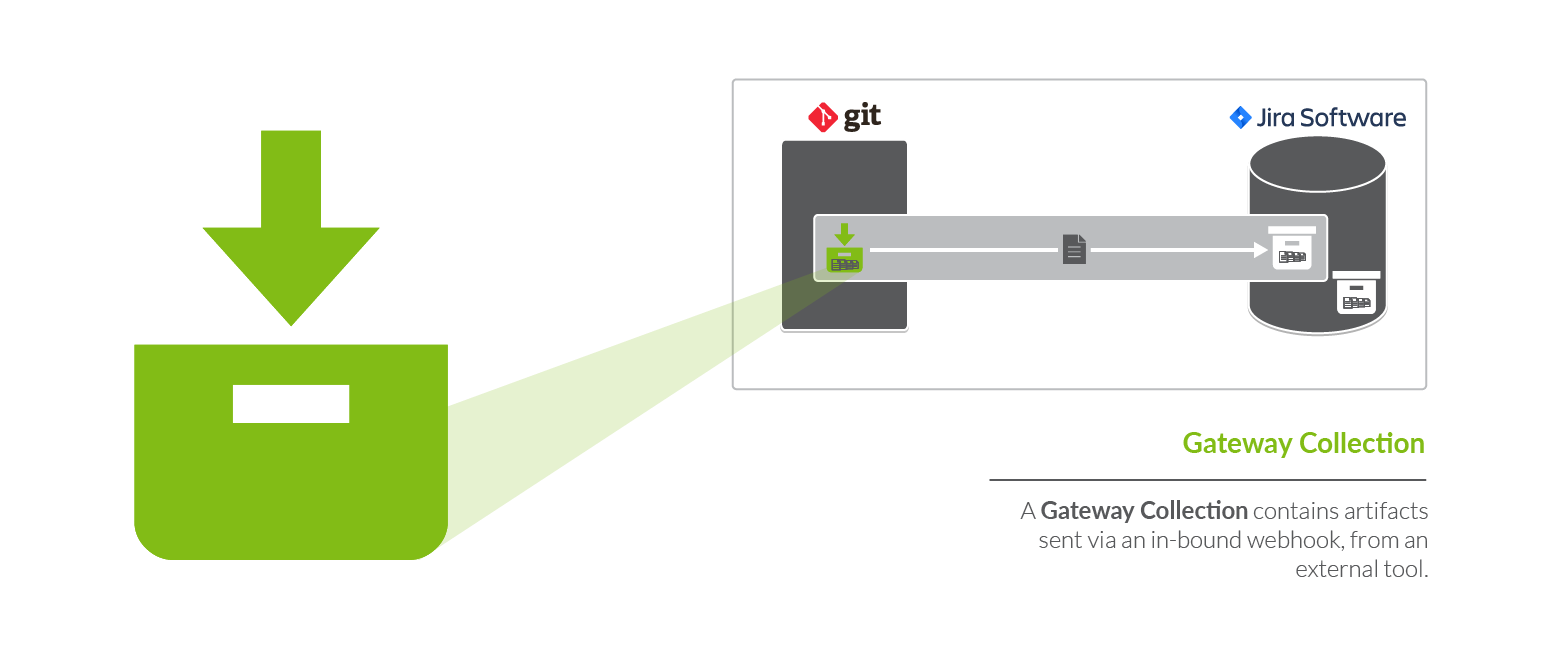
- Gateway Collections, which contain information sent via an inbound webhook, from an external tool. Oftentimes, this information is generated based on an event, such as a failed test or a code review.
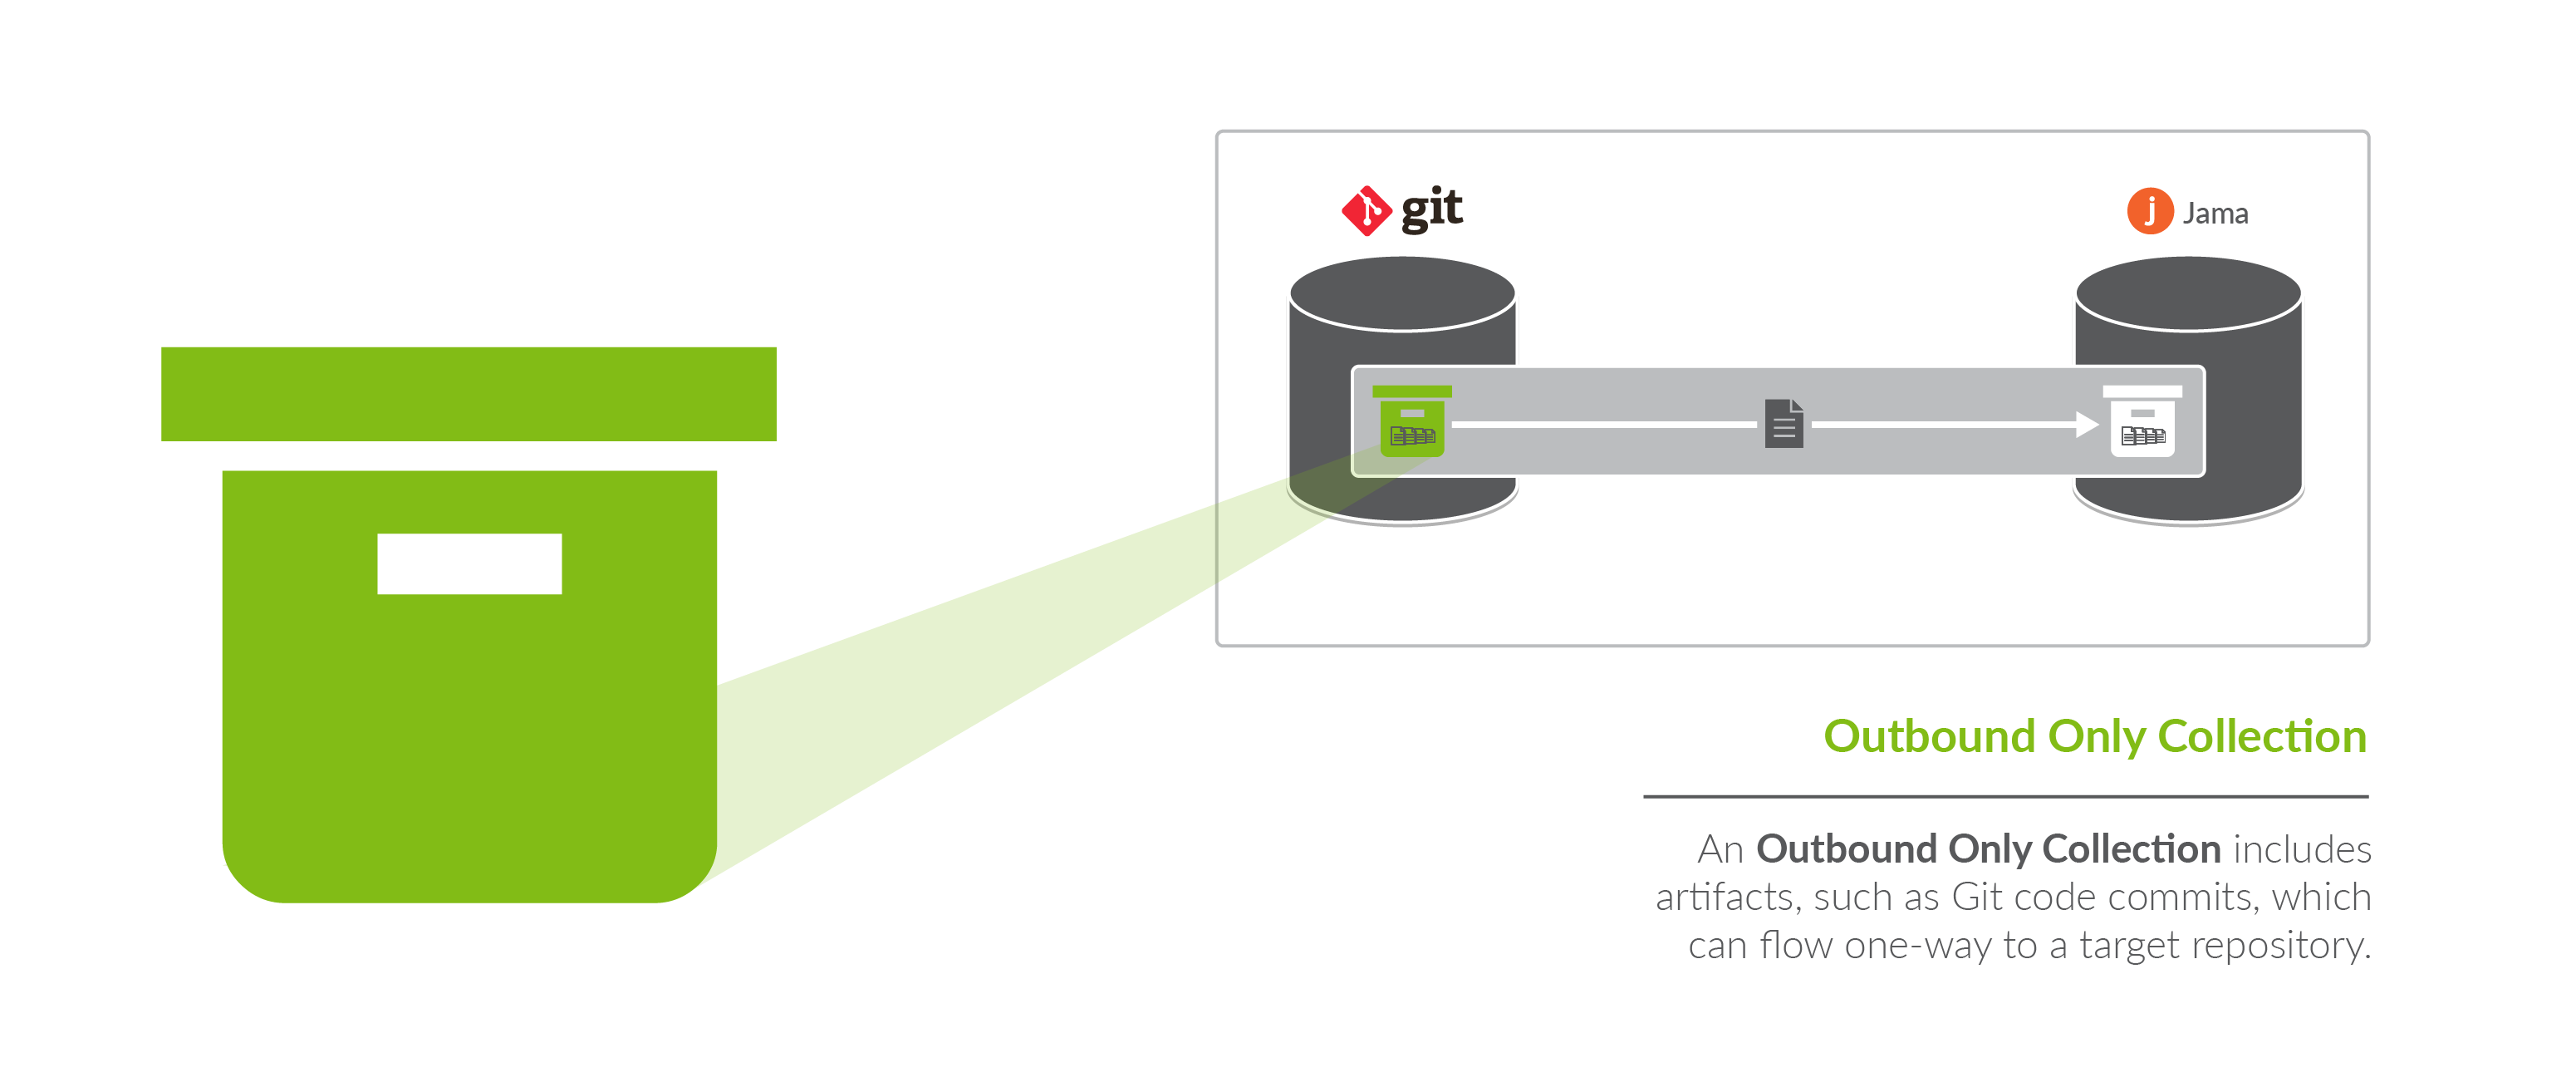
- Outbound Only Collections, which contains artifacts like code commits or changesets, where you may want to only flow out of your repository, but which would not receive updates into your repository.
You can learn how to create your collection(s) here.
Repository Collections (Work Item Collections and Container Collections)
Repository Collections (meaning either a Work Item Collection or a Container Collection that connects to a repository) comprise artifacts from an ALM, PPM, or ITSM repository like Atlassian Jira, ServiceNow, CA Clarity, or Zendesk. When used in an integration, artifacts in a repository collection can be created, can be updated, and/or can trigger the creation of artifacts in another collection.
What can Hub do to artifacts in a repository collection?
|
Action |
Permissible |
|---|---|
|
Create artifacts in a collection |
|
|
Update artifacts in a collection |
|
|
Detect additions or updates to artifacts in a collection in order to create or update artifacts in another collection |
|
Database Collections (a type of Work Item Collection)
Databases collections (a type of Work Item Collection) connect to a table in a database repository, such as MySQL or Oracle. Artifacts in the source repository will flow data to the fields in that table.
When used in an integration, artifacts in a database collection can be created, but cannot be updated nor trigger the creation of artifacts in another collection.
What can Hub do to artifacts in a database collection?
|
Action |
Permissible |
|---|---|
|
Create artifacts in a collection |
|
|
Update artifacts in a collection |
|
|
Detect additions or updates to artifacts in a collection in order to create or update artifacts in another collection |
|
Gateway Collection
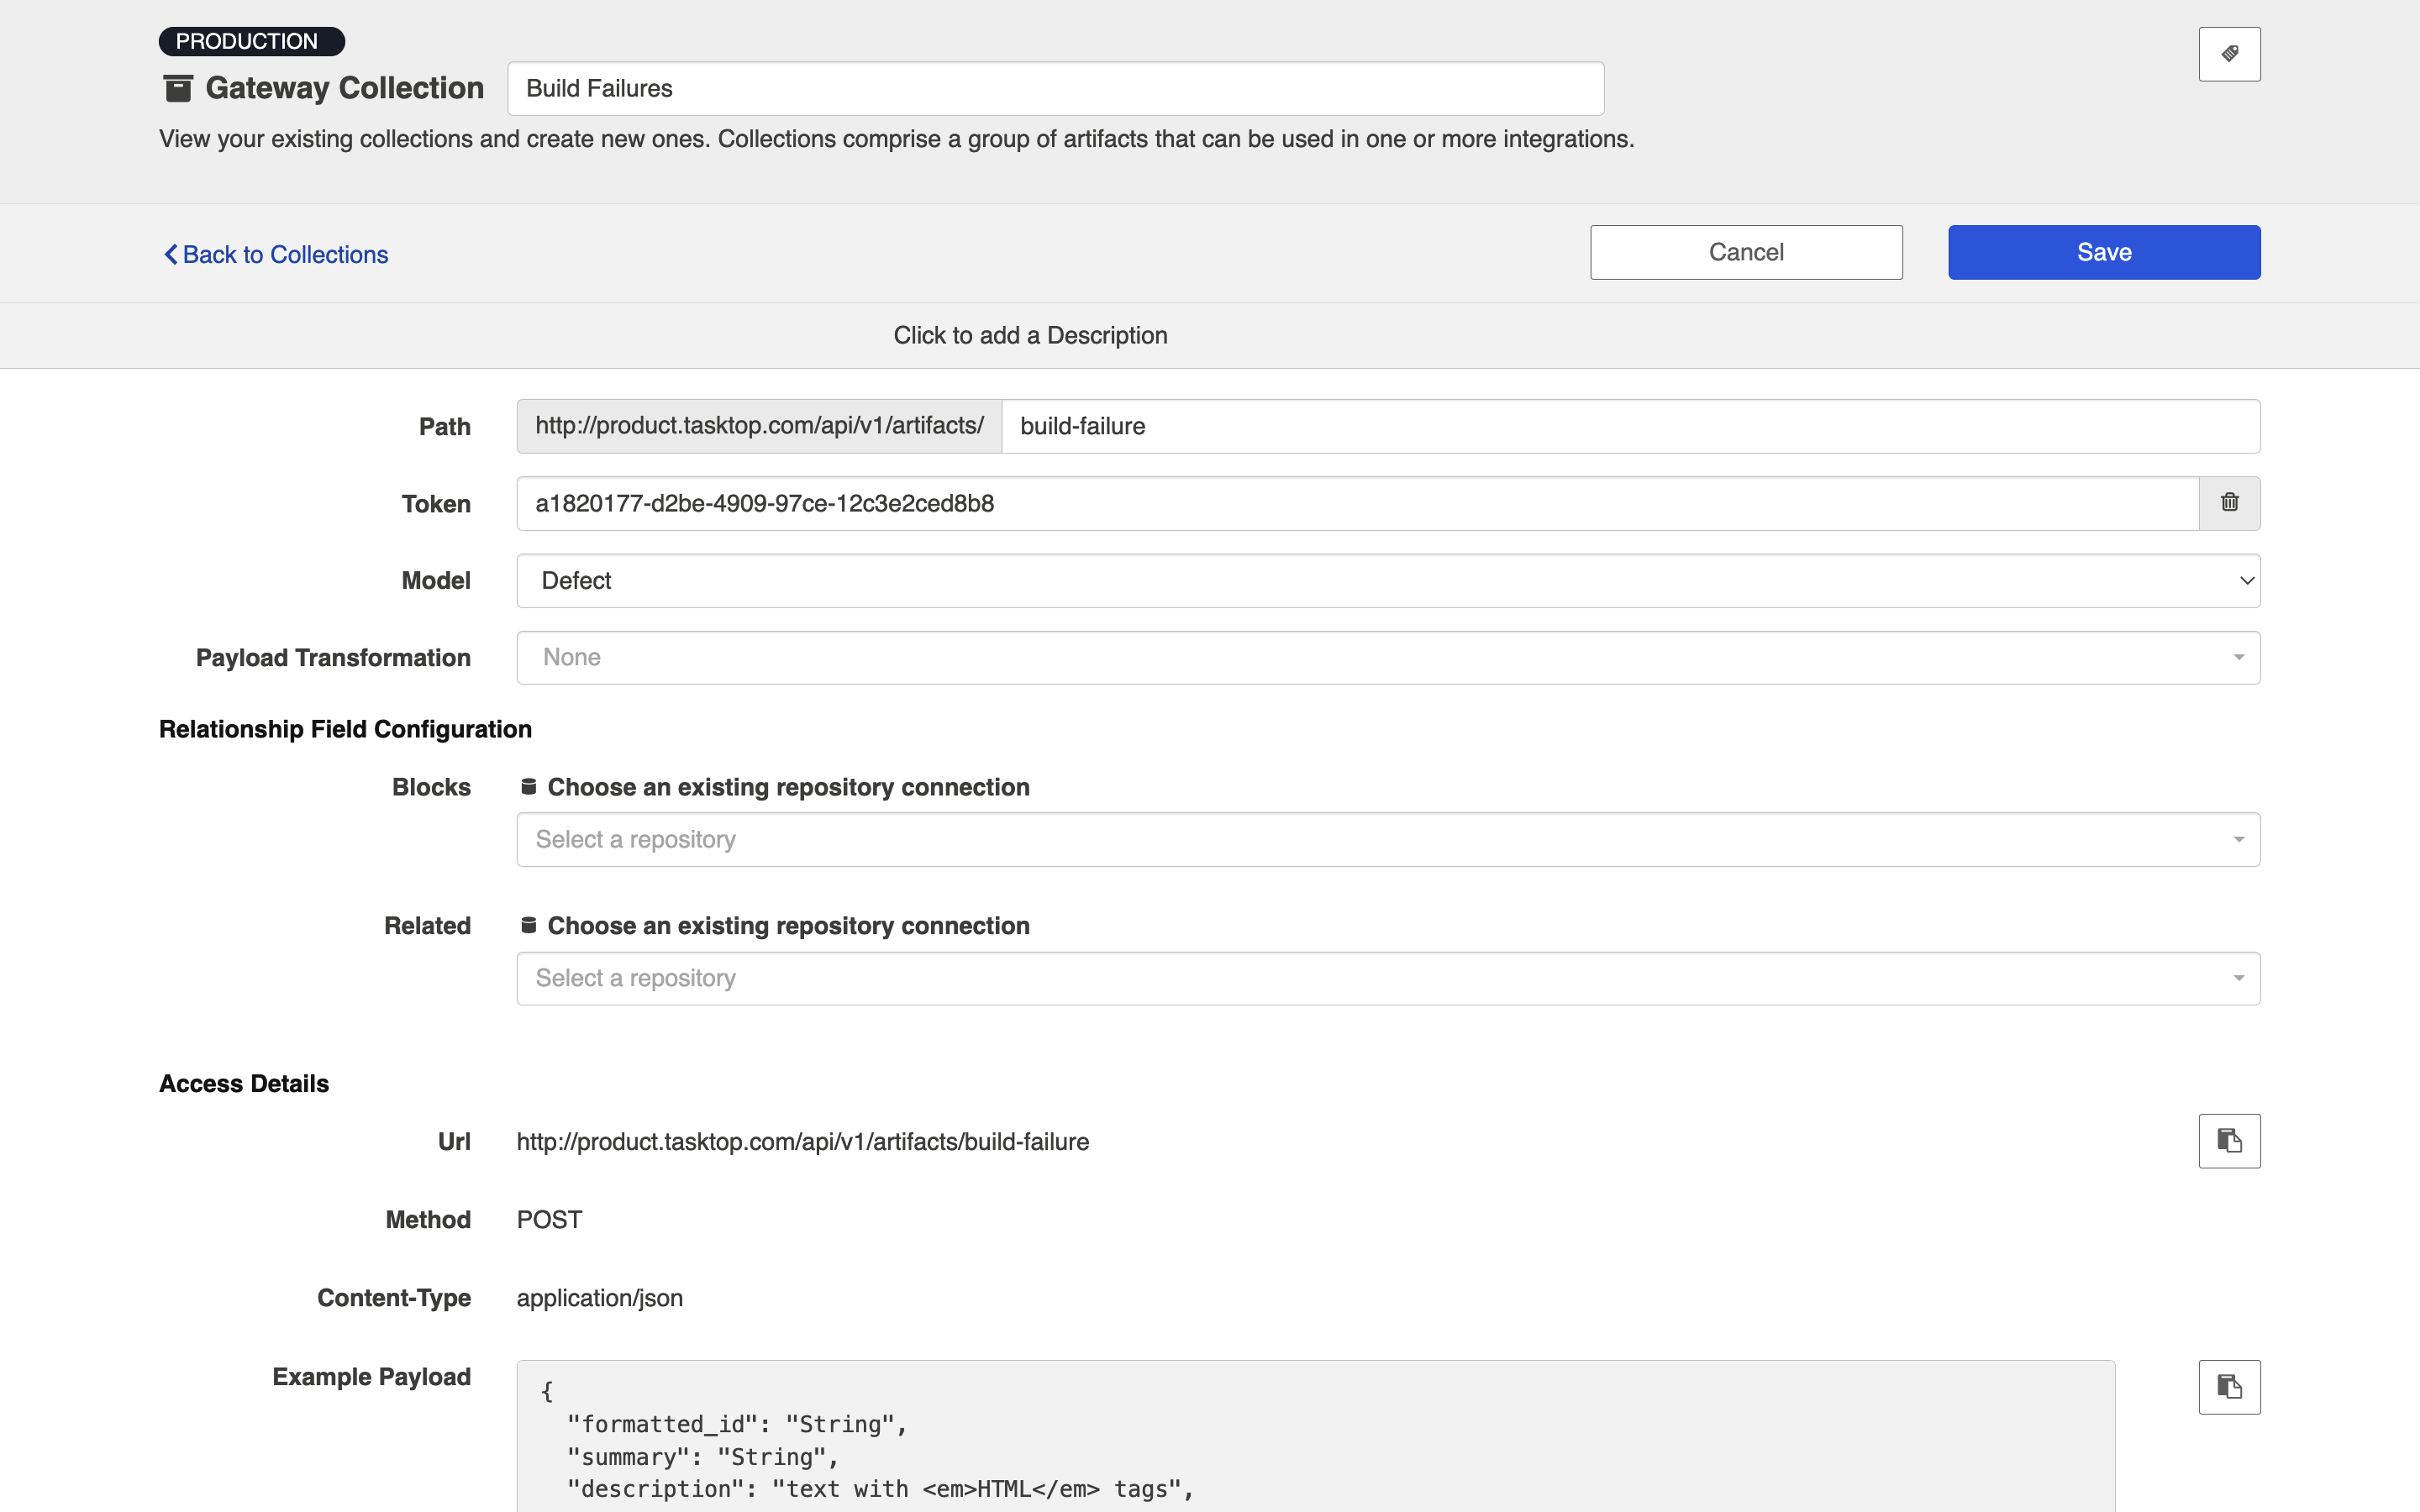
Unlike repository collections and database collections, which rely on Hub actively making various API calls to communicate with a given repository, artifacts in a Gateway collection are sent to Hub via our own REST API. This means that you don’t need to create a repository connection to create a gateway collection— as long as you can send Hub a simple REST call, those artifacts can then be used to achieve a specific goal within the context of an integration.
Gateway collections are particularly useful when the artifacts you want to integrate come from smaller, purpose-built systems for practitioners in various disciplines, such as Selenium for QA; when the artifacts you want to integrate come from systems that are largely event-driven, such as an application performance monitoring repositories; when artifacts come from home-grown tools your organization might have developed on their own; or when you’d like to pull information that is not considered a standard artifact from a repository supported by Hub, like capacity information from a PPM tool. When creating a gateway collection, you’ll specify a path to generate a webservice to which you’ll post information. You’ll also choose the model to which you would like incoming artifacts from this collection to conform. You’ll then be given an example payload and script that can be used to send artifacts to Hub:
When used in an integration, artifacts in a gateway collection can trigger the creation or modification of artifacts in another collection.
What can Hub do to artifacts in a gateway collection?
|
Action |
Permissible |
|---|---|
|
Create artifacts in a collection |
|
|
Update artifacts in a collection |
|
|
Detect additions or updates to artifacts in a collection in order to create or update artifacts in another collection |
|
Outbound Only Collections
Outbound Only Collections contain artifacts like code commits or changesets from Source Code Management repositories like Git, which you may want to flow out of your repository, but which would not receive updates into your repository. When used in an integration, artifacts and information will be sent to a target repository. For example, you can create a Git commit in an ALM tool like Atlassian Jira. You can also update existing artifacts with information from the Git commit or changeset. While you can use this collection to flow artifacts or information out of a repository, the artifacts in this collection will not receive any updates.
Note: Outbound Only collections can connect to the Git repository only. You can learn more about configuring that repository in our Connector Docs.
What can Hub do to artifacts in an Outbound Only collection?
|
Action |
Permissible |
|---|---|
|
Create artifacts in a collection |
|
|
Update artifacts in a collection |
|
|
Detect additions or updates to artifacts in a collection in order to create or update artifacts in another collection |
|
Model
When integrating data from multiple collections, there are three factors that are critical to success:
- The ability to normalize disparate definitions of artifacts between different collections
- The ability to scale the integrations to support many collections with hundreds or even thousands of projects and artifacts.
- Efficient flow of data – meaning, only flow information that is necessary between collections
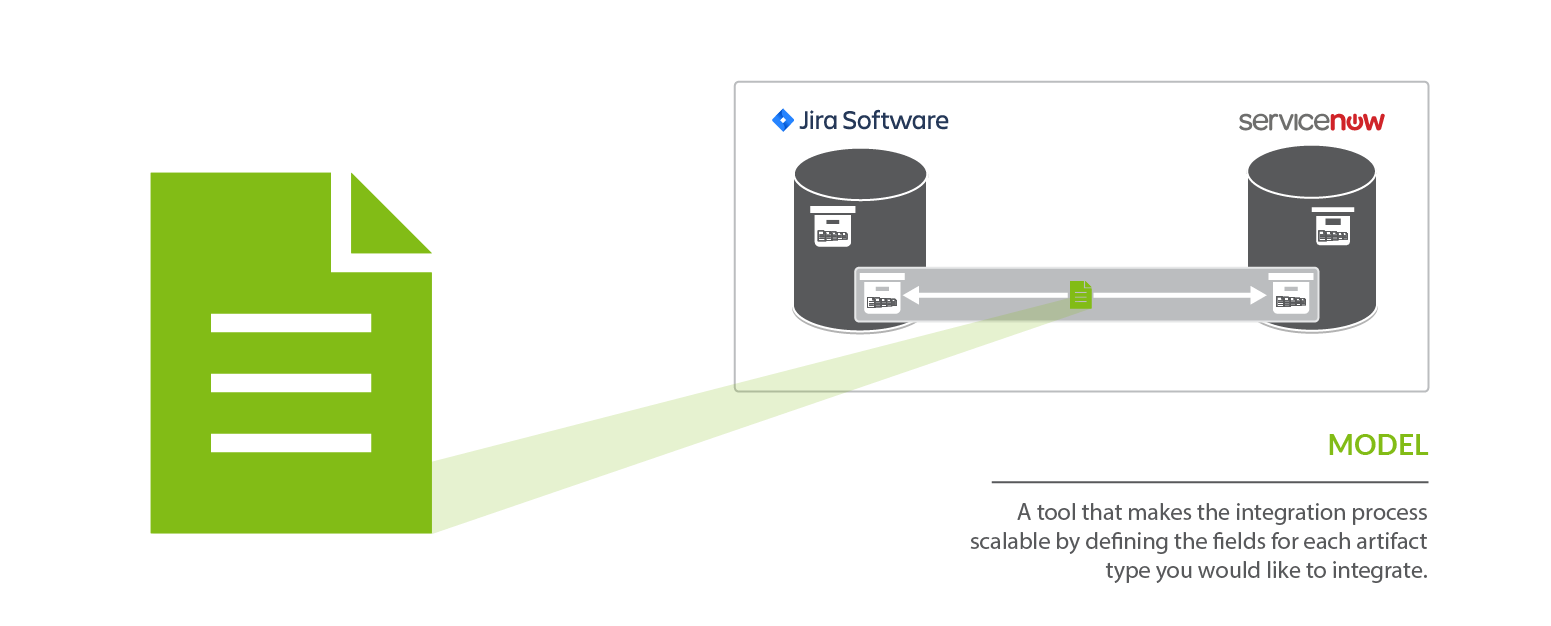
These three critical success factors are met with our usage of models. In very basic terms, a model is simply a list of fields or attributes that define a certain artifact that you want to integrate. For example, below is a very basic defect model:
|
Field |
Field Type |
|---|---|
|
Description |
String |
|
Priority |
Single Select:
|
|
Status |
Single Select:
|
Let’s talk about the first critical success factor – the ability to normalize disparate definitions of artifacts between different collections. Or, another way of thinking of it, is the classic “you say tomato, I say tomahto” conundrum. The diagram below shows that the Jira bug is similar, but not the same, as the Jama defect. The solution to this problem is to be able to “map” each defect to a common definition of a defect and “normalize” the fields and field values. Then, when you are communicating about “defects”, everyone is speaking the same language via the “model” definition. Like this:
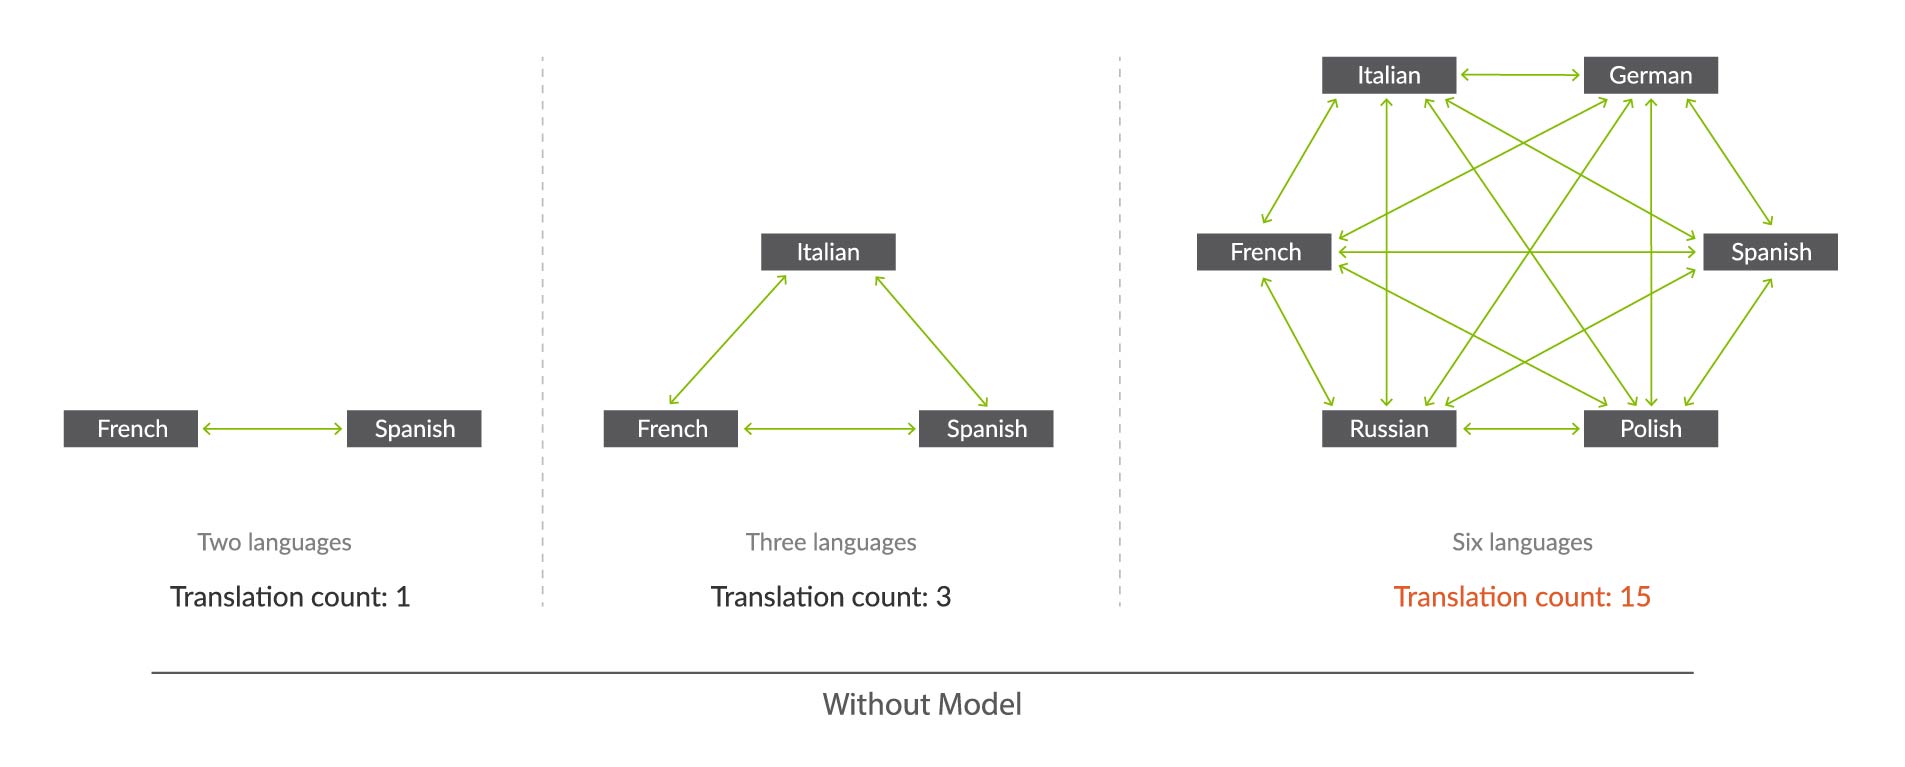
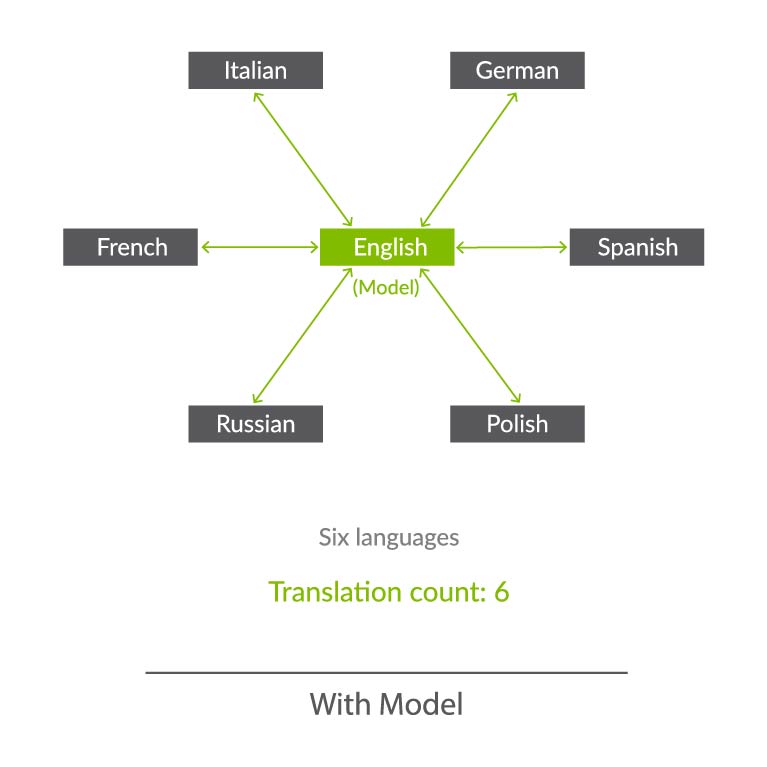
A good analogy to help understand why models are so important is the act of translating between people who speak different languages. If you have two people that speak two different languages, you need to translate only between those two points. If, however, you have three different languages, you have three points of disconnect in communication that need to be translated. But, as you add more and more languages, the number of disconnects blocking communication does not grow linearly – even if you have just 6 languages, you have 15 points of disconnect to translate between! And if you have 10 languages, you will have 45! As you can see, resolving these point-to-point disconnects individually quickly becomes unsustainable given the sheer number of them that can arise. It is in this way that models save the day, acting as a “universal translator,” overcoming all of the communication disconnects that are present by translating between all of the points at once. Now that we have the ability to solve the “you say tomato, I say tomahto" problem, the second critical success factor comes into play, which is the desire to scale your integration landscape to support many collections with hundreds or even thousands of projects and artifacts.
Integrating Without Models
Integrating With Models
Now that we’ve solved the first two critical success factors, there is one more that might not seem as obvious but is actually quite important to your overall success. When flowing large volumes of data, you need an efficient flow of data, not the ‘drink from the firehose’ approach where all fields of all artifacts are flowing everywhere. There is no business value in that and, worse, you will end up with significant performance issues. Instead, by using models, you can limit, or target, the exact data that you need to flow between collections – nothing more, and nothing less, than what is necessary.
In summary, models solve the critical three success factors for large-scale integration landscapes – giving users flexibility, scalability, and consistency at the same time.
You can learn how to create a model here.
Flow Specification & Templates
Now that we have introduced the concepts of artifacts, collections, and models, we can come back to the concept of an integration. As discussed earlier, the basic concept of an integration is the flow of information between two or more collections.
The last two concepts to introduce relate to integrations as a whole. First, the flow specification. This is probably the trickiest aspect of an integration, which is why we also have introduced another concept, called templates, to help.
Defining how you'd like data to flow between collections requires a lot of nuance and forethought. For instance, would you like to create new artifacts, or modify existing artifacts? Would you like artifacts and fields to flow in both directions or just one direction? What types of collections (and how many of them) would you like to integrate?
Picking a template jump-starts your integration, bundling many of the flow specification elements to facilitate quicker configuration.
You can learn how to configure your integration using a template here.
Integration Style
Each template is based on an underlying style that defines whether you want to create new artifacts in collections or modify already existing artifacts in collections.
Canvas Layout
Each template follows a certain canvas layout, determining the quantity and types of collections that can be added to the canvas. The canvas will either follow a many-to-one, one-to-many, or one-to-one layout.
By picking a given template, you are, in essence, also picking the style of integration and canvas layout, which in turn influences other configuration options such as the artifact flow directionality, field flow directionality, and routing directionality, making the act of integrating your collections quick and painless.
Artifact Relationship Management
Artifact Relationship Management (ARM) refers to the ability to maintain relationships between artifacts when they flow from one collection to another. Utilizing the Relationship Specification Screen when configuring your collection ensures that relationships are preserved between your artifacts. You'll learn more about how to configure ARM in the Quick Start Guide.
Internal ARM
When using Hub, it is important to understand the distinction between Internal ARM and External ARM.
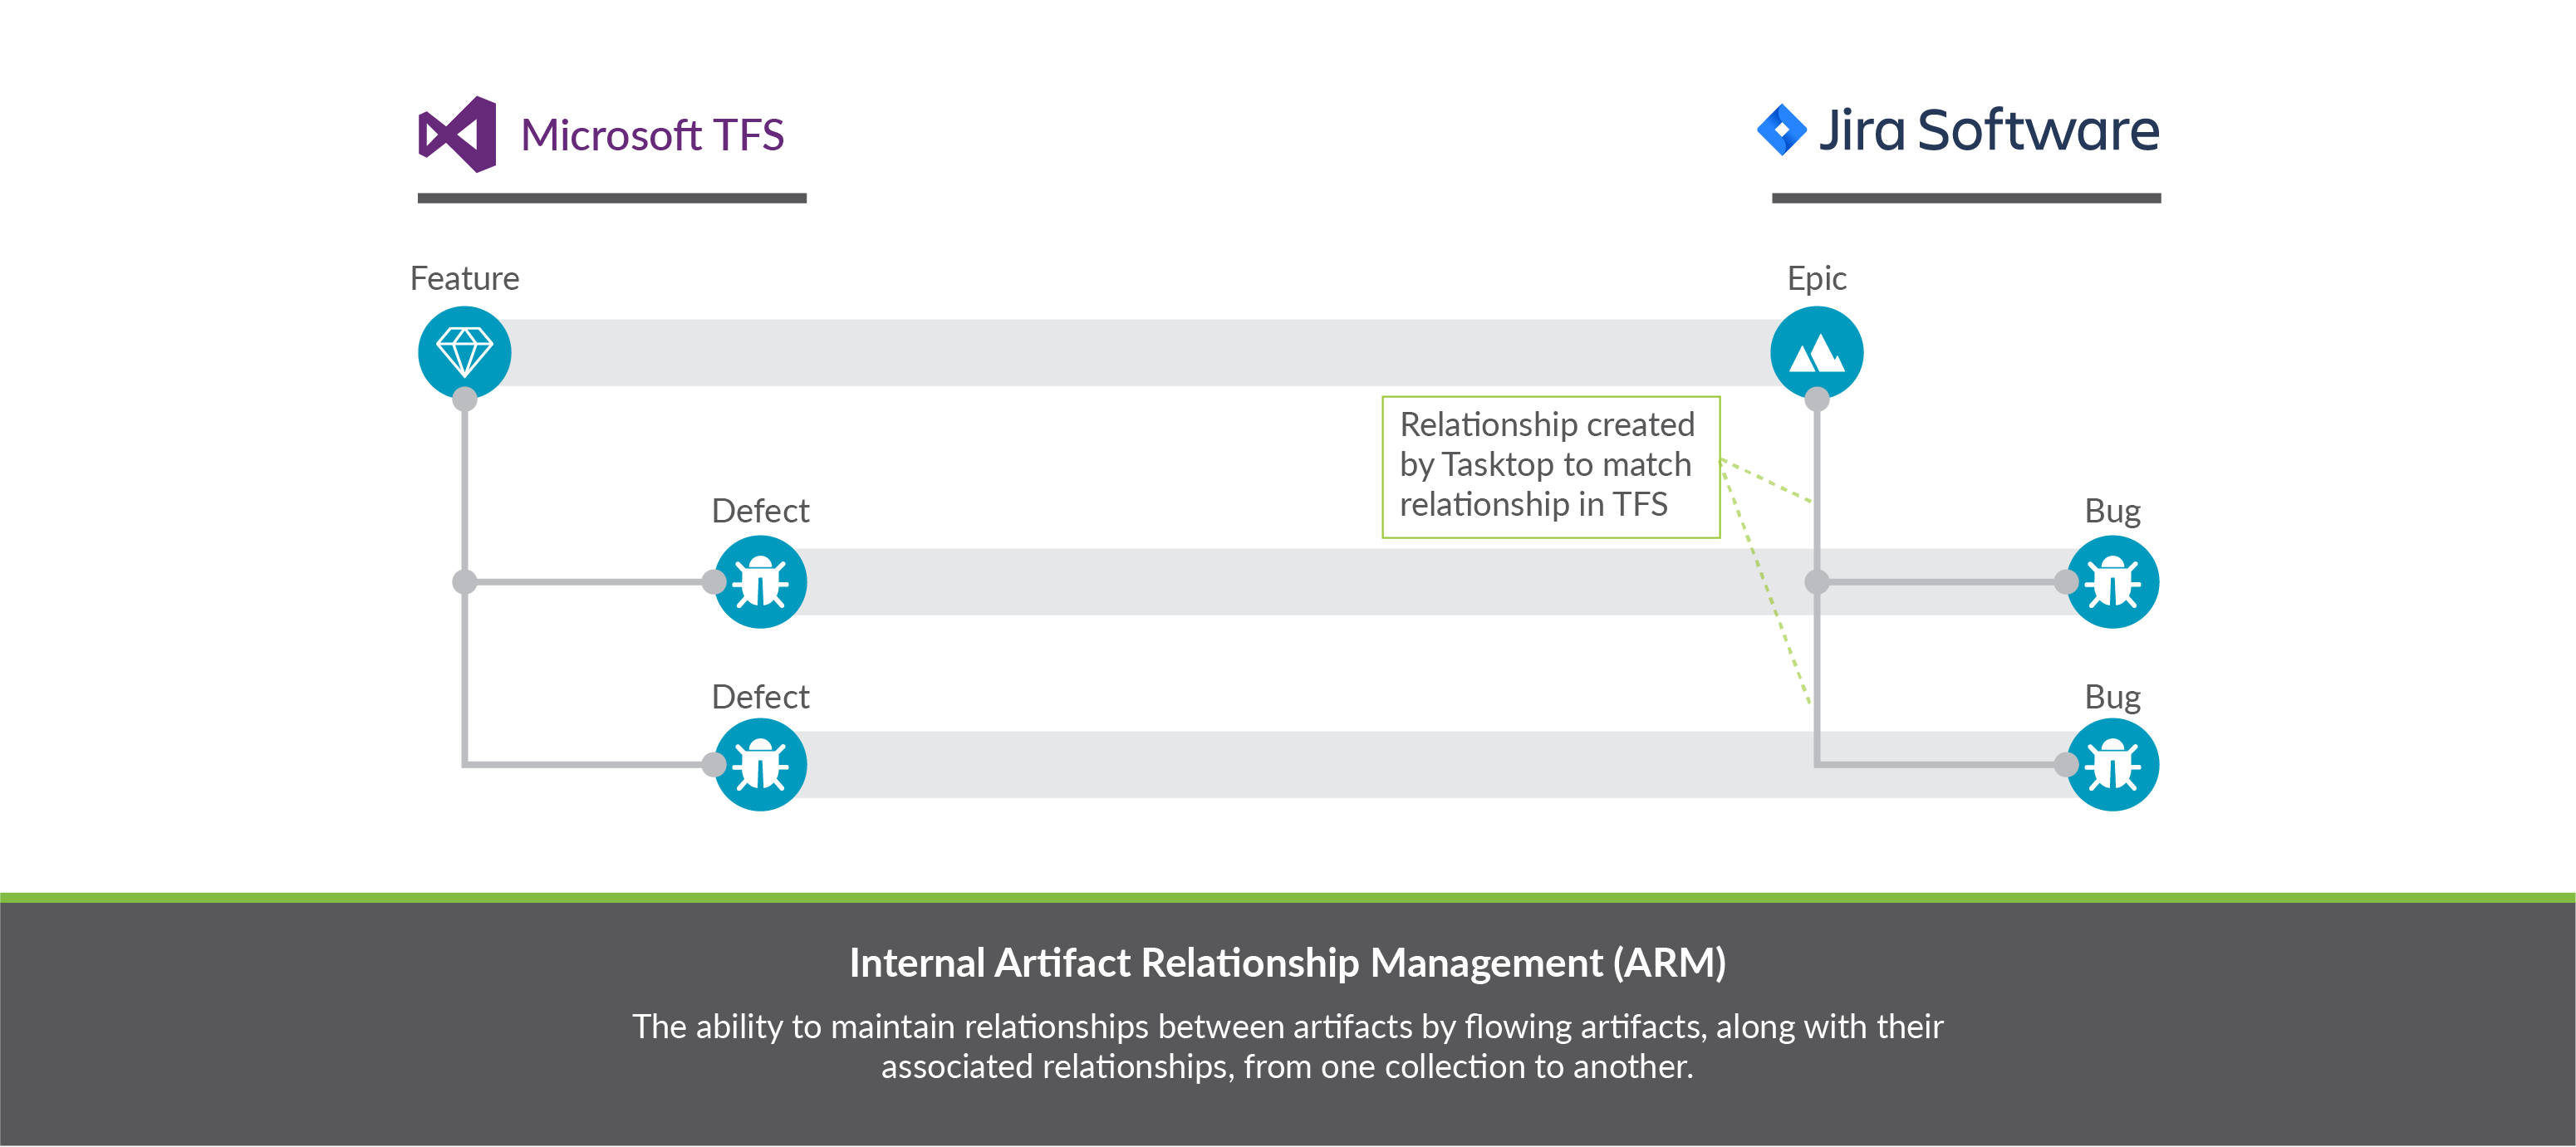
Internal ARM refers to the ability to flow multiple artifacts between two (or more) repositories and to maintain relationships between them.
In the example below, you can see an example of an Integration from Microsoft Azure DevOps (formerly TFS) to Jira which utilizes ARM to do the following:
- Flow Azure DevOps Features to Jira Epics
- Flow Azure DevOps Defects to Jira Bugs
- Utilizes Artifact Relationship Management (ARM) to preserve the relationships between the artifacts internally within each repository
External ARM
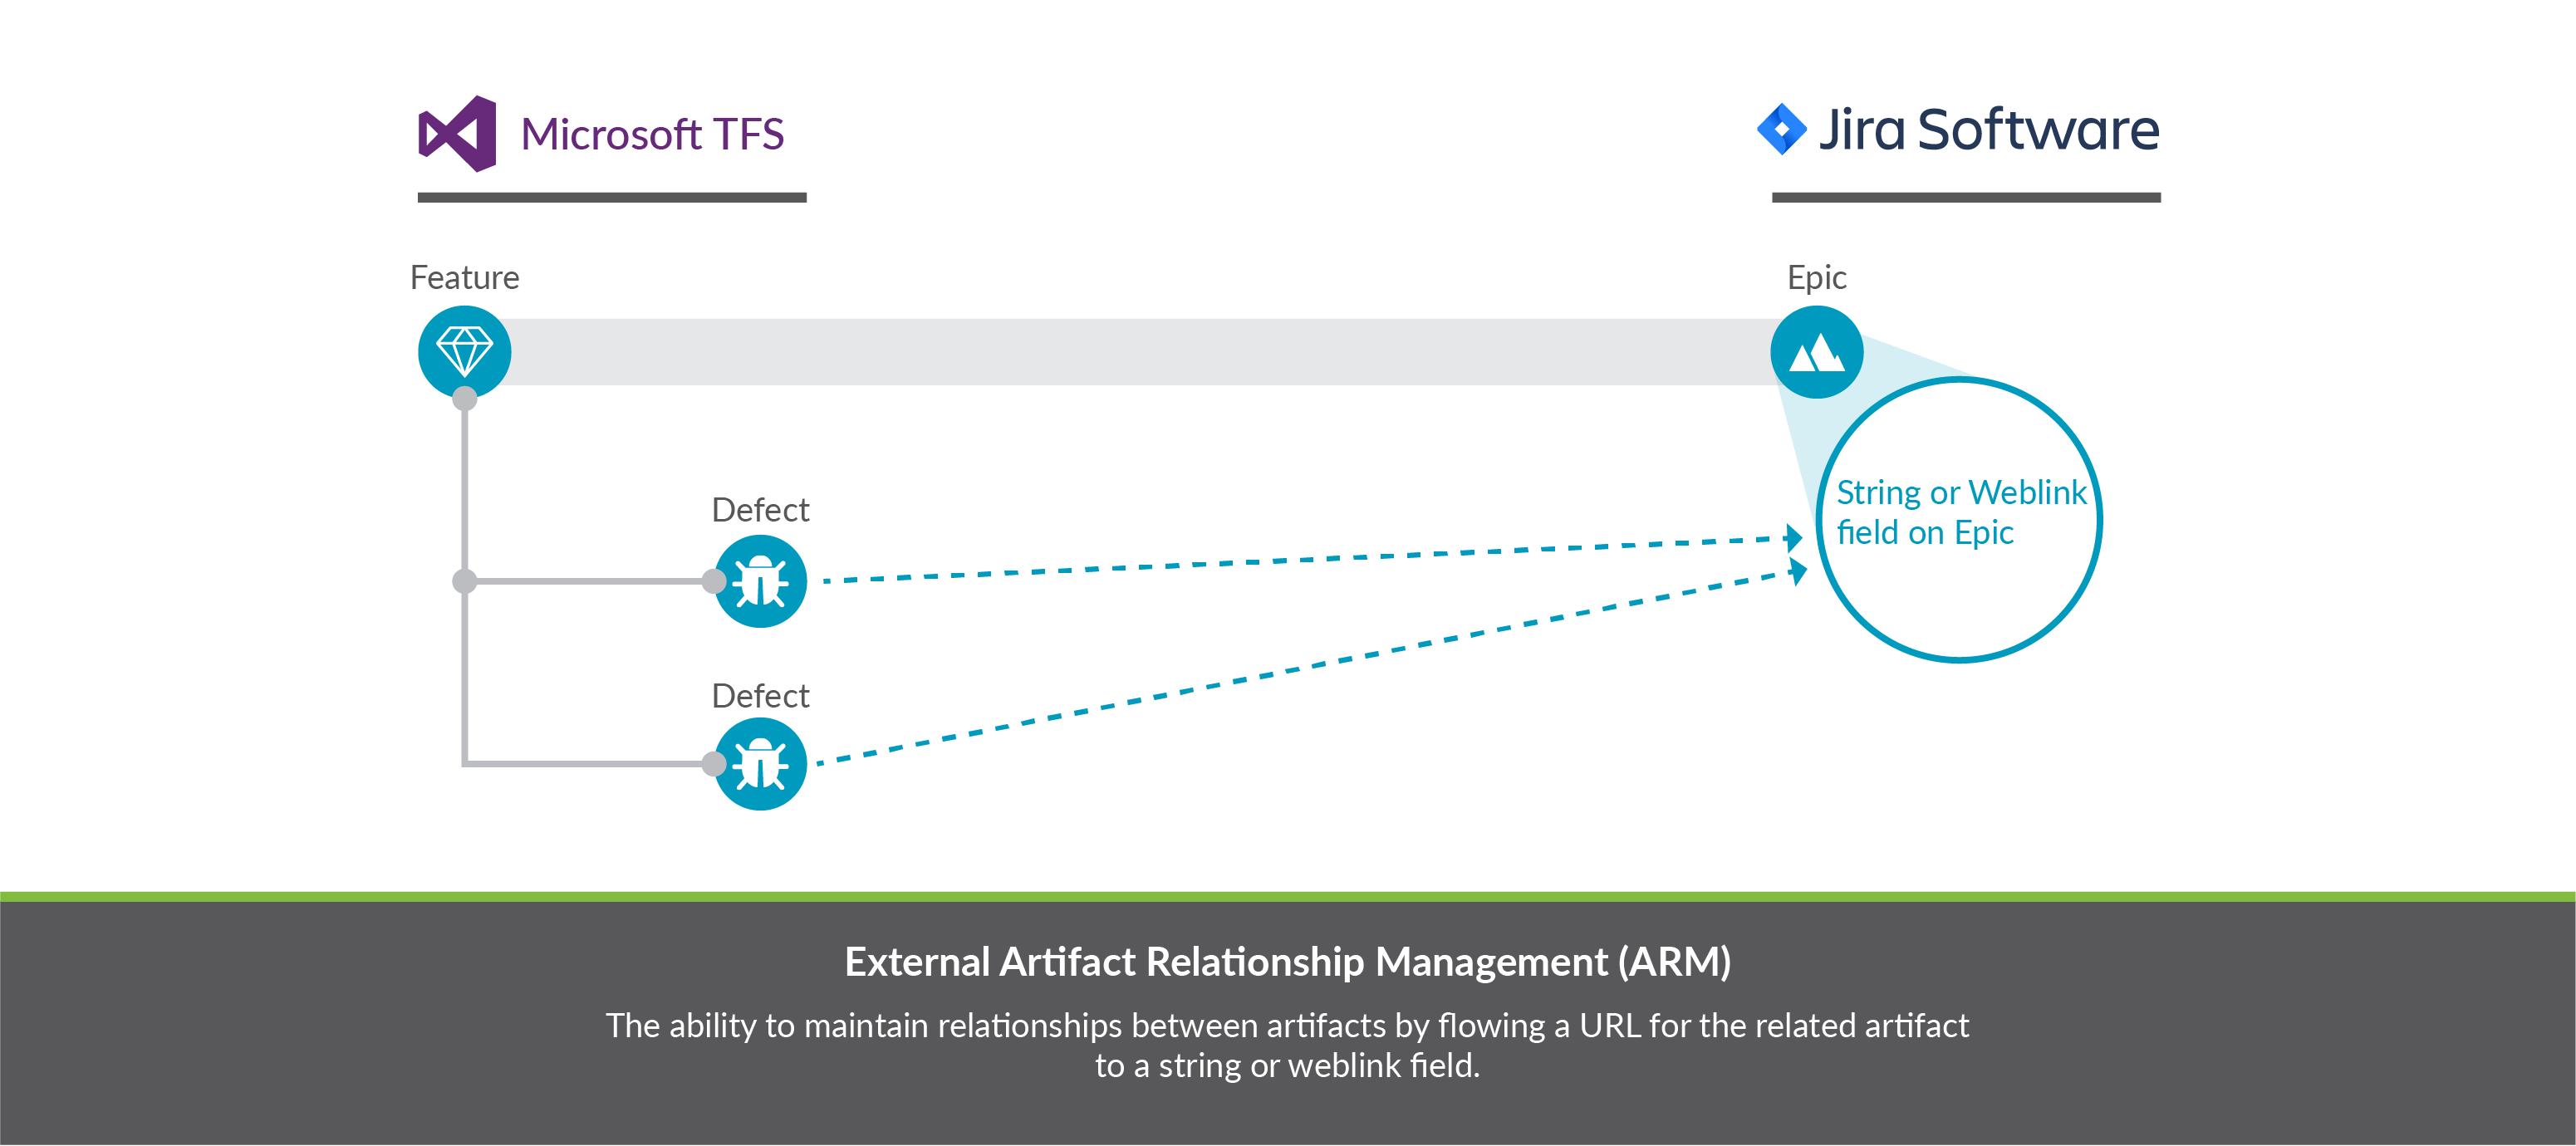
External ARM is a more lightweight approach, compared to internal ARM. Rather than flowing the related artifacts themselves to the target repository, you can flow a link to those artifacts to a string or weblink field.
For example, you could:
- Flow Microsoft Azure DevOps (formerly TFS) Features to Jira Epics
- The Azure DevOps Features are 'affected by' defects within Azure DevOps
- Instead of flowing the Azure DevOps Defects to Jira, we can flow a link to those Azure DevOps defects to a string or web link field on the Jira Epic
Key Concepts Video
You can learn more about these concepts in the short video below:
