Introduction to Environment Manager
Introduction
Environments represent each instance of a System that you have within your organization. For example, if you have ‘System 1’ and you have an individual instance for DEV, SIT, UAT, STAGE, and PROD. This would be represented by 5 individual Environments and linked to the same System 1.
Environment Manager allows users to view, search and filter their Environments. Administrators can use Title Names Customization to customize the name of the Environment module where it appears throughout Release & Verify.
Pre-requisite
You must have ‘View Environment Manager’ user permission to be able to access the Environment Manager menu.
Navigation
Environment > Manager
Environment Manager Grid Layout
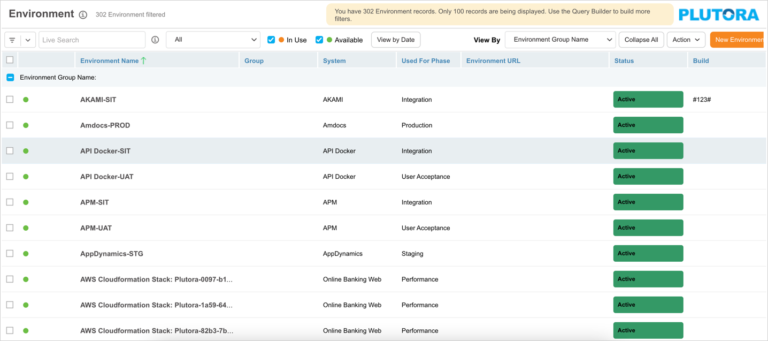
On the Environment Manager page, you can:
- View, search, and filter Environments
- Add and edit an Environment
- Manage technical specs and configuration of an Environment
- Duplicate and create new Environments
- Bulk update Environments
- Delete Environments
- Export the Environment Manager grid data to XLS
The Environment Manager grid displays up to 100 records on the page. Use Query Builder to build more filters.
Search and Filter Options
Filter by Query Builder
Query Builder allows you to create and save your own private searches and use public searches.
You must have the ‘Create/Delete Release Public Query Builder’ user permissions to create, edit or delete public queries.
To use Query Builder, click .png?revision=1) . See Query Builder for more information. Clicking
. See Query Builder for more information. Clicking![]() opens the quick access menu, which lists private and public queries.
opens the quick access menu, which lists private and public queries.
Filter Environments with Custom Field columns
You can filter the Environments using their custom field columns. To add custom field columns to the Manager page, select Grid Column Selector from the .png?revision=1) drop-down menu.
drop-down menu.

On the ‘Select Additional Columns’ dialog drag and drop custom fields into Selected Columns.
If any fields in this dialog contains  , it means that field is locked by the administrators using the Environments Custom Fields Customization. Fields can also be made uneditable or hidden by administrators using these customizations.
Click .png?revision=1) . The selected custom fields will appear as new columns to the right of the ‘Builds’ column.
. The selected custom fields will appear as new columns to the right of the ‘Builds’ column.
Filter by ‘My Filter’ Dropdown
Click on the ‘All’ drop-down to view the ‘My Filter’ options.
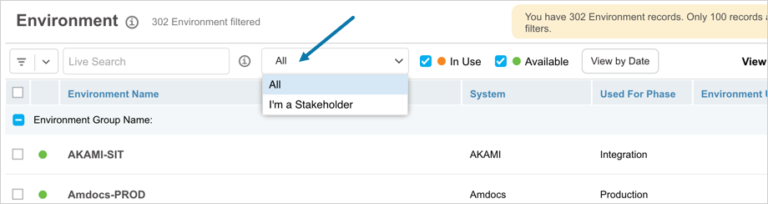
- All: Show all Environments.
- I’m a Stakeholder: Show Environments for which you are a stakeholder.
View by Date
Filter the Environments that are available or in use by a date range. Click  and enter the date range in the ‘Date Range’ pop-up. Then click .

The grid displays the Environments accordingly.
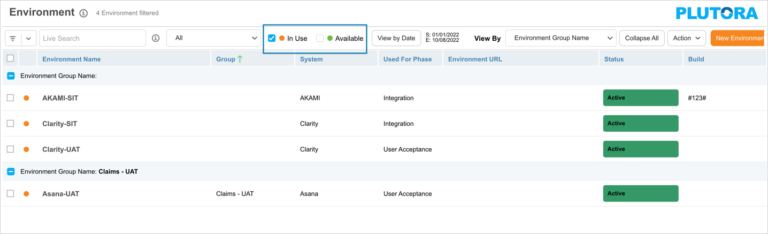
Filter by Availability
You can filter the Environments based on their availability:
- In Use: Displays the Environments that are in use today or within the date range you have entered.
- Available: Displays the Environments that are available today or within the date range you have entered.
Viewing Options
View By
Click View By drop-down to view the data by Environment Group name or System name.
Expand All and Collapse All Buttons
Click the Collapse All/Expand All button to collapse or expand all Environment Group or System.
View Status
You can view the status of an Environment by looking at the Status column on the grid.
Show/Hide Columns
You can show or hide these columns using the grid column selector. Hover your mouse cursor over the column header to see .png?revision=1) .
.
Click the button and select Columns. The list of columns available on the grid will be displayed. Select or deselect the checkboxes to show or hide columns.
Export Environments to XLS
To export your Environments to XLS:
You can export only those Environments that are available on the grid. Filter your Environments using the above options to alter the data to export.
To export to XLS, click and then click Export to XLS.

Your Excel file should start downloading immediately. If it doesn’t, check your pop up blocker settings. Save the file to your hard drive if prompted.
More Information
Show User Groups
Hover your mouse cursor over a user group in the ‘Environment Mgr’ column to show the group members.
