Manage Robots in the Account
A Robot is a special super user that allows programmatic access to an entire organizational account. It can create, read, update, and delete any information across all workspaces in the organizational account.
A robot can only be used programmatically. In other words, you cannot log in as a robot. You can only use the APIs.
Robot accounts are immensely powerful. Care must be taken to ensure credentials do not end up in the wrong hands, and that people who are to be trusted with credentials are carefully vetted.
Robots can only be managed by the Owner or Co-Owners of an organizational account.
Administrators cannot manage robots.
Individual robot access can be shared to any member of the account.
Finding the Robot Integration Settings Page
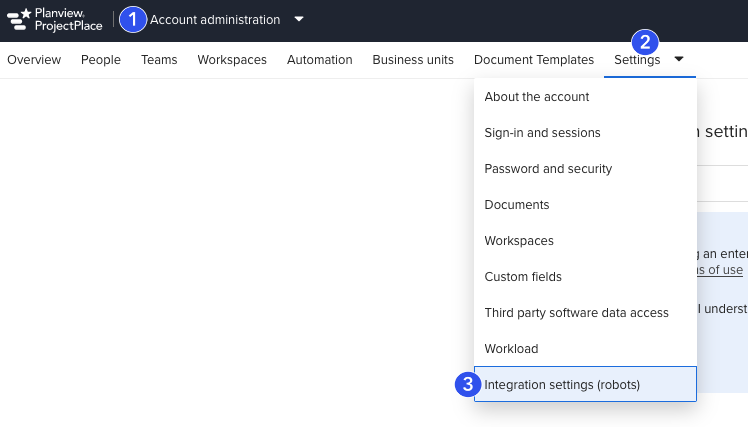
If you are the Owner or a Co-Owner of an organizational account you can:
- Go to the Account administration tool in the top bar.
- Select the Settings tab
- Click Integration settings (robots)
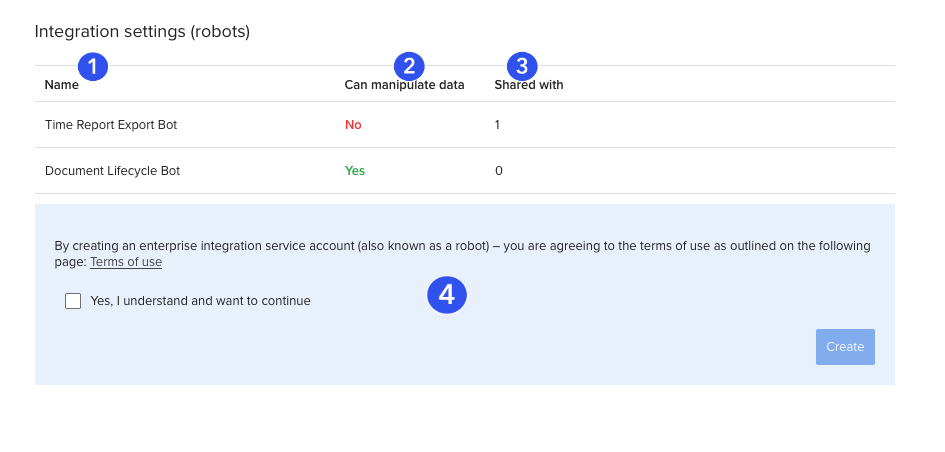
The integration settings page includes a list of your existing robots, informing you of:
- The name of the robot.
- Whether the robot can manipulate data in your organization or if it is read-only.
- How many account members the robot credentials are currently being shared with.
- A dialogue allowing the creation of new robots.
Clicking on a row will lead you to individual settings for that specific robot.
Creating and Editing a New Robot
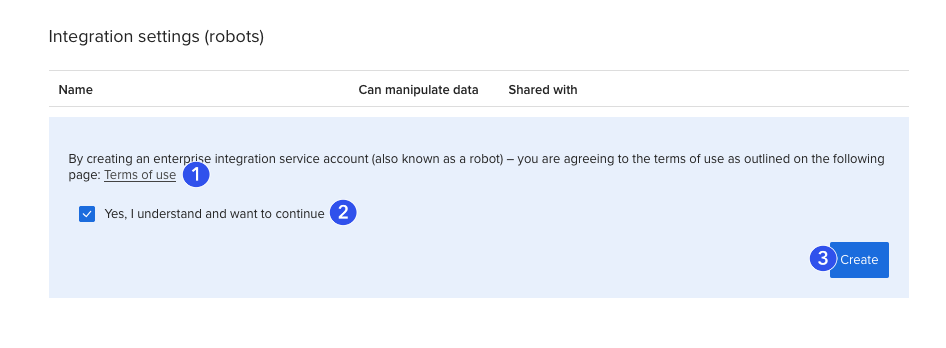
Once in the robot management section you can:
- Read the API terms of use
- Check Yes, I understand and want to continue if you approve of the terms.
- Click Create.
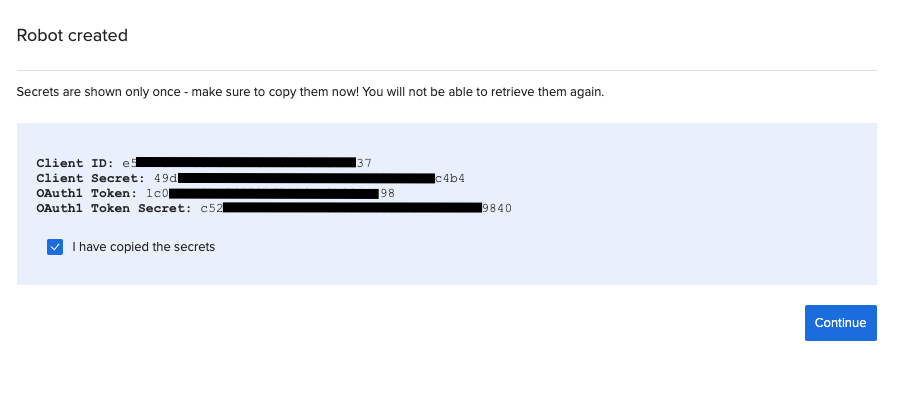
A robot will now be instantly created, and you will be shown a screen with the robot's secrets which you will want to copy to a secure place such as a reputable password manager, before proceeding.
You will not be able to retrieve this secrets again - although you will be able to share them to others (see below), or regenerate them.
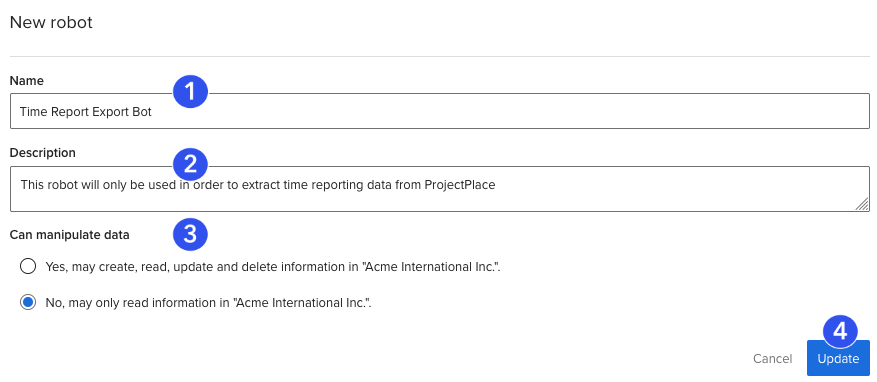
After proceeding you will want to change the default values of the new robot.
- The name of the robot will default to New robot. Update this to something more descriptive of the robot's purpose. The name can always be changed at a later date.
- Use the description field to summarize the purpose of the robot.
- Important: Decide whether the robot really needs to be capable of manipulating data in your organizational account. Opt for read-only access if you are unsure. This setting can always be changed at a later date.
- Once happy with the settings, click Update.
Sharing a Robot
NEVER send credentials in an email or through any other communication channel.
Use only the sharing functionality discussed here. This allows you to securely share credentials with the intended people, without the possibility of interception by third-parties.
Robots can only be shared with members and administrators of your organizational account.
Go to the settings of a specific robot.
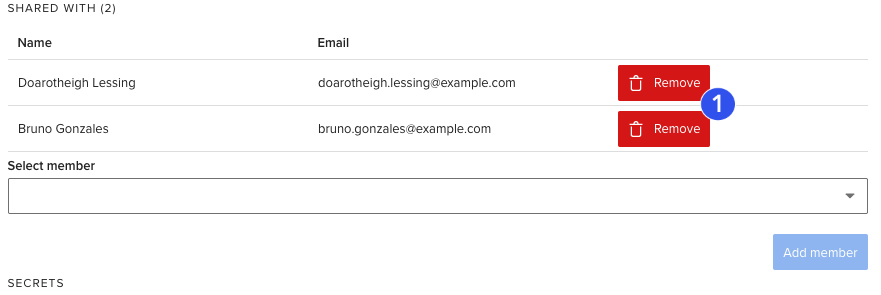
- Find the Shared with section.
- In the Select member dropdown, pick a member.
- Click Add member to save the sharing setting.
The individual you have shared with gets an email prompting them to sign in to view the robot credentials. They will be able to see the secrets only once, after that they will only be able to see redacted versions of the secrets.

Unsharing a Robot
You can always remove a user's access to the robot's credentials by clicking the Remove button in the list of members you have shared with.
Unsharing does not invalidate existing credentials. Unsharing only means that from this point onward the user will not be able to find the credentials after having signed in. For example, if the user has written a script using previously shared robot credentials, that script will still be working even after unsharing them to that user.
The only way to invalidate robot credentials is to refresh its secrets.
View Robot Credentials
As an Owner or Co-Owner of the organizational account, you can always find the redacted keys and secrets needed to interact with the APIs. You will be able to see only the first and last three characters of each secret. This is so that you can verify against your stored records. However, the only way to again see clear text secrets again, is to renew them - generating brand new credentials.
There are two sets of credentials for each Robot, both of which are also visible (once) to any member that the robot has been shared to.
- Client ID and Client Secret are needed for both the OAuth1 and OAuth2 Client Credentials flow.
- OAuth1 Token and OAuth1 Token Secret are only needed for OAuth1.
- The secrets can be renewed. Note that this will invalidate the previous secrets immediately. Users with whom the robot has been shared are prompted via email to update their information, they will be able to see the new secrets only once.
OAuth1 is still supported by ProjectPlace. But it is no longer the recommended way to use a robot.
Opt for the OAuth2 Client Credentials flow whenever possible.

Deleting a Robot
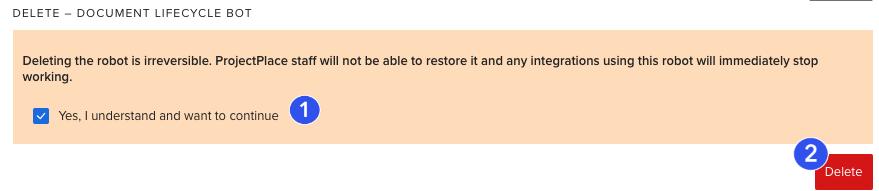
Deleting a robot immediately invalidates associated credentials. This means that integrations using these credentials will immediately stop working.
Deletion is irreversible.
Don't be overly scared about deleting robot accounts. You can always create a new robot and use those new credentials instead of the old ones. While the credentials are lost forever, whatever integrations you have set up can always be populated with credentials from a new robot.
- Indicate you understand that the deletion is not reversible by checking the checkbox.
- Click Delete.