Manage Business Units
Introduction
For customers managing multiple Business units (BU) in ProjectPlace, it could be rather inconvenient or a downright security issue that there has been no way to create a separation allowing them to control what information is shared across business units. With Business Units in ProjectPlace this will allow you to create separation at the account level. Account owners and co-owners can create and manage multiple business units, and these business units can be assigned to workspaces and Account administrators. This ensures that only Account administrators who belong to the same BU as the workspace have access to the workspace information at the account level.
Enable Business Unit functionality for the account
This feature is not enabled by default, but you need to contact ProjectPlace Support to enable this for your account.
Create Business Units
The account owner and co-owners can define different business units in their organization, so that they can group people and projects by them.

To create a Business Unit:
- Click on the tool selector
in the top navigation bar, and select Account administration.
- Choose Business units.
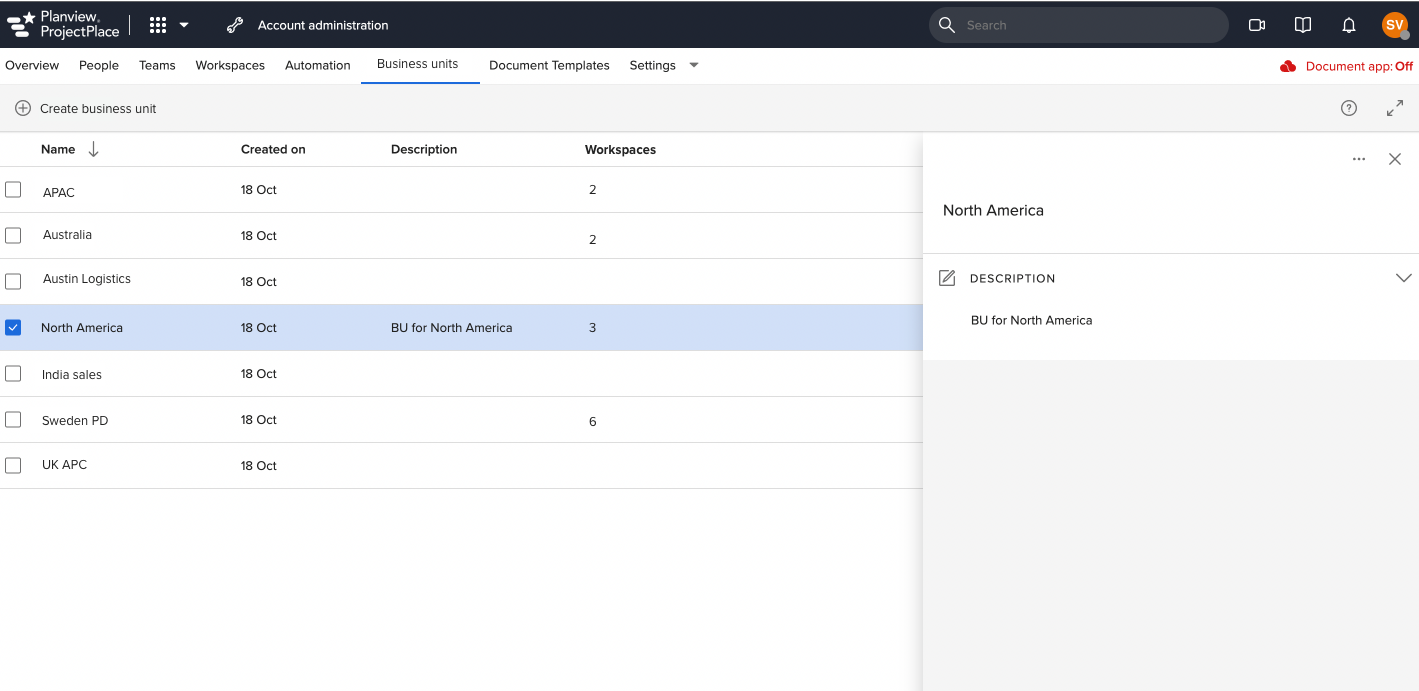
- In the Business units tool, click Create business unit on the toolbar.
- Enter a name for the Business unit and press Enter.
- In the detail pane, give the Business unit a detailed a Description.
Assign Business Units to Account Administrator
- The account owner and the co-owners can assign a business unit to an Account administrator while granting them the administrator rights.
- The account owner and the co-owners can assign a business unit to the account administrator created before the feature was turned on for the account.
- It's possible for an Account administrator to be assigned to multiple business units.
- Account administrators cannot see the workspace belonging to business units that they do not have access to in Account administration.

To assign BUs to an Account administrator:
- Click on the tool selector
in the top navigation bar, and select Account administration.
- Choose People.
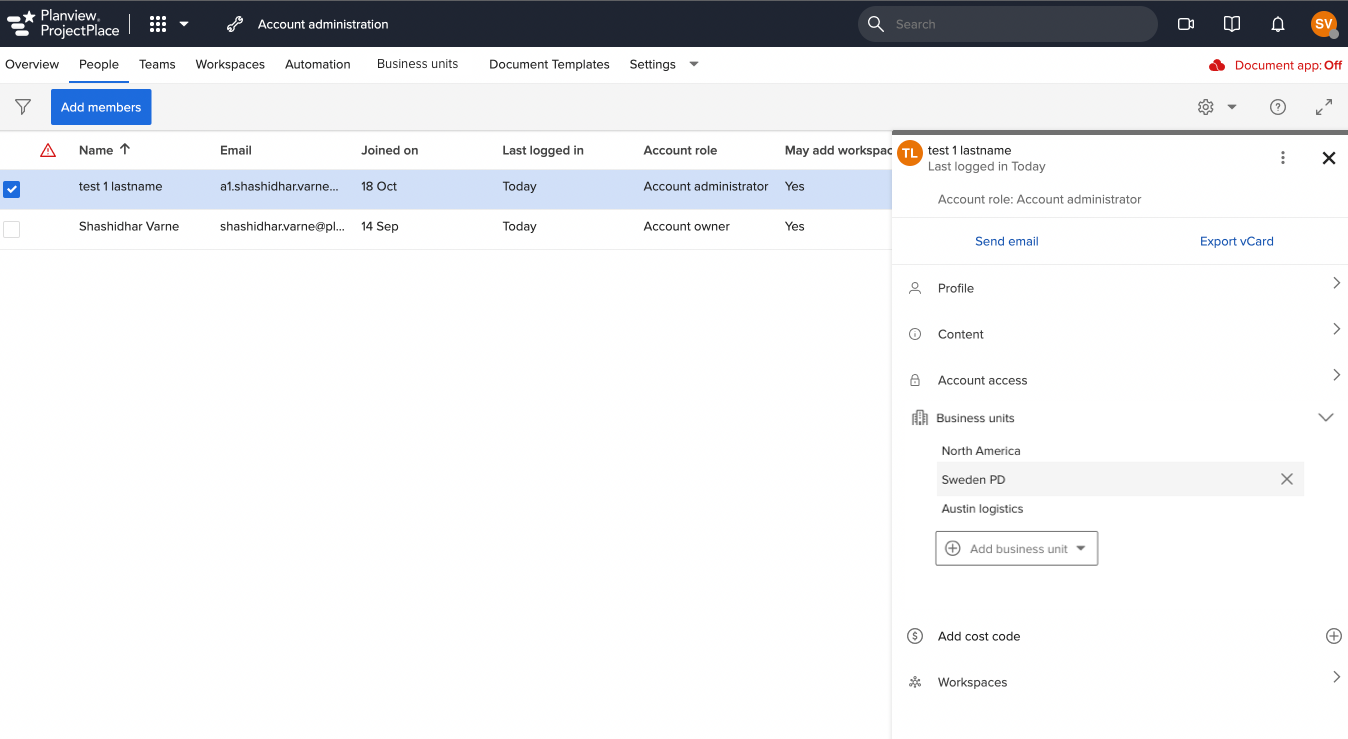
- Click the checkbox next to the member to whom you wish to assign a Business unit.
- In the Detail pane, click the Business unit you wish to assign or add a new one.
You can add as many needed for the Account administrator. In the screenshot above you can see that three BUs have been added and you can remove them by clicking the X on hover.
Assign Business Units to workspaces
Business units (BU) can be added from Account Administration but also from within a workspace by the workspace administrator.
Assign from the Account Administration
To assign business units to workspaces from the Account administration:
- Click on the tool selector
in the top navigation bar, and select Account administration.
- Choose Workspaces.
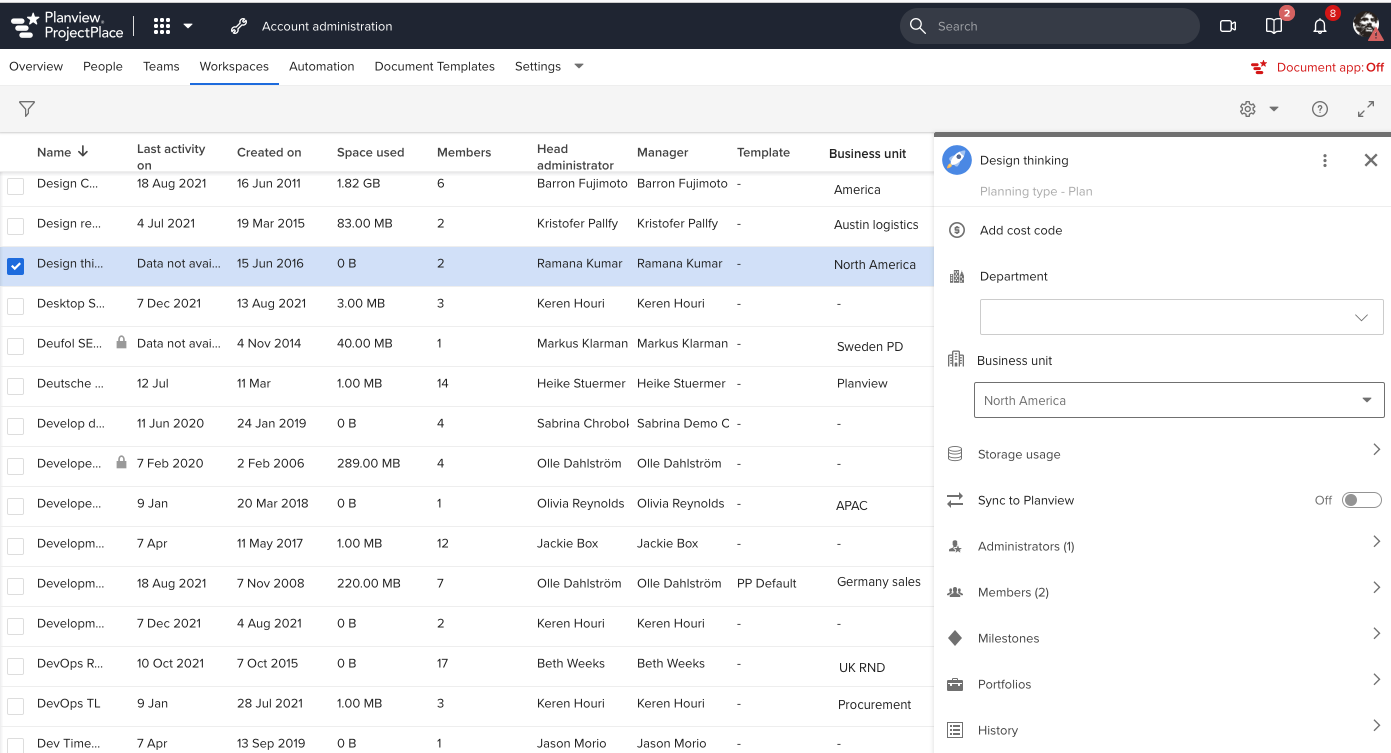
- In the Workspace tool, click the checkbox for the workspace to which you would like to assign a Business unit.
- In the Detail pane, select the Business unit from the dropdown menu.
A workspace can only belong to one business. If you don´t assign a workspace to a business unit it will visible to the whole account.

Assign from the Workspace Administration
The workspace administrator can add or change a business unit from the workspace.
To assign BUs to workspaces from the workspace:
- Navigate to a workspace you are a member of.
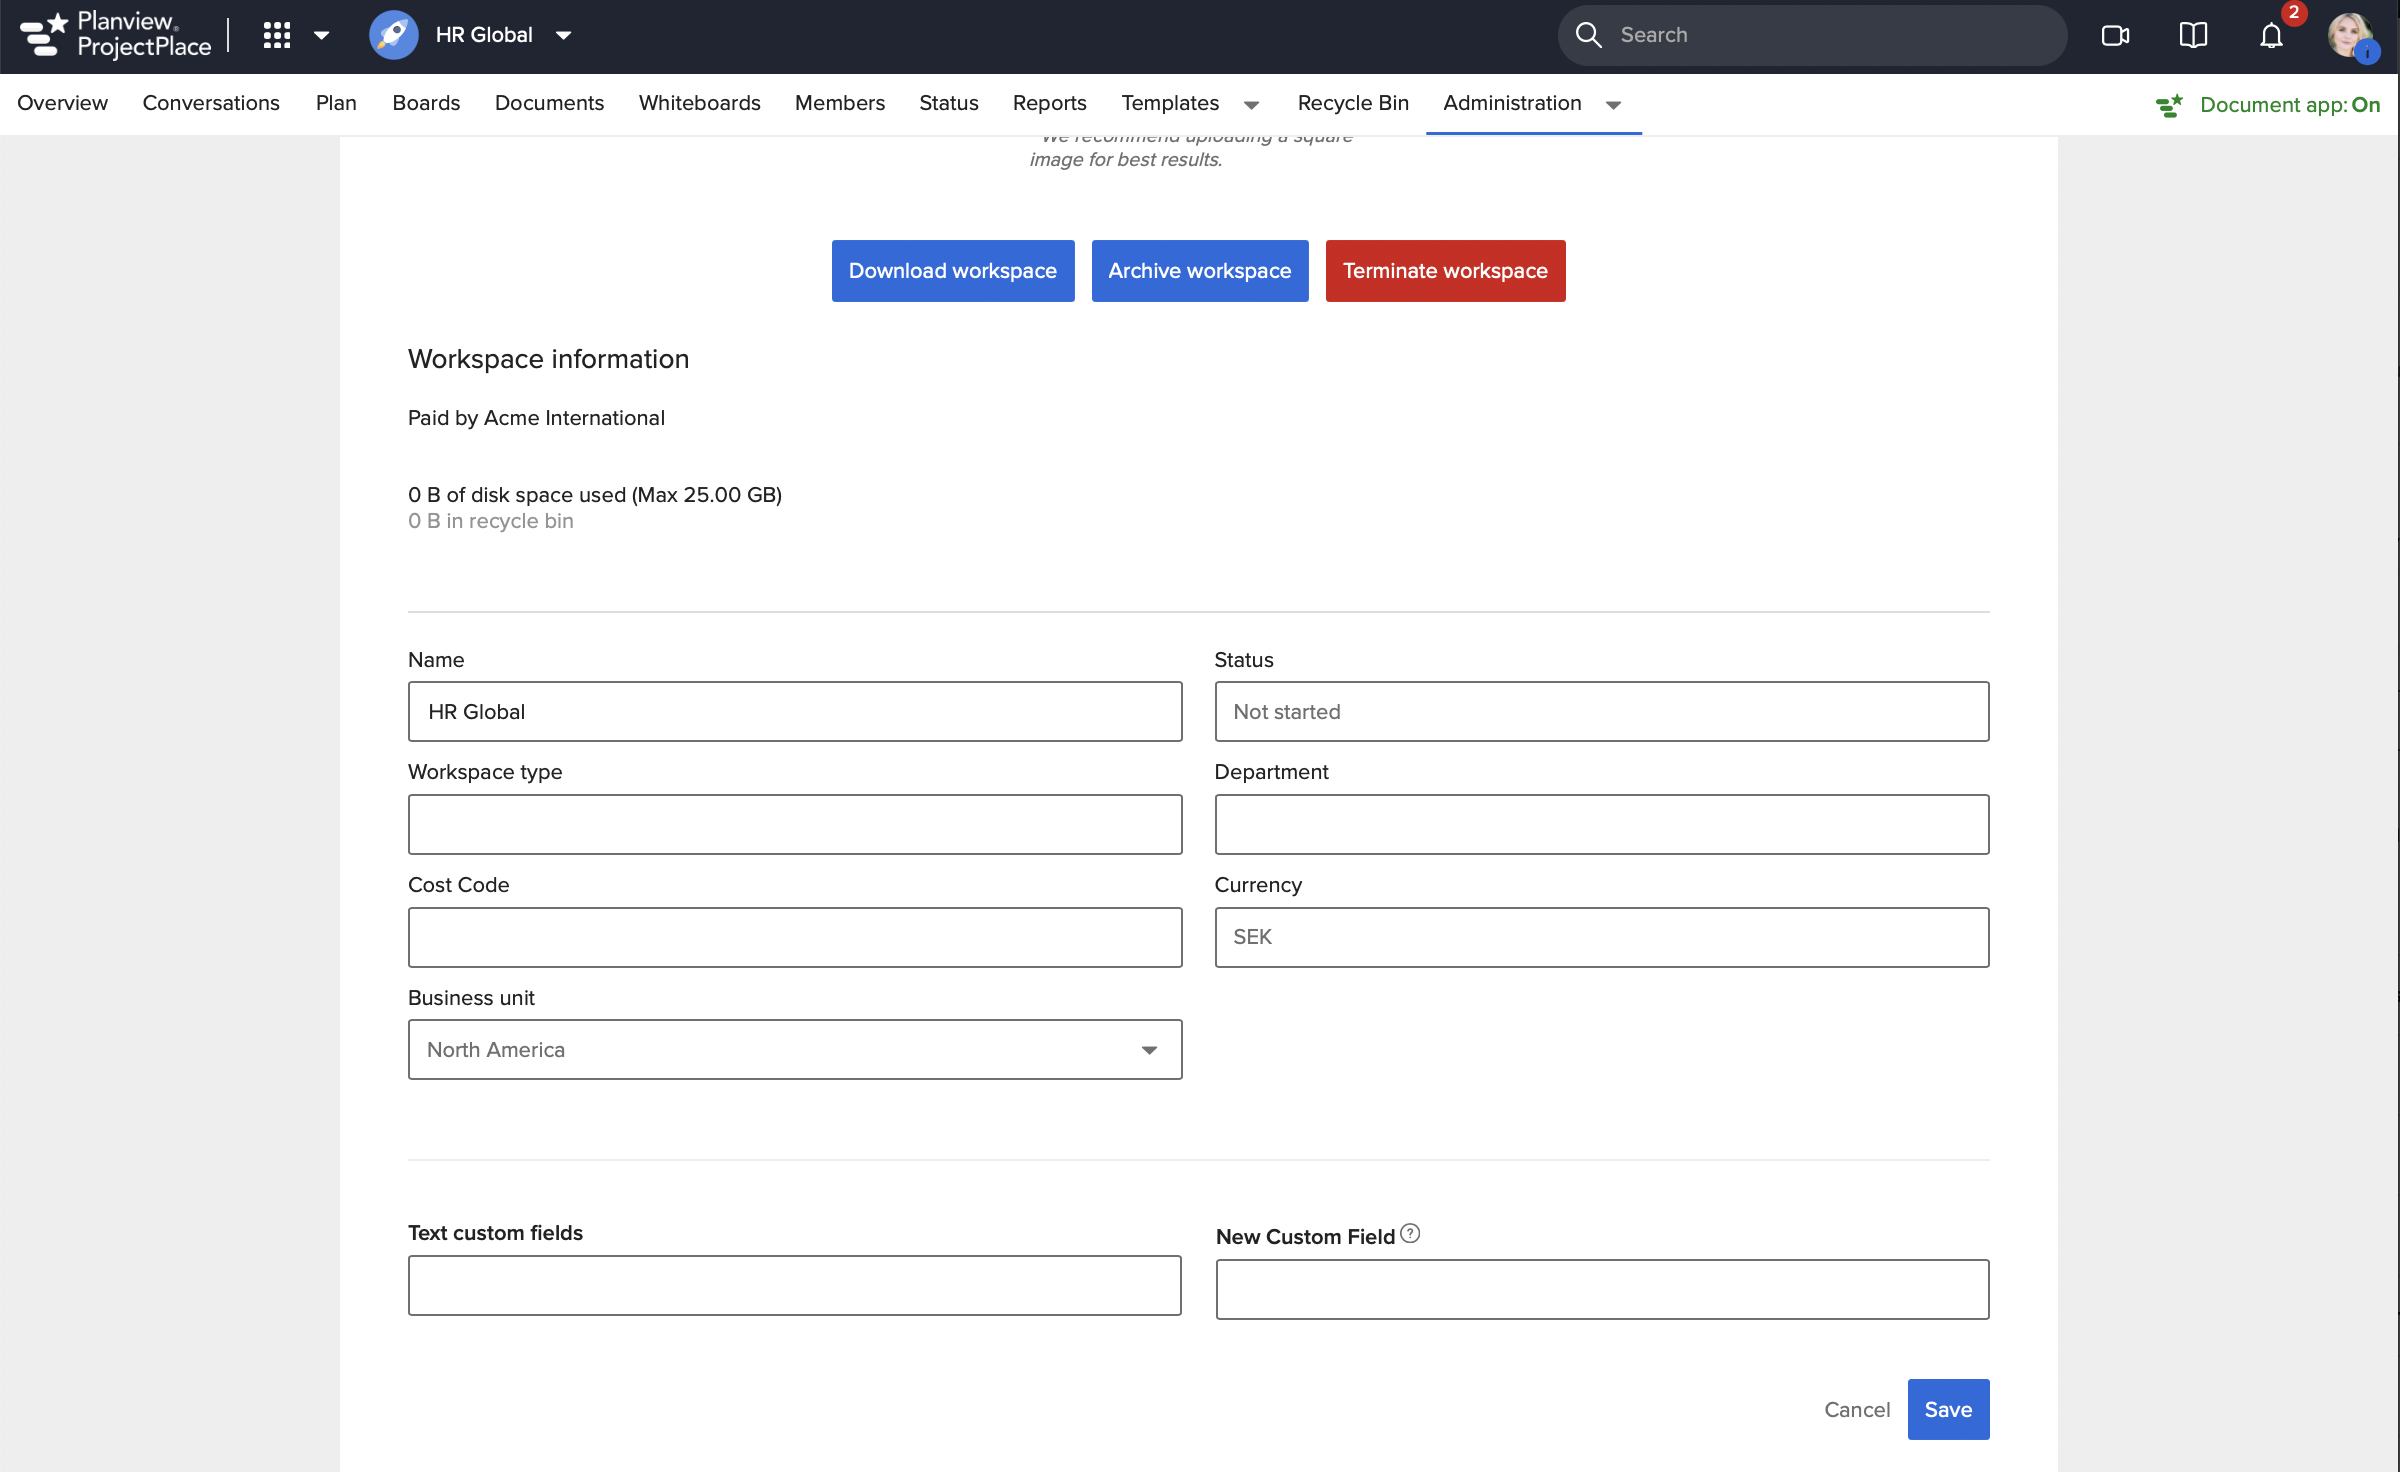
- In the workspace toolbar, click the Administration menu and select About the workspace.
- In the Business unit list, click the business unit name associated with the workspace.
- Click Save.

Assigning Business units when creating Workspaces
If a Business unit is used within the account, you can select the business unit upon creating a workspace. In Account administration you can set whether choosing a Business unit should be optional or mandatory for new workspaces.