Manage Account Rules
Account administrators can use the Automation tab to manage automatic rules for people and workspaces. Rules are created from templates, and account administrators can create multiple rules which may be active at the same time.
Access Account Automation

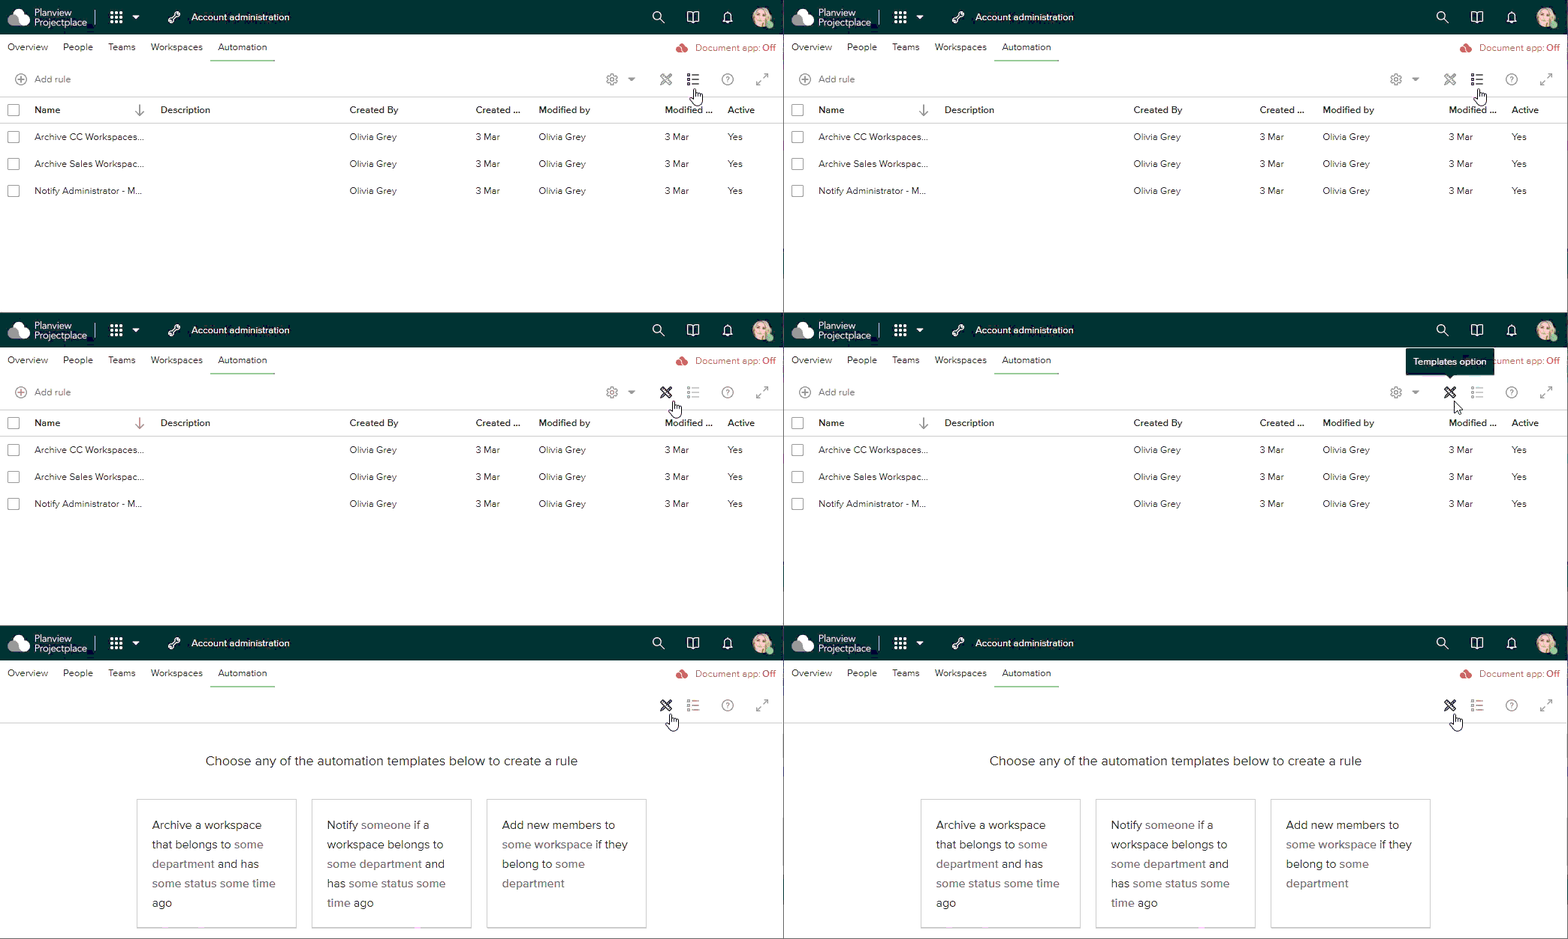
- Click the tool selector
 in the top navigation bar and select Account administration.
 - Click the Automation tab to see a list of account rules.
Use the icons in the menu bar to toggle between the Templates and Rules views. The Templates view displays the available rule templates, which you can click on to create a rule. The Rules view displays a list of all rules for the workspace, with the option to create a new rule using the Add rule button.
Create Account Rules
To create an account rule:
- Take one of the following actions to begin the rule creation process:
- From the Templates view, click the template you want to base the new rule on.

- From the Rules view, click the Add rule button. In the window that appears, select the template you want to base the new rule on and click Next.


- From the Templates view, click the template you want to base the new rule on.
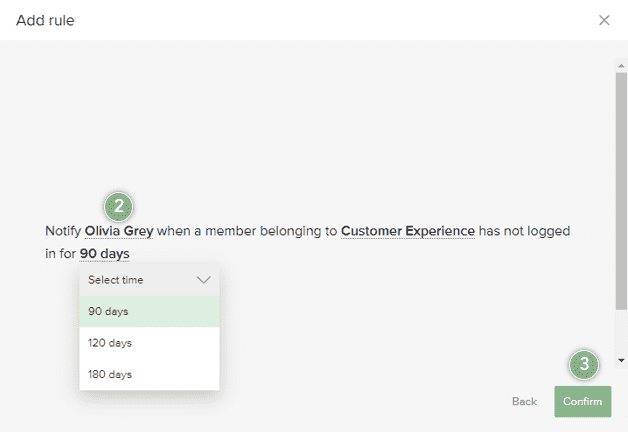
- In the Add Rule window, use the dropdown menus to create the desired rule.
- Click Confirm.
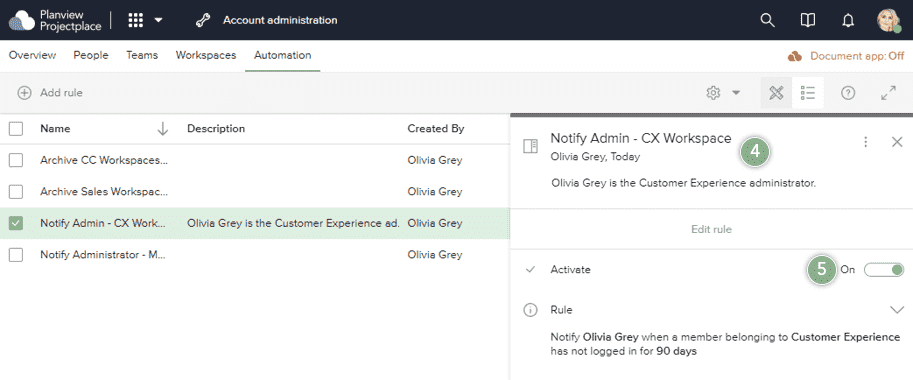
- In the detail pane, give your rule a name and description.
- To make the rule active, click the Activate toggle to switch it to the on position.
Edit Account Rules
To edit an account rule:
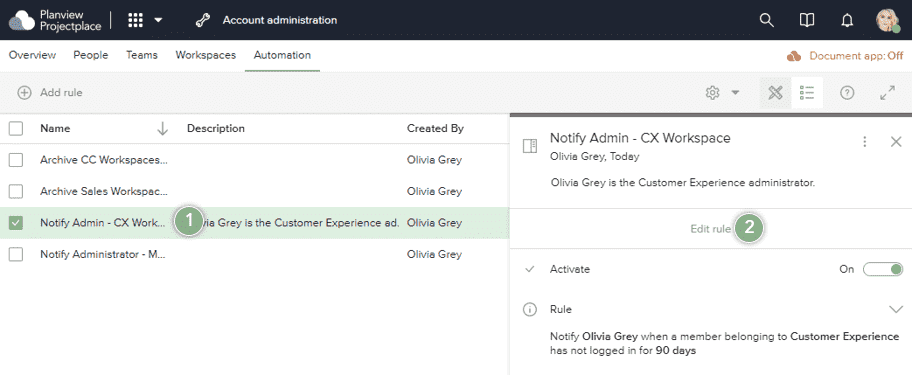
- Click the rule you want to edit to open its detail pane.
- In the detail pane, click Edit rule.
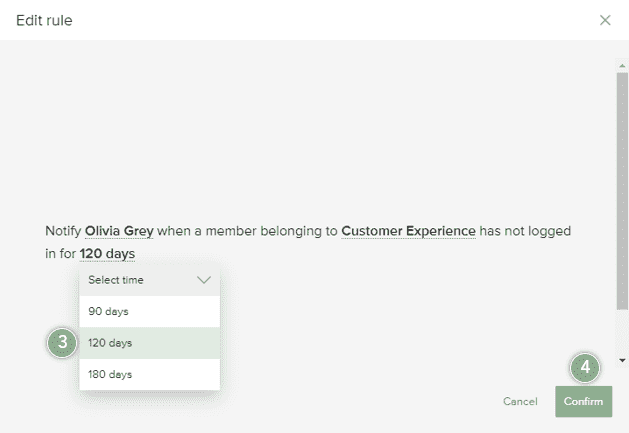
- In the Edit rule window, make the desired changes to the rule.
- Click Confirm to save your changes.
Delete Account Rules
To delete an account rule:
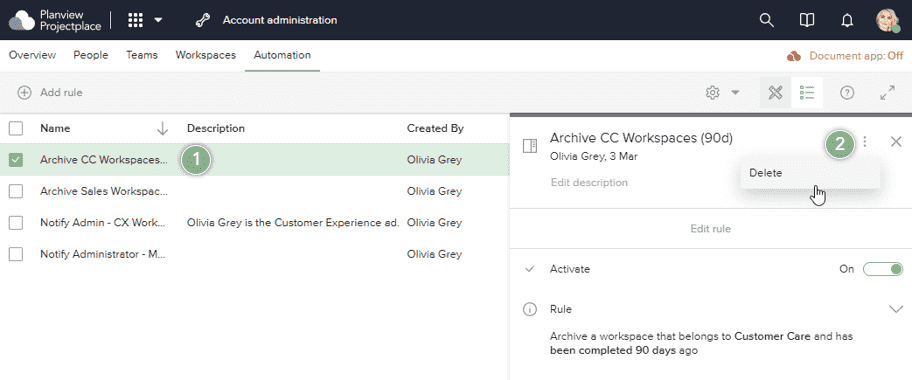
- Click the rule you want to delete to open its detail pane.
- In the detail pane, click the More menu icon
 and select the Delete option.